RSS
 

Posts Tagged ‘Football’

10 High School Football Photography Tips

11 Oct

The post 10 High School Football Photography Tips appeared first on Digital Photography School. It was authored by Jeff Guyer.

high school football photography tips and advice

Are you looking to capture top-notch, action-packed, jaw-dropping photos of high school football?

You’ve come to the right place.

I’ve been doing high school football photography for years, so I’ve picked up plenty of key tips, techniques, and secrets to capture amazing shots. And in this article, I aim to share it all with you, from essential equipment to camera settings to creative tricks and more.

So if you’re ready to elevate your football photography, then let’s dive right in, starting with equipment:

1. Use the right gear

I’m not going to spend a lot of time here discussing camera bodies. Some of the photos in this article were taken years ago using a Nikon D70, and they look great. As long as you’re photographing with a reliable DSLR or mirrorless camera, you’re going to be fine. A fast continuous shooting speed and a capable autofocus system is helpful, but if you can’t afford these features, then don’t worry too much.

For a football photographer, your big concern is lenses. Happily, it is possible to get really great shots with a few basic options. When I first started shooting sports, I used just one lens, a 70-200mm f/2.8. I was able to shoot and edit creatively enough to get a variety of images. If you can only afford one lens right now, definitely opt for a longer zoom.

Don’t just buy any long zoom, however. Make sure it’s plenty fast; in other words, it should ideally feature a maximum aperture of f/2.8. Fast lenses are going to be hugely important once the sun goes down because most high school sports have a prohibition against using flash. You’ll need that ultra-wide aperture to keep a sufficiently fast shutter speed (otherwise, your photos will all turn out blurry!).

By the way, I’d also recommend investing in a nice monopod to keep your camera steady. In good light, you can handhold, but as the day turns into night, you’ll want some form of support – and tripods tend to be annoyingly unwieldy.

As with any type of shoot, make sure you have all of the necessary backups: batteries, memory cards, etc. Also, make sure you also have a plan for when it starts raining. Note that rain will fall on occasion, so be prepared for it. The Think Tank Hydrophobia should do the trick.

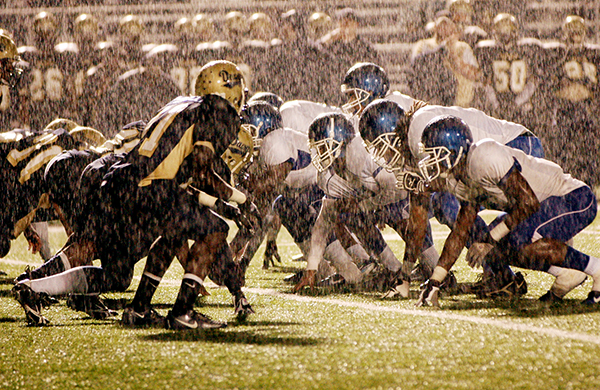
high school football in the rain

Trust me. At some point it’s going to rain!

2. Consider how you’ll get in

If you’re serious about football photography, consider contacting the school/venue ahead of time and ask about media credentials. In exchange for your images, you might be able to get a free pass into the game.

Otherwise, you’ll probably have to pay to get in (just like anyone else!). The good news is that it’s usually less than $ 10. You might be able to talk your way in on the day of the game, but the money goes to a good cause, so if you’re forced to pay, it’s not that big of a deal.

3. Get to the game early

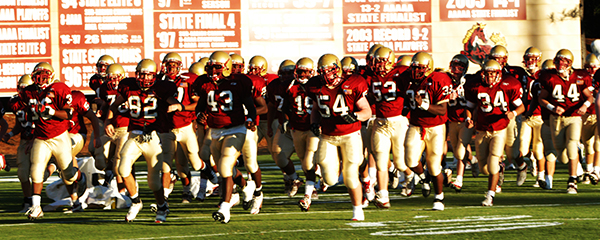
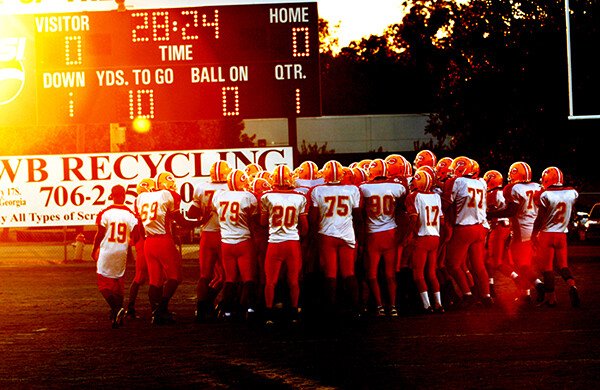
Teams take the field to warm up anywhere from one to one-and-a-half hours before game time. And warm-ups are going to give you one of the best opportunities for quality shots.

For starters, the light is better. The sun won’t have set, and you’re going to get strong, powerful natural light, particularly if you shoot with the sun at your back.

Plus, players also tend to move a little more slowly in warm-ups than in the actual game, so you’ll have an easier time capturing motion. You’ll also get more of an opportunity to isolate individual players.

In some cases, you may even be able to actually walk out onto the field to shoot. However, if you do, please be careful! There will be around 150 kids warming up, many of whom are big, fast, and not paying attention to you.

Always remember: the kids’ job is to play football, not give you a good photo op. So make sure you don’t get in the way!

high school football in good light

Get there early and take advantage of the sun while you can.

4. Know the sport

The key to getting quality photos in football?

Have a solid understanding of the game. Know how it is played.

After all, every game has an ebb and flow of its own. If you know how the game goes, then you’ll be ready when the game hits its highs (and you’ll know when you can relax and take your finger off the shutter).

Plus, knowledge of the game will allow you to anticipate moments before they happen. Will it be a running play or a passing play? What are the odds that they’re going to fake the punt on 4th down? Do you need to be on the sideline or the end-zone for the action? The home side of the field or the visitors’?

The more you understand the subtleties of the game, the better prepared you will be.

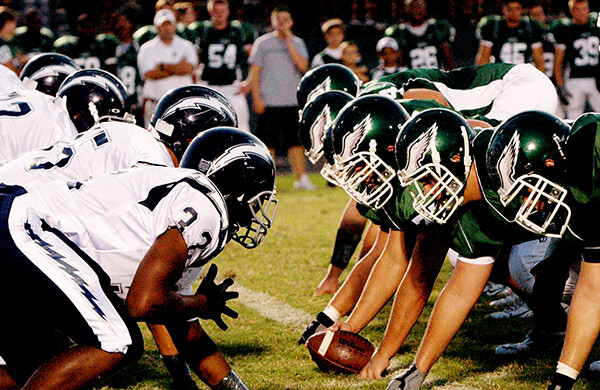
players snapping the ball

5. Focus like a pro

In football photography, you need to master two types of focusing:

  1. Mental focus
  2. Camera focus

First, mental focus: These kids are big and fast and strong, and are trained to run through anything in their way. So please, please, please pay attention to the game, anticipate change, and get out of the way if players are barrelling toward you.

I once saw a photographer stand his ground on the sidelines, despite the fact that a player was being pushed out of bounds right at him. I watched as his camera, lens, and monopod all went flying in three different directions (he flew in a fourth). He was ultimately wheeled off the field with cuts to his face and a leg that had been broken in two places. No photograph is worth that. So focus on where you are and what is going on around you.

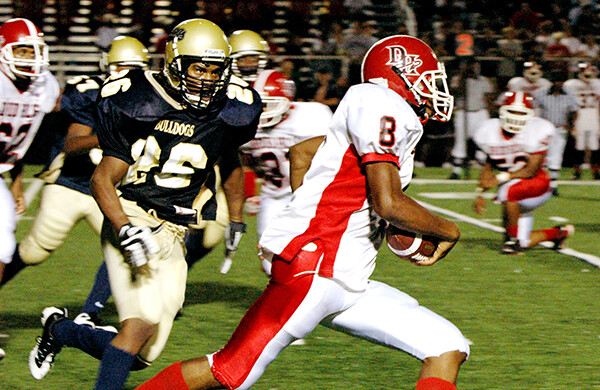
player running with the football

As for the other kind of focus:

You’re photographing an action sport and you want action photos. So set your camera to its continuous autofocus setting (AF-C on some cameras, AI-Servo on others).

Now, the kids will be wearing helmets, so don’t worry if you can’t focus on the players’ eyes. Sure, if you can get the eyes, that’s great. If not, your best bet is to lock on the players’ numbers, or even the ball once players start moving. Here, your camera’s tracking mode will be a big help. Of course, feel free to experiment with other AF area modes, just in case one suits your style of shooting.

The goal is speed and accuracy. And at first, you may struggle. That’s normal. But keep practicing, keep working at it, and you’ll eventually improve.

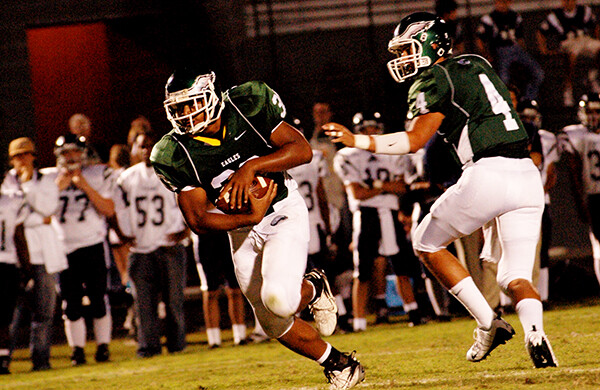
football player with ball

6. Use the right camera settings

Football players move fast, and if you come home with 250 blurry photos, you aren’t going to be happy. So pay careful attention to your shutter speed, because the faster your shutter speed, the better your chances of freezing the action.

I generally like to start with a shutter speed of 1/500s and adjust my aperture and ISO accordingly until I get the look I want. Since football is an outdoor sport, the lighting is going to change over the course of the game. You may start out with great natural light, but you’ll often end in the dark with less-than-ideal stadium lighting. This, in turn, may mean slowing down your shutter speed to let in more light, as well as opening up your aperture to its maximum or raising your ISO.

Mastering these settings – and knowing what to adjust during a game – takes some practice. Be prepared for some trial and error. Here, Shutter Priority mode is often your friend, as you can input your desired shutter speed and ISO, then let your camera automatically adjust the aperture. You might also consider using Auto ISO with some sort of cap (but before you go this route, test different ISO values and determine your maximum “good” ISO).

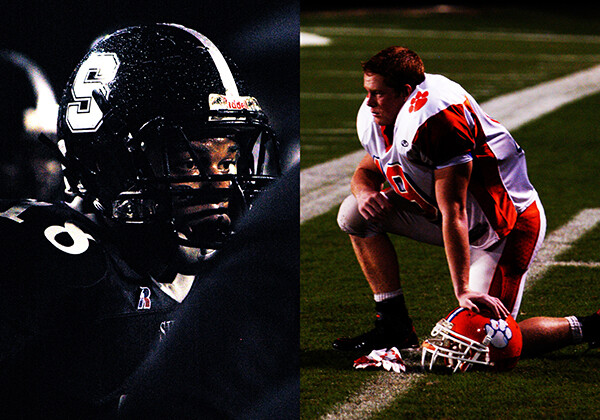
intimate details and portraits

7. Carefully choose your vantage point

Beginning football photographers struggle to position themselves correctly. They often pick an empty bleacher seat near the field, set up their gear, and stay in place for the entire game.

But if you want truly excellent photos, you need to position yourself carefully – and if possible, you should move with the action.

How do you pick the best position? First and foremost, let the light guide you. It sounds dramatic, but really, you should just take advantage of the sun while you can. Especially when you’re starting out, put the sun at your back so that it’s falling onto the field and nicely illuminating the players. As you get more experienced, you can try switching things up and working with backlight (i.e., situations where the light comes from behind the players, as in the photo below) or even sidelight, but as a beginner, keep things as easy as possible.

football photography in beautiful light

Obviously, the closer you are to the action, the better your photos will be. So get as close to the field as possible. If you can, position yourself on the sidelines, below the bleachers. This will give you the best angles, plus it will give you room to move with the game.

Be aware that some stadiums will have restrictions on where you can and can’t stand, regardless of your press credentials. “The Box,” for example, is the area on the sideline between the 20-yard lines. This area, for a variety of reasons, is off-limits to anyone other than players, coaches, trainers, etc. A game official who is a stickler for the rules could penalize the team for your presence in the box. If that happens, start running and don’t look back!

There is a natural tendency to shoot a football game primarily from “your” team’s side of the field. If you’re a parent, this is where you know people and feel comfortable. But try going around to the other side of the field once in a while. That way, you can capture the action with your team’s colors and sidelines in the background.

8. Be creative and keep your eyes open

Sure, you’re photographing football, but that doesn’t mean you can’t be creative with your angles and compositions. If you are selling game photos on your website, getting creative will only help!

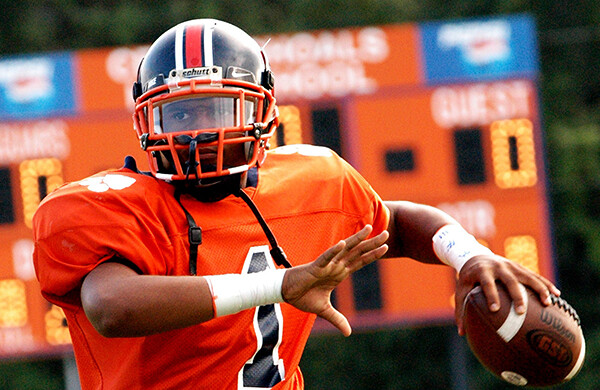
I tend to think in terms of portraits; how can I highlight a specific player in the best way possible? Changing angles resulted in getting this quarterback against a perfect background:

player preparing to throw the ball

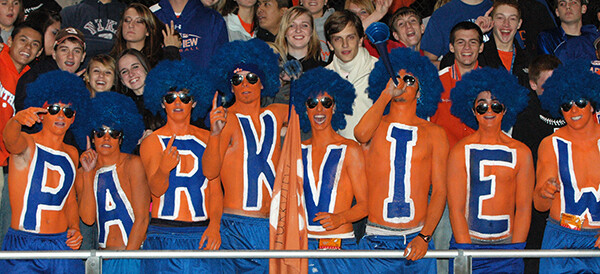
Don’t fall into the trap, though, of assuming that everything worth photographing is right there on the field in front of you. Spend some time in the stands. Shoot the crowd reactions. Photograph the band and the cheerleaders. Capture the traditions. There is so much more going on in a stadium than just a football game. So turn your back on the action once in a while and take a look around you. There are stories everywhere.

Most importantly, learn to keep your head on a swivel!

coaches and cheerleaders

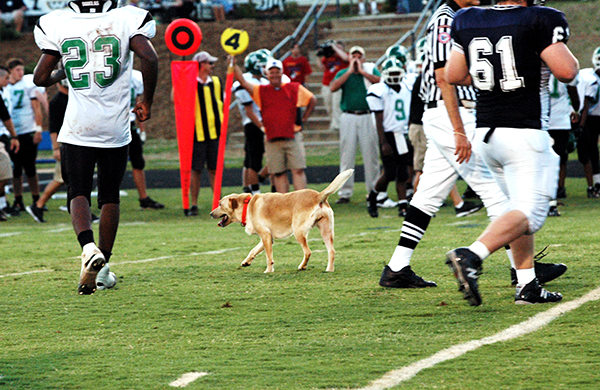
dog on the football field

Pay attention. You never know who might drop in.

9. Consider using your camera’s continuous shooting mode

Beginner sports photographers tend to set their camera to its fastest shooting mode, then follow the “spray and pray” strategy where you capture a series of shots over a split-second window.

But is this advisable? Or should you use your camera’s single-shot mode?

Honestly, it really depends on you and your style. Ask five photographers, and you’ll get five different answers. When I first started shooting high school sports, I was working with a slow camera that didn’t let me “spray and pray” consistently and hope for the best. It may have been frustrating back then, but it was probably a good thing. I learned to compose my shots and choose my moments a little more carefully. Over time, I developed a pretty fast shutter finger and a better eye for sports action. So even now, with a faster camera, I tend to leave my camera set for single clicks.

Ultimately, I’d recommend you try out both settings. Work with your camera’s continuous shooting mode for a while. Then, once you’ve gotten some shots you’re satisfied with, switch over to a single-shot mode and see how it feels!

players with the football

10. Listen to the coaches (and follow proper etiquette)

If you are covering a particular team over the course of a season, introduce yourself to the coaches. Your job will be easier if they know who you are and why you are there. Plus, play your cards right with the coaches and there’s no telling what kind of access you might get.

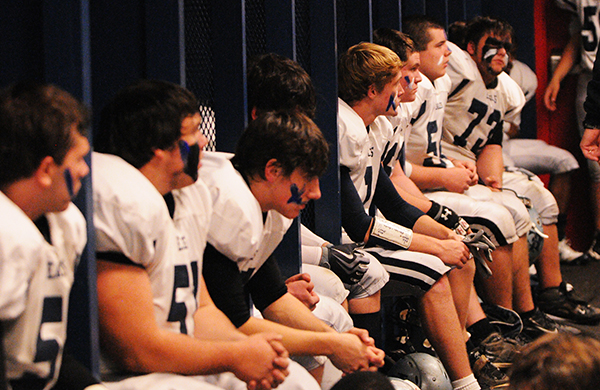
football players preparing for a game

Being nice to coaches gets you all kinds of access.

If a coach or official tells you something, listen. If they ask you to move, move. You’re in their house and you have to play by their rules.

As I mentioned above, don’t use flash. It’s not allowed, plus it can seriously impact the game. It may sound silly, but you have no idea what the consequences of an unexpected flash might be. There could be college scouts in the stands, and if you blind the receiver with your flash, they might not get a scholarship or even get recruited at all.

Also, if play stops for an injury on the field, show respect and put your camera down. While injuries might make for compelling photography, you may be witnessing the end of a child’s life-long dream or even their chances of going to college. You don’t want the student or their parents to see that on your website. This is high school, not the NFL. Be sensitive and keep things in perspective.

High school football photography tips: final words

Any seasoned photographer will tell you that photographing sports is not easy, and football may be one of the hardest games to shoot.

However, with with a little practice and preparation, your images will start to improve. Remember these tips, apply them to your photography, and pretty soon, your photographs will be outstanding.

Now over to you:

Do you have any tips for football photography? Have you photographed any games? What was it like? Share your thoughts in the comments below!

Table of contents

Sports Photography

  • GENERAL
    • 8 Tips On How to Photograph Sports
    • Tips from the Sports Photography Pros to Help You Get the Money Shots
    • Indoor Sports Photography
    • SETTINGS
      • How To Use Sports Mode
    • LIGHTING
      • Shooting Portraits and Action Sports with Speedlites – Workshop
    • GEAR
      • Lens Review Canon 300mm f4 Lens for Sports Photography
      • Aquatech CO-7 Underwater Sport Housing [REVIEW]
      • Shooting Motorsports with a Micro Four Thirds Camera
    • ADVANCED GUIDES
      • Tips for Photographing Football (Soccer)
        • How to Shoot High School Football

        • Play Ball! Covering Your Bases Shooting Baseball
        • How to Capture the Perfect Action Shot in Sports Photography
          • Low Light Sports Photography
          • 3 Tips for Taking Better Motorsport Photos
          • Catching the Action: Photographing Youth Sports
            • Top 5 Tips for Extreme Sports Photography
          • POST-PROCESSING
            • Using Photoshop to Create the Illusion of Depth of Field with your Sports Photos

          var dpsTopics = {
          id: 53961,
          titles: [{“id”:”use-the-right-gear”,”permalink”:”https:\/\/digital-photography-school.com\/how-to-shoot-high-school-football\/”,”title”:”1. Use the right gear”},{“id”:”consider-how-youll-get-in”,”permalink”:”https:\/\/digital-photography-school.com\/how-to-shoot-high-school-football\/”,”title”:”2. Consider how you’ll get in”},{“id”:”get-to-the-game-early”,”permalink”:”https:\/\/digital-photography-school.com\/how-to-shoot-high-school-football\/”,”title”:”3. Get to the game early”},{“id”:”know-the-sport”,”permalink”:”https:\/\/digital-photography-school.com\/how-to-shoot-high-school-football\/”,”title”:”4. Know the sport”},{“id”:”focus-like-a-pro”,”permalink”:”https:\/\/digital-photography-school.com\/how-to-shoot-high-school-football\/”,”title”:”5. Focus like a pro”},{“id”:”use-the-right-camera-settings”,”permalink”:”https:\/\/digital-photography-school.com\/how-to-shoot-high-school-football\/”,”title”:”6. Use the right camera settings”},{“id”:”carefully-choose-your-vantage-point”,”permalink”:”https:\/\/digital-photography-school.com\/how-to-shoot-high-school-football\/”,”title”:”7. Carefully choose your vantage point”},{“id”:”be-creative-and-keep-your-eyes-open”,”permalink”:”https:\/\/digital-photography-school.com\/how-to-shoot-high-school-football\/”,”title”:”8. Be creative and keep your eyes open”},{“id”:”consider-using-your-cameras-continuous-shooting-mode”,”permalink”:”https:\/\/digital-photography-school.com\/how-to-shoot-high-school-football\/”,”title”:”9. Consider using your camera’s continuous shooting mode”},{“id”:”listen-to-the-coaches-and-follow-proper-etiquette”,”permalink”:”https:\/\/digital-photography-school.com\/how-to-shoot-high-school-football\/”,”title”:”10. Listen to the coaches (and follow proper etiquette)”},{“id”:”high-school-football-photography-tips-final-words”,”permalink”:”https:\/\/digital-photography-school.com\/how-to-shoot-high-school-football\/”,”title”:”High school football photography tips: final words”},{“id”:”use-the-right-gear”,”permalink”:”https:\/\/digital-photography-school.com\/how-to-shoot-high-school-football\/”,”title”:”1. Use the right gear”},{“id”:”consider-how-youll-get-in”,”permalink”:”https:\/\/digital-photography-school.com\/how-to-shoot-high-school-football\/”,”title”:”2. Consider how you’ll get in”},{“id”:”get-to-the-game-early”,”permalink”:”https:\/\/digital-photography-school.com\/how-to-shoot-high-school-football\/”,”title”:”3. Get to the game early”},{“id”:”know-the-sport”,”permalink”:”https:\/\/digital-photography-school.com\/how-to-shoot-high-school-football\/”,”title”:”4. Know the sport”},{“id”:”focus-like-a-pro”,”permalink”:”https:\/\/digital-photography-school.com\/how-to-shoot-high-school-football\/”,”title”:”5. Focus like a pro”},{“id”:”use-the-right-camera-settings”,”permalink”:”https:\/\/digital-photography-school.com\/how-to-shoot-high-school-football\/”,”title”:”6. Use the right camera settings”},{“id”:”carefully-choose-your-vantage-point”,”permalink”:”https:\/\/digital-photography-school.com\/how-to-shoot-high-school-football\/”,”title”:”7. Carefully choose your vantage point”},{“id”:”be-creative-and-keep-your-eyes-open”,”permalink”:”https:\/\/digital-photography-school.com\/how-to-shoot-high-school-football\/”,”title”:”8. Be creative and keep your eyes open”},{“id”:”consider-using-your-cameras-continuous-shooting-mode”,”permalink”:”https:\/\/digital-photography-school.com\/how-to-shoot-high-school-football\/”,”title”:”9. Consider using your camera’s continuous shooting mode”},{“id”:”listen-to-the-coaches-and-follow-proper-etiquette”,”permalink”:”https:\/\/digital-photography-school.com\/how-to-shoot-high-school-football\/”,”title”:”10. Listen to the coaches (and follow proper etiquette)”},{“id”:”high-school-football-photography-tips-final-words”,”permalink”:”https:\/\/digital-photography-school.com\/how-to-shoot-high-school-football\/”,”title”:”High school football photography tips: final words”}] };

          The post 10 High School Football Photography Tips appeared first on Digital Photography School. It was authored by Jeff Guyer.


          Digital Photography School

           
          Comments Off on 10 High School Football Photography Tips

          Posted in Photography


          Student photographer knocked unconscious after vicious collision on the sideline of a football game

          17 Nov

          During today’s college football game between the Georgia Bulldogs and Auburn Tigers, a photographer on the sideline was knocked unconscious when a Georgia wide receiver knocked her over as he ran out of bounds following a short pass play.

          University of Georgia student photographer, Chamberlain Smith, was put in a neck brace and taken off the field on a stretcher following the hard collision.

          According to reports, Smith was responsive on the stretcher and was able to move all of her extremities, but was taken to the hospital to be checked for an orbital fracture and a concussion. It’s since been confirmed that Smith was released from the hospital, but there are no details on the extent of her injuries.

          Brian Herrien, the receiver who ran into Smith, was extremely concerned about her wellbeing and had to be told by officials to go to his sideline following the incident. After the game he shared the below tweet:

          Gary Danielson, one of the college football analysts providing color commentary for the game, has taken heat across social media for chuckling at the photographer on the ground following the collision and subsequently making insensitive comments:

          Football photography might not seem dangerous, but when you’re looking through the viewfinder, you never know what can happen. Consider this a reminder to always be vigilant about your surroundings.

          We would like to wish Smith the best in her recovery.

          Articles: Digital Photography Review (dpreview.com)

           
          Comments Off on Student photographer knocked unconscious after vicious collision on the sideline of a football game

          Posted in Uncategorized


          Man accused of flying drone over NFL football games charged

          02 Jun

          On Wednesday, authorities announced that a man had been officially charged on May 14th with violating two separate Temporary Flight Restriction (TFR) areas during NFL football matches. Sacramento resident Tracy Michael Mapes, 56, is accused of flying his drone over a San Francisco 49ers game at Levi’s Stadium and dropping anti-media leaflets into the crowd on November 26, 2017. He is also accused of the same violation during a Raiders game at Oakland Stadium later that day.

          Knowingly violating a TFR can result in serious legal and financial consequences. In this case, Mapes could face up to a year in prison and a $ 100,000 fine if convicted. TFRs are used by the Federal Aviation Administration (FAA) to restrict aircraft operations within designated areas. The restrictions help facilitate national security measures. Natural disasters, presidential and other high-ranking official visits, and professional sporting events that are typically congested with people warrant TFRs.

          Mapes has not publicly commented on the matter. According to police, his drone released leaflets containing content about free speech and personal views on television being corrupt. Most of the leaflets didn’t make it into the stadium or crowd at the 49ers game, due to high winds and rain. No one was injured.

          Surveillance cameras were able to identify the operator and record his license plate number as he drove away from Levi’s Stadium in Santa Clara. Detectives alerted their counterparts in Oakland ahead of the Raiders game. Mapes released leaflets into Oakland Coliseum and, once again, no one was affected. Officers located his vehicle as he was leaving, cited him with misdemeanor charges, and released him.

          Checking a service such as SkyVector is highly recommended before embarking on a drone flight. Flying in any TFR can result in severe consequences.

          TFRs begin several hours before the start of a professional game or other major event and continue for hours after it concludes. It is important for remote pilots to check Notices to Airmen (NOTAM) or SkyVector before embarking on a flight. Some prefer to use an Unmanned Aircraft Systems (UAS) application such as Kittyhawk, Skyward, or AirMap.

          Articles: Digital Photography Review (dpreview.com)

           
          Comments Off on Man accused of flying drone over NFL football games charged

          Posted in Uncategorized


          Cameraman injures OSU football player during pregame warm-up

          29 Nov
          Photo by Paula R. Lively. CC-BY-2.0

          Ohio State quarterback J.T. Barrett allegedly suffered an injury after being hit in the knee by a cameraman during pregame warm-ups. Barrett went on to play during the first-half of the game, but left during the second-half due to the knee injury.

          The claim that an unidentified cameraman was responsible was initially made by OSU coach Urban Meyer during the post-game press conference. “A guy with a camera hit [Barrett] in the knee…” explained a visibly angry Meyer, going on to call for an “all-out” investigation into who was responsible, though ESPN later reported that OSU Athletic Director Gene Smith said such a probe wouldn’t happen.

          “We’re not doing a full-blown investigation to find the photographer,” Smith said. “We’re looking at what things led up to that.”

          Details about how the incident happened are unclear, and despite there being a stadium full of cameras, no footage of the actual ‘collision’ has been released. TMZ has obtained some footage of the immediate aftermath from a fan who pulled out his smartphone to record what was happening, which shows Barrett limping off and gives you an idea of just how crowded the sidelines were during warm-up:

          Despite Meyer’s anger at the specific cameraman, the incident will probably have a broader impact rather than individual punishment. Smith stresses that the focus will be on making changes so that something like this doesn’t ever happen again.

          According to ESPN, Smith said:

          The conference office is gathering data. That’s the extent of it. The outcome of it will ultimately be improved operations. There’s no attempt to try and find a person. The attempt is to find out what happened, what corrective measures we need to put in place.

          So it sounds like the individual cameraman is off the hook… unless of course this ‘collision’ translates into strict new rules and limited access for sports photographers. Then he’ll have have some very upset colleagues to answer to.

          Articles: Digital Photography Review (dpreview.com)

           
          Comments Off on Cameraman injures OSU football player during pregame warm-up

          Posted in Uncategorized


          Tips for Photographing Football (Soccer)

          17 Jan

          Football (called soccer in some parts of the world) can be a very challenging sport to photograph. The ball is constantly moving quickly around the pitch, which may make it somewhat of a challenge to capture the action if you don’t have the right knowledge on how to do so. This simple guide will point you in the right direction to get more success at your next football match.

          football or soccer photography action

          Players contest the ball. © Daniel Smith / Getty Images.

          First, let’s start off with equipment, because heading to a game with the wrong kit is definitely not going to help you.

          Equipment

          For best results, an 18-55mm or similar lens will not be sufficient to cover a game of football; the players and the action will be too far away, and you will most likely end up being disappointed with the results. Using a 70-200mm or equivalent is a great starting point, and will be a fantastic range for areas closer to goal. However, if you do have anything longer in your bag that is always helpful; anything up to about 400mm will be perfect. Anything longer than that can get a little too tight on a football field, unless you want to photograph players at the other end.

          If you find that you’re current lens isn’t quite long enough, don’t feel like you need to run out and buy a longer one; cropping can always help quite a lot. With newer cameras having such high resolutions now, you won’t find too much of a drop in final image quality. Renting a lens for a day or two is always an option you may want to consider as well.

          Also, bringing a small camping stool will be of great comfort to you, and because you will be closer to the ground than standing, it will help you get less of the field in the frame.

          Fig 3

          Players competing for possession of the ball. © Daniel Smith / Getty Images.

          Settings

          If you’re comfortable with using Manual mode, the below will be a helpful guide to getting you started. If you’re not too comfortable with Manual mode just yet, using shutter speed priority set to 1/800th, or faster, should do the trick.

          Shutter Speed

          Football (soccer), as with the majority of sports, is fast paced. To be able to freeze the action you will need to use a fast shutter speed; 1/800th as a minimum, is a great starting point for more advanced players as they tend to move much faster than younger, junior players. If you’re photographing a very young age group match, you may find that 1/500th could be fast enough, however 1/800tj would be a safer option.

          Fig 5b

          A fast shutter speed was used here. © Daniel Smith / Getty Images.

          To add some variety, slower shutter speeds can create some fantastic images when done correctly. Shooting at around the 1/30th mark is a great starting point. If you find that there is too much blur in your images, then speeding the shutter speed up slightly will help. Conversely, if there is not enough blur, you may need to slow the shutter speed down.

          Fig 4b

          Try using a slower shutter speed to create motion blur showing speed. © Daniel Smith / Getty Images.

          Aperture

          For single player shots, f/2.8 would be ideal as it will isolate the player nicely. However, if photographing tackles, etc., where there is more than one player, it is best to use f/4 as this will give you a slight increase in depth of field (DoF), without sacrificing too much shutter speed. If your lens cannot got as wide as f/2.8 or f/4, that’s perfectly fine, just use the widest aperture your equipment offers.

          ISO

          Now that you have your aperture and shutter speed set, use the ISO to fill in for the exposure, or brightness, you want to have. Depending on what shutter speed/aperture combination you have, you may find ISO 400 on a bright day works, or on the other hand, if you’re in a low-light situation such as at dusk, night, or on a heavily overcast day, ISO 800 or higher may be required. Just be careful with how high you go on your particular camera as each model can perform differently at higher ISO’s. This is something that you may need to play around with a bit to explore.

          Autofocus

          Using the correct autofocus function on your camera will be a key element in ensuring you capture a sharp shot! Because you will be photographing moving subjects, One-Shot AF on Canon, or AF-S on Nikon, is not an appropriate focus mode to use, as it will not continually track the moving subject. In this situation, using AI-Servo on Canon, or AF-C on Nikon, would be the best solution as it will continually track a moving subject, so long as you keep the autofocus engaged. If you’re comfortable with manually selecting AF points, that will further help you control your camera’s focus even more; just select whichever autofocus point you wish your subject to be placed in the frame.

          Positions

          As with any sport, sitting in the right position will increase your chances of getting the shot. For football (soccer), this is generally around the corners of the pitch or field.

          Fig 1

          An overview of a soccer pitch with a guide of seating positions. © Daniel Smith / Getty Images.

          • Position 1: Looking down the pitch (field) will give you some great shots of players as they run with the ball toward you. You can also get some great shots of goals here, too. This position is also the most versatile position as you can get a good mix of everything.
          • Position 2: Looking around the pitch (field) is fantastic for shots at goal, as you will generally be able to get the goal shooter, and keeper in the frame. From here, you will also be able to capture players running down the pitch (field), but they will not be as head-on if running down the wings.
          • For some variation, try shooting at position 3, as from there you will be able to get some great panning shots of players with the ball, as they run the length of the pitch. You generally won’t be able to get many great goal shots from here but you may find some great tackle opportunities if they happen around mid-field.

          Do not be tempted to run around the pitch following the ball – you will be forever running, and not photographing! It is much better to sit in one location and wait for the action to come to you. You can always move locations, such as at half-time, if you’re wanting to photograph a particular team.

          Fig 10

          A nice tackle here. A player hslid right under the other for the ball. © Daniel Smith / Getty Images.

          What to look for

          Here are some things for you to look for at your next game.

          Celebrations – This could be of the team that just scored a goal, or after the final whistle, capture the team that won the match.

          Fig 6

          Teammates celebrate scoring a goal. © Daniel Smith / Getty Images.

          Fig 12

          A player shows the toll of losing a match. These images are also quite powerful, as the players can often have great expressions.

          Action – This will be a major part in the game. Football (soccer) has a lot of tackles, headers, dives, slides, not to mention goals, and goal deflections by the keeper. Staying focused is key to capturing these moments. Also bear in mind, that older players will generally play with a higher intensity than the younger players, so capturing dramatic tackles will happen more often. But be aware that older players also move a lot faster!

          Fig 2

          Players falls from a push. © Daniel Smith / Getty Images

          Fig 7

          A player took a shot at goal. Having the goal keeper, and the front goal posts in the frame, clearly illustrates that this is taking place at goal. © Daniel Smith / Getty Images.

          Fig 9

          Players heading the ball. Getting the ball close to their heads is key with these types of images. If the ball is too far away, it can get lost. Also, the players expressions are generally better when the ball has just hit their head! © Daniel Smith / Getty Images.

          The crowd – If the game you’re covering has a lot of supporters, don’t forget to get some shots of them, too, they can add some great atmosphere. Look for emotions on their faces; maybe they’re excited as their team just scored a goal, or they may be very quiet as their team is about to lose. The crowd is a great place for emotions.

          Conclusion

          Football (soccer) can be a very rewarding sport to photograph. As with any sport, the more you understand about the game, the more you know where to look for action, and will be able to follow it easier. However, if you’re not all that familiar with football (I’m not an expert on it by any meaning of the word) practice makes perfect.

          One thing I would suggest is if you are planning on heading down to your local club to photograph a game, as a courtesy ask any match officials or club president if they are okay with you doing so. They will appreciate it, and it will make it easier for future photographers. Happy shooting!

          googletag.cmd.push(function() {
          tablet_slots.push( googletag.defineSlot( “/1005424/_dPSv4_tab-all-article-bottom_(300×250)”, [300, 250], “pb-ad-78623” ).addService( googletag.pubads() ) ); } );

          googletag.cmd.push(function() {
          mobile_slots.push( googletag.defineSlot( “/1005424/_dPSv4_mob-all-article-bottom_(300×250)”, [300, 250], “pb-ad-78158” ).addService( googletag.pubads() ) ); } );

          The post Tips for Photographing Football (Soccer) by Daniel Smith appeared first on Digital Photography School.


          Digital Photography School

           
          Comments Off on Tips for Photographing Football (Soccer)

          Posted in Photography


          Q&A: Gearing up for the National Football League with sports photographer Otto Greule

          16 Sep

          As the National Football League season sweeps in, sports photographers across the United States take to the stadiums to create iconic images. In a Q&A below, veteran sports photographer Otto Greule shares insider knowledge & outstanding imagery to give insight into his fast-paced, visual craft.

          Articles: Digital Photography Review (dpreview.com)

           
          Comments Off on Q&A: Gearing up for the National Football League with sports photographer Otto Greule

          Posted in Uncategorized


          On Assignment: Kai-Huei Yau’s Football Previews

          18 Sep

          Growth as a photographer is, for me, long periods of muddy struggle punctuated by moments of clarity. Sometimes the moments break new ground. But other times the moments solidify things you already knew —but didn't know know.

          Photographer Kai-Huei Yau's shot of a high school football lineman is a great example of the latter.

          Read more »
          Strobist

           
          Comments Off on On Assignment: Kai-Huei Yau’s Football Previews

          Posted in Photography


          How to Shoot High School Football

          25 Aug

          It’s the middle of August here in Atlanta, and that means that the kids are back in school.  It’s a bit earlier than most places, but regardless of where you live the rites of fall will soon be in full swing.  Here in the South, one of those rites plays itself out every week– not in cathedrals of brick and stained glass windows, but in those made from steel beams, cement bleachers, and 6,400 square yards of well-tended grass.  Yes, it’s high school football season.  And in the South that means an almost religious zealotry.  If you think I’m kidding, give me a call and come for a visit.  Make sure to bring your camera, though, because you’re not going to want to miss this.

          FB-348

          The Right Gear

          I’m not going to spend a lot of time here discussing camera bodies.  Some of the photos in this article were taken six or seven years ago on a used Nikon D70, while later images were shot with a Nikon D300 or D700.  As long as you are photographing with a reliable DSLR, your bigger concern is going to be the glass. As much as you may covet that 400mm lens you see NFL sideline photographers shooting with on TV, it is possible to get really great shots at this level with a few basic pieces of equipment.  As with any sporting event, you are going to want a good mix of wide-angle and zoom images.  When I first started shooting sports I was using one body and one lens– the 70-200mm f/2.8.  I was able to shoot and edit creatively enough to get that variety of necessary focal lengths.  As things progressed, I was able to add a second lens– the 24-70mm– to the arsenal.  With these two lenses I was able to get everything cropped properly in the camera, without having to rely on destructive post production.  If you can only afford one fast lens right now, definitely opt for the longer zoom.

          Fast lenses are also going to be important once the sun goes down because most high school sports have a prohibition against using flash.  I’ll confess to occasionally firing my flash, but be careful with your angle.  You don’t want to blast a player with flash full in the face and possibly change the outcome of the game.

          Since flash is not going to be an option, you will most likely need a monopod for keeping your camera steady– particularly at slower shutter speeds after the sun goes down.

          As with any type of shoot, make sure you have all of the necessary backups– batteries, memory cards, etc.  Make sure you also have a plan for when it starts raining.  This isn’t an “IF” it starts raining.  Into every sports shooter’s life some rain WILL fall.  Be prepared for it.  The Think Tank Hydrophobia or the OP/TECH USA Rainsleeve should do the trick

          Trust me.  At some point it's going to rain.

          Trust me. At some point it’s going to rain.

          Getting In

          Unless you are a credentialed photographer from a media outlet or the school’s contracted photography company, chances are you’re going to have to pay to get in.  The good news is that it’s usually less than $ 10.  You might be able to talk your way in, but the money goes to a good cause, so don’t be a tightwad.

          Get There Early

          You are also going to want to get there early.  The teams take the field to warm up anywhere from one to one and a half hours before game time.  Warm-ups are going to give you one of your best opportunities for quality shots.  For starters, the light is better.  The sun hasn’t set and you’re going to have a really great quality of natural light– particularly if you shoot with the sun at your back.  Players also tend to move a little more slowly in warm-ups than in the actual game.  You’ll have an easier time capturing motion, and more of an opportunity to isolate individual players.  In some cases, you may even be able to actually walk out onto the field to shoot and not be restricted to the sidelines.  If you do walk out onto the field, PLEASE BE CAREFUL!  There are probably 150 kids and coaches out there warming up.  They are big, fast, and not paying attention to you.  Their job is to play football– not give you a good photo op.

          Get there early and take advantage of the sun while you can.

          Get there early and take advantage of the sun while you can.

          Know the Sport

          The biggest key to getting quality photos of any sport is to have a solid understanding of the game and how it is played.  These games have an ebb and flow all their own.  You are going to want photos of both the offense and the defense.  Is it a running play or a passing play?  What are the odds they’re going to fake the punt on 4th down?  Do you need to be on the sideline or the end-zone?  The home side of the field or the visitors’?  Remember that there is a big difference between shooting as a media photographer and shooting as a parent.  As a reporter or school photographer, you are there for “the big picture.”  As a parent, you are mostly concerned with getting photos of your son, and he’ll be easy to track with that big number on his back.  In either case, the more you understand the subtleties of the game the better prepared you will be.

          FB-207

          Focus

          When I say “focus” I’m not just talking about your photography.  As noted above, these kids are big and fast and strong, and are trained to run through anything in their way.  I once saw a photographer stand his ground on the sidelines, despite the fact that a player was being pushed out of bounds right at him.  I watched as his camera, lens, and monopod all went flying in three different directions and he flew in a fourth.  He was wheeled off the field with cuts to his face and a leg that had been broken in two places.  No photograph is worth that.  Focus on where you are and what is going on around you.

          FB-281

          Now let’s talk about the other kind of focus.  It’s an action sport and you want action photos.  Whereas you would ordinarily focus on the eyes for a portrait, these kids are all wearing helmets and you’re not going to have that option very often once the game starts.  Your camera’s auto-focus works by looking for contrast.  Football uniforms are usually going to have a lot of contrast between the color of the jersey and the color of the numbers.  If you can get the eyes, great.  If not, your best bet is to try locking on either those numbers or the ball once players start moving.

          FB-213

          Camera Settings

          As with any photo shoot, there is not necessarily a “right” or “wrong” exposure.  But this is a sport, after all, and if you come home with 250 blurry photos you aren’t going to be happy.  Keep in mind that since shutter speed controls ambient exposure, the faster your shutter speed is the better your chances of freezing the action.  I generally like to start with a shutter speed of 1/500 and adjust my aperture and ISO accordingly until I get the look I want.  Since this is an outdoor sport, your lighting is going to be changing over the course of the game.  What started out with great natural light before the sun went down is going to finish in the dark under less-than-ideal stadium lights.  That may mean slowing down your shutter speed to let in more light, as well as opening up your aperture or raising your ISO.  This is going to take some practice.  Be prepared for some trial and error.

          FB-777

          Vantage Point

          First and foremost, let the light guide you.  I know…sounds all dramatic and stuff, but really.  Take advantage of the sun while you can

          FB-071

          Obviously, the closer you are to the action the better your photos will be.  As noted earlier, having a solid understanding of the game will definitely help you decide where to be.  This is one reason why you hardly ever see a veteran sports photographer standing still for very long.  Be aware that some places are going to have restrictions on where you can and can’t stand, regardless of your press credentials.  “The Box,” for example, is the area on the sideline between the 20-yard lines.  This area, for a variety of reasons, is supposed to be off-limits for anyone other than players, coaches, trainers, etc.  A game official who is a stickler for the rules could penalize the team for your presence in the box.  If that happens, start running and don’t look back.

          There is a natural tendency to shoot a football game primarily from “your team’s” side of the field.  If you’re a parent, this is where you know people and feel comfortable.  Try going around to the other side of the field once in a while.  From this vantage point, you will not only capture the action, but your own team’s colors and sideline will add a great element to your background.

          Be Creative.  Keep Your Eyes Open

          It’s football, but that doesn’t mean you can’t be creative with your angles and composition.  If you’re the parent of a player, find a way to focus on your athlete and make them stand out.  If you are selling game photos on your website, getting creative will only help your sales.  I tend to think in terms of portraits.  Changing angles resulted in getting this quarterback against a perfect background.

          FB-295

          Don’t fall into the trap, though, of assuming that everything worth photographing is right there on the field in front of you.   Spend some time in the stands.  Shoot the crowd reactions.  Photograph the band and the cheerleaders.  Capture the traditions.  There is so much more going on in that stadium than just a football game.  Turn your back on the action once in a while and take a look around you.  There are stories everywhere.   Learn to keep your head on a swivel.

          FB-999

          Pay attention.  You never know who might drop in.

          Pay attention. You never know who might drop in.

          Spray and Pray…to Motor Drive or Not to Motor Drive?

          As with so much of what we do, five photographers will give you five different answers.  When I first started shooting high school sports I was doing so with a slow camera that didn’t have the buffer speed for just leaning on the motor drive and hoping for the best.  That was probably a good thing.  I learned to both compose my shots and choose my moments a little more carefully.  I developed a pretty fast shutter finger, and, I think, a better eye for sports action. Even now, though, with better equipment, I tend to leave my camera set for single clicks.

          FB-888

          Etiquette

          If you are covering a particular team over the course of a season, introduce yourself to the coaches.  Your job will be easier if they know who you are and why you are there.  These kids may be big and strong, but they are still kids and these coaches are looking out for them.  Play your cards right with the coaches and there’s no telling what kind of access you might get.

          FB-178

          Being nice to coaches gets you all kinds of access.

          If a coach or official tells you something, listen to them.  If they ask you to move, you move.  You’re in their house and you have to play by their rules.

          No flash.  It may sound silly to you, but you have no idea what the consequences might be.  There may be college scouts in the stands, and you blinding the receiver with your flash might have an impact on whether that kid gets a scholarship or if he’s even recruited at all.

          If play stops for an injury on the field, show some respect and PUT YOUR CAMERA DOWN.  While it might make for compelling photography, it is entirely possible that you just witnessed the end of a child’s life-long dream or his chance of going to college.  You don’t want him or his parents seeing that on your website.  This is high school, not the NFL.  Be sensitive and keep it in perspective.

          Any seasoned photographer will tell you that photographing sports is not easy, and football may be one of the hardest.  With with a little practice and preparation, though, you’ll see your images start to improve quickly and steadily.

          Post originally from: Digital Photography Tips.

          Check out our more Photography Tips at Photography Tips for Beginners, Portrait Photography Tips and Wedding Photography Tips.

          How to Shoot High School Football


          Digital Photography School

           
          Comments Off on How to Shoot High School Football

          Posted in Photography


          SWAC – Football Championship 2011 – Grambling & Alabama A&M (Birmingham Alabama)

          28 Jan

          the Grambling State University football program continued its winning ways as the team won its sixth SWAC Conference championship game by defeating the Alabama A&M Bulldogs 16-15 at Legion Field, in Birmingham Alabama. Grambling and Alabama A&M have become familiar foes as Saturdays match up marked the fourth time that the two schools have met in the SWAC Championship game. Saturdays win also avenged an early season lose for the Tigers as the Bulldogs won 20-14. Building on a six game winning streak the Tigers carried their momentum into the Championship game. The Tigers offence struggled in the first half as both the running and passing game got off to a slow start. Early defensive pressure from the Alabama A&M front seven resulted in a number of stalled drives for most of the first half. The Bulldogs got off to a quick start scoring on their first drive as Alabama A&M RB. Kaderius Lacey ran for a 11 yard touch down and in midway through the second quarter Terrance Pride caught a 36 yard pass from DeAunte Mason. The Bulldogs failed to convert the extra point attempts on both of their touchdown drives which played a critical role in the outcome of the game. The Bulldogs added to their lead after Chance Wilson kicked a 34 yard field goal midway through the second quarter. Near the end of the first half Grambling head coach Doug Williams decided to send Zoltan Riazzo onto the field to kick a 27 yard field goal after the Tigers drove the ball down to the Bulldogs 10 Yard
          Video Rating: 3 / 5


          Ada-Borup football – Postgame celebration with the coaching staff

          15 Jan

          Video shot with a Nikon D3s and a Nikon 24-70mm F2.8 lens. Video edited in iMovie.

          255lj,242hj,185ladder,268cj,272dcj,245bhop. Jumps by Playmate Created by Syrle.
          Video Rating: 3 / 5