RSS
 

Posts Tagged ‘Foot’

Five Foot Lens and 3.2 Gigapixel Camera Produced for Night Sky Photos

08 Oct

The post Five Foot Lens and 3.2 Gigapixel Camera Produced for Night Sky Photos appeared first on Digital Photography School. It was authored by Jaymes Dempsey.

Image: L1 Lens of the camera polished and coated with a broadband antireflective coating by Safran-R...

L1 Lens of the camera polished and coated with a broadband antireflective coating by Safran-Reosc. LSST Project/NSF/AURA.

Last month, engineers packaged up the largest optical lens ever created, before shipping it 17 hours from Tuscon, Arizona to the SLAC National Accelerator Laboratory in central California.

The lens is five feet in diameter and four inches thick; it required a truck to transport it. It was attached to an additional (3.9 foot) lens element when shipped, and it will soon be followed by another.

Together, these three lens elements will be mounted to a camera that, when finished, will be the largest digital camera in existence. And the camera-lens duo will ultimately be attached to a telescope: the Large Synoptic Survey Telescope, which is over ten years in the making.

Note that the camera itself is constructed out of 189 sensors which, when combined, will create pictures of an astonishing size: 3.2 gigapixels. It’s still in production at the SLAC National Accelerator Laboratory, but will likely be finished in 2021. The cost of the camera alone is a whopping $ 168 million dollars.

The purpose of this huge setup is to capture detailed photos of the night sky. The full telescope will be placed on Cherro Pachon mountain in Chile, where the camera will take exposures at 20-second intervals.

As explained in a press release by one of the laboratories involved in the lens construction:

This data will help researchers better understand dark matter and dark energy, which together make up 95 percent of the universe, but whose makeup remains unknown, as well as study the formation of galaxies, track potentially hazardous asteroids and observe exploding stars.

We recently reported on Xiaomi’s 108-megapixel smartphone, with its wrap-around screen, but a 3.2-gigapixel camera blows this out of the water. Even a recently announced security camera, which made waves when it was unveiled at the China International Industry Fair, topped out at 500 megapixels. Equipped with facial recognition technology, there are major privacy concerns when it comes to how this may be used in a country that already heavily monitors its citizens.

But, the high resolution of these cameras does bring to light something that is conveniently forgotten by tech advertisers: More megapixels will only produce greater detail if you have a lens that can resolve that detail. If your lens can only resolve 12 megapixels worth of detail, then you’re not going to gain from slapping a 108-megapixel sensor onto the camera. That’s why the Large Synoptic Survey Telescope requires ultra-precise optics if scientists want to gather meaningful data.

Of course, you don’t need a lens costing millions of dollars to produce highly-detailed 108-megapixel photos. But my suspicion is that the current optics used by smartphones (Xiaomi, but also Huawei, Apple, and Google) just aren’t up to the task of generating 108-megapixel photos.

So don’t fall prey to the megapixel myth. And keep your eye out for photos from the Large Synoptic Survey Telescope!

What are your thoughts on these new lenses and cameras? Share with us in the comments!

The post Five Foot Lens and 3.2 Gigapixel Camera Produced for Night Sky Photos appeared first on Digital Photography School. It was authored by Jaymes Dempsey.

Digital Photography School

 
Comments Off on Five Foot Lens and 3.2 Gigapixel Camera Produced for Night Sky Photos

Posted in Photography


Tiffen announces foot operated gas-lift Steadicam Air monopod

24 Feb

Tiffen has joined the monopod market with the new Steadicam Air line, which uses a gas spring and a foot pedal to help photographers quickly and easily adjust the monopod’s height.

The Steadicam Air is a three-section carbon fibre model that features a foot pedal close to the base that, when pressed, assists in lifting the mounted camera to the desired height. The monopod will come in two configurations to hold either 25lb or 15lb, and are suitable for both still and movie photographers.

Of the three sections, one uses a twist lock that allows the top of the monopod to rotate about 360°, while the other two are spring loaded for lifting the camera. A large rubber foot makes it easy to angle monopod without it slipping across the floor.

Here’s a look at the Steadicam Air in action:

The Steadicam Air-25 is available now for $ 500, while the Steadicam Air-15 will go on sale “at a later date” with a price of $ 400. For more information, head over to the Tiffen website.

Press Release

THE TIFFEN COMPANY INTRODUCES THE STEADICAM AIR

A Lightweight Carbon Fiber Pneumatic Monopod for Photographers and Cinematographers

Steadicam, a division of The Tiffen Company and Master Cinematographers teamed up to release the Steadicam Air, a revolutionary monopod that is gas lift activated by a foot pedal for adjustable height.

Setting a new standard, the Steadicam Air brings versatility back to the monopod. With its gas lift spring, the Air makes it easy for professional photographers and cinematographers to raise their heights and never miss a moment. Available in two different configurations, a 25 lb and soon after a 15 lb weight capacity, the Air is the perfect complement for professional image-makers to stabilize and support their equipment.

What sets the Steadicam Air apart from any other monopod is that it’s gas lift and spring activated. Weighing only 3.5 lbs, the Steadicam Air is made up of three sections including one twist leg lock that allows for a 360 degree rotation. The height adjustment is activated by the rubberized foot pedal which allows for a non-slip operation.

Made of carbon fiber, the Steadicam Air is lightweight and compact making it easy for travel. The Air is accompanied by a deluxe carrying bag with added protection and an ergonomic shoulder strap. It is ideal for nature, wildlife, sports, wedding, venue photographers and cinematographers alike.

The Steadicam Air-25 will be available on February 2, 2018 for $ 499 USD. The Steadicam Air-15 will available at a later date for $ 399 USD.

Features:

  • 100% gas lift, spring activated height adjustable monopod – activated by adjustable foot pedal
  • Made of Lightweight Carbon Fiber
  • 3 – Section Monopod with 1 – twist leg lock
  • Allows for full 360 degree rotation without compromise
  • Ergonomic foam padded grip point with debossed Steadicam branding on the handle
  • Removable aluminum top plate with reversible screw thread allowing for 1/4in-20 and 3/8in-16
  • Oversized rubber foot giving you extra stability connected to ball point
  • Quick twist rubberized leg grips
  • Non-slip, rubberized foot pedal allows for easy grip operation. Pedal also folds up with travel purposes and quick transport
  • Collapsed Height = 28in
  • Fully Extended Height = 62.5in
  • Sleek red accents

Articles: Digital Photography Review (dpreview.com)

 
Comments Off on Tiffen announces foot operated gas-lift Steadicam Air monopod

Posted in Uncategorized


Review: Lastolite 6×4 Foot Panelite Collapsible Reflector with Translucent Diffuser

12 Apr

review-lastolite-panelite-diffuser-0803

How many times have you heard that there are certain times of day you shouldn’t photograph people? For example, at midday in harsh sunlight. The logic is pretty sound. Direct, hard light can lead to unflattering shadows and ultra high contrast, which can result in unsatisfactory portraiture. However, if you follow this advice blindly, and only wait for the golden hours each day, you’re missing out on an enormous amount of time that could be spent photographing people.

There are several options to combat this problem, but one of the easiest and most effective, is a piece of gear called a diffusion panel.

What is a diffusion panel?

At its most basic, a diffusion panel is a piece of translucent material that allows harsh direct light to pass through it, so it effectively becomes a light source of its own. This softens the light and can allow you to obtain great, flattering, natural light portraits, in unfavorable conditions.

review-lastolite-panelite-diffuser-2745

There are many types of diffusion panels available ranging from very small, handheld ones, to giant ones that are many meters across and require dedicated stands.

When size matters

Small diffusion panels are useful, and if you happen to have a 5-in-1 reflector, you probably already have one. These are indispensable for still-life and tabletop work; however, in terms of portraiture, their small size often limits them to closely cropped images and headshots.

This is where the Lastolite Panelite Reflector comes in. At 6×4 feet (1.8m x 1.2m) it’s large enough to cover enough area for full length portraits. At $ 128 retail, its price also means that it isn’t way out of reach for the serious portrait photographer.

Putting it through its paces

To test it out, I took the Lastolite Panelite Reflector out on location, at mid-afternoon on clear days. The sun was low at this point, but still very harsh, and the high contrast would have been difficult, if not impossible, to manage without a modifier.

review-lastolite-panelite-diffuser-0385

By Diffusing the sun back lighting the scene, you can even out the exposure of the highlights and shadows which is far more pleasing for portraits.

review-lastolite-panelite-diffuser-0569

On the left, the bottom half of the image is shaded by the diffuser. You can see the two stop difference in exposure. In the image on the right, you can see how the hard directional sunlight has been softened (note that more exposure was needed overall so the background was also brightened in the process).

review-lastolite-panelite-diffuser-2621

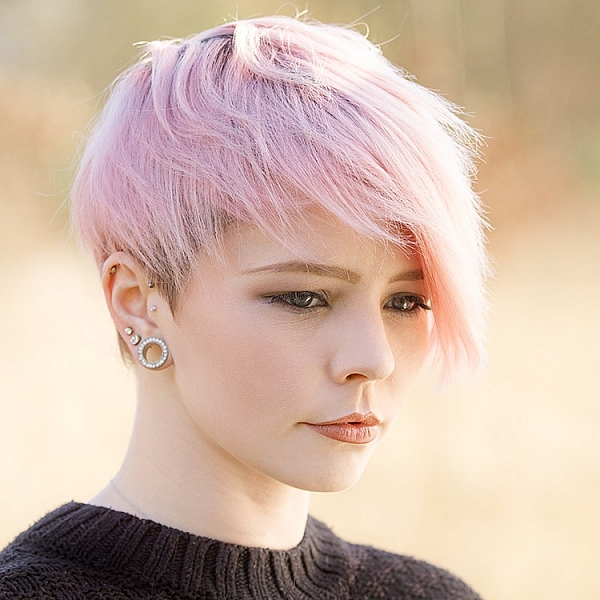
Apart from the unflattering shadows in the left hand image, the direct sun made it painful for the model to look into the camera. With the diffusion panel (right image), her eyes were shielded from the harsh light.

review-lastolite-panelite-diffuser-2734

In the left hand image, the extreme contrast from the back lighting made exposing for the rest of the image a nightmare. By diffusing the back light, the exposure was evened out, but still allowed for a pleasing rim light (image above right).

Let’s look at some of the pros and cons of using this light panel.

PRO: Two stop diffusion

review-lastolite-panelite-diffuser-2737

By reducing contrast, the loss of two stops of light can be a huge help in some scenarios.

When working with the extremes of bright sunlight, it can be difficult to get away from small apertures like f/16. This is a problem because these settings won’t allow for a shallow depth of field. By reducing the light on your subject by two stops with the diffuser, that hypothetical aperture of f/16 becomes f/8 and makes background blur much easier to control.

PRO: Size

review-lastolite-panelite-diffuser-2656

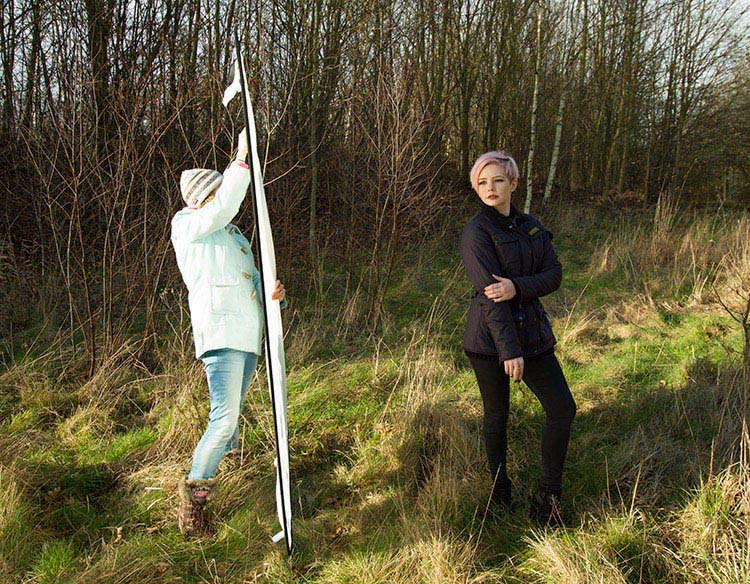
This thing is huge. It’s not the biggest on the market, but it’s big enough for full length portraits, which is a major plus. I did not yet have the opportunity to test it on groups of people, but I believe it should work well for up to four people, with careful control.

review-lastolite-panelite-diffuser-0734

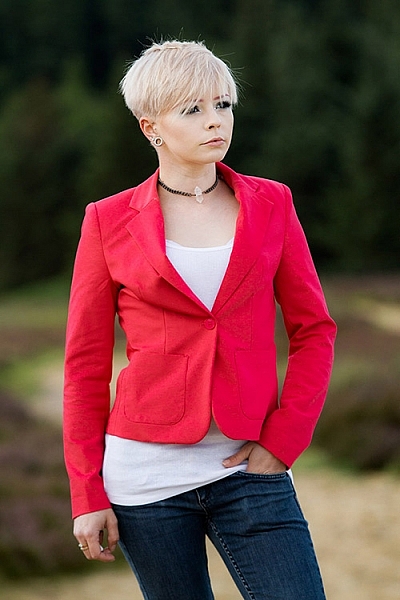
The ability to diffuse a large enough area for 3/4 and full length portraits is a big plus.

PRO: Portable

Like a lot of Lastolite’s product, the diffusion panel is collapsible, and folds up to a tiny fraction of its size. Packed in its case, I would compare it to the surface of a medium sized cafe table. Combined with its light weight, it’s easy enough to throw in the back of a car, and carry along on location with you, without strain.

PRO: Price

At $ 128, this is not a budget tool. However, for photographers serious about location based portraiture, the Lastolite Panelite Reflector comes in cheaper than lighting modifiers of moderate quality and unlike those, this doesn’t require lights to go with it.

CON: Extra hands

The Lastolite Panelite Reflector is large, and you will find it very difficult to manage without an assistant to hold it for you. If it needs to be held much higher than ground level, you may well need two people. It may be possible to rig it to some stands, but this leads into the next point.

CON: Be wary of wind

review-lastolite-panelite-diffuser-2695

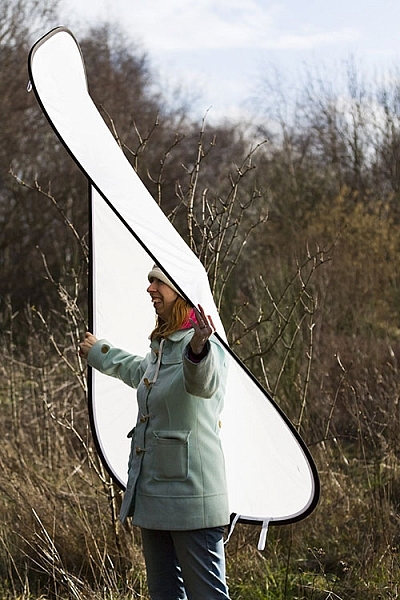
A small gust of wind sparked a several minute struggle to regain control over the panel.

The only real problem I came across while testing the Lastolite Panelite Reflector was that the slightest gust of wind will send it flying, and folding in on itself. Whoever is holding it for you needs to have a sure grip on it, and even then the whole process is still irksome.

If you’re into slapstick, this can be hilarious to watch, but any time spent trying to get the diffusion panel to play along, is time not spent taking photographs.

CON: Dirt

Like white reflectors, softboxes and white umbrellas, the Lastolite Panelite Reflector is really, really white and will be hard to clean when it inevitably gets dirty.

Overall thoughts

review-lastolite-panelite-diffuser-0640

If nothing else, when used head on, the Panelite Reflector creates some interesting catch-lights.

To sum it up easily, the Lastolite Panelite Reflector does exactly what it says on the tin. It’s portable, creates a beautiful diffused light, and is relatively affordable. Although, it can prove tricky to handle under some conditions, I found the results to be well worth the extra logistics and effort, and I am looking forward to a long an extended relationship with it in my photographic arsenal.

googletag.cmd.push(function() {
tablet_slots.push( googletag.defineSlot( “/1005424/_dPSv4_tab-all-article-bottom_(300×250)”, [300, 250], “pb-ad-78623” ).addService( googletag.pubads() ) ); } );

googletag.cmd.push(function() {
mobile_slots.push( googletag.defineSlot( “/1005424/_dPSv4_mob-all-article-bottom_(300×250)”, [300, 250], “pb-ad-78158” ).addService( googletag.pubads() ) ); } );

The post Review: Lastolite 6×4 Foot Panelite Collapsible Reflector with Translucent Diffuser by John McIntire appeared first on Digital Photography School.


Digital Photography School

 
Comments Off on Review: Lastolite 6×4 Foot Panelite Collapsible Reflector with Translucent Diffuser

Posted in Photography


Getting Your Foot in the Door as a Freelance Assignment Photographer

23 Jun

Hurricane Sandy

One of the biggest changes photography has seen over the last 10 years is in photojournalism and documentary photography. Some will see this change as good while others will see this change as bad. The improvements made to consumer DSLR cameras, lenses and editing software have opened the doors for many photography hobbyists to engage in documentary photography.

Gone are the days when having a good camera and access to a darkroom separated the professional photographer from the amateur photographer. The playing field has been levelled and it is open season for anyone to take part. Within this new landscape there is an abundance of opportunities for you to possibly earn a little extra cash by taking photos for your local paper, magazines or online news outlets.

The assignments will always vary. You may be asked to cover a government meeting or the opening of a new business. You may be taking pictures for a human interest story about a unique person in your town. You could be asked to cover a local high school football game or be asked to rush to the scene of an accident. You may find yourself taking pictures of a festival or a gala dinner featuring some movers and shakers.

Police Car

Below is a list of tips that will help you be a better assignment or documentary photographer, and possibly get your foot in the door to get some jobs.

PRACTICE. KNOW YOUR GEAR.

In many regards, photography starts with the gear. It is important to know the limitations of your equipment. It is equally important to know the areas in which your equipment performs well. No matter what camera and lens you are working with, your equipment will have limitations. Don’t spend time wishing for, or wanting a different lens or camera. Use what you have to the best of its ability. A better lens in some warehouse, is not going to help you now.

ASK QUESTIONS OF YOUR ASSIGNMENT EDITOR

As an assignment photographer you should be prepped before you go out by the editor of the publication, or the writer of the story. If you have any questions, ask them! I have never had an assignment editor react poorly to me asking questions about a piece they are asking me to cover.

Ignorance can be overcome by asking questions. Overcoming stupid is more challenging. Don’t be stupid. If you are not clear about what is expected of you, ask questions until you and your editor are on the same page.

WHO? WHAT? WHEN? WHERE? WHY? HOW?

Speaking of questions, do your pictures answer the ones above? Try to take pictures that answer as many of these questions as possible. While it will be very challenging to capture one picture that addresses all of them, shoot with the idea that your pictures are answering as many as possible.

Blueberry Season

DO YOUR OWN RESEARCH

After you have asked the necessary questions of your assignment editor, do your own research on the subject. This will help you develop ideas, understand how events may unfold, or which images will be more important than others. Don’t expect your editor to tell you exactly what picture to get. They are hiring you, in part, because of your vision. Conducting a little research before you go out will help you find your vision.

COME WITH AN IDEA IN MIND

After researching your subject, think of shots that you want to capture and work toward those pictures when you are in the field. But don’t knock yourself too much if you don’t get “the” picture you wanted. Documentary photographers have little (or no) control over what happens. Come with an idea that will keep your mind centred, but be prepared to adjust your ideas accordingly as the events unfold before you.

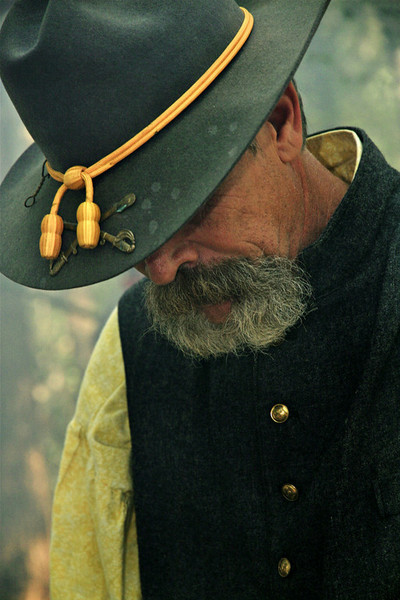
Civil War

START BY PLAYING

Once you arrive, begin by playing with your exposure settings and shooting styles. This will ensure that you, and your camera, are properly set up when the moment arrives. In the same way athletes warm up before a race or a game you need to begin by getting your mind and your gear in proper condition before the event begins.

BE INVISIBLE

Remember, you are there to document what others are doing. The story is not about you. Do what you can to stay out of the way to allow events to unfold naturally. If you are too intrusive your subjects will not relax and you will not be documenting natural events. Stay out of the way and let events unfold in front of you.

TIGHT. MEDIUM. WIDE.

Take wide, medium and tight shots of what you are covering. As an example, if you are covering a town hall meeting be sure to get a wide shot that shows all of the filled, or empty chairs, in the room. A medium shot may be a waist-up shot of someone at the podium. A tight shot would be a head shot of someone expressing emotion as they discuss the subject of the meeting or as they listen to the presenters speak.

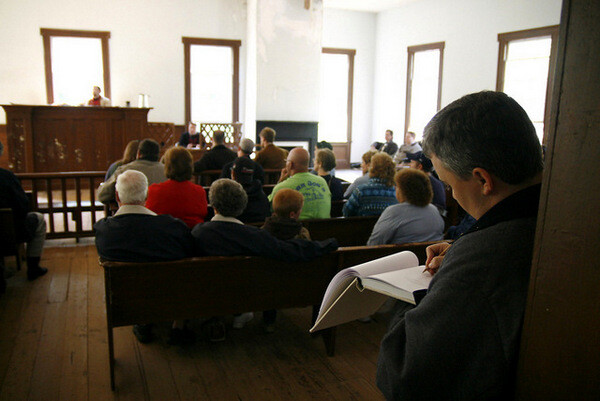
Westville Meeting

FOCUS

Proper focus is critical in all photography. It is essential in documentary photography and photojournalism. Your focal point tells the viewer what they should be looking at. If you are still taking pictures at that town hall meeting you can have two very different pictures of someone at the podium if one picture is focused on the speaker and another picture is focused on all of the microphones that the presenter is speaking into. One picture shows who was talking and the other picture shows how many people (news outlets) were there to cover the event. Each picture has its own meaning and that is derived from the focal point.

ANTICIPATE

I make a lot of sports analogies when talking about documentary photography because, in many regards, photojournalism and documentary photography is a sport. Just as a quarterback has to read the defence as he stands behind the centre, a documentary photographer has to have his eyes and attention in several places at once. By keeping a constant vigil on your surroundings you will see a picture developing in the same way a quarterback sees a play developing. The great ones always seem to be a few seconds ahead of the action.

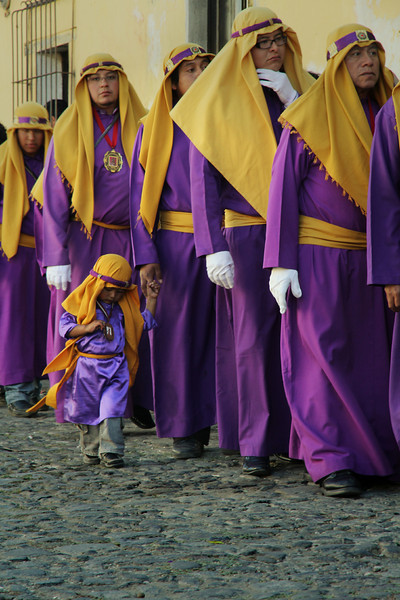
Semana Santa

BE PROFESSIONAL

A professional attitude will help to guarantee two things. One, it will help to ensure that those around you understand that you have a job to do and they will permit you to do your job as long as you maintain a professional demeanour. The other thing a professional attitude will bring to you is another assignment. If word gets back to your editor that you were forcing people to behave in a certain way or that you interfered with the event to get a shot, you may not get another chance to work for that editor again because you have embarrassed them (and yourself) in your attempts to get a great picture.

BACK UP YOUR WORK

Once you get back home or to the office, back up your pictures. It doesn’t matter if you put them on a second hard drive, upload them to the cloud or put them on a disk. Make sure that you have copies of your pictures in more than one place in the event that the originals become damaged, destroyed or lost.

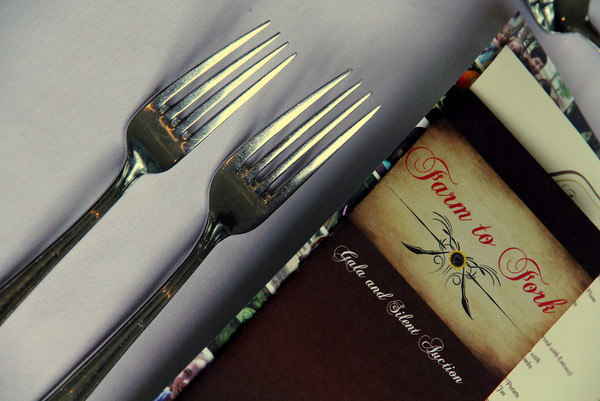
Farm to Fork

CAPTION YOUR PHOTOS

Your job as an assignment photographer doesn’t end when you back up your pictures. More times than not you will be asked to caption your photos. Your assignment editor will have no idea of the names of the people in your pictures. It will be up to you to write a brief description for each picture you are turning in. An easy way to do this is to answer the questions, who, what, when, where and why when making captions. “How” may not always be relevant.

DON’T OVER EDIT YOUR PICTURES

If you are asked to turn in edited pictures, don’t over-edit your work. Photojournalism and documentary photography are about the real world. In a strict sense you should only adjust the contrast of your picture. Some news outlets shun adding too much color and all news outlets shun the removal or addition of elements into a picture.

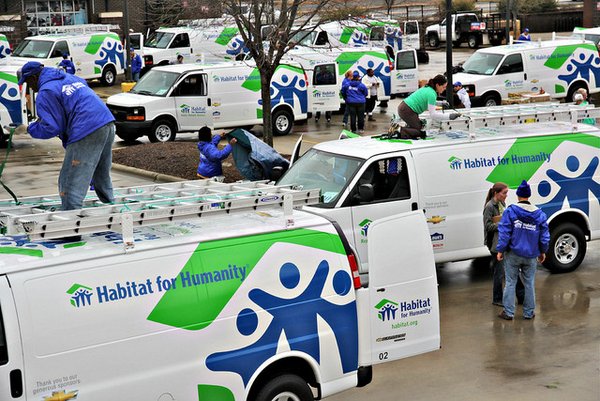
Habitat Vans

BE EASY TO WORK WITH

Being easy to work with is incredibly important in today’s freelance assignment photography landscape. It is becoming easier and easier to take quality pictures with less than professional equipment. Photographers are becoming very replaceable as there are more and more people with photo skills itching to get a little credit and maybe even a little money. Make sure you have an easy payment process. Make sure it is easy to get in touch with you, and that you respond quickly to emails and phone calls. Make sure you are open to your editor’s suggestions and that you are willing to go the extra mile to make them happy. Make it a no-brainer for them to rehire you because there are more photographers behind you just waiting for their chance.

This is a great time to get your foot in the door as a freelance assignment photographer. It’s not easy work and it’s not always sexy. But with hard work, a good eye, a professional attitude and determination you can find yourself on a short list of photographers that assignment editors want to use again and again.

The post Getting Your Foot in the Door as a Freelance Assignment Photographer by Scott Umstattd appeared first on Digital Photography School.


Digital Photography School

 
Comments Off on Getting Your Foot in the Door as a Freelance Assignment Photographer

Posted in Photography


Massive 3,000 square foot pinhole photo on display

03 May

6581p.jpg

The Smithsonian National Air and Space Museum’s Steven F. Udvar-Hazy Center is already home to some of the most impressive aviation and astronomical technology in the modern wold, but it has also become the home of one of the most impressive photographs ever taken as well. On display now is a 107 feet wide ‘camera-obscura’ image of a decommissioned Marine Corps air station. Learn more

News: Digital Photography Review (dpreview.com)

 
Comments Off on Massive 3,000 square foot pinhole photo on display

Posted in Uncategorized


Cool Million: Famous 420 Square Foot SoHo Condo for Sale

24 Mar

[ By WebUrbanist in Architecture & Houses & Residential. ]

small space mobile partition

A multifunctional masterpiece built with crowd-sourced design ideas and a small-space vision by the founder of TreeHugger, this New York City apartment is now for sale for $ 995,000.

small space murphy bed

small space divided apartment

small space dinner party

The star of Graham Hill’s LifeEdited, the unit boasts transforming furniture, sliding walls, secret panels and hidden resources from an array of manufacturers and custom installers.

Per the Gizmodo video above, the space unfolds to accommodate everything from dozen-plus dinner parties to overnight guests when you pull out the magically-long dining table or push an entire wall to one side.

small space kitchen drawers

small space storage closets

From the living room (which splits into bedrooms) to the bathroom and kitchen, lots of little tricks make it all work, including a microwave that doubles as an oven and modular burners that can be deployed on demand.

small space bathroom windwo

small space curtains divider

Everyone knows a million dollars does not go quite so far in Manhattan, but some might still wonder if the place is worth the asking price. Cool factor and high-tech tweaks aside, though, it is worth noting that other units in the building have Zillow estimates of 1.5 million dollars in some cases, so at the very least this high-sounding price may not be wildly off base.

Share on Facebook


[ By WebUrbanist in Architecture & Houses & Residential. ]

[ WebUrbanist | Archives | Galleries | Privacy | TOS ]


WebUrbanist

 
Comments Off on Cool Million: Famous 420 Square Foot SoHo Condo for Sale

Posted in Creativity


Westcott 7 Foot Parabolic Umbrella: Product Reviews: Adorama Photography TV

08 Nov

Adorama Photography TV presents the Westcott 7 foot parabolic umbrella for studio and outdoor use. This week Mark provides a hands-on review of Westcott’s durable and versatile umbrella. Mark highlights the features and demonstrates the umbrella’s use indoors and outside. Products featured in this episode: Nikon 70-200mm f/2.8G AF-S VR II Zoom-Nikkor ED-IF Lens www.adorama.com Nikon D3S Digital SLR Camera Body, www.adorama.com Profoto Acute2R 1200 Generator (1200Ws) www.adorama.com Profoto Acute2 Twin Head www.adorama.com Feet White Diffusion Parabolic Umbrella www.adorama.com Westcott 7 Feet Parabolic Umbrella, White/Black www.adorama.com Westcott 7 Feet Silver Parabolic Umbrella www.adorama.com For related articles and videos, go here: www.adorama.com Visit www.adorama.com for more photography videos! Send your questions to: AskMark@Adorama.com Links Westcott 7 Foot Silver Parabolic Umbrella: www.adorama.com Westcott 7 Foot Parabolic Umbrella. White/Black: www.adorama.com Westcot 7 Foot White Diffusion Parabolic Umbrella www.adorama.com

 
Comments Off on Westcott 7 Foot Parabolic Umbrella: Product Reviews: Adorama Photography TV

Posted in Nikon Videos