RSS
 

Posts Tagged ‘Flowers’

Spring on Speed: Time-Lapse Video Captures 3 Years of Blooming Flowers

13 May

[ By SA Rogers in Art & Photography & Video. ]

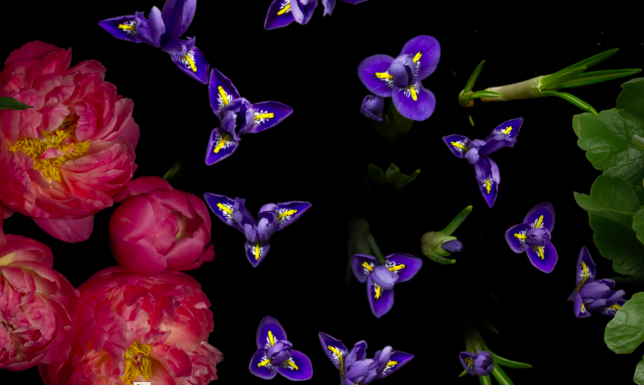
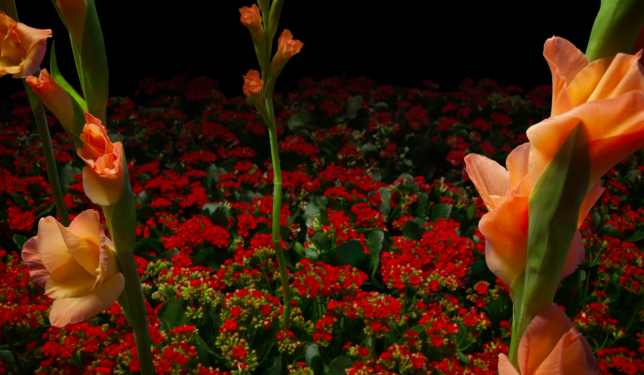
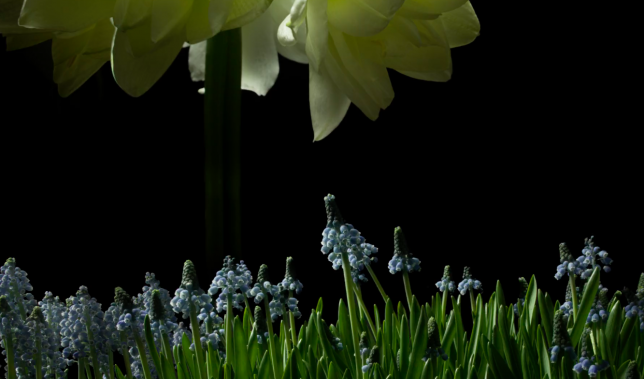
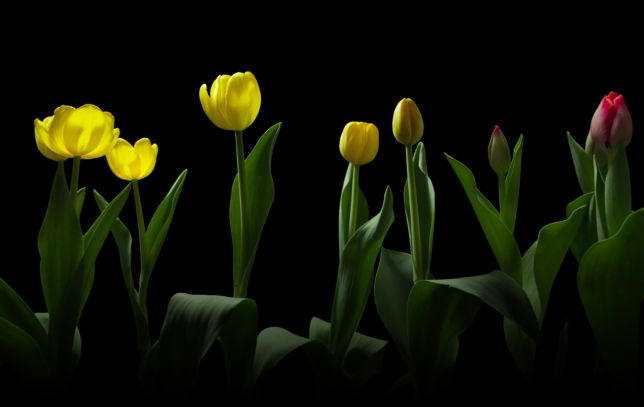
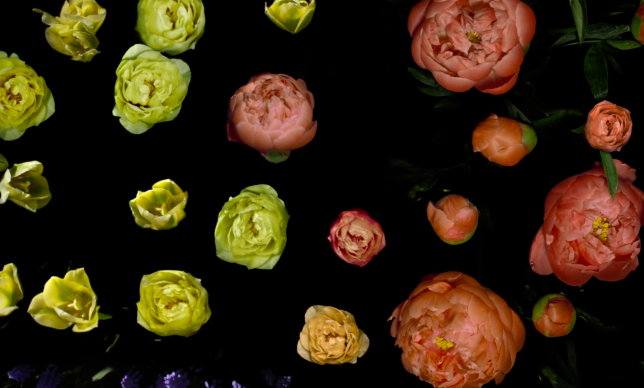
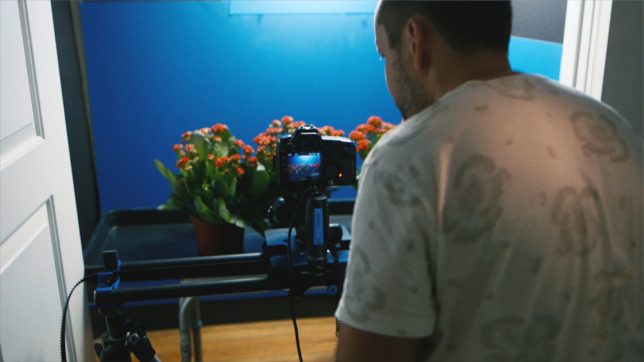
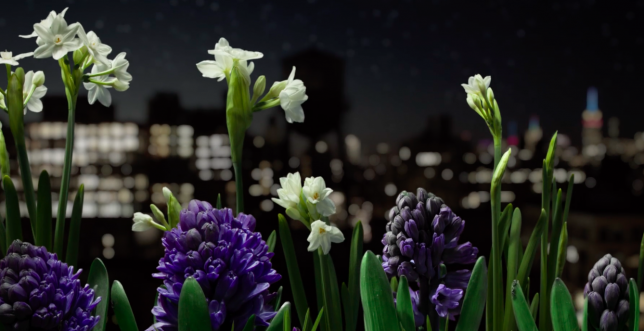
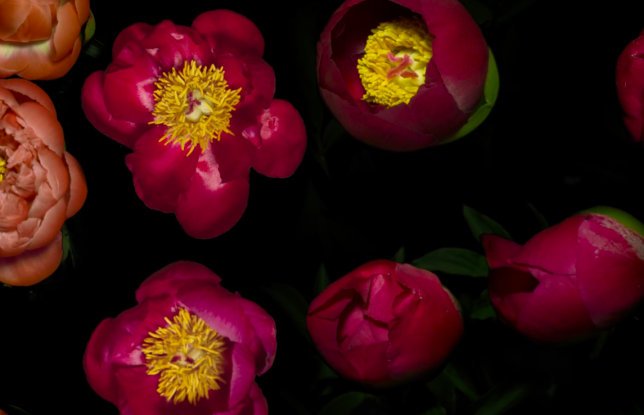
A single sweeping shot seems to capture an entire spring season of blooming flowers in this artfully directed time-lapse video, which took three years to record and complete. Filmmaker Jamie Scott captured almost all of the footage on a soundstage in the closet of his New York home, often against a black backdrop, placing the flowers in stark relief as they unfurl.

The sped-up result almost makes them look like sea creatures waving around under the sea, tentatively opening and then closing again as the camera passes over them. Scott started out filming the flowers from the front, but realized the effect was more dramatic if he shot them from above instead, shifting focus as he went.

In a behind-the-scenes interview with F-stoppers, Scott explains that he made the film in contrast to his previous time-lapse work entitled Fall. The difference between the two films isn’t just the season, but also the close-up shots, shallow depth of field, classical score and placing the camera on a slider.

Share on Facebook


[ By SA Rogers in Art & Photography & Video. ]

[ WebUrbanist | Archives | Galleries | Privacy | TOS ]


WebUrbanist

 
Comments Off on Spring on Speed: Time-Lapse Video Captures 3 Years of Blooming Flowers

Posted in Creativity


Blooming Street Lights: Giant Flowers Interact with the City

03 Nov

[ By Steph in Art & Street Art & Graffiti. ]

flower lights 1

Step beneath these massive red flowers in Jerusalem’s Vallero Square and they’ll bloom before your eyes, offering light after dark and shelter from the rain. The interactive installation by HQ Architects reacts to pedestrians and traffic, their crimson textile petals filling with air when motion is sensed nearby.

flower lights 2

flower lights 3

Standing 30 feet tall in two pairs on opposite ends of the square, the flowers can be seen from afar, providing an eye-catching visual for visitors to a busy nearby market. In addition to functioning as public art and street lights, the flowers provide cover to commuters getting on and off the tram.

flower lights 4

flower lights 5

flower lights 6

flower lights 7

When the square is full of action, the flowers billow, creating a sense of movement. They go still when all is quiet late at night, their petals closing. An air compressor is built into the top of each one. Named the ‘Warde Project,’ the installation is part of an effort to revitalize a square that felt a little shabby. [Photos by Dor Kedmi]

Share on Facebook


[ By Steph in Art & Street Art & Graffiti. ]

[ WebUrbanist | Archives | Galleries | Privacy | TOS ]


WebUrbanist

 
Comments Off on Blooming Street Lights: Giant Flowers Interact with the City

Posted in Creativity


Doom & Bloom: 36,000 Flowers Adorn Condemned Detroit Duplex

28 Oct

[ By WebUrbanist in Art & Installation & Sound. ]

florist abandoned house project

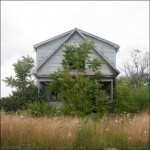
Bought at auction by a florist last year, this dilapidated multifamily home was destined to be demolished but given a last chance to blossom thanks to a team of florists and array of volunteers packing the place inside and out with a flowers.

floral arrangements exterior porch

floral abandoned beauty

floral room spiral design

Deserted houses in Detroit are famously sold for as little as a dollar by the city, giving florist  Lisa Waud (photos by Heather Saunders) an idea.

floral work in progress

floral filled bathtub

She purchased this place for just $ 250 at auction, then turned a trash-filled abandonment into a work of art as well as a fundraiser for a flower farm and design center on the site.

floral interior space closet

flor creative wall decor

floral rich colorful arrangement

The Flower House was given over to contributing florists, each encouraged to turn a space, wall or ceiling into a blank canvas for their creations. The results are remarkable.

floral exterior packing planning

floral decor creative

floral home exterior

Following the project, “the house that held the exhibition will be responsibly deconstructed and its materials repurposed. the land will be converted into a flower farm and design center on their formerly neglected properties.”

Share on Facebook


[ By WebUrbanist in Art & Installation & Sound. ]

[ WebUrbanist | Archives | Galleries | Privacy | TOS ]


WebUrbanist

 
Comments Off on Doom & Bloom: 36,000 Flowers Adorn Condemned Detroit Duplex

Posted in Creativity


3 Tips for Taking Photos of Flowers

16 Oct

Flowers are everywhere, and sometimes just the thought of going out to take pictures of their pretty petals can seem downright cliché, because so many people do it. However, one reason flower photography is so popular is because these kinds of pictures can capture incredible beauty, without a great deal of effort. It’s fun to go outside and document the incredible array of colors that can be found in flowers, but it’s just as common to look at your photos later and discover that they might not be as good as you had hoped.

Fortunately there are a few easy steps you can take to not only improve your own flower photography, but help you get out and enjoy the beauty of nature while you’re at it.
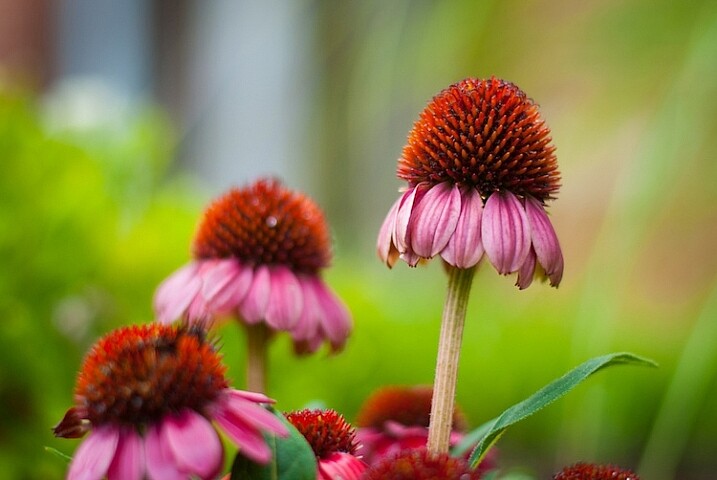
3-tips-flower-photos-coneflower

50mm f/1.8, 1/640 second, ISO 200

Everyone has their own unique style when it comes to photography, and taking pictures of flowers is no exception. Some people like flowers in isolation, whereas some like to see a whole field of blossoms in one shot. Some like to use techniques such as over-saturation or selective coloring, while others find these approaches distasteful. Therefore the following tips are not to be considered universal, or the be-all-end-all when it comes to taking pictures of flowers. They are a few lessons I have learned over the years that work for me, and hopefully they will give you something to think about the next time you step out to capture the beauty of nature.

Give your image a clear focal point

All good photos have a subject, or something on which the viewer’s attention is to be fixed. Some pictures can have multiple subjects, but rarely will you find a good image (flower or otherwise) with no subject at all. Where flowers are concerned, you might want to focus on just one flower, or have your viewers see many of them at once, but at the end of the day it should be readily apparent to anyone who sees your photo just what they are supposed to be looking at.

For example, the following image is decent, but as a viewer it’s difficult to notice the flower in the center amidst all the other blooms in the background. In essence, there is no one clear focal point even though there is a flower in the center of the frame.
3-tips-flower-photos-dof-wide

50mm f/4.8, 1/60 second, ISO 100

There are several things that can be done to fix the problem, but one of my favorite techniques is to simply use a wider aperture on my lens. I re-shot the same image using a much bigger aperture, which resulted in a shallow depth of field, rendering the flower in focus while the rest of the background shows up as a silky smooth blur. Looking at the second image, there is no doubt at all as to what the subject of the photo is, and what viewers are supposed to focus their attention on.
f/1.8, 1/350 second, ISO 100

50mm f/1.8, 1/350 second, ISO 100

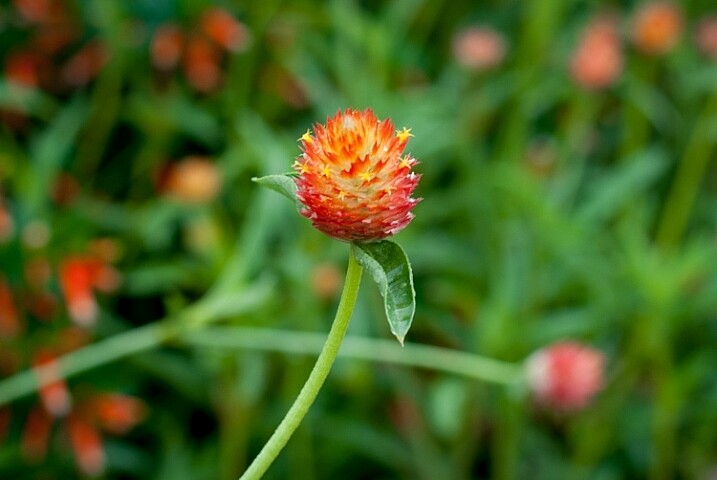
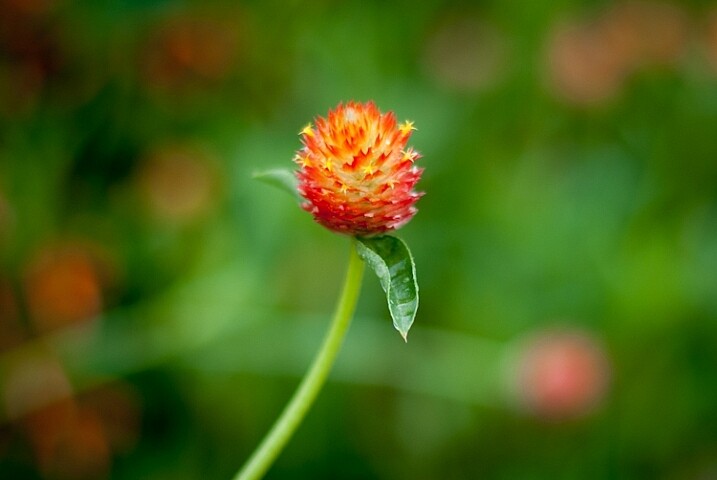
Another way to make sure your image has a clear focal point is to utilize colors that complement or contrast with one another. The purple flowers in the image below stand out because they contrast quite nicely with the green background, which draws the viewer’s attention immediately and creates a nice focal point for the picture as a whole.
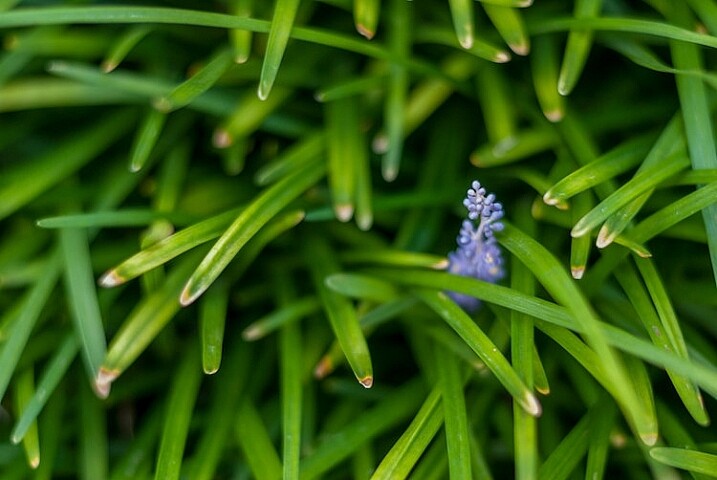
NEED EXIF

50mm f/1.8, 1/200 second, ISO 100

You can use multiple techniques to achieve the desired effect, such as the picture below of an orange lily that stands out clearly from the background thanks to contrasting colors, while also using a wide aperture to make the background appear blurrier. Be careful not to use an aperture that is too wide, though: depth of field can be a fickle mistress, and shooting at f/1.8 or f/1.4 might seem like a good idea, until you realize that only half of your flower is in focus and the rest is a fuzzy mess.
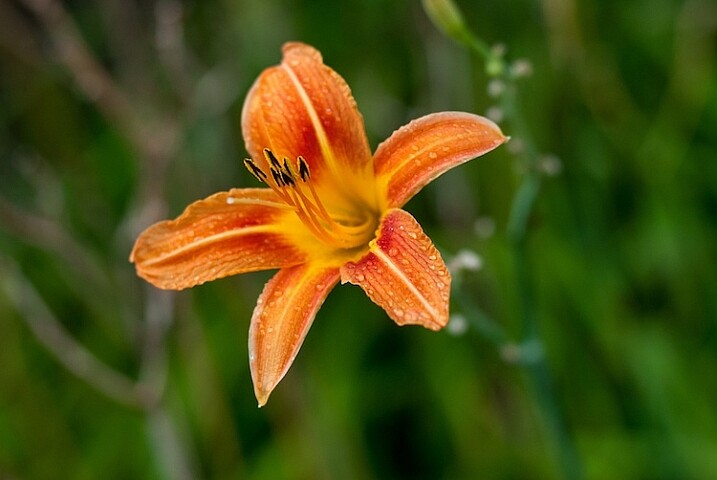
NEED EXIF

50mm f/2.8, 1/400 second, ISO 200

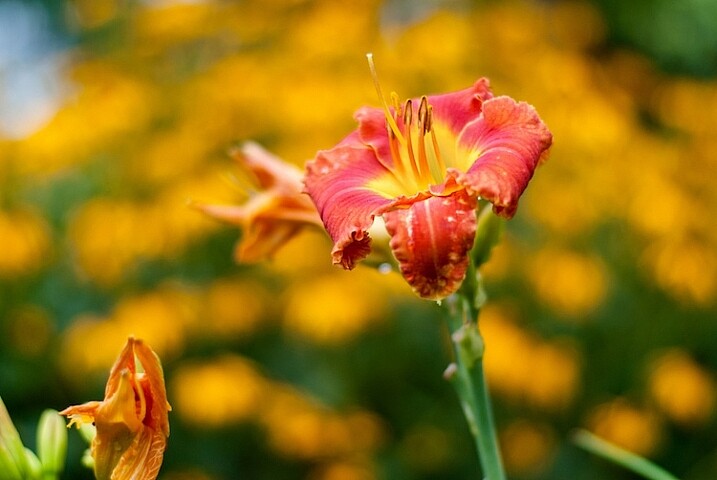
This last picture (below) is similar to the one above, but ultimately fails because there is no obvious focal point. Notice how the flower itself almost blends in with the background, and the inclusion of two additional blossoms just behind the red one and in the bottom corner of the frame. These problems cripple the image and keep it firmly in my “Rejected” category in Lightroom, but I’m using it here as an example of what not to do.
NEED EXIF

50mm f/1.8, 1/1000 second, ISO 200

I could have easily fixed this picture by looking at the flower from a different perspective, but alas, I did not and am left with an image that is almost unusable because the subject, what should be the focal point, blends in so much with the rest of the image that it’s difficult for the viewer to know what to see. Finding a clear focal point for your images might take a bit of practice, but the results will be well worth your efforts.

Find the right camera angle

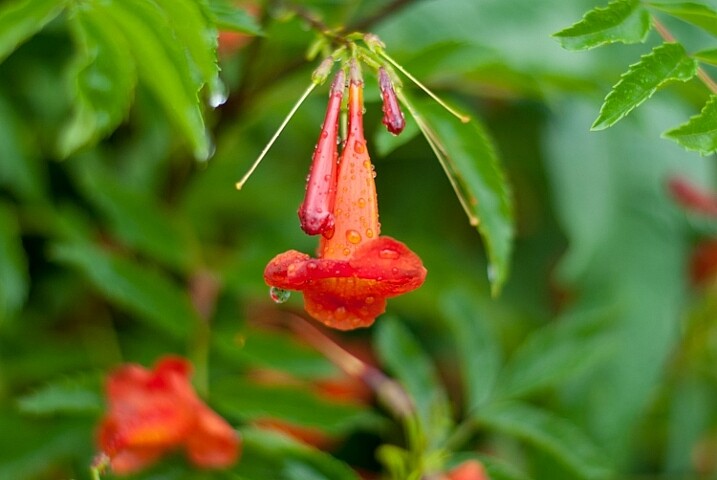
It’s not uncommon to see people taking pictures of flowers with their cameras pointed down from eye level. While doing so may produce decent results from time to time, you will often find that selecting a different angle will yield much more interesting results. The red blossom in the picture below was a few feet off the ground so I did what most people would do: I pointed my camera down and pressed the shutter button.
f/1.8, 1/320 second, ISO 100

f/1.8, 1/320 second, ISO 100

There’s a couple of things wrong with this picture, but to me the most critical problem is that it’s just not very interesting. Looking at flowers from your normal eye level can sometimes produce pleasing photos, but often you will get better results if you move around a bit, and seek out a more interesting angle. After taking the initial picture I crouched down and shuffled among the plants for a bit until I found a better perspective from which to shoot the photo.
3-tips-flower-photos-angle-comparison-side

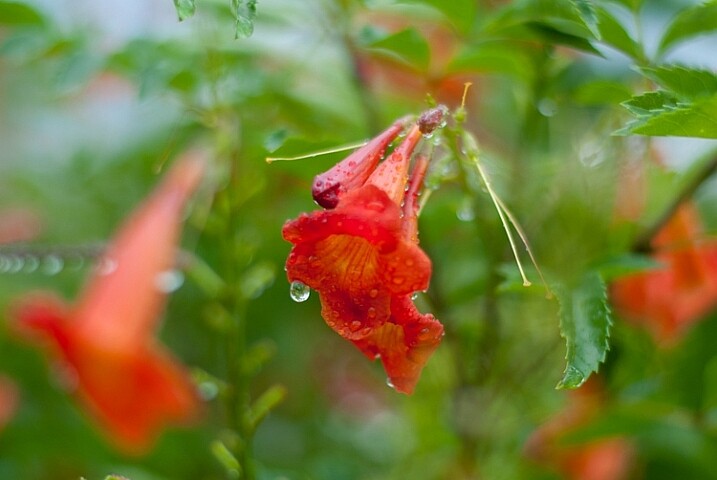
While not perfect, this is certainly a much better composition than the original shot, and it shows the flower in a whole new light. You can not only see more detail on the petals, but it stands out more from the background, and even utilizes a bit of foreground elements to add depth. The drop of water on the left side which is an afterthought in the original, is now featured quite prominently, and adds a nice accent to the rich red tones of the flower petals. All this was made possible because of a quick and simple change in my perspective. While this doesn’t always guarantee better photos it is a fun way to try something new, and even explore a bit more of your surroundings than you otherwise might.

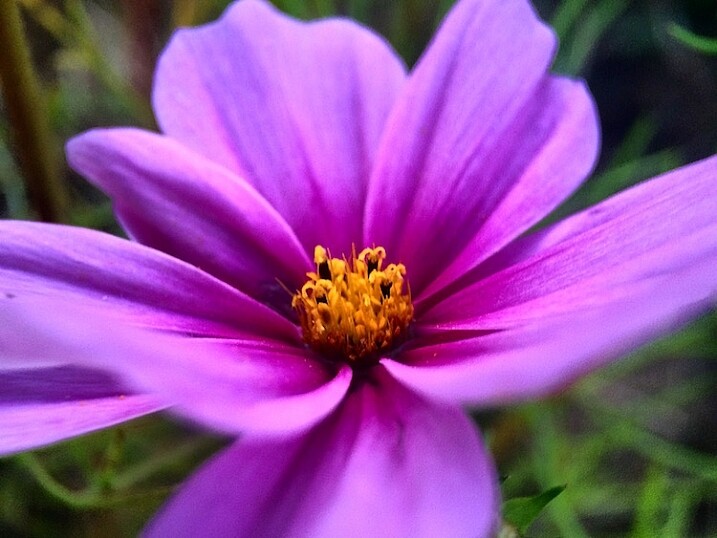
Shooting macro-style pictures is another fun way to get creative with choosing the angles on your shots, provided you are willing to look for some unusual perspectives. My cousin Beth took the following picture of a cosmo flower with nothing more than her iPhone 5s, and a $ 50 Olloclip lens attachment, that lets her get extraordinarily close-up photos of just about anything. By shooting from a creative perspective instead of straight down, and using complementary colors of yellow and purple, she was able to take a gorgeous picture that might otherwise have looked quite mundane and ordinary. Her Instagram account is filled with images just like these that she took with her phone, which also illustrates that you don’t need to spend a great deal of money to get incredible photos of flowers.
3-tips-flower-photos-iphone

Compose with the whole scene in mind

Taking good flower pictures is about more than just a few pretty petals, but everything in front of and behind them as well. Finding creative ways to avoid conflicting colors between your subject and the background or foreground is nice, but you can step things up a notch by actively using these elements to enhance your shots.

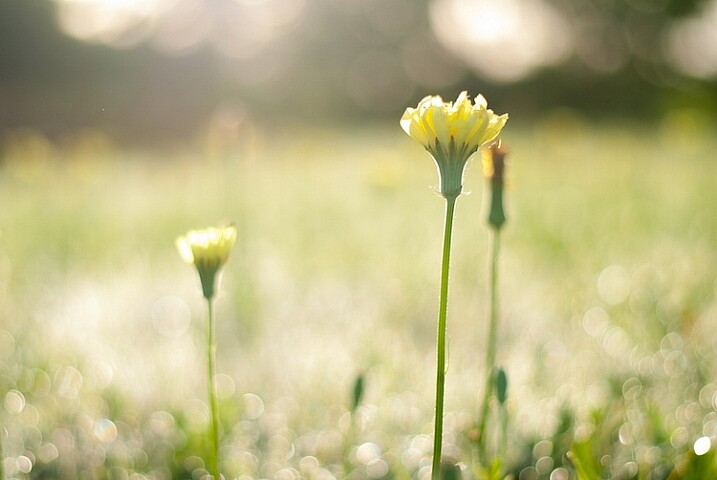
For example, I had many options available when I took the following shot of some yellow kosmeyas. I could have just focused on the flower in the foreground, but by taking all the other elements of the scene into account, I was able to create a much richer and more interesting picture. I shot into the early morning sun, before the dew had evaporated, so I could make creative use of backlighting, and was so pleased with the result that a large print of this is now hanging in my living room.
3-tips-flower-photos-morning-sun

50mm f/2.8, 1/750 second, ISO 100

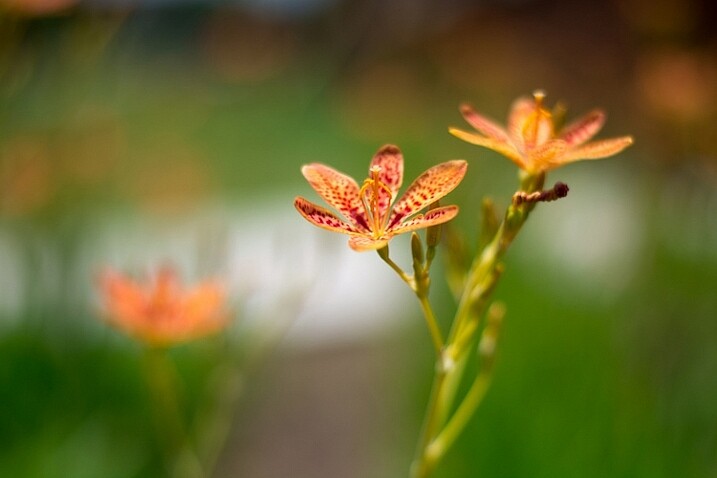
Even the background elements themselves can add interesting colors and patterns that you might not otherwise consider, as long as you pay attention when shooting, and use a careful eye with regard to composition. As I took the photo below, I saw a sidewalk running through the background, so I spent several minutes not just adjusting my camera settings, but also looking at the sidewalk and using that as an intentional compositional element. I like the way it cuts horizontally through the image and serves to accentuate the oranges in the flower at the center.
3-tips-flower-photos-bokeh-dark-orange

50mm f/1.8, 1/8000 second, ISO 100

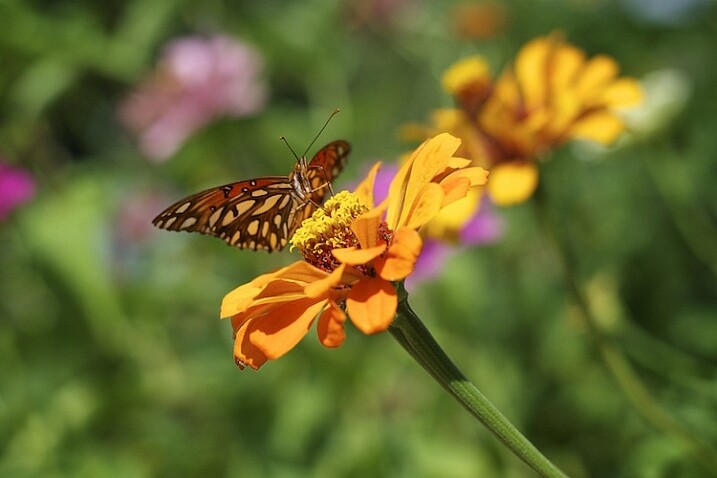
I want to leave you with one final example when I did not use this technique, and was quite disappointed with the photo that I almost got. Several months ago I spent a while following a butterfly around on a sunny day. When it finally landed on a flower and let me get close enough to take a photo, I eagerly snapped away without taking the rest of the scene into account.
3-tips-flower-photos-insects-butterfly

50mm f/2.8, 1/3000 second, ISO 200

If only I had scooted mere inches to the right I would have isolated the flower and the butterfly against a nice green background, but instead I did not take the whole scene into account, and got an image with no clear focal point and a big splotch of blurry orange right behind my subjects. I could have used the background elements to my advantage, but instead I was careless and overeager. This was actually a good learning experience for me though, as it helped me take much better photos in the time since.

As I mentioned at the outset, these are just a few examples and tips that you could employ to get better flower pictures but I’m curious to find out what has worked for you. What are your favorite tips and tricks to get better images of flowers? Leave your thoughts in the comments below.

googletag.cmd.push(function() {
tablet_slots.push( googletag.defineSlot( “/1005424/_dPSv4_tab-all-article-bottom_(300×250)”, [300, 250], “pb-ad-78623” ).addService( googletag.pubads() ) ); } );

googletag.cmd.push(function() {
mobile_slots.push( googletag.defineSlot( “/1005424/_dPSv4_mob-all-article-bottom_(300×250)”, [300, 250], “pb-ad-78158” ).addService( googletag.pubads() ) ); } );

The post 3 Tips for Taking Photos of Flowers by Simon Ringsmuth appeared first on Digital Photography School.


Digital Photography School
 
Comments Off on 3 Tips for Taking Photos of Flowers

Posted in Photography


2,300 Floating Flowers: Interactive Garden Makes Way as You Walk

01 Apr

[ By WebUrbanist in Art & Installation & Sound. ]

floating plants experienced together

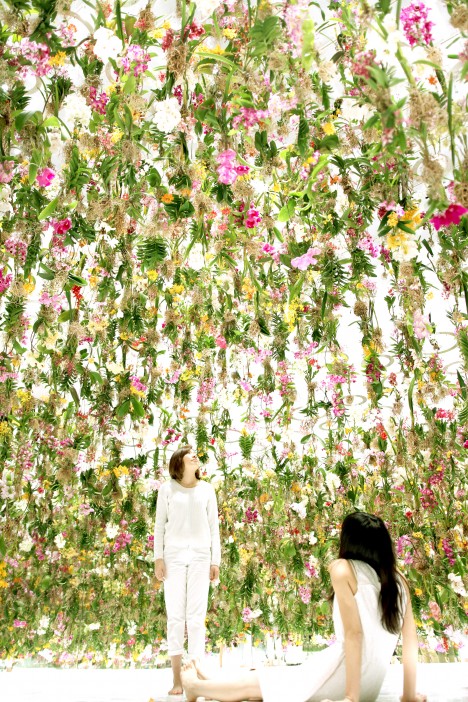
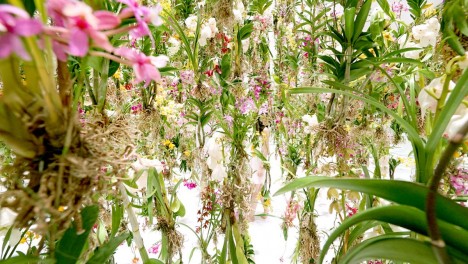
Responding to the movements of visitors passing through the space, this immersive work of installation art puts you in a private bubble in the midst of dense hanging garden – except this remarkable bubble that moves with you.

teamlab floating flower installation

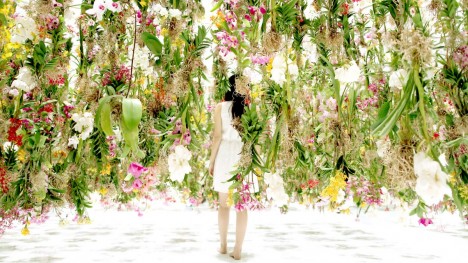
The Floating Flower Garden by TeamLab, a Japanese art collective, is on display in Tokyo, having been extended due to popular demand. Suspended from above, the plants are pulled up or dropped down to both envelop visitors but also given them hemispheres of personal space amid the floating foliage.

floating flower art installation

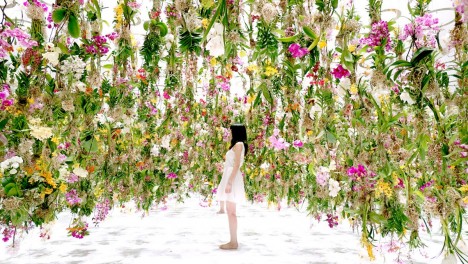
The idea is to make each guest part of the installation, allowing them to separate from friends and experience it alone or to move in groups and see how the computer system responds in realtime.

floating solo alone forest

Meanwhile, the digital setup is not the only piece that changes things over time: “these flowers are alive and growing with each passing day. Each flower has a partner insect and the scent of the flowers becomes stronger at the time that the insect is most active, as a result the scent of the air in the garden space changes according to the time of day, morning, noon, and evening.”

floating walking bubble interactive

TeamLab believes technology elevates art, but their work also places into pre-modern knowledge and ancient ideas of spatial awareness originating in Japanese philosophy and religion, including Zen gardens. More from the artists: “When a viewer gets close to this flower-filled space, the flowers close to the viewer rise upwards all at once, creating a hemispherical space with the viewer at its center.”

floating garden immersive space

“In other words, although the whole space is filled with flowers, a hemispherical space is constantly being created with the viewer at its center and the viewer is free to move around wherever they want. If many viewers get close to one another, the dome spaces link up to form one single space. In this interactive floating flower garden viewers are immersed in flowers, and become completely one with the garden itself.”

Share on Facebook


[ By WebUrbanist in Art & Installation & Sound. ]

[ WebUrbanist | Archives | Galleries | Privacy | TOS ]


WebUrbanist

 
Comments Off on 2,300 Floating Flowers: Interactive Garden Makes Way as You Walk

Posted in Creativity


Weekly Photography Challenge – Flowers

20 Aug

Earlier today I shared a bunch of flower photos to brighten your day. I can’t think of anyone who doesn’t like flowers, even the roughest toughest guys can appreciate nature’s beauty and splendour.

By Michael J. Moeller

The weekly photography challenge is flowers.

Now of course it’s your turn. Go find some flowers and photograph them. Go for a walk, find some wild flowers, or visit a garden. You could even think outside the box and make paper flowers or draw some on the sidewalk in chalk. Perhaps you could set up your tripod and do some macro shots and wait for a bee or bug to come along. Try some creative depth of field using a large aperture, or some multiple exposures.

The key of course is using light to your advantage. Show the flower off by backlighting it with gentle evening light. Or use side lighting to pick up extra texture. You’re only limited by your imagination.

Here are a few flowers to get you started:

By Lorenzoclick

By aussiegall

By @Doug88888

By aussiegall

By Theophilos Papadopoulos

By @Doug88888

By Alex Dram

By Sorin Mutu

By Richard Taylor

By Louise Leclerc

Now it’s your turn!

Share your flower photos

Simply upload your shot into the comment field (look for the little camera icon in the Disqus comments section as pictured below) and they’ll get embedded for us all to see or if you’d prefer upload them to your favourite photo sharing site and leave the link to them. Show me your leading lines using pathways and roads in this week’s challenge.

The post Weekly Photography Challenge – Flowers by Darlene Hildebrandt appeared first on Digital Photography School.


Digital Photography School
 
Comments Off on Weekly Photography Challenge – Flowers

Posted in Photography


Turn Photos into Paper Flowers

05 Sep

Extra photos for bloggers: 1, 2, 3

If romantic comedies have taught us anything it’s that getting a beautiful bouquet of flowers is pretty darn special.

Flowers brighten up your day, but they tend to do that one pesky little thing — dying once they’re cut.

Making flowers out of photographs is a fun and cheeky way of telling that special someone you are smitten.

Plus, these flowers will go on living as mini photographic reminders of beautiful things that have happened in your life.

Learn how to make a super fun and simple bouquet of photo flowers to cheer up your living space, a loved one, or a stranger on the street. (Because we’d all like to feel like we’re in a romantic comedy once in a while.)

Learn How to Make Flowers out of Photographs

Why It’s Cool

Flowers are beautiful and the tend to make everyone pretty stinkin’ happy.

It’s awesome how placing a vase of flowers in a room makes it feel a little more put together than it did before.

These photo flowers will achieve that higher level of design sophistication all the while displaying images of things you love.

They’re simple and elegant with a touch of whimsy that’ll make all your friends ask “How did you do that?”

The best part of the photo flowers is that they will live forever. They wont go rotting away in a vase that you just keep “forgetting” to clean out.

Ingredients:

  • Photos you want to turn into flowers*
  • Scissors
  • Floral Wire
  • Floral Tape
  • Glue
  • Pen or Pencil
  • Circular object for tracing

*Photos printed on computer/copy paper or vellum work the best.

STEP 1: Round and Round

beforeUse a circular object to trace a circle on your printed image.

Choose carefully where you trace, as the middle of the circle will be the middle of the flower.

STEP 2: Get to Cutting

beforeTime to get crafty. Take up your scissors!

Cut out the circle you just traced.

Don’t worry if it’s not perfectly cut out. The imperfection will add to the charm of the flower.

STEP 3: Go Halfsies

beforeFold the circle in half.

STEP 4: And Again…

beforeFold the half-circle in half.

You’re getting so good at this.

STEP 5: One more time

beforeFold it in half again.

Your circle will now look like tiny little fan.

STEP 6: Shape it up

beforeCut the top of the circle from end to end to create a cone shape.

The finished result will look an ice cream cone.

You can play around with how you cut the top as this will be your petal shape. Try a few shapes to see what petal cut out you like best.

STEP 7: Make Your Mark

beforeUnfold your circle and you will find 8 petals.

Mark off your least favorite petal and the top half of the petal next to it with a pen or pencil.

STEP 8: Just a Little off the Top

beforeCut out those one and a half petals. Buh-bye petals.

You will be left with 6 and a half petals.

The half petal will be the anchor of your flower (and it will look a little like a triangle).

STEP 9: It’s all Coming Together

beforePut a dab of glue on the half petal.

Glue the petal next to it (across the gap) on top of the triangular half petal.

STEP 10: Create Some Texture 

beforePinch each petal, making a crease down the middle to give them a little extra texture and shape.

STEP 11: A Little Loopy

beforeMake a simple loop in the top of the floral wire with your scissors.

STEP 12: A Flower Grows

before
Poke the end of the floral wire that does not have a loop in it through the center of the flower.

STEP 13: The Finishing Touch

beforeCut a 2 inch strip of the floral tape and wrap it around the base of the flower to secure it to the top of the wire.

Yippee! You just made your first flower out of a photo! Feels good, right?!

If you aren’t super stoked on your first attempt don’t give up hope. It may take a couple of tries to get the hang of this. Don’t discard the flowers you don’t like ’cause they will look cute among the flowers you do like when they are all put together in a bouquet.

Taking It Further

  • Print your photos double sided so that you will have images on the top side of the flower as well as the bottom side of the flower.
  • Make a garland of photo flowers by twisting the wire together.
  • Make all types of flowers. A quick google search on how to make paper flowers will give you a plethora of tutorials on crafting different types of flowers.
  • Make a wreath or head piece of photo flowers.

Related posts:

  1. DIY: Turn Digital Photos into Vintage-like Prints with Mulberry Paper Extra photos for bloggers: 1, 2, 3 What is it…
  2. Frame Your Photos with a Paper Craft Photo Globe Extra photos for bloggers: 1, 2, 3 With the holidays…
  3. DIY Photo Wrapping Paper — Wrap Gifts in Your Very Own Photos! Extra photos for bloggers: 1, 2, 3 Free shipping on orders over $ 100!…


Photojojo

 
Comments Off on Turn Photos into Paper Flowers

Posted in Equipment


How to Photograph Flowers

01 Sep

I know what you’re thinking.  “Flowers?  Really?  Didn’t he just write about shooting football?”  As a matter of fact, I did.  I shoot lots of different things– a statement which frustrates the hell out of business mentors and advisers who like to talk about branding, creating your niche, and attracting the right kind of client.  And they’re right.  After all, clients want to know that you do precisely what they need you to do seven days a week and twice on Sunday.  Makes sense.  But I was a lawyer for fourteen years.  Photography was my hobby for a long time before I ever even thought of trading in my briefcase for a camera bag ten years ago.  So, yes.  We’re going to talk about photographing flowers– in many ways the ideal subject.  Flowers are pretty, but they don’t require a hair and makeup team on set.  They are neither moody nor volatile, and never cop an attitude.  They don’t require a specific brand of expensive water secretly bottled straight from a hidden stream in Madagascar, and they are never late for a shoot.  Never.

But seriously.  I love shooting flowers.  My wife is actually convinced that I buy them for myself and not her anymore.  She’s (mostly) wrong, but I do take advantage of them while I can.  As with so much of what we do in photography, there are at least two ways of going about this–  ridiculously expensive or affordable.   Guess which way we’re going.

dPS Flowers-001

IT’S NOT AS EASY AT IT LOOKS

“How can it not be as easy as it looks?” you’re asking.  They just stand there perfectly still.  Get them near the light, push the button, we’re done, right?  Not so fast.  I was at a seminar one time where  Joe McNally said,  “If you want to take more interesting pictures, you need to stand in front of more interesting stuff.”  While I would never (EVER) presume to improve upon his wisdom, my own personal addendum to this guideline is, “But if you’re not going to stand in front of more interesting stuff, at least pick a more interesting angle.”  Six of us can stand around in a circle over the same flower, shoot straight down at it, and end up with six almost identical photos.  Boring, right?  Of course it is.  If you are going to stand an average distance from something, shooting it at an average angle with average camera settings, you are going to get average photos.  Personally, I’d rather not settle for average.  So get down low.  Shoot across it.  Shoot under it.  I actually really like photographing flowers from behind.  It’s not a mortal sin if you take that straight-down-the-middle shot.  No long arm of a photography god is going to descend from the heavens and snatch your camera away.  But promise me that once you take that straight-down-the-middle shot and get it out of your system, you’ll get down on your knees, or into a chair, or on your back, or anywhere else you need to be in order to achieve that interesting angle.

dPS Flowers-005

THE GEAR

You’ll see some macro photographers really go all out on these images.   While a really good macro lens or a tripod with an inverted center column can help create some truly stunning images, they aren’t always necessary.  Regular zooms can serve you just as well.  Every photo in this article was taken hand-held with one of three lenses: Nikon 24-70mm f/2.8, Nikon 18-70mm f/3.5-4.5 (GASP! A kit lens!), or my iPhone.  Never underestimate the value of a tripod for this kind of work.  I don’t often use one because I tend to have pretty steady hands, but having a tripod on hand is never a bad thing.  Nature tends to provide some pretty great backgrounds, but isolating a single flower on a black or white background can often make for some very compelling images.  A yard or two of black velvet from a fabric store or a poster-size piece of white foam core from an office supply store are simple, effective, and very budget-friendly options for getting that high-contrast look, indoors or out.  You could waste a lot of time creating these backgrounds in Photoshop, by why would you when the in-camera solution is so much easier?  The last piece of gear you’ll find useful is very high-tech.  A spray bottle with water will let you fake that just-rained-on look.  Just make sure it’s set to a fine mist, rather than a full spray.

dPS Flowers-002

START SHOOTING

As with any photo, finding the right angle only gets you halfway there.  Don’t forget everything you know about composition.  The usual considerations– Rule of Thirds, negative space, balance, etc.– all still come into play.  One of the advantages of a regular zoom lens over a macro is that by filling the frame with your flower subject, it becomes that much easier to blur out your background.  Start by focusing on one particular flower or a small cluster of flowers in the arrangement.  As you lock focus you will see the depth-of-field effect in your viewfinder.  Make sure that you don’t overdo it on the DOF.  Depending on your composition and camera settings, you could easily blur out your foreground.  Start with your widest aperture. but make sure you try several different combinations of aperture and shutter speed.  Your model is not going to get bored and give you a hard time.  Take advantage of this chance to achieve the look you want.  Remember that sometimes the whole is not always as interesting as its individual parts.  Focus in on details and textures.  Make it interesting.

dPS Flowers-003

HOW AND WHEN TO LIGHT IT — INDOORS AND OUT

Ultimately, diffused natural light is always at the top of my wish list.  Direct sunlight is going to blow out the subtleties and textures you’re trying so hard to capture.  As with all indoor lighting, time is less of an obstacle than when you shoot outside.  Outdoor light doesn’t care if you are photographing flowers, portraits, or a football game.  Light is light and its properties don’t change.  Just like we get the best portrait and landscape light right after the sun comes up and just before it goes down, the same goes for flowers.  We really want that soft, beautiful light to enhance these images, not overpower them.  For that, nothing beats an overcast or cloudy day– Mother Nature’s very own soft box.  For inside, use the biggest window you can find.  The side-lighting it provides will add more dimension than flat lighting from above the flower.  Whatever you do, experiment with your light.  Pay attention to where it falls and the shadows it creates.  You can also be sure that patience and time spent here will dramatically benefit your portrait work as well.

DCF 1.0

TAMING THE WIND

As much as I try to never take my camera out of Manual mode, an argument can be made that exposure modes are there for a reason.  This would be one of those.  When shooting outside, even the slightest breeze can give you fits.  Try switching you camera into shutter priority mode and dial in a shutter speed of 1/250 or faster.  The fast shutter speed should negate the effects of the breeze.  I’m not a huge fan of exposure modes and relinquishing control of my settings (one reason why we’re not talking about your camera’s macro setting in this article), but this is a simple and effective way to remove one of the obstacles in your path.

dPS Flowers-007

POST PROCESSING

My philosophy on editing these images is the same as my approach to portraits.  If you read my post on Basic Skin Smoothing in Photoshop, you know that when people look at my photos I want them to say, “That’s a beautiful ______,” not “Wow, nice editing.”  A slight levels adjustment and contrast bump should really be all they need.  Anything much stronger than that is going to come dangerously close to wiping out the texture and any of the natural feel to the overall image.

dPS Flowers-004

Now go buy some flowers and let me know how it goes.

Post originally from: Digital Photography Tips.

Check out our more Photography Tips at Photography Tips for Beginners, Portrait Photography Tips and Wedding Photography Tips.

How to Photograph Flowers


Digital Photography School

 
Comments Off on How to Photograph Flowers

Posted in Photography


Bone Flowers: Sculptures Made of Rodent Skeletons

09 Aug

[ By Steph in Art & Sculpture & Craft. ]

Bone Flowers Skeleton Sculptures 1

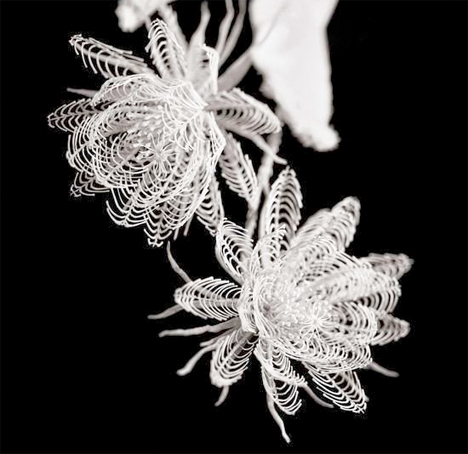
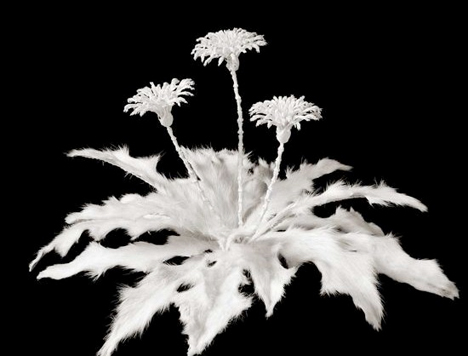
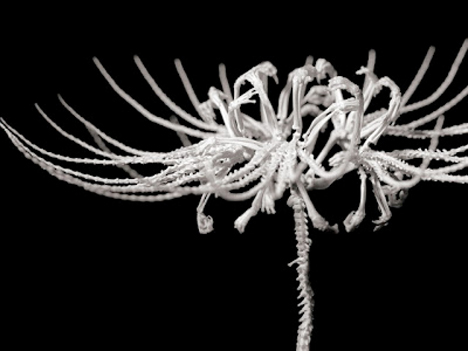
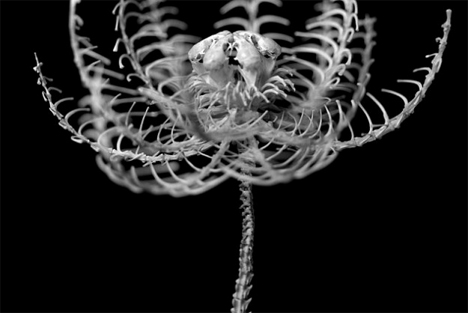
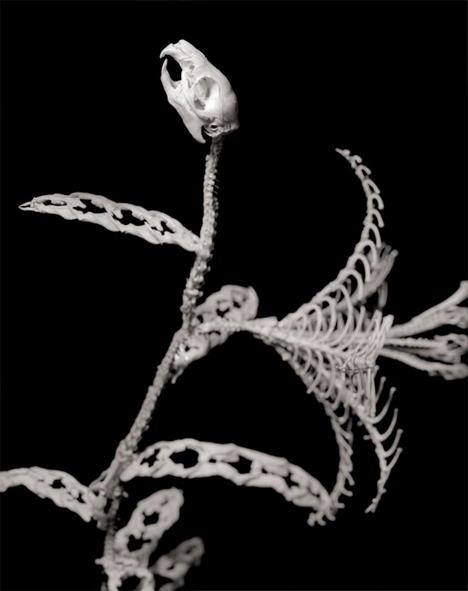
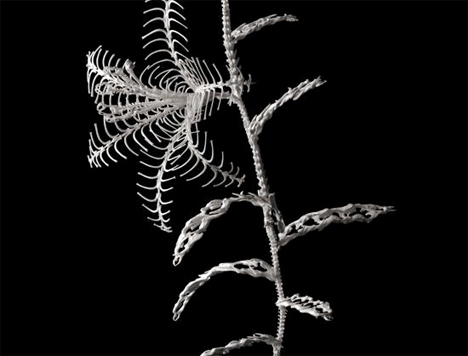
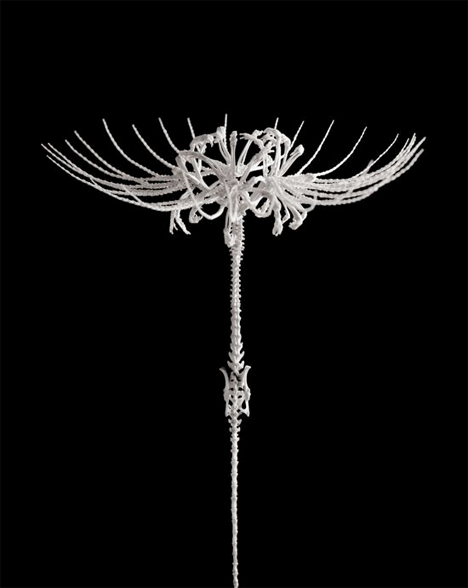
A white sculpture of a dandelion becomes infinitely more interesting the closer you look, as you begin to pick out the tiniest of paws, vertebrae and tufts of fur. Petals are made up of rib cages, stems of spines. Skulls come together to form the base of the flower. Tokyo artist Hideki Tokushige produces these honebana, or bone flowers, in honor of the cycles of nature.

Bone Flowers Honebana

Bone Flowers Skeleton Sculptures 2

Bone Flowers Skeleton Sculptures 4

Tokushige procures (already-dead) carcasses of rodents and keeps them frozen so the flesh can be picked off the skeletons more easily without causing damage to the delicate bones.

Bone Flowers Skeleton Sculptures 5

Once he’s finished completing and photographing the sculptures, Tokushige disassembles them and buries the remains. Using these mice, which are kept in cages throughout their short lives and then frozen to feed to other animals in the least grisly way possible, reflects “a sense of our modern view of nature and life.”

Bone Flowers Skeleton Sculptures 6

Bone Flowers Skeleton Sculptures 7

“Some might think it weird,” says Tokushige of using bones. He states that proximity to bones was normal throughout much of human history, but we’re not as used to seeing them anymore. “Still, someday we all go back to bones and back to soil.” The artist crafts the bones into flowers as a means of paying respects to the dead, our cultural customs and the realities of the life cycle. Flowers are temporary, but bones can last millennia.
Share on Facebook


[ By Steph in Art & Sculpture & Craft. ]

[ WebUrbanist | Archives | Galleries | Privacy | TOS ]


WebUrbanist

 
Comments Off on Bone Flowers: Sculptures Made of Rodent Skeletons

Posted in Creativity


Amaryllis flowers opening time lapse with rotate

26 Jan

Time lapse Amaryllis lily flower opening with rotate. Filmed by Neil Bromhall for www.rightplants4me.co.uk my free interactive plant identification and pruning guide website Filmed in my studio in Oxford over a period of three days. Exposure interval 3-5 minutes x2 Nikon D300, & 55mm & 105mm lens with growlight studio flash and rotate head.