RSS
 

Posts Tagged ‘Flares’

How to Photograph Sun Flares: 14 Tips for Beginners

15 Nov

The post How to Photograph Sun Flares: 14 Tips for Beginners appeared first on Digital Photography School. It was authored by Dena Haines.

Sun flares can add beauty and drama to your photos. Cameras and lenses are designed to cut down on flare – so when it comes to sun flares, you have to be a rule-breaker right from the beginning.

In this article, I’ll share 14 tips to help you get started photographing sun flares!

photographing sun flares

Photographing sun flares: 14 tips for beginners

There are no rules for sun flare photography; it’s all about creativity. You can capture sun flares at any time of day, and with these easy tips, you’ll be out experimenting in no time.

1. Try various aperture settings

Have you noticed that in some photos sun flares look soft and diffused, while in others they look bold and defined? That has a lot to do with which aperture setting was used.

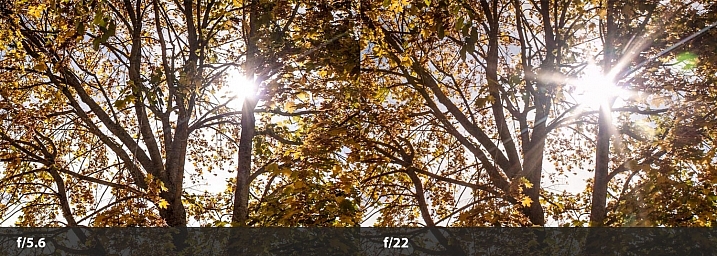
If you use a fairly wide aperture, like f/5.6, you’ll get soft flares. But if you use a small aperture, like f/22, you’ll get stronger, more defined flares.

photographing sun flares aperture comparison

In the split image above, the f/5.6 shot is a softer-looking flare, and the f/22 shot is more defined. The points of the flare are created by the blades of the aperture inside your lens. When the blades come closer together (as with narrow apertures like f/22), you get more defined points in your flares.

Using different apertures will give you a variety of looks to choose from when you’re editing. You’ll also learn which type of sun flare you prefer, depending on the setting and feel you want in your photo.

2. Use Aperture Priority mode

The easiest way to control the aperture (as discussed above) is to put your camera in Aperture Priority mode (indicated with an “AV” on a Canon camera, and an “A” on a Nikon camera). That way, you’ll be able to easily adjust the aperture setting.

And with your camera set to Auto ISO, it will automatically choose the ISO and shutter speed settings for you.

Now you’ll be able to quickly switch apertures and see the difference it makes to your sun flares.

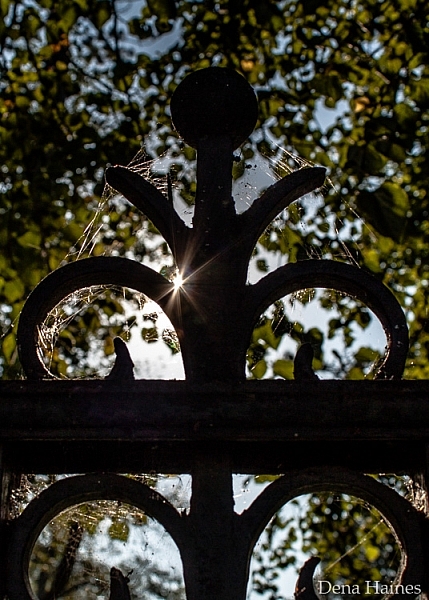
3. Partially hide the sun

Use an object (such as a fence post, building, or tree, etc.) to partially hide the sun. This will allow you to capture flare while adding an artistic touch to the object you’re shooting.

photographing sun flares

Move around the object and let the sun peek out at different locations as you keep taking photos. I love doing this, and I always come away with something unique.

4. Move around and take lots of pictures

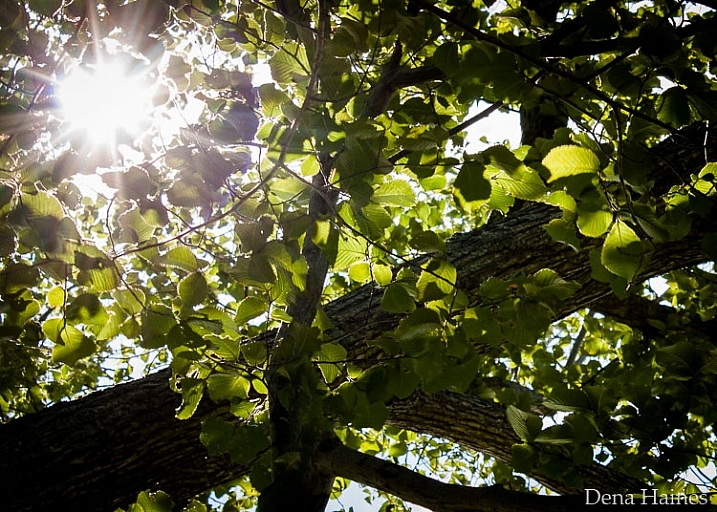
When shooting sun flares, it really helps to move around – a lot. If you are partially hiding the sun (as mentioned in the previous tip), a slight movement to the right or left will cause a big change in the flare. Your photo could be flooded with too much light, or you might miss the flare altogether. But moving could also reveal the flare in just the right spot to create the look you want.

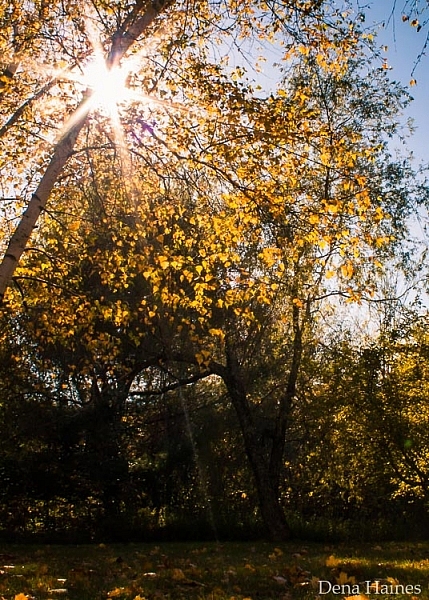
sun flares through leaves

It’s important to take lots of pictures. You’ll eventually learn how much sun to include in relation to the amount of flare you want.

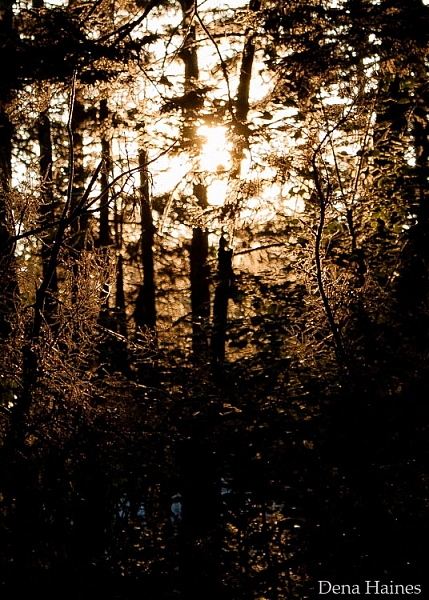
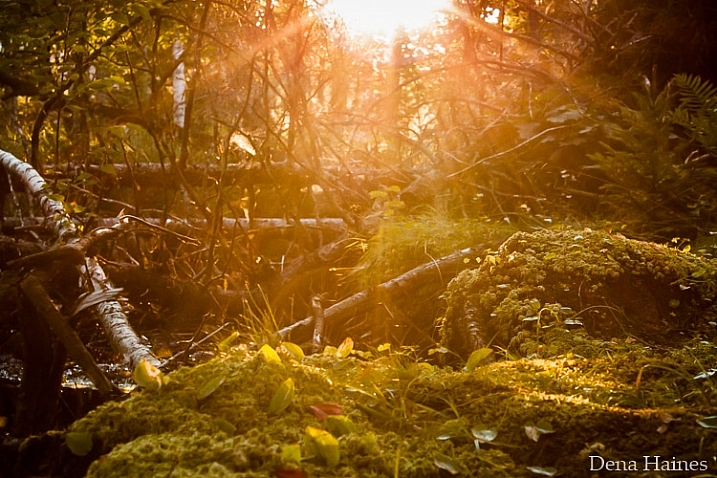
sun flare in forest

Sun flares can be unpredictable; that’s part of what makes them fun to work with.

5. Try using some filters

When photographing sun flares, filters can be helpful. I recommend considering either of the following options:

  • Polarizing filter: You’ll get different effects as you rotate this filter. It can help increase color saturation and decrease reflections. If you have a polarizer, play around with it and see how it affects the flares.
  • Graduated neutral density filter: This filter is darker at the top and becomes lighter near the bottom. It can prevent part of the image from looking blown-out when shooting into the sun.
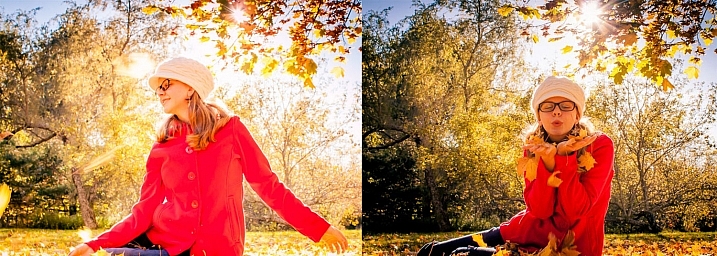
graduated neutral density filter

I used a graduated neutral density filter for the photo on the right. It helped control the light, which kept the colors richer.

6. Shoot during different times of day

Around sunrise and sunset, the sunlight comes in at a unique angle. This creates a warmer, golden color, whereas during midday, there is a cooler (bluish) or more neutral light.

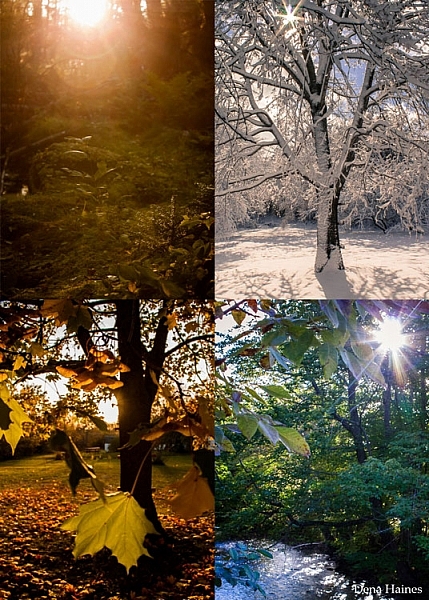
In the following image, two of the photos were taken around sunset, and the other two were taken a few hours after sunrise. Can you guess when each photo was taken?

images shot at different times of day

I bet you got it right – the images on the left were taken near sunset. They have a warmer feel, don’t they? Whereas the images on the right have a cooler feel.

7. Divide the sun with your camera

You can get a softer, more diffused look by composing your photo so that the sun is not fully in the frame. Try cutting the sun in half, or only including its bottom third.

sun flare cut off at the topic of the frame

Play with it. Create different effects and see which you prefer.

8. Use a tripod and a remote shutter release

As I mentioned earlier, a smaller aperture setting (higher f-number) will give you a sharper, more defined flare.

But using a small aperture also means that your camera will require more time to take the photo. The longer the image takes, the more chance there is for camera shake to cause blur.

If you are handholding your camera, this could be a problem. When your camera is on a tripod, there is much less chance of camera shake.

photographing with a tripod

Using a tripod will help keep your photos looking sharp and your sun flares looking crisp. By using a remote shutter release (or your camera’s self-timer), you’ll reduce camera shake even more.

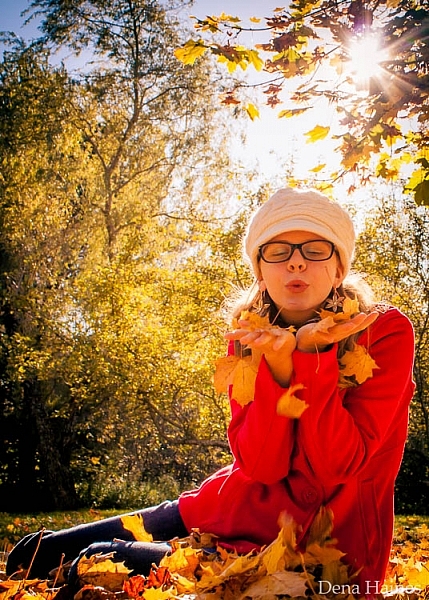
9. Keep the sun at your model’s back

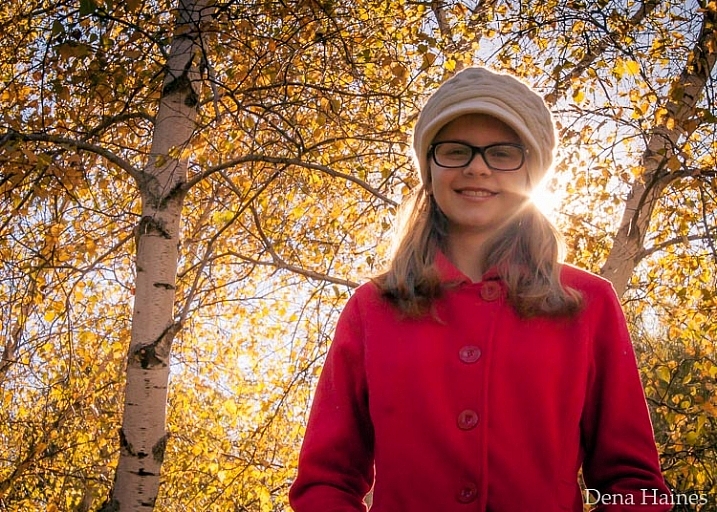
By keeping the sun at your model’s back, you’ll allow the light of the flare to spill out around them in interesting ways.

sun flare portrait

Depending on the time of day, you might need to lie down, and have your model sit or lie down, too. The image above was taken around 3:00 PM in the afternoon, and I was lying on the ground.

The higher the sun is, the lower you’ll need to be in order to place the flare at your model’s head or at your model’s shoulders. Having your model sit down will make it easier for you.

And when the sun is lower in the sky, positioning becomes easier for both of you.

10. Use a reflector

A reflector is designed to reflect the light back onto your subject. Reflectors are usually made of fabric (white, silver, or gold) and can be handheld, hung from a freestanding base, or placed on the ground.

Using a reflector can be helpful if your model is in the shade. It helps to brighten the face, making the photo look more pleasing.

11. Cover the sun with your hand to focus

It can be hard to focus when shooting sun flares. There is so much light that your camera may struggle to lock focus on the right spot. 

When this happens, hold up your hand to cover the sun, compose your photo, and press your shutter release halfway. Once your camera focuses, take your hand down and press the shutter the rest of the way.

You may have to try this a number of times until you get exactly what you want.

12. Place the sun out of the frame

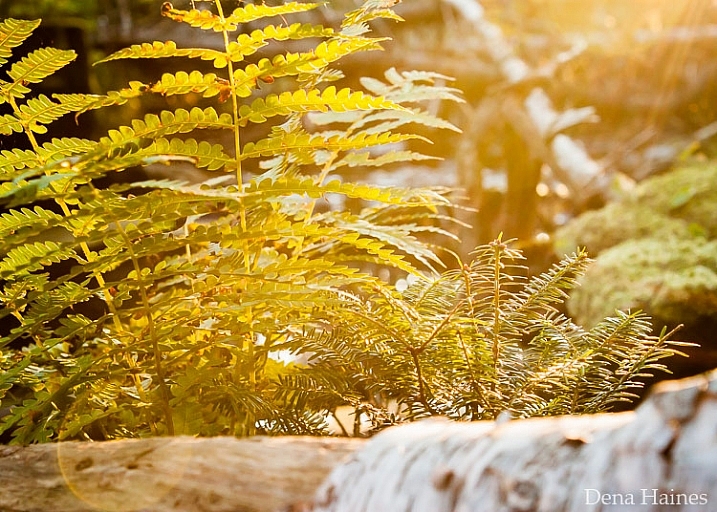
To get a really soft flare effect without a bright point, try placing the sun out of your frame.

the sun in the upper right corner

I love how this adds soft light (as shown in the photo above), and how the eye is drawn up to the source of light.

13. Use spot metering

Spot metering handles bright light really well, so if you’ve got a choice, go with this metering mode. All but one of the photos in this article were taken using spot metering. 

If your camera does not have spot metering, then partial metering is the next best choice. Note that I use autofocus with the focus point set to the center (as the focus point is where your metering mode will be active).

14. Have fun!

This last tip is probably the most important:

When photographing sun flares, experiment and have fun.

Don’t be afraid to take tons of pictures, try different aperture settings, and move around. Sun flares are wild and unpredictable. Be creative and use different objects to block (or diffuse) the light. You’re bound to get lots of overexposed and underexposed photos, but you’ll get a lot of gorgeous results, as well.

Photographing sun flares: Now it’s your turn

I would love to see your sun flare photos and hear your tips! Please share them in the comments below.

The post How to Photograph Sun Flares: 14 Tips for Beginners appeared first on Digital Photography School. It was authored by Dena Haines.
Digital Photography School

 
Comments Off on How to Photograph Sun Flares: 14 Tips for Beginners

Posted in Photography


How to Create Sun Flares Using Luminar 4 and Photoshop (video)

23 May

The post How to Create Sun Flares Using Luminar 4 and Photoshop (video) appeared first on Digital Photography School. It was authored by Caz Nowaczyk.

In this video from Anthony Turnham, you’ll learn how to create sun flares using Luminar 4, either standalone or as a plugin in Photoshop.

This effect can be a great addition to any landscape photo or portraits, especially if you feel your image is lacking something special. This effect can possibly give your image extra life and dynamic.

Anthony takes you through this tutorial in an easy-to-follow way, making it easy for you to create your own sun flare.

Try out this technique and share your resulting photos with us in the comments section.

Do you have other methods for creating sun flares? Share those with us too!

You may also like:

  • How to Easily Make Images ‘Pop’ with these Luminar 4 Tips
  • How to Use the Luminar 4 Pro Tools Panel
  • Portrait Editing with Luminar 4 – Using Artificial Intelligence
  • Luminar vs Lightroom: Three Reasons Luminar is Better (and Two Reasons It’s Not)
  • Easy Color Grading With LUTs and Luminar 2018
  • Tips For Editing the Colors in Landscape Photos Using Lightroom (video)
  • Editing Gently: 3 Tips for Processing Realistic Landscape Photos

The post How to Create Sun Flares Using Luminar 4 and Photoshop (video) appeared first on Digital Photography School. It was authored by Caz Nowaczyk.


Digital Photography School

 
Comments Off on How to Create Sun Flares Using Luminar 4 and Photoshop (video)

Posted in Photography


How to Photograph Sun Flares: 14 Tips for Beginners

29 Mar

Sun flares can add beauty and drama to your photos. Cameras and lenses are designed to cut down on flare – so when it comes to sun flares, you are a rule breaker right from the start.

In this article, I share 14 tips to help you get started photographing sun flares:

photographing-sun-flares-tips-for-beginners

Photographing sun flares: 14 tips for beginners

There are no rules with sun flares, they’re all about creativity. You can capture them at any time of day, and with these easy tips you’ll be out experimenting in no time.

1. Try various aperture settings

Have you noticed that in some photos sun flares look soft and diffused, while in others they look bold and defined? That has a lot to do with which aperture setting was used.

If you use a fairly wide open aperture, like f/5.6, you’ll get soft flares. But, if you use a small aperture, like f/22, you’ll get stronger, more defined flares.

sun-flare-tips-wide-narrow-aperture

In the split image above, the f/5.6 shot is a softer looking flare, and the f/22 is more defined. The points of the flare are created by the blades of the aperture inside your lens. When they come closer together (as with narrow apertures like f/22) you get more defined points on your flares.

Using different apertures will give you a variety of looks to choose from when you’re editing. You’ll also learn which type of sun flare you prefer, depending on the setting and feel you want in your photo.

2. Use Aperture Priority Mode

The easiest way to use tip #1 is to put your camera in Aperture Priority Mode (AV on a Canon, or A on a Nikon). This way, you’ll be able to easily switch the aperture setting. With your camera set to auto ISO, it will automatically choose the ISO and shutter speed settings for you.

Now you’ll be able to quickly switch apertures and see the difference it makes to your sun flares. Learn more here: Aperture Priority and Shutter Priority: Exposure Lesson #1

3. Partially hide the sun

Use an object (such as a fence post, building, tree, etc.) to partially hide the sun. This will allow you to capture flare, and add an artistic touch to the object you’re shooting.

sun-flare-tips-for-beginners

Move around the object, let the sun peek out at different locations as you keep taking photos. I love doing this, and I always come away with something unique.

4. Move around and take lots of pictures

When shooting sun flares it really helps to move around – a lot. If you are partially hiding the sun (as mentioned above in #3) a slight movement to the right or left will cause a big change in the flare. Your photo could be flooded with too much light, or you might miss the flare altogether. Or it could reveal the flare in just the right spot, and create exactly the look you want.

sun-flare-tips-move-around

It’s important to take lots of pictures. You’ll learn how much sun to include, in relation to the amount of flare you want.

sun-flares-creative-photography-tips

Sun flares can be unpredictable, that’s part of what makes them fun to work with.

5. Try using some filters

When photographing sun flares, filters can also be helpful:

  • UV filter: This is a good idea because you will be shooting into the sun. Some photographers feel that a UV filter will protect your camera’s sensor.
  • Polarizing filter: This will help you get different effects as you rotate it. This filter can help increase color saturation and decrease reflections. If you have one, play around with it and see how it affects the flares.
  • Graduated neutral density filter: These filters are darker at the top, and become lighter near the bottom. They can prevent part of the image from looking blown-out, from shooting into the sun.

sun-flare-tip-graduated-neutral-density-filter

In the above image, I used a graduated neutral density filter for the photo on the right. It helped control the light, which kept the colors richer. Learn more about polarizing and graduated neutral density filters.

6. Shoot during different times of day

Around sunrise and sunset, the sunlight comes in at a unique angle. This creates a warmer, golden color., whereas during midday, there is a cooler (bluish) or more neutral color.

In the following image, two of the photos were taken around sunset, and the other two were taken a few hours after sunrise. Can you guess when each photo was taken?

sun-flare-tips

I bet you got it right – the ones on the left were taken near sunset. They have a warmer feel, don’t they?  The ones on the right have a cooler feel. Learn more here: Understanding Natural Light Part 2: Color of Light.

7. Divide the sun with your camera

You can get a softer, more diffused look by composing your photo so that the sun is not fully in your frame. Try cutting the sun in half, or only including its bottom third.

sun-flare-tips-for-beginners-2

Play with it. Create different effects and see which you prefer.

8. Use a tripod and a remote shutter release

As mentioned earlier, a smaller aperture setting (higher number) will give you a sharper, more defined flare. But, using a small aperture also means that your camera will require more time to take the photo. The longer it takes, the more chance there is for camera shake to cause blur in your photo.

If you are hand-holding your camera, this could be a problem. When your camera is on a tripod, there is much less chance of camera shake.

sun-flare-tips-use-a-tripod

Using a tripod will help keep your photos looking sharp and your sun flares crisp. By using a remote shutter release (or your camera’s self-timer) you’ll reduce camera shake even more.

9. Keep the sun at your model’s back

By keeping the sun at your model’s back, you’ll allow the light of the flare to spill out around them in interesting ways.

photographing-sun-flares-tips-2

Depending on the time of day, you might need to lay down, and have your model sit or lay down. The above image was taken around 3:00 p.m. in the afternoon, and I was laying on the ground.

The higher the sun is, the lower you’ll need to be in order to place the flare at your model’s head, or shoulder level. Having your model sit down will make it easier for you. When the sun is lower in the sky, positioning becomes easier for both of you.

10. Use a reflector

A reflector is used to reflect the light back onto your subject. Reflectors are usually made of fabric (white, silver or gold) and can be hand-held, hung from a freestanding base, or placed on the ground.

Using a reflector could be helpful if your model is in the shade. It would help to brighten their face, making the photo look more pleasing.

11. Cover the sun with your hand to focus

It can be hard to focus when shooting sun flares. There is so much light, that your camera may struggle to lock on where you want. When this happens, hold up your hand to cover the sun, compose your photo, and press your shutter release halfway. Once your camera focuses, take your hand down and press the shutter the rest of the way.

You may have to try this a number of times until you get exactly what you want.

12. Place the sun out of the frame

To get a really soft flare effect, without a bright point, try placing the sun out of your frame.

sun-flare-tips-3

I love how this adds soft light to the above photo, and how the eye is drawn up to the source of light.

13. Use Spot Metering

Spot Metering handles bright light really well, so if you’ve got the choice, go with this metering mode. All but one of the photos in this post were taken using it. If your camera does not have Spot Metering, then Partial Metering would be your next best choice. I use autofocus, with the focus point set to the center.

14. Have fun

This last tip is probably the most important. When photographing sun flares, it’s time to experiment and have fun.

Don’t be afraid to take tons of pictures, try different aperture settings, and move around. Sun flares are wild and unpredictable. Be creative and use different objects to block (or diffuse) the light. You’re bound to get lots of over, and under exposed photos, but you’ll get lots of gorgeous results as well.

Learn more about Using Sun Flares and Starbursts to Create Stunning Images.

Now it’s your turn

I would love to see your sun flare photos and hear your tips! Please share them below.

googletag.cmd.push(function() {
tablet_slots.push( googletag.defineSlot( “/1005424/_dPSv4_tab-all-article-bottom_(300×250)”, [300, 250], “pb-ad-78623” ).addService( googletag.pubads() ) ); } );

googletag.cmd.push(function() {
mobile_slots.push( googletag.defineSlot( “/1005424/_dPSv4_mob-all-article-bottom_(300×250)”, [300, 250], “pb-ad-78158” ).addService( googletag.pubads() ) ); } );

The post How to Photograph Sun Flares: 14 Tips for Beginners by Dena Haines appeared first on Digital Photography School.


Digital Photography School

 
Comments Off on How to Photograph Sun Flares: 14 Tips for Beginners

Posted in Photography


Using Sun Flares and Starbursts to Create Stunning Images

02 Dec

This is a guest post by Katie McEnaney

An Introduction to Sun Flares and Starbursts

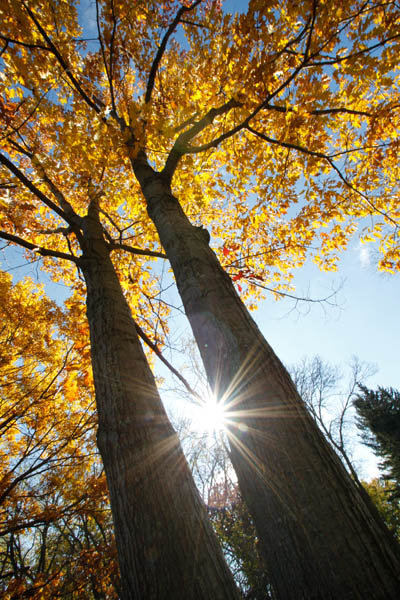
A sun flare or starburst is an incredibly cool photographic technique and one that is easy to achieve without any special post-processing or editing tricks. You will be amazed at the effects you can create by learning a few simple settings and knowing the proper situations for taking beautiful sun flare and starburst photographs.

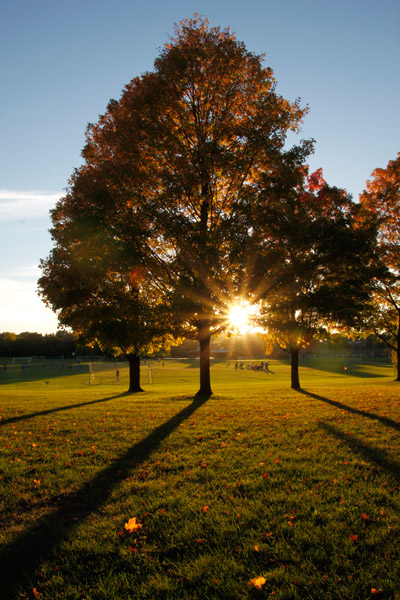
McEnaney sunflare vertical tree

How to Shoot Sun Flares and Starbursts

It is possible to obtain sun flare and starburst images with a point and shoot camera, but for more reliable results, you will want to use a DSLR or interchangeable lens camera with adjustable aperture. A UV filter on your lens is suggested to protect your camera’s sensor, as you will be shooting directly into the sun when capturing sun flares. Stability is critical for capturing starbursts, so a sturdy tripod and remote shutter release are recommended.

The technique for shooting successful sun flares and starbursts is to use a narrow aperture such as f/22 and a relatively wide focal length like 18 mm. With a narrow aperture, the blades inside your lens close down to create a very small opening for light to pass through. This narrow opening creates a slight diffraction or bending of the light, which causes a point source of light (described below) to become a starburst shape when it hits and is recorded by the camera’s sensor. Different lenses are built with different numbers of blades: the more blades, the greater the number of points on the flare or starburst. The wider the focal length also contributes to the size of the starburst shape, as a wider focal length can create a larger starburst.

For settings, you want to start by shooting in Aperture priority (Av for Canon or A for Nikon) mode and setting your aperture to f/22. You also want to shoot at a fairly low ISO, around 100-200, to avoid the increased noise of higher ISO values. The camera will then choose the shutter speed. If the final image turns out too dark or too light, you can switch to shooting in Manual mode, dial in the same settings, and then slightly increase the shutter speed for a lighter picture or decrease the shutter speed for a darker picture.

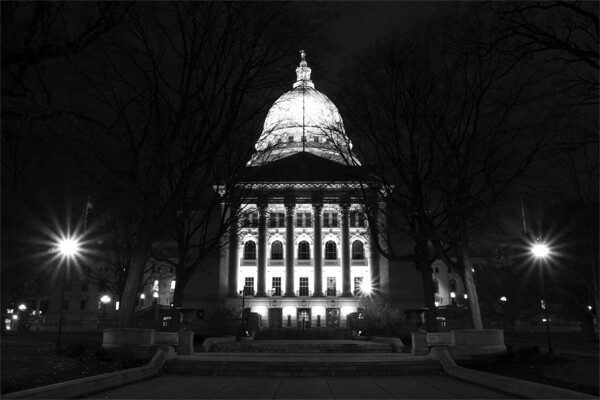
McEnaney Capitol night starbursts

In lower light situations, your shutter speed may become so slow that you need a tripod to ensure a steady shot. (The general rule of thumb is that you should be able to successfully hand-hold a shot at a shutter speed of 1 over the focal length of the lens. For example, you should be able to hand-hold a shot with an 18 mm lens at 1/18th of a second or faster or a 50 mm lens at 1/50th of a second or faster.) If you are photographing starbursts after dark, then your shutter speeds will generally be slow enough to require a tripod or other stable surface. The alternative option would be to start increasing your ISO, which will also increase the noise in the final image.

Along with the tripod, a remote shutter release (corded or wireless) is helpful to avoid shaking the camera when pressing the shutter button. If you do not have a remote, you can set the 2-second or 10-second timer on your camera instead. A remote shutter release also allows you to use the Bulb setting on your camera to get shutter speeds longer than 30 seconds.

Timing and Strategies for Sun Flares and Starbursts

Sunbursts and starbursts are created from small point sources of light, rather than larger dispersed or diffused light sources. A point source is one where light is emanating from a singular location: a bulb in a street lamp, a car headlight, a direct flashlight, even strings of holiday lights. A dispersed light source is one where light is emanating from a broader location: a frosted light bulb, an overhead florescent light panel, or the tubes of a neon sign. A diffused light source is one where the location of the light is very spread out or difficult to detect: the sun in an overcast sky, large studio lights with diffusers or softboxes, or light bounced off a large surface or reflector.

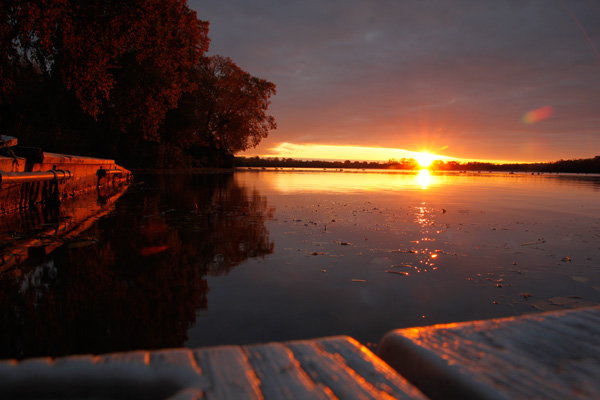
McEnaney sunrise sunflare

The sun is not generally a point source of light, as it is often too bright and overwhelming to create a sun flare. So, the best time to capture sun flares is when the sun is low in the sky, either in the early morning or late afternoon. The winter season is ideal for sun flares, as the sun is lower in the sky for longer periods of the day.

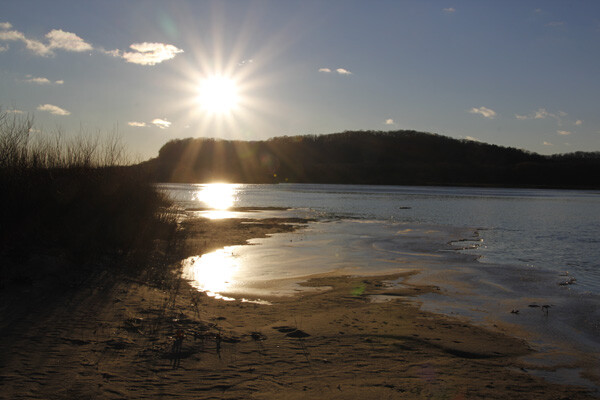
sun flare and starburst photo

Once you have the right time of day, the second step for creating a sun flare is to position the sun in your composition so that it is partially obscured behind another object, such as a tree or the edge of a building. Even at low angles, the sun can still be so bright that it will overwhelm your scene and create large bright patches rather than a starburst shape. Partially obscuring the sun also serves to amplify the effect of the narrow aperture. Position the camera so that the sun is directly behind the object and determine your final composition. Then, move the camera slightly until the sun is just beginning to peak out from behind the object and take the picture.

McEnaney sunflare two trees

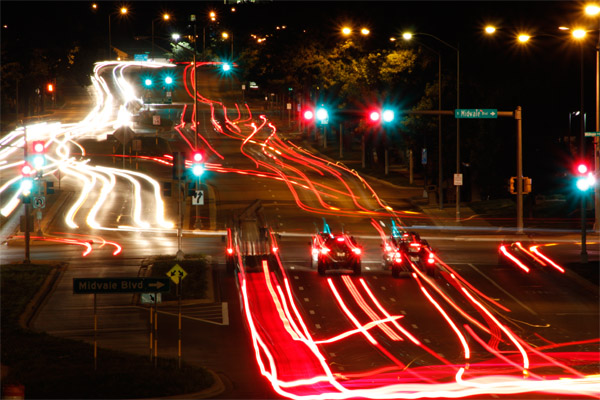
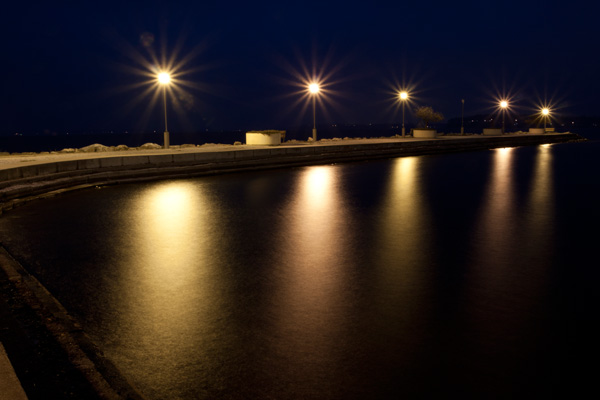
To create starbursts at night, you need to find suitable point sources of light. Street lamps and strings of lights work well. Because these sources are not as overpowering as the sun, you do not need to partially obscure them. This gives you a wider range of compositional choices. You can also combine multiple point sources of light to create an entire collection of starbursts in a single image. Moving lights will be rendered as blurs or light trails, while stationary lights will become starbursts.

McEnaney traffic trails

Composing with Sun Flares and Starbursts

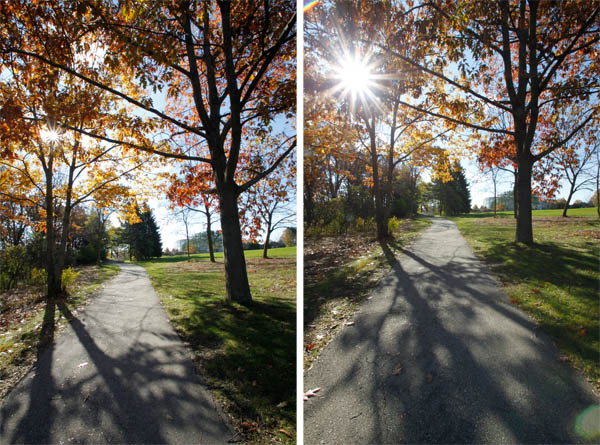
Be willing to be patient and experiment with your compositions and angles for sun flares. Slight differences in the angle of the sun and the amount of sunlight streaming in can make a big difference in your final image. The two images below were taken of the same tree, two minutes apart. The only compositional difference was backing up several feet for the second image, so that the sun was only barely obscured by leaves rather than partially blocked by the trunk.

McEnaney sunflare compare

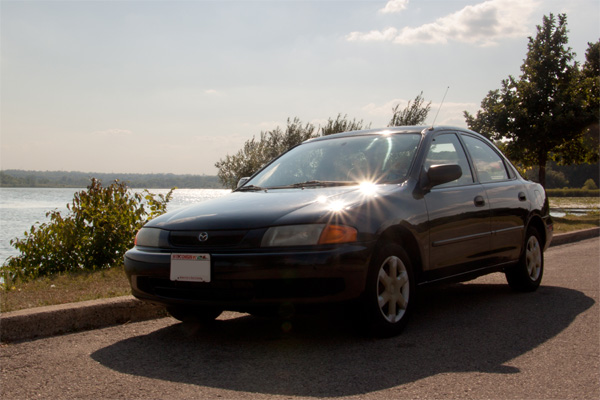
Once you have mastered the single flare, you can step up the challenge and capture multiple sun flares in a single image. An easy way to do this is to use reflected light. Light reflecting off several points or different surfaces can create multiple individual point sources. Look for situations where sunlight is bouncing off water, vehicles, or other reflective surfaces. In this goodbye photograph of my old car, the multiple flares were created by the sunlight bouncing off the dents and divots of the hail damage on the hood (bonnet) of the car.

McEnaney car sunflares

Starbursts are a great effect to use with holiday lights. Each individual light is a point source and can be rendered as its own starburst. The starburst look adds an extra sparkle to your holiday images, but you can use strings of white or colored lights to add starbursts to any kind of subject you choose.

McEnaney holiday starbursts

For cityscape starbursts, seek out locations with congregations of street lights or other point sources of light. The blue hour (the approximate hour before sunrise or after sunset) is an ideal time to photograph lights outside, as the deep blue colors in the sky set off the scene. Your camera will record these blue colors for a short time even after they are no longer visible to your eyes.

McEnaney starbursts water

Now that you know the basic idea behind sun flares and starbursts, you will start seeing opportunities everywhere. Get your f/22 aperture ready, and get out there!


Katie McEnaney is an educator and photographer from Madison, Wisconsin. Read more tips on her blog, Boost Your Photography, and connect with her on Google+, Twitter @archaeofrog, and Flickr. Her first eBook, Boost Your Photography: Learn Your DSLR, will be available soon on Amazon.

Post originally from: Digital Photography Tips.

Check out our more Photography Tips at Photography Tips for Beginners, Portrait Photography Tips and Wedding Photography Tips.

Using Sun Flares and Starbursts to Create Stunning Images

The post Using Sun Flares and Starbursts to Create Stunning Images by Guest Contributor appeared first on Digital Photography School.


Digital Photography School

 
Comments Off on Using Sun Flares and Starbursts to Create Stunning Images

Posted in Photography


How To Add Flares To a Photoshop Project (Download)

05 Aug

This is a tutorial on how to add Flares to a photoshop project, A download is included below (Flares, Sparks, Blood, Smoke, Bursts & Fire) www.filefront.com Comment, Like, Favourite & SUB (Extra Tags Ignore) how to computer tutorials hacks cmd never again will i be able to make money online with youtube ebay myspace hacks crack white black facebook he was so cute irfanview audacity photoshop retouching effects sony vegas platinum eight 8 1 2 3 4 5 6 7 8 9 10 lol he got owned everyone lets party like a rock star rockstar sean paul ownage hitting drunk these are my tags lol coming for pizza eating pig squealing technician techie making cash with your profile account on youtube haha charlie bit me smosh fred fred gets his finger bit off the song charlie the unicorn funny stuff to look at making cash online scratched chalk videos scratchedchalkvideos we own the tutorial making industry the how to masters ignore these tags tags ignore these MONEY FREE AWESOMEThis is an E3 preview of the new Xbox 360 dashboard soon to be released. xbox 360 new dashboard gears marcus dom halo e3 electronic enterntainment expo dashboards fall update 2008, including new avatars, 1vs100, and Netflix support. New Xbox 360 Dashboard Fall Update 2008 walks you through some of the new features xbox dashboards fall update including avatars 1vs10 Demo game installation process for the New Xbox Expe… SUBSCRIBER HACK WEBDemo game installation process for the New Xbox Experience dashboard Want to

Happy with our training? Donate! tinyurl.com Visit www.PhotoshopTalent.com for more tutorials, contests and more! Using the Vanishing Point Filter to remove objects in your image. http
Video Rating: 4 / 5


How To Add Flares To a Photoshop Project (Download)

03 Aug

This is a tutorial on how to add Flares to a photoshop project, A download is included below (Flares, Sparks, Blood, Smoke, Bursts & Fire) www.filefront.com Comment, Like, Favourite & SUB (Extra Tags Ignore) how to computer tutorials hacks cmd never again will i be able to make money online with youtube ebay myspace hacks crack white black facebook he was so cute irfanview audacity photoshop retouching effects sony vegas platinum eight 8 1 2 3 4 5 6 7 8 9 10 lol he got owned everyone lets party like a rock star rockstar sean paul ownage hitting drunk these are my tags lol coming for pizza eating pig squealing technician techie making cash with your profile account on youtube haha charlie bit me smosh fred fred gets his finger bit off the song charlie the unicorn funny stuff to look at making cash online scratched chalk videos scratchedchalkvideos we own the tutorial making industry the how to masters ignore these tags tags ignore these MONEY FREE AWESOMEThis is an E3 preview of the new Xbox 360 dashboard soon to be released. xbox 360 new dashboard gears marcus dom halo e3 electronic enterntainment expo dashboards fall update 2008, including new avatars, 1vs100, and Netflix support. New Xbox 360 Dashboard Fall Update 2008 walks you through some of the new features xbox dashboards fall update including avatars 1vs10 Demo game installation process for the New Xbox Expe… SUBSCRIBER HACK WEBDemo game installation process for the New Xbox Experience dashboard Want to
Video Rating: 4 / 5

Happy with our training? Donate! tinyurl.com Visit www.PhotoshopTalent.com for more tutorials, contests and more! Using the Vanishing Point Filter to remove objects in your image. http

 
Comments Off on How To Add Flares To a Photoshop Project (Download)

Posted in Retouching in Photoshop