RSS
 

Posts Tagged ‘Fine’

How to Create Fine Art Images from the Mundane

02 Oct

It’s easy to feel defeated before you’ve even started when it comes to creating fine art images. A quick search of any of the popular photography sites brings up beautiful and humbling images from the far corners of the world.

However, you don’t need a round-the-world ticket and a six-month career break to shoot beautiful fine art photography. You can do this at home in your living room with minimal expenses if you’re prepared to think a little outside the box!

Physalis color duo - How to Create Fine Art Images from the Mundane

What does fine art mean anyway?

Fine art photography is one of those terms that is tricky to pin down. There are two ways that the term “fine art” is usually used so it’s important not to get confused between the two.

The first is usually in the context of museums and galleries. Fine art in European academic traditions is most often used to describe a work that was created primarily for beauty and has no other function. It is the opposite of “applied art” which describes everyday objects (such as ceramics) which have been decorated to make them more aesthetically pleasing.

When people talk about fine art photography though, they tend to be talking about a style of photography rather than a method of production. In this context, it’s usually art that was created for art’s sake. An image that was always designed to be primarily enjoyed for its beauty rather than its subject matter.

Sometimes there are lighting and processing styles that maybe associated with the term “fine art photography” but fashions and trends come and go, even in the world of art!

Physalis colour triptych

For a more in-depth look at fine art photography read: The dPS Ultimate Guide to Fine Art Photography

Flat Perspectives

Flat lay images have been gaining popularity for a while now. If you scroll through Instagram or Pinterest you’ll almost certainly find them in your feed. But most of the flat lay images out there on social media are heavily focussed on creating a real commercial vibe that sells a product or an experience.

Even those photographers not selling anything have often adopted this commercial style for their personal feeds. While there’s nothing wrong with this approach at all, there is room for a different interpretation of this style of an image by creative photographers who want to shoot fine art.

Searching for Inspiration

It’s always a good idea to start with a vision of how your final shots will look. A close study of the detail and texture of an object was the idea that I had in mind for this image. There’s a real trend in interior design right now for groups of artfully curated objects placed creatively on walls and it was this trend that I wanted to explore.

These images are also heavily inspired by the work of Edward Weston over the past few years, someone who has been inspiring me in my work for years.

Weston used photography to explore natural forms. He strived to capture details of the reality around him with real precision. Between 1927-30 he would shoot a portfolio of images based around peppers, shells, and cabbages. Through these images, Weston translated reality into something much more abstracted and Modernism-inspired.

Physalis - How to Create Fine Art Images from the Mundane

A trip to the supermarket was in the cards as a homage to Weston’s visionary images of food. I auditioned pomegranates, gnarly heirloom tomatoes, and unusually long, thin peppers. But it was finding a bag of physalis (sometimes also called ground cherries or Chinese Lanterns) on the top shelf that really stoked my imagination.

Shooting Techniques

Lighting is everything when it comes to creating close photographic studies of objects. I am lucky enough to have an east-facing bay window in my studio. Around about early afternoon, it has the most perfect light for shooting really natural looking fine art images. You could create similar images using any large window on a bright overcast day.

Place a background onto your shooting table first – I selected a faux-wooden finish – and then set your camera up on a tripod looking directly down at the table (use a spirit level here if you have one).

If you don’t have a tripod that can flip its central column and tilt it horizontally you’ll want to purchase an accessory arm in order to shoot flat lays. Getting the camera directly above the subject without the tripod’s legs getting in the way is crucial to this style.

Physalis bw triptych - How to Create Fine Art Images from the Mundane

Finding the Light

There’s a theory that humans read images in a similar way to how they read written text. For me, because English is my primary language, I read from left to right. That means when I shoot I almost always start with the light coming from the left and the shadows on the right as default.

This way your viewer would be reading the image from the light to dark in the same way that they would read a book. It should feel very natural and easy.

If the light isn’t right for the image then wait until later in the day or even another day altogether. Shooting with available light isn’t always the quickest process but it can be very rewarding. When you’re using available light always have black and white cards on hand to bounce or block the light. Just because it’s not coming from a studio light, doesn’t mean you can’t modify it.

Controlling the Camera, Creating Compositions

One of the best things about the Fuji range of cameras is the iPhone app that goes with them. Although the screen on some cameras, like my Fuji, tilt so that you can see what you’re shooting – when you’re set up for flat lay shots it can still be a little awkward. The app gets around this problem and allows you to see exactly what you’re doing in real time.

Physalis fuji app - How to Create Fine Art Images from the Mundane

When you’re shooting overhead flat lay images, a smart thing to do is to connect the phone and camera, start the app, and then place it on the table next to the arrangement of objects (but out of the shot). That way you can watch the scene as you move objects around to get the perfect composition before you push the shutter button.

It’s an extraordinarily useful feature to have the images transmit live so that you can watch them as you work. It really allows you to perfect your styling in a much shorter time than it might otherwise take.

Look for More Images

It was too easy to be content with the first flat lay group of physalis that I shot, but I knew that there were more images to be had of such a beautifully delicate subject. A physalis is quite small so I grabbed my old DSLR and its macro lens and begun the process all over again of finding a shot.

Changing lenses, especially if you shoot with primes, can really help you find another great image if you’re stuck for ideas or you think you’ve already got “the one.”

An even better image emerged – a single lone physalis still encased in its delicate shell! I shot this image by getting myself between the window and the shooting table and placing a black card behind the fruit.

Physalis05

The soft, beautiful light made the semitransparent physalis appear to glow and I knew at once I had shot an image I’d be happy to print large on my wall. Changing your perspective and getting down low or up high can also stimulate new ideas when it comes to shooting the same subject.

color or Black and White?

Physalis bw color - How to Create Fine Art Images from the Mundane

I once interviewed a great boudoir photographer who was very candid about why people spent money with her. She said it was because she gave them images that they couldn’t easily create at home – and she did that by color grading every image.

It is relatively easy nowadays with modern cameras and phones to get an image that’s in focus with colors which are true to life. Auto settings will get you pretty close most of the time. In that respect, it’s also much harder to make an image stand out from the crowd.

If everyone can shoot images that look like what’s in front of you then you need to go beyond image selection, focus, and composition to get a truly unique image.

Physalis color lightroom - How to Create Fine Art Images from the Mundane

On the color images of the physalis the saturation was dropped, and then blues were added to the shadows and a warm tan color to the highlights using the split toning panel in Lightroom.

For the black and whites, I experimented to find settings that created a deep contrast between the subject and the background, adding some clarity and darkening the shadows. For some of the images, the background texture was removed altogether by selectively decreasing the exposure, thereby referencing Edward Weston’s images that are usually shot on dark backgrounds.

Seeing Art Everywhere

With some practice, you can start to see potential in every object to become a subject for a piece of photographic fine art images. Many artists have preoccupied themselves with close studies of the world around them.

Edward Weston, the painters of The Pre-Raphaelite Brotherhood, even Michelangelo all produced bodies of work that reflected on reality and how best to translate that into art.

You don’t need expensive trips around the world to exotic places or whole teams of people to create fine art photography. You just need a keen eye, your camera, and your kitchen table.

The post How to Create Fine Art Images from the Mundane appeared first on Digital Photography School.


Digital Photography School

 
Comments Off on How to Create Fine Art Images from the Mundane

Posted in Photography


The Google Arts & Culture app can find your fine art doppelganger

16 Jan

Google’s Arts & Culture app was first launched in 2016, offering “virtual access” to some of the most famous art collections in the world, and many stories about arts and culture from around the world. The latest update of the app, however, makes use of Google’s extensive knowledge of machine-learning-based facial recognition, and the front camera of your smartphone, to find your fine art doppelganger… just ’cause.

The new feature lets you record a selfie and receive a list of portrait artworks your self-portrait resembles. While the user interface is extremely simple, Google is using highly sophisticated facial recognition algorithms to compare your facial characteristics to the portraits among the 70,000+ works of art in its Google Art Project database.

To try it out, download and install the app and scroll down to the “is your portrait in a museum?” icon on the front screen. From there, you simply capture an image of your face, and the system will analyze which which work of art you most resemble.

Looking at some of the results on Twitter and other social media, it is fair to say that the feature generally does a pretty decent job in matching selfie subject and piece of art; however, among the examples we have posted below, you’ll also see the occasional slip-up.

Unfortunately, it appears that if you are, like myself, living outside the US, you are currently out of luck as the new feature has not been rolled out globally yet. Hopefully this will happen soon though. If you are based in the US, you can find Google Arts & Culture on Google Play and the Apple App Store.

Articles: Digital Photography Review (dpreview.com)

 
Comments Off on The Google Arts & Culture app can find your fine art doppelganger

Posted in Uncategorized


Putting the Fine Art into Travel Photography

18 Dec

“Fine Art” when it comes to travel photography is not an often used term and few photographers define themselves as “fine art travel photographers”. Genre definitions in photography can be highly subjective, and the fine art line can be very fine indeed. For me as a travel shooter, the fine art approach is just a natural extension of who I am and how I see and share the world through my images.

Vietnam is one of my favorite places to photograph, not only because of its remarkable aesthetic qualities but because of my great fondness for its people. And so when asked talk about my photography through the fine art lens, using Vietnam as the focal point was an easy choice to make.

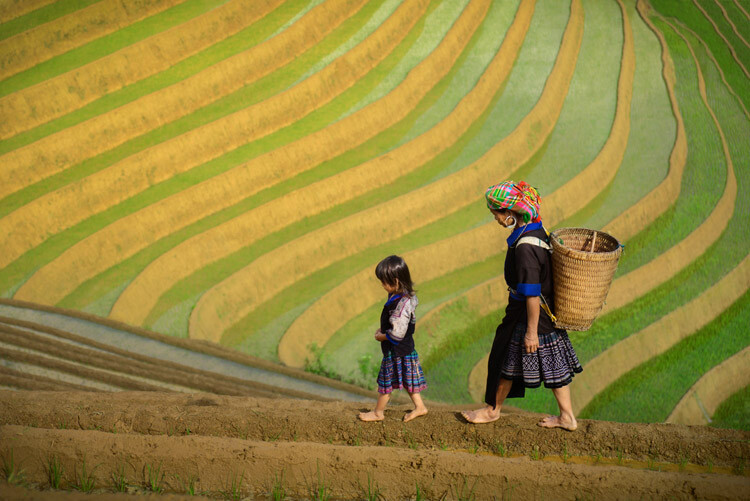
Putting the Fine Art into Travel Photography - Vietnam rice terraces

Flower H’mong mother and daughter walking a rice terrace berm in Mu Cang Chai, northern Vietnam. Exposure settings: f/4, 1/2000th, ISO 400, 70mm lens.

fishermen resting on Boats - Putting the Fine Art into Travel Photography

Fishermen resting. Shot from a bridge near Lang Co Bay. Exposure settings: f/8, 1/320th, ISO 800, 56mm lens.

The Fine Art of Travel Photography – People and Landscapes

Fine art photography, at least the way I see it, is about focusing on a specific style or look that reoccurs in every image with a goal to create aesthetically pleasing and engaging work.

Fine art travel photography implies that each travel-themed photo is of a very high artistic standard with consistent consideration to an effective composition, use of tonal range (lights and darks), and a balanced or focused color scheme throughout the photo.

Personally, I use natural light, and again, approach a photo to be a work of art. The goal is to create a visually striking image that looks similar to what a painter might have created, while still also looking completely like a photograph.

Fishermen in Halong Bay - Putting the Fine Art into Travel Photography

Fishing amidst the thousands of karst limestone formations of fabled Ha Long Bay. Exposure settings: f/9, 1/200th, ISO 800, 35mm lens.

Fishermen Ballet - Putting the Fine Art into Travel Photography

Four fishermen raise their nets on the Perfume River in Hue, central coastal Vietnam. Exposure settings: f/11, 1/160th, ISO 800, 30mm lens.

Showcase the people and culture

I aim to do this while still faithfully representing a country’s culture, with the goal to accurately, if ideally, portray the personality and lives of the people within the photos. I have always been most interested in the artistic side of travel photography, and less so in the traditional or documentary approach.

That said, I can see myself taking on more singularly focused projects in the future, where I can apply my artistic sense to the challenges of documentary storytelling within the travel space.

Vietnamese Monk - Putting the Fine Art into Travel Photography

A Khmer-Vietnamese monk daydreams at his monastery window in the Meklong Delta region. Exposure settings: f/4, 1/125th, ISO 640, 40mm lens.

Set your intention of making art

Although it may seem obvious, I think it’s critically important when adopting the fine art style to have the intention of making art throughout the process – from preparation to post-production. I take this mindset into the field and shoot a variety of subjects in various ways.

Portraiture is my first love, but I also enjoy landscape, wildlife, and cultural documentary photography. The purpose is to showcase scenes of life and culture for others to observe and enjoy. And of course I enjoy it as well, or I wouldn’t be doing it!

Playing in the River - Putting the Fine Art into Travel Photography

Ladies from the Cham ethnic group in Phan Rang having their own water festival. Exposure settings: f/36, 1/15th, ISO 400, 90mm lens.

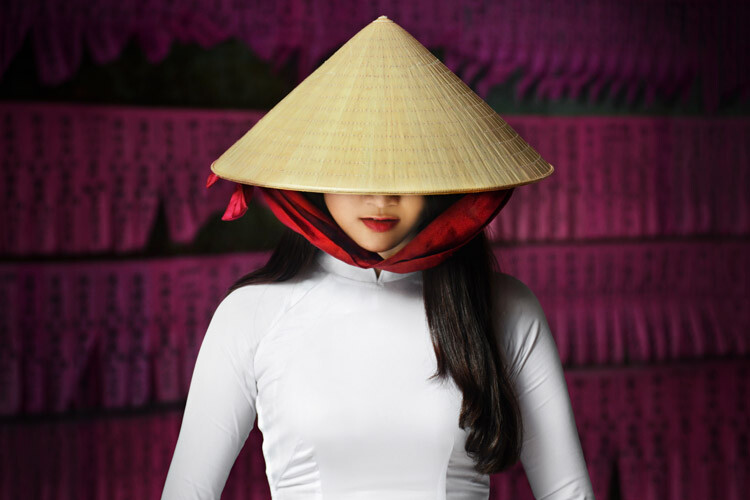
Lady in Conical Hat - Putting the Fine Art into Travel Photography

Vietnamese lady wearing the traditional white “Ao Dai” and Non La (conical hat), Saigon. Exposure settings: f/4, 1/125th, ISO 640, 70mm lens.

Have a vision and shoot with a purpose

In each work, I try to have a vision and understand what the photo will be about and how it will look in my mind before I take it. There is nothing in the frame that shouldn’t be there – everything included serves a purpose.

I also like to look for patterns in the scenes and feature these in the composition. Careful composition allows for clean backgrounds, no unnecessary distractions from the subject, and a clear focal point that is immediately identifiable against a complementary background that helps to tell the story or set the mood for the piece.

Below is some insight into how I approached photographing some of my favorite Vietnam images taken over the last few years.

Forever in Love

Forever in Love - Putting the Fine Art into Travel Photography

“Forever in Love” – A loving couple in Hoi An share a moment of joy and happiness together in their garden as the sun sets. At the time of photography, they had been married for 66 years. Exposure settings: f/7.1, 1/200th, ISO 500, 50mm lens.

I met a fellow travel photographer who now resides in Vietnam, Réhahn Croquevielle, and he generously invited to show me around his hometown of Hoi An. I was lucky to meet a lovely old couple who live in his village. When I met them they were smiling widely and happy be photographed by us.

To take this photo, I first observed the direction of light. Then I made sure to position them in front of the setting sunlight so their faces would be bright and the details on their skin well exposed.

I also had to consider the background and overall scene, and I found an area near one of their vegetable patches which was clean (consistent colors and even patterns without clutter) while also providing context and a backstory for the couple. So I asked them to sit there. They found this all very funny and were laughing constantly as we kept the mood light and fun, which I think is important to help make subjects enjoy a portrait session.

Interesting subject matter is the most important element to a successful photograph, in my opinion, followed by good composition and lighting. But a background that complements and doesn’t distract from the focal point is also crucial for a powerful photograph, and perhaps too often overlooked.

Playing in a Sea of Fishing Nets

Playing in a Sea of Fishing Nets - Playing in a Sea of Fishing Nets

A happy boy playing in a blue sea of fishing nets in the Mekong Delta region of southern Vietnam. Exposure settings: f/8, 1/250th, ISO 500, 24mm lens.

I was in search of a workshop where fishing nets are made by hand in the Mekong Delta region of Vietnam. When I arrived, I noticed a boy and his friends were curious about my presence and wanted to meet me and help out if they could. They led me to the net weaving shop, which was a large open-ended structure with a corrugated tin roof.

Inside were seated ladies spread about busily creating these nets. I was immediately struck by the blue color and knew it would be very photogenic, but it was important to get the right light to make them come to life. I noticed all the ladies were in shaded, darker areas where the light wasn’t strong enough. There was an area that was close to an opening in the rooftop, under a natural skylight. I saw that the light was good there, but without a human subject the photo wouldn’t be so interesting.

Since I had created a rapport with the boy and his friends and they were still hanging around, I encouraged them to play in the fishing nets. Demonstrating myself, I ran and jumped into the nets, making everyone laugh, and the kids started to do the same themselves. I captured this photo knowing that the frame had to be filled with the blue fishing nets to bring attention to the boy. It’s his genuine smile and action that makes this photo all the more interesting and enjoyable to view.

Patterns on the Streets of Hanoi

Patterns on the Streets of Hanoi - Putting the Fine Art into Travel Photography

A busy street scene in Hanoi photographed from a bridge on a rainy morning. Exposure settings: f/14, 1/40th, ISO 1250, 35mm lens.

It was raining one morning that I was to be exploring the city of Hanoi, which could have been considered a problem for photography. I went to the Long Bien Bridge after visiting a nearby market and observed the traffic passing by underneath me. I saw the potential for a really interesting pattern of cyclists with the high volume of motorbike traffic and the occasional bicycle. The rain had stopped, but the wet roads were creating reflections which would ultimately be beneficial and make for more dynamic lighting in the picture.

I waited a long time and photographed many combinations and patterns of commuters. I felt it was important to have an interesting focal point that was different from the rest of the scene. That was either going to be a person walking across the road or riding a bicycle amongst the sea of cars and other traffic.

I decided to use a slightly slower shutter speed to blur the traffic and capture the human subject sharper than the surroundings. It took a lot of patience and time on the bridge to finally capture an interesting pattern. It was fun to find the art in simple, everyday life.

Old Man with a Lute

Old Man with Lute - Putting the Fine Art into Travel Photography

Exposure settings: f/4, 1/160th, ISO 1000, 70mm lens.

I met this old man in the small idyllic village of Ninh Binh where he was walking by a lake. When he learned that I would like to make his portrait, he invited me into his home close by. We drank some tea and I spent some time together with his family.

Before I photograph someone, I always look around the scene and try to find the right place where I will take their picture, depending on the lighting and the background. I noticed near a window there was strong natural light coming into his otherwise dark home, and I placed a chair in this spot for him to sit. There was enough light on the man to not require a tripod in this position.

I noticed an old lute hanging on the wall. I found out that it was his and he could play, so I asked if he could show me. As he played, I took some pictures, but I noticed that the light would be stronger on his face, which is the main focal point if he were looking out the window. The breeze from the window blew his beard gently to one side, creating some movement in this portrait of an interesting, old and very friendly Vietnamese man who I was privileged to meet and photograph.

Here are a few more example images of my fine art travel photography.

Fisherman at Sunrise

Girl with Blue Eyes

Lady with Fan

Mekong Breakfast

Running and Playing

Salt Harvesters


The post Putting the Fine Art into Travel Photography by David Lazar appeared first on Digital Photography School.


Digital Photography School

 
Comments Off on Putting the Fine Art into Travel Photography

Posted in Photography


The dPS Ultimate Guide to Fine Art Photography

30 Nov

Daring to be Different

One of the contentious topics in the world of photography these days seems to be what exactly is fine art photography. Ultimately it is what the photographer deems it to be, but in the world of art, there is a lot more to it. If you want to get recognition as an artist that uses the medium of photography, then there are certain expectations of what your body of work should be like and how you go about executing it.

Galleries and collectors are not going to collect work or invest in art when there isn’t a lot of consistency within that body of work. One fine art image is not enough to make you a fine art photographer. The work needs to be done with intention, with a direction, and have a consistency over all the images. A style is developed that is recognizable in all the images.

It is important to look at other famous artists, not just photographers, but painters and sculptures, to see how their work has evolved. See how you can do something similar with your photography. Photography is no different to those other mediums and the same definitions that apply to them are also applicable to fine art photography.

Who can be a fine art photographer?

01 leannecole fine art photography

A long exposure that was taken during the day, but the light in the image has been manipulated to make it look like it was taken at a different time.

Anyone can be a fine art photographer; there are no hard and fast rules about it. Though it does demand a fair amount of dedication. There are no rules or special qualifications that a person needs to follow or have before they call themselves a fine art photographer.

Some of the things that help define a fine art photographer

Perhaps the best way to describe how you can be a fine art photographer is to look at how they work. There is a lot more to it than simply creating beautiful images. We can all do that, but an artist works towards something. Their work is done with intention, and they have a direction they are following. Finally, there is a consistency to their work. Let’s take a look at each of these points individually.

Intention

Often when you go out to take photos, you pick a place because you think you might get nice images at that location. That is most likely never going to be a problem for you. But if you want to be considered more of a fine art photographer then you need to go to places that you know will help you create images that will further your work, and build your portfolio. There has to be some intention behind why you photograph things.

2420 leannecole fine art photography

The cityscape that has some differences, but it is quite effective and if I was short of images for an exhibition this one would be included.

For example, a fine art portrait photographer who does images of people in certain scenes, like dark moody beach scenes, is not going to go and take photos of a baby in a park. Well, they might for a friend, but they wouldn’t include that work in their portfolio.

Artists are always trying to take photos that work with what they already have. They go out with the intention of photographing subjects that follow the direction of their work.

Direction

This is a lot like intention, but it means the photographer has direction. If they are taking photos somewhere, they are being directed by their previous work. This helps them to get images that will continue to follow that style.

06 leannecole fine art photography

Before processing.

07 leannecole fine art photography

After processing to give it my signature style.

Consistency

For the same reasons as intention, that same portrait photographer is not going to photograph a baby because it won’t give their workflow any consistency. For a fine art photographer, you need to have work that is fairly consistent and looks like it all belongs together.

That doesn’t mean it has to be the same subject all the time, it can also be a similar processing style. All the images are processed in a similar way so they look consistent when a gallery or investor is looking at the portfolio.

The more consistent you are the more galleries and investors will be interested in your work.

Consistency is important and making sure the images all have the same feel and look is important in creating a body of work.

This is definitely the case. I asked the curator for Stills Gallery in Sydney, Josephine Skinner, about how important it is that there be consistency in a body of work. This is what she had to say:

It’s very important. If an artist were contacting us, I would hope to view a resolved body of work, both conceptually and materially. Of course, we’re used to working with artists as they develop new work for an exhibition, but a cold submission won’t pique my interest unless you establish your capacity to deliver.

What is a body of work and how do you create it?

A body of work is where you have several pieces that show the consistency and intention that was spoken about earlier. When you have a body of work it should have a similar style and look as though one person created it all.

The subject matter should be all the same or very similar. There needs to be a number of images in the body of work so you can have an exhibition. The actual amount will depend on where you are exhibiting and how many are needed.

This is a selection of my work, notice the similar processing style, subject matter, and mood across all the images.

Contact sheet 02

Contact sheet 01

Artist Statement

Whether you want to believe it or not, an artist statement is very important. It doesn’t have to be an essay, but putting what you are trying to achieve with your photography down on paper is a great way to help with those areas that we just discussed; intention, direction, and consistency.

When writing one you want to be clear about why you are doing what you are doing. What is important about it and why you have chosen the medium of photography?

Here is what Josephine had to say about artist statements:

An artist statement is helpful: be brief, clear and use accessible language.

Some statements can waffle on and not make much sense. It is good to sound professional, but it should be concise and leave the audience of your work with a very clear understanding of what you are trying to achieve.

This image was taken with the intention of being able to change the mood and make it look different.

03 leannecole fine art photography

The final image. Many aspects were changed so this image would look like it was taken at night with just one light shining.

Look at some fine art photographers that are practicing now

Have you ever been told that if you want to be a good writer that you should study and read the writing of those in the same field? The same can be said for fine art.

If you want to be an artist then you should study and look at the work of other great artists, in this case, fine art photographers. Though, you should include a wide range of artists as photographers can also learn a lot from painters, drawers, printmakers, and sculptors.

08 leannecole fine art photography

This image of the 12 Apostles doesn’t really belong with most of the work, but it still has the same. The light has been manipulated, so it almost belongs. But, the different subject matter would make mean it would probably not be included in an exhibition.

You really need to look at what your work is and find similar photographers. There is such a large number of photographers working at the moment, that it’s hard for me to tell you who to study. But here is a list of a few fine art photographers to give you a starting point.

  • Julia Anna Gospordarou
  • Bill Henson
  • Tracey Moffat
  • Cindy Sherman
  • Brook Shaden – artist statement and gallery of work.
  • Andreas Gursky
  • Joel Grimes
  • Art Wolfe
  • Annie Leibovitz

What is an Artist CV?

15 leannecole fine art photography

A cityscape image before processing.

16 leannecole fine art photography

The final image showing how the light has been changed to create this look.

This is very similar to a work CV (curriculum vitae) or resume. But instead of listing all the jobs you have had, you list everything that galleries and other people in the art world might want to know about you.

They usually start with your education, where you have studied and when. Then you list what solo exhibitions you have had if you have had any. The goal is to end up with a massive list of those. Then you follow those with the group exhibitions in which you have been involved. Then you might add what prizes you have won.

Finally, comes a list of places where your work has been published. For example, if you have had work published in a magazine. You can also include collections and in this section, you will mention if you have sold work to important places like a major public gallery, for instance.

09 leannecole fine art photography

Another image that has the same look and processing, but doesn’t belong. It does belong more than the image of the 12 Apostles though.

Every time you approach a gallery you will be asked for your Artist’s CV. If you don’t have one, it is time to start working on it. They are usually one page.

Here is a link to my CV as an example.

Do you need to study Fine Art at a Tertiary Level?

The simple answer to this is no, you don’t have to study at a tertiary level to be a fine art photographer. But the long answer is that if you do, you will gain a greater understanding of the many aspects of being an artist. The really good places also give you studio space and impose the need to work in that space like a professional artist would.

10 leannecole fine art photography

Another one of the power stations, that could work, but wouldn’t be included in an exhibition.

There are so many other things you learn as well, for example, how to develop your style or your body of work. Or, how to create the consistency we talked about earlier. You begin to understand how the gallery system operates and how to approach them. Often you are given opportunities to exhibit your work so you can get an idea of what it is like. These can help you to get a start on your artist’s CV.

The lecturers are usually artists themselves, so they can guide and mentor you. They understand what you are going through and their advice can be invaluable.

Getting a Bachelor of Fine Art is never a bad thing. Many other artists and galleries will take you more seriously because you have shown a commitment to your practice.

12 leannecole fine art photography

This one is a little different, but it still fits the artist statement.

Where to study it if you so choose

There are places all around the world and where you study will depend on where you live, the cost, and if you are accepted. Look at other artists and see where they studied. Do your research to find out what is available near you. Find out how many graduates of that institution have had successful careers when they finished.

Not all art schools are equal. Some have very good reputations, while others will get you the degree, but not necessarily the prestige. For example, in Melbourne, you can get a Fine Arts Degree from many places, but two are more sought after, University of Melbourne, Faculty VCA, and RMIT University. People take more notice if you have attended and graduated from those schools.

14 leannecole fine art photography

This image appears as though it would work, but since the rest of the images are more cityscapes and not close-ups of anything, it would not be included. If more similar images were made, I may have to reconsider that decision.

Keep in mind that this type of degree will not lead to a paying job, and you are being trained to be an artist. It is expected that you will work at it full-time when you finish. Of course, most artists end up doing other jobs to supplement their income until they are making enough from their art. Though this appears to only happen for a few. Nearly all teach or have other jobs to pay the bills.

I had a lecturer once that told us if we were still doing art and exhibiting our work 10 years after graduation we would make money from it. Unknown if this is true, but it is a nice sentiment.

Visit galleries and see what others exhibit

2220 leannecole fine art photography

This was taken near a marina, but it is too different and I couldn’t make it look like the other images, so it would never be included in an exhibition.

To get a great understanding of what fine art photography is one of the best things you can do is visit art galleries, both public and commercial. You can see how the artist works, look at the consistency and also how the work all looks when it’s put together in an exhibition.

Look for commercial galleries that are exhibiting photography works, or better still find ones that specialize in fine art photography. If you can’t visit them in person, then look on the internet. They all have websites and usually show the works of the artists they represent.

Study the work and the artist. If you find some whose work you really like, pay a lot more attention to them. Find out what motivates the artist, look at their artist CV, and see if you can find an artist statement. That will really help you to understand their intention, direction, and the consistency.

Public galleries often have some of their collection online, but you are usually required to go and look. Don’t be disappointed if the photography section if very small, other artworks often get more wall space. You can look for galleries that specialize in photography, for example in Victoria, Australia there is a place called Centre for Contemporary Photography and that is all they show. It’s a great way to see what other photographers are doing.

18 leannecole fine art photography

Like the ocean image, this has the same look and feel, but the subject matter doesn’t match.

Here are a few others:

  • International Center of Photography in New York City
  • A Gallery for Fine Photography in New Orleans – they carry prints by many famous and iconic photographers including Ansel Adams, Julia Margaret Cameron, Henri Cartier-Bresson, W. Eugene Smith, Edward Steichen, Elliott Erwitt, and many others.
  • Center for Creative Photography in Tucson, Arizona. They house a large collection of photography archives including many of Ansel Adams original negatives.
  • Maison Européenne de la Photographie in Paris dedicated entirely to photography.
  • Torch Gallery in Amsterdam
  • Galleria Carla Sozzani in Milan
  • Magnum Photos and Gallery – they represent several iconic photographers’ work and have a gallery in Paris, as well as events in many cities worldwide and a great online gallery for viewing.
  • The Photographers’ Gallery in London, England.
  • Camera Work in Berlin.

Study about all art, its history and what is happening now

Part of being an artist is keeping yourself informed. As previously stated, you should be going to galleries and seeing other exhibitions. It is so important to read and study other artists. It can help you understand what their lives were like and what drove them to create their art.

It is also good to keep up to date with what is happening in the world of art. Who is winning awards, what work is really popular right now, and how you could fit in. Look at who is being exhibited and which galleries are showing their work.

Look at painters, sculptures, and other mediums

Don’t limit your photography study to just photographers. You should also look at painters, sculptures, printmakers, and drawers. You can learn a lot from them as well.

Rembrandt lighting is a type of lighting pattern that portrait photographers strive to create. It involves a triangular spot of light on the cheek of the portrait subject. Photographers have been trying to replicate that style for years, but it came from a painter – Rembrandt.

13 leannecole fine art photography

The image is similar, but it probably wouldn’t be included in an exhibition. It doesn’t quite fit.

In some ways, painters were our earliest photographers as they tried to paint what they saw. Looking at their work is very important. You can learn a lot about subject-matter and more importantly, about composition. For those artists, the composition was key and they would have spent a great deal of time working on that element of their craft. Study how they put their paintings together and learn.

Sculptors create compositions and often work conceptually. If you are interested in conceptual photography then looking at how these artists work can help you find direction. See what lengths they go to in creating their sculptures.

Living an artist’s life and what that means

There is a myth that many creatives were “suffering artists”. That to be an artist you had to be in some kind of struggle. The other myth is about being the “starving artist”, so if you are going to be an artist you have to also be very poor.

An image that would be part of the body of work. It follows the theme of the rest of the images.

The first is a myth, you don’t have to be on some internal struggle to be an artist. It has been said that you have to go through disasters in your own life in order to help you create masterpieces. It isn’t true, of course. Very normal people create the most amazing artworks. There is a lot more to it than some emotional suffering.

In the past, many artists were starving. Even in today’s world, making money as an artist is incredibly hard. There are more people wanting to be artists than there are people wanting to buy the work. The reference to starving was more to do with making no money and not having enough to buy food.

The reality is that most artists live very normal lives. They often work part-time jobs to survive and live in ordinary houses. They are often very normal people. There are some eccentric artists, but they are more the exception to the rule. Many have studios and workspaces, and every free moment they get, they work in their art practice.

11 leannecole fine art photography

A cityscape that would work in an exhibition, it has the same feeling as the others.

Exhibiting your work

There are various different kinds of galleries and if you want to exhibit your work then you need to start studying them. Find out which ones are the best for you to approach first of the several different types (large public and private).
First, you need to find out what the galleries are looking for. Once again, Josephine has some advice for those wanting to approach galleries:

The first piece of advice I would have is to do proper research into which galleries you approach and be selective with those you do. We get submissions from painters, for instance, who haven’t even looked on our website to find out we exhibit photomedia and video. In the process of narrowing it down, bear in mind that if a gallery has an emphasis on photomedia that doesn’t mean that all forms of photography will fit with their broader aesthetic and focus. Also, be conscious that each artist brings something unique to a gallery so diversity is desired – they probably won’t want someone whose practice mirrors an existing represented artist. Lastly, each gallery has a different policy for receiving submissions, so a good idea is to call and ask what they prefer. Don’t just show up and expect to sit down with the Director!

17 leannecole fine art photography

A cityscape taken from an observation deck. While it is a cityscape it also would not be included. It really does not have the same look at the others.

That is great advice and a good idea for all artists. Do your research and study the galleries you are interested in to see if they are a good fit for you. You can also ask questions to see what they have to say. They will often be more than happy to talk to you about what type of work they are looking for, and how to submit your work.

Josephine has provided some information on how they find new artists:

Our focus is contemporary photomedia and video, so we tend to look at art prizes that are often interdisciplinary, such as the Hatched Graduate exhibition at PICA, and keep an eye on what’s happening in ARI (Artist Run Initiatives) spaces. These platforms provide an initial filter because the work has already undergone a process of competitive selection. Galleries with a more traditional or commercial aesthetic would probably look elsewhere.

Most galleries will have information and guidelines about how to send in proposals for exhibitions; you need to follow those closely. They get a lot of submissions and if you don’t do what they ask then you could be eliminated straight away. Do everything you can to get them to look at your artwork.

Preparing your work to exhibit

2320 leannecole fine art photography

The subject matter fits with much of what the fine art work is about, but it’s the wrong colors and sends a different message than the others.

Having an exhibition of their work is the ultimate goal for most artists. It is where they develop a name and reputation. If you want that too, then you have to make sure your work is good enough to show.

There are so many decisions to be made before you do a show. You have to decide who will print your work and how it will be printed. Part of the reason for exhibiting is to sell your work and if it doesn’t look good then people won’t buy it.

Before the work is sent to be printed you need to make sure that there aren’t any defects in the images. When they are blown up, sensor spots or other unwanted items in your scenes will be enlarged as well. They could end up standing out so much that they take over the image. Magnify the image on your computer (view at 100% or 1:1 size) and look very closely for any mistakes or faults.

20 leannecole fine art photography

Work in an exhibition.

19 leannecole fine art photography

Work that is packaged and ready to be sent to an exhibition.

Find a professional printer who will work with you. Look for one that you can rely on, and who knows their business. They should be able to help you figure out the best way to present your work. There are so many options for photographs these days. You can do canvas prints, put images on fine art paper, and even have them on metal, which is very popular right now.
Then you are faced with the option of framing or not. Most galleries will answer that question for you.

Read my article: How to Prepare a Photography Exhibit of Your Work for more on this topic.

Editioning your work

This is not compulsory, but one thing that many photographers do is edition their work. This means they will only sell a certain number of that image or a limited edition. The artist sets the edition to what they think they might sell.

2520 leannecole fine art photography

A cityscape that is very similar to many I do, but I wouldn’t include this image as it doesn’t have the impact that many of the others do.

For many artists starting out, the number of editions is usually small, around 10 or 20. The more successful an artist becomes, the more expensive the images get, and often the edition number increases as. Some will do editions of up to 200 photos.

For most of us though, especially starting out, it isn’t necessary to do editions. You may only sell one or two copies of an image. As sales pick up and you begin to make a name for yourself it is good to consider putting out editions of your work.

If you die your work will double in price

This is probably the biggest myth out there about fine art photography and art in general. While it is true that when some artists die their work becomes a lot more valuable, it isn’t the same for everyone. If the artist had a successful career and was being collected by a lot of people then there is some truth in this.

2120 leannecole fine art photography

Image with similar colors and a long exposure, but it is not an image I would include in an exhibition.

When they die their work gains in value because it becomes rare. As no new work will be produced, all of their previous work becomes more valuable. That’s all there is, a finite amount, so it will increase in value.

For most artists, our death will only matter to those around us and our artwork will only increase in sentimental value. It’s sad, but you dying likely isn’t going to cause an increase in the value of your work.

Being a fine art photographer

There are many steps you can take that will make you a fine art photographer. There are many different paths and it is up to you to decide which ones you will take. In the end, being an artist is about doing work with intention, having a direction and working consistently.

2620 leannecole fine art photography

This would very definitely be included. The light has been changed and it works with the artist statement.

Artists usually exhibit their work with the idea of gaining a reputation so collectors will purchase it. This, in turn, leads to their work increasing in value and they can sell more. Being an artist is a noble profession and one that dates back hundreds of years, who doesn’t want to belong to that group?

The post The dPS Ultimate Guide to Fine Art Photography by Leanne Cole appeared first on Digital Photography School.


Digital Photography School

 
Comments Off on The dPS Ultimate Guide to Fine Art Photography

Posted in Photography


Luminar – The New Powerhouse for Fine Art Black and White Conversions

14 Nov

I recently embarked on a project of creating black and white images for an upcoming exhibit at an art gallery. The images have been shot, now the only question that remains is how will I handle the post-processing. In years past I’ve relied heavily on Lightroom and also Nik Silver Efex (yep remember that program). I have found, however, that the black and white conversions and looks created by the Nik Collection are starting to get a little dated.

It was very trendy some years ago to process in Silver Efex, but now that Google is no longer updating the program I find that the presets are not working as well for creating looks that appeal to today’s art buyers.

Luminar - The New Powerhouse for Fine Art Black and White Conversions

One of the images in the collection. I used Lightroom for some initial adjustments then used Luminar as a plugin to finish off the editing.

So I decided to process my images using Luminar by Macphun. I was already familiar with the program and the easy to use interface, so I thought I would push myself a little further and edit these images looking specifically to process for black and white.

Preset Black and White Workspace

One of the first things to be aware of is that Luminar offers a Black and White specific workspace. By clicking on the workspace tab, you will bring up a variety of tools that will help you to process for black and white conversions.

The workspace includes some filters like Colour filters, Exposure/Contrast, Highlights/Shadows, as well as Clarity/Detail, and a few others. The Curves filter is nicely constructed in that you can adjust RGB as well as the separate colors with just a simple click of the mouse.

Luminar - The New Powerhouse for Fine Art Black and White Conversions

In this image, you can see that I’ve set the workspace to B&W for black and white conversion.

I was also able to add additional filters to the list and remove others quickly and easily. For the majority of my images, I don’t tend to use textures, so I removed this filter from the workspace. If I were to process another set of images, I might use this filter, but for now, it was easier to remove it. You will notice that once you start adding or removing filters, the workspace becomes a custom setup.

Create your customized Workspace

One of the features that I like about Luminar is the fact that I can create a customized workspace. I am still in the process of tweaking my black and white filters so I can quickly and easily choose a specific workspace with which to start. One that will offer me the filters I need for easy black and white conversions aiming at a variety of different looks. For instance, I can create workspaces for grungy black and white conversions as well as ones that would mimic vintage film looks.

So I added filters to the workspace and made a custom set for processing to my tastes. Filters I removed; Texture Overlay, Grain, Soft Glow, Curves, and Vignette. I added the Advanced Contrast filter. You can also collapse any of the filters you aren’t working at the moment by clicking the little triangle icon just left of the filter name. That will give you more work area and less need to scroll up and down the filters panel.

Adjustment Brushes

Luminar also offers users the opportunity to make specific local adjustments with the Brush and Radial Mask tools. For one specific image, I used the brush to paint in my adjustments to only specific parts of the image. The brush tool creates a mask where you can selectively apply edits to your image.

Read more about this technique here: How to use Filter Masks in Luminar for Powerful Local Adjustments

Here you can see how I am applying the Highlight/Shadow filter only to a select area using the brush and a filter mask.

Workflow

So without further ado, I will take you through the steps I used to edit this image. As you will see, Luminar is a very quick and simple to use program that lets you edit your work in the matter of a few moments.

Step 1 – Presets

I always start by viewing my images in the presets. Who knows, one of them might just work and then my job is done. Luminar has these huge previews of each preset at the bottom of the screen, I find them very useful. This one is called “Bloody Mary”. I like the hint of color it includes but for this upcoming exhibit it won’t fit with the rest of the images so I’ll have to save this effect for later.

Step 2 – Black & White Workspace

Next, I chose the Black and White workspace and then started to adjust the black and white points. I like to make sure that each of my images contains the full range of tones right from pure white to pure black. This is always one of my first steps. I make sure that my histogram touches both the left and right edges. This step is very important as it gives my prints a lot of depth.

Before adjusting the Black and White point sliders. Notice the lack of contrast in the image.

After adjusting the Black and White point sliders. This sets the pure black and pure white in the image and adds contrast.

Step 3 – Color Filters

My next step was to play with the color filters and sliders and see how they would affect the look of the image. Sometimes using a filter makes a specific part of the image pop. For this particular shot, I want to emphasize the bands of light that played across the tree trunk.

To do this click on “Edit” next to the colored circles, and then on the Luminance (brightness) tab. That will allow you to adjust the tones of each color individually. Play with them each to see how they affect your image.

In this image, if I move the red slider all the way to the left, you will see that the tones on the rock get considerably darker. While moving the slider to the left adds light to this part of the shot.

Before adjusting the color sliders.

Red slider to the left darkens any tones in the image that are red.

Red slider to the right lightens red and darkens opposite colors.

Step 4 – Structure

I wanted this shot to be much grittier and defined, so I adjusted the Structure Filter as well. The texture in the bark is important for the effect of the light on the trunk. The structure slider helps emphasize this.

These two shots show the effect Structure has on this image. In this first image, I’ve purposely moved the slider all the way to the left so you can see the effect. The second shot shows the slider moved further to the right. The ridges of the bark become much more defined as I played with this slider.

Structure Slider pulled all the way to the left.

Final toned-down Structure Slider.

Step 5 – Split Toning

For this series of images, I am pairing urban shots with nature shots. All the nature shots, however, were taken somewhere within the city of Toronto. The photos will also contain a slight hint of blue. I love that tone when it’s printed out on my textured fine art paper. I also like to pair this hint of blue with a slightly grey/blue matte when I frame the images for the gallery exhibit. It’s a subtly unique look.

You can see here I’ve exaggerated the saturation to determine if I liked the color. Then, once I had the hue I liked, I toned the colors down to add just a subtle hint of blue to the black and white image. I also adjusted the balance so that the tone of blue will show more in the shadows than in the highlights.

Exaggerated Split Toning Filter to judge the color.

Final Split Toning settings and look.

Step 6 – Final Adjustments

Finally, I added an Advanced Contrast filter. I wanted to give the details within the image some punch and this slider worked beautifully on this image. You can play around with the highlights, mid-tones, and shadows separately. After some adjusting, I shifted the highlight slider further to the right adjusting the effect of the contrast on the tree bark.

Advanced Contrast Filter turned off.

Advanced Contrast filter added.

Conclusion

Well, that’s it, folks. The editing was very quick and simple. The image is complete for now. I always like to leave my work for a few days and then come back to view the image again. A set of fresh eyes always helps in fine-tuning the details.

In closing, Luminar has proved to be a very quick and easy-to-use tool for completing black and white conversions. It offers the same versatility and creative opportunities as other programs and is truly a powerful application.

Before and after comparison. You can use the handy before/after slider to see all the changes you’ve made to your image. Just click the little icon at the top that looks like an open book, and move the slider across your image to see the effects.

Before and after image, side-by-side.

I like the fact that I can use it as both a stand-alone product and a plug-in for Lightroom. The interface is certainly easier to navigate than other programs and I enjoy working in Luminar. That certainly says something as I’m not the type who likes to mess around with post-processing.

Disclaimer: Macphun is a dPS advertising partner.

The post Luminar – The New Powerhouse for Fine Art Black and White Conversions by Erin Fitzgibbon appeared first on Digital Photography School.


Digital Photography School

 
Comments Off on Luminar – The New Powerhouse for Fine Art Black and White Conversions

Posted in Photography


VAST photography collective creates ‘highest resolution fine art photographs ever made’

02 Aug

A group of photographers are working together to take gigapixel photography to the next level, and they’re doing it under a collective called VAST. Founded by photographer and software engineer Dan Piech, the VAST collective combines artistic skills with technical skills to produce high-quality, Fine Art gigapixel photographs.

Unlike typical gigapixel photography, these images feature scenes that are difficult to produce in massively high resolutions, such as photos taken around sunrise and sunset.

Talking about the collective and the work they do, founder Piech said, “We’ve developed a number of new techniques for doing some pretty amazing things that allow us to have the best of both worlds: resolution + aesthetics.”

Whereas common panoramas may involve only a few photos stitched together, these gigapixel photos require creators to assemble hundreds of images, the end result being an incredibly detailed, sharp photo for large printed pieces.

Huge amounts of time and work go into creating gigapixel shots, but the process doesn’t necessarily require expensive rigs.

As explained in a blog post by Ben Pitt, this 7 gigapixel photo of San Francisco was taken using “a normal tripod and an inexpensive ultra-zoom camera [the Panasonic FZ200].” That particular gigapixel photo is composed from 1,229 images captured across 16 rows, each with about 75 images. The shooting alone took more than an hour.

Stitching the images was, in the case of the San Francisco photograph, performed over the course of many hours using the automated and free Windows application ICE, though alternatives are available like GigaPan Stitch and PTgui. Photoshop was tapped for post-processing, used to patch in content from the original images when necessary, among other things. The resulting Photoshop files can be many gigabytes in size.

You can find out more about VAST’s own technique here.

VAST offers prints of these photographs, as well as others spanning categories like Abstract, Cityscapes and B&W. Price depends on the image and size—one example, the ‘Requiem for 2016’ image of New York City shown above, starts at $ 2,745 for a 60 x 21″ print of the 6,410 megapixel image. The full gallery of available prints can be viewed here.

Note: A previous version of this post mistakenly identified Ben Pitt as a VAST photographer. That is not the case.


All photographs courtesy of VAST, and used with permission.

Articles: Digital Photography Review (dpreview.com)

 
Comments Off on VAST photography collective creates ‘highest resolution fine art photographs ever made’

Posted in Uncategorized


24 Fantastic Photos of our Fine Feathered Friends – Birds

23 Jul

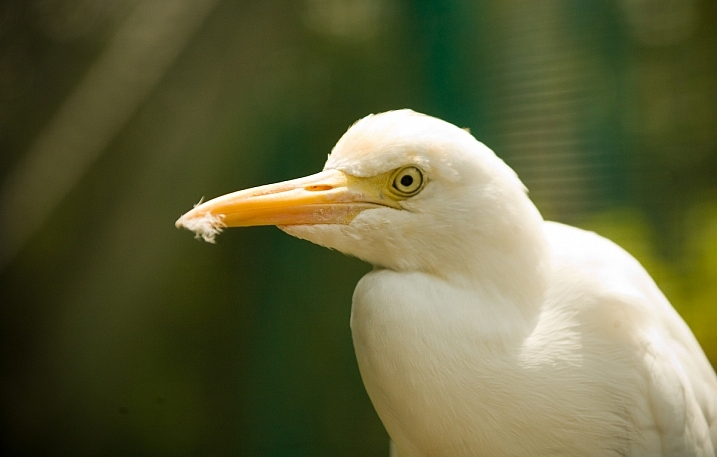
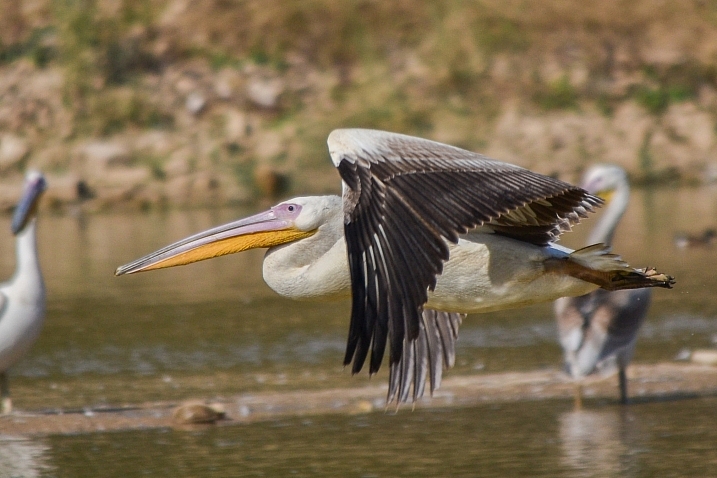
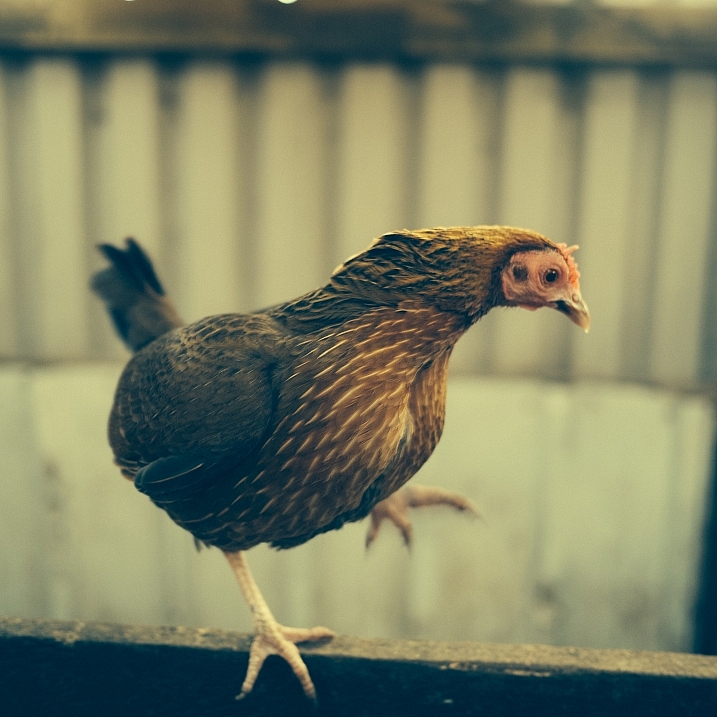
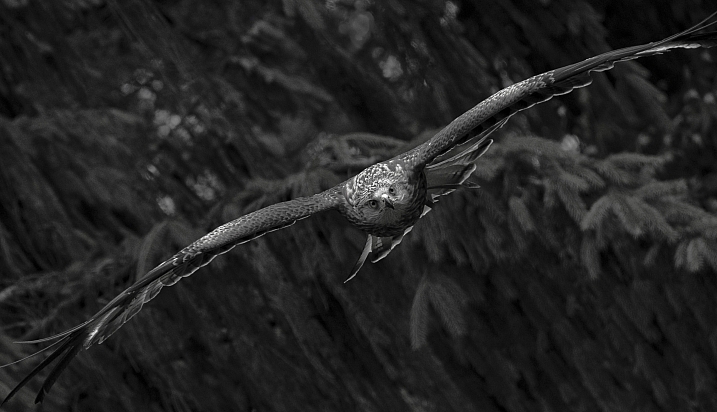
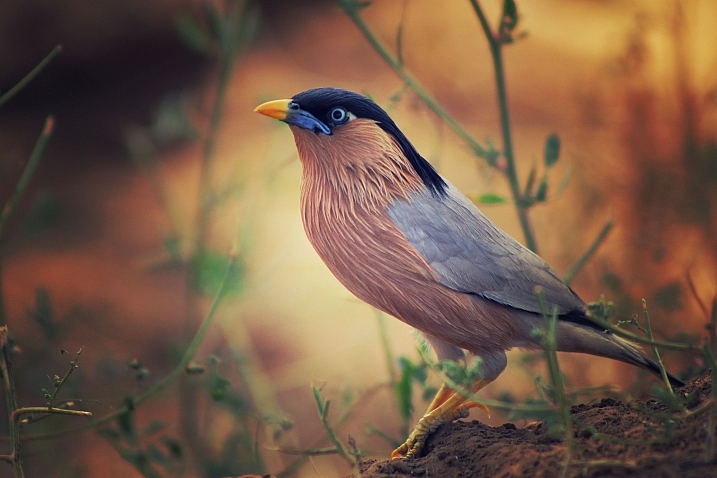
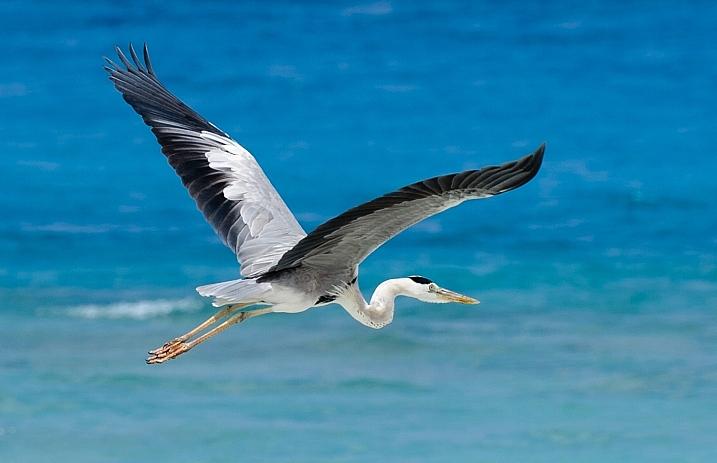
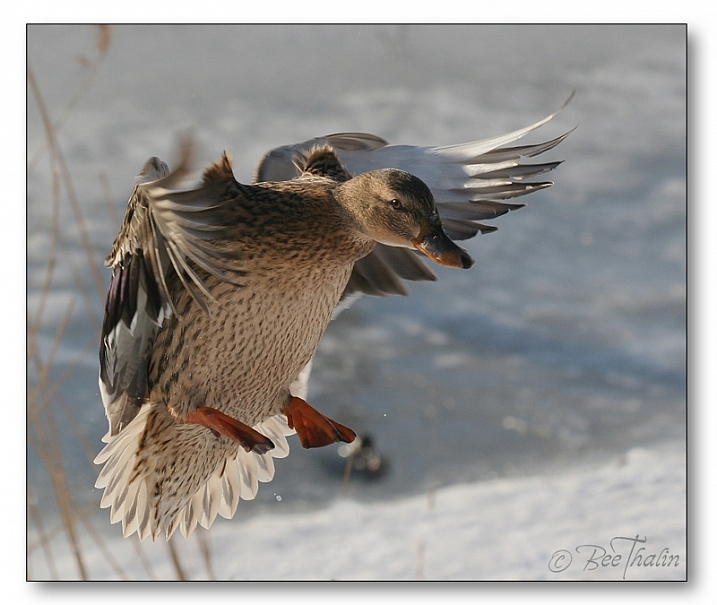
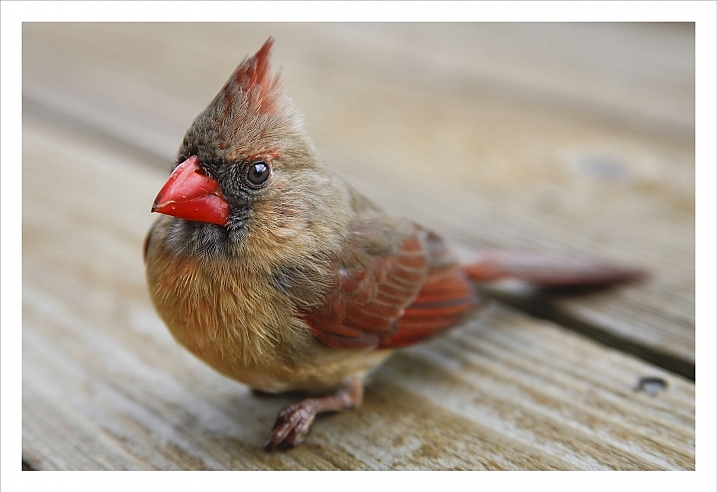
As we just wrapped up a week of nature photography related articles I wanted to round it out with a few images of our feathered friends, the birds.

Birds are incredibly hard to photograph when in motion, luckily some stick to the ground or are slower than others. Let’s see some fantastic examples of bird photography (I’ll even throw in a few of my images) – enjoy!

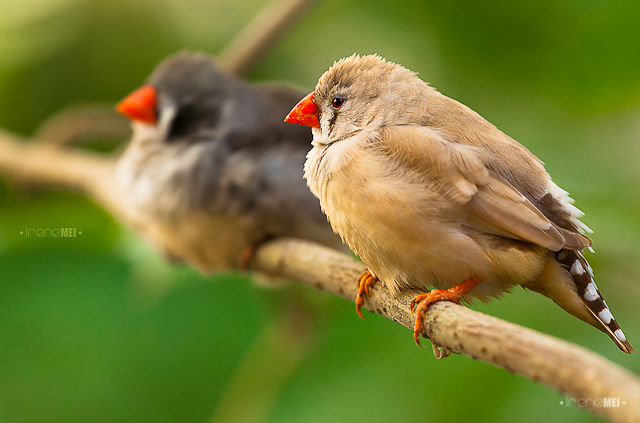
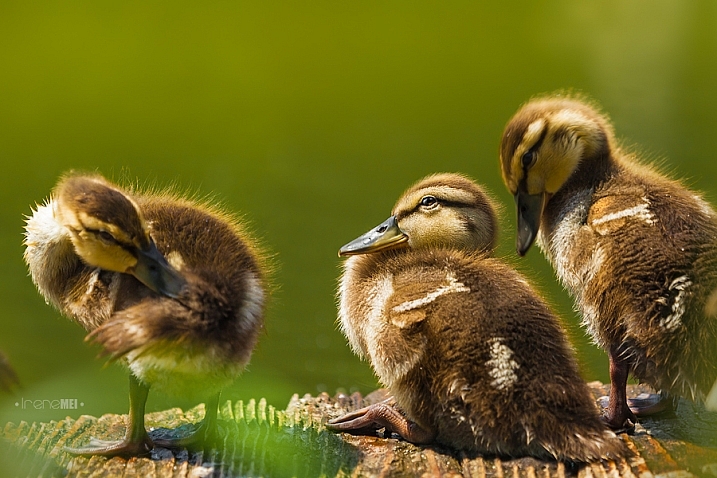
Irene Mei

By Irene Mei

Darlene Hildebrandt

By Darlene Hildebrandt

Darlene Hildebrandt

By Darlene Hildebrandt

Deven Dadbhawala

By Deven Dadbhawala

Amro

By Amro

Glasseyes View

By glasseyes view

Carolyn Lehrke

By Carolyn Lehrke

Sadie Hart

By Sadie Hart

Susanne Nilsson

By Susanne Nilsson

Ken Mattison

By Ken Mattison

Vikramdeep Sidhu

By Vikramdeep Sidhu

Alessandro Caproni

By Alessandro Caproni

Bee Thalin

By Bee Thalin

Rosanne Haaland

By Rosanne Haaland

Zach Stern

By Zach Stern

Christopher Michel

By Christopher Michel

Ian McMorran

By Ian McMorran

Teddy Llovet

By Teddy Llovet

Irene Mei

By Irene Mei

Smudge 9000

By Smudge 9000

Jon Dunne

By Jon Dunne

Matt Knoth

By matt knoth

RayMorris1

By RayMorris1

Daniel Schiersner

By Daniel Schiersner

googletag.cmd.push(function() {
tablet_slots.push( googletag.defineSlot( “/1005424/_dPSv4_tab-all-article-bottom_(300×250)”, [300, 250], “pb-ad-78623” ).addService( googletag.pubads() ) ); } );

googletag.cmd.push(function() {
mobile_slots.push( googletag.defineSlot( “/1005424/_dPSv4_mob-all-article-bottom_(300×250)”, [300, 250], “pb-ad-78158” ).addService( googletag.pubads() ) ); } );

The post 24 Fantastic Photos of our Fine Feathered Friends – Birds by Darlene Hildebrandt appeared first on Digital Photography School.


Digital Photography School

 
Comments Off on 24 Fantastic Photos of our Fine Feathered Friends – Birds

Posted in Photography


The FAA finalizes commerical drone use rules, is fine with your drone photography business

23 Jun

The FAA has finalized a rule regarding commercial use of drones, and the organization is a-okay with individuals profiting from aerial photography – provided that operators follow some guidelines.

The update to Federal Regulations has been available for public comment since February 2015, and has now been finalized to provide guidance for commercial UAS (unmanned aircraft system) use. The guidelines are much the same as when they were first proposed, stating that your drone and everything attached to it must weigh less than 55lb/25kg, and the pilot must remain within line of sight of the aircraft.

Flying over crowds is a no-no, unless everyone in the crowd is participating in the shoot or under a reasonable amount of cover. As initially proposed, drone operators must be at least 16 and have a ‘remote pilot certificate’ or be under direct supervision of someone who has one.

The rule goes into effect in August 2016, so you’ve got plenty of time to study up and get your certificate.

Articles: Digital Photography Review (dpreview.com)

 
Comments Off on The FAA finalizes commerical drone use rules, is fine with your drone photography business

Posted in Uncategorized


Maximum sharpness: Nikon’s automated AF Fine Tune explained

22 Apr

Among the features introduced in Nikon’s new D5 and D500 DSLRs, we’re very excited by automated AF Fine Tune. This feature allows users to quickly fine-tune their specific camera bodies and lenses, maximising the chances of a sharp shot and avoiding the lengthy process of trial-and-error tuning that was previously necessary. Watch our video and read our in-depth analysis.

What’s the problem?

If you’re a DSLR shooter, you may be acutely aware of consistent front or back-focus issues with some of your lenses, particularly fast ones like F1.4 primes. Mirrorless users tend to not have such issues, because their cameras focus using their image sensors. When a mirrorless camera says it’s achieved focus, generally it’s actually in focus. That doesn’t necessarily hold true with DSLRs, which use a secondary phase-detect sensor under the mirror as a sort of proxy for focus at the imaging plane. This makes DSLR focus sensitive to misalignments between the secondary AF module and the image sensor, and also requires calibration of the optics inside the module itself. Furthermore, the way these phase-detect AF modules makes them sensitive to certain lens aberrations, like spherical aberration.

Manufacturers of DSLR bodies and lenses do a lot of calibrations to make sure that this isn’t an issue, calibrating every AF point at the factory, writing look-up tables into lenses, and more. But the reality of tolerances is such that you’ll be best off if you calibrate your particular copy of a lens and your particular copy of a body yourself. That’s what AF Fine Tune, or AF micro-adjustment as Canon calls it, is all about.

State of the current art…

Up until now, this calibration procedure has required cumbersome procedures for accurate calibration. We’d often set a camera up on a tripod and align it to a LensAlign (which has a sighting tool), then have to change the set up to test different subject distances, lighting, or lenses. Some photographers even try to Fine Tune on the spot by trying different values and seeing if a real-world target looks sharper or not – but this method is extremely prone to error. Solutions like FoCal have tried to automate the procedure, but again, the requirement of a chart and a computer is cumbersome.*

… disrupted

Nikon’s new automated AF Fine Tune makes things as easy as child’s play. It uses contrast-detect AF in live view, which focuses using the image sensor and is nearly always accurate, to calibrate its own phase-detect AF system. Watch our video above to get an idea of just how easy it is to calibrate your lenses on the new D5 and D500 cameras.

A couple of things are worth keeping in mind. For some lenses and systems, the optimal calibration value can change for different subject distances. This isn’t necessarily always the case, but you may wish to calibrate for the subject distances you’re most likely to shoot for any particular lens. For a good all-round calibration, we’re told that using a target approximately 40x the focal length away strikes a good balance.

The key here is to play around a bit. Try a couple different distances, a few different runs, and make sure you’re getting a consistent result. Sometimes we’ve found the optimal value to change with lighting temperature, but this sort of thing is precisely why the automated procedure is so valuable: if you’re running into trouble with focus, you can – right at the wedding reception you’re shooting – set the camera on a table, point it at a static object, and calibrate your camera in under 10 seconds. Yeah, we timed ourselves.

The result

Here’s an example of how Fine Tune helped calibrate our Nikon 24/1.8 to our D5. Roll your mouse over the ‘OFF’ and ‘ON’ buttons to see Sam’s eye sharpen up. If you click on the main image, you can see the full image in a separate window, where you’ll notice that the ‘OFF’ shot is front-focused on Sam’s nose, while the ‘ON’ shot is focused correctly on his eye. We placed a single AF point over Sam’s left eye (on camera right) for focus in both cases.

AF Fine Tune OFF
(focused on nose)
AF Fine Tune ON
(focused on eye)

In this case, for this lens paired to this body, automated AF Fine Tune found a value of +14 was best. This indicates that for correct focus, the camera has to shift focus backward an arbitrary 14 units from the focus reading the phase-detect sensor makes. In other words, out of the box, this lens on our D5 front-focuses. If it had back-focused out-of-the-box by a similar amount, we might have expected the automated procedure to find -14 to be the optimal value.

How we’d like to see this feature evolve

AF Fine Tune currently only writes one global value per lens. This means the calibration value can’t be adjusted for either end of a zoom. Furthermore, only the center point can be calibrated – the camera assumes that the calibration at the factory ensures all points are consistent with one another and, importantly, the center point. Finally, as mentioned earlier, sometimes the optimal value can change based on subject distance.

Canon cameras currently at least offer to microadjustment values for either end of a zoom, but don’t offer any sort of automation to help you out. Sigma and Tamron USB docks allow for calibration at either end of the zoom, and for 3 to 4 different subject distance ranges, allowing for a high degree of accuracy of calibration. Unfortunately, entering 4 different subject distance ranges for two ends of a zoom mean the user has to literally set up the camera 8 times, with some sort of test target for accurate assessment – hardly practical for most working photographers.  

The key here is automation: automating opens up a world of opportunities, and automated Fine Tune is an important first step. We’d even imagine a future implementation where calibration data for all focus points is stored and learned from over time. Every time you calibrate a particular point, the camera could retain subject distance information (passed on to it via the lens), and over time learn the best calibration values for each point, for all subject distances, for different temperatures and lighting as well (the latter are often minor concerns).

To sum up…

Nikon’s automated AF Fine Tune is truly one of the most welcome features we’ve seen added to a DSLR in recent times. We’ve wondered for years why camera companies don’t use their contrast-detect AF to self-calibrate their phase-detect systems, instead relegating calibration to a cumbersome end-user experience.

Automated Fine Tune changes all that. It’s a really useful feature that takes a lot of guesswork and cumbersome aspects of calibrating yourself out of the equation, allowing you to do it on the spot, at an event, anywhere, on the fly. In fact, anyone working with shallow depth-of-field imagery should absolutely perform this procedure. Wedding, newborn, portrait, lifestyle, photojournalist, and even sports photographers: take note.


* We really like Reikan FoCal for research purposes though: you get a plethora of data for how a body/lens combination behaves at different subject distances, on different days, under different lighting, and even a map of the optimal calibration value per AF point. Of course, since you can only enter one global adjustment value into your camera, this information is a bit more academic, but if you want to get an idea of the behavior of your system, there’s probably no more comprehensive tool than FoCal.

Articles: Digital Photography Review (dpreview.com)

 
Comments Off on Maximum sharpness: Nikon’s automated AF Fine Tune explained

Posted in Uncategorized


Like Fine Wine – Creativity Gets Better With Age

11 Mar

As a culture we are constantly encouraged to believe that youth is a magical time – that everything is at our fingertips, easily captured, and that age will only bring a withering of possibilities and opportunities.

DPS creativityAnthonyEpes01

“Aging seems to be the only available way to live a long time.” – composer, Daniel-Francois-Esprit Auber

Creativity is a huge victim of this idea – that aging destroys it rather, than helping us to flourish. Well, I don’t believe that at all. Creativity can wither with age – but it doesn’t have to. What about our huge amount of experience that we gather throughout life? Isn’t that pretty useful for creating?

Here are some ideas on the benefits of keeping creative with your photography as you age, and why you can get more creative, not less, as you get older.

Very few of us can tap the creative genius at a young age

When you are taking photos and being creative, you want to aim to access that wild creative place deep inside you, where pure inspiration flows. Some people call it the creative flow state. For some it’s a zone, but it could be thought of as a well of inspiration. But, that can be a hard place to get to – you’re encouraged in so many ways in life to prioritize your practical skills (getting a job, buying a house, raising children, etc.) over your creative skills. Some people can access their inspirational, creative space when they are young, but for many it takes years. But what’s great about that, is that it’s only a question of getting there, not whether or not you have it.

“Every day we slaughter our finest impulses. That is why we get a heartache when we read those lines written by the hand of a master and recognize them as our own, as the tender shoots which we stifled because we lacked the faith to believe in our own powers, our own criterion of truth and beauty. Every man, when he gets quiet, when he becomes desperately honest with himself, is capable of uttering profound truths. We all derive from the same source. there is no mystery about the origin of things. We are all part of creation, all kings, all poets, all musicians; we have only to open up, only to discover what is already there.” – author, Henry Miller

DPS creativityAnthonyEpes02

I don’t remember my youth being a place of unfettered, wild creativity. I was a pretty good photographer, but I wasn’t one of those types of artists who excelled in their twenties (think Rankin, Bob Marley, or JD Salinger). So unless you’re one of those young creative geniuses, I reckon that you could be on the same path as me – my creativity is building, and improving over the years.

Let it give you permission for freedom

But becoming more creative as you age isn’t a given, it’s a choice. As a culture we are more likely to give into the idea that we can’t be as creative with age, as when we were young.

“No, that is a great fallacy; the wisdom of old men. They do not grow wise. They grow careful.” – author, Ernest Hemingway.

But it doesn’t have to be that way. You can use what you’ve learned, and seen throughout life to make you more cautious, or you can allow it to give you permission to ignore your fears, ignore what others tell you about aging, and just choose freedom.

DPS creativityAnthonyEpes03

You are not who you think you are (unless you want to be)

Our brains are amazing at creating stability and continuity, so that we can live day-to-day, almost on auto-pilot. Neuroscientists now say that 95% of who you are (habits, behaviours, beliefs) is set by the age of 35. And 70% of the thoughts you will have today, you also had yesterday! So if you aren’t in the habit of being creative, it might seem a little hopeless.

But – and this is an awesome but – neuroscientists are now also saying that we can change our brains any time we like. So even if you haven’t lived a creative life, and are only turning to it at 40, 60 or 85 – you can quite easily change your brain’s habits. Becoming super creative is completely possible at any age. You don’t have to be stuck in the same place, doing the same things, and being the same way forever.

Creativity keeps your mind young

“There is a fountain of youth: it is your mind, your talents, the creativity you bring to your life and the lives of people you love. When you learn to tap this source, you will truly have defeated age.” – actress, Sophia Loren

Some kind of creative thinking, is an amazing way to keep your mind young. Because as Edward de Bono says, in order to be creative you have to use your mind in a different way than before. Anything you do that is new to your brain, creates new neural pathways, and engages those dusty grey parts that maybe you hadn’t used before.

DPS creativityAnthonyEpes04

Photography is about communicating feelings and experiences

“Photography for me is not looking, it’s feeling. If you can’t feel what you’re looking at, then you’re never going to get others to feel anything when they look at your pictures.” – photojournalist, Don McCullin

What more do we have as humans as we age, than experiences, and a rich storehouse of memories and feelings? Let’s draw from that to inject our photos with more meaning and feeling. Let’s use that experience to connect with our subjects, to go deeper into the myriad of experiences happening all around us every day.

“Photography is a way of feeling, of touching, of loving. What you have caught on film is captured forever… it remembers little things, long after you have forgotten everything.” – photographer, Aaron Siskind

Unshackled from expectation – “The man who views the world at 50, the same as he did at 20, has wasted 30 years of his life.” – boxer, Muhammad Ali

I love that now I am in my forties, I care a lot less about what other people expect of me, and my photography. I can go on my own way, and do the things that really inspire me. And you know what, the more inspired I am, the better my photography turns out – so that’s a double win!

DPS creativityAnthonyEpes05

Age can bring freedom from expectation. Many people mind less about what people think as they get older. Use that. Create not for some specific goal, but just for the sheer joy of it, the wonder of discovering new subjects, the beauty of light, the amazing feeling of walking not to get somewhere, but to just see new things.

“We move what we’re learning from our heads to our hearts through our hands. We are born makers, and creativity is the ultimate act of integration – it is how we fold our experiences into our being.” – professor, PhD, author, Brené Brown

Taking photos energizes your mind

Creativity is an amazingly powerful way to smash through lethargy, and that beautiful French word, ennui (a feeling of listlessness and dissatisfaction arising from a lack of occupation or excitement). Maybe your job is boring, maybe your life is a lot of endless tasks that make you feel a bit sludgy, maybe you’ve retired and are thinking – now what?! Well, what better way to greet lethargy, than to meet it with the scintillating excitement of creating something. We are all born to be creative, it’s in our bones, the very fabric of our being. Maybe we hide it under deep layers of other stuff – but it’s still there, burning like a small ember of inspiration.

DPS creativityAnthonyEpes06

Creativity is a journey, not a destination

Creativity is a liberating experience. It will help you discover new parts of yourself, but also help you see the world in a new and refreshing way. Let it liberate you. Let it fill your life with awe at the beauty, craziness, and amazingness of what lies around us in this world.

You are never too old, too set in your ways, too full of habit to embrace the creative journey. Photography has brought amazing, interesting, challenging and awe-inspiring experiences into my life, which make me feel good to be alive.

“Putting things off is the biggest waste of life: it snatches away each day as it comes, and denies us the present by promising the future.” – Seneca

Whatever you do, don’t let age stop you.

Carpe diem! Because if not now, then when?


googletag.cmd.push(function() {
tablet_slots.push( googletag.defineSlot( “/1005424/_dPSv4_tab-all-article-bottom_(300×250)”, [300, 250], “pb-ad-78623” ).addService( googletag.pubads() ) ); } );

googletag.cmd.push(function() {
mobile_slots.push( googletag.defineSlot( “/1005424/_dPSv4_mob-all-article-bottom_(300×250)”, [300, 250], “pb-ad-78158” ).addService( googletag.pubads() ) ); } );

The post Like Fine Wine – Creativity Gets Better With Age by Anthony Epes appeared first on Digital Photography School.


Digital Photography School

 
Comments Off on Like Fine Wine – Creativity Gets Better With Age

Posted in Photography