RSS
 

Posts Tagged ‘Field’

Review and Field Test of G-Technology G-Drive ev ATC Portable Hard Drives

18 Sep

As photographers, keeping our data safe is of the utmost importance. Being able to trust your hard drives to work and survive all types of conditions and hardships is something to consider. As a wildlife photographer, I often find myself out in the elements, and when traveling, my gear has to put up with the rugged nature of travel, while still being ready to work when called upon. Recently I have been putting the G-Technology G-Drive ev ATC hard drives through their paces and I think these might just be one of the best rugged and solid ways to keep data safe on the move.

Review G Technology G Drive ev ATC Portable Hard Drive

G-Drive ev ATC hard drive features

The ATC is part of the G-technology ev series, a set of drives offering a simple workflow from the field to the studio. The ATC builds upon the standard RaW and ev drives by adding a polycarbonate protective shell to the main drive offering protection from bumps, dust, sand and even full submergence in water to keep your drive and data safe.

The case itself is solid – the simple blue and black design that is stylish and bright enough to easily find in dark conditions. The polycarbonate shell feels very solid in the hand and fits the drive like a glove. It seals closed with a latch system that might seem flimsy, but offers a solid click and seal to ensure the drive is closed off from the elements.

G-Drive ev ATC hard drives - The G drive inside the ATC case

G-Drive ev ATC hard drives Locking mechanism for waterproof closure

The G-Drive ev ATC comes in two varieties, offering Thunderbolt or USB-3 connections for your chosen device. The cords are built into the case itself so you don’t need to worry about forgetting them, a really well thought out design. Of course, the case adds an extra amount of bulk to the setup that might be a problem for those photographers wanting to keep things as small as possible, but personally, I think the extra size is a worthy trade off for the added protection.

Testing the drives during travel

Testing the drives out, they have accompanied me on a few international trips, coming as my primary and backup drives for work in the Falklands, Canada, and Finland. On each trip I have worked with two drives, keeping one as a primary and the other as secondary backup. The fast data transfer speeds were great, 1GB of data transferred in less than a minute over USB-3 meaning backups were swift and simple.

On returning flights keeping data separate is important (in case of a lost bag) and I had no worries about packing one of these with the G-Drive ev ATC hard drives into my checked baggage, knowing the solid construction would keep it protected from any rough handling from the dreaded baggage handlers! On all of my trips, the hold drive never skipped a beat, being ready to upload as soon as I got home to my office.

G-Drive ev ATC hard drives Using the internal drive with the EV docking station

The drive easily pops out and can be inserted into the G-Dock for easy file transfer back home.

In the office the workflow is simple. Popping the drives out of the housing I can easily slot them into the Ev docking station (called G-Dock) that gives me Thunderbolt speeds to upload images directly to my main drives for editing, backup and archiving. The ease of being able to just slot in one drive saves faffing around with multiple SD and CF cards again, keeping my workflow streamlined.

Extreme testing

To further test the drives I wanted to put them through the mill so I decided to rough them up with some real world testing. Grabbing one of the drives in the ATC case I took it out onto location and basically treated it like I didn’t care it was full of precious data. Dropping it onto the ground, into muddy puddles and even throwing it into my local river before rescuing it again down stream.

G-Drive ev ATC hard drives Tested in the dirt and mud without a hitch

Each test was passed with flying colors and even after fully submerging the drive underwater with my hand for a minute, it was in perfect working order. Of course, one problem with the drive is that you do need to check that everything is latched down. Human error, not fully closing the latch or getting something stuck into the gasket could compromise the waterproofing and seal, so it’s best to always be careful. I mean I doubt too many of us regularly throw our drives in a river intentionally…

G-Drive ev ATC hard drives Underwater isnt a problem for the ATC

As a drive, they are built solidly, but one area that I feel would be a great improvement is the use of SSDs rather than normal disk drives. Including an SSD would just add another level to the rugged nature of the drives making them even more durable for life on the road, while also giving faster transfer speeds. This would be especially useful for those editing and working with video files on the move as well.

As a photographer, G-Drive ev ATC hard drives suit my needs very well. The large 1TB hard drive easily has enough storage for a long photo shoot on location and with the protective shell offering great durability to my drives I am sure they will be part of my workflow for many years to come.

The post Review and Field Test of G-Technology G-Drive ev ATC Portable Hard Drives by Tom Mason appeared first on Digital Photography School.


Digital Photography School

 
Comments Off on Review and Field Test of G-Technology G-Drive ev ATC Portable Hard Drives

Posted in Photography


Cones on Poles: Field Guide to Elevated Traffic Cones in Everyday Contexts

11 Aug

[ By WebUrbanist in Art & Installation & Sound. ]

Like some many things in the built environment, once you start noticing cones on poles you will see them everywhere — Cones on Poles, an “unofficial sequel” to The Subconscious Art of Graffiti Removal by Matt McCormick, explores “the strange phenomena of people placing cones on poles and other elevated places.”

What started out as a joke has become a study of adaptive patterns — per Matt, some are “predictable, like a cone being placed atop a bollard that keeps people from backing up into an oil tank,” while “others that are more geo-locative, like a cone on a mailbox or telephone pole in a rural area, set in place to create a sort of landmark.”

Over time, he has started noting and naming different configurations — a cluster of three or more is a “congress” (above) and then, of course, there is the self-evident “triple stack” (below).

“Traffic cones are symbols within a larger semiotic system we’ve created around the driving of automobiles (signifier: traffic cone / signified: hazard),” he explains, “but with cones on poles we see instances of people individualizing that system; the practice of everyday life, as Michel de Certeau puts it.”

Cones, in essence, signal us to be on guard, whether by indicating the presence of a fire hydrant, acting as a beacon for a home or simply (much like street art) making us wonder: what is that there for?

“Like so many of my projects,” says Matt, “this is both tongue-and-cheek yet also serious. It’s fun and goofy, but also part of my larger effort to simply encourage people to pay attention to the natural and built environments around them.” Follow this semi-serious documentary project on Instagram, and check out a trailer for Matt’s latest documentary film below.

Share on Facebook


[ By WebUrbanist in Art & Installation & Sound. ]

[ WebUrbanist | Archives | Galleries | Privacy | TOS ]


WebUrbanist

 
Comments Off on Cones on Poles: Field Guide to Elevated Traffic Cones in Everyday Contexts

Posted in Creativity


Thoughts and Field Test of the Sigma 12-24mm F4 DG HSM Art Lens

31 May

In November 2016, Sigma introduced the world to its widest zoom lens offering to date: the Sigma 12-24mm f/4 DG HSM Art lens. This is actually Sigma’s third version of the 12-24mm DG (full frame) lens, but it is the first to have the “Art” designation and a constant aperture. Previous lens versions share the same focal length but differ in maximum aperture, weight, size, and price.

Priced at $ 1,600, this isn’t the cheapest lens, but it is a steal compared to Canon’s EF 11-24mm f/4L USM, which runs just under $ 2,700. Here are some more details on the Sigma 12-24mm lens and reasons why it may or may not be for you.

Sigma 12-24mm Art Lens

Thoughts and Field Test of the Sigma 12-24mm F4 DG HSM Art Lens

Sigma 12-24mm mounted on a Canon 6D.

Specs of the Sigma 12-24mm

  • 12-24mm focal length
  • Maximum aperture of f/4
  • Minimum focusing of 0.24 m (9.45″)
  • Available in Canon EF, Nikon F (FX) and Sigma mounts
  • Ring-type hypersonic motor
  • Item dimensions of 3.3 x 4.7 x 3.3 inches
  • Item weight of 1.5 lbs
  • Weather sealing, dust and splash proof
  • Comes with a solid lens cap and a zippered carrying case with shoulder strap
Sigma 12-24mm Art Lens

A phenomenal lens for architecture and interiors. Shot at 12mm.

Pros of the Sigma 12-24mm

Solid build quality

The build quality of the Sigma 12-24mm is impeccable. Constructed mostly of metal and glass, this is a solid and rather heavy lens. It takes up quite a bit of space in your bag and can make it difficult to travel with (more on that below). On the plus side, I would expect it to hold up well over time. Also, it is dust and splash proof as well as being weather sealed.

Thoughts and Field Test of the Sigma 12-24mm F4 DG HSM Art Lens

Excellent distortion control

Ultra-wide angle lenses often suffer from distortion, where straight lines may appear more curved, and proportions may seem off. This can often be corrected in post-processing. Shots that were taken with my previous wide-angle lens, the Canon 16-35mm f/2.8, often needed quite a bit of Photoshop post-processing to straighten lines and correct distortion. The Sigma 12-24mm, however, does an outstanding job of keeping photo subjects pretty free of distortion, no matter what focal length you’re using.

Sigma 12-24mm Art Lens

Interior image shot at 12mm.

Sigma 12-24mm Art Lens

Same photo subject from above, but shot from a slightly closer angle at 24mm.

Things to consider

Not for everyday shooting situations

Shooting with an ultra-wide angle lens takes a certain eye for composition. Not everything will photograph well at 12mm due to perspective distortion. People, for example, may end up with body parts that appear much larger or longer than they should be when they are photographed at wide focal lengths. Thus, it’s important to manage your expectations with a wide-angle lens and realize that not everything will photograph well with it. Generally speaking, ultra-wide angle lenses suit the needs of architecture and landscape photographers. Portrait and product photographers, not so much.

Thoughts and Field Test of the Sigma 12-24mm F4 DG HSM Art Lens

Not a great image due to poor composition and distortion of shooting at 12mm.

Sigma 12-24mm Art Lens

With better composition and positioning, 12mm can work in certain situations, like landscape or cityscape photos.

Curved front lens element

The Sigma 12-24mm f/4 has a bulbous, curved front lens element that makes it impossible to use standard, threaded filters. This might be a hindrance to landscape photographers needing to use circular polarizers and neutral density filters, or the average photographer who likes to stick a UV filter on for added lens protection. There are other filter solutions such as slip-in rear gel filters, but those can be quite large and cumbersome to deal with.

Heavy lens

While a solid lens is great in terms of being reliably built, the weight and bulk of this lens are undeniable. Combined with the aforementioned con of not being able to add a protective filter to the glass, the Sigma 12-24mm becomes very unfriendly as a travel lens. If you do travel with it, you’d need to be extremely careful to avoid damaging the glass.

Thoughts and Field Test of the Sigma 12-24mm F4 DG HSM Art Lens

Other Lens Options

Since this is the third iteration of Sigma’s 12-24mm lens, there are two previous models to consider if you are looking for alternatives.

  • Sigma 12-24mm f/4.5-5.6 EX DG HSM lens (version 1)
  • Sigma 12-24mm f/4.5-5.6 DG II HSM lens (version 2)

This Sigma lens is also going up against the Canon EF 11-24mm f/4L USM lens ($ 2699), the Nikon 14-24mm f/2.8G ($ 1899), and Tamron 15-30mm f/2.8 ($ 1199). Focal lengths, apertures, and prices all vary, so it really depends on which features are most important to you.

In Conclusion

In terms of image quality, I found the Sigma 12-24mm to be incredible for shooting architecture and interiors in particular. However, its weight and fragile, bulbous lens make it tricky to travel with.

Would you pull the trigger on investing in this lens? Let me know in the comments below!

The post Thoughts and Field Test of the Sigma 12-24mm F4 DG HSM Art Lens by Suzi Pratt appeared first on Digital Photography School.


Digital Photography School

 
Comments Off on Thoughts and Field Test of the Sigma 12-24mm F4 DG HSM Art Lens

Posted in Photography


How to Use a Neutral Density Filter to Control Depth of Field

28 Apr

If your photography isn’t focused around landscapes, there’s a fair chance you don’t have a set of neutral density filters. These accessories are mainly for landscape photographers as their use in long exposure photography is invaluable. Because they are most associated with slow shutter speeds, their application in other genres, like portrait photography, isn’t immediately apparent. A neutral density filter can, however, be vital to gain control over your depth of field in some situations.

This tutorial will show a quick and dirty tip for two scenarios in which to use ND filters to control the depth of field in your photography; one outdoors in natural light and the other in a studio environment.

What is a Neutral Density filter?

At its most basic, a neutral density filter is a piece of material (usually plastic, resin, or glass depending on the quality) you place between your lens and subject to reduce the amount of light entering your camera. This will result in a slower shutter speed being required, a larger aperture, or a higher ISO in order to achieve the correct exposure. The filters come in different strengths, usually ranging from a loss of one stop to three stops of light. For example; if you are metering an exposure of f/8 at 1/250th and you place a 1-stop ND filter on your lens, to compensate you will need to change either your shutter speed to 1/125th or your aperture to f/5.6.

How to Use a Neutral Density Filter to Control Depth of Field

Neutral density filters are a valuable tool in landscape photography, but they are also useful in other genres.

In terms of photographing landscapes in low light, you can probably see how they are useful. A 2-stop ND filter turns a 2-second exposure into an 8-second exposure. Alternatively, it turns an 8-second exposure into a 32-second exposure. If you’re trying to smooth out water or clouds on a windy day, an ND filter makes it a breeze.

For portraits, however, you will almost never want to reduce the shutter speed. If anything, you will often want to increase it. Why, then, would you want to put something on your lens that reduces the amount of light coming in? The answer is simple – when you have too much light in the first place.

Outdoors

If you’re taking photographs outdoors on a bright sunny day, you may find yourself limited to smaller apertures like f/11 and f/16. This is great for capturing a high amount of detail, not so much if you would like a shallow depth of field.

This is where a neutral density filter comes in. A 2-stop ND filter will turn an aperture of f/8 into f/4. A 3-stop ND filter will make it f/2.8, making it far easier to obscure a cluttered background with a shallow depth of field.

How to Use a Neutral Density Filter to Control Depth of Field

Both of these images were taken moments apart. Left: Shot at f/8 without an ND filter. Right: Shot at f/4 with a 2-stop ND filter.

In the studio

The idea behind using the ND filter in a studio environment is the same as it is outdoors. The main difference is that with natural light, you can always wait until later in the day. With high powered studio lights, that’s not always the case. If you’re aiming for soft light , you need to get your light source in close to your subject. If you have high-powered studio strobes, you may not be able to turn the power down low enough to use large apertures.

Again, a quick solution is to pop a neutral density filter on your lens. By doing so, you don’t have to sacrifice the softness of your light and you gain the benefit of complete control over depth of field.

How to Use a Neutral Density Filter to Control Depth of Field

Taken in a studio environment at f/8

How to Use a Neutral Density Filter to Control Depth of Field

Adding a neutral density filter reduced the aperture to f/4 without changing anything else in the scene.

Bonus round

Chances are that throughout this tutorial, the problem-solving side of your brain has figured out that all of these scenarios have a multitude of other methods to solve them. Outdoors, you could use a diffuser that cuts down exposure, or you could move to an area of open shade where the intensity of the light is reduced. In a studio, it’s often easy enough to move a light backward or to move your subject. Using an ND filter just adds another potential tool, and like most techniques, it is neither a be all or end all, nor is it required. It’s just another option.

That said, what do you do in a situation where you can’t control the intensity of your light and if you were to move it even an inch further away from the subject, everything in the frame would completely change? Same with diffusing it? I ran across this exact situation recently, as illustrated below, and it was a 2-stop ND filter that solved the problem.

How to Use a Neutral Density Filter to Control Depth of Field

Moving the light source in this instance, would have ruined the effect of the lighting. A neutral density filter allowed for a larger aperture while still allowing the camera to be handheld.

That’s it

In the end, if you want to have full control over your camera and the depth of field in your images, then neutral density filters deserve a place in your kit bag even if you never set eyes on a landscape.

The post How to Use a Neutral Density Filter to Control Depth of Field by John McIntire appeared first on Digital Photography School.


Digital Photography School

 
Comments Off on How to Use a Neutral Density Filter to Control Depth of Field

Posted in Photography


MagMod and MagBeam Speedlight Modifiers – Thoughts and Field Test

07 Apr

MagMod made their debut on the photography scene in 2013 with their original speedlight flash modifiers. Recently, they debuted their latest lighting product for photographers, the MagBeam. Functioning as a fresnel lens for your flash, the MagBeam provides a creative boost by easily adding a blast of color or patterns to your images. This article will highlight some of MagMod’s newest products with a special emphasis on the new MagBeam.

What is MagMod?

MagMod (short for MagnetMod) is a company which offers a series of compact, super durable flash modifiers that easily attach to your speedlight flash via ultra strong magnets. The magnets make it super simple to switch out modifiers, or even add color gels without having to pause and interrupt your photo shoot for too long. We first introduced this unique speedlight modifier in a MagMod review awhile back (read it to learn more about the MagGrip, MagGrid, and MagGels).

Since that initial review, MagMod has expanded its product line to include the products below (the MagSphere, MagSnoot, MagBouce, and MagGrip). All of them have a built-in slot for easily adding color-correcting gels.

MagMod and MagBeam Speedlight Modifiers - Thoughts and Field Test

Basic MagMod kit with MagSphere, MagSnoot, MagBouce, MagGrip, and color gels.

MagSphere

MagSphere is an omnidirectional modifier that transforms your speedlight’s harsh flash into a bare-bulb light source by increasing the size of your flash over 250%. Use it like a small bounce card or on-camera diffuser.

The MagSphere

MagMod and MagBeam Speedlight Modifiers - Thoughts and Field Test

Food photo, taken with the MagSphere.

MagBounce

Made from a large piece of silicone, the MagBounce increases the size of your flash by 300%. It delivers incredibly soft light and is akin to having a small softbox that is super easy to setup.

MagMod and MagBeam Speedlight Modifiers - Thoughts and Field Test

A portrait, taken with the MagBounce.

MagSnoot

This unique, collapsible snoot can easily be expanded or contracted to deliver a focused beam of light. MagSnoot is perfect for using as a hair light or highlight in product or portrait photography.

MagMod and MagBeam Speedlight Modifiers - Thoughts and Field Test

Left to right: MagSnoot (collapsed), MagBounce, MagSphere.

MagBeam

If you’ve ever wanted to project a variable spotlight pattern as a photography supplement or background, MagBeam has you covered. This compact system gives you a portable Fresnel spotlight that produces an even light with soft edges and a soft shadow. Since this product is a little more complex that the above-mentioned modifiers, we’ll be doing a deeper dive into its features.

Two main uses of the MagBeam

MagBeam can be paired with one of two different lenses that produce very distinct effects. The MagBeam Tele Lens is used to project a focused beam of light, similar to a spotlight. It also gives you two to three extra stops of usable light. This is handy for wildlife photographers to light subjects in the distance. You might also use this Tele Lens to get a tight, concentrated, beam of light for creative portrait or product photography.

The other option is a MagBeam Wide Lens. Use it in conjunction with custom-made metal disks known as MagMasks and you can create projected light patterns for creative backgrounds or lighting effects. You can also stick MagMod color gels into the MagBeam to add a blast of color.

MagMod and MagBeam Speedlight Modifiers - Thoughts and Field Test

MagMod and MagBeam Speedlight Modifiers - Thoughts and Field Test

Taken with MagBeam, wide fresnel lens, MagMask, and creative color gels.

What’s in the MagBeam Kit box?

The MagBeam can be purchased in several different ways, but the most comprehensive way is to order the whole MagBeam Kit. It comes with the MagBeam itself, a tele lens, wide lens, and MagMask Standard Set. You can add on extra MagMasks as accessories, and load up on colored artistic and creative gels as optional accessories.

MagMod and MagBeam Speedlight Modifiers - Thoughts and Field Test

What’s in the box of the MagBeam kit.

MagBeam in Practice

The MagBeam itself is like a bigger, wider version of the MagSnoot. It’s made of black silicone and can be easily collapsed or extended. When collapsed, the MagBeam is super compact and easy to stick in your camera bag. Using the MagBeam is simple. All you have to do is attach the magnetic end to your speedlight flash via a MagGrip (NOTE: this is not included with the MagBeam you need to buy it separately), then stick a plastic fresnel lens on the wide end.

MagMod and MagBeam Speedlight Modifiers - Thoughts and Field Test

Collapsed MagBeam with a patterned MagMask and red color gel attached on one end. The wide fresnel lens is on the other end.

Speaking of the two Fresnel lenses, they look identical but are actually quite technical, so you must use them correctly to get the right effect. As an example, the wide fresnel lens must be used when the MagBeam is fully collapsed in order to use the included MagMasks (described in detail below) to create a light pattern. It’s not complicated, but you might have to do some experimenting and read some manuals before jumping right in.

Pratt_MagMod MagBeam Review_001

Things to Consider

There is only one possible thing to consider about the MagMod before investing in this system. MagMod magnets that attach to your flash are impressively strong. Once you attach the modifier, it certainly isn’t going to fall off by accident. But sometimes the magnets are a little too strong. I often have to use two hands to carefully pull the MagMod modifiers off to avoid accidentally breaking my flash. I also have to make sure the MagMod units aren’t too close to other magnetic items in my camera bag otherwise, they’ll stick together.

NOTE: If you have any concerns about using magnets next to your electronic equipment this video should answer your concerns. Items they do say to keep away from magnets include: 

  • Older spinning hard drives
  • Credit cards and bank cards
  • Older televisions
  • Speakers
  • Most importantly, pacemakers!

In Conclusion

Overall, I love the MagMod system and always have it in my on-the-go photography kit. In particular, I’ve been using the MagSphere for event photography and the MagBounce as a replacement to my Westcott Rapidbox softbox for food and portrait photography. In both cases, I appreciate how compact the modifiers are. They’re so convenient that I can stash them in my camera bag and simply pull them out whenever I need them.

While the MagBeam took a little more trial and error to figure out, I’ve also been using the wide fresnel lens and gobos to add a splash of color and creativity to my product and food shots.

If you shoot a lot with speedlights and are looking for compact and flexible lighting modifiers to add to your kit, I highly recommend the MagMod system!

The post MagMod and MagBeam Speedlight Modifiers – Thoughts and Field Test by Suzi Pratt appeared first on Digital Photography School.


Digital Photography School

 
Comments Off on MagMod and MagBeam Speedlight Modifiers – Thoughts and Field Test

Posted in Photography


Field Test: The Hasselblad True Zoom Camera and Moto Z Smartphone

09 Mar

It’s impossible to ignore the fact that camera phones are becoming increasingly better. With impressive image quality and the ability to add on and shoot with mobile phone lenses, the case for replacing your dedicated camera with your cell phone is becoming more compelling by the day. However, one aspect of camera phones really hasn’t seen much improvement: ergonomics. Shooting with a camera phone is for some still pretty awkward and difficult to get used to. Here’s where the Hasselblad True Zoom comes into play.

Below are some notes and observations from a week-long experiment of shooting with the Hasselblad True Zoom and Moto Z smartphone.

Field Test: The Hasselblad True Zoom Camera and Moto Z Smartphone

What is the Hasselblad True Zoom?

The Hasselblad True Zoom makes your smartphone feel and function like a point-and-shoot camera. It is one of many Moto Mods available to add extra features to Motorola Moto Z smartphones, so all mods are limited to use on the Moto Z phones only. All Moto Mods attach to the phone via extra strong magnets, and can easily be detached.

To be perfectly honest, the Moto Z smartphones have superb native cameras. The Moto Z Force Droid, in particular, is very impressive and it even outperforms the Apple iPhone 7. This is to say that image quality is great with or without the Hasselblad True Zoom mod, but it is certainly nice to have some of the mod’s extra features.

Field Test: The Hasselblad True Zoom Camera and Moto Z Smartphone

Hasselblad True Zoom Specs

  • Compatible phones: Moto Z Droid, Moto Z Force Droid, Moto Z Play Droid
  • Dimensions / Weight: 152.3 x 72.9 x 9.0 – 15.1 mm / 145g
  • Sensor resolution: 12MP
  • Video resolution: 1080p Full HD at 30fps
  • Sensor size / Pixel size: 1/2.3-inch / 1.55 um
  • Aperture: f/3.5-5.6
  • Zoom: 10x optical/4x digital
  • Flash: Xenon flash
  • Capture modes: Photo, panorama, video, professional, night landscape, night portrait, sports, day landscape, back light portrait
  • Storage Internal phone: 32GB-64GB microSD
  • Price: $ 250
  • Carrying case included

best smartphone photography camera

The good

By far the best part of about the Hasselblad True Zoom is the fact that it allows you to use a phone (somewhat) like a real camera!

Physical camera controls

For those of us who despise having to pinch to zoom on a mobile phone, the Hasselblad True Zoom is a welcome relief. The mod is complete with a physical shutter release button and a physical zoom switch to operate the mod’s 25-250mm-equivalent range. There’s also an on/off button to turn the camera off and on without having to first unlock the phone.

Field Test: The Hasselblad True Zoom Camera and Moto Z Smartphone

Ability to control the camera via a touchscreen

After the mod is attached, the phone’s stock camera app switches over to “Professional mode.” This mode allows for manual camera control via the phone’s touchscreen. While you don’t have true manual control over every aspect of the camera (more on that below), you can adjust certain features such as ISO, capture mode (e.g. Action, Portrait mode, etc.), and choose to shoot in RAW or JPG format.

Field Test: The Hasselblad True Zoom Camera and Moto Z Smartphone

Professional mode options.

Comes with a carrying case

While you can operate your phone as usual even with the mod attached, you’ll probably want to remove it occasionally. Luckily, a solid carrying case with a wrist strap is included so you can keep your mod safe when you aren’t using it.

What could be improved

For every positive feature listed above, there’s an aspect that could be improved.

Limited manual control

Manual camera control on the Hasselblad True Zoom mod is still pretty limited. While it’s nice to be able to adjust the ISO, it’s not possible to adjust aperture or shutter speed. It’s a real shame, considering the native f/3.5-5.6 aperture available.

Field Test: The Hasselblad True Zoom Camera and Moto Z Smartphone

Extra physical features missing

The addition of a physical shutter button and zoom toggle is very welcomed and makes it easier to operate your phone like a true camera. However, two key features are missing.

First is a wrist strap that attaches to either the phone or camera. Considering how expensive the devices are and how bulky they can get, a strap would add a sense of security.

Second is a tripod thread. Since you don’t have full manual control over the camera, many low lighting shots revert to settings with incredibly slow shutter speeds, resulting in blurry images when shot handheld. Also, trying to take advantage of the mod’s 10x zoom feature while also holding the camera steady is incredibly tricky. There are some sample images below that demonstrate these focusing problems. The ability to shoot with a tripod would greatly enhance the resulting images.

Field Test: The Hasselblad True Zoom Camera and Moto Z Smartphone

Size

It’s impossible to ignore the allure of being able to shoot and carry a Hasselblad camera that fits into your pocket. The only problem is this camera won’t quite fit in your pocket unless you’ve got exceptionally large ones. While the bare Moto Z phone is slim enough to be tucked into most pockets, the camera mod adds just enough bulk to make the device difficult to carry. The carrying case is nice for protecting the mod, but it’s an awkward size that won’t fit into most pockets or purses.

Uncertain future

Moto Mods are a brand new concept for Motorola, a company recently taken over by Lenovo. Thus, the future of the Moto Z phone line and Moto Mods as a whole is pretty uncertain. No one knows if the next generation of Moto Z phones will be compatible with the Hasselblad True Zoom, or if the Moto Z line will continue at all. As a result, this can be a risky investment.

In Conclusion

The Hasselblad True Zoom is a step in the right direction for mobile photography. Having physical controls to better control smartphone cameras are welcome additions, but there is certainly room for improvement in future iterations.

What do you think about the idea of the Hasselblad True Zoom? Would you pick one up to try for yourself?

Hasselblad True Zoom Sample Images

The post Field Test: The Hasselblad True Zoom Camera and Moto Z Smartphone by Suzi Pratt appeared first on Digital Photography School.


Digital Photography School

 
Comments Off on Field Test: The Hasselblad True Zoom Camera and Moto Z Smartphone

Posted in Photography


Around the world in 10 videos: 2016 Field Tests

02 Jan
DPReview’s Carey Rose, doing what he does best. Staring at women. In this case, rodeo Queens at a rodeo in Nyssa, Oregon, during a DPReview Field Test of the Canon EOS-1D X Mark II.

DPReview has been around the world in 2016, from the deserts of the Southwest to the lush jungles of Mexico’s Yucatan Peninsular. We’ve used everything from enthusiast compacts to high-end professional DSLRs, and along the way we’ve met some amazing photographers. 

Click here to See our full series of Field Test videos

You can check out the full series at the ^ link ^ right ^ there ^ but in this article, I want to take you back through the ten videos that we’ve published this year, and hopefully in the process, let you share a little in some of the sights, the sounds and the smells of DPReview’s Year in Field Tests. OK, not the smells, but definitely the other things.

Before we continue, I am legally obligated to let you know that all of the videos featured on this page are sponsored content, made possible with the support of Amazon and the manufactures featured in the videos. Click here for more information about DPReview sponsored content.

All clear? OK then – let’s watch some videos!

February: Sony Cyber-shot RX100 IV in the Yucatan

Shot at the end of last year, this Field Test, featuring Sony’s Cyber-shot RX100 IV was one of our most ambitious. Mexico’s Yucatan Peninsular is a beautiful place, full of amazing scenery, vivid history, and corner shops that sell antibiotics over the counter to weak-stomached gringos. 

We took advantage of all of these things during our trip, and as a bonus, you get to see me try to speak Spanish. Just be grateful for what you don’t get to see me doing.

March: Canon PowerShot G5 X on the Olympic Peninsula

Even on a grey weekend in early spring, the Olympic Peninsular is still a stunningly beautiful place. In this video, featuring the Canon PowerShot G5 X, DPReview writer Carey Rose spent a couple of days bro-ing down hard with local photographer and keen fisherman Kyle Johnson.

A little bit of trivia for you – this video actually breaks the world record for most amount of plaid featured in the least amount of screen-time. If you have trouble telling some of the men in this video apart from one another, don’t worry – so do I, and I know all of them.

April: Claire Bangser and the Olympus PEN-F

In April, we headed to Mississippi with the Olympus PEN-F, where Editorial Manager Wenmei Hill joined New Orleans-based photographer Claire Bangser on the Blues Trail. Claire and Wenmei spent a couple of days on the trail, photographing the local sights and people of the area. And yes – they used all the Art Filters. 

May: Shooting stars with the Nikon D810 & D810A

In May, we cast our eyes skywards. In this Field Test, DPReview’s Dale Baskin joined astrophotographer José Francisco Salgado in Death Valley, for a celestial shoot with Nikon’s D810 and D810A. One of the things I like most about this video is the way that José says ‘stars’. It’s hard to explain – you’ll just have to watch it.

May: Building a kayak with the Canon EOS 80D

While Dale was star-gazing in Death Valley, I was closer to home, learning how to make a traditional Greenland-style skin-on-frame kayak, in Seattle. I documented the entire process using the Canon EOS 80D. I’m proud to say that despite the countless mistakes, including several holes drilled in the wrong place, Aril still floats.  

July: DPReview goes to the rodeo with the Canon EOS-1D X Mark II

From slow, methodical action to fast, energetic action. In July, we drove down to Nyssa Oregon, with Canon’s professional flagship DSLR, the EOS-1D X Mark II, to cover the annual ‘Nite Rodeo’. This one is worth watching just for the sight of me and Carey wearing cowboy hats. Quote of the trip, from a rodeo spectator: ‘Y’all sure as hell don’t look like cowboys’. 

September: Shooting Action with the Nikon D5

DPReview’s Technical Editor Rishi Sanyal is a super-nerd. Given a chance, he’ll talk your ear off about everything from signal-to-noise ratio to smart lightbulbs. But what he’s probably most nerdy about is autofocus. In this video, featuring the Nikon D5, Rishi gets to indulge his AF obsession for almost 15 minutes. You’re welcome, Internet.

October: Birds in flight with the Nikon D500

In October, we traveled to Montana with the Nikon D500, to join wildlife photographer and friend to the wolves Ronan Donovan, at a nature reserve. It was a short, packed shoot, the dubious highlight of which was when I got dive-bombed by a hawk.

Fun fact: this is the only DPReview Field Test to feature a moose.

Wedding photography with the Fujifilm X-T2

Guemas Island is a tiny dot on a map of the Pacific Northwest, but it’s one of the most beautiful spots for a daytrip, weekend getaway, or a wedding. In this Field Test, Carey and Wenmei took the Fujifilm X-T2 to Guemas Island to document a very special day. Carey really covered himself in glory on this one, by forgetting to shoot Raw.

Dog Portraits with the Sony a6300

They say that dogs are man’s best friend. They also say you should never work with animals. Who are ‘they’ anyway, and where do they get their sayings? We may never know. In this video, Sam Spencer took Sony’s a6300 to a dog adoption shelter, to shoot some professional portraits of their canine residents. I’ll remember this shoot because it was the closest I’ve ever come to adopting an animal. See if you can spot which dog melted my heart.

Anyway – this video is cute. You should show it to your mum.

Subscribe to DPReview on YouTube, and never miss a new video


All of the videos featured on this page are sponsored content, made possible with the support of Amazon and the manufactures featured in the videos. What does this mean?

Articles: Digital Photography Review (dpreview.com)

 
Comments Off on Around the world in 10 videos: 2016 Field Tests

Posted in Uncategorized


Review and Field Tests of the new Canon 5D Mark IV – Is it Worth Upgrading?

28 Nov

Canon recently announced the new incarnation of its 5D lineup, the Canon 5D Mark IV. I myself have owned the 5D Classic (Mark I), and I currently own the Mark III. Personally, I don’t have any plans to upgrade as I went another way instead, choosing to shift to the Fuji X-series as they are smaller and lighter for traveling. However, I am eyeing the new X-T2!

For those of you considering an upgrade on your Canon camera body, here are some reviews and field tests I found for the 5D Mark IV. Whether you’re going from an APS-C camera up to full frame, or just looking to upgrade from an older 5D model, do your own testing and decide if it’s the right move for you.

The Camera Store Guys

This store is in Calgary, AB, Canada – a mere four hours drive from my city. Not the place you’d expect world class camera reviews to come from – but these guys really do some great tests, in real-world situations and they produce some great videos that are totally impartial. If they find a flaw or sticky bit, they will tell you about it. I like that.

Let’s see what they had to say about the Canon 5D Mark IV:

Hmmm, interesting! Watch to the end where Chris sums up his thoughts on the 5D Mark IV they may surprise you. He’s very honest about it.

PhotoRec TV – Comparison of three cameras

The Canon 5D Mark IV, 5D Mark III and the Sony A7RII

Toby from PhotoRec TV has some notes for you comparing three different cameras including the 5D Mark IV’s predecessor, and the Sony A7RII full frame camera. He talks about what’s new and improved from the Mark III and how it compares to the Sony.

Dphog discusses the new dual-pixel RAW capability

This is a new introduction by Canon, dual-pixel RAW format. What does that mean? Quoted from Canon’s UK site:

Using the Dual Pixel RAW Optimizer in Digital Photo Professional software, users can make use of the Dual Pixel data recorded with the Dual Pixel RAW image for micro-adjustments of the position of maximum sharpness using the depth information contained within the file.

Is it worth it? Would you use this feature?

Pye from SLR Lounge shot a wedding with the Mark IV

Pye has done quite a few articles for us here on dPS, so you may be familiar with him. He took this camera to a wedding shoot and put it to work. He pushed the limits on it in many areas and tested ISO, dynamic range, the new dual-pixel RAW and some of the great new focus features.

Conclusion

So are you considering buying the Canon 5D Mark IV? If so you can price them out here:

  • On Amazon.com
  • On B&H Photo’s site

I would be remiss if I didn’t mention there have been some reported issues with the 5D Mark IV. So do some research and due diligence if you are thinking about buying this camera.

Have you tried one of these cameras out yet? Give us your thoughts in the comments below.

googletag.cmd.push(function() {
tablet_slots.push( googletag.defineSlot( “/1005424/_dPSv4_tab-all-article-bottom_(300×250)”, [300, 250], “pb-ad-78623” ).addService( googletag.pubads() ) ); } );

googletag.cmd.push(function() {
mobile_slots.push( googletag.defineSlot( “/1005424/_dPSv4_mob-all-article-bottom_(300×250)”, [300, 250], “pb-ad-78158” ).addService( googletag.pubads() ) ); } );

The post Review and Field Tests of the new Canon 5D Mark IV – Is it Worth Upgrading? by Darlene Hildebrandt appeared first on Digital Photography School.


Digital Photography School

 
Comments Off on Review and Field Tests of the new Canon 5D Mark IV – Is it Worth Upgrading?

Posted in Photography


Review and Field Test of the New SpiderLight Holster

23 Nov

Since 2010, Spider Holster has produce camera carrying systems which are intended to create a more innovative method for carrying your camera with you while working. Their carry systems are designed to offer a convenient and comfortable way to access your camera quickly while still managing to store it securely within easy reach when not in use.

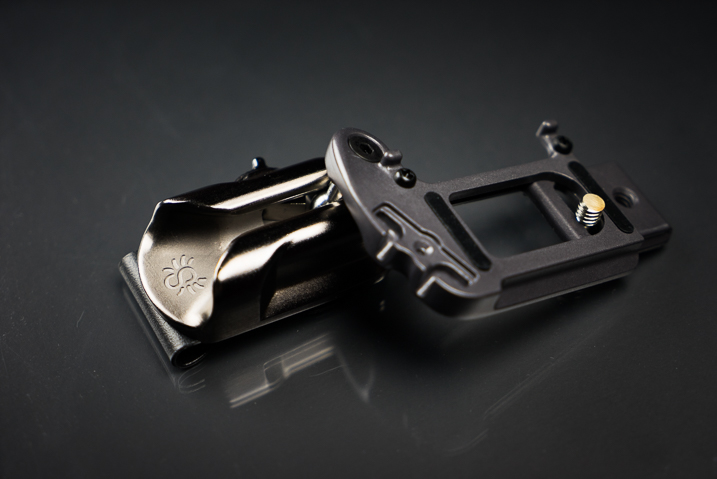
SpiderLight Holster Close Up

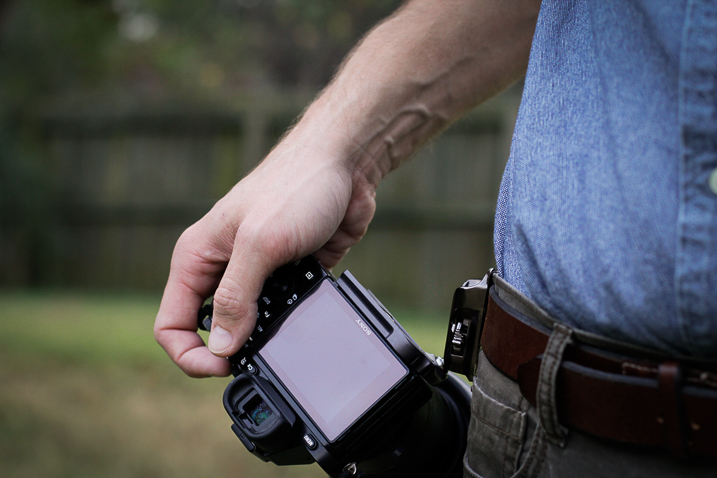
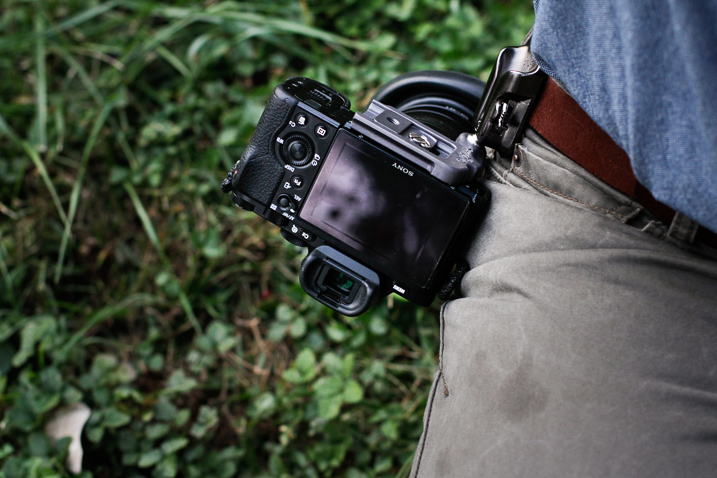
Recently, Spider Holsters has launched a brand new Kickstarter campaign for the latest addition to their line of quick-draw type camera carry systems; the SpiderLight Holster. The SpiderLight is intended specifically for those shooters who carry a mirrorless or smaller SLR camera setup. Being a recent convert to a mirrorless camera system myself, I was excited to try out this newest offering from Spider and see if I would truly “Ditch the strap” in favor of this inventive way of carrying my camera while in the field.

First Impressions of the SpiderLight Holster

My cameras are more like extensions of myself than just pieces of metal and plastic. I love my cameras. So naturally I was, shall we say, somewhat hesitant to place their welfare in the hands of a new type of carry system instead of my heavy-duty leather camera strap. All those fears were genuinely soothed as soon as I handled the SpiderLight Holster for the first time. The product is solid, beefy, and extremely substantial. More so than I expected it to be based on the product photos from Spider Holster’s website.

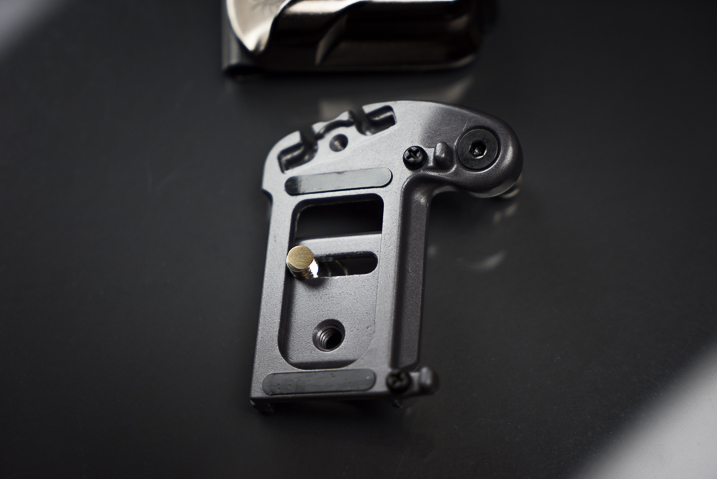
SpiderLight Holster_Plate_2.jpg


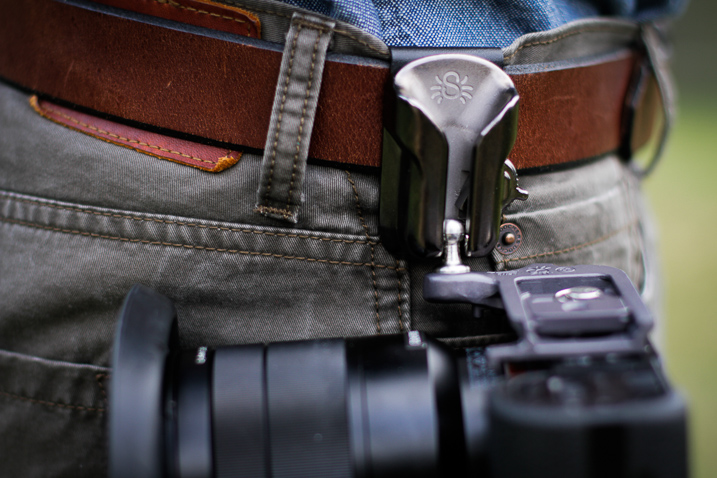
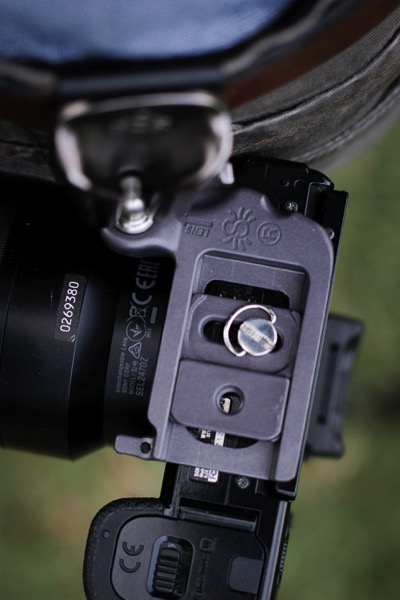
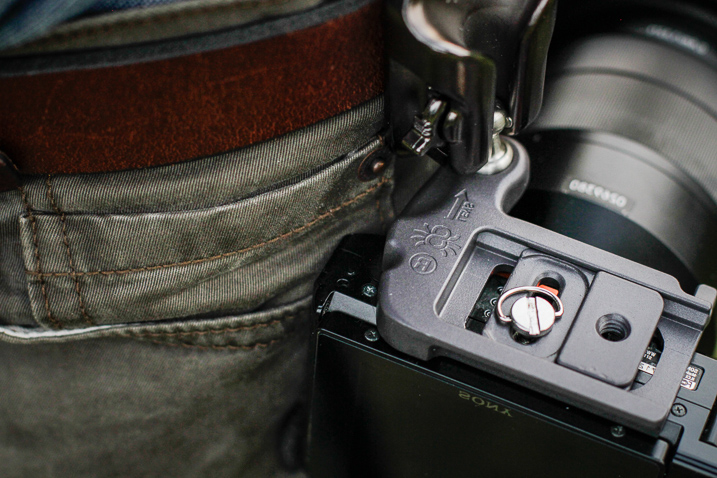
The construction of the SpiderLight is all stainless steel and aluminum, subdued in a professional-looking matte finish. The holster itself is constructed of aluminum with a stainless steel insert to prevent wear with the belt clip on the back, being made from spring steel. The camera plate is crafted from heavy aluminum as well, while the Spider pin (the part that slides into the holster) is CNC machined stainless steel.

SpiderLight Holster Plate

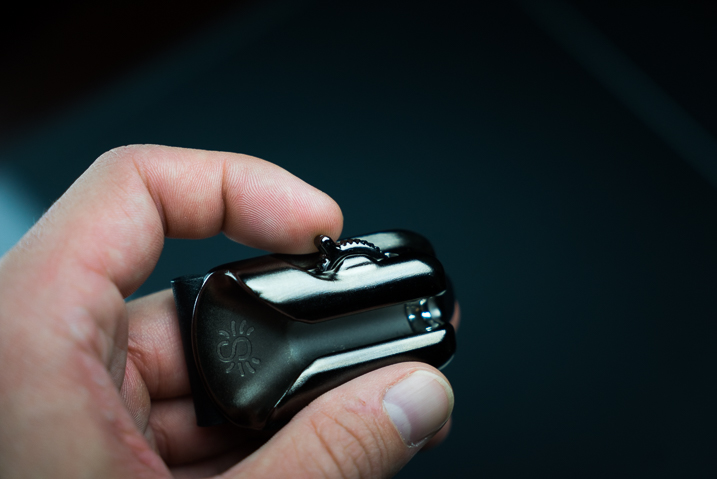
SpiderLight Holster Release

All the screws were tight and the entire mechanism moved smoothly with no burrs or imperfections appearing to be found. Even the markings on the product are etched into the metal instead of being painted onto the surface. The belt clip itself is substantial and provides a heartily robust grip to a wide range of belt widths.

Real World Use

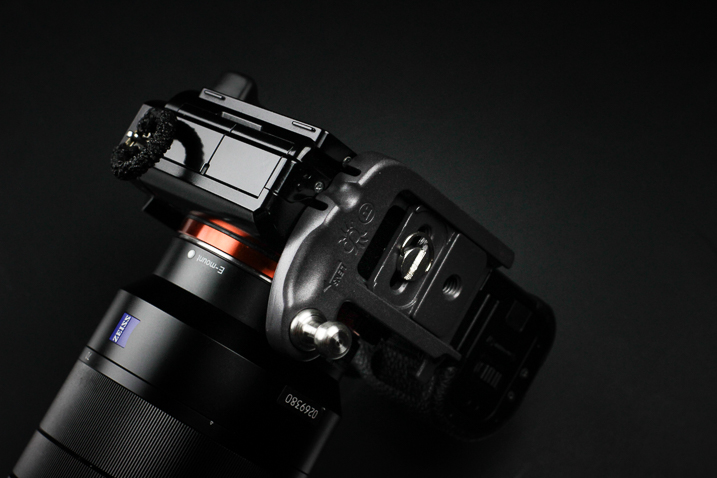
The majority of my work focuses on wilderness and adventure photography with a little bit of everything else thrown into the mix. I spend lots of time in the outdoors chasing light so I was extremely curious to see how well the SpiderLight would perform during hiking and fast movements. I tested the mechanism using my main camera body, the Sony A7r Mk1 fitted with Zeiss Vario-Tessar 24-70mm F4.

SpiderLight Holster 3

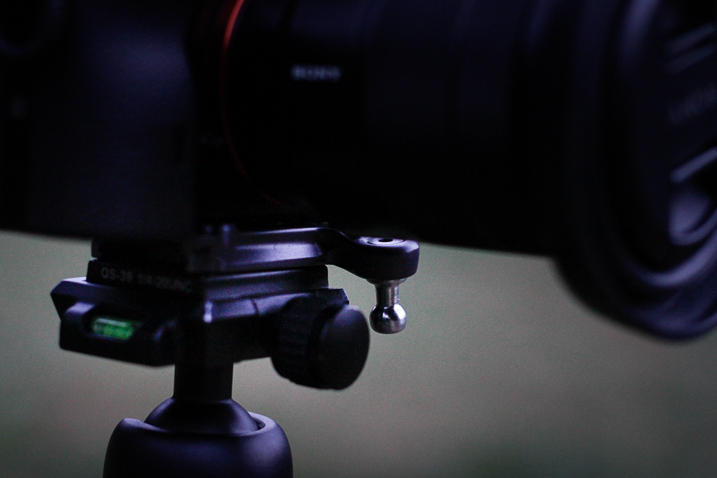
Functionally, the SpiderLight is deceptively simple. There is a steel peg that slides into a groove on the holster in such a way that the camera hangs inverted from the holster. However, looking more closely reveals evidence of some fairly impressive engineering at work.

A well placed two-stage locking switch secures the camera in one of two ways depending on your needs. This switch is invaluable. It locks the camera in place until the user disengages it with a subtle flick. More importantly, it can be completely disengaged to facilitate quick retrieval of your camera.

SpiderLight Holster 4

SpiderLight Holster 5

I was extremely surprised at just how versatile the SpiderLight could be in practice. I walked, jogged, bent down, and did all the epic things photographers do without any real encumbrance caused by the device. The only adversity I encountered was to remember the camera was by my hip when passing through doorways. After a little practice, I completely forgot that I carried the camera at my side. It worked, for lack of a better word, beautifully.

SpiderLight Holster 2

SpiderLight Holster 1

Using a tripod with the SpiderLight Holster

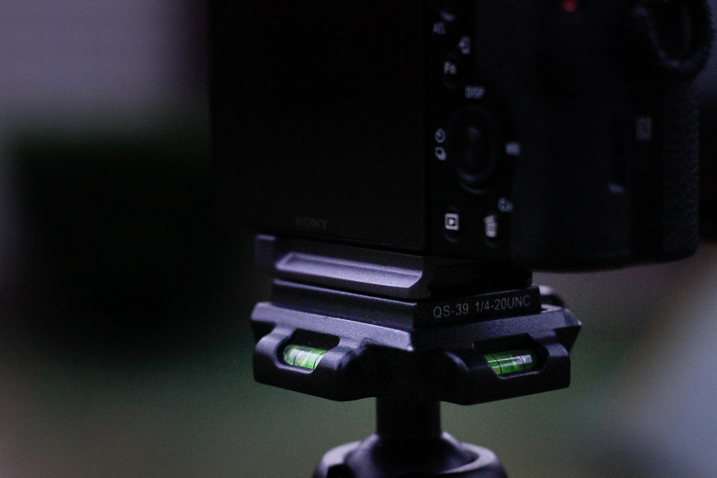
The SpiderLight still allows for the attachment of your own tripod’s quick-release plate, so it does not interfere with your normal workflow if you find yourself shooting with a tripod. It’s not guaranteed that the holster will work with your specific tripod, though. Notice I have to mount mine backward. Still, the function was not hindered in any way by the Spider.

SpiderLight Holster Tripod 1

SpiderLight Holster Tripod 2

One caveat

The only possible reservation I have with the SpiderLight is that even with a lightweight camera kit (Sony A7r and 24-70mm Zeiss) the one-sided weight distribution sometimes sags the pants. I wouldn’t consider wearing the system without a sturdy belt. This wasn’t something that deterred me from using the holster but it is definitely a point of consideration. If you carry a heavier camera I would highly recommend the Spider Holster Pro.

Final Thoughts

The SpiderLight Holster works great for use with a lightweight kit such as mirrorless cameras and smaller DSLRs. From the perspective of a first time user, the SpiderLight performed admirably, in spite of my reservations. The overall build is sturdy enough for heavy-duty use and the complete concept works well. If you are considering the idea of trying the SpiderLight or any other of the products in Spider Holster line you won’t be disappointed.

That being said, give yourself enough time to get to know the holster. Some will love it, some not so much. One of the biggest obstacles I faced was learning to actually trust the holster to securely carry my camera. In my case, breaking 10 years of absolute camera strap reliance takes some time. Still, you never know until you try it and it very well could become your favorite method of carrying your camera.

googletag.cmd.push(function() {
tablet_slots.push( googletag.defineSlot( “/1005424/_dPSv4_tab-all-article-bottom_(300×250)”, [300, 250], “pb-ad-78623” ).addService( googletag.pubads() ) ); } );

googletag.cmd.push(function() {
mobile_slots.push( googletag.defineSlot( “/1005424/_dPSv4_mob-all-article-bottom_(300×250)”, [300, 250], “pb-ad-78158” ).addService( googletag.pubads() ) ); } );

The post Review and Field Test of the New SpiderLight Holster by Adam Welch appeared first on Digital Photography School.


Digital Photography School

 
Comments Off on Review and Field Test of the New SpiderLight Holster

Posted in Photography


Field Test: Wedding Photography with the Fujifilm X-T2

09 Nov

When it comes to special occasions, weddings are about as special as it gets. Special for the couple getting married, of course, but also for their families and guests. And from candid portraits to group shots, to simple details and private moments, weddings provide endless opportunities for creative photography.

For this field test, we’ve brought the Fujifilm X-T2 to Guemes Island to shoot the wedding of our friends Tim and Erin, with DPReview’s Editorial Manager and professional portrait and wedding photographer Wenmei Hill.


This is sponsored content, created in partnership with Fujifilm. What does this mean?

Articles: Digital Photography Review (dpreview.com)

 
Comments Off on Field Test: Wedding Photography with the Fujifilm X-T2

Posted in Uncategorized