RSS
 

Posts Tagged ‘Field’

Shallow Depth of Field: How to Get It in Your Photos (5 Easy Ways)

07 Oct

The post Shallow Depth of Field: How to Get It in Your Photos (5 Easy Ways) appeared first on Digital Photography School. It was authored by Darren Rowse.

shallow depth of field: how to get it in your photos

What is shallow depth of field photography? And how can you create it for beautiful, pro-level effects?

In this article, I’ll share everything you need to know about shallow depth of field, including:

  • What shallow depth of field actually is
  • Why shallow depth of field is useful in photography
  • Five easy ways to create that gorgeous shallow depth of field effect

In fact, here’s my guarantee: By the time you leave, you’ll be a shallow DOF expert.

Sound good? Let’s dive right in, starting with a simple definition:

What is a shallow depth of field in photography?

A shallow depth of field refers to an effect where very little of the image is in focus.

For instance, an image might include an in-focus subject, but have a blurred-out background. This is common in portrait photography (and if you look through this article, you’ll notice that my shallow depth of field examples are all portraits for this very reason!).

A shallow depth of field contrasts with a deep depth of field, where the entire shot, from foreground to background, remains in focus. Deep depth of field effects are common in landscape photography, where detail is a key compositional element.

Why is a shallow depth of field effect important?

Plenty of photographers love shallow depth of field effects – for two big reasons:

  1. A shallow depth of field separates the subject from the background, helping the subject stand out.
  2. A shallow depth of field generally blurs the background, which looks really gorgeous (when done right, that is!).

Often, a shallow depth of field is a stylistic choice, one that certain photographers tend to prefer and other photographers like to avoid.

Here’s a list of genres that gravitate toward shallow DOF effects:

  • Portrait photography
  • Wildlife photography
  • Street photography (sometimes)
  • Fashion photography
  • Product photography (sometimes)

Of course, this list isn’t exhaustive, and regardless, don’t feel hemmed in. If you prefer shallow depth of field but you shoot landscapes, that’s okay – do what you like!

How to get a shallow depth of field effect: 5 techniques

Now let’s take a look at how you can create shallow depth of field effects in your photos:

1. Increase the subject-background distance

It’s one of the easiest ways to achieve a shallow depth of field effect:

Position your subject as far away from any background objects as possible.

If your subject is standing right in front of a wall, it’ll be in focus no matter what you do. But if they’re standing 100 meters in front of that same wall, it’s going to be a lot more blurry. Think of it as giving your background more room to blur.

Quick note: Technically, increasing the distance between the subject and the background doesn’t make the depth of field more shallow. The depth of field remains the same regardless (it depends on other factors that I discuss below).

But bringing your subject forward increases the appearance of a shallow depth of field and gives you a near-equivalent effect.

shallow depth of field photography woman smiling

2. Use your camera’s Portrait mode

These days, most beginner cameras include a little wheel on top with lots of little icons on it – the Mode dial.

And on certain beginner models, the Mode dial will feature Scene modes, such as Landscape, Night, Sports, etc.

Generally, one of these modes is Portrait. And if you’re uncomfortable using more advanced modes (such as Aperture Priority or Manual mode), Portrait mode is a good way to decrease the depth of field; it sets a large aperture (discussed in the next section!), which will make the depth of field smaller.

Now, Portrait mode doesn’t offer any control over your depth of field effect, so I only recommend you use it if you feel completely lost or have no intention of learning basic camera settings.

And if you do want to gain more control, check out the next method of creating shallow depth of field:

3. Widen your lens’s aperture

Every lens includes an aperture – essentially a hole – that widens or narrows depending on your camera’s aperture setting.

And the wider the aperture, the shallower the depth of field.

Portrait mode will automatically widen your aperture. But if you want a greater level of control, I’d recommend using either Aperture Priority mode or Manual mode, which allow you to dial in your preferred aperture (then watch as the background is blurred).

If you’ve never set the aperture before, know that small numbers, such as f/1.8 and f/2.8, correspond to a wide aperture (and hence a shallow depth of field). Large numbers, such as f/16 and f/22, correspond to a narrow aperture (and a deep depth of field).

For ultra-shallow depth of field effects, stick to f/2.8 and wider if possible, though your aperture capabilities will depend on your lens (because all lenses have an aperture maximum).

shallow depth of field photography man with camera

In fact, if you like the idea of adjusting the aperture to achieve the perfect depth of field effect, I highly recommend you put your camera on Aperture Priority mode, find a subject, and test out a handful of different apertures. Then review each photo carefully, paying attention to how the aperture setting affects the depth of field.

4. Use a long lens (and get close to your subject)

The closer you get to your subject, both optically – by using a long lens – and physically – by moving toward your subject – the shallower the depth of field and the better the background blur.

That’s why the best shallow depth of field portraits tend to be taken on an 85mm lens or a 70-200mm lens, not a 50mm or 35mm lens. The longer focal length makes it easier to get close, which in turn decreases the depth of field. Make sense?

However, if you only own a 35mm lens, don’t worry; you can still create a shallow DOF. You simply need to get close to your subject. Yes, it might be a bit uncomfortable if you’re photographing people – you’ll be shooting from right in front of their face! – but the results will be worth it.

By the way, longer lenses have another advantage over shorter lenses:

They compress the background. The actual effect is difficult to explain, but it leads to a smoother background blur and the appearance of a shallow depth of field.

So if possible, shoot your images from up close – and use a long lens, too. (Don’t get crazy with your focal length, though, especially if you’re photographing people; if you go over 200mm or so, you’ll be forced to back up ridiculously far, which can become unmanageable, plus you’ll lose a level of photographer-subject intimacy.)

5. Get a wide-aperture lens

Previously, I explained that a wide aperture leads to outstanding shallow depth of field effects. I also mentioned that some lenses feature a maximum aperture.

So if you’re serious about achieving a shallow depth of field, a lens with a wide aperture (known as a fast lens) is your friend.

Unfortunately, fast lenses tend to be expensive, but they can also be worth the investment. Plus, there are a few fast primes – such as a 50mm f/1.8 – that are optically impressive, capable of beautiful background blur, and are also quite cheap.

(Fast lenses also let you shoot in low light, which is a major bonus.)

By the way, some lenses offer better background blur than others. So before purchasing, I recommend reading reviews of possible lenses (or at least viewing sample images). Good reviewers will discuss background blur (also known as bokeh), and you can determine whether the lens is right for you.

woman on a subway platform portrait shallow DOF

Shallow depth of field: final words

Now that you’ve finished this article, you know all about shallow depth of field and how to create it.

So head out with your camera. See if you can get some beautiful depth of field effects. Try out the methods I’ve suggested.

And have fun!

Now over to you:

Which of these methods is your favorite? Do you have any tips that I missed? Share your thoughts in the comments below!

The post Shallow Depth of Field: How to Get It in Your Photos (5 Easy Ways) appeared first on Digital Photography School. It was authored by Darren Rowse.


Digital Photography School

 
Comments Off on Shallow Depth of Field: How to Get It in Your Photos (5 Easy Ways)

Posted in Photography


Roger Cicala: Understanding field curvature for fun and profit

24 Dec
When deciding which 35mm lens to buy, what do you want to know? How sharp it is? How it handles? How much it costs? I want to know what its field curvature looks like. (Spoiler: the plot on the right is from the little guy.)

I’m not a fan of lens testing purely for the purpose of winning pissing contests. I am, however, a great fan of lens testing for learning how to best use a lens. There are a few tests I find particularly useful, and the single most important one is field curvature.

Field Curvature (in metrology speak MTF v Field v Focus) tells me a lot about how to use a lens. It is also the most complete way to test a lens because it’s three-dimensional. Shooting a brick wall or test chart the way most people do is 2-Dimensional. The 2-D chart test below says the lens is sharp in the center and soft at the edges. How nice.

This is a test image of a lens’ MTF, basically what you’d see shooting a test chart except with color representing sharpness. This one is sharp in the center, really soft at the edges, and a tiny bit softer on one side than the other. But what does that tell you about the lens? Not much.

I’ve spent over a decade developing fast, sensitive optical tests. My gold standard is a modified $ 250,000 optical bench that quickly analyzes field curvature. That test (the graph below) tells me that this lens is actually amazingly sharp at the edges, but that field curvature causes the area of maximum sharpness to be further forward at the edges than at the center. In a 2-D test, the edges look soft because they are out of focus when the center is in focus.

A 3-D (Field curvature) MTF graph. The center focus is along the black horizontal line. The Y axis represents focusing distance, the X axis edge-to-edge sharpness, and the MTF is the color (red is sharpest). So the edges of the lens are very sharp, but not at the same focusing distance as the center.

The 2-D test chart images, like the first graph, are taken right along the black line of best center focus. They show the center is sharp and the edges soft. The 3-D graph shows, the edges are very sharp, but not in the same plane of focus as the center. That’s very, very different than the edges are soft.

Think about that for a second. Photographer #1 gets that lens, knows how to frame with it, and posts about how awesomely sharp the edges are in his photographs, which are 3-D. Photographer #2 buys it, tests it on a 2-D chart and sees the edges suck so he sends it back because it’s supposed to have sharp edges. Again and again.

Inexperienced photographers think a curved field is bad and a flat field good. But a designer may have chosen to let the field curve so the lens has other, wonderful attributes. Not to mention a curved field is a tool that can be useful. Many great portrait lenses are great portrait lenses because of their curved field, for example.

knowing your lens’s field curvature will help you take better pictures

I showed how to check field curvature with just a photo in a previous post. Today I’ll show a slightly different method using a test chart or brick wall. But field curvature isn’t really about better testing; knowing your lens’s field curvature will help you take better pictures.

Take the lens above as an example. I saw a group photo taken with that lens. The photographer positioned everyone in a slight crescent rather than a line because he knew the lens’ field curvature and placed his subjects so they were all in best focus. Someone else (someone without that information) would probably have said the lens was ‘too soft at the edges’ to use in a group shot.

Field Curvature graphs (clockwise from top left) showing overall curvature (this lens doesn’t have much); astigmatism, tangential field, and sagittal field.

A Quick Word About the Graphs

The shape of the field is different for sagittal and tangential rays (the two lower graphs above), which many people don’t realize. Where the fields don’t overlap, there is astigmatism (upper right graph above). The overall curvature (upper left) is what you see at home if you do my not-patented ‘field of grass’ test. Most of the time I’ll just show the sagittal and tangential fields; you can eyeball whether they overlap or not and what the overall curvature would be like.

Testing Field Curvature at Home

If you follow my grass-photo-with-find-edges-filter technique, you get a nice image showing the field curvature. You’ll also know if the field is tilted and if it is, how badly. Here’s the grass test for two copies of the Sigma 24mm f.14 Art, a lens with a bit of field curvature. One copy has tilt problems and it’s pretty easy to see which one.

One copy is good, one is pretty tilted. Can you tell which one is which? I thought that you could. This two-copy test took 60 seconds, was shot hand held, and required no home testing lab.

If you’ve already got a home testing setup and want to put some numbers to your lens, that’s easy, too. First, mount the lens on a tripod and manually focus on your 2-D target of choice: test target, brick wall, treeline, whatever. (If you don’t use a tripod and you don’t manually focus, you should be filled with shame and delete all your test posts because you did NOT test the lens. I never, ever, take a single AF image of a test chart. It’s a waste of time. But you can do the find-edges technique with a hand-held AF shot even if you don’t own a tripod and don’t know how to manually focus.)

Where was I before the rant? Oh, yeah. Take your first image past (distant) to best center focus, then take a series of 6-10 images while manually moving the focus back a bit after each shot until you’ve gone out of focus to the near side.

I never, ever, take a single image of a test chart – it’s a waste of time

Next, you take that set of six or 10 through-focused images, find the one with best center sharpness, the one with best right edge sharpness, and the one with best left edge sharpness. If they are all the same image (it happens sometimes), congratulations – you have a very good lens with a flat field. Most of the time, though, you will get one of three other possibilities:

  • Both edges are sharpest in the same image, and the center is sharpest in another. Which means: The field is curved but not tilted.
  • The edges are sharpest in different images: The field is tilted.
  • One edge never gets as sharp as the other: The lens is optically abnormal.

For example, let’s say you take six images. Images #1 and #6 from the sequence shown below were way out of focus, so I’m only showing you images #2-5. The center is sharpest in image #3, the right edge sharpest in #4, and the left in #5.

What this tells me is that I’ve got a lens with a field that is both curved towards the camera and tilted to the left.

Taking a series of images from far focus (2) through near focus (5) lets you evaluate field curvature and tilt.

Let’s all take just a moment to think about all those threads that started with someone posting just image #3 and asking “do you think this lens is OK??” You’ll see 57 or so responses with no definitive conclusion because the OP didn’t give enough information from which to draw a proper conclusion. If they had done a through-focus test, they probably wouldn’t need to ask the question; the answer would be obvious.

Why Should I Bother?

If the field is badly tilted (scroll back up to the first grass images) you’ll know to exchange it for another copy, or if a little tilted you’ll have that information for framing your shots. I had a favorite landscape lens which had a field that was slightly curved and slightly tilted. It gave me great images, usually with a subject of interest closer and on the left side in sharp focus. It was a great lens for me because I knew how to frame my shots with it and I liked the different look that gave.

If the field is markedly curved, you can use that knowledge to better frame your shots. Or perhaps you’ll decide that this lens isn’t for you. Personally, I often prefer a curved field because it’s a tool I can use, but some people want flat fields all the time. I might choose one lens over another for certain shots because of the field curvature. That lens I showed at the beginning is going to focus the edges closer than the center, for example. It might be great for isolating the subject for center-framed portraits. Or to frame shots so the center point of interest is further away than the edge points of interest. I would prefer a different lens with a flatter field for an architectural shot. You might prefer flat fields for all of your shots, for that matter. I find field curvature a fun tool, but some people are flat lensers.

As an alternative, if the field is really curved, focusing slightly away from center gives an overall sharper image. Here’s an example. The Zeiss 50mm T/1.5 has big-time curvature with the edges towards the camera as shown in the top-half of the image below.

Field curvature of the Zeiss 50mm T1.5 showing that if you place the focus point to the left or right of center you get maximum edge-to-edge sharpness. The calculations show the best off-axis point is 9mm from center (about halfway to the edge) but you could eyeball this pretty accurately.

I love a curved field for just this reason. Center focus can isolate my subject but off-axis focus brings good edge-to-edge sharpness. I get to choose. I love getting to choose.

I have some cool software (bottom half of the image) that tells me exactly where to focus to get the best edge-to-edge sharpness (the black line across the field curvature graph) but you can eyeball your homemade field curvature graph and know where it should go – about halfway to the edge in this case. This can serve as an alternative to stopping down for edge-to-edge sharpness, or let you get edge-to-edge sharpness when stopping down isn’t enough.

The big takeaway is you can often get excellent get excellent edge sharpness in lenses with field curvatures if you know how to use them. Many lenses with flatter fields sacrifice edge sharpness to get flat fields, and you can’t find edge sharpness that just isn’t there.

Do you know the focal length at which your zoom lens has the flattest field, or at which focal length the field curvature changes? That’s useful information, and I want to know this kind of thing for every zoom I carry (pro tip, the flattest field is rarely at the center of the zoom range; it’s often 1/3 of the way from one extreme). Some zooms have massive curve at an extreme, but if you zoom just a few mm away from the extreme the field is much flatter. That’s another useful thing to know.

Very often your 24-70mm is curved one way at 70, while your 70-200mm is curved the another (ditto at 24mm, etc.). Knowing that helps choose which lens best frames the shot. (I should also mention that one zoom is always sharper than the other at 70mm. Of course, I probably should also mention neither one is really 70mm. Most 24-70mm lenses are actually 26-67mm; most 70-200s are about 73mm to 190mm.)

Sagittal field of Canon 70-200mm f/2.8 L III and24-70mm f/4 L IS, both set at 70mm.

The 70-200mm has a very slight curve back towards the camera and is pretty sharp (red) even at the edges at 70mm. The 24-70mm has a more significant curve and is not as sharp at the edges. Depending on what you are shooting, those differences could be important.

At least a few of you, I hope, have read this far and are now interested in field curvature. This article is already long enough, so I’ll stop here for today. For the next article though, I’ll show example field curvatures from various kinds of lenses. To be clear, I’m not going to put out 6,342 field curvature graphs for all the lenses at all the focal lengths. I’m showing you how to fish, not hosting a fish fry.

Since everyone tells me I should click-bait tease the next article, here you go: Next time I’ll show how field curvature explains ‘3-D pop’ and ‘microcontrast’. (Spoiler: No, no I won’t. Field curvature explains a lot of things and is a useful tool, but it’s not magic.)

Until Next Time…

Articles: Digital Photography Review (dpreview.com)

 
Comments Off on Roger Cicala: Understanding field curvature for fun and profit

Posted in Uncategorized


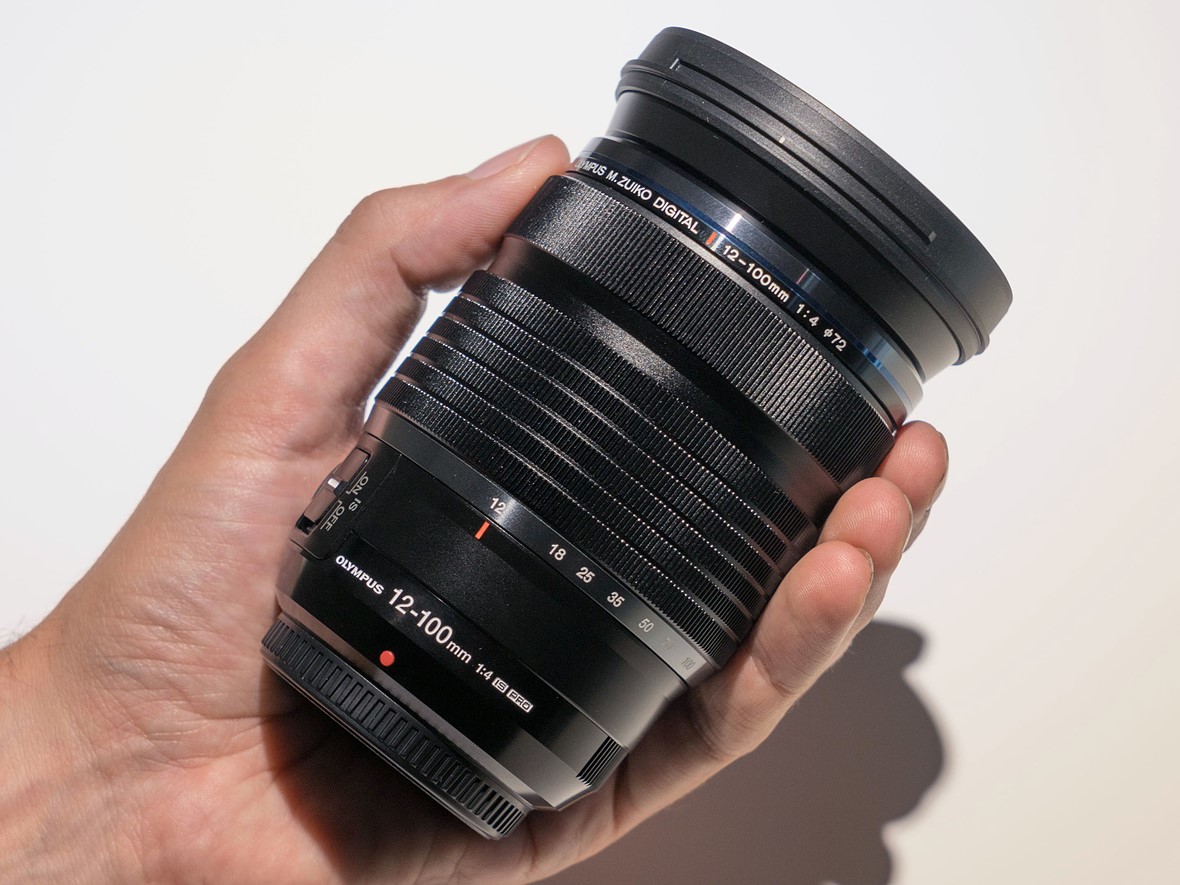
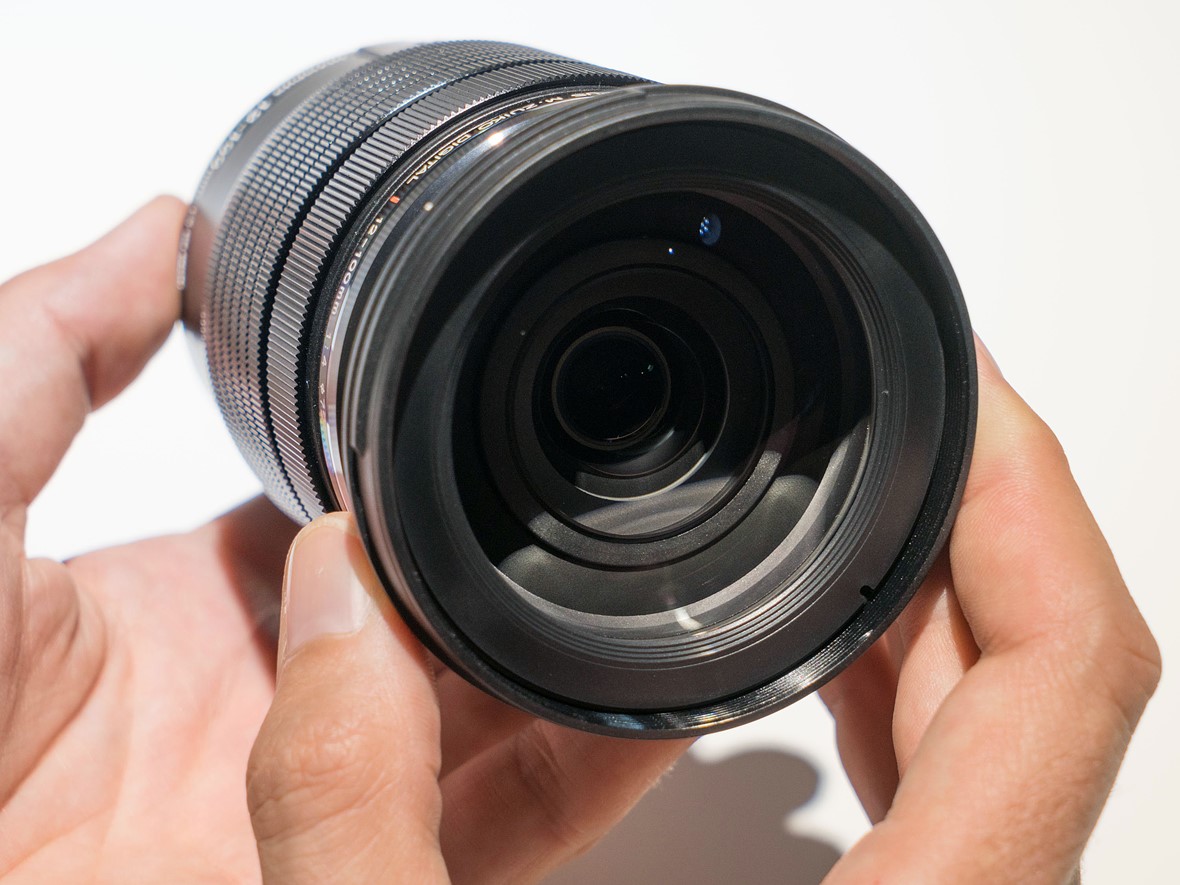
Field review: The Olympus M.Zuiko 12-100mm F4 IS Pro goes to Oz

28 Oct
Silver Award

84%
Overall score

The Olympus 12-100mm F4 IS Pro is a rugged, professional-level zoom lens with a focal length range that can cover almost any everyday situation. It also focuses impressively close, only adding to its versatility. It’s the kind of one-lens solution that might tempt you for travel photography in particular, but these types of lenses often trade convenience for outright image quality – so is that the case here? Let’s find out.


Key specifications:

  • Focal length range: 12-100mm (24-200mm, 35mm equiv.)
  • Stabilization: Up to seven stops with Olympus bodies
  • Filter thread: 72mm
  • Close focus: 1.5cm (0.6″) at 12mm; 27cm (10.6″ at 100mm)
  • Maximum magnification: 0.3x at wide end of zoom (0.6x 35mm equiv.); 0.21x (0.42x 35mm equiv.) at tele end
  • Diaphragm blades: seven
  • Hood: LH-76B (included)
  • Weight: 561g (1.24 lb)
  • Optical construction: 17 elements in 11 groups
The Olympus 12-100mm F4 is pretty much up for anything. Like a good Port Douglas sunrise.
ISO 200 | 1/6400 sec | F4 | 47mm

Back in 2018, which feels more like two decades ago instead of two years, I took the Olympus 12-100mm F4 on a vacation to Australia for three weeks as my main lens alongside a single bright prime. Mounted on an OM-D E-M1 Mark II, it seemed to me to fit the bill of a reasonably sized solution for just about everything I’d want to photograph. Plus, I knew from prior experience that the Olympus kit would stand up to just about anything mother nature could throw at me.

Full disclosure: I organized and paid for this personal trip on my own, and the choice to bring Olympus gear was my own as well.

All images edited in Adobe Camera Raw 13 with adjustments limited to white balance, exposure, highlights, shadows, white and black levels. Sharpening at ACR defaults; noise reduction at 25 luminance, 25 chroma.


Handling and design

The M.Zuiko 12-100mm F4 joins Olympus’ Pro lineup of prime and zoom lenses, offering top-notch build quality, with claims of dust-proof, splash-proof and freeze-proof construction. It has a manual focus clutch mechanism, giving the feel and very nearly the response of a mechanical focus ring, even though it’s technically a focus-by-wire system. The large, metal-ribbed zoom ring has just the right amount of resistance to it.

The manual focus clutch mechanism in its pulled-back position The stabilization switch and customizable L-Fn button

There’s no denying it, hold this lens in your hand and it just oozes quality. Nearly everything is metal, though even the plastic IS switch on the side of the lens doesn’t so much ‘snap’ into place as ‘thunk’.

What you get in exchange for this feeling of solidity, though, is some heft. At 561g (1.24 lb), it’s very nearly the weight of an Olympus E-M1 Mark III, and significantly weightier than the E-M5 Mark III and E-M10 Mark IV. That said, the larger grips of the E-M1 Mark III and E-M1X mean it actually balances quite well on those bodies.


Autofocus and stabilization

Autofocus on the Olympus 12-100mm F4 is extremely quick, whether you’re shooting close-up or far away. The bokeh isn’t half-bad either, considering that’s fencing in the background. A more in-depth look at bokeh is coming up later in the review.
ISO 200 | 1/250 sec | F4 | 100mm

The Olympus 12-100mm F4 racks through the entirety of its focus range really quickly. It’s perhaps not quite as quick as some Panasonic lenses designed to take advantage of those cameras’ Depth-from-Defocus technology, but it’s more than fast enough for any wildlife I encountered, both inside and outside the Australia zoo.

The rapid AF speeds also make it easy to use the lens when you’re near minimum focus distance, allowing for easy capture of close-ups without necessarily needing to resort to manual focus.

Great stabilization with slower shutter speeds helped to keep my ISO values low a lot of the time, even when working around the F4 max aperture.
ISO 250 | 1/3 sec | F4.5 | 12mm

The stabilization promised by the combination of the 12-100mm F4 and the E-M1 Mark II was part of the reason I could see past this lens’ F4 maximum aperture for general use. It wouldn’t be great for shooting fast action in failing light, but it was perfect for images like this travel snap of a crazy-colored hostel under warm sunset light.

And really, the nice thing about the M.Zuiko 12-100mm F4 is that unless you need to stop down for depth of field or another reason, the lens is more than sharp enough to just shoot wide-open all the time.


Image quality

Olympus’ line of Pro lenses has a history of being renowned for their great image quality, and the M.Zuiko 12-100mm F4 is a strong performer in most respects.

Sharpness

The lens maintains a great level of sharpness throughout the zoom range, and it doesn’t get hazy or fall apart if you’re close to your subjects. So while there were times on this trip where I stopped the lens down, it was usually to get more depth of field, not to increase sharpness.

Things stay nice and sharp even at 200mm (equiv.), and with a relatively close distance to the subject.
ISO 200 | 1/200 sec | F4 | 100mm

On the wider end of things, the 12-100mm is more than a match for the 20MP sensor in the E-M1 Mark II even at F4. This is great news for users that might be leery of a Micro Four Thirds lens that ‘only’ opens up to F4, as well as those users that want to take advantage of the high-res shot mode.

Wide open, the Olympus 12-100mm is plenty sharp across the frame for the 20MP sensor. Click-or-tap-through for the full-size image.
ISO 200 | 1/2500 sec | F4 | 12mm

Vignetting and distortion

As is the case with most lenses designed for mirrorless systems, the M.Zuiko 12-100mm F4 Pro has some non-optional software corrections built into its design. These are applied automatically to the Raw files. So while characteristics like vignetting and distortion appear really well-controlled, it’s likely that software is partly responsible. You can see in the image above that there’s still some vignetting in the extreme corners, but it clears up somewhat as you zoom in.

There’s a bit of vignetting at the wide end of the zoom, but it’s not too objectionable.
ISO 200 | 1/5 sec | F4.5 | 12mm

Again, likely due to built-in software corrections, there’s not much to complain about with regards to distortion either. There looks to be a small amount of barrel distortion at the wide end of the zoom, and without much in the way of pincushion distortion at the longer end of the zoom. Check out the vertical lines present in the two images below to get a sense of how the lens’ distortion will (or won’t) impact your images.

At longer focal lengths, there’s not much in the way of distortion at all.
ISO 200 | 1/500 sec | F5.6 | 80mm
Click through to see a small amount of barrel distortion in this image at wide-angle.
ISO 1250 | 1/10 sec | F4 | 12mm

Bokeh

While this lens was never going to be a bokeh machine owing to its F4 maximum aperture, you can absolutely get some subject isolation depending on your distance to subject and focal length.

For snapshot portraiture, you can get some subject isolation even in the middle of the zoom range.
ISO 200 | 1/250 sec | F4 | 54mm

In most cases, the bokeh is nice and smooth. You’ll struggle to really blur the background fully away unless you’re real close to your subject and at near maximum zoom. Unfortunately, if your background is full of lots of out-of-focus highlights, you may sometimes notice it looks a bit ‘busy’, with rings around the outsides of the ‘bokeh balls’ and in some cases some ‘onion ring’ effects.

I found the bokeh in this image to be a bit ‘busy’ for my taste.
ISO 200 | 1/800 sec | F4 | 100mm
For smaller subjects, you can get close and zoom in for nice isolation.
ISO 640 | 1/60 sec | F4 | 70mm

Flare and sunstars

Flare and loss of contrast aren’t serious issues on the 12-100mm F4, even with the sun in the frame. What I was never really sold on, though, were the sunstars. They just didn’t ‘sharpen up’ even as I stopped down further, which then softened up the rest of the image due to diffraction.

After all, F11 on Micro Four Thirds is F22 equivalent for full-frame systems, so if you’re stopping down to the same aperture you would on 35mm to get better sunstars, your sharpness will drop off a cliff. Admittedly, I did put up with some diffraction to get some fantastic sunstars with the M.Zuiko 17mm F1.2 on this trip, so it seems like this is just a slight weak point of the 12-100’s design.

Flare is pretty well controlled, but I’m not super sold on the sunstars; stopping down might help more, but on Micro Four Thirds, that’s guaranteed to soften the image. (And apologies for those couple specks of dust, as well).
ISO 200 | 1/800 sec | F8 | 13mm

Lateral and longitudinal chromatic aberration

The M.Zuiko 12-100mm F4 does a pretty good job keeping chromatic aberrations at bay. If you look closely, though, you will see some fringing in challenging situations. The bottom-left corner of the below image shows some residual fringing around the leaves; the built-in corrections look to have taken care of much other fringing, but left the purple behind. At least this type of CA (lateral) is easy to remove.

Less easy to deal with is the bit of fringing around the slightly out-of-focus sticks just to the right of the center of the frame; this is longitudinal CA, and you can see a bit of it in as green/cyan fringing in the reptile image earlier in the review. So it’s there, but we’ve definitely seen worse.

Bats. So. Many. Bats.
ISO 200 | 1/200 sec | F4 | 100mm

But jumping back to bokeh for a moment, I think the biggest issue with this image (other than the subjects, if you’re not a fan of bats) is the severe onion-ring bokeh in the highlights behind the flying mammals.


Conclusion

What we like What we don’t
  • Sharp across the zoom range
  • Built like a tank
  • Resistant to flare
  • Incredibly versatile range
  • Very good stabilization
  • Low distortion
  • Bokeh can be busy
  • Sunstars aren’t the best
  • Some CA present, even with built-in corrections
  • Heavy
  • Expensive

And so, as happens occasionally on this site, I will be forced to eat some of my previously published words. I’ve said before that I don’t need a zoom on vacation. And I said I like cameras that are small and light, maybe even pocketable. Well, it turns out that I may have become a convert to zooms, depending on the destination.

If I myself was in the Olympus ecosystem, this is a lens I’d strongly consider. Also, this is the beach on which I got sunburned through my shirt. That Australian sun is no joke.
ISO 200 | F9 | 1/320 sec | 20mm

The M.Zuiko 12-100mm F4 provides such a versatile range in such a well-built package that I really did feel ready for anything. From dimly lit church interiors and landscapes to portraits and wildlife, the 12-100mm can handle pretty much anything. No, it won’t blur backgrounds to oblivion most of the time, and when you do get some subject isolation, the backgrounds will occasionally look a bit busy. Sunstars aren’t the best (nor the worst), and some people will have trouble accepting an F4 zoom on a Micro Four Thirds body.

On the other hand, the stabilization offered by this lens (when mounted to a compatible body) is pretty insane, which allowed me to keep my ISO values lower much of the time. I also love being able to hand-hold images at 1/10th of a second to get some motion into a scene while the surrounding environment stays tack sharp.

ISO 200 | 1/160 sec | F4 | 28mm

I think the biggest knock against this lens is the price; with an MSRP of $ 1299, it’s a costly proposition. There are a few Olympus options that fall within this focal range that are less expensive and built similarly well, but that’s just the nature of this particular offering.

If you want solid image quality and don’t want to be fumbling around and changing lenses on a beach next to a sweltering Australian rainforest, the M.Zuiko 12-100mm F4 IS Pro is well worth considering.


Scoring

Olympus M.Zuiko Digital ED 12-100mm F4.0 IS Pro
Category: Superzoom Lens
Optical Quality
Build Quality
Autofocus
Image Stabilization
Ergonomics and Handling
Value
PoorExcellent
Conclusion
The Olympus M.Zuiko 12-100mm F4 Pro IS is a solid option for travel and generalist photographers using the Micro Four Thirds system. It doesn't grant you the blurriest backgrounds nor the most compact dimensions available among other Olympus lenses, but it's well-built, offers excellent stabilization and gives a great zoom range to match almost any situation you find yourself in.

Good for
Travel and generalist photography, including landscape and architecture work.

Not so good for
Situations where you need a fast aperture as well as a fast shutter speed to freeze the action, as in low-light sports imagery.
84%
Overall score

RegularScoreCompareWidget({“mainElementId”:”scoringWidget”,”mainProduct”:”olympus_12-100_4p0_is_pro”,”scoringSchema”:{“id”:”Lenses”,”variables”:[{“id”:”OpticalQuality”},{“id”:”BuildQuality”},{“id”:”Autofocus”},{“id”:”ImageStabilization”},{“id”:”ErgonomicsAndHandling”},{“id”:”Value”}],”categories”:[{“id”:”Wideangle”,”label”:”Wideangle Lens”,”shortLabel”:”Wideangle”},{“id”:”Normal”,”label”:”Normal Lens”,”shortLabel”:”Normal”},{“id”:”Telephoto”,”label”:”Telephoto Lens”,”shortLabel”:”Telephoto”},{“id”:”Superzoom”,”label”:”Superzoom Lens”,”shortLabel”:”Superzoom”}]},”helpText”:”Choose one or more lenses from the drop-down menu, then roll your mouse over the names to see how their scores compare to the lens on review.”})


Sample gallery

Please do not reproduce any of these images without prior permission (see our copyright page).

$ (document).ready(function() { SampleGalleryV2({“containerId”:”embeddedSampleGallery_6403402487″,”galleryId”:”6403402487″,”isEmbeddedWidget”:true,”selectedImageIndex”:0,”isMobile”:false}) });
Articles: Digital Photography Review (dpreview.com)

 
Comments Off on Field review: The Olympus M.Zuiko 12-100mm F4 IS Pro goes to Oz

Posted in Uncategorized


DPReview TV: How to start a YouTube channel Part III – should you shoot in a studio or in the field?

24 Sep

Have you ever dreamed of starting your own YouTube channel? In this video, we discuss the pros and cons of working of shooting from a studio vs. shooting in the field.

Subscribe to our YouTube channel to get new episodes of DPReview TV every week.

  • Introduction
  • Studio: Advantages
  • Studio: Disadvantages
  • Field: Advantages
  • Field: Disadvantages
  • Field: Conclusion

Articles: Digital Photography Review (dpreview.com)

 
Comments Off on DPReview TV: How to start a YouTube channel Part III – should you shoot in a studio or in the field?

Posted in Uncategorized


Weekly Photography Challenge – Shallow Depth of Field

29 Aug

The post Weekly Photography Challenge – Shallow Depth of Field appeared first on Digital Photography School. It was authored by Sime.

Our dPS Weekly Challenge this week is ‘Shallow Depth of Field’ #dPSShallowDOF

After our challenge last week, ‘Mistakes‘ it reminded me of when I first purchased my EF 50mm f/1.4 lens and pretty much had it at f/1.4 or ‘wide open’ the whole time! The shallow depth of field (Where you have your subject nice and sharp, and everything else out of focus, the quality of the ‘out of focus’ area sometimes referred to as ‘Bokeh‘) look was something I loved at the start, and as I learned to use it more effectively, became another ‘tool’ in my photography toolbox.

Shallow depth of field lets you isolate a subject or highlight an area in your frame, my first example below, highlighting the lens details on my new Sony 12-24mm, you see everything else nice and blurry – This was shot with another Sony lens, the FE 35mm f/1.4 (Maybe my favourite ever) it’s great for shallow depth of field!

You might not have a lens with a wide aperture (f/1.4 / 1.8 / 2 / 2.8, etc) but you can use whatever you have to go for the most shallow depth of field that you can.

Check out Kevin’s article here for some good tips on ‘depth of field’

Weekly Photography Challenge – Shallow Depth of Field
A Sony photographs a Sony ‘Wide open’

We look forward to seeing what you come up with this week!

Congratulations to all of you that Tweeted, Instagrammed, Facebooked or posted a photo in the comments below our blog post! There were some great ‘mistakes’ in there! Well done to Elena, on this photo! Doesn’t look like a mistake to us! ? Congratulations on your recent awards, too! It’s great to see members of our dPS community progress in their photography!

Weekly Photography Challenge – Shallow Depth of Field
Congrats to our dPS Group Member, Elena

Great! Where do I upload my photos?

Simply upload your shot into the comments field (look for the little camera icon in the Disqus comments section) and they’ll get embedded for us all to see. Or, if you’d prefer, upload them to your favourite photo-sharing site and leave the link to them.

Weekly Photography Challenge – Looking Up

Share in the dPS Facebook Group

You can also share your images in the dPS Facebook group as the challenge is posted there each week as well.

If you tag your photos on Flickr, Instagram, Twitter or other sites – tag them as #DPSShallowDOF to help others find them. Linking back to this page might also help others know what you’re doing so that they can share in the fun.

Follow us on Instagram?

The post Weekly Photography Challenge – Shallow Depth of Field appeared first on Digital Photography School. It was authored by Sime.


Digital Photography School

 
Comments Off on Weekly Photography Challenge – Shallow Depth of Field

Posted in Photography


Understanding Depth of Field for Beginners

28 Jul

The post Understanding Depth of Field for Beginners appeared first on Digital Photography School. It was authored by Bruce Wunderlich.

Depth of Field for Beginners

You may have heard the term depth of field (DoF), but if you are new to photography you may not yet be taking advantage of how DoF can enhance your photos.

A basic definition of depth of field is: the zone of acceptable sharpness within a photo that will appear in focus. In every picture there is a certain area of your image in front of, and behind the subject that will appear in focus.

Understanding depth of field in photography.

This zone will vary from photo to photo. Some images may have very small zones of focus which is called shallow depth of field.

Here’s a series of images with very shallow depth of field.

Others may have a very large zone of focus which is called deep depth of field.

Here’s a collection of images with much deeper depths of field.

Three main factors that will affect how you control the depth of field of your images are: aperture (f-stop), distance from the subject to the camera, and focal length of the lens on your camera. Here are some explanations and answers to other common questions concerning depth of field.

How does aperture control depth of field?

Aperture refers to the access given to light from the lens to the camera sensors. The size of your aperture (the diameter of the hole through which light enters the camera) controls the amount of light entering your lens. Using the aperture (f-stop) of your lens is the simplest way to control your depth of field as you set up your shot.

Large aperture = Small f-number = Shallow (small) depth of field
Small aperture = Larger f-number = Deeper (larger) depth of field

It may be easier to remember this simple concept: The lower your f-number, the smaller your depth of field. Likewise, the higher your f-number, the larger your depth of field. For example, using a setting of f/2.8 will produce a very shallow depth of field while f/11 will produce a deeper DoF.

The image on the left was captured at 250th of a second at F5.0 which resulted in a very shallow depth of field,

The image on the left was captured at 250th of a second at f/5.0 which resulted in a very shallow depth of field.  Because of this the background is out of focus allowing the subject to stand out. The image on the right was captured at 1/5th of a second at f/32 which created a deep depth of field and a sharper background.

How does distance control depth of field?

The closer your subject is to the camera, the shallower your depth of field becomes. Therefore, moving further away from your subject will deepen your depth of field.

How does the focal length of a lens control depth of field?

Focal Length refers to the capability of a lens to magnify the image of a distant subject. This can get complicated, but the simple answer is that the longer you set your focal length the shallower the depth of field. Example: Your subject is 10 meters (33 feet) away, using a focal length of 50mm at f/4; your depth of field range would be from 7.5 -14.7 meters (24.6-48 feet) for a total DOF of 7.2 meters (23.6 feet). If you zoom into 100mm from the same spot, the depth of field changes to 9.2-10.9m (30.1-35.8′) for a total of 1.7m (5.7′) of depth of field. But if you move to 20m (66′) away from your subject using the 100mm lens, your depth of field is almost the same as it would be at 10 meters using a 50mm lens.

Image of a swan hiding in the tall grass captured from about 5 meters with 300 mm focal length created a DOF only about 5cm.

This image of a swan hiding in the tall foliage was captured from about 5m (16′)  with a 300mm focal length lens. This combination of focal length and distance created a depth of field of approximately 5cm (2″).

What if I just have a point and shoot camera, or don’t know how to change those settings?

Even with a point and shoot camera, there are ways to control your depth of field. In the Scene Modes menu, look for a symbol of a human head, which is the setting for portraits. This will give you a narrow depth of field. In the same menu there is also a mountain symbol, which is a setting for landscapes, which will give you a deeper depth of field.

If you are a beginner with a DSLR there are some simple ways you can control depth of field and still use and automatic shooting mode. By choosing Aperture Priority mode you can set your aperture to get the depth of field that you want, and the camera will automatically set the shutter speed.

Can I set the depth of field exactly for each situation?

Yes, but because changing your aperture affects your shutter speed, the result may not meet the needs of your image. For instance, if you are trying to increase your depth of field by reducing aperture size you will also need to increase (slow down) your shutter speed which could make your image blurry. Understanding how all these settings work together can increase your control over depth of field.

Is depth of field equally distributed in front and back of my focus point?

No, it’s usually about one third in front and two thirds behind your focal point, but as your focal length increases it becomes more equal.

How will understanding depth of field improve my images?

Managing depth of field is one of the most important tools at your disposal, because having tack sharp images is one of the most important factors to getting that great shot. Knowing how to make the parts of your image you want sharp and the parts you want to be out of focus, is a great artistic tool to create great images.

Getting the right DOF for your shot can make the difference

Getting the right depth of field for your shot can make all the difference.

When should I use a shallow depth of field?

Using a shallow depth of field is a good way to make your subject stand out from its background and is great for portrait photography. Shallow DoF can also be useful in wildlife photography, where you want the subject to stand out from its surroundings. This is also useful because many wildlife photo opportunities are low light situations, and increasing your aperture size will give you more light. Shallow depth of field is also effective for sports photography where many times you want to separate the athlete from the background to bring attention to them. The result of this should also help give you a fast enough shutter speed to freeze the action.

This image captured at 300mm focal length and F/ produced a very shallow DOF. Because of this very shallow DOF it is important to set your focal point on the eye. Notice how the bird appears to pop out from the background.

This image captured at 300mm focal length and f/5.6 produced a very shallow depth of field. Because of this, it is important to set your focal point on the subject’s eye. Notice how the bird pops out from the background.

When should I use deeper depth of field?

In landscape photography it is important to get as much of your scene in focus as possible. By using a wide angle lens and a small aperture you will be able maximize your depth of field to get your scene in focus.

In this landscape captured at 50mm at F/16 Focus point was set at 8 meters which made everything from 4 meters to infinity in focus

This landscape was captured with a 50mm focal length at f/16. The focus point was set at 8 meters, which made everything from 4 meters to infinity in focus.

How can you determine depth of field?

There are several on-line sites that will provide depth of field charts for your camera and lenses. Also, there are a number of apps available for smart phone users that can calculate it for you while you’re in the field. Most cameras have a DoF preview button which will give you a preview as you look through the eye piece. (This is probably the easiest and most under-utilized method.) Using this button may cause your image to appear darker as you view it through the eye piece, but not to worry. Your image will be properly exposed as long as you have the correct exposure settings.

Can depth of field be adjusted to get everything in focus?

Yes, using what is called the hyperfocal distance. When you are focused at the hyperfocal distance, your depth of field will extend from half the distance to your focal point to infinity. Use a DOF calculator to find your hyperfocal distance. If you don’t have a DoF calculator, a good rule of thumb is to focus a third of the way into the scene. Using an aperture of about f/11 or higher with a wide angle lens will maximize your depth of field.

What about depth of field in macro photography?

Because most macro images are produced in low light and with a longer focal length, the depth of field is often very shallow. Adjust your lens to the smallest aperture that the light will allow. It may also be necessary to increase your ISO to allow you to properly expose the image and to maximize your depth of field. Still, in many macro images your DoF may be very minute. With this very narrow focus it becomes necessary to use a tripod, because even the slightest movement of the camera will move your macro subject outside your depth of field.

120 mm Marco at F8 still is a very shallow DOF with the lens only 15 cm from the focal point on the front flower.

This 120 mm macro even at f/8 still has a very shallow depth of field.

What is bokeh?

Bokeh (boh-ke) comes from the Japanese word meaning blur. This effect is produced by the out-of-focus areas in your image that are beyond the depth of field. Bokeh commonly refers to the pleasing circle shapes caused by the shape of the lens aperture. Usually created when shooting with your aperture wide open, such as f/2.8, bokeh can also be created with smaller apertures if the background is distant enough.

Learn more about how to get beautiful bokeh in your images here.

Bokeh in this image caused by the distance from the subject to the background which fell well beyond the DOF

Bokeh in this image was created by the distance of the subject to the background, which fell well beyond the depth of field.

To summarize controlling depth of field:

Increase depth of field

  • Narrow your aperture (larger f-number)
  • Move farther from the subject
  • Shorten focal length

Decrease depth of field

  • Widen your aperture (smaller f-number)
  • Move closer to the subject
  • Lengthen your focal length

Take control of your depth of field. Understanding how these adjustments control your it will greatly improve your photography. What questions do you have about depth of field? Please share your photos and comments.

Recommended Reading for Beginner to Intermediate Photographers

If you enjoyed reading this tutorial we’ve put together a series of comprehensive advice for photographers:

  • Ultimate Guide to Photography for Beginners
  • Ultimate Guide to Landscape Photography
  • Ultimate Guide to Taking Portraits and Photographing People
  • Ultimate Guide to Nature and Outdoor Photography
  • Ultimate Guide to Street Photography
  • Ultimate Guide to Getting Started in Lightroom for Beginners
  • Ultimate Guide to Fine Art Photography
  • Ultimate Guide to Photography Terms and Common Words

The post Understanding Depth of Field for Beginners appeared first on Digital Photography School. It was authored by Bruce Wunderlich.


Digital Photography School

 
Comments Off on Understanding Depth of Field for Beginners

Posted in Photography


Shoot now, focus later: multi-view E-mount lens patent is Sony’s latest foray in to light field photography

23 Apr

According to Sony Alpha Rumors, Sony has filed a patent for an interchangeable E-mount lens that will allow users to adjust focus after the shot has been recorded. The lens appears to contain a number of lenses arranged next to each other to record multiple individual images on the camera’s sensor that can be combined later presumably to control focus and depth-of-field.

The site doesn’t tell us where the patent information was seen so we can’t read it for ourselves, but some diagrams are provided that we are told are part of the application.

The Light L16 light field camera from Light Labs Inc

Sony investigating light field technology is nothing new, as in the past it has filed patents for a light field sensor and has a partnership to supply sensors to Light Labs Inc, the manufacturer of the Light L16 camera that was announced in 2015. The draw of the technology is obvious as it can allow multiple focal lengths to be used for full-resolution zooming and/or focus and depth-of-field selection after the event.

We have seen a few attempts at harnessing the idea in commercial camera products in the past, including the Lytro Illum, Nokia’s 9 PureView and to some extent a number of other multi-lens and multi-sensor smartphones. It is hard to tell from the available information exactly what these lenses will used for in this patented idea, and whether they will be to collect distance information or be used to expand the range of tones that can be recorded in a single shot – or both.

Either way, such a lens will need a camera with an extremely powerful processor or the ability to simply record the images for processing in software later – as with Sony’s Pixel Shift Multi Shooting mode that requires images are processed in the company’s Imaging Edge desktop application.

As we have all noticed in the past though, exciting patent applications don’t always result in a product that comes to market. If genuine however this does at least demonstrate Sony is still pursuing ideas in this area.

Articles: Digital Photography Review (dpreview.com)

 
Comments Off on Shoot now, focus later: multi-view E-mount lens patent is Sony’s latest foray in to light field photography

Posted in Uncategorized


Apple patent shows its working on panoramic light field capture technology

04 Apr

A newly-published Apple patent, filed back in September 2019, details a light field panorama camera system seemingly intended for use in future iPhone and iPad devices. The technology would enable the average consumer to capture large light field panoramas of a particular scene by moving their device using gestures. The resulting content could be rendered and viewed on the device or using some type of head-mounted display (HMD), including VR headsets.

According to Patently Apple, which first spied the patent, Apple details technology that would build upon its current AR efforts by enabling its consumer devices to capture complex 3D scenes. To do this, the user would need to move their light field-equipped iPhone or iPad in a gesture, such as moving the device in a swooping infinity symbol, to capture light field images of the environment from multiple angles.

A flow-chart provided within the patent filing that shows the process of capturing, processing and viewing the resulting imagery.

A rendering engine would process the individual images into a 3D panorama with six degrees of freedom (6DOF) made possible using the light field technology. As a result, the viewer would have the ability to look above and behind objects, zoom in on areas of the scene and view different angles of the environment. The patent follows Google’s acquisition of light field camera technology company Lytro in 2018.

Unlike conventional cameras, a light field camera system captures both the intensity of the light from a scene and the direction the light rays are traveling in space. The additional data gathered by light field camera systems enable new types of experiences, including the one detailed by Apple.

The patent indicates that Apple’s system may use the sensors in the iPhone and iPad to capture position, motion and other similar metadata alongside the images, the combination of which would contribute to the final light field panorama. The combination of captured images and metadata could then be used to render different views of the same 3D scene, according to the patent, ultimately giving the user six degrees of freedom for exploring the panorama using an HMD like a VR headset.

This would differ substantially from a traditional 360-degree panorama, which is captured from a single point, only allowing the viewer to move their head around within the rendered 3D scene. Light field panoramas will appear more realistic, keeping objects in their correct positions as the user moves around within the scene, which could realistically render from different angles as the user has a look around.

It’s no secret that Apple has been heavily focusing on augmented reality technologies; its most recent iPad Pro model underscores this effort with the inclusion of a LIDAR sensor.

Just a few of the possible movements you could use to capture the scenery using your Apple mobile device.

In its announcement of the 2020 iPad Pro last month, Apple said the new LIDAR sensor ‘delivers cutting-edge depth-sensing capabilities, opening up more pro workflows and supporting pro photo and video apps,’ specifically with augmented reality in mind. The sensor works by measuring the distance of objects that are as far as 5m (16ft) away.

Apple went on to explain:

‘New depth frameworks in iPadOS combine depth points measured by the LiDAR Scanner, data from both cameras and motion sensors, and is enhanced by computer vision algorithms on the A12Z Bionic for a more detailed understanding of a scene. The tight integration of these elements enables a whole new class of AR experiences on iPad Pro.’

The future expansion of these capabilities using light field technology wouldn’t be surprising, particularly in light of ongoing rumors Apple is working on AR/VR gear. With that said, and as with any patent, it is possible we’ll never see this technology make its way into a consumer product. Per usual, Apple has not commented on the patent.

Articles: Digital Photography Review (dpreview.com)

 
Comments Off on Apple patent shows its working on panoramic light field capture technology

Posted in Uncategorized


Sigma 14-24mm f/2.8 Lens for Sony – Thoughts and Field Test

22 Nov

The post Sigma 14-24mm f/2.8 Lens for Sony – Thoughts and Field Test appeared first on Digital Photography School. It was authored by Suzi Pratt.

Sigma-14-24mm-f-2-8-Lens-for-Sony-review

The Sigma 14-24mm f/2.8 lens is a brand new ultra-wide-angle zoom lens intended for full-frame mirrorless cameras. Launched in August 2019, this lens follows in the footsteps of the Sigma 45mm f/2.8 prime lens. Similar to that lens, the Sigma 14-24mm is available for Sony E-Mount cameras, or L-Mount mirrorless cameras made by Panasonic, Sigma, and Leica. It is currently the widest and fastest full-frame zoom lens made for Sony E-Mount, with FE 12-24mm f/4 as the closest match.

In the DSLR world, the 14-24mm f/2.8 lens is no stranger. Nikon made its own version, and Sigma has been making this lens for full-frame DSLRs for a while now. But the 14-24mm focal range is indeed for special use cases, with most photographers preferring the 16-35mm range to meet their wide-angle needs. Tamron echoes this sentiment with the recent release of the 17-28mm f/2.8 E-Mount lens. So what sets the 14-24mm lens apart, and who is this lens for? Read on to find out!

Sigma-14-24mm-f-2-8-Lens-for-Sony-review

Technical specs

The Sigma 14-24mm has a maximum aperture of f/2.8 and a minimum aperture of f/22. It offers a 114.2 degree to 84.1-degree angle of view and has a minimum focusing distance of 11 inches (27.94 cm). This is an autofocus lens that also offers manual focus at the flip of a notch. There is no image stabilization or vibration reduction, making it unideal for video. It is on the larger side with dimensions of 3.35 x 5.16″ and a weight of 28.04 ounces. But it is slightly narrower and lighter in weight than its DSLR counterparts.

This lens is also weather-sealed, but the front lens element is curved and thus cannot be protected by standard screw-on UV filters. On that note, you also cannot use screw-on ND filters or polarizers with this lens either.

Currently, the lens retails for $ 1,399.00 USD. It’s not cheap, but it does cost less than the Sony FE 12-24mm f/4 and the Sony 16-35mm f/2.8.

Sigma-14-24mm-f-2-8-Lens-for-Sony-review

Pros

Ultra-wide focal range

The biggest benefit of this lens its ultra-wide focal range. If you’re shooting in tight spaces or want to cram as much visual detail as possible in your image, this is the lens to use. It’s perfect for shooting architecture, real estate, or landscapes. However, ultra-wides can also be tricky to work with due to distortions (more on that below).

Solid build quality

Sigma declares this lens to be dustproof and splashproof (in other words, semi-weatherproof). The front lens also has a coating that repels water and oil. Given the heft of this lens, it indeed feels like it could withstand various outdoor environments, but I wouldn’t take it into a downpour.

Nice bokeh effects

With a relatively fast f/2.8 aperture, this lens is much faster than its wider yet slower cousin, the 12-24mm f/4. However, ultra-wide lenses are typically used for landscape and architecture, when you’ll be shooting an f/9 or f/11 to get as much of your scene in focus as possible. So whether you really need the f/2.8 aperture depends on what kind of photos you intend to shoot.

While ultra-wides are not a standard portrait or subject photography lens, the f/2.8 gives you a nice background blur if you prefer shooting wide. The smooth bokeh is thanks to the 11 rounded diaphragm blades, an increase to the 9 blades found in previous models.

Sigma-14-24mm-f-2-8-Lens-for-Sony-review

Cons

Large and heavy

Pretty much all f/2.8 lenses are larger and heavier than their slower counterparts, and this lens is no exception. It’s a big and bulky lens that you likely won’t use for casual travel photography, not just because of its size, but because the front element is completely exposed.

Distortion

All wide-angle lenses face the challenge of decreasing the amounts of barrel or pincushion distortion. In other words, the wider the lens, the more likely your vertical lines won’t be straight.

The Sigma 14-24mm handles this moderately. At its widest focal length, there is indeed some barrel distortion. For certain scenarios such as astrophotography or landscape photography, this is less of an issue. But for real estate, architecture, or anything that requires super straight vertical lines, this lens may not be the best choice.

You can, of course, attempt some perspective control in Photoshop.

Can’t use standard filters

As mentioned earlier, the front curve of this lens prevents standard ND filters or polarizers from being used. Sigma does say that the lens comes with a rear filter holder, but you would need to invest in this specific type of filter to make use of it. Standard filters that screw onto the front of the lens would not work.

Sigma 14-24mm f/2.8 Lens for Sony – Thoughts and Field Test

Who is this lens for?

All in all, the 14-24mm f/2.8 is a specialty lens. At its widest focal length, there is typically quite a bit of barrel distortion. This makes for extra post-processing work for those trying to shoot real estate or architecture, but perspective control has improved in post-processing software.

While barrel distortion is less of an issue for landscape or astrophotography, this lens doesn’t allow you to attach screw-on ND filters and polarizers that are often needed when shooting outdoors. Sigma declares that the 14-24mm f/2.8 is intended to be “the definitive lens for astrophotography.” Unfortunately, it is not the season for night sky photos, so I was not able to test this aspect of this lens.

With all of that said, the image quality is fantastic. This lens produces tack-sharp images with excellent colors. It just requires a bit of extra work in post-production to make up for some of its shortcomings.

Would you buy this lens? Let me know in the comments below!

Sigma 14-24mm f/2.8 Lens for Sony – Thoughts and Field Test Sigma 14-24mm f/2.8 Lens for Sony – Thoughts and Field Test Sigma-14-24mm-f-2-8-Lens-for-Sony-review Sigma-14-24mm-f-2-8-Lens-for-Sony-review Sigma 14-24mm f/2.8 Lens for Sony – Thoughts and Field Test Sigma 14-24mm f/2.8 Lens for Sony – Thoughts and Field Test

Watch Suzi’s video review

The post Sigma 14-24mm f/2.8 Lens for Sony – Thoughts and Field Test appeared first on Digital Photography School. It was authored by Suzi Pratt.


Digital Photography School

 
Comments Off on Sigma 14-24mm f/2.8 Lens for Sony – Thoughts and Field Test

Posted in Photography


From field to cup: We join photographer Lauren Kelly as she documents tea production with the Canon EOS RP

30 Oct

Positioned far to the south of the country in the shadow of an active volcano, Kagoshima has a very different feel to most Japanese cities. Warm and humid all year, the area around Kagoshima is ideal growing country for fruit and vegetables, and the rich volcanic soil is perfect for the cultivation of tea.

In this video, we’re joining photographer Lauren Kelly in Japan, on assignment to document the production of matcha – a finely ground type of green tea, prized by connoisseurs for its rich, complex flavor. Along the way, Lauren captured the vivid sights and sounds of the Kagoshima area using the Canon EOS RP, a small, lightweight mirrorless camera ideal for travel and portraiture.

Canon EOS RP in Kagoshima, Japan

$ (document).ready(function() { SampleGalleryV2({“containerId”:”embeddedSampleGallery_2404430755″,”galleryId”:”2404430755″,”isEmbeddedWidget”:true,”selectedImageIndex”:0,”isMobile”:false}) });


This is sponsored content, created with the support of Amazon and Canon. What does this mean?

Articles: Digital Photography Review (dpreview.com)

 
Comments Off on From field to cup: We join photographer Lauren Kelly as she documents tea production with the Canon EOS RP

Posted in Uncategorized