RSS
 

Posts Tagged ‘Fear’’

IBC 2020 latest show to be cancelled, go virtual as organizers fear ‘many unknowns’

19 May

The International Broadcasting Convention (IBC), scheduled to take place in Amsterdam this September, has become the latest industry exhibition to get canceled as the coronavirus pandemic continues to disrupt events around the world.

Organizers cited ‘many unknowns’ around the shape of restrictions for social distancing and measures that would have to be in place to make the show safe for visitors and exhibitors alike. ‘It has become clear that a return to (a new) normal is unlikely to be achieved by September’ CEO Michael Crimp says in a statement on the show’s website.

Crimp says the decision to cancel now, while the show was still four months away, was to allow exhibitors to plan for the future and not spend money and time on the event only to have it canceled at a later date. He also says the show will use its digital platform, IBC365, to support the industry and hints that there will be some form of a virtual show on the channel this year, before the physical show returns in 2021.
For more information see the IBC Show website.

Press release:

IBC2020 Cancelled due to Covid-19

I hope you are safe and well, as we continue to adapt to the changing world in which we find ourselves. Following on from my previous statement I wanted to give you an update on the developments and situation at IBC.

As previously outlined, the IBC team has been focused on assessing and developing appropriate plans for IBC2020 this September at the RAI Amsterdam.

Within these plans it is crucial that IBC can deliver a safe and successful environment. However, as governments announce the route forward, it has become clear that a return to (a new) normal is unlikely to be achieved by September.

It has also become evident, through our dialogue with the IBC community, that an early decision is preferential for the industry so it can plan for the future.

Right now, despite the best work of the IBC team and our Dutch colleagues, there are still many unknowns. Therefore, we cannot guarantee that we will be able to deliver a safe and valuable event to the quality expected of IBC.

It is also evident that important aspects of a large-scale event such as IBC will be greatly altered by social distancing, travel restrictions, masks etc. so much so that the spirit of IBC will be compromised.

With that in mind and based on what we know at this point, it is with a heavy heart IBC has made the difficult decision to cancel the IBC2020 show. You may have seen IBC and the IABM surveys on this topic. Evidence gathered from these IBC stakeholders helps to confirm this decision.

Whilst this is hugely disappointing for us all, IBC will continue to play a vital role in supporting the industry to get back on track wherever we are able.

For more than 50 years, IBC has provided the central annual meeting place for the Media, Entertainment & Technology community. For example, over the coming months IBC will continue to engage with the industry through its digital platform IBC365. Details of our plans will follow soon.

Your views continue to help shape IBC. If you have suggestions, questions or concerns regarding this decision and announcement please do not hesitate to contact us using our dedicated email address: use our dedicated email address statusupdates@ibc.org

My very best wishes to all of you during this time of unprecedented challenges and I look forward to welcoming you next year at IBC2021, in Amsterdam.

Kind regards,
Michael Crimp
CEO IBC

Articles: Digital Photography Review (dpreview.com)

 
Comments Off on IBC 2020 latest show to be cancelled, go virtual as organizers fear ‘many unknowns’

Posted in Uncategorized


How to Push Past Fear in Photography: A Retrospect

18 Feb

The post How to Push Past Fear in Photography: A Retrospect appeared first on Digital Photography School. It was authored by Adam Welch.

Five years. It doesn’t seem like so long ago that I first sat down to write an article which I hoped would help other photographers overcome some of the fears that we all face at one time or another. So much can change in five years. As I sit here and read back through that piece, “How to Overcome Fear in Photography,” I feel uniquely placed to add some insightful commentary on the things I’ve learned over the years about combating the oddly universal apprehensions that we all have to overcome from time to time as photographers. At the very least, I hope it lends a measure of solidarity to you no matter what stage you happen to find yourself at on your journey on the path of photography.

pushing-past-fear-in-photography-dps-adam welch-2

Fear #1: My work isn’t good enough

Ah, yes. I can personally guarantee that no matter how experienced or accomplished you may become in making photographs there is always concealed within yourself a secret doubt about whether or not your photos are good enough. The idea that we somehow fall short in our efforts is something that is forever in the back of your mind to one degree or another. Good photographers consistently are their own worst critics.

pushing-past-fear-in-photography-dps-adam welch-3

How to beat it:

Like all facts of life, the remedy to this lies not in solving the problem but rather in controlling our reaction. The recognition that we all strive towards an unattainable perfection with our work should not be a source of anxiety but instead should fill us with a sense that there are always new ways to improve. An assurance that we can do better gives us something to aspire to and through our aspirations lies creative growth.

Fear #2: I’ll never “make it” as a photographer

When you think about it, the idea of relying on photography to pay all of your bills is a scary thing. Let’s face it, going “all-in” on any endeavor drags us through all sorts of anxiety and fear. This is especially true if you happen to be leaving an established career which lies outside of photography as I did. Confounding the problem further is if you do decide to make a go of it as a photographer, you may be met with quiet disbelief and polite warnings of caution from your coworkers, your friends, and even your family.

pushing-past-fear-in-photography-dps-adam welch-4

I never saw myself as being anything resembling a teacher…yet here we are.

How to beat it:

Alright, let’s get one thing out of the way first: no one can tell you if you’re ready to be a full-time photographer except for you. However, the point I want to get across to you is that you CAN make it happen if you are willing to put in the work, accept failures with renewed vigor and never give up if it’s something you truly want to accomplish.

I’ll also let you in on another secret: photographers today seldom “make it” solely on income from their photographs alone, although some do. Many lead photography workshops and teach courses, sell books, produce editing presets and otherwise diversify themselves in many creative ways to keep the ball rolling. Sure, carving out a career in photography today is more competitive than ever.

The key to overcoming the fear of not being able to survive is by realizing that being a skilled photographer is not enough. You need to be flexible, persistent and resourceful in creating different sources of income based on your love of photography.

Fear #3: “I don’t know how to do…”

Closely related to that nagging fear of your work not being on par with other photographers lies the dreaded idea that you don’t possess a particular photographic skill which you’re convinced you need to master to take your work to the next level. Whether it’s working with strobes or filters, posing people for portraits, working with particular post-processing software, or simply learning what all those buttons do on your new camera; we all feel a little outmatched at times by our own ignorance.

How to beat it:

pushing-past-fear-in-photography-dps-adam welch-1

Luckily, of all the fears we’ve talked about, this one is the easiest to push past. It’s also the one which requires the highest level of tough love in order to overcome. Here goes…*clears throat*. The only thing standing in the way of you learning a new photographic technique or skill is you. Now, I know that’s a hard pill to swallow but stay with me. We live in a world today which offers arguably infinite knowledge right at our fingertips. The internet, eBooks, YouTube videos, online discussion groups, and photography courses have enabled us to learn virtually anything in the privacy of our homes.

Furthermore, the majority of this enormous wealth of knowledge is available for free!  There is virtually no excuse for us to be worried about not knowing how to do something. Knowledge truly is power.

Fear #4: The great unknown

If there’s one all-encompassing fear that eats at both new and established photographers, it is the fear of uncertainty. I remember back when Instagram changed its algorithm a couple of years ago. Many people, photographers and otherwise, suddenly realized that one of their primary sources of client exposure (and income) could be taken from them overnight. The fear crept in.

The same was true when YouTube reorganized it’s video monetization guidelines for creators causing widespread panic for those who depended on the outlet for a large slice of their work. I make and sell a large number of develop presets for Lightroom. When Adobe changed their file formats for develop presets a couple of years ago, there was a brief moment when I thought that all of the presets I had made thus far would no longer work with the new versions of Lightroom. Do you think that scared me? Absolutely it did. The harsh and inevitable reality of situations occurring which are wholly beyond our control can terrify us.

pushing-past-fear-in-photography-dps-adam welch-6

How to beat it:

There are two ways we can deal with the fear of the unknown. The first is that we can curl up into a ball and hope that nothing negative happens. I don’t recommend that option. Alternatively, we can accept that there are always things that can happen to us that we don’t see coming which spark fear and apprehension in our hearts. For example, your camera battery may die just as the sun breaks over that mountain top. Alternatively, your lens may malfunction just as the bride and groom kiss, or three clients might cancel their engagement sessions in one month.

Moreover, Instagram could change the algorithm for the 100th time, and your connecting flight for that incredibly expensive photo workshop in Patagonia may get delayed. Any number of a trillion problems may arise at any given time. We can’t control everything, especially when it comes to photography. Whatever happens, the only weapons we have to combat the fear of the unknown is preparation and acceptance. Prepare yourself for as many scenarios as you can and then just let go. “Be the ball” as Ty Webb might say. If you continuously operate under the notion that the future holds nothing but bad things not only will your photography suffer but so will you.

Pushing Past the Fear

Hindsight, as they say, is 20/20. As photographers, we base much of our learning on experience and experimentation. Trial and error is often our best teacher. We grow and evolve in our work as much through failure as we do by our success. The idea that there can be a day when you walk out with your camera without a doubt in your mind and feeling completely free of any degrees of photographic angst may likely never happen. You gain confidence through constant practice. You make gains, take losses and learn new skills by making mistakes. At times the future may hold much uncertainty, but being able to push past your fears is the key to reaching your potential in photography.

The hope I had five years ago when I wrote the first article on overcoming fear in photography is the same hope I carry now. I hope you now know that whatever fear you might be facing with your photography is likely shared by others. Moreover, it is entirely beatable. Push past your fears and allow yourself to be the photographer you know you can be.


The post How to Push Past Fear in Photography: A Retrospect appeared first on Digital Photography School. It was authored by Adam Welch.


Digital Photography School

 
Comments Off on How to Push Past Fear in Photography: A Retrospect

Posted in Photography


DJI challenges drone plane collision test, accuses researchers of ‘sowing fear’

23 Oct

DJI has challenged a recently published video that demonstrates a small drone smashing into an airplane wing. The test collision was conducted in a simulated environment by researchers with the University of Dayton Research Institute (UDRI) to assess the potential damage such an in-air crash may cause. DJI has accused the test of being “unbalanced, agenda-driven research.”

In a letter sent to UDRI’s group leader for impact physics Kevin Poorman, DJI alleges UDRI’s “Risk in the Sky?” video (below) and related materials present a “collision scenario between a drone and an airplane wing that is simply inconceivable in real life.”

The test collision involved a 952g / 2.1lbs DJI Phantom 2 quadcopter being launched at the wing of a Mooney M20 aircraft. In a blog post about the research, UDRI researchers said the test was intended to “mimic a midair collision of a drone and a commercial transport aircraft at 238 miles per hour…”

DJI has taken issue with that claim, saying the test assumes the Mooney M20 would be flying at its max 200mph / 321kph speed, and that the drone would “apparently” be exceeding its max 33.5mph / 53.9kph speed. “At the altitudes where that plane would conceivably encounter a Phantom drone,” DJI claims, “it would fly less than half as fast – generating less than one-fourth of the collision energy.”

DJI also states:

Your video was created contrary to established U.S. Federal Aviation Administration (FAA) crash test parameters, which assume a bird striking an airplane at its sea-level cruising speed —which is typically 161 mph to 184mph for Mooney M20. Your video deliberately created a more damaging scenario, and was widely cited as evidence for what could happen to a large commercial jet —even though the Mooney M20 is a small plane with four seats.

The Chinese drone company has likewise taken issue with the test as a whole, accusing it of having not been “created as part of a legitimate scientific query, with little description of your testing methodology and no disclosure of data generated during the test.” The company accuses the researchers of having a “bias toward sowing fear,” claiming they would have otherwise also shared a video of a simulated bird-plane strike that caused “more apparent damage.”

DJI’s letter demands UDRI “remove the alarmist video,” withdraw the research, and “issue a corrective statement” that proclaims the test to be “invalid.”

Articles: Digital Photography Review (dpreview.com)

 
Comments Off on DJI challenges drone plane collision test, accuses researchers of ‘sowing fear’

Posted in Uncategorized


4 Tips to Help You Overcome the Fear of Photographing People

13 Jul

Are you someone who shies away from photographing people?

I this article, I want to share with you some of my journey and four tips to help you become more confident photographing people. I went from being fearful of photographing people to absolutely loving it.

Portrait of an Asian woman with a Nikkormat FTN film camera - 4 Tips to Help You Overcome the Fear of Photographing People

She’s holding the same camera and lens I used to take the next photo in this article.

The fear is real

Many photographers who join our workshops tell us they find it a real challenge to photograph people. Whether it’s people they know or complete strangers, so many people struggle to photograph others. I think this my be one reason selfies have become so popular.

When I bought my first camera I was 19 years old and very shy. I had a small group of friends and a few places I enjoyed socializing. But beyond that, I preferred not to interact with others. I loved taking photos – landscapes, flowers, still life, but not people. I could not bring myself to do it.

My sister encouraged me. She said she loved my photos, but they would be better if there were people in them. So I started photographing her.

girl on the beach in the morning - 4 Tips to Help You Overcome the Fear of Photographing People

One of my favorite photographs of my sister when we were on a camping trip in 1986. Shot with the Nikkormat camera above.

Build your courage and confidence

She was a reluctant subject, which gave me more of a challenge. We used to hang out a lot together with a few other friends, and I started photographing them as well. Slowly my confidence built.

Sometimes I would sneak candid photos of strangers. I had bought a zoom lens which made this easier. Being separated by the distance the long lens gave me, I was not as uncomfortable.

After a while I packed my camera and bag and headed off. When I traveled overseas I found it easier. Somehow being a tourist changed things. I became more confident. Even so, there were many people I connected with along the way that I did not photograph and now regret that I was not bold enough.

Asian woman with a camera - 4 Tips to Help You Overcome the Fear of Photographing People

The story continues

I returned to New Zealand after only six months. My sister had died suddenly so I went back. Thankfully, I have a number of lovely portraits of her.

Not long after I landed a job at a daily newspaper in the Illustrations Department. No, I wasn’t doing drawings, this was where the editorial photographers worked. The task of an editorial photographer is to illustrate the story. Hence the department name.

man holding a photo of himself - 4 Tips to Help You Overcome the Fear of Photographing People

There I learned many things very quickly. The most challenging thing I learned was that most photos published in newspaper stories include at least one person in the image. If I was going to make the most of this lucky break I needed to overcome my fear, quickly. I knew I would not keep my job long if I returned from an assignment with no photos of people and an excuse that I was too shy.

It has not been easy and it has taken a long time to really be confident photographing people, most of the time. But not all the time. Sometimes I can’t do it, as I am still essentially a shy person.

Young Thai woman in traditional costume - 4 Tips to Help You Overcome the Fear of Photographing People

4 Tips for Overcoming the Fear of Photographing People

1. Find someone who will let you photograph them.

This might be a spouse or sibling, or maybe a good friend. If you can find someone who enjoys being photographed then you have already overcome the biggest hurdle.

Photograph them whenever you can. Build a photographer/model relationship. Be aware of times you and your model have the most fun and replicate the circumstances again in future.

If things work out well, invite some other people to join you. Sharing your photos with them and asking them to post to their social media accounts will help boost your confidence.

young woman lying on the grass - 4 Tips to Help You Overcome the Fear of Photographing People

2. Join a club or group and volunteer to be their photographer.

Maybe you are already a member of an organization you could offer your services to. You might be the official photographer for your church picnic. Or perhaps you could start making a series of portraits of gardeners in their element for the local gardening club.

Think of other ways you can offer your services which will give you a valid reason to take people’s photographs. I found this a great confidence boost when I started at the newspaper.

Studio portrait of a mud covered woman holding clay - 4 Tips to Help You Overcome the Fear of Photographing People

3. Offer to cover events for your local newspaper or community website.

Put yourself on the spot. Commit yourself to a task. Make a reason that you have to come up with pictures. You can’t offer to cover an event and then only supply photos with no people in them.

Woman being kissed by an elephant - 4 Tips to Help You Overcome the Fear of Photographing People

4. Practice being bold enough without appearing to be rude or pushy.

Practice this without being self-effacing. Having your camera in your hand will help.

People will respond to you very differently if you display confidence when you ask them to take their photo. If you come across apprehensive they may doubt your ability as a photographer and respond with reluctance.

So much of creating a good portrait is in how you present yourself. If your subject is comfortable when they are being photographed you will get better pictures of them. They are also more likely to appreciate the portrait you have made.

Portrait of a rice vendor at Muang Mai Market - 4 Tips to Help You Overcome the Fear of Photographing People

Start Today

If you have been wanting to start photographing people and have not – today is the day to start. You never know how much you might truly bless someone by taking their photo.

Here’s a video story of how I was able to share a special portrait I had initially been reluctant to make.

?

The post 4 Tips to Help You Overcome the Fear of Photographing People appeared first on Digital Photography School.


Digital Photography School

 
Comments Off on 4 Tips to Help You Overcome the Fear of Photographing People

Posted in Photography


How Conquer Your Fear of People as a Photographer

25 May

You know the feeling; shyness around strangers, dreading new situations, sleepless nights worrying, completely self-conscious in a crowd, thinking that everyone is judging you. In short, a fear of people.

Your fear and inhibition are like having “stage fright” in everyday life. All of this leads to you suppressing your personality, your creativity, and any chance to share your gift of photography with your culture and the world. All of this fear is dangerous because it blocks your creativity, making you become miserable and anxious.

But there is hope for you because many folks have overcome their fear of people and gone on to thrive as photographers. Below are five exercises that will help you to conquer your fear of people too.

Climbing child on playground equipment - How Conquer Your Fear of People as a Photographer

My son used to be afraid of heights at the playground. But I knew he could overcome it. So every time we were at the playground I would encourage him to try something with heights. He’d go just a little bit higher each time until he had completely overcome his fear.

How to Overcome Self-Consciousness and Fear

“If you want to conquer fear, don’t sit home and think about it. Go out and get busy.” – Dale Carnegie

The way to overcome self-consciousness, fear, and shyness is to practice the healthy opposite.

What is the healthy opposite of fear and inhibition? Having a healthy confidence, the ability to enjoy other people, and the courage to try your best and accept constructive criticism. Here’s how you can work toward that.

Window light portrait. - How Conquer Your Fear of People as a Photographer

It used to be extremely intimidating to ask friends if I could take a portrait of them. At a favorite coffee shop of ours, I asked my friend if I could snap a few photos while we were talking. I was really intimidated by this, but it becomes much easier once you do it a few times, trust me.

1. Begin with a Healthy Goal

Without healthy goals to aspire to, your life will be stagnant. You need a goal or you have nothing to move toward. Here’s a good goal for you if you’re a fearful photographer. Aim to become a creative photographer who is comfortable and confident with people.

Setting a goal doesn’t help you much unless you’ve got some steps to achieve it. Let’s see how to practice the healthy opposite of fear so that you can become “a creative photographer who is comfortable and confident with people.”

Begin with the smallest steps possible, and gradually improve from there.

Walking the dog. How Conquer Your Fear of People as a Photographer

When I was a kid I was afraid of dogs. I didn’t want my kids to be afraid of dogs so I made sure that they were around dogs from the time they were infants. Whenever they showed fear I helped them to be brave and get comfortable with the dog.

2. Use Your Voice

If you’re afraid of people, you probably don’t speak much. You’re likely afraid of having your ideas rejected, giving damaging advice, or being locked in a heated debate. But as long as you’re a kind and thoughtful person, these things aren’t likely to happen often.

The worst part about speaking up is the nervousness you feel just before saying something. Ignore that “stage fright.” Overcome it by saying something small. Don’t go big, just practice by making small talk.

Portrait in a coffee shop - How Conquer Your Fear of People as a Photographer

I’ve challenged myself to try street photography or photographing people while out and about. I was sitting in a coffee shop reading about photography when I saw this gentleman quietly having coffee on his own. I couldn’t resist taking a picture, waiting for the moment that he brought the coffee cup up to drink.

Baby Steps

Perhaps you’re interested in street photography, but you’re so afraid of people that you could never ask for a portrait of them. You could practice getting comfortable by making small talk with strangers. Don’t even bring your camera along, that’s too much pressure. Just practice small talk.

Once you get over that initial discomfort of striking up a little conversation, asking strangers to take their picture won’t be as scary.

Mayfly - How Conquer Your Fear of People as a Photographer

Add bugs to the list of things I’ve been afraid of! One summer I took a macro lens around and photographed bugs. The time I spend photographing them and editing the photos seemed to make me much more comfortable with bugs! Slowly exposing yourself to the things that cause fear will help you to overcome them.

lady bug macro shot - How Conquer Your Fear of People as a Photographer

On the Job Training

Another way to become comfortable working with people is to get a job working at a department store portrait studio. If you work during the Christmas rush you’ll have the opportunity to photograph hundreds of families.

Because it’s your job, you’ll be forced to talk with them. This repetition will help you get over your fear of talking with people. Remember, you’re not there for the photography itself. You’re there to practice talking with people so that you can get over your fear and move toward your goal of being a creative photographer who is comfortable and confident with people.

First hair cut. How Conquer Your Fear of People as a Photographer

My little girl tends to be shy of new people and new situations. It takes a little while but she will become comfortable with friendly people. She was very shy for her first haircut but now loves a day out to get her hair done.

3. Offer Compliments

If you’re not sure how to start a conversation, start by noticing something that you can sincerely compliment a person about. Self-consciousness and fear paralyze you by keeping you focused on yourself in negative ways. If you’re always self-conscious, then you need to just take the spotlight off yourself by focusing on other people instead.

When you focus on offering people compliments two things will likely happen. First your attention is turned away from yourself and on to them. Second, your mind is turned away from negative thoughts (about yourself) and toward positive thoughts (about them) instead.

When I was a senior portrait photographer I would always find some little thing to compliment students about. If it was obvious that they spent a lot of time on their hair, that’s the compliment I gave. Maybe they had a great smile, or were funny, or we had something in common.

Focusing on the other person and having something nice to say will build bridges and help you to overcome your fear and discomfort around people.

Riding the escalator. How Conquer Your Fear of People as a Photographer

Escalators can be intimidating the first time you step on one. Kids are afraid they’ll get swallowed up in the moving steps. Once my kids figured out how to ride one, they treated the escalator like a ride at an amusement park! Overcoming your fear can lead to exciting things in life.

4. Visualize Criticism

You may quickly get over the fear of talking to people or the anxiety you feel over negative thoughts about yourself. But how about receiving criticism of your photographs? This is one of the worst things imaginable for some photographers.

If you panic or become consumed with anxiety and want to “just give up” over the slightest criticism of your photos, then you need to learn to take criticism better. It’s not comfortable at first, but it can be done.

Here are some steps

First, admit that you are not perfect and that you should always focus on improvement. Be humble and admit that some healthy criticism could actually help you.

Second, seek it out. That’s right, go looking for critiques! Look for people who are better than you who can show you how to improve. You want to grow as a person and a photographer don’t you? Ask successful people how you can be better.

Journal writing - How Conquer Your Fear of People as a Photographer

You can document your journey of overcoming the fear of people by journalism. Get it all out on paper. What you’re thinking, what you’re feeling, and all the successes you have.

Third, visualize criticism. You can practice receiving the image critique comfortably before actually receiving it. Close your eyes and imagine someone saying, “These photos are terrible” or “That’s not your best work.” Just imagine hearing those words. Get over the shock and uncomfortable feelings. How could you respond to their harshness in a positive way?

Do you think it seems weird to use your imagination this way? Yes, it may seem strange at first. But it’s exactly how you’re already using your imagination.

Your self-conscious fear is leading you to imagine what people are thinking and saying about you. Your imagination is causing you to fear criticism and be paralyzed instead of receiving it graciously, improving, and moving forward toward your goal of being a creative photographer who is confident and comfortable with people.

Chopping wood. How Conquer Your Fear of People as a Photographer

I’ve embarrassed myself a few times trying to chop wood with people watching me. I needed to learn to do it well. So one summer I decided to chop a massive pile of wood. It wasn’t easy to learn and some pieces ended up a mess before I could get them to split. But by the end, I was now showing other people how to chop wood. Constantly try things that intimidate you. The little successes will keep you moving forward and ignoring fear.

Consider who you are receiving the criticism or critique from. If you post photos online, you’re eventually going to receive harsh criticism from someone, solicited or not. The internet is an easy place for people to be mean and remain anonymous.

Please feel free to ignore people who are harsh and cruel. But always listen to the constructive criticism by other photographers who actually care about you and want to help. Their insights can be very valuable, making you a better photographer.

5. Open up, be vulnerable, and make friends

Your fear and shyness of people may come from your honest desire not to bother anyone. You avoid saying or doing the wrong thing. But are you also avoiding friendship and positive interaction too?

Begin with small talk and offer compliments. Become comfortable with conversation and criticism. Once you’ve done this then opening up and going deeper with people won’t be so hard.

Do you know what you might discover? You’re not alone in your fears. Other people (and especially photographers) are afraid too. And they’ll be thankful that you spoke up, and shared your ideas and your creativity. Courage is contagious.

Paddle boarding - How Conquer Your Fear of People as a Photographer

This is our friend who is terrified of water. It used to be almost unthinkable for her to get out into the water.

two girls paddle boarding - How Conquer Your Fear of People as a Photographer

However, she was determined to overcome her fear – or at least ignore it. Fear can be paralyzing, but finding the strength to overcome it can open new doors in life.

Go Forward Toward Your Goals

I used to be terrible with people, especially with kids. But I used all of the ideas above to break out of my shyness and conquer my fear of people. I still feel uncomfortable at times. But now I run my own photography business specializing in people! Whether it’s families or individual portraits, I’m able to connect with people and help them to feel comfortable in front of the camera.

If your goal is to become a creative photographer who is comfortable and confident with people, follow the steps above. It’ll take time, but start small and soon you’ll be thriving among people.

The post How Conquer Your Fear of People as a Photographer appeared first on Digital Photography School.


Digital Photography School

 
Comments Off on How Conquer Your Fear of People as a Photographer

Posted in Photography


Don’t Fear Photo Post-Processing – Shooting is Only the First Part of the Image Creation Process

14 Sep

You have just bought your new bright shiny camera and you are sure that it is just the thing that will help you create better images. You’re shooting JPG with the camera’s automatic program modes, but you’re not getting the results you wanted. You keep upgrading your cameras thinking that will do the trick, only to find that the quality of your imagery isn’t getting any better. What’s going on?

Lightroom Banner - Don’t Fear Photo Editing - Shooting is Only the First Part of the Image Creation Process

You may be missing an important part of digital photography, post-processing, with a state of the art processing program like Adobe Lightroom or Photoshop.

Before and after

Iceland Light Before - Don’t Fear Photo Editing - Shooting is Only the First Part of the Image Creation Process

This image of a lighthouse in Iceland was taken on a bright yet overcast day. In a matter of moments with the help of Lightroom, it became a favorite.

Iceland Light After - Don’t Fear Photo Editing - Shooting is Only the First Part of the Image Creation Process

The role of post-processing in photography is not new

There are several integral parts to digital photography. The technical and creative aspect of using your camera, and the technical and creative application of post-processing your images. Each part is equally important and when all the pieces are put together, that’s when the magic starts to happen.

Unfortunately, many people are still thinking about the days of film when you took it to a lab and the post-processing was done for you. You never had to think twice about how the image was processed. Did you ever notice that different labs gave you different results? That’s because of their level of post-processing.

Now it’s time for you to understand the importance of post-processing if you are going to create better imagery. It will take some time and some dedication to learn, but it will improve your photography by ten-fold.

The first step – shooting with post-processing in mind

First of all, start shooting in RAW format and stop letting the camera make the decisions for you. When you shoot JPG format, it will automatically process your images in camera, even though you may even not be aware of it.

Have you ever taken a JPG and a RAW image and compared the two photographs? The JPG may appear bright and saturated and the RAW file looks flat. That’s because the JPG has been processed by the camera and the RAW file is an unprocessed digital negative.


That RAW file is ready for you to make your own creative adjustments and apply your photographic vision in Lightroom or Photoshop. Only then can you start to recreate that scene you saw when you first took the image.

What kind of post-processing decisions will the camera make for your JPGs? Depending on your camera, it can automatically increase saturation, sharpness, and contrast, but it will also compress your image. There are settings in your camera where you can make blanket adjustments for every JPG (Picture Styles), however, the camera is still making the decisions for you. That gives you zero creative control.

Raw format gives you control

RAW files contain more information and will allow you to have a wider range of tones (called dynamic range) to work with when you bring your images into Lightroom or Photoshop. When shooting in the JPEG format, image information is compressed and lost forever. In a RAW file, no information is compressed and you’re able to produce higher quality images while correcting problem areas that would be unrecoverable if shot in the JPEG format.

The Histogram

Once you start shooting in RAW, it’s very important to be conscious of the histogram. You can bring up the histogram on your Live View shooting screen or after you have taken the shot in your image review screen. Check your camera’s manual for the location of the histogram.

Note: If you shoot with a mirrorless camera you may be able to see the histogram on the screen before you shoot. Check your settings this is very handy.

Why is the histogram important for your photographic success?

If used correctly while shooting, the histogram will give you the information you need to know to bring up the shadows or bring down the highlights and pop out exposure and detail in an image.

The histogram shows you the brightness of a scene and it can be measured as you are shooting, or after you have captured the image. When look at the histogram and see the bulk of the graph pushing towards the right, this means you have an image that may be overexposed (or a really light toned subject).

Overexposed - Don’t Fear Photo Post-Processing - Shooting is Only the First Part of the Image Creation Process

If the data is mostly on the left of the graph, it’s an image that might be underexposed.

Underexposed - Don’t Fear Photo Post-Processing - Shooting is Only the First Part of the Image Creation Process

If the graph spikes on either the left or right “wall” of the histogram, that means that “clipping” has occurred. Clipping happens when you have areas in your photo with no information as a result of over or underexposure. When an area has no information, it is either pure white or pure black which is often referred to “blown out”.

Generally, it is undesirable to have large areas of your image that have highlights or shadows clipping. See the image below. The red areas show highlight clipping, and the blue areas show shadow clipping.

Clipping - Don’t Fear Photo Post-Processing - Shooting is Only the First Part of the Image Creation Process

Because of the limited dynamic range of a camera’s sensor, the area registering as clipped usually leaves the image with no information in the shadows or highlights. A spike touching the left edge of the histogram means that there is shadow clipping. A spike touching the right edge of the histogram means that there are highlights clipping.

What is possible with post-processing?

Many photographers have frustrating results with their images because they don’t embrace digital editing and post-processing. They are doing everything right when they shoot and are good at composition. They know how to expose correctly for the scene, but don’t know where to go with the image once they get home.

For example, maybe they are in a high contrast area and have taken an image with the histogram in mind. Then they open the image on-screen and throw it out because it looks over or underexposed. They don’t know what the post-processing possibilities are even though they may have a viable image. This is where they are missing a large part of the potential in their digital photography post-processing.

Here’s a great example. This image was taken in the Eastern Sierra in California.

Alabama Hills Before - Don’t Fear Photo Post-Processing - Shooting is Only the First Part of the Image Creation Process

It is obvious that the shadows are way underexposed and it creates an interesting silhouette. But, if you look at the histogram, you can see there is space on the left side of the graph which represents the shadows. This means there is more information there, and a good possibility of bringing up the shadows to create a whole different image.

Here is the result after brightening shadows in Lightroom. This adjustment took just seconds and creates a whole new scene.

Alabama Hills After - Don’t Fear Photo Post-Processing - Shooting is Only the First Part of the Image Creation Process

Start with Lightroom

Almost every image needs post-processing. Some people think that’s “cheating”. It’s not, it’s all part of the digital artistic process.

With post-processing, you can create the image you saw when you photographed the scene. Your eyes have the capability of seeing a wider range of light and color than your camera does, so the images need help in post-processing to duplicate the full range of light and shadows. The problem with a lot of beginners, is they tend to oversaturate or over-sharpen an image. So this talent comes with time and practice, practice, practice.


Once you have mastered the basics, there is a lot more you will be able to do with your digital post-processing that will add drama and interest to your photos. The above image of Bridal Veil Falls in Yosemite looks rather flat in the RAW version (left). Once you add saturation, sharpening, and a vignette to the whole picture it starts to pop. Then you can enhance the brightest areas by “painting with light”, and it now becomes a much more interesting image.

Start your post-processing journey with a full featured program like Adobe Lightroom. It is the standard in the industry for professionals, but it is also user-friendly for beginners and helps with both post-processing and image organization. Just be sure that your computer has enough memory and RAM to run these full featured programs. Check the requirements at adobe.com.

Check out our guide to LR:  The dPS Ultimate Guide to Getting Started in Lightroom for Beginners

Nothing is more satisfying than when you have a catalog of 30,000 images and you’re able to find your favorites in literally seconds by entering a few keywords and star ratings. Take some time to set it up, add a class or two, and you’ll be up and running!

Conclusion

Photo editing or post-processing is an integral part of the digital photography puzzle. Don’t think that you can skip this part and come away with satisfying images. It’s just as important to learn photo editing as it is to learn the basic functions of your camera. Only then, will you be able to bring that intentional photographic vision into post-processing and create great images

How are you going to start your post-processing journey? Is shooting in RAW and learning Lightroom in your future? Please share your thoughts with me on this subject.

The post Don’t Fear Photo Post-Processing – Shooting is Only the First Part of the Image Creation Process by Holly Higbee-Jansen appeared first on Digital Photography School.


Digital Photography School

 
Comments Off on Don’t Fear Photo Post-Processing – Shooting is Only the First Part of the Image Creation Process

Posted in Photography


How to Conquer the Biggest Fear in Street Photography

26 Jan

As a street photographer you may have had fear sometimes taking photos on the street. All of us who spend time in the streets shooting know that not everyone likes when you take photos of them. When photographing strangers, our biggest fear is of people noticing that we are taking photos of them or people complaining about being in the frame.

How to Conquer the Biggest Fear in Street Photography

The biggest fear in street photography

Every time this thought hits your mind, just realize that there’s nothing to be afraid of. I’d say that 99% of the fear and anxiety taking photos of strangers comes from inside you, not from the outside. You need to deal with your fears and know that the biggest problem you could have is someone calling the police (which doesn’t happen really often, at least it’s never happened to me). In most of the countries taking photos on the street is allowed and you don’t need permission. Always check the regulations of the country or the province where you are shooting.

If you want to photograph kids I’d recommend always asking for the permission of the parents. In a lot countries you can get in trouble really easily for taking photos of minors without permission. If you want to check in which countries you need consent to take photos, please check this link: Countries that need consent.

Requests to delete the photos

How to Conquer the Biggest Fear in Street Photography

From my personal experience I have to say that sometimes it’s tricky to take shoots of strangers. Some people have come to me asking to delete the photos in front of them. You don’t necessarily need to do that. As per the law in Canada (British Columbia) I can take photos in public places as much as I like. If I want to publish them it’s different story, but you can take photos without having to be worried about getting in trouble. When people ask me to delete their pictures I do it, not because I’m afraid of them because I don’t want to start arguing with someone and lose time that I could be shooting, and out of respect for that person.

Advice to help you be invisible

Since I started shooting I’ve changed my technique a lot. With time you’ll get better and you will feel more confident asking for permission or framing your photo to get an interesting composition.

I have tried different tips and techniques that you can find on the internet, most of them from Eric Kim (one of the biggest street photographers of our time) and from other photographers like Bruce Gilden, among others.

How to Conquer the Biggest Fear in Street Photography

Here is a list of different things people do and my opinion about each of them.

The shooting from the hip technique

You’ll find that this way of taking photos helps you at the beginning but it won’t take you really long if all the photos you do are like this. You need to frame your photo and think about what you want in your frame, otherwise you’ll end up just being lucky.

Shooting from the hip doesn’t allow you to decide, you are just finding something interesting and trying to get lucky pressing the shutter. Let’s be honest, if you want to get good photos don’t do this. Street photography isn’t easy, so you need to be confident and earn the photo. Last but not least it looks pretty shady having your camera on your chest and pressing the shutter when you see something.

How to Conquer the Biggest Fear in Street Photography

Here is my advice to avoid shooting from the hip to give you a better result. What you can do is walk with your camera around like you are shooting a video, people will think that you are just a tourist and won’t care that much what you are doing.

Dress code

There isn’t a proper dress code for street photography, but I will recommend you to dress according to the style of shooting you are gonna be doing. If you go to poor neighbourhoods don’t dress fancy. I often dress with damaged or old clothing to fit in more in that kind of environment.

In case you are shooting in the middle of the city my recommendation would be always dark clothes rather than brighter ones. People won’t notice you that much, and if you want to capture candid moments that’s what you need to blend in more.

Camera and equipment go as light as possible

How to Conquer the Biggest Fear in Street Photography camera gear

In terms of camera equipment, you should always go as light as possible. The less you carry the more freedom you will have when you’re shooting. In my case, I bought my first camera about a year ago (Nikon D7200) and even tho I love the camera I realized after a short amount of time that I couldn’t take the camera around. It was too heavy and too noticeable.

When you are shooting street photography you want to be as invisible as possible, that’s why months later I decided to buy another camera (Ricoh GR II). The advantage of this camera is the fact that it’s super small and I can carry it around all the time. Now I take photos every day, and that helps have no regrets when I see something that I want to shoot.

My personal experience

How to Conquer the Biggest Fear in Street Photography

Since I started I haven’t had a lot of problems. A bunch of people said no when asking for permission but many others said yes. Sometimes people will yell at you for taking photos and others will try to run away from you, but the more shots you take more confident you’ll feel.

I’ve experienced more problems taking photos of rich people than poor people. Which is funny to me, people who have less are seemingly willing to give more than those who have everything.

Rough neighborhood

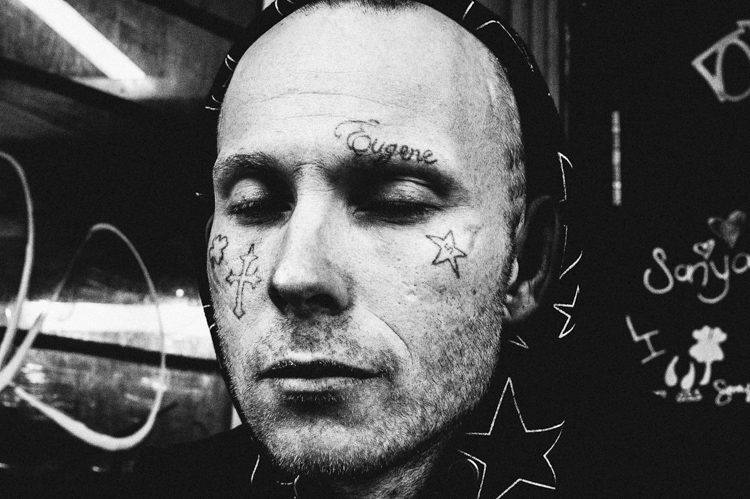
As a photographer based in Vancouver, I find my inspiration in neighbourhoods like Vancouver East Side which is known for their problems with poverty and drug abuse in some zones. Hastings Street is the part of Vancouver East Side that interests me the most. There is where I take most of my portraits and where I get to talk and share some moments with the people.

How to Conquer the Biggest Fear in Street Photography confidence

In the image above you can see my portrait of a man with tattoos on his face. When I saw him I was by myself and I wished to take his photo. I won’t lie to you I was afraid. Taking photos of people doing drugs or in bad situations is not easy. I get too close emotionally sometimes and feel bad for taking photos of them, like I am stealing something from people who have nothing. But in these cases you need to be strong and see photography not as a weapon but as a way to capture something beautiful and exciting to you. Back to the point, I saw this man and I hesitated taking the picture or not, but eventualy I did.

I asked him, “Excuse me, I really like the tattoos on your face and I would like to take your portrait, do you mind?”. (Always compliment your subject, it gives you a reason for taking the photo.) The man looked at me seriously and said, “Just one, do it fast because I’m mad.” So I took the photo as fast as I could and after thanking him I left and continued taking photos of other people.

Be brave but also be safe

How to Conquer the Biggest Fear in Street Photography

In most cases when you are in areas where is not always safe you don’t want to take a long time taking the photo so I switched to automatic and just took one frame. The outcome was great from my point of view but it is not always like that. Rushing is not always a friend of success, but in some cases you don’t have an option.

Many times some of the tough guys you see if you get closer and ask them for a photo you realize how easy is to take photos of them.

Note from the editor: Always put your own safety first and if you feel it would be dangerous or unsafe to take a photo then do not do so.

My point with this article is to help you realize it’s okay to take photos of strangers in street photography. Think about Robert Frank, Bruce Gilden, or Henri Cartier-Bresson. They didn’t hesitate when the shot showed up in front of them, the question is, would you?

googletag.cmd.push(function() {
tablet_slots.push( googletag.defineSlot( “/1005424/_dPSv4_tab-all-article-bottom_(300×250)”, [300, 250], “pb-ad-78623” ).addService( googletag.pubads() ) ); } );

googletag.cmd.push(function() {
mobile_slots.push( googletag.defineSlot( “/1005424/_dPSv4_mob-all-article-bottom_(300×250)”, [300, 250], “pb-ad-78158” ).addService( googletag.pubads() ) ); } );

The post How to Conquer the Biggest Fear in Street Photography by Camil Adell appeared first on Digital Photography School.


Digital Photography School

 
Comments Off on How to Conquer the Biggest Fear in Street Photography

Posted in Photography


A Simple Way to Conquer Your Fear of Street Photography

02 Nov

Frustrating, isn’t it? You are ready to go out, your camera is in your hands, it’s a nice day outside and once you actually go where people are….panic starts settling in. It’s that old fear of street photography.

It’s almost like, as soon as you start putting the camera to your eye, your heart starts beating faster and you start sweating. You can’t think about the picture anymore, it’s gone. You are pretty sure you can get a nice shot if only you could get close enough. But you chose to play it safe and settle for some wide angles where everyone is pretty far away.

fear-street-photography-2

That, my friends, is called the fear of street photography. And if you are reading this, I am pretty sure you want to get rid of it, right? The good news is, you not only can, it’s actually probably not the way you think. Oh, and take it from a guy that couldn’t even look his own older brother in the eye.

But before diving into the logistics of fear, let’s get two things straight and out of the way first.

1 – Getting closer means nothing

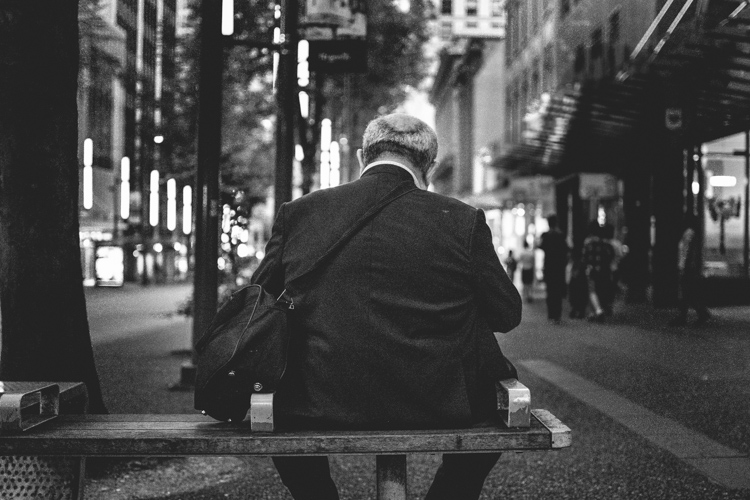
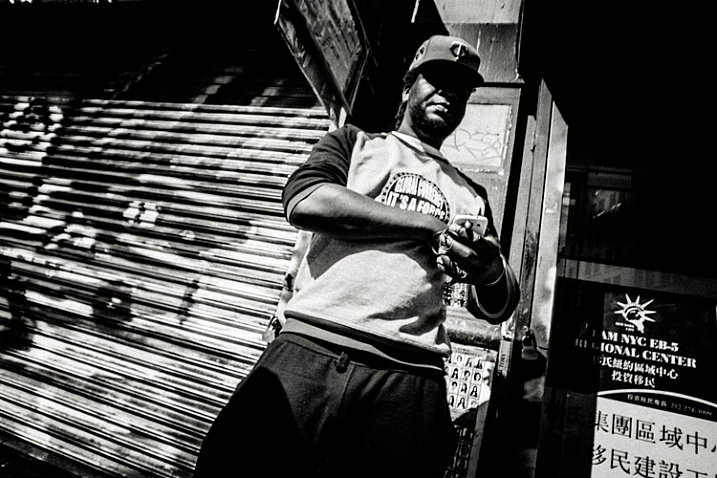
There’s an unspoken creed amongst street photographers, it’s the notion that that you always need to be close for it to be a good image. While it is probably better to be closer than not, that’s just one thing. A bad image is a bad image, whether it’s close or far away. Just getting close won’t magically make an image good. Look at the image below, I’m not particularly close to the guy in the middle and he’s not even facing me!

fear-street-photography-3It’s not just about getting close. There are far away images that are great and very close images that are the epitome of boring. If anything, you might NOT want to get too close to people, so that you can include them and their surroundings. All of this to say what? Street photography is an art form, it’s about images, and getting closer sometimes has no bearing on the final results!

2 – A smaller camera is better

Some cameras bring more attention to them than others. No one would really notice a pocket camera, but pull out a double battery DSLR with a large lens and you will be noticed. So, use a small camera, it’s de facto less attention on you, at least for the time being.

With that being said, let’s get to the nitty gritty of fear!

fear-photography-1

People don’t really care about what you do

Sorry to break it to you. You are not so important that all the people in the street want to do is to notice you. Except if you are Brad Pitt, or Beyonce. If you are, call me! If you are just a regular Joe like the rest of us, the bottom line is this; people just don’t care about you. They care about themselves, and it’s easy to prove. Just go out in the streets without a camera and ask yourself how many of these people actually notice you.

Hint: Very few, most likely none will notice you.

Psychology tells us we all have something called the spotlight effect, where we believe a spotlight on us, that everyone notices us, but that is not the case, it’s just how we feel. But it’s not the same when you have a camera with you and near, right? Yes and no. Again, most people won’t notice you with a camera, but even if they do, what’s the problem?

fear-street-photography-4

Why you fear street photography

What’s the problem if people notice you taking a picture of them? Well, let me ask you a question. Don’t worry, it relates to the matter at hand. Do you feel guilty when your boss pays you? The answer (except if you are doing something fishy) is probably NO. Because you exchanged value for it. Your time and skills in exchange for his/her money, nothing wrong there.

But it’s not the same on the streets. There you feel like you are TAKING something from the person you are photographing. Something that is theirs, and you took it. That’s called stealing, right? So doesn’t it logically follow that you feel fear because you fear being caught at thievery? It’s easily proven. As soon as you ask for permission the fear dissipates because there is no more tension.

street-photography-fear

You fear because you think you are doing something inherently wrong. Let’s look at it in another way, do you feel any fear when just walking down the street? No, because you don’t feel you are doing anything wrong. Fear in street photography comes from fearing the reaction of others to your perceived wrong-doing. And between me and you, if I was stealing, I would feel fearful!

The cure for fear

The answer then is understanding the value exchange that happens on the street. You are not taking anything, you are making a photograph. You are creating something. Of all the people and things to photograph, you have chosen one person to make an image of them. You have acknowledged that person’s existence and importance.

street-photography-fear-03

Sounds cheesy? The photograph is the ultimate ego tool. Check your Facebook, everyone is clamoring for attention through their selfies. Why can’t you be the one that bestows that attention on them with your lens?
Images are so powerful, that a Japanese photographer got carte blanche to photograph Yakuzas, Japanese mafia. Quite powerful, no?

By making a photograph of someone, you are acknowledging their existence, something that every one of us needs and desires at a deep level of our psyche.

fear-street-photography-5

The exchange between you and the subject

Go down the street, give a nod to someone. Smile, and say hello. You have just altered someone’s day with your acknowledgment. Images are like that, they are visual acknowledgment. Once you stop seeing what you’re doing (photographing them) as something that’s wrong and actually see it as something good by exchanging value (they get to participate in the making of an art piece in exchange for their photo) your outlook will start to change. And by doing so you change your way of approaching street photography and the fear will dissipate.

The street photographer’s posture

This is truly where the magic happens because here’s a truth – the street reacts to you. The way you are in the street will dictate how people react to you. That’s the whole secret. But wait. If that was the whole secret, why then did I write all of the stuff above? Couldn’t I just cut to the chase, get right to this part? The streets react to you, so it’s all about appearing confident, right?

fear-street-photography-6

Well, not really because I don’t believe you can fake it. I could tell you to go up and down the streets and act confident, to fake it till you make it so to speak. But I think people smell these things like a dog smells fear. If you think you are doing something wrong, it’s probably going to show in your posture and people will react accordingly.

Street Karma

Think about this with me – you look out your window and this guy is just strolling by your house, all happy go lucky. Then you look out your window once again and see this shady looking guy, looking right and left, as if he is doing something wrong. How are you going to react towards each one? Towards the first one you might even smile, but to the other, you may be ready to call the police.

The same rule applies on the street, it’s called street karma. You will get out of it the energy that you put into it. And it’s no woo-woo stuff either. It’s because of mirror neurons, those things in your brain that make you tend to mimic others. The street reacts to you. That’s what makes the difference between getting a dirty look and a smile of amusement.

street-photography-fear-04

Conclusion

As you have seen, people care less about you than you may think, and the streets react according to how you hold yourself. Act like a thief, be treated like one. But act like you are enriching the world, and people will react differently.

Such things can be faked. It all comes from knowing that what we are doing in the street isn’t anything wrong. Indeed we are not thieves because as photographers we seek to simply interpret the reality that is in front of us with our lens. Now go out there and shine forth. Be yourself, stay focused, and keep on shooting.

googletag.cmd.push(function() {
tablet_slots.push( googletag.defineSlot( “/1005424/_dPSv4_tab-all-article-bottom_(300×250)”, [300, 250], “pb-ad-78623” ).addService( googletag.pubads() ) ); } );

googletag.cmd.push(function() {
mobile_slots.push( googletag.defineSlot( “/1005424/_dPSv4_mob-all-article-bottom_(300×250)”, [300, 250], “pb-ad-78158” ).addService( googletag.pubads() ) ); } );

The post A Simple Way to Conquer Your Fear of Street Photography by Olivier Duong appeared first on Digital Photography School.


Digital Photography School

 
Comments Off on A Simple Way to Conquer Your Fear of Street Photography

Posted in Photography


Fear, Laziness & Change

27 Jul

Fear Laziness Change – Lazy, slow and un-imaginative industries , companies and people


Fashion Photography Blog

 
Comments Off on Fear, Laziness & Change

Posted in Uncategorized


9 Steps to Get Over Your Fear of Off-Camera Flash

25 Feb

fastflash_bookIf you want to learn more about using flash for creating portraits, pick up Gina’s brand new dPS ebook: Fast Flash for Portrait Perfection. Now on sale for an introductory price for a limited time only.


For the first three years as a professional photographer I suffered a severe case of Photophobia and Photoaugliaphobia. I tried to cover it up by saying things like, “I’m a natural light photographer” or “I really don’t like the aesthetics of flash photography”. In reality I was scared to death of using flash. I just couldn’t wrap my head around the concepts and science behind it.

Fear: False Evidence Appearing Real

  • Photophobia – Fear of light
  • Photoaugliaphobia – Fear of glaring lights

Each shoot I went on that involved flash was accompanied by a sleepless night, with dreams about turning up to the shoot naked (anxiety dream) and just the thought of having to use flash, also had a mild to moderate laxative effect on me.
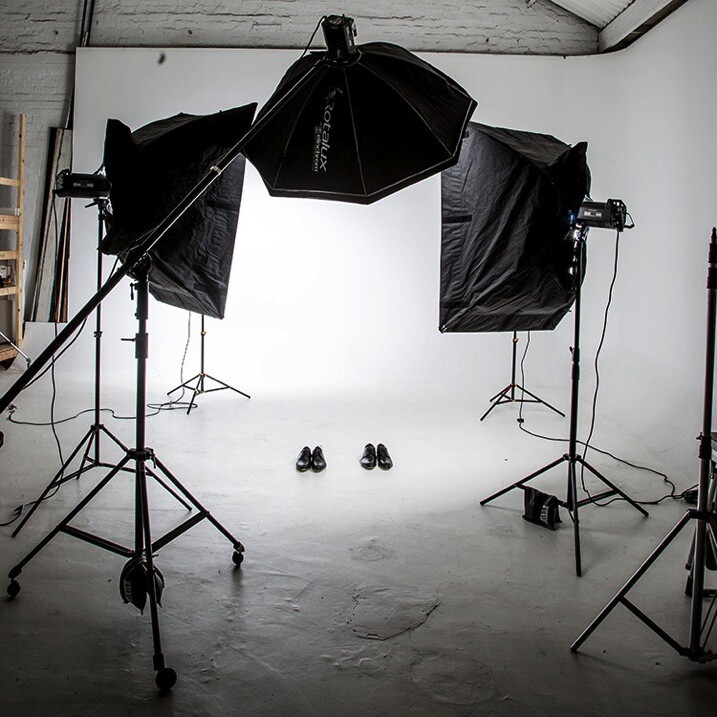
Fearflash main

I managed to work out a system where if I shot at f/8, with the flash dialled in to a particular spot, I would end up with a shot that looked half decent. I had a few successful shoots (and by that I mean there was a detectable image on the film, often blown out by two stops) and was feeling pretty confident about my high-tech – stand here, shoot at f/8, and don’t change anything on the dial – approach to flash photography.

I started getting cocky and developed a “geez you’re good you should do this for a living” strut. In my mind, I’d mastered flash. Sure it wasn’t amazing, but I’d convinced myself that I was pretty good at it.

Then everything changed. I botched a few big jobs in a row; a wedding, where only one frame turned out, a corporate shoot where the flash overexposed the logo, and a historic family portrait where 200 members of the same family flew in from around the world to be in one place together. I set the camera to the wrong shutter speed. The only record of the event is now a faded memory.
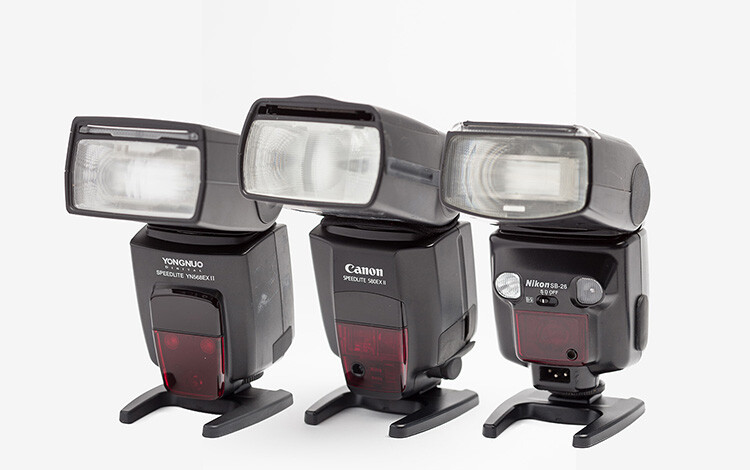
Gear 11

I blamed Flash. It was the common denominator – it’s unreliable, difficult to use, and completely stupid. Why bother, I’m a natural light photographer and I don’t need this in my life.

I then started to go through all the stages of grief:

  • Denial – this isn’t my fault right? Flash did it. It’s stupid, right?
  • Anger – what do you mean this is my fault?? Are you kidding me?
  • Bargaining – dear God/Universe/Oprah please make this go away. I will never eat Nutella again.
  • Depression – I suck at photography, what was I thinking? Who do I think I am?
  • Acceptance – I suck at photography, what was I thinking? Who do I think I am?

Probably the toughest, and most grown-up thing I did as a professional photographer, was to face up to the fact that I sucked at flash photography. I needed to develop a learning style, a protocol that would help me understand flash, learn how to use it well, and stop being afraid of it.
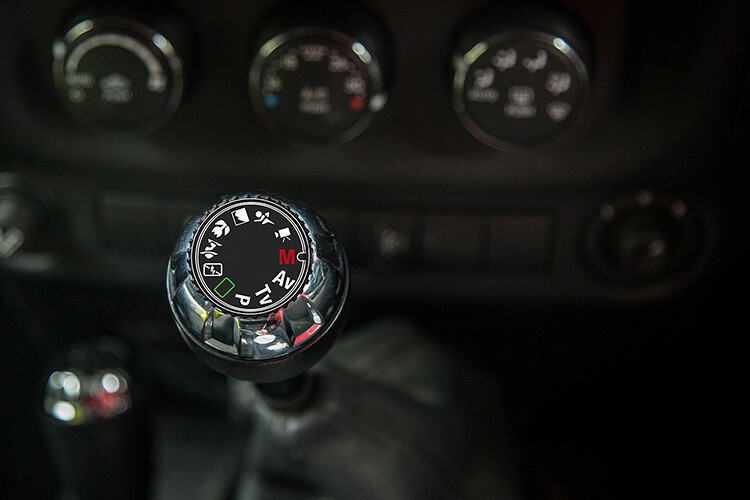
PG 51 manual mode

Learning a new skill can be overwhelming at first. I can still remember learning to drive stick shift, and bunny hopping my father’s car around the block, stalling at every red light and being frustrated at the number of things I needed to remember. At the time, I thought there was no way I could possibly remember how to do everything. But, little by little, day by day, I started to overcome the shock of the new, and driving became second nature.

I think the reason that many photographers become frustrated with flash, is because they are working with lighting styles, and modifiers that are too complicated and involve too many variables. Most of us are impatient. We want to get to the “good stuff” right away. But the danger is that you never really understand the subtle differences between each lighting style and modifier.

When it comes to teaching flash photography, I like to implement what I call, The Bruce Lee Protocol. Bruce Lee was a master in martial arts, whose training requires participants to master each level, or belt, before they move on to the next. If a white belt in Karate attempted to break a plank of wood with a roundhouse kick, they would probably end up breaking their foot.
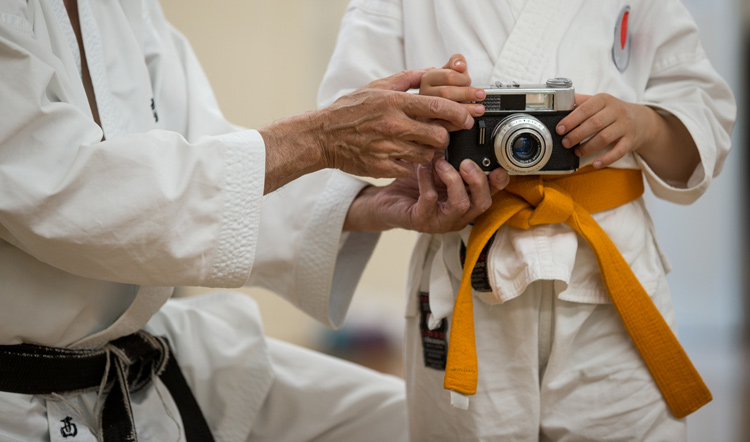
Fearflash 2b

We all want to skip straight to the black belt, but doing this before we’re ready usually ends with tears.
Taken for: Japan Karate Association Australia (JKA)

It took me many years to realize that owning every single light modifier and photography gadget, was not going to make me a better photographer. The one thing that would improve my photography was deciding on one lighting style and modifier, and working with it until I felt I’d mastered it.

I use one light with the same modifier for 80% of my fill-flash photography. I can vary the look of my shots by the way I expose my images, and where I position the light. If you’re just starting out, I recommend that you buy only one modifier and one light, then work with that setup until you’re confident, and happy with your style. Here is my stepped approach to learning how to light with flash based on The Bruce Lee Protocol.

The Bruce Lee Protocol to Learning Flash

Just like training for a black belt, I believe it’s a great idea to stay on one level, until you feel 100% ready to move on to the next. A white belt in Karate would never attempt to break a plank of wood in half with a roundhouse kick , a newbie to lighting shouldn’t attempt to work with a beauty dish before they have mastered working with an umbrella.

Step One: White Belt – Laying the foundation

I think it’s a great idea to ease into lighting, by starting with daylight. Work with hard light, soft light, flat light, and contrasty light, until you are confident you can notice the subtle differences.

Step Two: Yellow Belt – Easing into a new way of thinking

Start by adding fill-flash to your images, using flash on-camera, set to auto. This will give you the confidence to continue working with flash. The next stage is to introduce flash on-camera modifiers, to soften and shape the light.

Step Three: Orange Belt – Expanding your knowledge
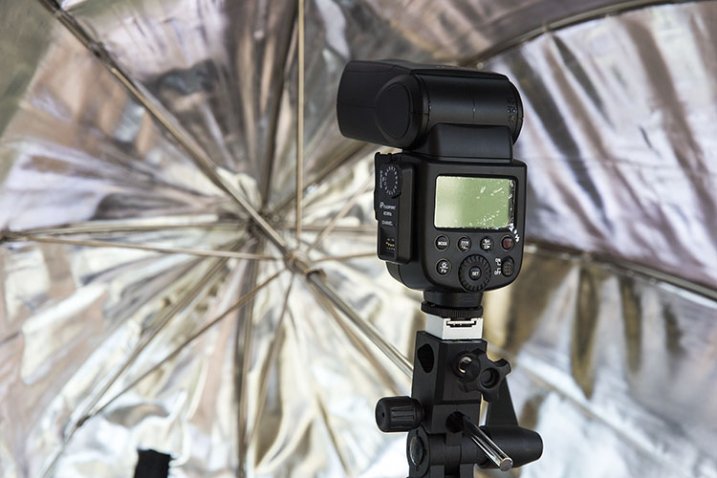
FlashPoint Li-on zoom flash and commander set

Umbrella light is a great choice for a fill-light. It closely resembles daylight, making it perfect for lighting large areas. Because the light is very soft and spreads everywhere, this is the easiest light shaper to work with, making it an ideal light modifier to start learning.

Step Four: Green Belt – Developing your skills

Once you have gotten the hang of working with umbrellas, try adding reflectors to your shot, and focus on balancing the daylight and flash.

Step Five: Blue Belt – Confidence

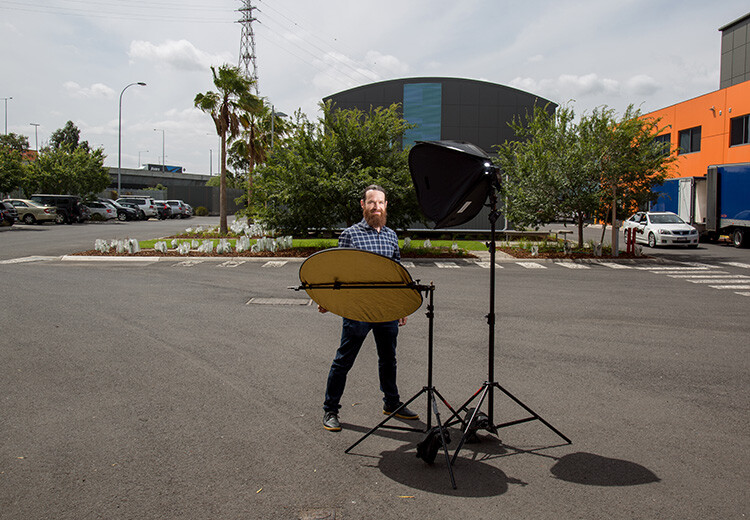
It’s time to ditch the Umbrella and move up to softboxes, umbrellas boxes and octaboxes.

The umbrella box is the most convenient light modifier, because it combines the simplicity of an umbrella, with the control of a softbox. The box design eliminates the complications of using this modifier outdoors. Umbrella boxes are also cheaper than softboxes, so they’re a great choice for your first serious light modifier.
Head 5 200

Softboxes create a soft light that is more contained than that from an umbrella. This makes it a better choice of light modifier if you want to light only certain areas of your image. They are completely enclosed, and are a much better light modifier to use outside, as they are less likely to blow around in windy conditions.

Step Six: Purple Belt – Getting serious now

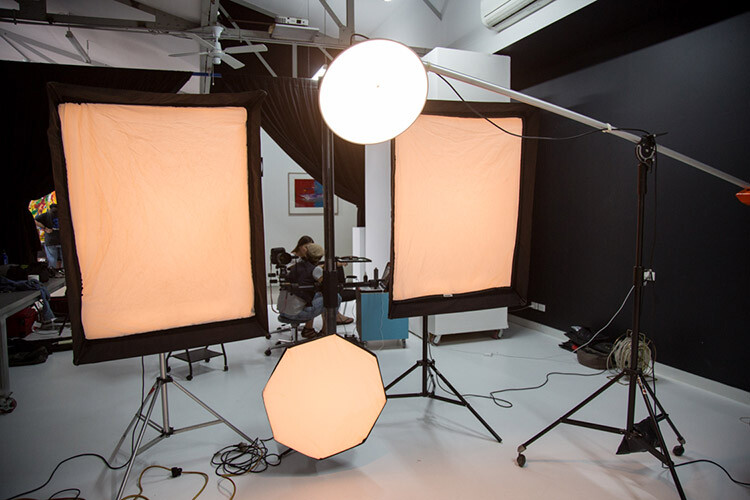
Once you have mastered soft light, it’s time to start experimenting with hard light. Hard light is tricky to work with, because there is very little room for error. Hard light modifiers include beauty dishes and grid spots.

If you’ve done all the work, adding a beauty dish or grid spot to your lighting setup, will be much easier to manage at this stage.
Fearflash 1

Step Seven: Brown Belt – Bringing everything together

Now you are ready to work with hard and soft light at the same time. The hard light, like a beauty dish or grid spot, can be used as the main light, and the soft light becomes the fill.

Step Eight: Red Belt – Developing your own style

Once you’ve mastered each of the lighting styles individually, and know how to work with them together, you can focus your attention on developing a lighting style that is unique to you.

Step Nine: Black Belt – Enlightenment

A black belt in lighting comes with the realization that we never really stop learning. Most of the best photographers in the world will admit that they are yet to master their craft, and the more they know, the more they realize they have yet to learn.

One of my greatest highlights of the past few years, has been watching the students I have taught overcome their fear of flash, and seeing their styles evolve and develop.

Here are some of my favourite examples of their work, and the steps they took to create these images.

Lisa McTiernan
Lisa McTiernan

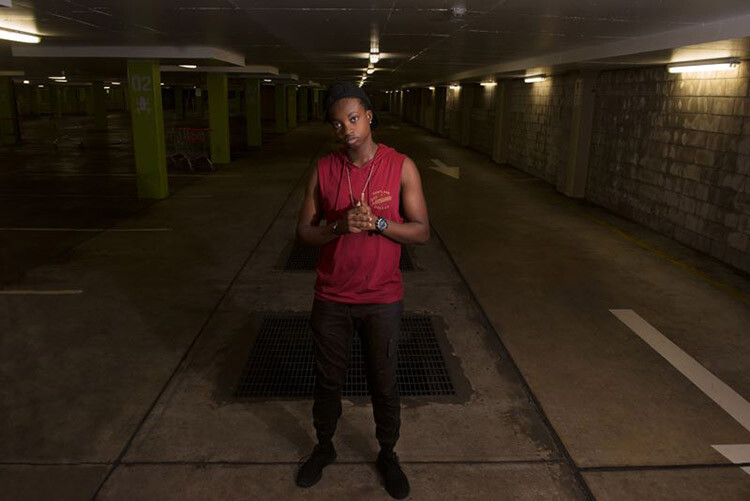
Off-camera flash has scared me for a while now. Finally! Simple, easy to understand info, that even after one go has opened up a whole new world for my photography. Gina Milicia you’re my hero. Legit.

I wanted a moody vibe for this shoot in an empty concrete carpark. I wanted the shot to look like it was lit by the fluorescent lights on the walls and ceiling, and not by my speedlight. After setting the exposure for the ambient light, I bounced the flash (with the diffusion dome) off the ceiling at an angle to soften, and bounce it back onto my subject’s face and upper-body to highlight his red shirt. I set the flash to 1/16 power, and adjusted the level until I got the look that worked. Exposure: 1/100th, f/5.6, ISO 500, 27mm lens.

Kristi Louise Herd

Kristi Louise Herd

www.herdstarphotography.co.uk ( weddings only for now) www.flickr.com/photos/herdstar

This is from a photo shoot I did with an aspiring model, it was my first night shoot and my first using flash. Before I did the shoot I read and re-read your ebook, Portraits, Lighting the Shot. Tricks I learned from you became invaluable. I used the trick with the phone to focus, as the light was pretty dim. It worked fantastic, and the softbox, which I had never used before, was held just above and sightly to the left of the model (I had seen this again in a diagram from your ebook). Camera settings: Nikon D750 f/4.2, 1/30th, ISO 800, focal length 112mm. I would never have achieved this shot without learning from you Gina Milicia.

Erica Rampant
Erica Rampant

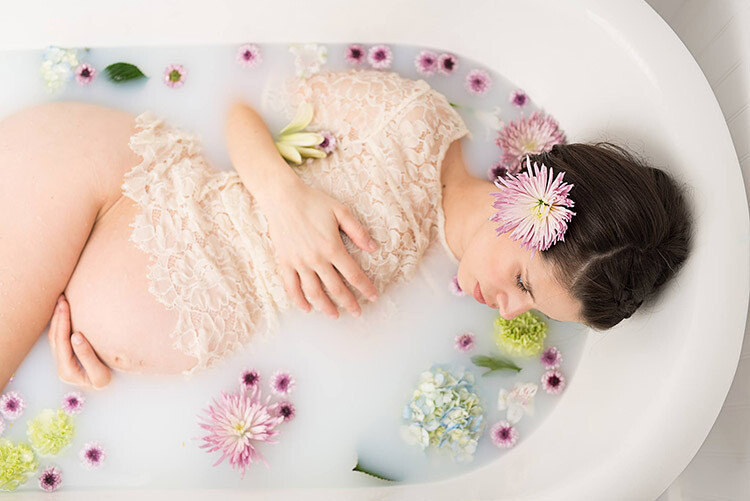
Hi Gina, I asked a few weeks ago about placement for lighting for a milk bath shoot. Here is the result! It was taken with a Nikon D610, 50mm Sigma Art lens, ISO 100, f/2.2, 1/160th of a second.

This is my friend Antonette, she just gave birth to a healthy baby boy and I was there to photograph it. She had a home birth and her baby was born in water! I’m still a new photographer and have only been shooting for five months, but have been listening to you, and learned so much!

Natalie Ord
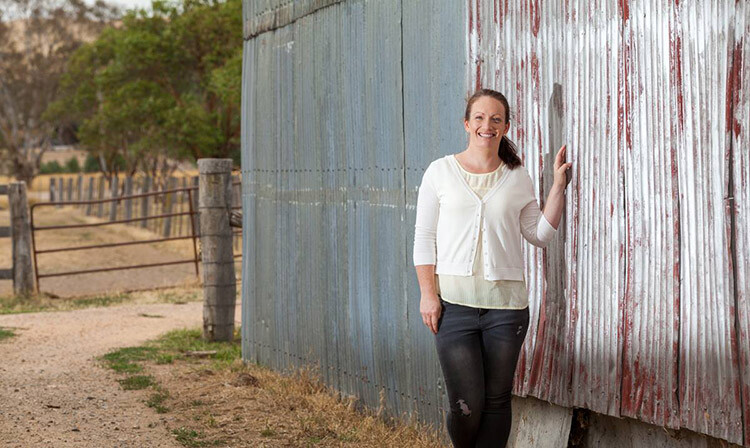
Natalie Ord

This is a shoot a recently did for a client. The day was windy, overcast, and I had limited time. I needed to portray the client as friendly, accessible, and show that she is rural-based, so it was important for me to get the background exposed right. I couldn’t have done that without using off-camera flash.

Settings were 1/320th, ISO 250, f/7.1, using PocketWizards, a Canon Speedlite 600EX without a softbox, as it was windy and I didn’t have anyone to hold the stand, shot on my 70-200mm f/2.8L with a Canon 5D MkII.

Gary Lun
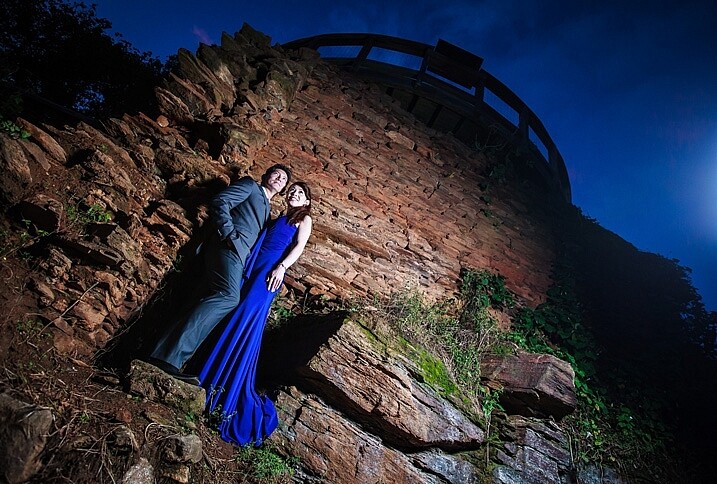
 

Gary-Lun-3

Canon 5D MkII with Canon 16-35mm f2.8 at 18mm, f/4.5, 1/125th, ISO 1600. Flash was Yongnuo YN560III at 1/8 power, positioned at camera right. Softbox was using SMDV SpeedBox-60.

Quick story: I was doing an engagement shoot at a typical location in town for many photographers. It was packed with photographers that day! Anyway, in order to get a unique photo I knew I must use flash. So I waited until all other photographers were gone, because the sun is going down (since most of them were using natural light), took my flash out, asked the couple to stand near something with texture, and took the shot.

Phil Enn
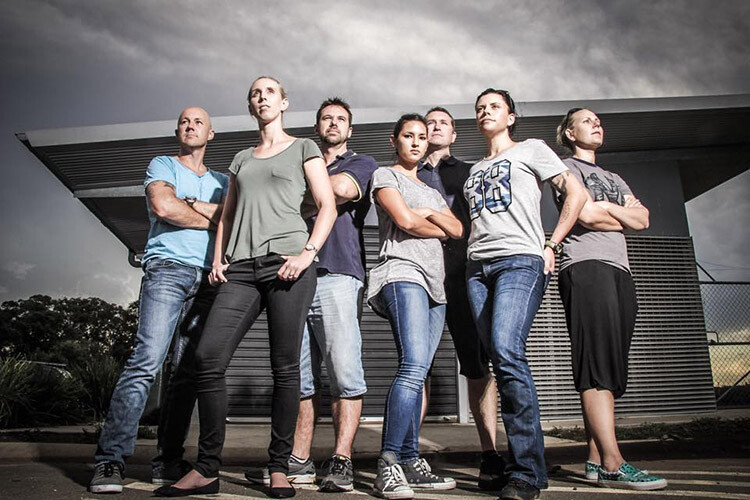
Phil Enn

Canon 7D, 17-85mm at 17mm, f1/6, ISO 200, six speed lights held in a bunch, off to camera right.

Andrew McNamara
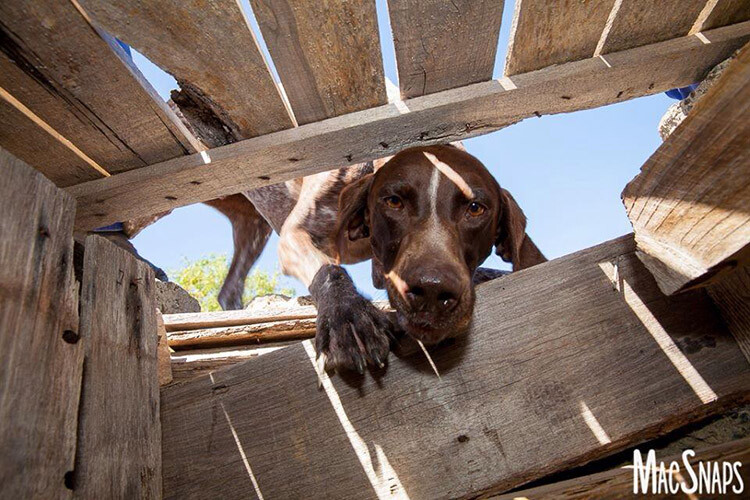
Andrew McNamara

Canon 5D MkII, 24-70mm at 24mm, f/9.0, ISO 100, 1/50th with a camera-mounted Canon 480exII Speedlite. As stated in the original story, shot from inside a training element for the Southern Cross Search Dogs photoshoot. I had a diffuser on the flash, just for the safety of the dogs eyes, and bounced it just a little.

P.S. I’m one of those people who are afraid of flash so this was a big step!

Rahim Mastafa
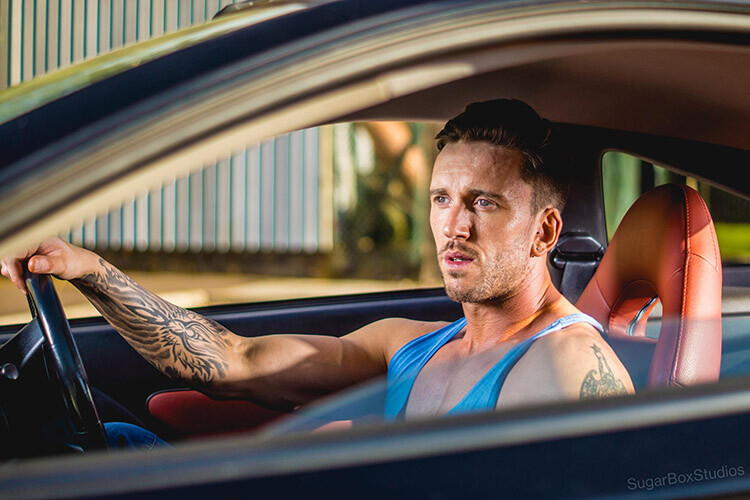
Rahim Mas
Inspired by one of your ebooks, I used one studio strobe as a key light to the front of him, and a speed light as a kicker, over his shoulder on the backrest. Settings were: f/2, 1/1500th, ISO 100, Sony a77, 50mm lens.

Matt Zahn
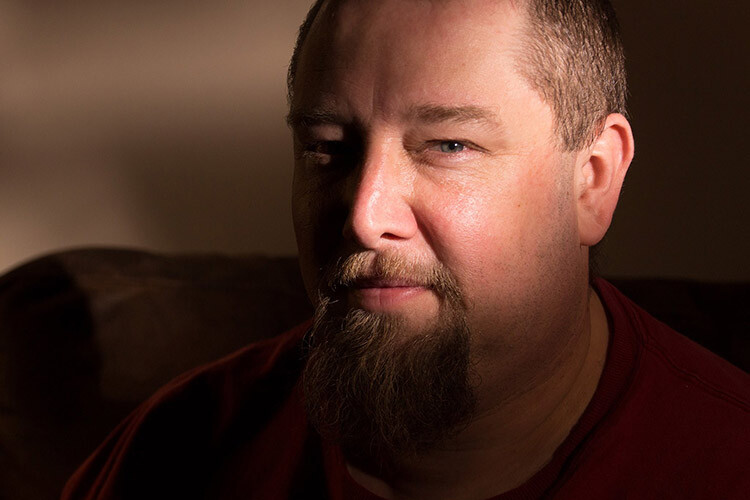
Matt Zahn

This was part of my self portrait challenge. Since it was nighttime, and obviously no natural light to shoot with, I attempted to create the illusion that this was natural light coming through a window. I used my Canon 430exII Speedlite on my T5i. I slid a home-made snoot over the end, and used some electrical tape to create some of the shadows. This shot was taken at 1/400th, f/5.0, ISO 400. I also placed a gold reflector to camera left, behind me.

Scott Stokhaug
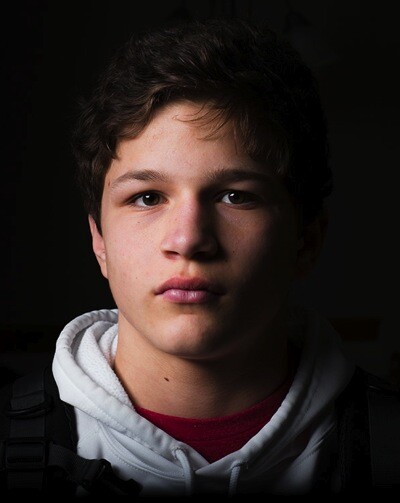
Scott Stockhaug

With the help of your ebook, Flashfast for Portrait Perfection, I made a minimal investment to get that speedlight off my camera, and open many new doors! This photo is my Rembrandt lighting, along with black background that was shot in my home, in broad daylight, with no backdrop. I love this technique!

Next step

So where are you on The Bruce Lee Protocol steps? Do you have a fear of flash? Have you overcome and mastered it already? Please share with us where you are, and what you’ve done to conquer your fears.


fastflash_bookIf you want to learn more about using flash for creating portraits, pick up Gina’s brand new dPS ebook: Fast Flash for Portrait Perfection. Now on sale for an introductory price for a limited time only.

googletag.cmd.push(function() {
tablet_slots.push( googletag.defineSlot( “/1005424/_dPSv4_tab-all-article-bottom_(300×250)”, [300, 250], “pb-ad-78623” ).addService( googletag.pubads() ) ); } );

googletag.cmd.push(function() {
mobile_slots.push( googletag.defineSlot( “/1005424/_dPSv4_mob-all-article-bottom_(300×250)”, [300, 250], “pb-ad-78158” ).addService( googletag.pubads() ) ); } );

The post 9 Steps to Get Over Your Fear of Off-Camera Flash by Gina Milicia appeared first on Digital Photography School.


Digital Photography School

 
Comments Off on 9 Steps to Get Over Your Fear of Off-Camera Flash

Posted in Photography