RSS
 

Posts Tagged ‘Family’

4 Lessons for Aspiring Family Portrait Photographers

08 Aug

Over the past four years as my wife and I have done more family photography we have learned quite a bit. Going through some of those early shots I’m sometimes amazed that anyone paid us money for them at all! Self-reflection is critical not just for photographers, but any artist and indeed anyone who wants to improve at a given skill over time. In thinking about what has worked and what hasn’t worked I repeatedly noticed four key elements that I wanted to share with you. Hopefully, these will be useful to you if you are just starting out as a family portrait photographer, and you won’t have to make the same mistakes I did as I was learning them!

4 Lessons for Aspiring Family Portrait Photographers

1. Location, location, location

I live in Stillwater, Oklahoma, and there’s a spot in the middle of our town that a lot of people think is the ideal location for photography. It’s called Theta Pond and sits in the heart of the campus of our very own Oklahoma State University.

When you go there for an afternoon stroll it’s almost impossible not to be taken in by the beautiful flowers, towering trees, and flocks of waterfowl that dot the serene landscape. There are stone paths, wooden bridges, and several fountains sending water high into the air. They all combine to create a scene which practically screams “Do your family portrait photography here!” So a lot of people do just that, and it’s how I started out as well.

4 Lessons for Aspiring Family Portrait Photographers

You might think a location like this would be ideal for family photos. But you’d be wrong.

Your town probably has a Theta Pond too; a park, garden, waterway, or another setting that seems like it has been tailor-made for capturing poster-size prints of happy families with cute kids. However, if your town is anything like mine, your Theta Pond is probably one of the last places you really want to shoot.

Great for a picnic, not always optimal for portrait sessions

While locations like these are ideal for getting out and enjoying nature, they are often plagued by a host of other issues that make it quite difficult for taking good pictures. There’s traffic whizzing by in the background, people walking around and getting in the way of your shots, and trash bins and informational signs scattered all about. And then there’s the matter of all those ducks and geese you’ll find at just about any pond, lake, or river. You might think they’re fun to have around but they leave some nasty messes behind that can stain jeans and ruin dresses if you ever want your clients to sit on the ground.

4 Lessons for Aspiring Family Portrait Photographers

The kids look great in this photo, but there are way too many distractions in the background including a person walking through the frame between the boys. I actually gave this shot to a client and even though she liked it, I have since learned that I prefer to go to other locations for photo sessions.

When I started getting more serious with family portrait photography I began looking at other places besides just what was popular, and found that a whole new world of opportunities opened up for me. I found places off the beaten path that were much more convenient for me and my clients to meet, much less crowded, and often just as scenic and pretty.

Your subjects take priority over the background

Also, it’s important that you find locations which complement your subjects and don’t distract the viewers. The local botanical garden might seem like a great place for a photo session. But you may end up taking your viewers’ attention away from the people and putting it on the plants and flowers by accident. Nowadays I like simple groves of trees, empty fields, or old barns and farm settings that aren’t flashy but make for great photography. Wherever you shoot your photos, choose your locations intentionally such that they fit your photography and your subjects, not just because a friend thinks it would be pretty.

Wherever you shoot your family portrait photography, choose your locations intentionally such that they fit your style and your subjects, not just because a friend thinks it would be pretty.

4 Lessons for Aspiring Family Portrait Photographers

This location may not be as flashy, fancy, or popular as a park with fountains, but that’s exactly why I like it so much for photography sessions.

2. There’s no substitute for good lighting

This second rule works in tandem with the first regarding location. Wherever you choose to do your photo sessions, you need to make sure to pay attention to lighting. Great photographers can wrest beautiful images from the most challenging lighting conditions. But for the rest of us mere mortals, it’s essential to stick to the fundamentals. For family sessions that usually comes down to two basic tips: be careful when shooting in broad daylight, and make sure your subjects are evenly lit.

Avoid direct sunlight

Bright sunlight is, contrary to what some beginning photographers may think, far from ideal in terms of taking good photos of people. The harsh overhead lighting often creates shadows, causes people to squint, and results in uneven lighting across the entire frame with some parts of a picture being very bright and others ending up quite dark. You don’t want Grandma looking perfect while Grandpa is squinting to keep the sun out of his eyes, or bright patches of light showing up on shirts and ruining haircuts.

Use even diffused light

Fortunately, it’s not too difficult to make sure your subjects are well-lit even if you are shooting at high noon, as long as you are aware of your surroundings and use the elements to your advantage. Look for buildings that cast nice long shadows, overhangs that you can stand beneath, or even trees that block out a lot of the sun and allow for nice even lighting.

4 Lessons for Aspiring Family Portrait Photographers

I had this family sit in a park shelter to combat the harsh overhead sun. They’re evenly lit and properly exposed, which is what really mattered to me when taking the shot.

You can also use accessories like a diffusion panel to cast a pleasing shadow on your subjects which help mitigate the effects of harsh, bright sunlight.

4 Lessons for Aspiring Family Portrait Photographers

These videographers are using a diffusion panel to make sure their subject is evenly lit, despite the harsh overhead sunlight. The background will be overexposed, but that’s fine because the person being filmed is going to look fantastic.

Shoot at golden hour

Another option is to forego the afternoon hours entirely and shoot photos during what’s known as the golden hour. This generally starts about an hour prior to sunset (or from sunrise to an hour after) but can vary depending on your exact location.

During this short window of time, the sun is low on the horizon and it bathes your scene in a rich, warm light that is amazing for portraits. You can have your subjects stand almost anywhere and face any direction, or ask them to face the sun which will make their eyes sparkle nice and bright. Everything looks so rich and beautiful during this time, but it passes quickly so make sure to use your time wisely and work efficiently to get the shots you want.

4 Lessons for Aspiring Family Portrait Photographers

I shot this as the sun was setting which resulted in rich, deep colors. I also put these kids in the shadow of a tree to make sure they were evenly lit, which resulted in a pleasing picture overall.

The message that I hope I’m conveying here is that there’s just no substitute for good lighting. I didn’t touch on things like off-camera flash which can also be used to manipulate the light in a scene. But if you’re looking to get started with family, child, or senior portraits one of the best things you can do is use the tools you already have to make sure your subjects are evenly lit and properly exposed.

You can fix a lot of things in Lightroom and Photoshop afterward, but poor lighting isn’t really one of them.

3. Know your camera settings and how to change them

There’s an old Greek amorphism, gnothi seauton, which has been the basis for countless philosophical discussions over the ages. Roughly translated, it means know thyself and often functions as an exhortation for an individual to be intimately aware of who they are, what makes them tick, what their goals in life are, etc.

Even in the most controlled studio environment, things can change at a moment’s notice, and often there isn’t much you can do about it. So it’s important to know your camera settings and how to change them if you need to fast.

4 Lessons for Aspiring Family Portrait Photographers

Your camera might have so many buttons and menu options that it seems overwhelming. It’s good to figure out how they work on your own time, not when you’re on location with clients.

It’s not enough to simply know about fundamentals like aperture, shutter speed, and ISO when you are doing formal photo sessions. You need to know how to control these parameters on your camera and when to change them if you need to in a hurry. The former comes from reading your manual, looking at articles online like the ones we have here at dPS, and a lot of experimentation. The latter often comes only from years of experience.

Get up to speed with your camera on your own time

I’m a big proponent of poring over your camera’s manual. But when you’re on location with clients that is not the time to try and figure out how to use your exposure compensation button or in which menu the auto-ISO setting is buried. You need to be intimately familiar with how to access and alter the settings on your camera in order to get the shots you want and deal with conditions as things change.

One of my favorite tricks to help learn the camera better is to do a practice session with a friend or family member. Go out to a location and make sure you know how to adjust various camera settings on the fly. Then tell your helper to try something you aren’t expecting which could require a faster shutter, higher ISO, etc. Practice changing your camera settings in this type of environment before you go out with clients, so when the unexpected happens you’re as ready as you can possibly be to deal with it in the moment.

4 Lessons for Aspiring Family Portrait Photographers

Remember that Theta Pond example from earlier? When this moment came up during that same session I was able to think on my feet and quickly adjust my aperture and ISO to get this impromptu headshot which the boy’s mom really liked.

4. Make the experience memorable

One of the most important aspects of doing a photo session for clients is that it’s about much more than the end product. Wells, Valacich, and Hess (2011) found that the quality of a website is related to the perception of quality regarding the products being sold on the website. A higher-quality website, their data tended to show, meant that consumers perceived the things they were buying as being higher quality than the same products purchased from lower-quality websites.

The same holds true for photography, in that how your clients view the final photos you deliver to them is directly related to how they feel about the session itself. If you make the experience fun, enjoyable, and stress-free while engaging your clients in friendly conversation they will be more likely to enjoy, appreciate, and share the pictures when they receive them. Conversely, if your clients get top-notch pictures but you showed up for the session late, unprepared, and stressed-out, then they will likely have a lower opinion of the photographs.

4 Lessons for Aspiring Family Portrait Photographers

This family’s dog wandered into the photo shoot totally uninvited. I’m not much of a dog person but I set that aside, went with the flow, and got some shots that the family really liked. It also helped put the kids at ease and so they enjoyed the rest of the session more.

The overall experience is important

To put this in a different context, let’s say you are looking to buy a new microwave. Two stores in town have the one you want at the exact same price. One store has a clean parking lot and interior, bright lights, neat shelves, and friendly employees. The other store has a dirty trash-filled parking lot, dim and flickering lights, haphazard shelves, and employees who will barely give you the time of day. From which store are you likely to purchase the appliance? If you’re like me you’ll go to the first store. Then if your friends are ever looking for a similar appliance you will probably recommend the same store with great enthusiasm. Budding family photographers would do well to remember this concept and apply it to their approach to dealing with clients.

Taking photos is not just about the end product but the whole photographic experience. Make it fun for your clients from the time you first interact with them to when you deliver the final products. Get to know them, and don’t be afraid to show your own personality too. Make the photo session fun and enjoyable, and if there are kids involved, make sure to spend time getting to know their names and finding a bit more about them. (This has a couple of bonus side effects too – parents are thrilled when photographers spend time getting to know their kids, and the children will be more likely to listen to you and follow directions during the session.)

Don’t underestimate the value of providing a good experience

The point is that if your clients enjoy the photo session, they are likely to assign a high perceived level of quality to the end product and will recommend you to their friends, coworkers, and especially their acquaintances on social media.

4 Lessons for Aspiring Family Portrait Photographers

This couple invited me into their home for a rather emotional photo session due to a medical condition their daughter has. While I had a job to do as a photographer, that was only a small part of the whole experience.

It’s not your job to be your clients’ best friend, but it is your job to make the photo session something they will remember in a positive light. Do what you can to earn their trust and respect, as this can pay off in many ways long after you deliver the pictures.

Conclusion

One of my biggest weaknesses as a photographer, or even as a person, is that it’s difficult for me to go back and look through things I’ve done in years past. I often find it more than a little embarrassing to read things I’ve written, examine things I’ve built, and look at photographs I’ve taken because I think the work I’m doing now is so much better. Yet in five years I’ll probably dust off a few of the pictures I’m taking now and wonder what in the world I was thinking when I took them!

However, this type of self-reflection is essential for growth in any profession, hobby, or craft. It’s only by learning from our previous experiences and examining our mistakes as well as our successes that we can truly grow and refine our skills.

The four lessons I have detailed in this article are by no means comprehensive, but they are things that have turned out to be extremely important to me over the years and I hope they prove helpful for you also. I’m also curious to hear from you, especially those of you who have been doing family portrait photography for a long time. What are some of the important lessons you have learned over the years? Please share in the comments below and I look forward to reading them.

The post 4 Lessons for Aspiring Family Portrait Photographers by Simon Ringsmuth appeared first on Digital Photography School.


Digital Photography School

 
Comments Off on 4 Lessons for Aspiring Family Portrait Photographers

Posted in Photography


Benjamin Button captures *and edits* your family video footage

17 Jun

As a parent, I take a lot of photos and videos of my children and the things we do together as a family. I edit most of the photos but barely any of the videos, because who has time for that? Even when I manage to set aside some time to go through them, I get sucked into a rabbit hole of watching old videos of my son laughing for the first time or my daughter running around the house with a waste can on her head. Those videos are adorable, seriously.

That’s why the announcement of a Kickstarter for a new HD video camera that captures, culls and edits (!!) video for you has caught my eye. Benjamin Button is a hands-free and kid-friendly “button” that clips to your child’s (or your) clothing and records up to 3 hours of video. When you plug it in to recharge, it automatically processes the video and uses a combination of face detection, sound recognition, and human activity to analyze the footage and edit it into a movie for your enjoyment. You can also use a mobile app to manually select footage that you want to be included, so you get some control over the results.

We haven’t had a chance to try it out yet, but I sure am curious. Will this be the gadget that gives me family videos more recent than 2010? Or that gets me into a video or two, rather than just my disembodied voice saying, ‘No, come back here’? Do you think I can clip it onto one of my children’s jackets without them noticing so that I can find out who really started the argument? Or will this go the way of the pet’s view cameras that were so popular a few years ago? (Turns out my dogs don’t do anything very interesting when I’m not there.)

Press Release

Benjamin Button – The World’s First Smart Wearable Camcorder for Kids

It’s never been easier to capture and store childhood memories.

CHICAGO, June 12, 2017 – Many parents have long struggled to balance the chaos of life with kids and recording all of the precious moments that happen along the way. Especially those that children will most likely not remember, but play a significant role in forming their lives and personalities (from 0 to 4 years old, children have a very limited memory). Thanks to the team at Benjamin Button, now there’s an easy solution. They’ve just launched the first smart wearable camera in the shape of a button created for kids and parents alike.

Parents simply clip Benjamin Button to their child’s clothing and they will get authentic, natural, and loveable full HD content from their child’s perspective with up to three hours of recording time. Based on sound recognition, face recognition and action recognition parents will automatically be given only the best parts of the day that have been captured with Benjamin. There’s the option to hand choose the best moments after they have happened, too. The button is large enough to eliminate any risk of choking, has advanced encryption privacy security, no WiFi or Bluetooth radiation, and is made of safe BPA-free plastic.

“We wanted to create a product that made it possible for parents to be free to focus on enjoying time together with their child, rather than operating a camera. That’s exactly what Benjamin Button does! Our long term goal is to create an ecosystem around family memories and create a revolution in parenting by allowing parents and their kids to spend time together and capture and keep memories for future generations to enjoy. Through the memories of the youngest family members we are creating a world where we are bringing families together in this fast and demanding era,” said Dominik Orfanus, CEO of Benjamin Button.

Benjamin Button’s Specifications

  • 140 degree diagonal FOV aspherical lens
  • 1080/25 fps full HD recording (video), time-lapse mode, advanced video enhancement features
  • 16 GB storage
  • Custom made Li-pol battery
  • Automatic turn on and turn off system
  • 3hrs of video recording
  • Water, dust and kids-proof (IP 66/67)
  • USB type C connector
  • 264 video encoding
  • 2 inch (53 mm) in diameter and 0.79 (20 mm) inch in thickness
  • Weight of 65 g (2.3 Oz) = 4 packs of chewing gum
  • No active WiFi or Bluetooth

About the Benjamin Button Team

The Benjamin Button team is led by serial entrepreneur and former journalist, Dominik Orfanus. Together with Andrej Spanik (CTO), co-founder of the tech company and serial entrepreneur too, they are now focused on bringing the final hardware prototype to life. The girl power behind Benjamin Button: Michala Lipkova is in charge of UX and product design, together with Boris Salapa, the Head of Marketing and Ivan Za?ko, the crowdfunding manager, they have launched a Kickstarter crowdfunding campaign.

The company is taking pre-orders for Benjamin Button exclusively through Kickstarter until July 3, 2017. The campaign, where early adopters can still take advantage of the special Kickstarter only discounted prices, was funded in under four hours.

Kickstarter page: http://kck.st/2rajbZB

For additional information about Benjamin Button please visit our website, follow us on Facebook, Twitter, Instagram, and YouTube.

Articles: Digital Photography Review (dpreview.com)

 
Comments Off on Benjamin Button captures *and edits* your family video footage

Posted in Uncategorized


New Pro Light Bumblebee family from Manfrotto targets still, video and drone users

15 Jun

Manfrotto has introduced a new collection of outdoor backpacks and messenger bags that are designed to cope with extreme environments and to allow users to carry loads of kit. The largest backpack in the Pro Light Bumblebee series, the Bumblebee-230 PL can hold a DSLR with vertical grip with a 70-200mm F2.8 zoom attached as well as an extra ten lenses, according to Manfrotto.

The series comprises two backpacks and two messenger bags all of which can hold a laptop as well as cameras and lenses. The backpacks have configurable internal dividers so the main compartment can be arranged for high-end still or video cameras, lenses and accessories. These backpacks also have a tripod holder and the Bumblebee-230 PL features a lens pouch on the waistband strap.

$ (document).ready(function() { SampleGalleryV2({“containerId”:”embeddedSampleGallery_0518829044″,”galleryId”:”0518829044″,”isEmbeddedWidget”:true,”standalone”:false,”selectedImageIndex”:0,”startInCommentsView”:false,”isMobile”:false}) });

The two messenger bags, the Bumblebee-M30 PL and M10 PL, can also be configured to hold a small gimbal with their XtraSecure handheld gimbal strap. The larger of the two, the M30 PL can also be used to carry a DJI Mavic plus the Osmo gimbal camera.

The messenger bags have NoiseFree Velcro for silent access to the main compartments and all of the Bumblebee bags have DuoFace rain/sun covers. For more information see the Manfrotto website.

Prices:
MB PL-B-230 Bumblebee-230 PL Backpack $ 279.99
MB PL-B-130 Bumblebee-130 PL Backpack $ 229.99
MB PL-BM-30 Bumblebee M-30 PL Messenger $ 149.99
MB PL-BM-10 Bumblebee M-10 PL Messenger $ 129.99

Press release

Manfrotto Launches New Pro Light Bumblebee Camera Bag Family

Performance, Quality & Comfort, Redefined

Manfrotto, a leading global innovator and manufacturer of premium photo, video and lighting support products and accessories, has launched the new Pro Light Bumblebee bags – perfect for professional and amateur photographers and videographers who work outdoors and want a reliable carrying solution. With this collection, users can stay comfortable in the harshest of conditions despite high temperatures, extreme cold or high humidity.

The new Pro Light Bumblebee family is an exceptional assortment of high-performance camera backpacks and messenger bags which perfectly embody Manfrotto’s Italian heritage. This family introduces Manfrotto’s unique-to-the-market breathable harness system that greatly reduces photography gear fatigue, allowing image makers to cover more ground and locate the best spots for the perfect shots.

Inside, the bags’ innovative designs safeguard the latest professional equipment options. The renowned Camera Protection System (CPS) dividers take extra care of camera bodies and lenses. They are fully adjustable and built to distribute weight evenly and avoid tension to the body.

The new Manfrotto Bumblebee backpacks are designed to take stress and heat off the shoulders, neck and lower back and feature Manfrotto’s state-of-the-art AirSupport breathable harness and back panel, adjustable sternum support, shaped hip and waist support systems. A side handle helps users put the pack on or take it off, while elastic side pockets keep water bottles outside the critical gear zone.

The removable Manfrotto CPS insert safeguards equipment right at the heart of the pack and keeps it organized with the efficiency of a portable studio:

  • The Bumblebee-230 PL backpack protects a gripped DSLR with a 70-200/2.8 lens attached and 10 additional lenses or an attached 400/2.8 with five additional lenses. In video configuration, it protects a disassembled modular camcorder like the Canon C100 with numerous lenses & accessories. It also fits a 17” laptop in its own padded compartment.
  • The Bumblebee-130 PL backpack keeps a high-end CSC or a DSLR safe with a 70-200/2.8 lens attached and eight additional lenses or an unattached 400/2.8 with three additional lenses. In video configuration, it protects disassembled modular camcorders like a SONY FS-5. It also fits a 15” laptop in its own padded compartment.

The entire internal space is padded to protect camera gear but can be also configured to accommodate accessories and personal gear as well. The main zipper comes with four pullers, which can be divided by a stopper into a top and lower compartment. Just open the top zipper for rapid access to frequently used contents from above.

A smart NeverLose tripod connection secures both longer and shorter tripods on the side of the pack. The connection straps are stitched in the side pocket and can be tucked away when not in use for a tidier appearance and to prevent straps getting lost.

The bigger Bumblebee-230 PL also features a lens pouch located in the waist belt. When not in use, the pouch can be flattened by tightening the webbing strap. (This feature is not available in Bumblebee-130 PL.)

Manfrotto’s new Bumblebee Messengers have significantly raised the bar for their category: a combination of flawless design and reliable performance, they meet all the needs of demanding professionals who travel light and fast. Like the backpacks, the messengers’ body-gripping fit and 3-point AirSupport harness system is breathable and perfect for prolonged outdoor use. The length of the strap can be rapidly adjusted using the EasyGrip buckle.

Despite their compact size, they hold a substantial amount of professional gear:

  • The Bumblebee M-30 PL Messenger protects a DSLR with a 70-200mm/2.8 lens attached and three additional lenses, a handheld gimbal (such as a DJI Osmo) and a 15” laptop in their own padded compartments, with all the necessary accessories.
  • The Bumblebee M-10 PL Messenger keeps a CSC/DSLR safe with a 24-70/4 lens attached and two additional lenses (including 70-200/2.8) and a handheld gimbal (such as a DJI Osmo) and a 13” laptop in their own padded compartments, with all the necessary accessories. It can also carry a full set DJI Mavic plus the Osmo gimbal camera.

These bags introduce the XtraSecure handheld gimbal-carrying solution – a stretchable band that holds the gimbal’s moving parts so it can be taken out quickly. The area can also be used as a traditional lens compartment if there is no gimbal in the bag.

Manfrotto’s Bumblebee Messengers feature a secure silent quick-access flap. When shooting in quiet environments (e.g. during a ceremony), apply the NoiseFree Velcro silencer to keep a low profile. The broad front organizer keeps everything on hand. There are two bungee cord straps to hang a small tripod, monopod or selfie pole, which are also protected by the front flap. The Bumblebee Messengers can hold a gripped DSLR body when you take out the laptop from its compartment.

All the bags of the Bumblebee collection come with a DuoFace sun/rain cover to protect from rain, reflect sunlight and keep the gear cool and dry all day long.

Key features:

  • Breathable design – comfortable carrying solutions for professional and amateur outdoor photography
  • Super lightweight construction – carry more lenses and stay comfortable even with prolonged use
  • High-performance materials – rip-stop fabric and the Manfrotto Protection System safeguard equipment

The following models are now available nationwide:

MB PL-B-230 Bumblebee-230 PL Backpack $ 279.99
MB PL-B-130 Bumblebee-130 PL Backpack $ 229.99
MB PL-BM-30 Bumblebee M-30 PL Messenger $ 149.99
MB PL-BM-10 Bumblebee M-10 PL Messenger $ 129.99

Articles: Digital Photography Review (dpreview.com)

 
Comments Off on New Pro Light Bumblebee family from Manfrotto targets still, video and drone users

Posted in Uncategorized


Five Tips for Fun Family Photos

06 Jun

It’s family photo time!

Grab a tripod for your phone or DSLR, a shutter remote (if you don’t want to mess with the self timer) and some candy to bribe the kiddos.

We’ve got just a few tips from arranging your pretty faces, to going totally nuts, that’ll ensure a fun time taking the pics and an even funner time enjoying them forever.

p.s. Family photos make perfect Father’s Day gifts for dads and grandpas. Save 20% on all photo prints at Parabo Press through 6/7 with the coupon PJDAD.
(…)
Read the rest of Five Tips for Fun Family Photos (433 words)


© laurel for Photojojo, 2017. |
Permalink |
No comment |
Add to
del.icio.us

Post tags:

The post Five Tips for Fun Family Photos appeared first on Photojojo.


Photojojo

 
Comments Off on Five Tips for Fun Family Photos

Posted in Equipment


Apple ad hints that its Portrait mode is so good it will save your family business

16 May

They say a picture’s worth a thousand words. But in a tongue-in-cheek new Apple ad, a picture turns out to be worth hundreds of new customers, thanks to the iPhone 7’s Portrait mode. The minute-long spot features a quiet family barbershop that sees its business boom after posting photos of its clients and their sleek new haircuts in the window. The photos, of course, are taken with the iPhone 7’s bokeh-imitating Portrait mode. 

Photographers will likely find the premise a little tiresome, as they’ve heard for ages how easy it is to replace their experience and skill set with an incredible new camera/auto mode/photo app. But as much as we want to dislike this ad, it’s just too darn upbeat and clever to hate. See what you think.

Articles: Digital Photography Review (dpreview.com)

 
Comments Off on Apple ad hints that its Portrait mode is so good it will save your family business

Posted in Uncategorized


Food photographers rejoice: Camera-enabled Samsung Family Hub 2.0 fridge quick review

02 Apr

Introduction

 Source: Samsung

All of Samsung’s new Family Hub 2.0 line of camera fridges come in three or four door configurations, have 21.5” 1080p LED screens, and of course, internet connectivity and cameras with enough resolution to allow you the freedom to count your yogurt cups from anywhere in the world.

Electronics giant Samsung has been largely absent from consumer digital imaging lately, save for its ongoing lineups of smartphones and tablets (please, don’t say ‘phablets’ within earshot of anyone, anywhere). That all changed at CES 2017, where the company has shown a renewed vigor in the digital imaging space with an update to its Family Hub refrigerator-based camera technology.

At the heart of this system is the large LED screen on the front of the units, which will allow you to load web pages, place food orders, leave notes for your family, and of course, frame your photographs of the food that is being cared for by the very device doing the photographing. The 21st century sure is grand.

Key Specs

  • Camera type: Fridge
  • Price as tested: $ 3499
  • Resolution: Good enough
  • ISO: Good enough
  • Image stabilization: Weight-based (334 lb. shipping weight)
  • AF Point Selection: Dunno
  • Battery life: AC power only
  • Fingerprint resistance: Standard

So who, then, is the Samsung Family Hub 2.0 camera fridge for? For the budding food photographer, it doesn’t get much easier. If you’re a landscape shooter though, you may run into some limitations.

In practice

The Family Hub 2.0 line of camera refrigerators makes basic food photography as easy as can be. The camera fridge acts essentially as a large softbox or cove, with ample space to style your food with ease.

Your photos with your camera fridge will look nothing like this, because this is a camera in a fridge, not a camera built into a fridge door. Important distinction.

A full internal LED lighting setup provides bright, constant illumination to allow you to capture your stylized creations or past-due eggs with a flattering (or maybe just flat) look, and internet connectivity lets you share these works with literally anyone in the world, even if no one wants to see them. In other words, this could be the perfect food-focused Instagrammer’s main camera.

There’s also an argument to be made for the eccentric product photographer who prefers to shoot primarily on bright reflective white, or the accomplished portraitist who wants some variety for his or her ‘Trapped Businessman’ portfolio (note, the ‘similar images’ listings on that page show a similar theme, ‘Trapped,’ but for some reason, the businessman is nude – fair warning).

But as an enthusiasts’ all-rounder, the Family Hub 2.0 camera fridge leaves something to be desired. First of all, to photograph anything besides what’s actually in the fridge, you will have to literally saw the back of the fridge off (DPReview in no way endorses this activity). And though the immense weight will be a boon to those photographing landscapes in windy conditions, the lack of any sort of control over image capture settings makes long exposures of waterfalls, grassy knolls and the like exceedingly difficult to capture with any sense of motion or grandeur.

There goes a brave man.*

For wildlife, you’re going to need a very long extension cord to keep the generator noise far enough away to keep from frightening your subjects, to say nothing of the rustling you’d make wheeling the camera up to a confused and soon-to-be angry Grizzly. And as for sports, the lack of a zoom will be limiting for anything besides a slot-car track built inside the fridge itself; wheeling a fridge up and down the sidelines of your local football match is likely to cause health problems.

Lastly, there’s no Auto ISO or Raw support (besides supporting the chilling of various raw meats), and these are both features that are present on many competing camera models in this price range. Of course, none of those competing models comes with a fridge built-in. So you just can’t have it all, it seems.

The wrap

Overall, we’re pleased to see Samsung’s continued commitment this new (ice) age of digital imaging. Their Family Hub 2.0 line of camera fridges offer easy-to-use Wi-Fi connectivity in solid, well-built packages. But we can’t help but feel that the camera fridge phenomenon as a whole will be given the cold shoulder by the broader photography community.

After all, the price of entry for a camera that primarily appeals to food photographers is fairly steep. And even if you can appreciate the stabilizing heft, there will be those for whom a hand truck is just one photography accessory too many. Perhaps most importantly, if you need to photograph anything besides what you place in the fridge, it’ll require a couple of warranty-breaching hours with a hacksaw.

In the end, the Family Hub 2.0 line of camera fridges is going to appeal to a very select niche, and if it’s the right camera for you, who are we to judge? But if you need a more well-rounded solution for your photography, we have to recommend that you hold off and put that pre-order on ice.

*In accordance with Creative Commons 2.0 and 3.0 licensing, image is a composite with credits to Rob Bixby for the photographer, Samsung for the fridge and someone whose alias is Traveler100 for the bears.

If you hadn’t caught on yet, we’re having a little April Fool’s Day fun her. We in no way endorse taking a hacksaw to a refrigerator, or really using a refrigerator for anything aside from refrigeration.

Articles: Digital Photography Review (dpreview.com)

 
Comments Off on Food photographers rejoice: Camera-enabled Samsung Family Hub 2.0 fridge quick review

Posted in Uncategorized


8 Tips for Getting Great Expressions in Family Portraits

26 Jan

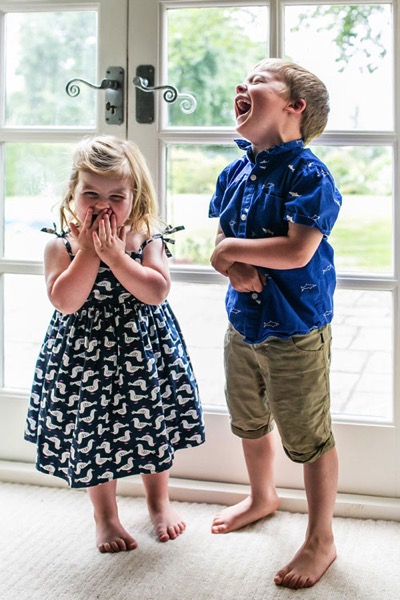
8 Tips for Getting Great Expressions in Family Portraits

Sometimes as a photographer, you are lucky enough to get a family session full of models with perfect natural smiles in every photo. It doesn’t take much to get a photo that is ready to hang on the wall. However, most of the time with family portraits it isn’t that easy.

Maybe you’ve got somebody who doesn’t want to be there or little kids that have no idea what you’re trying to get them to do. And maybe, just maybe, you’d like to have some photos that show some extra personality. Everyone looking at the camera and smiling is nice, but I always love the ones that show a little more of who the family really is. I’ve got a few tricks up my sleeve to help you through the more difficult sessions, and to help you get some fun full-of-personality shots and great expressions with any family.

1. You’re in charge of the kids

8 Tips for Getting Great Expressions in Family Portraits kids

Many times during a family session, you’ll have parents that are really concerned about whether or not their kids are looking and smiling at the camera. They don’t realize that the moment their little one looks and smiles, their faces aren’t photo-ready because they’re spending all their time wondering what their kid is doing.

Remind the parents to keep their faces ready for photos at all times, and you, as the photographer, will take care of getting their kids to look and smile. If they are talking to their child, it will be hard for their child to look at you, because he’ll think he needs to be looking at mom or dad. Whether you want the parents looking at the camera or not for a particular photo, remind them to do their part for the photo and leave the rest to you.

2. Let the parents help sometimes

parents - 8 Tips for Getting Great Expressions in Family Portraits

This might seem to contradict point #1 above, but there are times when getting those genuine smiles from the kiddos requires a little bit of help from the parents. If you have a reluctant smiler and you want to get a good individual photo of the child smiling, ask the parent to make a funny face, or do something silly off-camera. If you want the subject looking at the camera, ask the parent to get right behind you. Parents often know one silly word that will get their child giggling, or the child might just need the comfort of seeing a parent smiling at them to know that it’s all okay.

You can also have photos with the parents interacting with their children in the frame. These often end up being some of my favorites. I love capturing the genuine interactions, and those expressions that the parent sees every day. Put the parent and child together, and simply ask them to smile at each other. Often this initially awkward directive gets them really giggling together, and you’ve got the perfect expressions.

3. Laugh at the silly one

laugh silly - 8 Tips for Getting Great Expressions in Family Portraits

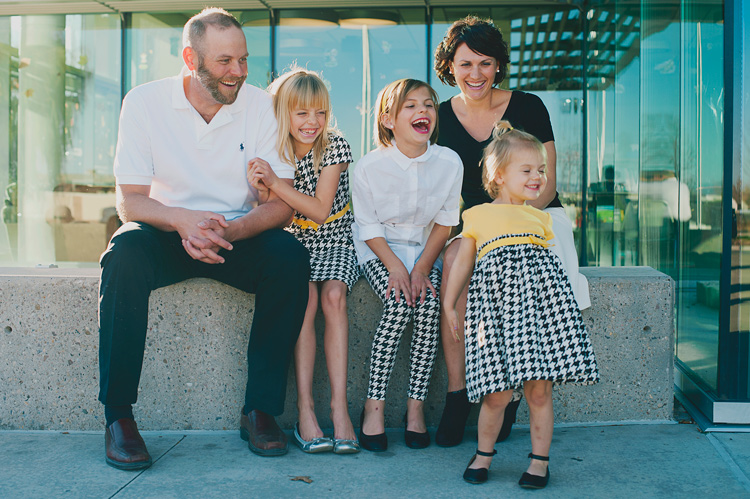
One of my most effective prompts for natural looking family interaction and genuine expressions is to ask them to laugh at the silly one. Sometimes they all look to the same person right away, and everyone will start truly laughing. Sometimes they all look at someone different, and after a second of bewilderment, they all start laughing.

This one can backfire, though, and needs to be used with caution. Some kids automatically think that laughing means to be over the top silly, and they over-exaggerate a huge laugh that doesn’t look natural at all. Some kids think that laughing also must be accompanied by pointing, and that never looks great in a photo either. In these cases, I tell them to giggle quietly and to keep their hands down. Usually, that solves the problem. If it doesn’t, I just move on to something else and let the moment go.

4. Simply hug

hug - 8 Tips for Getting Great Expressions in Family Portraits

Oftentimes in sessions, I position everyone into a nice arrangement, take a photo of them all smiling and looking, and then I just say, “Now, everyone hug each other.” or “Put your arm around the person next to you.” When I look at the photos side by side later, I’m always amazed at how much more natural the smiles are in the hugging photos.

I think that when photos feel really formal, it’s hard to relax, and people end up with stiff smiles. When they feel comfortable, the true smiles come out. There’s just something about being surrounded and hugged by those you love that makes you feel safe. Sometimes you need to prompt them to hug each other but make sure they’re still looking at you. Occasionally you get the real huggers that will turn right around and give their mom a bear hug. Although that looks cute in real life, it doesn’t work as well for a photo.

5. Let the personalities shine

personality - 8 Tips for Getting Great Expressions in Family Portraits

Sometimes you might have a perfect photo in mind, but you just have some little guys that have big personalities. You could spend the whole session trying to get them to be somebody they’re not, or you can just go with it and laugh about it.

Let’s be honest, sometimes those expressions that just scream personality make the best photos. Families will treasure those photos and laugh about them throughout their whole lives. You can try to get that perfect family photo for mom, but don’t make everyone miserable by insisting on squelching unique poses and expressions every time they pop up. That said, I don’t encourage them in their silliness because sometimes that can make them go a bit out of control. Just simply take the photo, and don’t make a big deal out of it.

6. Big groups are fun too

big groups - 8 Tips for Getting Great Expressions in Family Portraits

Giant group photos can look very dull at times. When you have tons of people in one photo, it can be a task just to get them all arranged, and then after all that work the photo just looks like a bunch of little boring faces.

Try getting a few photos that are just for fun. Ask the entire group to hug or kiss their neighbor. (Give them the option. Nobody likes to be told they must kiss the person next to them.) If you have a bride and groom, you can have the bride and groom kiss, and ask everyone else to cheer or to react however they’d like.

When you have a big group of people with funny happy faces, it makes a photo that you want to look at for awhile, and you can’t help but smile. These photos are never perfect, but they’re fun, and end up being the photos the families really love.

7. Capture life

life - 8 Tips for Getting Great Expressions in Family Portraits

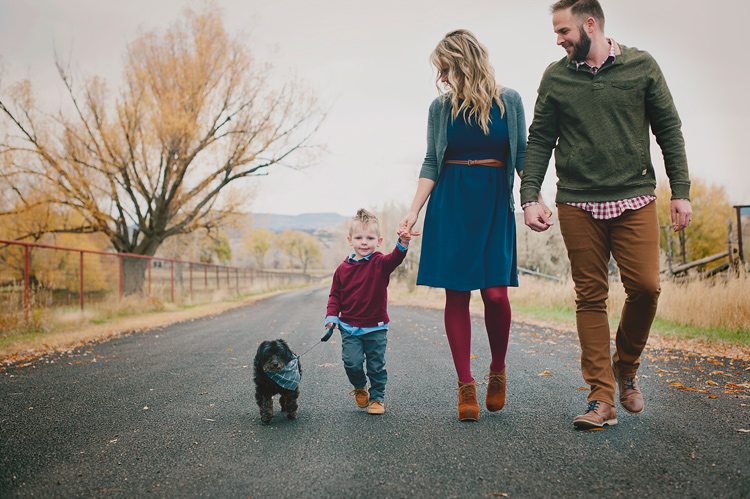
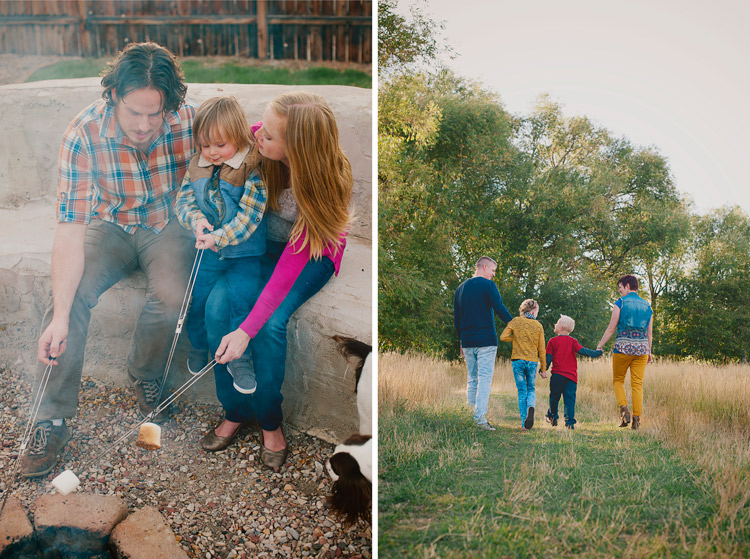
You don’t always need smiles, nor do you need all the eyes showing. Capture the family participating in an activity together, and just let their expressions happen naturally. These lifestyle photos will capture the family as they are, right now. They will be the photos that really bring back memories for your families when they come across them later. You don’t have to set up anything elaborate. It can be as involved as a picnic together with the blanket and basket and everything, or as simple as holding hands and walking together. If you do have them walking away from you, ask the family to look at each other as they walk, so you get some profile expressions, and interaction with each other.

You don’t have to set up anything elaborate. It can be as involved as a picnic together with the blanket and basket and everything, or as simple as holding hands and walking together. If you do have them walking away from you, ask the family to look at each other as they walk, so you get some profile expressions, and interaction with each other.

8. Take a lot of photos in a row

8 Tips for Getting Great Expressions in Family Portraits

When you’ve got a lot of people to capture at once, the chances of getting all of them with a great expression at the same time is slim to none. I snap a lot of photos in a row of one pose because the chances of catching smiles and open eyes for each person go up greatly when you have a lot to choose from. If all else fails, you have a lot in nearly the same position, so you can swap eyes, faces, or heads if needed.

It can be so frustrating when you have a family photo that is nearly perfect, but one family member is blinking. Trust me, even three in a row may sometimes not be enough to get every expression that you need. I don’t head swap often because I usually have one in the series that captures everything as I want, but it’s nice to have the option of swapping something if needed.

I’d love to see your family portraits in the comments! What tricks have you found to capture great expressions in your family sessions?

googletag.cmd.push(function() {
tablet_slots.push( googletag.defineSlot( “/1005424/_dPSv4_tab-all-article-bottom_(300×250)”, [300, 250], “pb-ad-78623” ).addService( googletag.pubads() ) ); } );

googletag.cmd.push(function() {
mobile_slots.push( googletag.defineSlot( “/1005424/_dPSv4_mob-all-article-bottom_(300×250)”, [300, 250], “pb-ad-78158” ).addService( googletag.pubads() ) ); } );

The post 8 Tips for Getting Great Expressions in Family Portraits by Melinda Smith appeared first on Digital Photography School.


Digital Photography School

 
Comments Off on 8 Tips for Getting Great Expressions in Family Portraits

Posted in Photography


10 Tips for Doing Your First Family Portrait Session

15 Nov

Photographs from a good family portrait session will be treasured for many years to come. It’s an incredibly rewarding area of photography, but it can also be a little daunting for new photographers. You need to build a rapport with the family fast, keep the children on board, and meet the parents’ expectations with gorgeous photographs.

Family portrait FAMILY GROUP

So where do you start? Which camera settings should you choose?

Here are some important pointers to make your first session go smoothly, and to help you take great family portraits.

1. Get down to their level

Get down to a child’s eye level. This will lead to far more engaging photographs, as well as helping you to interact better with the child.

Family portrait INDIV GIRL flowers

2. Use Centre point focus

Different focus settings suit different photographers, but center point focusing tends to be the most useful for family portraits. As you take more and more family portraits, you’ll get a feeling for whether this suits you, But it’s a great starting point for your first session.

3. Choose an appropriate aperture

Your aperture settings will be influenced by the style you prefer. As a starting point, many lifestyle family photographers choose to shoot wide open for individual portraits (f/2.2 works really well), and around f/5.6 for group shots to ensure everyone is in focus.

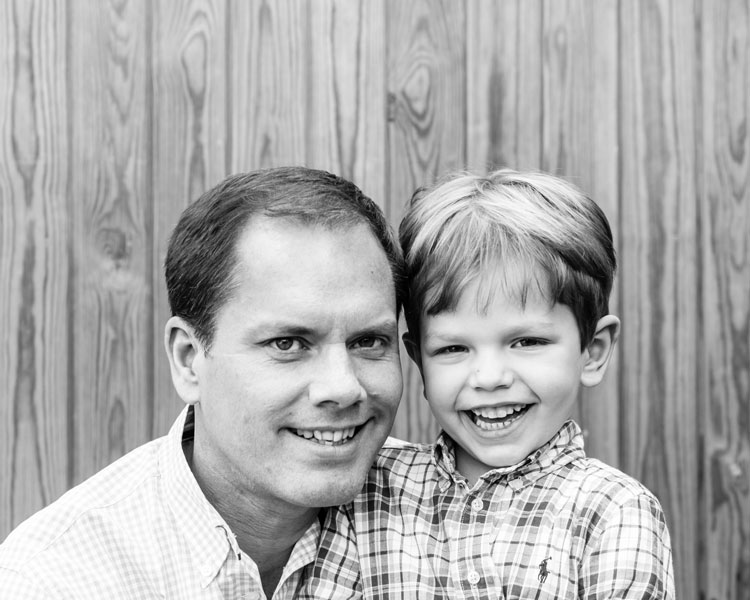
Family portrait DAD AND SON opt

This was taken at f/5.6.

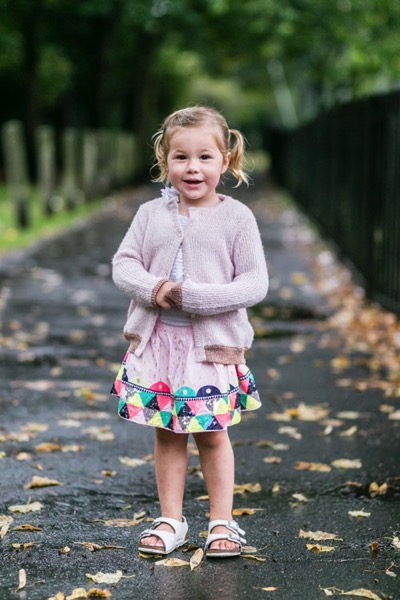
Family portrait INDIV GIRL park

This was shot at f/2.2.

4. Starting shutter speed

You will probably find yourself needing a slightly faster shutter speed for family portraits than you’d need for many other kinds of portraits. Children move fast, and sometimes unpredictably! A good setting to start with is 1/250th, which will give you flexibility for children rolling over or waving. If you have a situation where someone is moving very fast, such as a child jumping or racing off into the distance, choose a much faster shutter speed like 1/800th.

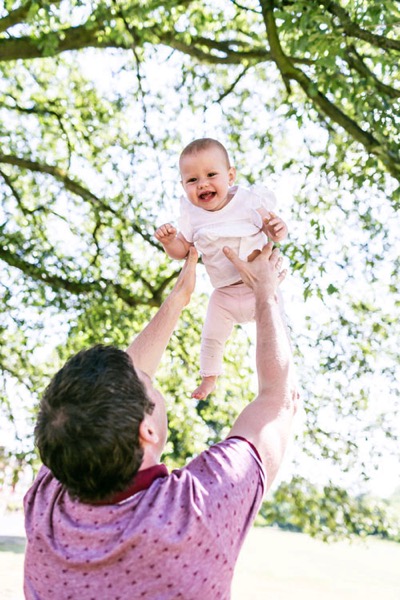
Family portrait BABY opt

This was taken at 1/800th]

5. Use Auto ISO

While you’re familiarizing yourself with the apertures and shutter speeds that work for you on family portrait sessions, consider setting your ISO to auto. The results are usually satisfactory, and it’s one less thing to think about on the day. As you gain experience and confidence, you can start to select the ISO as you go along.

6. Metering mode

Certain metering options seem to suit some photographers better than others. As you take more family portraits, you’ll soon see which works best for you. To start with, try using spot metering for individual portraits, and evaluative metering for a group shot.

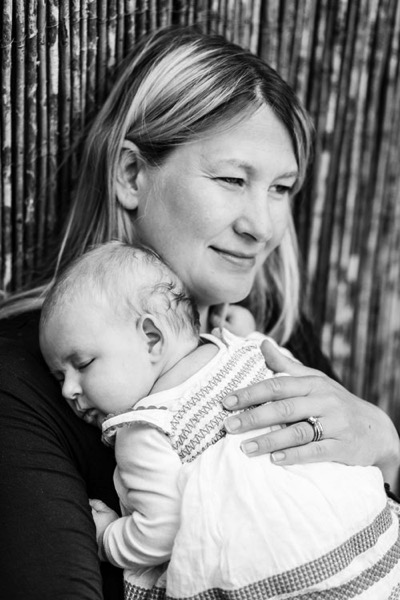
Family portrait MUM AND BABY

This was taken with the evaluative metering mode.

7. Shoot in RAW format

The editing options open significantly in Lightroom, and you’ll have a far greater range of colors and detail recorded if you shoot in the RAW format.

8. Auto White Balance

Set your white balance to auto if you’re doing a location shoot. You’ll be working in a variety of locations with different lighting, and you won’t have much time for setting white balance as you go. Correcting white balance is an easy edit in Lightroom, so you’d be better off spending the time engaging with the family you’re photographing.

9. Choose your lenses

Consider which lenses to take with you to the family portrait session. If your budget doesn’t stretch to having several lenses, consider renting some. It can be surprisingly economical, and it gives you the opportunity to try out different focal lengths to see which suit you best.


Family portrait BABY

This was taken with an 85mm lens.

Using several lenses throughout a family portrait session will give you lots of variety in the images, as well as meaning you can cope with most locations. A zoom lens like a 24-70mm will give you lots of flexibility, or a popular prime lens for family portraits is an 85mm lens, which is very flattering for portraits. A wide lens like a 35mm will help you to set the scene.

As you gain experience photographing families, you’ll develop a sense for which lenses suit you best. That’s a good time to invest in the best quality lenses you can afford.

Family portrait SIBLINGS INSIDE

This was taken with a 35mm lens.

10. Set limits

Limit yourself to taking five versions of each scene. This will train your eye to look for the details and expressions you want to capture and to make sure you ultimately combine them all in one photograph.

Conclusion

So there you have it – family portraits in a nutshell. Practice makes perfect, though, so be prepared to work hard and hone your camera skills. Above all, a friendly and professional attitude combined with careful preparation for each family portrait shoot should make for happy clients and repeat business.

Please share your family portrait tips and photos in the comments section below.

googletag.cmd.push(function() {
tablet_slots.push( googletag.defineSlot( “/1005424/_dPSv4_tab-all-article-bottom_(300×250)”, [300, 250], “pb-ad-78623” ).addService( googletag.pubads() ) ); } );

googletag.cmd.push(function() {
mobile_slots.push( googletag.defineSlot( “/1005424/_dPSv4_mob-all-article-bottom_(300×250)”, [300, 250], “pb-ad-78158” ).addService( googletag.pubads() ) ); } );

The post 10 Tips for Doing Your First Family Portrait Session by Louise Downham appeared first on Digital Photography School.


Digital Photography School

 
Comments Off on 10 Tips for Doing Your First Family Portrait Session

Posted in Photography


Tips for Taking the Torture out of Extended Family Portrait Sessions

04 Oct

I have yet to meet someone who loves getting their picture taken with the whole extended family. The thought of getting all the dramatic aunts, crazy uncles, wild kids, and tired grandparents together and smiling all at the same time seems nearly impossible, and not at all fun. I know of many photographers who refuse to do big family portraits because they can be so unpleasant. I have grown to love big extended family portrait sessions throughout the years. You can too, whether you’re the photographer, or one of the silly cousins getting her photo taken.

Extended Family Portrait Session

Think of big groups as your own family

The first thing that helped me love extended family sessions was the way that I thought of them. Instead of a difficult crazy session, I try to think of them as my own family, and take the photos with love. Let me share a story that may change your mind about extended family sessions too.

A while ago I was asked to add a missing brother to an extended family photo. The entire family had been there when they had the photo taken, except for this one brother who couldn’t get off work. Months later, one of the other brothers tragically passed away. Their most recent family portrait wasn’t complete, and they’d never be able to get a new one.

So, I took this working brother to the same location, took a photo of him, worked him into the photo through the magic of Photoshop. I matched everything the best that I could, so they could have the last most complete family portrait. It made me realize how fragile life is, and how fragile families are. If I have an opportunity to capture a family right now, today, as they are, I’m happy to do it. You never know when or why that portrait may become priceless to them.

Not only are these photos precious and invaluable, but they can be a lot of fun, and not too difficult to pull off. Let me give you some tips to help.

Extended Family Portrait Session

Take charge, be bold, move fast

When you’re working with a big group of people, someone has to be in charge. That person is you, the photographer. This is not a time to be timid and quiet, hoping things will fall into place. As soon as you’re ready to start, get everyone’s attention. Taking charge right away will let them know that you are confident, that you know what you are doing, and that they can trust you. Smile a lot, and if it works for you, throw in some humor. Tell your group that if they will listen to you closely, and do everything you say, that it will be quick, painless, and even fun. Everyone there likes to hear “quick, painless, and fun”, so you’ll have their attention right away.

Don’t take a long time getting everything situated. Have everything scoped out beforehand, and have a firm idea of where and how you will place everyone. Know what order you will be photographing each group, and if you have any stragglers, kindly, but firmly move them toward the picture location. If there are a lot of small children, this is especially imperative. You will lose their interest and patience so quickly, so you need to take advantage of any time when they are even remotely cooperative. You won’t get any good photos when everyone is exhausted and sick of you, so you have to be done before that happens.

Extended Family Portrait Session

Add some personality

With a big group, it seems like you might only have one option – get everyone to look at you, and hope they are smiling. Many clients do want a more traditional family photo, very posed, with everyone looking and smiling. But try giving them a few photos with a little bit of their family’s personality. When you are working with so many people it’s really hard to get a perfect traditional photo anyway. Most of my clients know that isn’t really my style, so they are happy with the more fun, casual photos.

My favorite thing is to ask everyone to hug in to Grandpa and Grandma, or hug someone next to them. Set everyone up for the more formal photo, and once you’ve captured that, just ask them all to hug. Usually it feels silly enough that they start to laugh, and you get genuine laughs and connection.

Extended Family Portrait Session

Try different poses and positions

It can be a challenge to know how to arrange a really big family group. You could easily have four generations in one photo, which can add even more challenges with arrangements. Some families like family photos where they are all squished in together, in one big family group. I’ve had some that want them completely mixed up, where nobody is grouped into separate families. This is okay, but I find that most families like to at least be able to tell which small families within the group belong together. You can do this by just having each family stand next to each other, or you can even put gaps in between each family. I usually do both, so they have options to choose from later.

I usually place Grandpa and Grandma in the center then evenly distribute their children’s families on either side.

Extended Family Portrait Session

My style doesn’t involve a lot of props, so you won’t notice a lot of chairs and stools in my family photos. They are an option if you’d like to create different levels, but it usually takes a lot of time to get that set up, and your subjects lose patience fast. I prefer a more casual, natural look to something that looks very precise and contrived. Sometimes worrying about those extra things can cause a lot of stress for you, and for your families, and make the whole process more of a chore. But feel free to use them if it’s your style and preference.

Extended Family Portrait Session

Find suitable locations

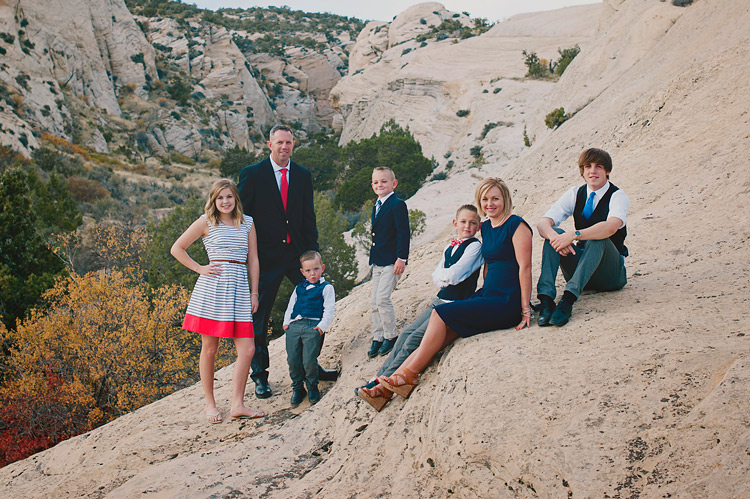
If you want to have some seated photos, look for locations that have places to sit built in. I love rocks, logs, or even park benches. You can also have some people sit on the ground, some kneel, some stand, but again, be careful not to take so long over-posing that you lose their patience.

It can be difficult to find a place that will work for such a large group. Try to find locations with simple backgrounds that don’t detract from the faces. If possible, schedule the session during the early morning or evening, to take advantage of better lighting. Look for places that have large trees or buildings to filter the light. It’s much harder to make difficult lighting situations work with 30 people than it is when you’re just photographing one.

Don’t move around a lot with a large family once you’ve found a good spot. Find one or two good backgrounds, three if they’re really close to each other, and stick with them. This will keep their photo groupings more consistent with each other, and will make the session go much faster and smoother. Try getting 30 people to move quickly over to a different rock, and you’ll see what I mean.

Extended Family Portrait Session

Get all the break-off groupings

Once you’ve photographed the big huge family, it’s time to get all of the little groups. Keep this moving quickly, and be efficient moving from one group to the next. Here’s a list of the different groupings that I do:

  • Entire extended family
  • Grandpa and Grandma (Dad and Mom) alone
  • Dad and Mom with their children (siblings)
  • Dad and Mom with their children and children’s spouses
  • All the siblings
  • The siblings and their spouses
  • Grandpa and Grandma with the grandchildren
  • All the grandchildren
  • The sisters together
  • The brothers together
  • Each separate family

I don’t do every one of these every time. It depends on what the family wants. Also, I know every family is different, and there may not be Mom and Dad, or any grandchildren, etc. This is just to give an idea of how you might break the groupings up.

I try to do the whole family first, and then the smaller groupings. Because it’s hardest to get everyone paying attention and happy for the whole group, you want to get that in when everyone’s fresh. However, sometimes some of the families arrive before others. It’s a great use of time to take the photos of those families while you’re waiting for the entire group to get there. They’ll be happy that they’re finished early, and that they don’t have to sit around doing nothing while they’re waiting for the latecomers.

Extended Family Portrait Session

A few more tips

Remember when you’re working with big families, that letting go of perfection can save you, and them, from a miserable experience. Kids often don’t cooperate, and sometimes some of the family is really grumpy about being there for photos. Do the best you can, and let the rest go. If there are little ones not looking at the camera, or even crying, you are still capturing that family at this moment in time, and giving them a gift. They may end up treasuring the silly faces, and loving the memories of when one grandchild was going through his never-sit-still phase.

Direct the adults

Tell the parents and grandparents to do their best to continue looking at you and smiling, even if you are trying to get their kids’ attention. Many a good photo is ruined by a parent looking down and lecturing their child right at the moment when the child finally does look up and smile. If the adults are picture-ready at all times, then you will have a chance at catching the split second that their kid smiles, and they’ll be smiling too.

Extended Family Portrait Session

Shoot lots of the big group

Take LOTS of photos in a row with the big group. You may think that you have what you need, but then later when you look at the photos full size, you’ll realize that Uncle Bob blinked in every single one. If you take a lot of photos, one right after the other, you can do head swaps later if you need to open some eyes. If they’re taken at approximately the same time, it will be really easy to change the faces, because they’ll be in the same place in every photo.

Love your families

Lastly, remember to love the families you are photographing. They love each other, even through their faults and imperfections, enough to want to preserve a moment in their lives. This photo is so important to at least one person there. Important enough to go through all the hassle of gathering their entire family together in one place at one time. They are trusting you to give them this cherished gift. Consider yourself one of the family for that hour or so, and let your lens capture the love.

googletag.cmd.push(function() {
tablet_slots.push( googletag.defineSlot( “/1005424/_dPSv4_tab-all-article-bottom_(300×250)”, [300, 250], “pb-ad-78623” ).addService( googletag.pubads() ) ); } );

googletag.cmd.push(function() {
mobile_slots.push( googletag.defineSlot( “/1005424/_dPSv4_mob-all-article-bottom_(300×250)”, [300, 250], “pb-ad-78158” ).addService( googletag.pubads() ) ); } );

The post Tips for Taking the Torture out of Extended Family Portrait Sessions by Melinda Smith appeared first on Digital Photography School.


Digital Photography School

 
Comments Off on Tips for Taking the Torture out of Extended Family Portrait Sessions

Posted in Photography


Leica’s historical family tree is up for auction at Christie’s

12 Aug

A piece of Leica history is on auction at Christie’s – or more specifically, 107 pieces of history. The Stammbaum, or family tree, once greeted visitors at the company’s Solms, Germany headquarters and includes models introduced throughout Leica’s history. The collection traces models from rangefinder and SLR product lines all the way back to the U-r Leica, a prototype 35mm camera designed by Oskar Baranack.

The auction is open at Christie’s through September 14, 2016. The family tree’s assessed value is between £350,000 and £450,000 (roughly $ 456,400 – 586,800). If that’s a bit steep for you, there’s a free PDF download showing the camera models included over at apotelyt.com.

Articles: Digital Photography Review (dpreview.com)

 
Comments Off on Leica’s historical family tree is up for auction at Christie’s

Posted in Uncategorized