RSS
 

Posts Tagged ‘Falls’

Upper Yosemite Falls Moonbow – Getting The Shot

27 Jul
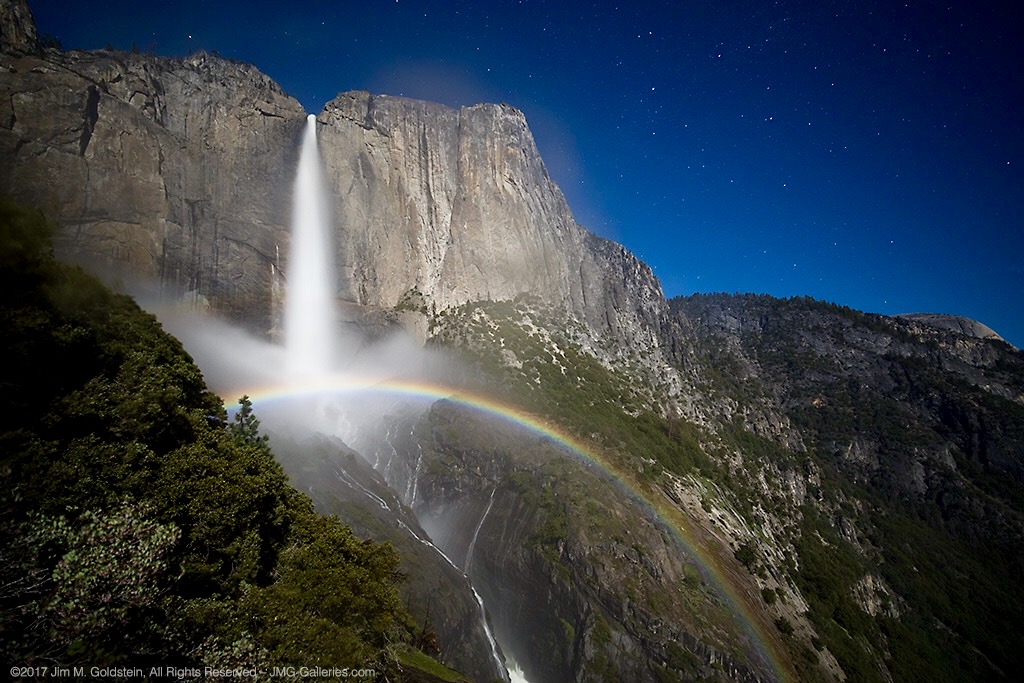
Upper Yosemite Falls Moonbow - May 9 2017

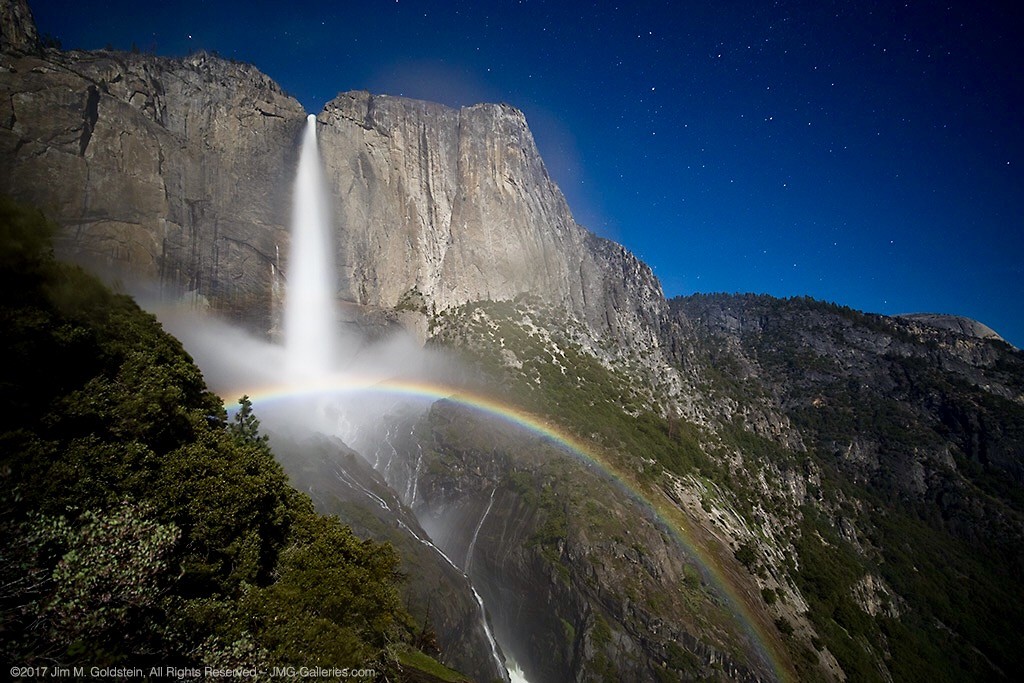
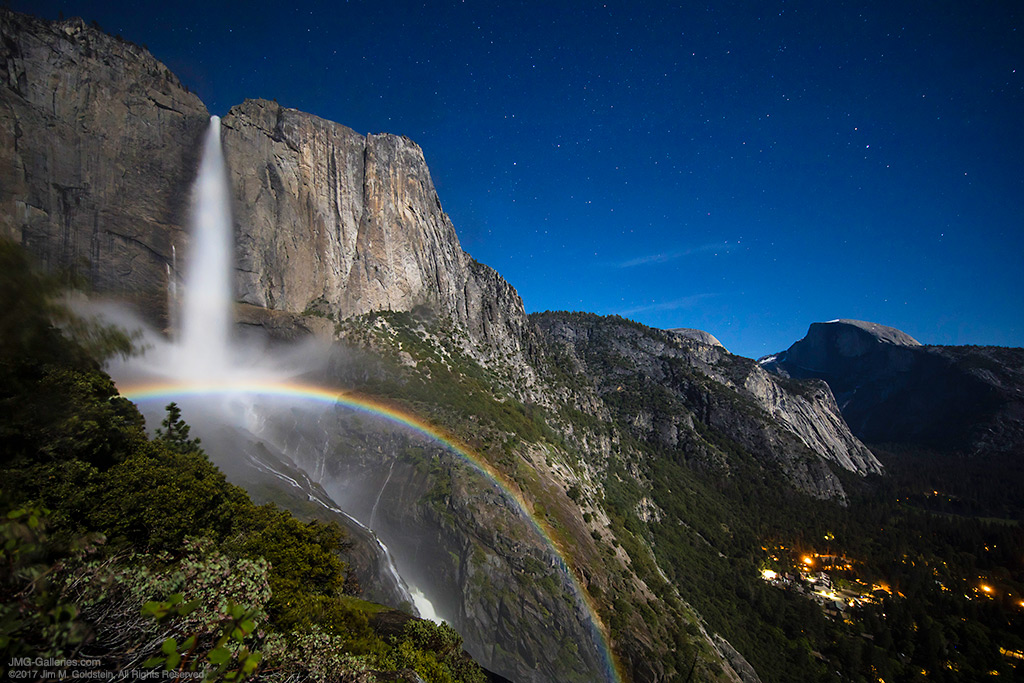
A large moonbow arcs across the mist from Upper Yosemite Falls, Yosemite National Park

There are quite a few photos in my portfolio that I look back upon and question my sanity due to the absurd conditions I’ve endured to capture them. This particular photo is up there on the insanity scale.  This past winter has seen extraordinary snowfall levels in the Sierras and now that Spring has rolled around the water levels are quite high in Yosemite Valley due to the snow melt.  That translates to huge waterfalls and under the right conditions moonbows (rainbows at night via moonlight).

I’ve taken moonbow photos from the Upper Yosemite Falls trail several times, but this year was like none other. I took up position in a new spot this year with a good friend Brian Hawkins. Our hike started off innocently enough with a hike that started at 4:30PM and later ended at 5:30AM. The reason for the long duration of the shoot was a combination of bringing a lot of gear (3 Canon DSLRS, 2 tripods, and 4 lenses plus extra layers of clothes) and the interest in shooting multiple time lapses + stills. Time lapse sequences run a couple hours and the moonbow wasn’t going to appear until 11:30PM.
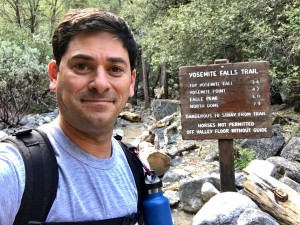
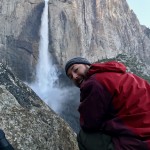
Start of the Upper Yosemite Falls moonbow hike (4:30PM)
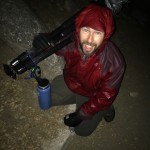
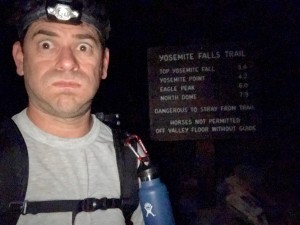
End of the Upper Yosemite Falls moonbow hike (5:30AM)

Now that I type it all out It really is rather nuts. I, of course, don’t think this before the hike because I have selective memory issues or quite simply my elevator doesn’t go to the top floor when it should.

Hiking with a full photo backpack means slow going on a hike that is 1.5 miles with a 1250 foot elevation gain. Leaving “early” affords me the time to properly stake out the right location, set up all 3 cameras, eat and start shooting. On the way up the focus is squarely on the task at hand and making it to the setup spot early.
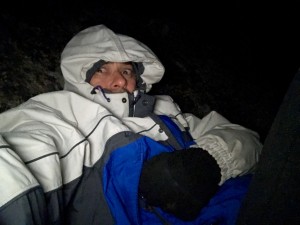
Waiting in heavy mist and gusty winds.

Are we having fun yet? Waiting in heavy mist and gusty winds. Only 4 hours to go.

The most painful part of the excursion is the wait. This year this was particularly true given the setup spot quickly became inundated with heavy mist from the falls when the wind kicked up (10mph gusts). Without exaggeration, we were waiting in a windy rainstorm. A sane person might consider moving to avoid the heavy mist, but once you’ve invested the time to set up multiple cameras and climb down steep side trails it quickly becomes a less attractive option. This, of course, was constantly second-guessed throughout the night as conditions remained miserable. Eventually, we called uncle and left the cameras running but took shelter a 1/8th of a mile away on the main trial to stay dry.

So what does one think during the hours of waiting for the moonbow to appear and during the moonbow sequence run? Let me tell you in order of thought.

  1. I am so freaking wet and cold.
  2. I should have brought more layers to stay warm and dry.
  3. It’s so wet I’m not sure any of this footage will come out.
  4. I don’t think I could have carried anything more.
  5. What the f*ck are you thinking that this would be a good idea!
  6. I’ve never seen conditions so good for moonbows, but it’s too good. There’s too much water.
  7. What was that noise!? F*ck it better not be a mountain lion. Crap it was just my jacket hood rubbing against my head.
  8. I can’t feel my fingers. I should use those hand warmer things. Cr*p they’re in my camera bag back in the heavy mist. Forget it I’d rather have cold hands than get wet again.
  9. I wonder if my batteries died. I better go check.
  10. Upon returning repeat all the above thoughts
  11. I am so freaking cold. I am never going to do this again. I don’t know what I was thinking.
  12. Now that it’s so wet and windy how am I going to retrieve all my gear
  13. Holy sh*t! I can’t believe I’m here at 3AM


Then after all of this, I get to my camera to see the most amazing sight, Yosemite Falls roaring full of water with the biggest moonbow I’ve ever seen. All those earlier thoughts are lost as I get more stills taken. The results, like the photo above, are like a narcotic that wipes my mind clear. With my “photo-high” in place packing up is less cringeworthy albeit still miserable. Trying to remember, pack and not leave behind gear and accessories for 3 cameras is tough enough, but particularly mentally challenging when cold and tired. Fortunately, years of experience and more importantly being a little too anal for my own good make this a little easier.

Unlike years past the extra effort of trying to dry off gear took some extra time. It also required another round of gear packing. By the time this was all complete the hike down could begin at 3:50AM.
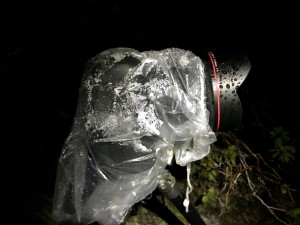
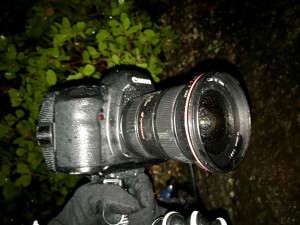
Canon 5D Mark IV + Canon 11-24 drenched from the heavy mist off the falls.
Canon 5D Mark II + Canon 16-35mm Mark II drenched from the heavy mist off the falls.

Brian Setting Up While Nice and Dry
Brian Soaked After Retrieving Gear

The hike down was cold, but dry and thus in my mind “warm”. On the way down thoughts of mountain lions hiding in the shadows quickly subside, instead focusing on not twisting an ankle due to fatigue or carelessness. Also important is to not step on the many millipedes that crawl across the trail. In between dodging millipedes, I’m left wondering how well my footage and stills came out. Cold and tired I’m thinking it’s doubtful anything could have come out and back to questioning why I thought this was a good idea.

Millipede on the trail

Millipede on the trail

Fast forward 7 hours as I write this and it’s become apparent several shots came out, but I won’t know how much until I’m back home. Between three cameras it’s likely it worked out. I really shouldn’t do this again, but come next year I’m sure all this will be mentally blocked and I’ll be making a similar hike/moonbow shoot just like I did in 2011, 2012, 2013, 2014, 2016 and this year. Apparently, I’m a slow learner.

Authors Note: Excuse the typos if any as I typed this on my phone and I’m still very sleep deprived.

Gear Used On This Shoot

Camera 1
Canon 5D Mark IV, Zeiss Distagon T* 15mm f/2.8 ZE, Gitzo Carbon Fiber tripod (small) with canon timer remote controller TC-80N3

Camera 2
Canon Mark IV, Canon EF 11-24mm f/4L USM lens, Gitzo Carbon Fiber tripod (large) with canon timer remote controller TC-80N3

Camera 3
Canon 5D Mark II, Canon EF 16-35mm f/2.8L II USM lens, JOBY GorillaPod for SLRs with canon timer remote controller TC-80N3


The post Upper Yosemite Falls Moonbow – Getting The Shot appeared first on JMG-Galleries – Landscape, Nature & Travel Photography.


JMG-Galleries – Landscape, Nature & Travel Photography

 
Comments Off on Upper Yosemite Falls Moonbow – Getting The Shot

Posted in Equipment


Upper Yosemite Falls & Half Dome Moonbow

26 Jul
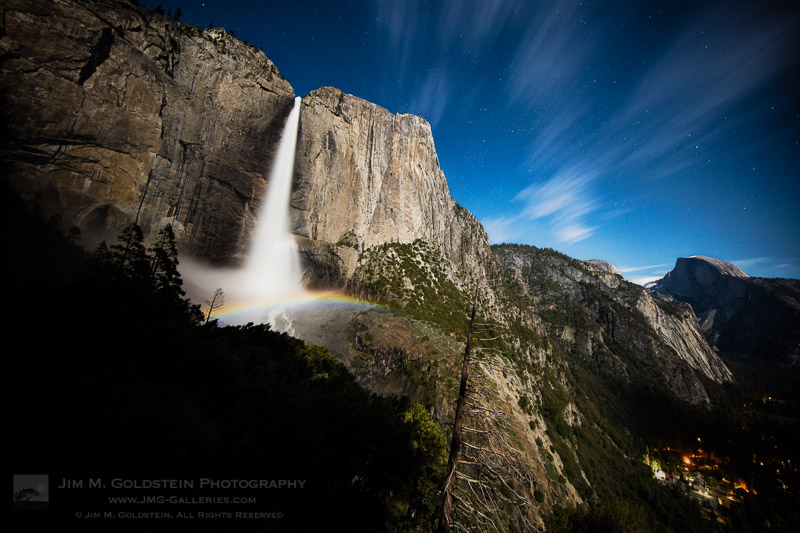
A wide arcing moonbow stretching across Upper Yosemite Falls on a clear night moonlit night in Yosemite National Park.

A wide arcing moonbow stretching across Upper Yosemite Falls on a clear night moonlit night in Yosemite National Park.

This past week was the optimal time to photograph moonbows in Yosemite Valley. I revisited photographing the moonbow at Upper Yosemite Falls as I had last year, but this time there was considerable more water and as a result the moonbow (rainbow by moonlight) was more easily seen. It was considerably larger, more vivid in color and wider arching. Conditions were great and at times a little too good as the 3 cameras I set up were completely drenched. If you’d like to read about what it took to get this photo be sure to check out my last blog post, Upper Yosemite Falls Moonbow – Getting The Shot, as it goes into a lot of detail about the hike and the challenges I faced.  If you’re curious about gear and settings this was taken with a Canon 5D Mark IV and Canon 11-24mm f/4 lens. Settings were ISO 640, 15 seconds at f/4.

The post Upper Yosemite Falls & Half Dome Moonbow appeared first on JMG-Galleries – Landscape, Nature & Travel Photography.


JMG-Galleries – Landscape, Nature & Travel Photography

 
Comments Off on Upper Yosemite Falls & Half Dome Moonbow

Posted in Equipment


Famed Chinese rooftopper falls to his death from 62-story skyscraper

15 Dec
Photo: Weibo

Editor’s Note: We have decided not to post the video of the tragedy, or even link to it. Please, if you value your life, do not engage in ‘rooftopping’ or other risky activities for the sake of a ‘cool’ photo. There are legal and safe ways to capture great photos from tall places.


Performing dangerous stunts to capture exciting photos has long been hotly debated, but that hasn’t stopped some people from continuing to do incredibly dangerous things for the sake of a few Instagram likes. “Rooftopping,” the act of climbing a very high structure to take images showing the distance to the ground, is one of the most popular of these activities, and it recently claimed the life of 26-year-old Chinese rooftopper Wu Yongning.

Yongning regularly engaged in risky photo shoots. Hanging off of tall buildings earned him more than 60,000 followers on Weibo and a portfolio of unique, if vertigo-inducing and deeply unsettling, images. In the end, it also claimed his life.

Photo: Weibo

According to Channel NewsAsia, Yongning fell from the 62-story Huayuan Hua Centre while filming an attempted stunt to win 100,000 CNY (about $ 15k USD / €13k EUR) from an unnamed sponsor. Yongning reportedly planned to use the money to fund his wedding and help pay his mother’s medical bills.

A camera that had been set up to record the stunt captured Yongning’s final moments, showing him performing a couple of pull-ups while hanging off the edge of the skyscraper. Tragically, Yongning didn’t have the strength to pull himself back onto the rooftop afterward, and without anyone there to help him back up, he eventually lost his grip and fell.

The incidence happened on November 8th.

Recent public awareness of the tragedy has prompted Chinese state media to warn against performing unsafe social media stunts for money and/or attention.

Articles: Digital Photography Review (dpreview.com)

 
Comments Off on Famed Chinese rooftopper falls to his death from 62-story skyscraper

Posted in Uncategorized


Canon 6D Mark II dynamic range falls behind modern APS-C cameras

20 Jul

We’ve reported in recent years how Canon’s newer sensor designs have started to close the dynamic range gap, compared with chips from the likes of Sony and Toshiba. Dynamic range isn’t everything, of course: Canon’s Dual Pixel sensors have brought advances in live view and video autofocus that for many people will be every bit as significant as the noticeable shortfall in Raw file malleability. But it was promising to see Canon getting competitive in an area where it had fallen behind.

Sadly though, it seems the benefits that appeared in the sensors used in the EOS 80D and EOS 5D IV have not been applied to the latest EOS 6D II, and the new camera has less dynamic range than we’ve become used to. Graphs plotted by regular DPR collaborator Bill Claff illustrate this pretty clearly. In this article, we’re taking a look at what this might mean for your images.

Dynamic range assessment

Our exposure latitude test shows what happens if you brighten a series of increasingly dark set of exposures. This illustrates what happens if you try to pull detail out of the shadows of your image.

$ (document).ready(function() { ImageComparisonWidget({“containerId”:”reviewImageComparisonWidget-9522166″,”widgetId”:542,”initialStateId”:3691}) })

As you can see, the EOS 6D II begins to look noisy much sooner than the broadly comparable Nikon D750, meaning you have less processing flexibility before noise starts to detract from your images.

The EOS 6D II should have a 1.3EV image quality advantage over the 80D, when the images are compared at the same size, since its sensor is so much bigger. Despite this, the EOS 80D’s$ (document).ready(function() { $ (“#icl-3692–1019644042”).click(function() { ImageComparisonWidgetLink(3692); }); }) images shot with the same exposures look cleaner, when brightened to the same degree. Have a look and you’ll see the difference is around 1EV$ (document).ready(function() { $ (“#icl-3693–487818319”).click(function() { ImageComparisonWidgetLink(3693); }); }), despite the head start that the 6D II’s chip should have. This corroborates what Bill Claff’s data suggests.

ISO Invariance

The downside of our exposure latitude test is that reducing the exposure also increases the noise. Our ISO Invariance test uses the same exposure shot at different ISO settings, such that the shot noise contribution is the same in each image. This way any differences must be a consequence of electronic noise (and how well the camera’s amplification overcomes it, at higher ISO settings).

$ (document).ready(function() { ImageComparisonWidget({“containerId”:”reviewImageComparisonWidget-16732339″,”widgetId”:541,”initialStateId”:null}) })

This isn’t good, especially not by modern standards. We’re used to seeing sensors that add so little noise$ (document).ready(function() { $ (“#icl-3694–1065892121”).click(function() { ImageComparisonWidgetLink(3694); }); }) that there’s barely any visual difference between shooting at a high ISO and using a low ISO (retaining additional highlights) then brightening. Instead we see that you have to amplify to around ISO 3200 before you see no additional impact from the camera’s electronics. This suggests a reversion to the level of the original EOS 6D$ (document).ready(function() { $ (“#icl-3690-1001550611”).click(function() { ImageComparisonWidgetLink(3690); }); }).

Real world impact

If you shoot JPEG, you’ll never notice any of this, since the differences occur beyond the ~8.3EV or so that tend to be incorporated into a typical image. Similarly, at higher ISO settings, amplification overcomes the electronic noise, so you see the camera begin to out-perform the 80D and then close the gap with the D750, just as Bill’s chart suggests.

However, it means if you’re processing from Raw at low ISOs, you have much less flexibility in terms of what you can do with the file than we’d expect from a modern camera. Almost as soon as you start to push the image or pull detail out of the shadows, you risk hitting the camera’s electronic noise floor and hence you won’t see the advantage over the 80D that you might reasonably expect.

Canon EOS 6D Mark II | EF 35mm F2 IS | ISO 100| F9 | 1/200th Shadows lifted, highlights lowered, slight selective brightening to couples’ faces. As you’ll see if you click to view the full-sized image, noise in the areas of lifted shadow is very apparent.

This is an extreme example but it’s a photo I’d expect to be able to shoot on other full frame cameras without revealing so much noise. All of our test results suggest I could have achieved just as good a result from a contemporary APS-C camera.

Articles: Digital Photography Review (dpreview.com)

 
Comments Off on Canon 6D Mark II dynamic range falls behind modern APS-C cameras

Posted in Uncategorized


Video: Sony a9 falls short with Canon 300mm and 400mm lenses attached

24 Jun
<span id=”__caret”>_</span>?<span id=”__caret”>_</span>?<span id=”__caret”>_</span>?<span id=”__caret”>_</span>?<span id=”__caret”>_</span><br />

Sports shooters considering Sony’s speedy a9 have one major hurdle to overcome: glass. There’s a dearth of long, fast primes available to Sony FE shooters, and it seems like using off-brand glass while you wait for Sony to catch up just isn’t a great option.

In this video, photographer Dan Watson of Learning Cameras tried both the Sigma MC-11 and Metabones Mark IV lens adapters to test how well the a9 worked when attached to the Canon EF 300mm F2.8L IS II USM and Canon EF 400mm F2.8L IS II USM.

Watson mainly wanted to test the focusing capabilities, and unfortunately, the results were somewhat disappointing.

Before you dive into the video, it’s worth pointing a few things out. Our own Rishi Sanyal has tested the focus capability of the a9 with adapted lens, and points out a couple of caveats to Watson’s otherwise solid points:

First, the performance of far off-center AF points depends on the lens. While Watson is correct in pointing out that they don’t perform well with long lenses (despite working astonishingly fast with Sony’s own 100-400 F4.5-5.6), they do work well with shorter focal lengths (we’ve had success with a Sigma 85/1.4, Canon 35/1.4, 24-70/2.8, etc.). With these wider lenses, ‘Wide’ area mode will continue tracking subjects to the extremes of the frame.

Second, Sony A-mount lenses adapted with the LA-EA3 adapter do shoot at an impressive 10 fps with autofocus, something we confirmed with the 50/1.4 (as long as you’ve updated the firmware of the adapter).* With the Metabones and Sigma adapters though, as with all Sony FE bodies, only the L drive mode offers continuous focus. And it’s actually only 2.5 fps, not the 5 fps Watson mentions (technically L is 3 fps, but it slows to 2-3 fps with continuous focus).

With that out of the way, Watson’s video is a great resource for seeing how well (or not) the a9 performs when attached to the long, fast Canon primes sports shooters love. And while single-shot focus with central points is speedy and almost 100% accurate with long adapted lenses, the lack of true subject tracking (Lock-on AF modes) or continuous focus at speeds higher than ~2.5 fps (or in video) will probably be a deal breaker for many fast-action photographers.

Once you’ve lost the impressive high speed shooting advantages Sony baked into the a9, you might as well be shooting with any other camera. Moral of the story: stick to Sony glass and hope they keep churning out new lenses at break-neck pace.

You can watch the full demo for yourself up top. And if you’re considering jumping ship from Canon to Sony, keep this information in mind – like all previous Sony bodies, you’ll only have access to the a9’s slowest continuous drive mode when you’re adapting your own glass.


* We’ve not yet confirmed the performance of off-center points with long A-mount glass.

Articles: Digital Photography Review (dpreview.com)

 
Comments Off on Video: Sony a9 falls short with Canon 300mm and 400mm lenses attached

Posted in Uncategorized


Upper Yosemite Falls & Half Dome Moonbow

16 May
A wide arcing moonbow stretching across Upper Yosemite Falls on a clear night moonlit night in Yosemite National Park.

A wide arcing moonbow stretching across Upper Yosemite Falls on a clear night moonlit night in Yosemite National Park.

This past week was the optimal time to photograph moonbows in Yosemite Valley. I revisited photographing the moonbow at Upper Yosemite Falls as I had last year, but this time there was considerable more water and as a result the moonbow (rainbow by moonlight) was more easily seen. It was considerably larger, more vivid in color and wider arching. Conditions were great and at times a little too good as the 3 cameras I set up were completely drenched. If you’d like to read about what it took to get this photo be sure to check out my last blog post, Upper Yosemite Falls Moonbow – Getting The Shot, as it goes into a lot of detail about the hike and the challenges I faced.  If you’re curious about gear and settings this was taken with a Canon 5D Mark IV and Canon 11-24mm f/4 lens. Settings were ISO 640, 15 seconds at f/4.

The post Upper Yosemite Falls & Half Dome Moonbow appeared first on JMG-Galleries – Landscape, Nature & Travel Photography.


JMG-Galleries – Landscape, Nature & Travel Photography

 
Comments Off on Upper Yosemite Falls & Half Dome Moonbow

Posted in Equipment


Upper Yosemite Falls Moonbow – Getting The Shot

12 May
Upper Yosemite Falls Moonbow - May 9 2017

A large moonbow arcs across the mist from Upper Yosemite Falls, Yosemite National Park

There are quite a few photos in my portfolio that I look back upon and question my sanity due to the absurd conditions I’ve endured to capture them. This particular photo is up there on the insanity scale.  This past winter has seen extraordinary snowfall levels in the Sierras and now that Spring has rolled around the water levels are quite high in Yosemite Valley due to the snow melt.  That translates to huge waterfalls and under the right conditions moonbows (rainbows at night via moonlight).

I’ve taken moonbow photos from the Upper Yosemite Falls trail several times, but this year was like none other. I took up position in a new spot this year with a good friend Brian Hawkins. Our hike started off innocently enough with a hike that started at 4:30PM and later ended at 5:30AM. The reason for the long duration of the shoot was a combination of bringing a lot of gear (3 Canon DSLRS, 2 tripods and 4 lenses plus extra layers of clothes) and the interest in shooting multiple time lapses + stills. Time lapse sequences run a couple hours and the moonbow wasn’t going to appear until 11:30PM.

Start of the Upper Yosemite Falls moonbow hike (4:30PM)
End of the Upper Yosemite Falls moonbow hike (5:30AM)

Now that I type it all out It really is rather nuts. I of course don’t think this before the hike because I have selective memory issues or quite simply my elevator doesn’t go to the top floor when it should.

Hiking with a full photo backpack means slow going on a hike that is 1.5 miles with a 1250 foot elevation gain. Leaving “early” affords me the time to properly stake out the right location, set up all 3 camera, eat and start shooting. On the way up the focus is squarely on the task at hand and making it to the setup spot early.

Waiting in heavy mist and gusty winds.

Are we having fun yet? Waiting in heavy mist and gusty winds. Only 4 hours to go.

The most painful part of the excursion is the wait. This year this was particularly true given the setup spot quickly became inundated with heavy mist from the falls when the wind kicked up (10mph gusts). Without exaggeration we were waiting in a windy rainstorm. A sane person might consider moving to avoid the heavy mist, but once you’ve invested the time to setup multiple cameras and climb down steep side trails it quickly becomes a less attractive option. This of course was constantly second guessed through out the night as conditions remained miserable. Eventually we called uncle and left the cameras running but took shelter an 1/8th of a mile away on the main trial to stay dry.

So what does one think during the hours of waiting for the moonbow to appear and during the moonbow sequence run? Let me tell you in order of thought.

  1. I am so freaking wet and cold.
  2. I should have brought more layers to stay warm and dry.
  3. It’s so wet I’m not sure any of this footage will come out.
  4. I don’t think I could have carried anything more.
  5. What the f*ck are you thinking that this would be a good idea!
  6. I’ve never seen conditions so good for moonbows, but it’s too good. There’s too much water.
  7. What was that noise!? F*ck it better not be a mountain lion. Crap it was just my jacket hood rubbing against my head.
  8. I can’t feel my fingers. I should use those hand warmer things. Cr*p they’re in my camera bag back in the heavy mist. Forget it I’d rather have cold hands than get wet again.
  9. I wonder if my batteries died. I better go check.
  10. Upon returning repeat all the above thoughts
  11. I am so freaking cold. I am never going to do this again. I don’t know what I was thinking.
  12. Now that it’s so wet and windy how am I going to retrieve all my gear
  13. Holy sh*t! I can’t believe I’m here at 3AM

Then after all of this I get to my camera to see the most amazing sight, Yosemite Falls roaring full of water with the biggest moonbow I’ve ever seen. All those earlier thoughts are lost as I get more stills taken. The results, like the photo above, are like a narcotic that wipes my mind clear. With the photo high in place packing up is less cringeworthy albeit still miserable. Trying to remember, pack and not leave behind gear and accessories for 3 cameras is tough enough, but particularly mentally challenging when cold and tired. Fortunately years of experience and more importantly being a little too anal for my own good make this a little easier.

Unlike years past the extra effort of trying to dry off gear took some extra time. It also required another round of gear packing. By the time this was all complete the hike down could begin at 3:50AM.
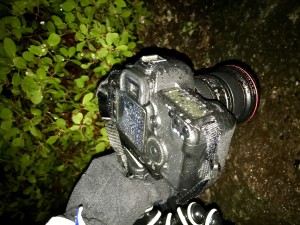
Canon 5D Mark IV + Canon 11-24 drenched from the heavy mist off the falls.
Canon 5D Mark II + Canon 16-35mm Mark II drenched from the heavy mist off the falls.

The hike down was cold, but dry and thus in my mind warm. On the way down thoughts of mountain lions hiding in the shadows quickly subside, instead focusing on not twisting an ankle due to fatigue or carelessness. Also important is to not step on the many millipede that crawl across the trail. In between dodging millipedes I’m left wondering how well my footage and still came out. Cold and tired I’m thinking it’s doubtful anything could have come out and back to questioning why I thought this was a good idea.
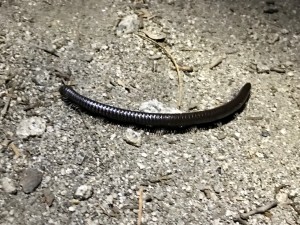
Fast forward 7 hours as I write this and it’s become apparent several shots came out, but I won’t know how much until I’m back home. Between three cameras it’s likely it worked out. I really shouldn’t do this again, but come next year I’m sure all this will be mentally blocked and I’ll be making a similar hike / moonbow shoot just like I did in 2011, 2012, 2013, 2014, 2016 and this year. Apparently I’m a slow learner.

Authors Note: Excuse the typos if any as I typed this on my phone and I’m still very sleep deprived.

The post Upper Yosemite Falls Moonbow – Getting The Shot appeared first on JMG-Galleries – Landscape, Nature & Travel Photography.


JMG-Galleries – Landscape, Nature & Travel Photography
 
Comments Off on Upper Yosemite Falls Moonbow – Getting The Shot

Posted in Equipment


Visiting the ‘Niagara of the West’: Idaho’s Shoshone Falls

01 Apr

$ (document).ready(function() { SampleGalleryV2({“containerId”:”embeddedSampleGallery_3016072904″,”galleryId”:”3016072904″,”isEmbeddedWidget”:true,”standalone”:false,”selectedImageIndex”:0,”startInCommentsView”:false,”isMobile”:false}) });

After visiting Idaho on a road trip, Resource Travel’s Michael Bonocore fell in love with the state, and moved there just three months later. One spot he hadn’t yet visited was beautiful Shoshone Falls, which is 45 feet taller than world-famous Niagara Falls and arguably as spectacular. 

After a two hours in the car wondering if the light from the setting sun would still be there when he arrived, Michael struck gold:

‘I didn’t take into account the fact that the sun would stop hitting the wall of water straight on well before the actual sunset time. But, as the diffused light cascading across the roaring waterfall, I was able to start getting some nice, evenly lit photos.

‘And then, it happened.’

Find out what ensued and see even more photos from Michael’s trip at Resource Travel. He’s also provided some tips on shooting the falls should you end up visiting.

Articles: Digital Photography Review (dpreview.com)

 
Comments Off on Visiting the ‘Niagara of the West’: Idaho’s Shoshone Falls

Posted in Uncategorized


Upper Yosemite Falls Moonbow, Yosemite National Park

26 Apr
Upper Yosemite Falls Moonbow

A moonbow (AKA lunar rainbow) spans across upper Yosemite Falls with passing clouds and Half Dome in view.

This past week I ventured off to Yosemite to capture moonbows. Midway through my trip I met up with Brian Hawkins who twisted my arm ever so slightly to make a hike to upper  Yosemite Falls for a moonbow shoot. The last time I ventured up to this location I did so solo and while I got great photos it was a grueling hike with the amount of gear I was carrying. For whatever reason this time around while carrying the same amount of gear the hike didn’t seem so hard.  I chalk that up to great company keeping my mind off of the hundreds of switchbacks. Long story short the entire hike and shoot lasted 11 hours leaving on Thursday at 5pm and returning back to the valley floor at 4am.

Photographing Moonbows in Yosemite (taken Thurs. at midnight). Photo courtesy of Brian Hawkins.

A photo posted by Jim Goldstein (@jimgoldstein) on


While the effort was exhausting, the end result is one that I’m proud to share. Conditions turned out great and no one twisted an ankle or squashed one of the dozens of millipedes on the trail.

Photo Details:
Canon 5DS R, Canon 11-24mm at f/4, 11mm, ISO 640 and 30 sec.

The post Upper Yosemite Falls Moonbow, Yosemite National Park appeared first on JMG-Galleries – Landscape, Nature & Travel Photography.


JMG-Galleries – Landscape, Nature & Travel Photography

 
Comments Off on Upper Yosemite Falls Moonbow, Yosemite National Park

Posted in Equipment


Leica M9 falls from balcony onto granite, granite comes off worse

20 Aug

Leica has a reputation for making pretty rugged cameras, going back more than 100 years. But nobody would expect a rangefinder to survive a fall from a balcony, onto granite tiles. However, if a recent post on Chinese social network Sina Weibo is to be believed, that’s exactly what happened to a Leica M9 recently, and somehow it survived the experience. Click through to read more

Articles: Digital Photography Review (dpreview.com)

 
Comments Off on Leica M9 falls from balcony onto granite, granite comes off worse

Posted in Uncategorized