RSS
 

Posts Tagged ‘Explanation’

What is Ambient Light in Photography? An Explanation for Beginner Photographers

17 Jan

The post What is Ambient Light in Photography? An Explanation for Beginner Photographers appeared first on Digital Photography School. It was authored by Lily Sawyer.

what-is-ambient-light-in-photography

Have you ever wondered what ambient light in photography means? You may have heard phrases such as “capture the ambiance,” “allow ambient light,” and have wondered how to do that. This article explains exactly that!

So let’s get started.

dps-ambient-light-in-photography-beginners-guide-tutorial

f/5.6, ISO 3200, 1/60th

Simply stated, ambient light means the light already available in the space before you add any other lighting. Yes, any light already available and that could be many types!

Types of ambient light in photography

1. Natural light from outdoors

The first type of ambient light in photography is natural light from outdoors. This is the daylight that comes through side windows, ceiling windows, and open doorways.

dps-ambient-light-in-photography-beginners-guide-tutorial

f/5.6, ISO 6400, 1/60th (This was shot on a very dark and overcast winter day in a north-east facing kitchen)

Compare the two images above and below. The image above was taken using purely natural light from outdoors whilst the image below incorporated neons, lamps and spotlights.

dps-ambient-light-in-photography-beginners-guide-tutorial

f/5.6, ISO 4000, 1/60th

2. Natural light from indoors

Candle lights and the glow of light coming from fireplaces are natural lights that can already be indoor sources rather than the natural sunlight coming from outdoors.

dps-ambient-light-in-photography-beginners-guide-tutorial

f/5.6, ISO 1600, 1/60th


dps-ambient-light-in-photography-beginners-guide-tutorial

f/5.6, ISO 1000, 1/60th

3. Artificial lights in the home

This is a range of lights commonly seen in homes and spaces. It includes ceiling down-lighters, spotlights, ceiling pendants, chandeliers, table lamps, floor lamps, neon lights, lights from mirrors, fluorescent lights, and wall sconces.

dps-ambient-light-in-photography-beginners-guide-tutorial

f/5.6, ISO 6400, 1/30th

Which light/lights do you require?

In photography, the question is, what light is needed to achieve the image the photographer wants to capture? I dare say there are no hard and fast rules as the success of an image depends on getting the correct lighting combination required, regardless of the type of lighting.

Let’s explore some lighting scenarios in various spaces.

Portraits

Just like any type of lighting, whether it be natural or artificial, ambient light is just one option for photographers.

dps-ambient-light-in-photography-beginners-guide-tutorial

Left: f/2.8, ISO 1000, 1/100th  Lens 24-70mm Right: f/4, ISO 400, 1/125th with off-camera flash

In portraits, ambient light could be purely the sunlight coming through a side window. To shoot this, a photographer would only need a camera. And, if it helps to achieve the image, a few accessories such as a reflector, a diffuser, and a backdrop – or use an existing wall.

dps-ambient-light-in-photography-beginners-guide-tutorial

Left: f/2.8, ISO 1000, 1/100th  Lens 24-70mm Right: f/4, ISO 400, 1/125th with off-camera flash

Conversely, the photographer may choose not to use ambient light at all and solely utilize electronic flashes or vice versa in the same space above.

Sunlight from windows is not usually strong (depending on the size of windows and the position of the sun). It’s definitely not as strong as electronic flashes can be, so sometimes there is no need to block it out fully. Electronic light can cancel out any natural light from the windows or can add a touch of light to any ambient light where needed. The outcome depends on the settings used by the photographer.

The images on the left above have been shot using natural light filtering through the diffused window and a reflector to increase the shadows. The images on the right have been shot using electronic flash in a softbox. Here is an article on how to achieve both set-ups. My typical settings for portrait shots are around f/2.8 – f/4, ISO 200 – ISO 400, SS 1/100 – SS160.

Events

Ambient light is your best friend when it comes to events. Weddings and parties are often busy and buzzing with people. Here in the UK, space for large equipment at such events is not always available and often the photographer has to rely on just a camera and a speedlight to capture these events.

dps-ambient-light-in-photography-beginners-guide-tutorial

f/2.8, ISO 3200, 1/100th  Flash power 1/32 Lens 24-70mm

Letting the ambient light in is key to capturing the ambiance of the room and the atmosphere of the party. This means allowing background lights such as fairy lights, festoon lights, wall sconces etc to seep into the image.

The resulting look has depth rather than a flat dark backdrop. My typical settings for events range between f/4 – 5.6, ISO is rather high especially indoors in dark areas around 3200 – 6400, SS rather low around 1/60 – 100.

dps-ambient-light-in-photography-beginners-guide-tutorial

f/5.6, ISO 3200, 1/100th  Lens 70 – 200mm

The last thing a photographer wants to do is to kill any ambiance by using a strong flash to mitigate low light – especially in events where dry ice is used to create smoke effects and various colored lighting for a party atmosphere.

You don’t want to completely obliterate these just to light your subjects’ faces.

dps-ambient-light-in-photography-beginners-guide-tutorial

f/8, ISO 2000, 1/30th, Lens 24-70mm, off-camera flash

Balancing speedlight flash power and shutter speeds is key to achieving images like these as well as incorporating existing ambient light.

dps-ambient-light-in-photography-beginners-guide-tutorial

f/5.6, ISO 3200, 1/125th, Lens 24-70mm with off-camera flash

You can read more about dragging the shutter here, a technique used often to produce these images.

dps-ambient-light-in-photography-beginners-guide-tutorial

f/5.6, ISO 2500, 1/60th,  Lens 70 – 200mm with off-camera flash and on-camera flash

You can use ambient light in the background to create silhouettes.

In the photo below, there was no light whatsoever on the balcony. I used the light inside the building to create a silhouette of one of the guests. This was an unposed shot so it was a rather hasty one.

dps-ambient-light-in-photography-beginners-guide-tutorial

f/11, ISO 2000, 1/200th,  Lens 24-70mm

Interiors

Most photographers and magazines require natural light only in the interiors images they use.

Most often this would need a tripod and the use of slow shutter speeds to mitigate dark areas in the space that need capturing. But if the space is characterized by light features such as neon and lamps that make the atmosphere of the room, then I’m for capturing these with the lights on too.

dps-ambient-light-in-photography-beginners-guide-tutorial

f/5.6, ISO 2000, 1/100th,  Lens 24-70mm

In my opinion, it is necessary to be selective with the amount of artificial ambient light to allow in a photographic composition to ensure a harmonious and natural-looking image.

More importantly, it is a must to edit out the lights that are unnecessary in the space for the image you want to achieve. Below are three different lighting set-ups in one space. All three dramatically change the look and feel of the same room.

My typical settings for interior shots depend on the time of day and how much natural light the room gets but range between f/5.6 – f/8, ISO is quite high around 2000 – 4000, SS usually really low around 1/30 – 60 or 100 depending on light availability.

On the photos below, the top photo utilized only natural light. The photo in the middle had all sorts of lights going on like festoon, lamps, fairy lights, candlelight, and neon but without the main ceiling chandelier, which is very bright. The third photo had the chandelier switched on on top of everything else, but because it got too bright, it killed the ambiance in the room.

dps-ambient-light-in-photography-beginners-guide-tutorial

f/5.6, ISO 3200, 1/80th,  Lens 24-70mm

dps-ambient-light-in-photography-beginners-guide-tutorial

f/5.6, ISO 4000, 1/80th,  Lens 24-70mm

dps-ambient-light-in-photography-beginners-guide-tutorial

f/5.6, ISO 3200, 1/60th,  Lens 24-70mm Highlights taken down in editing.

I lean towards a selective mixture of lighting in my interiors.

Some areas are so hard to capture. For example, really dark areas where there is no ambient light at all and using a long shutter speed will overexpose the areas with light and correctly expose the unlit area.

dps-ambient-light-in-photography-beginners-guide-tutorial

f/5.6, ISO 2500, 1/60th, Lens 24-70mm

Of course, this can be rectified by bracketing and compositing in Photoshop. But I don’t always want to be doing that! Besides, I think adding some form of ambient light brings some charm in. Take these photos above and below, for example, illustrating this point.

dps-ambient-light-in-photography-beginners-guide-tutorial

f/5.6, ISO 6400, 1/30th,  Lens 24-70mm

Color temperature

One of the most common problematic issues when using mixed lighting, especially when including electronic flash into the mix, is color temperature disparity. Natural light from sunlight is usually around 5600K range, while tungsten lights indoors are usually around 3200K.

This means that when shooting outdoors, you need to set your white balance to around 5000 – 5750 Kelvin. That way, the resulting image looks similar to what you see with the naked eye. If you were to set the white balance to 3000K, for example, everything will look very blue (nothing worse than a white wedding dress looking blue!).

The same is true when shooting indoors with tungsten or incandescent lights on. The temperature required to shoot this image is around 3200K, but if you shoot it with the white balance set at 5650K, you will end up with an image looking very orange.

dps-ambient-light-in-photography-beginners-guide-tutorial

f/5.6, ISO 3200, 1/80th,  Lens 24-70mm

The most important thing to remember is to shoot with the correct white balance setting.

However, when using mixed lighting, you will still get color disparity. Here are three ways to solve this, depending on what you require for your images.

  1. You can adjust the white balance in post-production (shoot with a gray card or specified color temperature in your white balance)
  2. Use gels for your artificial lights to match the ambient temperature
  3. Change the bulbs in your indoor lamps to match the sunlight temperature and then adjust everything evenly in post-production if required.

As for me, I try to match what I see in real life to the outcome of the images. Then they are warmed up in post-production for a natural color with the added touch of a film look to best capture what my eye sees.

I hope this little article has helped you in your understanding of ambient light in photography as well as balancing color temperatures when dealing with mixed lighting.

If you have any tips to add about ambient light in photography, do share in the comments below.

The post What is Ambient Light in Photography? An Explanation for Beginner Photographers appeared first on Digital Photography School. It was authored by Lily Sawyer.
Digital Photography School

 
Comments Off on What is Ambient Light in Photography? An Explanation for Beginner Photographers

Posted in Photography


A Simple Explanation of the Camera Mode Dial

09 Aug

If you have a more advanced camera like a DSLR or mirrorless, or even a high-end pocket model, it’s a good bet that somewhere on the top of the camera body you will find a circular dial (the camera mode dial) with a whole lot of strange letters like: M, Tv (or S), Av (or A), P, and maybe even a U1 or U2 (or C1, C2) thrown in for good measure. There is also a friendly safe green option, that may say Auto, or depending on the type of camera you have, is just represented by a green rectangle.

mode-dial

Most beginners know this option the best, since it essentially puts your camera in the driver’s seat, and forces it to do all the heavy lifting of figuring out the exposure, while all you need to do is point your camera in the right direction. If you like shooting in Auto and you are happy with your pictures, then don’t let anyone tell you that you need to change, or that you aren’t a good photographer.

However, if you would like to branch out a little bit, and learn to make your camera do what you want in order to make the photos you desire, then the mode dial is your key to a whole new world of photographic creativity. It can be somewhat daunting, and those strange letters don’t inspire much confidence for beginners who already feel overwhelmed. So I’ll walk you through the basic functions of the mode dial one by one, and give you the information you need to start experimenting with some of your camera’s more advanced settings.

Auto Mode

This one might seem fairly self-explanatory, but I’d like to offer some detail about what Auto mode actually does. In most situations, your camera is going to do whatever it can to make sure the pictures you take are properly exposed (in other words, not too dark nor too bright). There are three main things that govern exposure (Aperture, Shutter, and ISO – otherwise known as the Exposure Triangle) and Auto mode takes care of setting the values of all three of these elements for you. If your camera has a flash, it may decide to fire it, order to brighten up a scene that is quite dark, which often happens indoors or at night. Auto generally does a good job at allowing you to take decent photos in a variety of situations.

Sometimes Auto mode is all you need to get the pictures you want.

Sometimes Auto mode is all you need to get the pictures you want.

P: Program Auto Mode

When you want to branch out from Auto mode, this is a good place to start. Program Auto does exactly the same thing as the familiar, comfortable green Auto mode, but with a twist – you can change a few settings if you want. Using Program Auto allows you to do things like decide whether you want the flash to automatically pop-up or turn off altogether, as well as change the ISO and the White Balance.

It really gets interesting when you turn the rotating circular dial (called a control wheel) on the top or back of your camera, which lets you take some degree of control back from your camera. In Program Auto your camera will always try to maintain a properly-exposed picture, but you can use the dial to change the aperture and shutter speed at the same time. It’s a fun way to experiment with your camera while being reasonably certain that you will still get good pictures, and also start to notice some of the effects that changing the aperture and shutter speed has on your final images.

Program Auto can be a great way to help you get the shot you want by changing the shutter speed and aperture with a simple flick of your thumb.

Program Auto can be a great way to help you get the shot you want by changing the shutter speed and aperture with a simple flick of your thumb.

Av (or A): Aperture Priority Mode

When you want to have full control over the aperture in your lens (and thus also control the depth of field), this is the mode to use. It lets you turn the control wheel on your camera in order to adjust the aperture alone, while the camera decides what ISO (if you use auto ISO) and shutter speed to use.

If you have plenty of available light this is a fantastic mode to be in, because you can choose whether you want a wide depth of field (i.e. everything in focus) or a shallow depth of field (just your subject in focus, with foreground/background elements blurry) and know that the shutter speed and ISO will be set automatically to get the shot you want. However if you are shooting in low light, you might end up in a situation where you set the aperture you want, but your camera chooses a shutter speed that is too slow, or an ISO (again only if you are using Auto ISO, if you are manually setting the ISO you will still have to adjust that yourself) that is too high for your liking.

My personal favorite mode to shoot in is Aperture Priority with Auto-ISO, which means my camera won’t use a shutter speed that’s too slow (you can usually set the parameters for minimum shutter speed in your camera’s settings via the menu options – consult your user manual if you aren’t sure), and will instead raise the ISO.

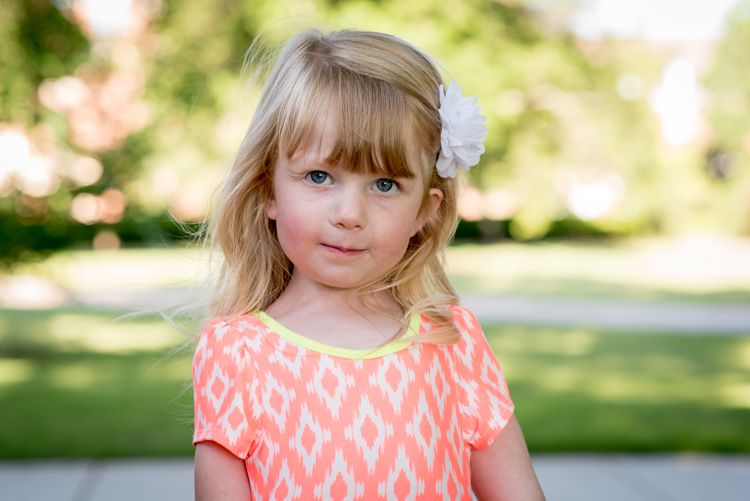
I knew I wanted a shallow depth of field with this, so I used Aperture Priority mode to select a wide aperture and let my camera figure out the rest.

I knew I wanted a shallow depth of field for this shot, so I used Aperture Priority mode to select a wide aperture, and let my camera figure out the rest.

Tv (or S): Shutter Priority Mode

You may have already guessed what this mode does, based on the explanation of Aperture Priority above. Shutter Priority Mode is essentially the opposite. In this mode you tell the camera what shutter speed to use, and let it calculate the aperture and ISO (when using Auto ISO). It is particularly useful if you are shooting fast action like a race or sporting event, because you can set your shutter speed to be fast enough to freeze the motion of the subjects, and know that your camera will select whatever aperture and ISO values are needed to get the shot. Most cameras can shoot as fast as 1/4000th of a second which is plenty for freezing motion, or as slow as 30 seconds, which can be fun for nighttime photography and capturing light trails.

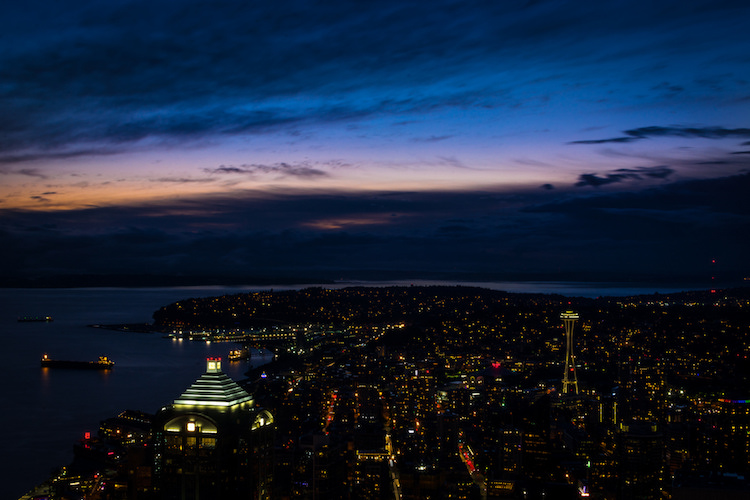
I used Shutter Priority with a value of 30 seconds to get this shot of the Seattle skyline from the Columbia Tower Observation Deck.

I used Shutter Priority with a value of 30 seconds to get this shot of the Seattle skyline, from the Columbia Tower Observation Deck.

M: Manual Mode

This is the granddaddy of all camera modes, because you have to choose all three settings: Aperture, Shutter Speed, and ISO. Shooting in manual can be a little scary at first, but the trick here is to learn to use your camera’s light meter, which will tell you if your picture will be over, or under-exposed. When you put your camera in Manual ode, the control wheel will only change one parameter of the three aforementioned settings at a time, so you may need to press another button while turning the wheel, or navigate to one of your camera’s menus in order to select a different value. With enough practice you will easily get the hang of it.

Shooting in Manual can be challenging, but intensely rewarding, as you learn exactly how to control your camera to get precisely the picture you want. Any situation can be good for Manual, provided you are well acquainted with your camera and how it operates.

Learning to shoot in Manual mode might seem daunting at first, but it's incredibly liberating when you learn how to take full control over every element of exposure.

Learning to shoot in Manual mode may seem daunting at first, but it’s incredibly liberating when you learn how to take full control over every element of exposure.

U1 (or C1): Storing custom user settings

Not all cameras have these options, but if yours has the ability to save custom user settings, you may want to investigate it a little more to start taking advantage of how this can help you. These custom settings allow you to specify a set of parameters, not just for exposure, but for other options like: shooting in JPG or RAW, shooting mode, White balance, enabling Auto ISO, and others – then instantly switch to those settings with just a click of your dial.

One thing I find these user storage banks useful is for having U1 (may be called C1 or something else on your camera) store a set of parameters that is a good starting point for indoor photography, such as a wider aperture and higher ISO, and then using U2 for outdoor pictures. The values and parameters can all be changed once you click over to a U1 or U2 storage bank, but it’s an incredibly handy to instantly change to a specific custom baseline for shooting different types of scenes.

Other things you could use it for are: saving settings for panning, bracketing for HDR shots, low light photography, portrait settings, landscape settings, etc. Use them for the types of things you do most often, or need to access quickly.

I have U1 configured to be ideal for outdoor portraits, so no matter what I'm doing I can instantly switch over to those settings to get the shot I want.

I have U1 configured to be ideal for outdoor portraits, so no matter what I’m doing I can instantly switch over to those settings to get the shot I want.

Preset Program Modes

Insert mode dial close-up shot here. This is just a placeholder.

Think of these as custom Auto settings, each one suited for a different type of photography (look for the mountain, flower, person or sports figure on your mode dial). If you are perfectly happy shooting in Auto mode, but get frustrated when it doesn’t always give you the results you want, you might want to try using one of these instead.

Each option includes a specific set of parameters, kind of like the U1/U2 storage banks, that is ideal for taking pictures in certain types of settings. If you like going outdoors and taking shots of landscapes, twist the dial away from Auto, and over to the mountain icon, which will force your camera to use smaller apertures and lower ISO values that are suited for this type of photography. If you are watching your kids play football or run around at the park, use the icon with a person running, which will make your camera use faster shutter speeds and higher ISO values, if necessary, to freeze the action.

Each one of these icons is calculated and calibrated by your camera’s manufacturer to deliver good results in various types of situations, and they often deliver better images than just shooting in Auto mode.

Using the icons on your camera can help you get the specific type of picture you want; the Portrait mode works here because it forces the camera to choose a wider aperture resulting in a blurry background behind the subjects.

Using the icons on your camera can help you get the specific type of picture you want; the Portrait mode worked here because it forced the camera to choose a wider aperture, resulting in a blurry background behind the subjects.

Other Common Modes

There are plenty of other modes you might find on any given camera, and each manufacturer includes a slightly different set of options, so it’s difficult to make a list that includes an explanation of all available functions. Here are just a few more that you might find, along with brief explanations. If your camera has something that’s not on this list, it may well be worth your time to open up your user manual and investigate. You may find some very useful modes for helping you take better pictures that were hidden in plain sight all along!

A-Dep: A fully automatic mode that lets you pick two points (in the foreground and background) that you want to be in focus, and your camera selects the aperture needed to get everything between those two points in sharp focus. The abbreviation stands for Automatic Depth of Field and it’s fun to play with, but doesn’t always work out so well in practice.

Box with Lightning Symbol Crossed Out: Another automatic mode that also disables the flash. It’s good if you want to shoot in low-light situations and only use available light, but your pictures may come out grainy or blurry.

Flower (macro): This is useful for shooting subjects at close range, such as flowers, or other small objects. It doesn’t affect the properties of your lens, which are far more important when shooting close-up subjects, but merely tells your camera to set the focus priority on things that are closer instead of farther away.

SCN/SCENE: Similar to the icons you may find on a mode dial, this lets you choose from several built-in scene examples, in order to help your camera figure out the appropriate shooting parameters to use.

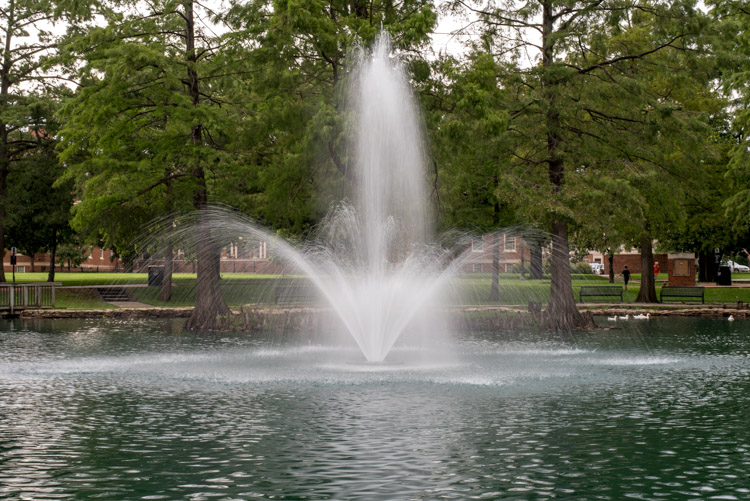
Though I shot this in the day, the nighttime scene mode worked well because it forces the camera to use a slow shutter speed which resulted in a nice blurry fountain.

Though I shot this in the day, the nighttime scene mode worked well because it forces the camera to use a slow shutter speed, which resulted in a nice blurry fountain.

Do you like using the mode dial on your camera, or do you prefer to leave it in just one position for all your shooting needs? Do you have any other tips or tricks you have learned from using the various functions on your mode dial? Did I leave out any critical information you think might be useful to someone learning to use the mode dial? Please leave your thoughts in the comments below.

googletag.cmd.push(function() {
tablet_slots.push( googletag.defineSlot( “/1005424/_dPSv4_tab-all-article-bottom_(300×250)”, [300, 250], “pb-ad-78623” ).addService( googletag.pubads() ) ); } );

googletag.cmd.push(function() {
mobile_slots.push( googletag.defineSlot( “/1005424/_dPSv4_mob-all-article-bottom_(300×250)”, [300, 250], “pb-ad-78158” ).addService( googletag.pubads() ) ); } );

The post A Simple Explanation of the Camera Mode Dial by Simon Ringsmuth appeared first on Digital Photography School.


Digital Photography School

 
Comments Off on A Simple Explanation of the Camera Mode Dial

Posted in Photography


Primes vs Zooms Explanation

18 Dec

Questions? Go here: www.youtube.com Tutorial on understanding the differences and benefits prime and zoom lenses.
Video Rating: 0 / 5

 
Comments Off on Primes vs Zooms Explanation

Posted in Nikon Videos