RSS
 

Posts Tagged ‘Estate’

How to Process Real Estate or Architectural Photos with Aurora HDR 2018

21 Nov

If you’ve ever tried your hand at real estate or architecture photography, you know that these are two of the most complicated forms of photography out there. The challenge is due mostly to having to balance out shadows created by harsh or uneven lighting. Thus, it’s no wonder that High Dynamic Range (HDR) photography is one of the most-used techniques for capturing real estate and architecture photos.

Before I go any further, let’s make it clear that this article is not about defining what HDR photography is or debating its merits. There is a myriad of arguments for and against HDR, but let’s save those are for another article. For now, let’s talk about Aurora HDR 2018 and how it might help you capture and process better HDR images.

How to Process Real Estate or Architectural Photos with Aurora HDR 2018

Simple, intuitive interface

If you’ve made HDR images using other photo editing programs such as Adobe Photoshop, you’ve probably had trouble figuring out how to use the software. One of the best features of Aurora HDR is that it is very stripped down, presenting you with only a few essential options that you can select to create your image. This greatly reduces your learning curve and makes it easy to get started immediately.

Use as standalone or with other programs

Speaking of other photo editing programs, you can use them in conjunction with Aurora HDR. It’s very easy to do. When you install Aurora HDR 2018 you can set it up to work both as a standalone program, or as a plugin for Lightroom, Photoshop, and others.

You don’t need a tripod

Historically, you’ve always needed to shoot bracketed images with a tripod to make sure they’re all aligned before merging them into a single HDR image. Not so with Aurora HDR. Thanks to their handy Alignment feature, Aurora HDR can automatically align your bracketed images (more on this in #2 below). This means that you don’t necessarily need to capture brackets with a tripod.

Of course, your images should be relatively aligned beforehand, but you don’t need the pinpoint accuracy that you used to need with other HDR photo editing programs.

Macphun Aurora HDR Photo Editing

Getting started with Aurora HDR

1. Open Aurora HDR and load images

When you first open Aurora HDR, you’re presented with a straightforward dialogue box that offers you three options (as seen in the screenshot above).

a) Open Image – In the very center is a button labeled “Open Image.” You can click on the button to select your images, or drag and drop them.

b) Batch Processing – If you have multiple sets of bracketed shots that you want to process all at once, drag and drop them into the Batch Processing dialogue box! Aurora HDR is intuitive enough to sort through the batch of files for you and automatically detect and match up your bracketed images.

Aurora HDR Batch Processing

c) Open Sample Image – This is a blue hyperlink below the “Open Image” button that you’ll probably only use the very first time you’re getting your feet wet with Aurora HDR. It exists mainly for demonstration purposes.

2. Set additional settings

For now, let’s assume you chose to Open Images (or, in the demo screenshots below, Load Sample Images). After doing so, another dialogue box appears with just a few options. The Alignment option is visible, and the others pop up when you click on the “Additional Settings” button.

Aurora HDR Brackets

Alignment

As mentioned above, checking the Alignment box will make sure all of your bracketed images line up properly. This means that you could possibly hand hold your camera while taking bracketed shots. But if you’re shooting a paid job, I’d still recommend shooting on a tripod to make sure you get the right shots, in perfect registration.

Ghost Reduction

If you happen to have a moving subject in your HDR brackets, enable the Ghosts Reduction setting. This can minimize the effect of ghosting in which moving objects may appear translucent or ghost-like in your final image. For real estate and architecture photography, you’re unlikely to have moving subjects unless you’re incorporating people in your photo or you can see moving tree branches through a window.

Aurora HDR Options

Get to Ghosts Reduction, Color Denoise, and Chromatic Aberration Removal by clicking on the gear icon (seen here in orange).

Color Denoise

Reduces the low-light noise in color pixels that can sometimes occur when merging photos together. This option is automatically enabled (as seen above), but you can shut it off if you wish.

Chromatic Aberration Reduction

It’s not unusual for real estate or architecture photos to have chromatic aberrations. Luckily, Aurora HDR has an option for minimizing the appearance of the purple and green glow along your image edges that is a clear indication of chromatic aberration.

3. Merge your photos

After checking the settings, click on the blue Create HDR button, and wait for your images to merge. This is perhaps the only downside to Aurora HDR (or, the whole HDR process in general). It takes a minute or two for the images to be merged together, so sit tight!

4. Select a preset or edit with the tools

Once Aurora HDR is done merging your photos, you’ll be presented with a more robust workspace where you can edit your HDR image further.

At the very bottom of the screen are a bunch of presets that you can choose to automatically adjust your image to a certain style. The Basic presets are selected by default, but if you click on the yellow “Categories” hyperlink, a bunch more will appear. For real estate, the Architecture presets are particularly helpful. Once you select a preset, you can adjust the amount to lessen or magnify the effect to your taste.

If you prefer to manually edit the photo with or without presets, use the far right panel where you’ll find basic photo editing tools. Scroll down to find even more editing tools such as Adjustment Layers and Dodge and Burn (more on these below).

aurora HDR

Preset categories here.

Aurora hdr

Lessen the effect of a preset by lowering the slider.

5. Add Adjustment Layers

Another fantastic feature of Aurora HDR is the ability to easily add Adjustment Layers in order to make targeted, non-destructive edits to your image. This is extremely useful in real estate and architecture photography, as you often need to make color and tonal adjustments to your image without inflicting permanent changes on the pixels.

For example, the image below illustrates the addition of an Adjustment Layer that targets the blue tinge in the staircase and chairs in the middle of the image, with the goal of color correction. Adjustment Layers also exist in Photoshop, and they function very similarly in Aurora HDR. The best part is that it is much more intuitive and easier to find in Aurora HDR than they are in Photoshop.

Aurora HDR Adjustment Layers

Adding an Adjustment Layer for local color control in selected areas.

6. Dodge and Burn

If you’ve upgraded to the brand new Aurora HDR 2018 version, you’ll find a couple of essential real estate photo editing tools that are much handier to access: Dodge and Burn Tools! If you’re unfamiliar with dodging and burning, you can read up on these photo editing processes in this dPS article.

In short, dodging helps you brighten targeted areas of an image while burning lets you darken them. Both techniques are essential for real estate photography retouching. In the new version of Aurora HDR, these tools are easily accessible in the right-hand panel. Simply scroll down to the “Dodge and Burn” panel and click on “Start Painting.” This will activate a few settings right above your image.

Aurora HDR Dodge and Burn

Use the Dodge and Burn tools to do special localized tone control in your image.

In Conclusion

If HDR photography sounds interesting to you and you’re looking for an easier way to post-process your images, give Aurora HDR 2018 a shot! Its intuitive, clutter-free interface is relatively easy to learn and you can begin enhancing your real estate photos in no time.

Disclaimer: Macphun is a dPS advertising partner.

Aurora HDR Final

Final image edited with Aurora HDR 2018.

Aurora HDR Sample Images

Before – a single image of a series of brackets.

Before

01 Macphun Aurora HDR Photo Editing

Before

Before

01 Macphun Aurora HDR Photo Editing

01 Macphun Aurora HDR Photo Editing

The post How to Process Real Estate or Architectural Photos with Aurora HDR 2018 by Suzi Pratt appeared first on Digital Photography School.


Digital Photography School

 
Comments Off on How to Process Real Estate or Architectural Photos with Aurora HDR 2018

Posted in Photography


Andy Warhol estate preemptively sues photographer over infringement claims

18 Apr

Photographer Lynn Goldsmith has been sued by The Andy Warhol Foundation following her alleged claims that the artist infringed upon a photo she took of musician Prince in 1981. The lawsuit appears to be a preemptive strike against Goldsmith; it argues that Warhol merely ‘drew inspiration’ from the photo to create an entirely new – and therefore infringement-free – image.

At the heart of the issue is a 1981 publicity photo of Prince taken by Goldsmith, who has allegedly raised issues with the artist’s estate over claims that Warhol’s ‘The Prince Series’ artwork infringes her copyright. The lawsuit seeks to establish that the artist’s work (made in 1984) is a new creation, thereby preventing any future potential lawsuits brought by the photographer against Warhol’s estate.

The lawsuit highlights elements of Warhol’s work that deviate from Goldsmith’s photograph, including, ‘substantially heavier makeup’ around the eyes, as well as a different angle of the head. According to The Wrap, Warhol’s estate is seeking a declaratory judgement stating both that the statute of limitations has run out on any possible infringement claims by Goldsmith, and likewise that the artist’s work does not violate the photographer’s copyright.

Via: The Wrap, US District Court via Scribd
Homepage photo By Jack Mitchell, CC BY-SA 4.0-3.0-2.5-2.0-1.0

Articles: Digital Photography Review (dpreview.com)

 
Comments Off on Andy Warhol estate preemptively sues photographer over infringement claims

Posted in Uncategorized


How to Photograph a Real Estate Interior or Property

16 Mar

Are you or someone you know thinking of selling or renting out a property? Whether it’s a house, an apartment, a restaurant, or a hotel; the key to successfully marketing it is with captivatingly well exposed, and well-composed photographs. Here are a few tips on how to successfully photograph a clear, bright interior with visible exterior showing through the windows. Learn how to stack your bracketed photos so that your finished photographs show the outside and the inside of your rooms clearly and perfectly balanced.

The problem with interiors

Here is what it looks like when you expose for the inside or interior of a room.

How to Photograph Real Estate Interiors or Properties

This is what it looks like when you expose for the outside.

How to Photograph Real Estate Interiors or Properties

This is a big problem, right? You can very rarely get a well-balanced shot of the interior of a room without blowing out the windows. The trick is to take several bracketed exposures of each room and stack them, in order to get a clear, evenly exposed photograph.

Here is what you want your final photo to look like.

How to Photograph Real Estate Interiors or Properties

Equipment needed

This is what you will need to shoot interiors:

  • DSLR with auto bracketing feature.
  • Tripod – I like to use a tripod with a bubble level on the head to ensure straight horizontals.
  • Wide-angle lens – Depending on your camera’s sensor, use the widest angle lens that you have available.
  • Shutter release – Not essential, but quite useful to reduce camera movement (resulting in a blurry image) when pressing the shutter.

Quick and easy steps to achieve the perfectly exposed shot

Firstly, it’s recommended to do a little home staging of the rooms that you want to photograph. Having it clear of clutter and clean definitely makes for better photographs. You can arrange some flowers and some fruit bowls to warm up the interior space, and make it look inviting. Clearing the floors of clutter will also make the rooms look more spacious.

How to Photograph Real Estate Interiors or Properties

You don’t need to redecorate or go through a whole moving process, but definitely, a little planning beforehand will make your photographs look more professional. Sometimes just moving a few pieces of furniture around or putting things away in another room will suffice. Turn on all lights that you feel will give depth to the room and open all curtains and blinds. I always like to show the outside, but of course, if the view is not a very nice one, you may want to shut the blinds partly.

A wide-angle lens is best for this type of photography because you will want to get most of the room into your shot. I often find that shooting from corners of the room and getting three walls into my shot will help the viewer get a better feeling for the size of the room. Sometimes shooting from the doorway also works well if the room is very small.

You often have to squeeze and make yourself small to get behind your tripod. I sometimes find myself in some pretty strange positions in order to get the perfect shot. You may even develop some contortionist skills doing this type of photography. Move around the room to find the perfect angle that showcases the best features of the room. Also, try not to shoot directly at windows. Instead, if possible, try to shoot at an angle.

How to Photograph Real Estate Interiors or Properties

Setting up and shooting

You will want to set up your camera on a tripod and shoot at waist level, not eye level. The verticals need to be straight and by lowering your camera and shooting straight you will achieve a better-composed photo with a better angle. Look at the view from your camera and try to assure straight vertical lines when looking at cabinets or tall furniture.

Set your camera’s auto bracketing feature (AEB) to shoot several shots. Depending on the amount of light in each room, you will need to shoot between three to nine bracketed exposures at 1 to 1.5 stops between each. I prefer to use natural light as much as possible, so timing the photo shoots with the time of day is essential. Usually, the more light you have in a room, the more brackets you will need.

How to Photograph Real Estate Interiors or Properties

A shutter release will assure that the camera will not move during the bracketed shooting. You will want to shoot quickly and have the camera as steady as possible if you’re not using a shutter release.

Blending exposures

There are several different techniques to stack your photos in order to blend your bracketed exposures together. I personally use a stacking software called Photomatix Pro 5. I am satisfied with the results I can achieve with minimal adjustments and I enjoy the time-saving quality that it provides.

You can search for other HDR software and choose the one that best suits your needs and budget. You usually get a trial period or a trial version that includes watermarks. This will allow you to test with your own photos in order to see if you like it before you purchase it. Recent versions of the most popular photography software like Photoshop and Lightroom now have a HDR merge feature to perform HDR processing and tone-mapping.

How to Photograph Real Estate Interiors or Properties

Your photos are ready when you feel like the room is evenly exposed and you can see the outside view clearly through the windows.

Conclusion

Have fun experimenting with your photography and showing your friends and family what great, professional looking interior photographs you took of your property! They may even ask you to photograph their properties if ever the time comes when they are contemplating selling or renting.

Don’t hesitate to show me your photos in the comments section.

The post How to Photograph a Real Estate Interior or Property by Sandra Roussy appeared first on Digital Photography School.


Digital Photography School

 
Comments Off on How to Photograph a Real Estate Interior or Property

Posted in Photography


Plastic Village: Tropical Housing Estate Built from 1MM Recycled Bottles

25 Oct

[ By WebUrbanist in Architecture & Houses & Residential. ]

plastic-bottle-architecture

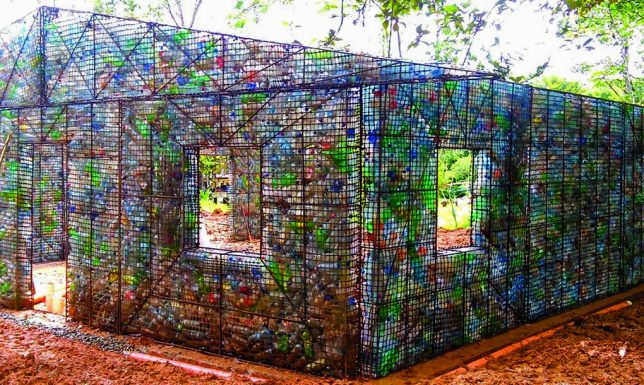
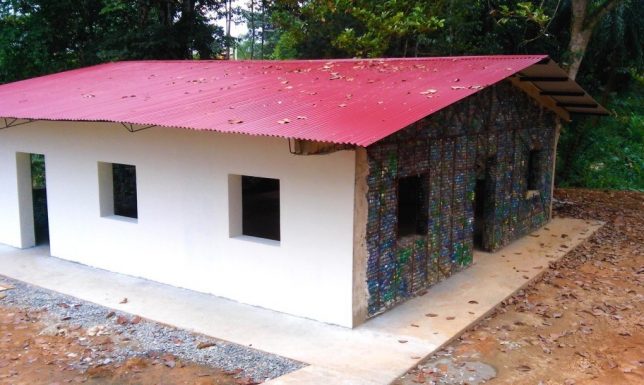
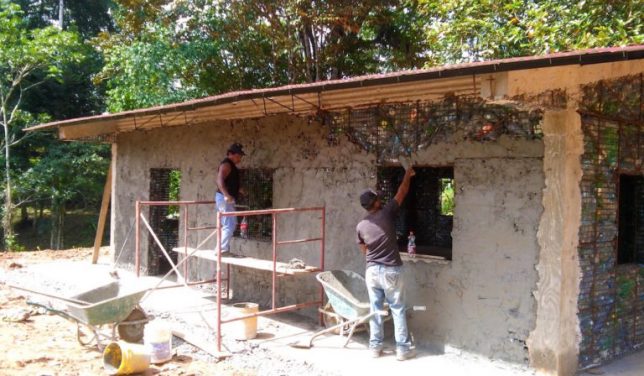
At a glance, it would be impossible to guess that the finished houses in Panama’s Plastic Bottle Village featured walls packed with recycled drinking containers. What started as a recycling initiative by a expat Canadian entrepreneur has become an architectural adventure that will ultimately reuse over a million plastic bottles.

plastic-bottle-finishing

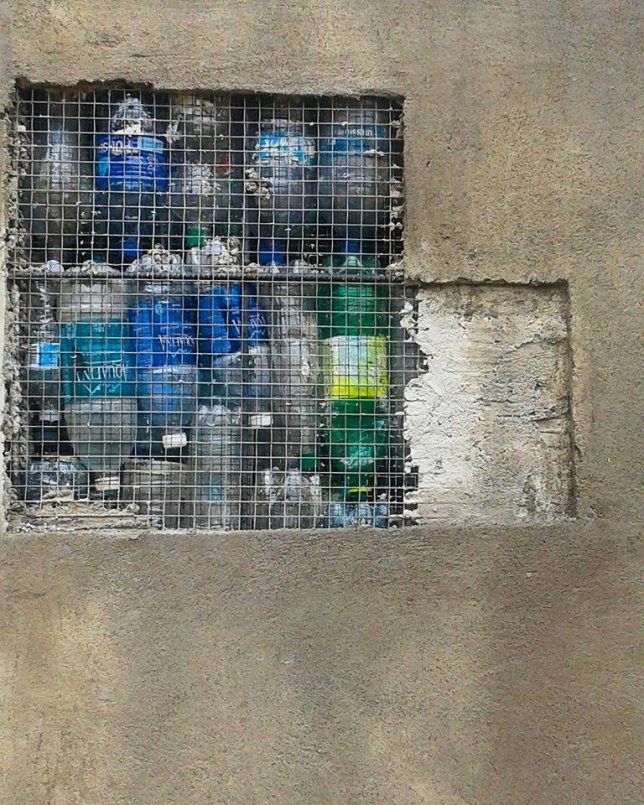
Since 2012, tens of thousands of bottles have been brought to the growing town to make buildings. These are stacked in steel cages with stones to fill in gaps and provide rigidity. Cement plaster covers the structures inside and out, making them appear like solid concrete or finished stucco.

The bottles, meanwhile, provide insulation while allowing airflow, keeping interiors in the hot climate a full 17 degrees cooler than the ambient outdoors.

plastic-bottle-castle

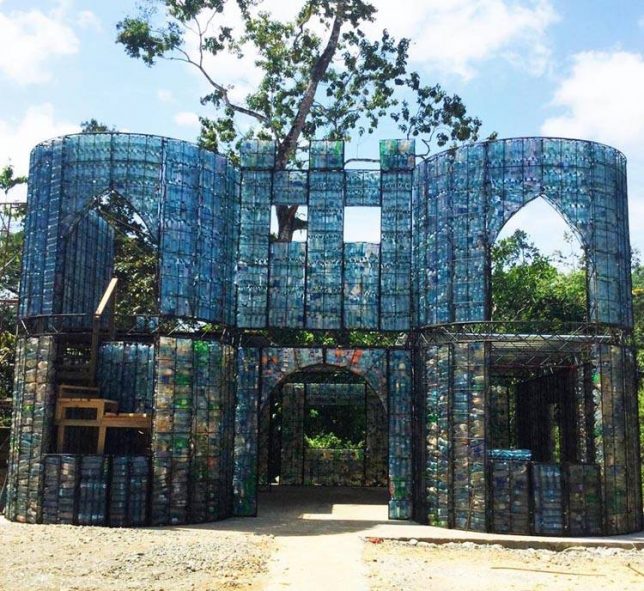
Multiple bottle-based houses already constructed on nearly 100 acres of lush tropical jungle land purchased for the Plastic Bottle Village, which will eventually be home to over 100 such structures. Also in the works: a small public park, retail operation and yoga pavilion.

plastic-bottle-complete

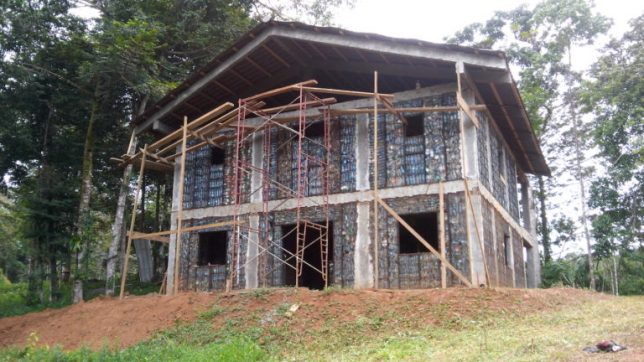
The steel-framed structures provide a balance of strength and flexibility, helping them stand up and support roofs but also to resist earthquakes. The Plastic Bottle Village is about more than just one place, too: its founder is educating others about how to build with this cheap and ubiquitous material that many see simply as waste.

plastic-bottle-cage

caged-bottle-concrete

The project puts consumption in context: “Average humans can consume 15 or more drinks in plastic bottles a month. If you were born after 1978, and live until 80 years old, you will leave behind a minimum of 14,400 plastic bottles on this planet.”

“These bottles take hundreds of years to break down into tiny pieces of plastic, never to completely disappear. Most of the waste is consumed by fish and birds, which has shortened their lifespans greatly.”

plastic-bottle-wall

It also illustrates the potential offsets: “If you live in a two story plastic bottle house of 100 square meters or 1,000 square feet per floor, then your house will be built reusing 14,000 plastic bottles. These recycled bottles could neutralize the negative effect of your passage on this planet,  and move closer to leaving only your footprints.”

Share on Facebook


[ By WebUrbanist in Architecture & Houses & Residential. ]

[ WebUrbanist | Archives | Galleries | Privacy | TOS ]


WebUrbanist

 
Comments Off on Plastic Village: Tropical Housing Estate Built from 1MM Recycled Bottles

Posted in Creativity


Horror House: Real Estate Listing Instantly Infamous for ‘Terrifying’ Decor

15 Oct

[ By SA Rogers in Design & Fixtures & Interiors. ]

horror-house-3

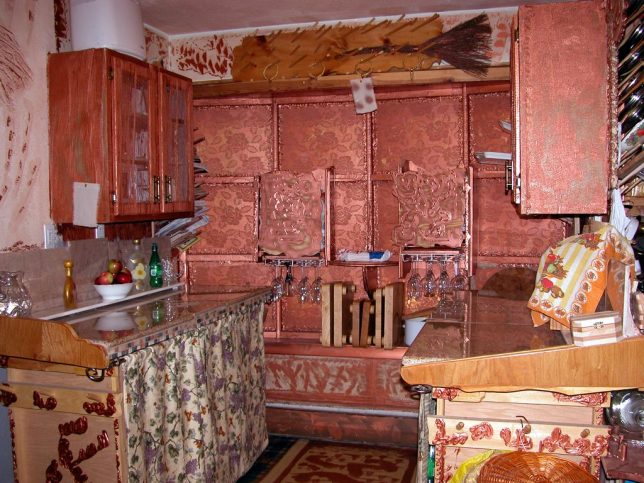
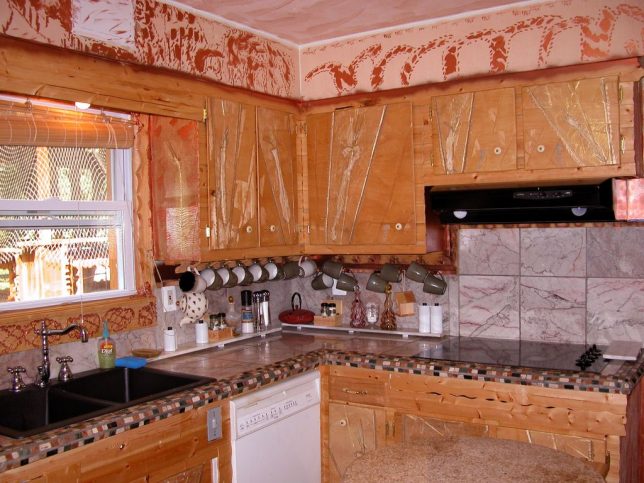
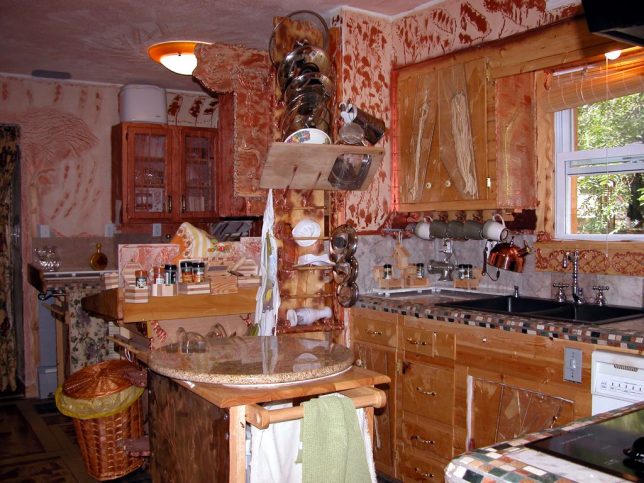
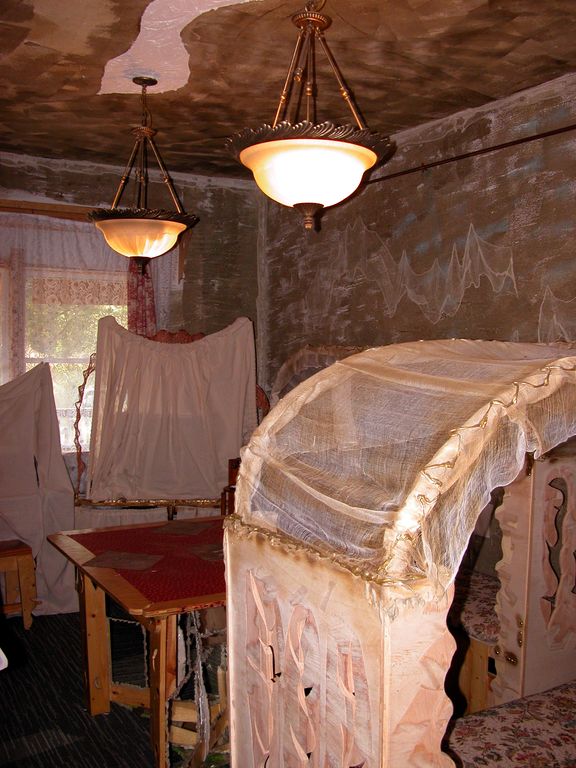
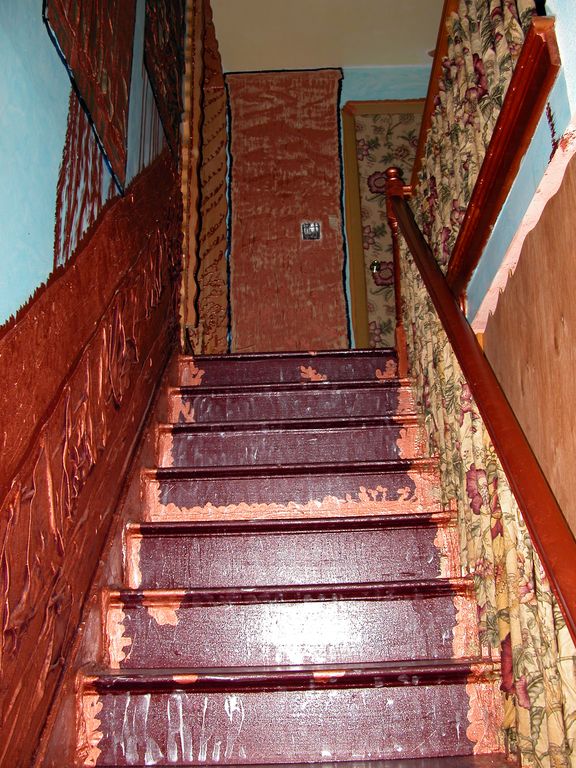
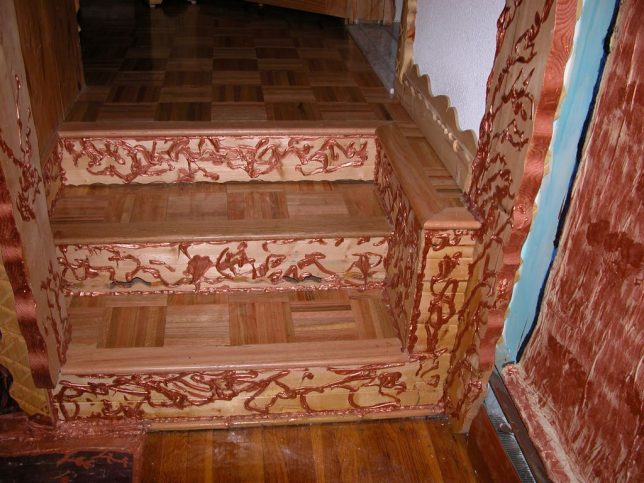
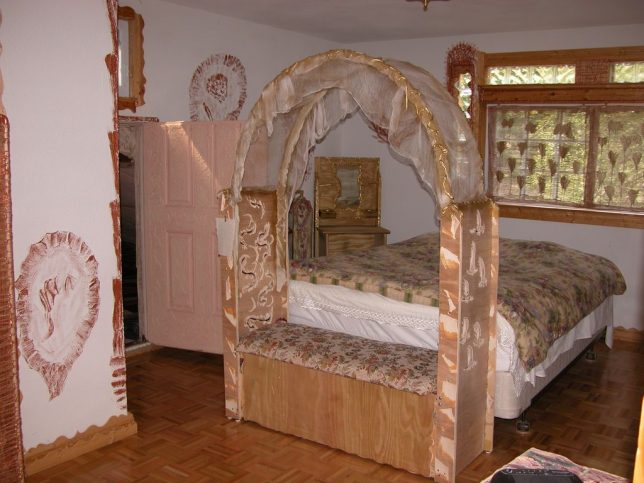
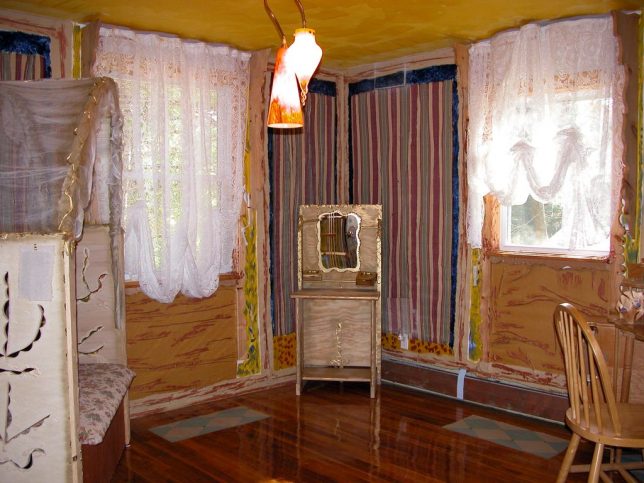
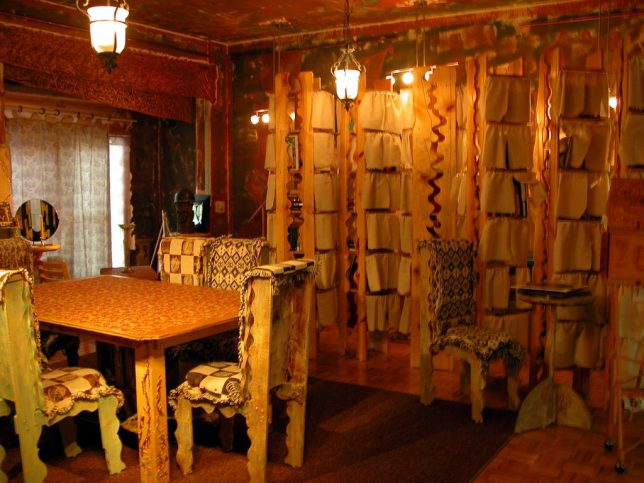
Had Buffalo Bill escaped Clarice Starling and moved into a quaint suburban Connecticut home, his interior decor might have looked a little something like this. At 24 Brentwood Drive, an absolutely amazing color palette in shades of dried blood, glistening internal organs and Exorcist vomit green adorns every available surface in the form of hand-painted designs. And the best part is – all of this could be yours for just $ 339,900.

horror-house-1

horror-house-2

horror-house-5

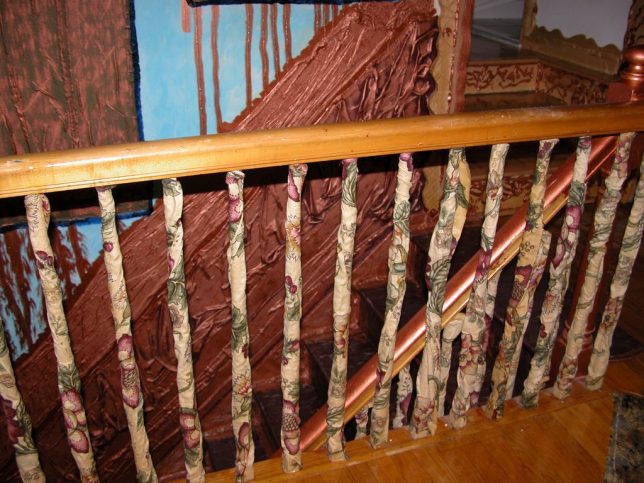
Believe it or not, this is an actual real estate listing on Zillow.com, described by listing agent Ernie Rossi as a “unique one of a kind finishing completed by a professional!” The agents provide a full 51-photo tour on the site, showing off room after room filled with decoupaged stair rails, musty-looking floral curtains, decorative stamped paint in rust red and squiggly designs in shiny copper.

horror-house-7

horror-house-8

horror-house-9

Naturally, the listing went viral on social media upon discovery, with people describing the interiors as “serial killer chic,” “deranged” and “a portal to hell.” The real estate agents told The National Post that the sellers are artists, and remain optimistic that someone out there will fall in love with their designs. The home has only had one interested party in thirty days online, however.

horror-house-10 \

horror-house-11

horror-house-12

Who knows – maybe it’s actually some kind of viral horror marketing for a horror movie or a Halloween attraction, given that it’s mid-October and the house is located near the ominously named Mount Horr and Secret Lake – but there are elements of the home that feel earnest. Check out the full listing to decide for yourself.

Share on Facebook


[ By SA Rogers in Design & Fixtures & Interiors. ]

[ WebUrbanist | Archives | Galleries | Privacy | TOS ]


WebUrbanist

 
Comments Off on Horror House: Real Estate Listing Instantly Infamous for ‘Terrifying’ Decor

Posted in Creativity


How to Shoot Real Estate Photography Using Natural Light

14 Aug

There’s something about the way sunlight illuminates a room. The light pours over surfaces, metal fixtures gleam, wood detail shines, and the edges of furniture upholstery glows. Natural shadows produced by different objects convey a sense of depth. A naturally-lit image gives you a feel for what it would be like to see the space in person.

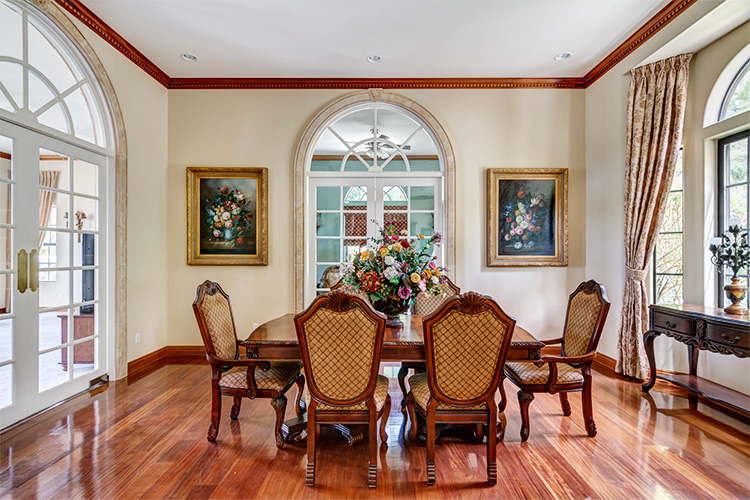
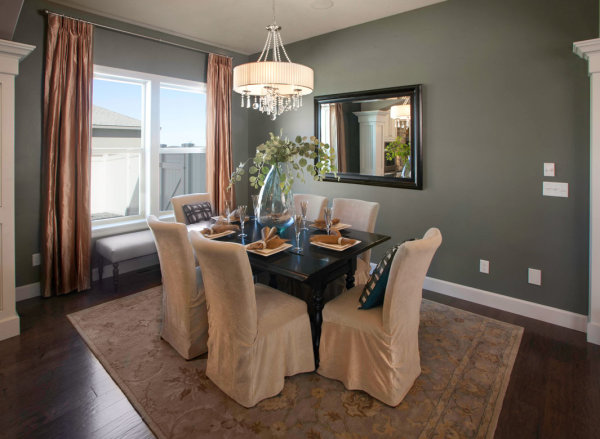
1 dining

The following will give you a basic understanding of equipment needs, how to manage contrast and mixed lighting in a room, and HDR shooting techniques to get you started doing real estate photography using natural light.

Equipment

Shooting with natural light has the benefit of a short equipment list. A camera, tripod, and wide angle lens is all you need.

  • Camera: A DSLR with auto-bracketing will increase your shooting speed and ease.
  • Tripod: Your tripod should be sturdy enough that your camera will stay put if you need to manually adjust camera settings, while shooting a series of bracketed images.
  • Wide Angle Lens (with lens hood): For cropped sensor cameras, the Tokina 11-16mm is a fantastic choice for real estate photography. The Canon 10-22mm is also a great option. You’ll be able to handle just about any real estate shooting situation with either of these aspherical lenses. For full frame cameras you’ll want a lens in the 16-35mm range. A lens hood is necessary to prevent lens flare.
  • Not required, but definitely a bonus: Circular Polarizer. In addition to deepening blue skies, a circular polarizer can be very helpful in reducing glare on windows, foliage and pool surfaces.

Sunlight on the exterior

A sunny day is the best canvas for your exterior shots. Try to schedule your shoot during a time of day when the sun will be shining on the front of the house. Ask your client (or check Google Maps) to see which direction the house faces. You want capture the front exterior in its best light, as it’s almost always used as the featured image for the property’s listing.

2 exterior sun darlene

If it’s not possible to shoot the exterior in sunlight, don’t fret. Shooting HDR (explained later on) will help perk up a shady exterior.

851 Cabrillo Ave 05 Exterior print

4036 Baldwin Lane 01 ExteriorFront

Camera position within a room

There’s usually one ideal spot in a room, to position your camera to showcase the best angle. A room’s best angle usually shows:

  1. As much of the room as possible.
  2. The most aesthetically pleasing furniture and/or architectural elements.

For the natural light photographer, finding that spot depends on two things: available space, and window brightness.

Most importantly, you need to pick a space you can physically occupy. For smaller houses and rooms, quite often your only choice is the doorway, as it is likely to be the only spot where you can fit behind the tripod, and still squeeze enough of the room into your shot. Capturing three walls in your shot will give the viewer a better idea of the size and space of the room.

Rooms large enough to offer more than one shooting location often have windows lacking shades or blinds. Pick a spot in which extremely bright windows are angled more than 45 degrees away from center of your lens’ field of view. Doing so will help you avoid a high-contrast shooting situations and potential lens flare, which will in turn reduce your time spent in post-production.

4 side light

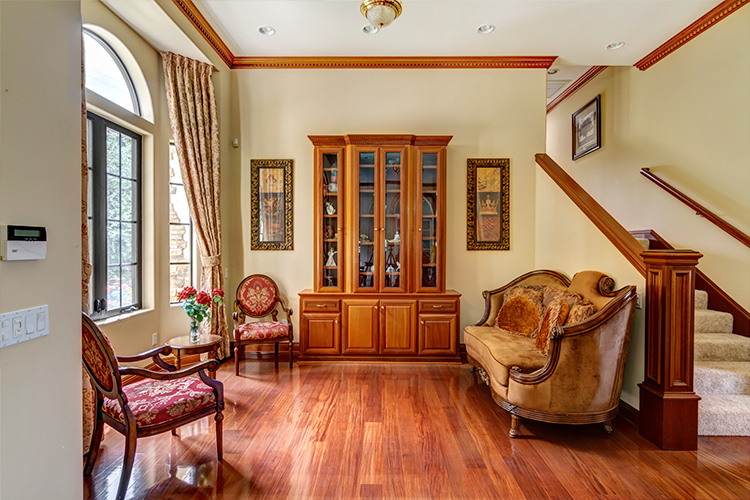
The shooting location for this image placed the bright window at a 90-degree angle to the lens, minimizing contrast, as well as producing a pleasantly side-lit scene. An out of frame kitchen window, provided supplemental light from the right.

5 low contrast window

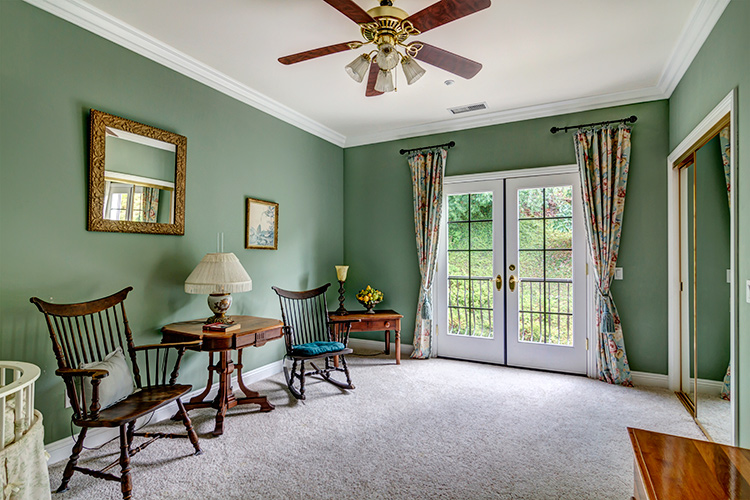
This room’s patio doors looked directly onto a foliage-covered hillside, resulting in a reduced contrast between interior and exterior, and less work required in post-production.

Working with windows

The windows in smaller rooms, such as bedrooms and bathrooms (in which your shooting position is limited) usually have blinds or shades. If the windows are bright, consider closing them at least partially, to reduce contrast between the interior and exterior – especially if the view outside is not an additional selling point for the house. This cuts down on the overall contrast of the scene, while still illuminating the room. It also prevents direct light from hitting your lens, minimizing flare and ghosting.

6 bed shades

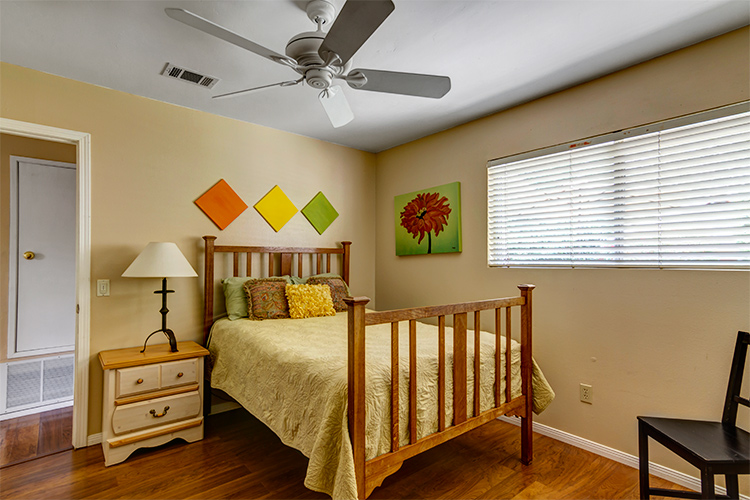
Blinds are angled at 45 degree to cut down on scene contrast.

7 living partial

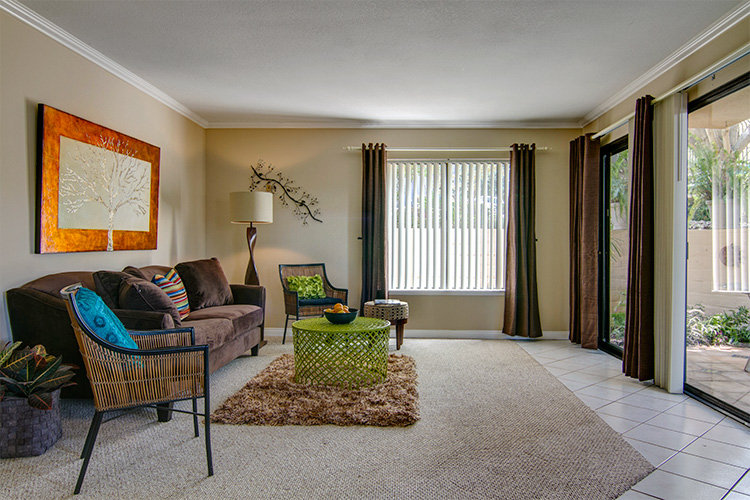
Blinds on the brightest window are partially closed, whereas the patio door blinds were left open.

Shooting HDR

Natural light can create beautiful images, but they do require some extra work in post-production. Rarely can a single exposure handle the range of contrast produced by an interior space with windows. HDR techniques will help remedy shadowy corners and bright windows, properly exposing all parts of the space.

8 bed no hdr

From a single exposure.

9 bed hdr

HDR composite created with nice bracketed images.

To create an HDR image, you’ll need to shoot a series of bracketed images. Tiny rooms without any windows, such as washrooms and closets, usually require three images bracketed by 1-1.5 stops. In most rooms 5-7 images will do the trick. High-contrast spaces containing bright interior lighting and/or windows, may require nine bracketed images. For rooms with exterior views, sometimes HDR programs have difficulty rendering the contrast, no matter how many bracketed images you shoot, and the composite starts to look unnatural.

In general, it’s difficult to achieve a natural look within an image that contains a room with a view. For finer control over this interior/exterior blending process, consider shooting an image to expose for the view out the window, then using Photoshop to mask the view into the HDR composite image of the room.

10 view hdr

HDR composite image.

11 view hdr+extra image
HDR composite with an additional image exposed for the view masked into the windows with Photoshop (above). Even though the change is subtle, the potentially distracting overexposed window scene is now closer to proper levels, making it easier for the viewer’s eye to move from the interior to exterior, and back again.

Mixed lighting inside

One of the difficulties of working with natural light, is dealing with mixed lighting situations. If enough light is coming in through the windows, you can choose to leave interior lights off, resulting in a single daylight color temperature throughout the image. Leaving interior lights off works especially well when window light is sufficiently illuminating the room, the light fixtures themselves aren’t in the frame, and the palette of the room is mostly white.

12 bath sunlight only

Lights off in this bathroom resulted in a fresh and clean look.

13 bed sunlight only

The window light was so abundant in this bedroom that turning the interior lights on could have arguably made the scene look unnatural.

14 living sunlight only

The interior lights were kept off to avoid mixing tungsten with daylight for this shot. Turning them on wouldn’t have added much illumination, as the sunlight was quite bright on its own.

If the room isn’t bathed in sunlight, or contains light fixtures like pendants or chandeliers that should be on display, make sure to turn them on. You’ll end up with multiple color casts that will require correction later, but there’s a point at which simplifying the lighting just to speed up post-production, starts to undermine the ambiance of the room.

15 living mixed

Mixed lighting in the living room above, and the bedroom below, required a significant amount of color correction in production, but resulted in more inviting and warmer looking spaces.

16 bedroom mixed

You can reduce your color correcting time by masking in the lights, the same way you would the view outside a window. Shoot the room with the lights off, then with the lights on. Create two HDR composites of each lighting situation, then mask in the illuminated lights. This works well with fixtures that don’t provide much illumination but should be seen turned on.

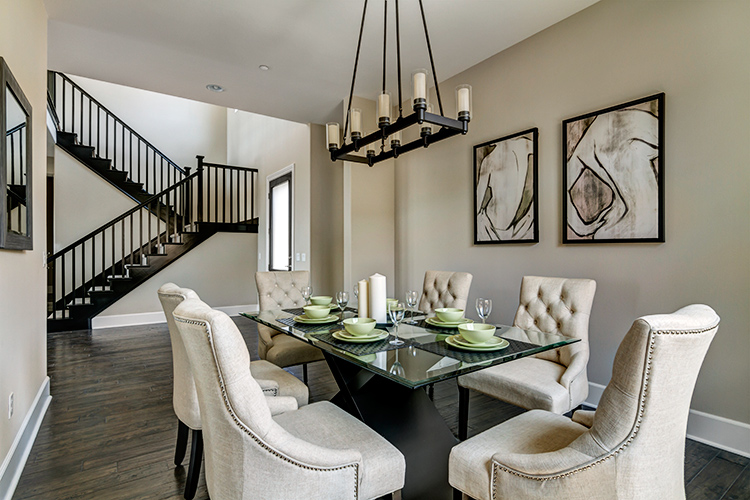
17 dining chandelier off

HDR composite with chandelier off.

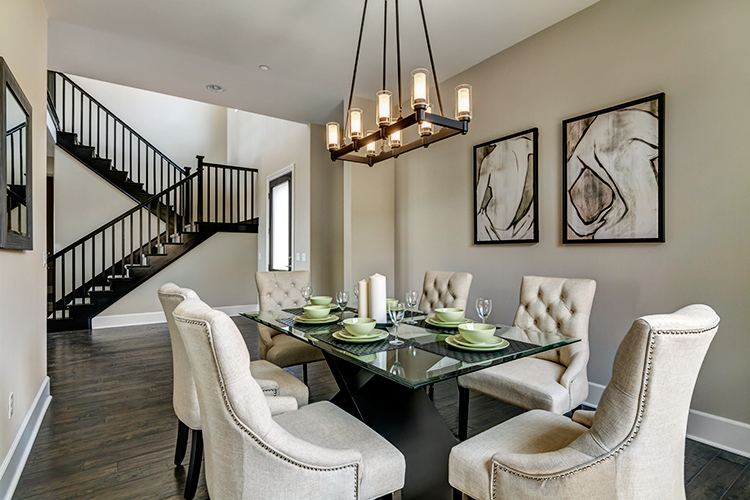
18 dining chandelier on

HDR composite with the illuminated chandelier masked in with Photoshop.

Conclusion

Shooting real estate with only sunlight and interior lighting lends a beautiful, natural aesthetic to your images. When setting out, remember:

  • A wide angle lens is a must-have, along with camera and tripod.
  • Shoot the exterior bathed in sunlight, if possible.
  • Avoid shooting directly into extremely bright windows.
  • Adjust shades and blinds to control contrast within a room.
  • Decide how to deal with mixed lighting, and shoot different variations to give yourself plenty of options in post-production later.

Please post your questions and share your real estate photos in the comments below.

googletag.cmd.push(function() {
tablet_slots.push( googletag.defineSlot( “/1005424/_dPSv4_tab-all-article-bottom_(300×250)”, [300, 250], “pb-ad-78623” ).addService( googletag.pubads() ) ); } );

googletag.cmd.push(function() {
mobile_slots.push( googletag.defineSlot( “/1005424/_dPSv4_mob-all-article-bottom_(300×250)”, [300, 250], “pb-ad-78158” ).addService( googletag.pubads() ) ); } );

The post How to Shoot Real Estate Photography Using Natural Light by Lauren Schroeder appeared first on Digital Photography School.


Digital Photography School

 
Comments Off on How to Shoot Real Estate Photography Using Natural Light

Posted in Photography


The Latest Tech Trends in Real Estate Photography

19 Apr

6324 Castle Drive, Oakland, CA

Earlier this week I was checking out a new listing that Kelly and Marvin Deal with Grubb Company here in Oakland, CA have up for a home for sale in the Oakland Hills. Kelly and Marvin helped mrsth and I buy our home in Piedmont a few years back and are excellent real estate agents if you are looking to buy or sell in the East Bay, especially near Piedmont or Oakland.

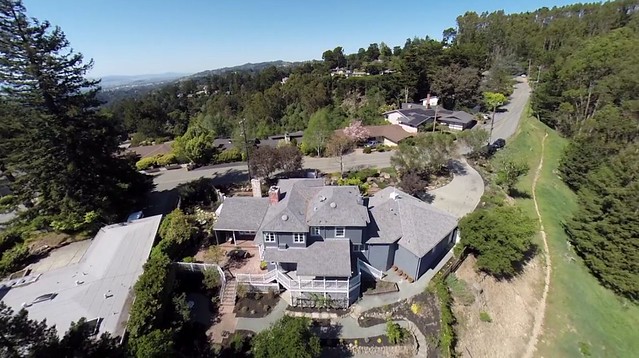
In looking at the listing, I was struck by how sophisticated real estate photography is getting. I’d seen interactive home tours online before, but with the convergence of things like 360 degree cameras and drone photography, real estate photography seems to be moving to a whole new level. In this case they used drone cameras to get unique views of the property including dramatic aerial views showcasing the parklands around the property.

They also used a company called Open Homes Photography who is using 360 cameras to build not just interactive walk through tours of properties, but can even convert these 360 degree views into custom floor plan and aerial type dollhouse views.

Anyways, if you are doing real estate photography, check it out — and if you’re thinking of moving to Oakland, give Kelly and Marvin a call as well.

With housing in San Francisco and the Peninsula going nuts with the recent tech boom, on a relative basis Oakland is much more affordable. We moved to the East Bay in 2001 and over the last decade I think Oakland especially has been growing into a wonderful place to live and work. Great new restaurants seem to be popping up daily, art and food and culture are thriving and BART makes it super easy to get to the City quickly.


Thomas Hawk Digital Connection

 
Comments Off on The Latest Tech Trends in Real Estate Photography

Posted in Photography


Real Estate Photography – a Guide to Getting Started

20 May

real-estate-photography-home-front-lighting

Photography has never been more important to selling real estate than it is today. The markets are heating up again and demand for real estate creates demand for photography. This is good news to photographers, but like any business, there is plenty of competition. If you are new to real estate and architecture photography, here are some general guidelines to start you on the right path.

Camera Equipment

A camera, lens, and tripod, are all that is required to get started, but you might quickly learn that many competitors are very proficient at using supplemental lighting and Photoshop techniques.

Your camera should allow you to add a cable release, a flash, different lenses, and wireless triggers. Wide angle lenses are required. For cropped sensor cameras a lens around 10-22mm or 12-24mm is perfect, and for full frame sensor cameras, a lens around 16-35 mm will do the job.

Tilt-shift lenses help avoid converging vertical lines such as wall edges and door frames leaning in or out. There are several tilt-shift lenses available from Canon’s 17mm, the 24mm from Canon and Nikon, and others. While these lenses are wonderful to use, they are fixed focal length so if you need  a perspective that is for example; 19 mm or 27 mm or somewhere in between, a 16-35mm zoom lens is a great companion to a tilt-shift lens.

real-estate-photography-converging-lines

This image before processing shows diverging vertical lines, seen best by the edge of the fireplace, from using a 16-35mm lens tilted down to add foreground and minimize ceiling.

Shooting techniques vary from exposure blending, HDR, wireless flash, and light painting with multiple exposures. No matter your shooting style the camera should not be moved to guarantee image alignment of multiple exposures. The camera’s self-timer, a cable release, or wireless triggers insure no camera movement. The iOS App or Camranger also triggers the camera and provide a preview of the photo on a smart device.

Approaching the Property

The first image a potential buyer sees (usually) when reviewing properties online is an exterior photo. That photo is important so take the time to find the best angle and best light. Ask the realtor what are the important features to highlight. They usually want exterior photographs from front and rear, a deck or patio, landscaping and gardens, pool or hot tub, a barn, shop, or other outbuildings. Each feature should be emphasized in the composition by using the surroundings, like beautiful gardens leading to a cool garden shed.

  The client was most interested in the outdoor theater under cover on the back porch, which I captured, but I also captured this image showing the patio furniture and giving a broader view of the backyard.

The client was most interested in the outdoor theater under cover on the back porch, which I captured, but I also captured this image showing the patio furniture and giving a broader view of the backyard.

Exterior Lighting

Most outdoor subjects benefit from early or late day lighting, including real estate. Using Google Maps and Google Earth can help you determine the best time of day prior to the photo shoot.  Searching only takes minutes and provides an idea whether a home faces the sunrise or sunset, or neither.

Light hitting the front of a home is perfect as seen here after sunrise. In winter, some homes facing south never have the sun hitting the front of the home To avoid shooting into the sun, photograph from the same end of the house as the sun.

Light hitting the front of a home is perfect as seen here after sunrise.

In winter, some homes facing south never have the sun hitting the front of the home To avoid shooting into the sun, photograph from the same end of the house as the sun.

 This home has a huge yard and a street lined with cars. Photographing from the left put the sun right above the roof but moving to the right side was a better perspective and the sun was out of view.

This home has a huge hedge behind the camera and a street lined with cars. Photographing from the left put the sun right above the roof but moving to the right side was a better perspective and the sun was out of view.

Overcast skies can eliminate any problems with sun’s position, but shooting on poor days is a decision best discussed with the realtor.  The advantage is you can shoot any time of the day but the disadvantage is white skies can lessen the impact of an otherwise great exterior image.

The dusk/dark technique

The dusk/dark technique

The dusk/dark technique is often requested by clients because it helps sell properties. The image is photographed outside and from the best angle to showcase the house. The technique is to turn on all the lights in a room and shoot at a certain time. After sunset the sky’s exposure will balance with the room lights’ exposure. A better approach is to add lights to the rooms creating even lighting, and working this way means not having to wait for that perfect balance between room lights and outdoor light.

Interior Photography

Homes come in all shapes, sizes, styles, and conditions. I always tell my clients that I am not in the house cleaning business, so I send them a task list with my suggestions on prepping the home prior to the photo session. Once inside, I set out to photograph the main rooms: the living room, kitchen, dining area, master bedroom, master bath, are all ‘must shoot’ rooms. There could also be a library, office, large walk-in closet, and more. The client can often tell you what they deem important. Next, seek the best perspective for each room.

The master bathroom

The master bathroom

I describe my approach as using the inside elements: furniture, windows, and room layout, to create visual flow. I generally try to avoid composing something large in the foreground that prevents the eye from flowing through the room.

This is the first test shot I took of this room and the foreground chair blocked the flow through the room.

This is the first test shot I took of this room and the foreground chair blocked the flow through the room.

real-estate-photography-interior-after

By rotating the chair and lowering the camera height slightly, the eye can flow through the room easier. This image also has the vertical lines corrected.

Camera Height and Vertical Edges

There is broad agreement among clients and photographers, that if there is to be a rule it will state: verticals must be correct! In most interiors there are edges and corners of walls, door frames, and windows that have vertical sides and these edges need to truly be vertical. When you use a tilt-shift lens this problem is solved, but tilting the camera up or down with a non-TS wide angle lens makes vertical edges converge or diverge and they no longer appear straight.

One widely used approach is to level the camera using a hot shoe bubble level, making edges straight. While this is a simple solution, it is not always the best solution when using a non-TS lens. A level camera at chest height can result in foreground subjects, like furniture being cutoff at the bottom with too much ceiling at the top. Lowering the camera height will improve this problem but how low can you go and still have an effective photo?

This image by one of my online course students; Simone Brogini, illustrates this point. His camera is chest high and his camera is leveled to avoid diverging lines. The problem as I mentioned to him was that the foreground furniture is cutoff and there is too much ceiling that lacks interest.

This image by one of my online course students; Simone Brogini, illustrates this point. His camera is chest high and is levelled to avoid diverging lines. The problem as I mentioned, is that the foreground furniture is cutoff and there is too much ceiling that lacks interest.

 Simone also shot this bedroom image the same way. It looks pretty good but I advised him again that in my that camera height might be just a little too low as the bed and furniture get only about 1/3 of the frame and the wall and windows uses 2/3 of the frame.

Simone also shot this bedroom image the same way. It looks pretty good but I advised him again that in my opinion the camera height might be just a little too low, as the bed and furniture get only about 1/3 of the frame and the wall and windows use 2/3 of the frame.

So what is the perfect camera height? There are many opinions. Some suggest chest height while others suggest door knob height or even lower, all to avoid diverging verticals lines. I prefer chest height or close and correcting vertical lines using other methods like a tilt-shift lens or the Lens Correction Tool in Photoshop (or Lightroom).

This image shows the use of the Lens Correction Tool. The bed and furniture consume 2/3 of the frame and provide a fuller view of the room.

This image shows the use of the Lens Correction Tool. The bed and furniture consume 2/3 of the frame and provide a fuller view of the room.

Getting Good Exposure

The perfect interior exposure is challenging when balancing bright window light, with darker interiors. You can deal with scene contrast many ways; one is to shoot when outdoor light levels are lower. Midday light will be much brighter outside than during or after sunset, or on a cloudy day. Turning on every light inside increases the interior brightness, and if the outdoor brightness is lower a RAW file can often capture the scene in one frame.

  This room has a dark ceiling, dark furniture, and window flare and hot spots. To much contrast for one capture.

This room has a dark ceiling, a dark floor, a window flare and hot spots with too much contrast for one capture. (see corrected version below)

  On a overcast day, the interior exposure is quite good as well as the window exposure. A flash was bounced off the ceiling on the right.

On a overcast day, the interior exposure is quite good as well as the window exposure. A flash was bounced off the ceiling on the right.

To make sure I have all the exposures for a great image, I determine my ‘base exposure’, the image that has most of the data centred in the histogram. Then I bracket widely in +/- one stop increments of varied exposures so I have variety just in case I need them. Lightroom and Photoshop, and certainly other programs, allow selective lightening and darkening of shadows and highlights on a single image, but if the contrast is too much, I can blend those bracketed images into a great final image.

The Adjustment Brush was used to bring down the brightness of the left window. There is still a little flare around the window, but this worked for the real estate website.

The Adjustment Brush in Lightroom was used to bring down the brightness of the left window.

Interior Lighting

Just like a finely lit portrait, interiors can benefit greatly from nicely styled lighting. HDR can manage scene contrast but it does not create highlights and shadows in areas that have no directional light. If you have a dark cabinet against a dark wall, adding supplemental light can bring out that needed detail.

Most interiors have two light sources: window light and interior lights, both constant light sources. You can add constant lights or use strobe or flash. Constant lights, unlike flash, are like the lamp on the table or window light. Changing your exposure to darken window light also changes the exposure brightness of your constant lights. Flash is not a constant light! If you change your shutter speed to darken the window light exposure, flash exposure will not change and for this reason; flash or strobe provides flexibility when lighting interiors.

Photographers shooting for architects or magazines often have plenty of time to photograph a property with finely crafted lighting techniques, but a real estate photographer’s time is usually limited, making flash the perfect tool. Some photographers have mastered the balancing act of using direct on-camera flash to fill in a scene while others use on-camera flash in a bounce capacity.

Here the only light is coming from a window on the left and the ceiling fixtures, leaving dark areas in front.

Here the only light is coming from a window on the left and the ceiling fixtures, leaving dark areas in front.

Adding bounce flash, hand held just to the right of the camera, filled in those darker areas effectively.

Adding bounce flash, handheld just to the right of the camera, filled in those darker areas effectively.

Also popular are multi-flash wireless set ups allowing the flash to be placed around a room for styled lighting. Also growing in popularity is the ‘light painting’ approach where areas are selectively lit and the exposures are blended.

This image utilizes the Light Painting approach to interior lighting.

This image utilizes the Light Painting approach to interior lighting.

One side effect with outdoor lighting mixing with interior lighting is ‘lighting color balance‘. This is different than camera White Balance settings. Camera White Balance is set to either specific areas of your scene or set to average all light sources together.

There is a blue color cast above and right side of the window as well as the floor on the left.

There is a blue color cast above and right side of the window as well as the floor on the left.

When you have mixed light, such as daylight colored window light mixing with tungsten colored ceiling lights, and then throw in a fluorescent kitchen light, you have a veritable palette of different colors mixing together. Walls closest to windows will be blue while the wall closest to a lamp will be amber and the ceiling in the kitchen will have a green tint.

The final image shows color correction in those areas as well as verticals and window flare.

The final image shows color correction in those areas as well as corrected verticals and removal of window flare.

In some cases the effects of mixed light will be minimal and other times require attention. You can prevent mixed color in many cases by color matching the inside lights to the same color or use Photoshop color correction techniques to change color of specific areas.

The End Product

Once you have completed the assignment you will need to deliver the image files. Clients may have different preferences, but mine usually request low resolution for the web and high resolution for print publication.

Be sure to save your files in the proper file format and size for the intended use. Most Multiple Listing Service’s specify what is accepted format and acceptable sizes. I use Photoshop and the Save for Web option for the low resolution and TIFF format for high resolution.  Then final delivery of the files is made by Dropbox or a comparable online service.

Summary

Things to remember doing real estate photography:

  • You are not photographing for yourself; you are photographing for clients who will expect professional quality work.
  • Don’t get ALL the best gear, get only what is required to do the job well.
  • Master the creative side of photography such as angles, perspectives, and composition.
  • Master the technical side of exposure, HDR, supplemental lighting, color matching, and exposure blending.
  • Be careful when processing real estate images, like removing power lines, to avoid misrepresenting the property. 

There are many styles and techniques you can use to photograph architecture and real estate and you should master them all. Real estate photography is architecture photography and you can photograph a home for a real estate agent for $ 200 or photograph a model home for a home builder for $ 1000 or more.  Start small, plan big!

The post Real Estate Photography – a Guide to Getting Started by Charlie Borland appeared first on Digital Photography School.


Digital Photography School

 
Comments Off on Real Estate Photography – a Guide to Getting Started

Posted in Photography


Rare photos of Rolling Stones emerge from estate sale

17 Nov

Mick_Jagger_Untitled_65.jpg

Photos of the Rolling Stones are not hard to find, but the majority of images from the height of the band’s career consist of on-stage performances and posed publicity shots. That’s why a stack of photos uncovered at a Southern California estate sale have attracted a lot of attention recently. See gallery

News: Digital Photography Review (dpreview.com)

 
Comments Off on Rare photos of Rolling Stones emerge from estate sale

Posted in Uncategorized


Your Real Estate Agent Would Like Some Free Photography, Please

18 Oct

Please pardon the detour today. I need to rant. I'd like to share with you the ballsiest request for free picture use that I have ever gotten…

Read more »
Strobist

 
Comments Off on Your Real Estate Agent Would Like Some Free Photography, Please

Posted in Photography