RSS
 

Posts Tagged ‘essentials’

lighting essentials advanced workshop – a brief review

06 Jun

For those not familiar, Lighting Essentials are a series of workshops put on by Don Giannatti (you may know him as “Wizwow” on flickr).   I am a big fan of Don, not only is he an excellent photographer, with years of commercial experience under his belt, but he is also a fantastic teacher – which is just as difficult a skill unto itself.  He’s also a really down to earth guy with a low tolerance for BS and fools, which I find refreshing, particularly in the online photo community which can often turn into a bit of a hive-mind circle-jerk at times (you know what I’m talking about)…

Anyway, I got to go to his workshop in Philly in ’08 and it was awesome – definitely kicked my work up a couple of notches.   At the time I was already somewhat experienced with lighting, so I wasn’t sure what to expect, but I was blown away; it was amazing to watch Don demonstrate things that I already “knew” lighting wise, and still be able to pick up something new – a new way of thinking about it, new ways of analyzing and constructing and deconstructing light.

A few weeks back, I had the opportunity to attend the advanced lighting essentials ‘shop down in Baltimore.  Different than the standard workshop, this one assumed a baseline familiarity with lighting to begin with – getting a baseline exposure, balatncing flash/ambient, ratios etc… This was fantastic, as we were able to jump right into working with little “catch up” required.  The format was well done. Don split us up into groups, with various assignments/challenges – in the morning we worked “in studio” talking about and working on precision lighting techniques for still life/objects.  I gained a whole new respect for product photographers – it’s a lot more difficult than you’d think.  One light, and lots of carefully placed white/black cards/diffusers etc…  I particularly appreciated this as it  really made you focus on analyzing and constructing light carefully rather than the “throw some strobes on it till it looks good” approach which many lighting novices seem to take.

In the afternoons we worked with models,  but instead of the standard “how to light/balance” we focused more on creating a mood or complex lighting schemes – sometimes using 4, 5 or more lights – little accents and subtleties to construct a meaningful lighting scheme.   Now I tend to be more minimalist in terms of my own lighting (I tend to favor zero, one or two lights – rarely more) but even so it was valuable to concentrate on the subtleties of the lighting scheme as a whole.

One of the things I like the best about Don’s workshops is that it’s all hands-on.  There’s no “sit around and listen to the instructor talk about how great he is” for 6 hours, as is the case with many “workshops” – Don has everyone jumping right in and shooting right off the bat.  It’s simply “talk about technique -> apply technique”.   Good stuff.   We also spent quite a bit of time talking business.  Don has been a full time photographer as well as designer and creative director for many years, so he has a fantastic amount of the experience in the industry and shares freely.  There are few things more valuable for a new photographer than the lessons of experience from someone who has “been there and done that”.   It’s like going through the school of hard knocks without having to take the knocks.

To sum up, aka the TL;DR version:  if you get a chance to attend one of Don’s workshops, go for it – it’s worth every penny.  What boggles my mind is that folks who will drop thousands on a new camera body or lens, are so hesitant to spend money on education or workshops.  I can say without reservation that the couple of hundred bucks for the LE workshops improved my work far more than any gear purchase I have made (and yeah, I’m also guilty of chasing the latest and greatest toys when it comes to gear).

finally some shots from the ‘shop:

Tweet This Post Stumble This Post


F/1.0

 
Comments Off on lighting essentials advanced workshop – a brief review

Posted in Photography


Makeup Essentials for Photographers Part 2 – Application

18 Jul

The post Makeup Essentials for Photographers Part 2 – Application appeared first on Digital Photography School. It was authored by Mark C Hughes.

makeup application for photographers 9

A little makeup will help your images pop

In part 1, we explored the tools you need to be able to help your subjects. Once you have all those essentials for applying makeup, the next step is the hard one – application. Again, this overview is intended for photographers and not makeup artists. The approach should be about helping your portrait subjects look a little better in your images of them. However, it should not replace using an actual makeup artist if you have one available.

Makeup artists can do amazing work that takes a lot of time, effort and skill to become good at. You can’t become a makeup artist by simply reading one article. We are going to help you tweak what is already there rather than give tips on how to be a junior makeup artist.

Many models come to sessions with their own makeup

Virtual Makeup

Beyond makeup, there are lots of techniques for improving someone’s appearance in post-processing including adding virtual makeup. Virtual makeup programs and plug-ins have come a long way, but, as always, it is much easier to get the images correct in-camera and not rely on post-processing to fix everything.

Also, while it can be done, post-processing images can take a fair bit of time, so getting it right in-camera means very little post-processing. Little post-processing can end up saving you a tremendous amount of time, particularly if you are handling lots of images and tight timelines.

Virtual makeup can be virtually indistinguishable from regular makeup and is way better than excessive smoothing or reverse clarity.

Before applying makeup

In general, when you are applying makeup to an individual, there are a few factors to consider before applying makeup to them. First, you need to be aware if they are comfortable with makeup and with you applying it to their faces. Most women and few men are comfortable with makeup, however, there are both men and women who are not. Before you do anything to anyone, you need to ask for their consent. Also, ask how comfortable they are with letting you do anything regarding the application of makeup.

When you apply makeup to someone, you end up getting up close and personal (much like a haircut) and there are lots of people and cultures that frown on you entering their personal space. Your subjects need to feel beautiful or handsome but more importantly, they must feel comfortable.


Rule of thumb

The rule of thumb for photographers who are applying makeup to subjects is that you are looking for a very light touch of makeup (i.e. very little).

With women, just improve a little of what is already there (they may already have most of it down and may be way more skilled at it than you are).

For men, you are looking to remove the sheen and give them a light tan to look healthier. For all your subjects, think smoothing and getting rid of shine.

makeup application for photographers 8

Making subjects relaxed is important

Approach for women

Lots of women wear makeup everyday. Many will show up for a portrait session with the makeup that they normally use and are comfortable with. That’s really great. For these women, you will need to carefully consider or assess what you want to achieve before applying or correcting your subject’s makeup. Ideally, your subject’s makeup is just fine with no need for any changes or only some minor touch-ups. Only add or repair what’s needed for these subjects. Do not make their makeup worse.

Alternatively, some women don’t wear any makeup. So for them, you will need to let them know you will only be doing a little to help them look better in front of the camera. You are really trying to make them look their best – you will not be trying to fix them or to try to make them look like a supermodel. Everyone has great features, and everybody wants to feel attractive. Great photography will bring out their inner beauty. You are just trying to enhance what they have, not to make them look like something they are not. Some women will joke and ask you to take 10 years off. The best thing to do is to reassure them that you will make them look good.

Makeup for men is just a really light touch.

Approach for men

Most men don’t wear makeup. This means that you need to make them relax having makeup on.  Depending upon how and who the person is, will affect your approach. The best approach you can take is to tell them you are just cleaning some stuff up and making them look great. It will be really important for most men to tell them that you will be putting very little makeup on them.

As with most subjects, you tend to be dealing with normal people. Here is a before makeup shot of a typical subject. Ensure your subject’s face is clean and moisturized before adding makeup.

Preparation

If your subject arrives with no makeup, you may need to apply some very basic makeup. Ideally, their faces are at least clean before you start. If your subject’s face is not clean, recommend a splash of soap and water as well as cleaning with a clean applicator using an alcohol-free toner.

Beyond making people feel comfortable, you also need to be wary of any allergies. Before you start applying any makeup to anyone, make sure you know if they are allergic to any products. This ensures you don’t start applying some makeup only to have them feeling really bad and break out in hives.

Fair complexion individuals will benefit from a little bit of makeup by providing some definition.

Your first step is to use blotting paper to blot up any obvious oil spots. Simply press the blotting paper to the oily area, lift, and repeat as necessary, using a clean section of blotting paper each time. Never rub, just blot.

Concealing

This is a critical stage of applying makeup. Done well, concealing transforms small skin irregularities and get things right straight out of the camera. This saves retouching later in post-processing.  Using your smallest brush (the lip or concealer brush), dab concealer onto blemishes, dark circles under the eyes, and in any other areas that need a bit of correction. Dab on a bit of concealer with your brush, wait a minute or so, then use a clean finger to lightly dab the concealer to begin blending.

makeup application for photographers 7

Concealing involves targeting small imperfections to help people look more like themselves

As a photographer, you will be familiar with color theory. Now you need to think about it for makeup. Applying concealer normally requires you to think about color theory and shading. For example, apply green to red blotches; yellow to purple-blue under-eye circles on olive or tan skin, and light purple or pink to under-eye circles on fair skin.

Try to always use a flesh-toned concealer that is the same as, or slightly lighter than, your subject’s skin to allow the ability to even out the corrections.

Correcting or balancing foundation on women

With excess oil removed and any blemishes concealed, now you will need to look closely at your female subject’s foundation. Some women use too much foundation or don’t blend foundation enough along the jawline. If either applies to your subject, moisten a wedge sponge and use it to even out the foundation using light and gentle strokes. Pay particular attention to jawlines and hairlines. Ensure any makeup lines are smoothly blended out to make them invisible.

Alternatively, some women don’t apply enough foundation. If you find this to be the case with your subject, use your largest brush (the face brush) and brush on lightly-tinted setting powder. Powder will not provide deep coverage, but it will supplement a thin application of foundation.

Blush and contour for women

If you’ve never applied makeup to another person, this is the stage where you will initially feel particularly awkward using a brush and makeup. Even people with lots of practice on themselves can feel awkward doing it on someone else.  You may want to practice in advance by brushing makeup onto white sheets of paper, particularly textured paper like those used for watercolors.

A good application of foundation, blush and contour will make the subject’s face even

When you are ready to apply blush and contour to your subject, ask her to smile. Use a medium-sized brush to apply blush from the apex of her cheeks in a very slight curve down and then back up again, almost to her ears. Apply the blush in light strokes, brushing additional makeup in thin layers until you’ve achieved a look that is only slightly more dramatic than natural.

If you are feeling adventurous and confident, use your blush or powder brush with your bronzer to lightly contour the sunken area of her cheeks from about mid-cheek back to the hair line. A little contouring can go a long way. When you begin feeling more confident applying contour, consider applying it down the middle of a woman’s nose, at her temples, and on the tip of her chin. This application will make your subject’s face look a bit thinner.

Blending for women

For good makeup application, continued blending is key. Begin with a large face brush and lightly sweep in circles to begin to blend in the edges of the blush and contour you’ve applied. Finish blending by using the face brush to lightly brush on some flesh-colored translucent powder.

Highlight and manage shine

Setting powder can be used now to add some highlights to your subject’s face and to tone down any shiny areas. To add highlights, use a clean blush or face brush (be sure you’ve cleaned it of blush and contour). Dip the tip of the brush in some rice powder and gently touch the rice powder onto the areas you wish to highlight. Then use your face brush to blend.

Adding highlights to either side of the bridge of your subject’s nose, near the inside corners of her eyes, will brighten her eyes.

If your subject has some shiny areas (this may be all you need to correct for some clients), apply some rice powder on the shine using your face brush. Go easy on the application as you can overcorrect and end up with pale looking skin.

makeup application for photographers - 6

Smooth lips are never noticed, but rough ones always are. This is an easy thing to fix before taking a photo.

Lips

The last main step is to ensure your subject’s lips are smooth and moist looking. If your subject brought lipstick, use that. If not, or if her lips need a bit of moisture or shine, use a bit of lip gloss or balm. Apply the gloss or balm with a clean concealer or lip brush. Don’t use fingers or let your subject use her fingers as more lip gloss will end up on fingers than on lips.

A little bit of makeup can really bring out the individuals inner beauty

makeup application for photographers - 5

Final results coupled with good lighting can make for images people are proud to show others

Final assessment

Once complete, and at each intermediate stage, step back and assess what you have applied or corrected. Make sure it works. You can always layer on a bit more makeup where needed, but it’s much more difficult to remove too much makeup.

Applying makeup to men

Many men won’t refuse a bit of corrective makeup even if they feel awkward about it. Remember to limit makeup application for men to concealing and managing shine. You want them to look healthy, not made up.

makeup application for photographers - 4

For men just smoothing and a light touch are all that is necessary

Blot and conceal

As before with women, use blotting paper before applying any concealer. Men often produce more and heavier oil on their faces than women. If this oil is not blotted, the concealer will come off as you attempt to apply it. The same principles for applying concealer to women applies to men. You may only need to be a bit more diligent in blending concealer over shaved facial hair.  It may be trickier too with men who want that scruffy 5 o’clock shadow look or have a day’s growth of beard.

Managing shine

Rice powder works wonderfully to matte shine on a man’s face, especially on high foreheads and bald spots. Even if you are not able to completely matte shine in those areas, rice powder will bring the shine down enough that you will have texture to work with in those areas of the photograph when retouching.

As with women, apply rice powder to men lightly with a large face brush, blend well, and check to be sure you have not created pasty-white areas. If your client’s skin tone is dark and you are trying to matte significant shine, blend a little tinted translucent powder with the rice powder before applying.

Lips

Some men have dry or flaky lips, often from spending a lot of time outside. Ask if you can apply a small amount of clear lip balm. Rub the balm in well because you don’t want shiny traces on a man’s lips.

Before finishing up, take a close look at your client. Remove smudges, makeup flakes, or lint with a cotton swab. Use your face brush or a damp disposable sponge to blend any makeup that needs just a tiny bit more blending. And use a damp disposable sponge to remove stains or lint from clothing.

makeup application for photographers - 3

The judicial use of makeup can help people feel more confident for other types of posing.

Cleaning up

Finally, always clean your brushes and cosmetics after every use. You want to have sanitary makeup and brushes. Use a conditioning brush spray or isopropyl alcohol on your brushes. Use cosmetic sanitizer or isopropyl alcohol on your cosmetics so that you can use them for others. Throw away any disposable items you used. And always wash your hands with soap and running water or with sanitizer as soon as you are finished.

In the end, the desired result is for images people are proud of. To do that a little bit of makeup knowledge helps a photographer simplify his or her processes to get the best results

Practice, Practice, Practice

Applying makeup to another person does not come naturally. There is a reason why makeup artists are paid handsomely for their work. But with a few tools, a small bag of cosmetics, and practice, you will be able to address the worst of makeup or skin flaws before you capture your client’s portrait.

makeup application for photographers - part 2

The post Makeup Essentials for Photographers Part 2 – Application appeared first on Digital Photography School. It was authored by Mark C Hughes.


Digital Photography School

 
Comments Off on Makeup Essentials for Photographers Part 2 – Application

Posted in Photography


Makeup Essentials for Photographers Part I – The Tools

25 Apr

The post Makeup Essentials for Photographers Part I – The Tools appeared first on Digital Photography School. It was authored by Mark C Hughes.

Makeup! Before I took photographs (and as a guy), I rarely used or had to use makeup, so I had very limited personal experience with it. That being said, I have taken portrait photographs of beautiful women that have been professionally made up, and I can honestly say it really makes a difference through the lens of a camera.

The best makeup is always barely noticeable – you only focus on the subject. It is truly a skill to do makeup well. Getting a good makeup artist to help with your portraits will always make the images better. However, in many cases, a makeup artist is not available, so the next best thing is to do it yourself to help deal with specific issues and get better results.

Made up Model

Best results

For the best portrait shooting results, you want subjects that are well rested and healthy. You also want interesting locations, great lighting, and skill behind the camera.

Although the last three are things you have control over, you generally have limited control over your subjects.

Other than suggesting your subjects be well hydrated and rested, there is little you can do to change your given subjects. Makeup can help improve the overall appearance of your subject by balancing skin tones, correcting most skin imperfections and even change the perceived shape of a subject’s face.

Well-applied makeup will also boost the effects of good lighting and minimize retouching.

Same model different makeup

Nothing new

Fashion and glamour photographers have long known the benefits of makeup and often employ a makeup artist on their sets. Most portrait photographers don’t have the budget or benefit of a makeup artist on location particularly if you are only doing one or two portraits.

Usually, the portrait photographer is working with the makeup that the subject shows up with (or lack thereof).

Any corrections are often done in post-production to deal with shine, blotchy skin, and uneven skin tones.

However, with a few makeup items supplied and a bit of practice, any photographer can develop enough skill to apply basic makeup and improve a portrait straight out of the camera (SOOC).

All subjects benefit from a little makeup (female, male and other), as long as they are human.

Even males benefit from a little makeup

Basic requirements

Let’s consider the basics of a useful makeup kit, simple application techniques, and hygiene requirements.  Makeup artists will spend lots of money on equipping their kits, but you only need a few items to apply simple makeup before a portrait session.

There are, however, two important things you need to consider before putting together your own makeup kit.

Makeup will make many women feel special

First, poor quality products generate poor results. You don’t need to purchase the very best products but getting cosmetics from a reputable makeup store, a cosmetics counter at a department store or a pharmacy with a larger cosmetics section will produce better results. You can purchase online, but it is best if you know what you are getting.

As a male photographer purchasing cosmetics, be prepared for comments from some stores about getting stuff for your wife or girlfriend mostly because men buying makeup is less common.

Men will often be unaccustomed with makeup

Secondly, people are becoming more considerate of products that have fewer animal byproducts and are free of animal testing. Most people do not want weird stuff on their faces, and you will want to be respectful of people’s wishes.

Brushes and applicators

Ideally, you should have three brushes – a face brush, blush or powder brush, and a concealer brush. Brushes need to be soft durable and able to be easily cleaned. Generally, it is a good practice to purchase good quality synthetic brushes. Always ensure that the larger brushes are very soft and pliable.

Brushes and Applicators

The face brush is the largest and fluffiest of all the makeup brushes. They are often about 2 inches wide with bristles curves into a rounded shape.  The blush or powder brush is a medium-sized soft brush that is about 1 inch wide with curved edges. The third brush is a concealer or lip brush which is small, about 0.25 to 0.5 inches wide with tapered ends.

In addition to brushes, wedge-shaped disposable sponges are handy for all sorts of things. Cotton swabs are indispensable but buy a brand name because inexpensive bands tend to cause more of a mess than they clean up. Disposable hand towels (thicker than paper towels) are useful for cleaning up. Finally, blotting film or facial blotting paper is the last disposable item you need for a brush/applicator.

The cosmetics

Although there is a lot of makeup out there, this kit is not intended to replace a makeup artist, it is just to help you, so you can get away with a surprisingly small collection of cosmetics to pull it together. There may be additional things but start with the basics.

Cosmetics

Translucent loose-setting powder will have a very light skin tone color in the jar but applies neutrally on almost all skin tones. These powders are often mineral based.

Concealer is an inexpensive staple for any makeup kit. You can get smaller collections, but often you can get a wheel or concealer palette that has multiple colors to adjust for skin tones.

Blush or bronzer is used to give the cheeks a little color and make you look a little suntanned as well.

Rice powder is a very fine, light, loose white or very pale powder use for absorbing excess oils and highlighting features. It should almost be invisible and is not expensive.

Lip gloss can be super simple and does not need to be a bold color. Just a simple stick of clear lip gloss or slightly tinted balms will do the job.

Great results straight out of the camera

Cleaning and sanitizing products

For non-makeup people, the importance of cleaning up hands, brushes, and cosmetics cannot be understated. You really need to keep everything clean, particularly if you intend to use the makeup for more than one person (but even then you need to clean up your brushes).

Key staples are hand sanitizer, a brush cleaner (baby shampoo will do), and a cosmetic sanitizer. Use unscented hand sanitizer to keep your hands clean before and after every makeup application.

The brush cleaner is essential to keep the brushes functional. Finally, the cosmetic sanitizer gets applied to the cosmetics after use. Isopropyl alcohol in a spray bottle works but tends to discolor the makeup with repeated use. It is best to get a proper sanitizing mister made especially for cosmetic products.

Makeup as an art

Applying makeup takes skill. To become skilled, you need to practice. Before you start applying makeup to a paying subject, you need to practice on someone who doesn’t mind you practicing on them. There is a reason why makeup artists are paid well for their work. It is hard, and they make it look easy.

Couples will enjoy it too

Conclusion of Part I

With all this equipment you are ready to help your clients look better for their portraits. In part 2, we cover the techniques and basic skills to apply makeup to your clients. The intent is not to make you a makeup artist, but to help smooth features and improve the look of your portraits straight out of the camera. That way, you don’t have to spend a lot of time post-processing your images.

It doesn’t replace a true makeup artist’s work


The post Makeup Essentials for Photographers Part I – The Tools appeared first on Digital Photography School. It was authored by Mark C Hughes.


Digital Photography School

 
Comments Off on Makeup Essentials for Photographers Part I – The Tools

Posted in Photography


Five Essentials of Doing Dark Food Photography

23 Jan

Over the last several years, several identifiable trends have developed in the world of food photography, including one towards dark, moody images, often with a rustic feel. These photographs call to mind the interplay of light and shadow in the paintings of the Old Masters, such as those by Vermeer and Rembrandt.

The style is often referred to “chiaroscuro” photography, a painting term borrowed from the art world. It means “light-dark” and refers to the contrast between the shadows and light in an image. The technique guides the viewer’s eye to a specific area in the frame and creates a dramatic mood. Mystic Light is another phrase used to describe this dark and moody style.

However, a dark style won’t necessarily suit every image. Sometimes a dark, shadowy approach is not appropriate to your subject. Developing strong food photography requires thinking about the purpose of your image. Your lighting, props, styling, and camera settings all work together in service of the story you are trying to convey.

Chili - dark food photography

For example, in the image above, I imagined someone sitting down at a farmhouse to eat a bowl of chilli on a cold winter’s day. I envisioned that the light was spilling in from a window onto my scene. This food story is one that I often use in my work, in one form or another, and chiaroscuro is the perfect style to bring it to life, as it arouses the emotions of the viewer.

So let’s take a closer look at how you can apply the chiaroscuro style to your food photography.

Dark Props and Backgrounds

The idea in dark food photography is to keep the background in shadow and draw the viewer’s attention to the main subject—what in food photography we call the “hero”. Therefore, a selection of dark or muted props, surfaces, and backgrounds is vital. White or light dishes and props will draw the eye away from the food and create too much contrast, which is distracting and can also be difficult to expose correctly.

Utensils - Five Essentials of Doing Dark Food Photography

When sourcing props, look for vintage utensils with a patina, which will not reflect the light as much as new ones. Matte dishes will also be less reflective, and are best in darker, neutral tones. Reflections can be hard to manage and cause a lot of problems in food photography.

Some good places to look for these items are thrift shops and vintage or flea markets, where you can find them for a fraction of the price you would pay for them new. Many food photographers use old, mottled cookie sheets in their work, which create a stunning surface or background, which subtly reflects the light without being to bright.

Wood is also a great material to utilize, both in the background and as props. It is easy to work with and lends a rustic feel. You can use weathered items such as an old cabinet door or tabletop. Ensure that whichever wood you use isn’t too warm toned. It will look quite orange in the final images and therefore unflattering to the food. A deep espresso color always looks great.

Charcuterie - Five Essentials of Doing Dark Food Photography

Food Styling

You will most often find the dark food photography style in editorial as opposed to advertising work. Advertising photography is meant to look perfect, with highly stylized food. Anyone who has ever seen a fast food burger ad and compared it to a real burger knows what I’m talking about.

But editorial food photography, such as that found in cookbooks and foodie magazines, has a looser, more candid style. The food is often perfectly imperfect, with scattered crumbs or artfully placed smears and drips, as if it has been freshly prepared or someone has just begun to tuck in.

This is not to say there is no deliberate effort in the styling because there is. The line between rustic and real and downright sloppy is a fine one. It takes a practiced hand to make food styling look casual and random.

Carrot Ginger Soup - Five Essentials of Doing Dark Food Photography

In the image of carrot ginger soup above, I gently swirled cream on the surface and carefully placed the croutons off-center to create a focal point. I garnished it with pepper and thyme leaves, which I also scattered on my surface with a thought to the composition.

In reality, one’s dinner table would hardly look like this, but for the purposes of food photography, such extra touches give an honest, storytelling quality and enhance the main subject, which in this case is the soup.

When approaching styling, think about the ingredients used in the recipe you are shooting. Ask yourself how you can incorporate some of them into your image in a way that makes sense and complements your hero.

Lentil Soup

Carving the Light

When producing darker images, it is imperative to carve and shape the light to bring attention to your main subject. You will need to determine how you want to light your image and where you want the shadows to fall. For moody images, I often use side and backlighting. My light placement is at about 10:00 if I am imagining the face of an analog clock as my set.

It’s best to use indirect lighting so no lights pointing directly at the set or food. In the case of natural light, placing the surface at an angle to the window.

Use small black reflector cards, like black cardboard or poster board cut into squares, to kick in shadows where you want them, and place them around your set depending on where you want to cut down the light. Alternatively, you can roll up pieces of black poster board and staple the ends together; these rolls can stand on their own and do not need to be propped up against anything.

Mushroom Toast - Five Essentials of Doing Dark Food Photography

In the images above, I wanted the mushrooms to be bright and catch some of the light, especially as the look was monochromatic, yet I wanted shadows to fall on the plate. I used side backlighting and a black card from the front, angled into my scene to create shadows in the front and absorb some of the light that was coming directly into my scene.

You will have to play around with different sizes and placements of the reflector cards to get the shadows where they work with your story.

Exposure

Typically, with chiaroscuro food photography, you want to slightly underexpose the image in the camera. Chiaroscuro can have very bright treatment of food with very deep shadows, or the image can be low key with not a lot of contrast. Whichever approach you choose, the main subjects should be placed in the brightest part of the frame, which attracts the eye first. Make sure the highlights are not blown out and the shadows are not too black with no detail.

Olive Oil -Five Essentials of Doing Dark Food Photography

It is best to work with a tripod, especially if you are shooting in natural light in less than ideal conditions. Instead of boosting the ISO and risking a high amount of noise, you can increase the exposure time when using a tripod. As long as you have some light, a long exposure allows you to take a properly exposed picture.

Using the timer or a remote shutter trigger will prevent camera shake and an image that is less than sharp. The focus should be on the main subject, however, the image needs to be exposed for the concept, mood, and story.

Post-Processing

The right post-processing for dark food photography will really make your image pop.

Using the luminance sliders in Lightroom or Camera RAW to brighten colors individually. Use global and local adjustments to bring out the best in the food, instead of bumping up the exposure in the whole image, which can cause your shadows to fall flat.

Lentil Soup - Five Essentials of Doing Dark Food Photography

And remember, warm colors bring elements forward, whereas cool colors recede. The best food photography has a balance of both, as it gives a three-dimensional feel to your image. With chiaroscuro food photography, white balance and tint can be used creatively, since you are not using white dishes and backgrounds. Split-toning can also be used to great effect, as long as it is done with subtlety.

Finally, no matter how you carve the light, a bit of a vignette adds a bit more mystery. It also prevents the eye from wandering out of the frame by bringing you back to the brightest part of the image — the food.

Conclusion

So there you have it, my top tips for making dark and moody food photography images!

I’d love to hear if you’ve had a chance to experiment with this approach to food photography. What were your struggles? Please share your experience and images in the comments below.

The post Five Essentials of Doing Dark Food Photography by Darina Kopcok appeared first on Digital Photography School.


Digital Photography School

 
Comments Off on Five Essentials of Doing Dark Food Photography

Posted in Photography


Portrait Gear Essentials – by dPS eBook author Gina Milicia

21 Nov

portrait-gear-essentials-02

My Portrait Gear Essentials – Images by Gina Milicia

What’s the best equipment for taking amazing portraits?

portrait-gear-essentials-12

I’m often asked what the best equipment is for taking great portraits. Many people assume that a great camera will take great portraits. That is simply not true. A quick scan through Flickr, Instagram or any photo sharing site will reveal thousands of beautiful portraits, some taken on mobile phone cameras, and yet others using very basic entry level equipment.

A great photographer can take great photos using any kind of camera. A great camera in unskilled hands will still deliver mediocre photos. Before you invest the big bucks in high end gear take the time to learn the craft first.

I started out my professional career with a borrowed camera and very cheap lens. I worked this way for a few years and then invested in a high end second hand camera and lens. If I were starting out again now I would do exactly the same thing. My advice on buying a camera is always buy within your means and upgrade as your skills start to improve.

Most girls love buying shoes and handbags. I admit I’m a self-confessed gear-a-holic!

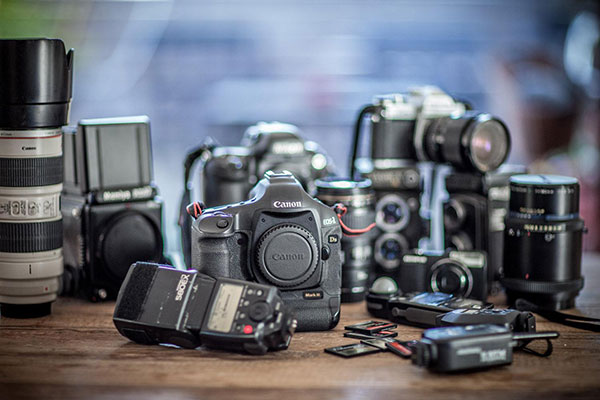
It’s taken me 25 years to accumulate this gear. My gear is subjected to punishing workouts, with my average shoot being approximately 2000-3000 images. I need gear that is built to last and won’t curl up and cry for its mama when I push it too far.

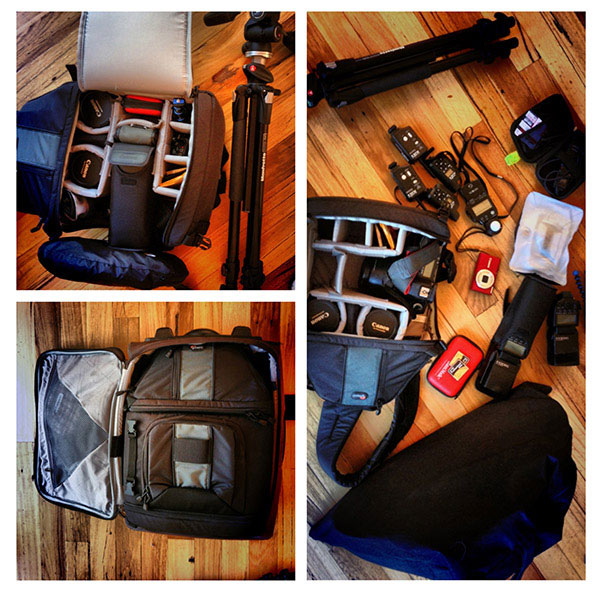
My portrait gear essentials – what’s in my bag

Cameras

  • Canon 1Ds Mark III – this is a pro-level camera, so it’s more expensive and a lot heavier but it’s designed to survive heavy usage. I would say I use this camera for 80% of my shooting.
  • Canon 5D Mark II – I’ll favour this camera body if I know I have to shoot with a high ISO (in very low light or on a night shoot). At 400-1600 ISO this camera is amazing.

Lenses

I like to work with a focal length between 70mm and 200mm. With a long lens, facial features are slightly compressed, which is really flattering for portraits.

The workhorse

Canon EF 70-200mm f/2.8L IS lens – this lens is my workhorse and I use it for 70% of my shoots. It’s fast, sharp and consistently gives amazing results.

I like working with zoom lenses because they give me the luxury of zooming in to get tight head shots and mid-shots, or zooming out to get full length shots. All without moving my camera. As a result, I can stay out of my model’s personal space, which can be intimidating or confronting, and keep the momentum of the shoot flowing.

The traveller

Canon EF 24-105mm f/4L IS lens – this is the lens I use for events, lifestyle and travel shoots. It’s light, compact and my go to lens when travelling.

Makes my heart skip a beat

Canon EF 85mm f/1.2L lens – it’s expensive, heavy, and slow to focus but I quickly forget all of this when I see the gorgeous results. I love using this lens for head shots, beauty, portraits, and events.

This lens will give amazing results in very low light conditions and the shallow depth of field will eliminate any background clutter giving me the luxury to use it lens in any location.

Tripods

portrait-gear-essentials-11

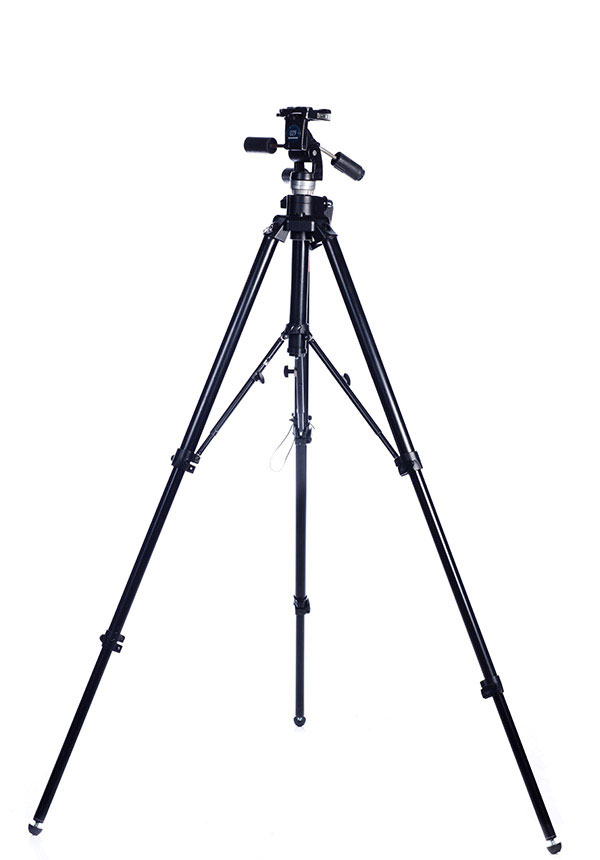
Most of my portraits are shot using tripods. I like to set up my shot, position my model and then focus on their expression. Keeping my camera fixed in one position allows me to do this and really suits my shooting style.

Having my camera on a tripod also allows me to focus 100% of my attention on my model and frees me up to gesture with my hands, or step away from the camera without breaking the shot.

I have four tripods:

  • Manfrotto 190XPROB – small, light-weight tripod that I use when I travel
  • Manfrotto 475B Pro – great sturdy tripod for location shoots
  • Manfrotto 058B – heavy duty tripod for studio use
  • Manfrotto 679B Monopod – for film, TV stills, and theatre

portrait-gear-essentials-07

Remote flash triggers

PocketWizards

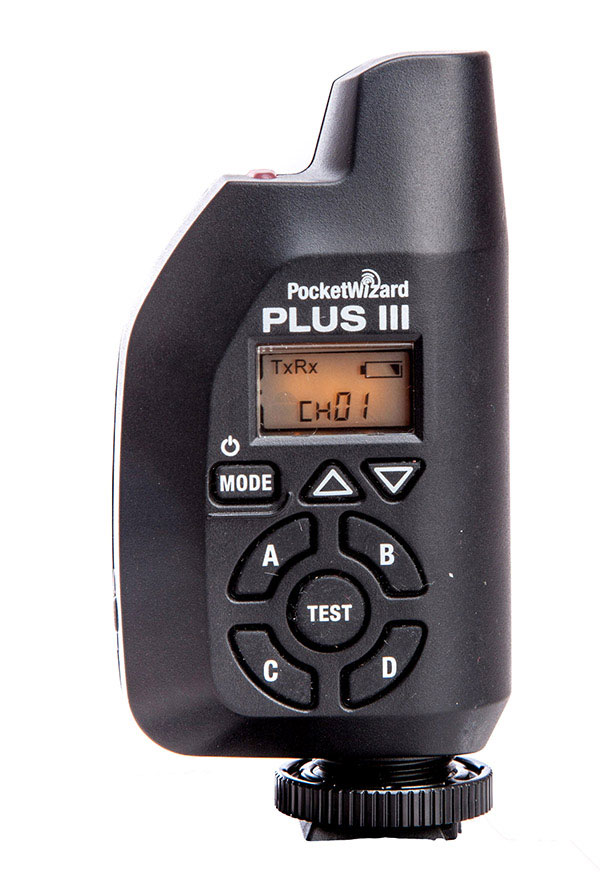
I have six PocketWizard remote flash triggers because I’ll often have three different sets running. I love the PocketWizards because they are reliable and rarely misfire.

Light meter

This model isn't available any more, try one in the Sekonic line

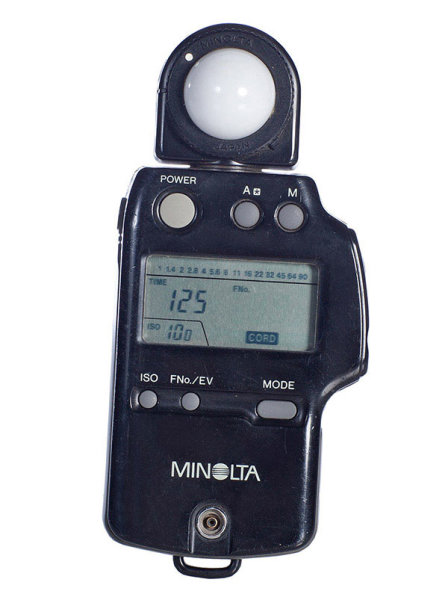
I believe the light meter is an essential tool in good portrait photography and would never leave home without one. When you use a light meter you know you have most accurate readings.

Minolta IV (not available any more) – I’ve had this light meter for over 23 years now and I’ve grown rather fond of it. As a basic meter it’s excellent, reading ambient light or flash, and it’s perfect for most lighting conditions.

Lighting

Speedlights

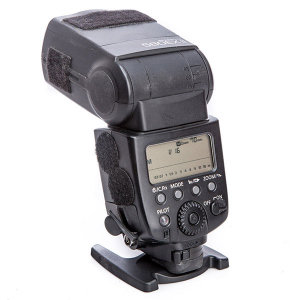
portrait-gear-essentials-01I use a speedlight off camera for about 20%-30% of my photo shoots. Like any piece of gear, they have their pros and cons, but they can light you out of some tight spots (quite literally).

I use Canon 580EXii speedlights as my preferred lighting when I am travelling or need to work quickly or in tight locations. I will also use a Photoflex medium size softbox that folds flat, and is perfect for lighting one person and couples.

portrait-gear-essentials-09

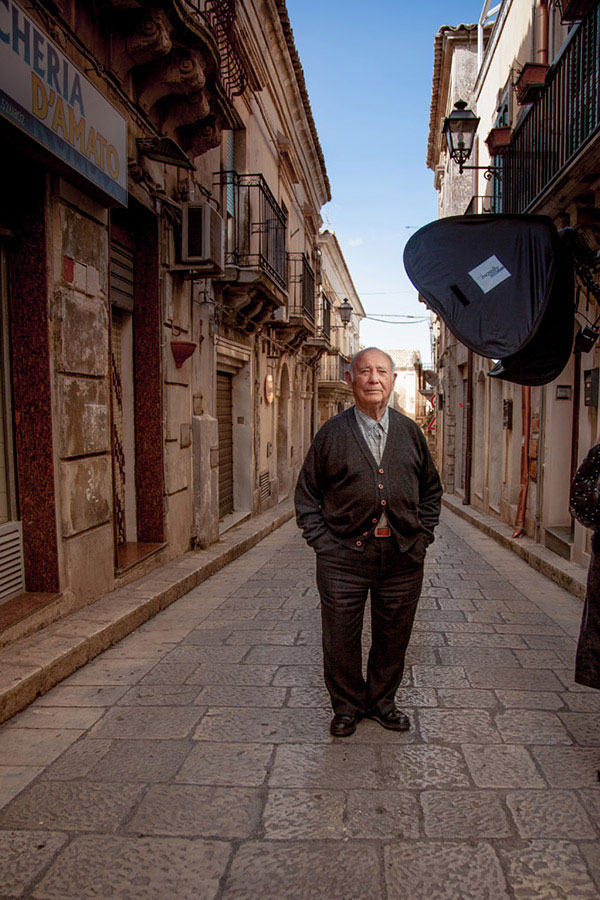
Portrait of Vito shot on location at my Sicily Photography workshop

My complete travel location portrait photography kit:

  • One Canon 5D MKII (much lighter than the Canon 1Ds Mark III 
  • Two Canon 580EXii speedlights
  • Four PocketWizard remote flash triggers
  • Six 8GB memory cards. I prefer smaller cards because I don’t like to have an entire day’s worth of images on one card. I’ve had several cards fail over the years ,and also lost one once.
  • Minolta IV light meter (this model is no longer available, try one in the Sekonic line)
  • Canon EF 24-105mm f/4L IS lens
  • Canon EF 85mm f/1.2L lens  or Canon EF 70-200mm f/2.8L IS lens

portrait-gear-essentials-04

Studio lighting

Elinchrom Lights

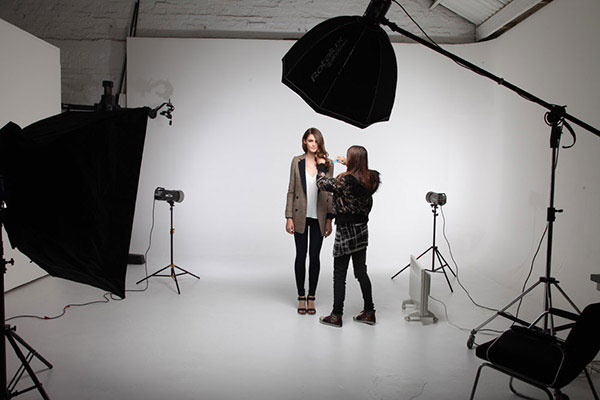
60% of my shoots require studio lighting, so I need heavy duty monolights with fast recycle times, and a high quality of light. When I’m working on location, I still need a great quality of light and I give my Elinchrom Rangers a work out in those situations.

portrait-gear-essentials-06

Behind the scenes for Piperlane.com

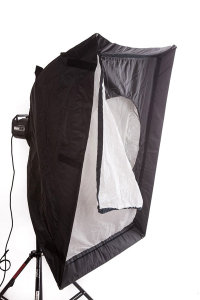
Large Softboxes

portrait-gear-essentials-08If I could only pick one light modifier to take to a deserted island, it would have to be a softbox. Small, medium or large this little puppy is my go to light source for 80% of my shoots.

Why? The quality of light is soft, flattering and malleable. Changing the angle and proximity of the softbox to the subject, easily changes the quality and direction of light.

A softbox, I feel, recreates the effect of soft daylight through a window.

I think what I like most about softboxes is that they are subtle. Highlights gently merge to shadows.

If it’s a studio shoot I love using my Chimira Medium softbox, with white reflective interior. The white interior creates a softer light and this particular softbox has an extra layer of diffusion on the inside, adding even more softness to the light.

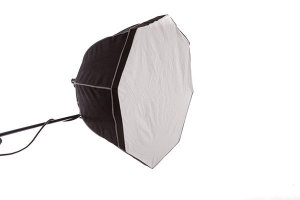
portrait-gear-essentials-05Rotalux Deep Octabox

Rotalux deep octabox would be the result if a softbox married a beauty dish and made babies. This, as far as I’m concerned, is a match made in heaven for lighting single person portraits.

Laptop

MacBookPro 15”

portrait-gear-essentials-10

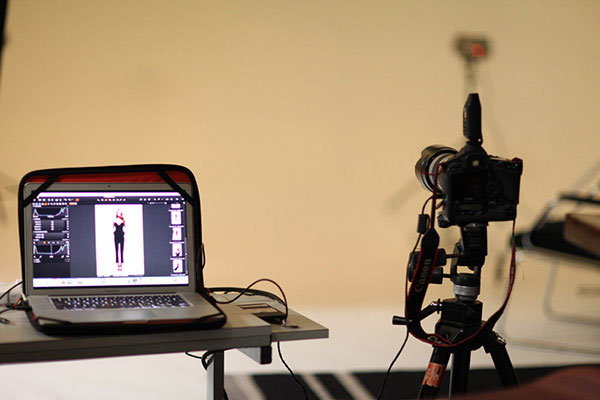
Shooting tethered to a computer has made my life as a photographer so much easier, because I can use my computer as a teaching tool. ?I can show my model a series of great images, with slightly different poses. We can talk about how the poses are different and what I want them to do in the next series. They can see what I mean and it makes more sense, straight away.

Note from the Editor

For more information on how Gina works and does her portraits, pick up her dPS eBooks “Portraits Lighting the Shot” and “Portraits Making the Shot”

You also might want to grab our brand new eBook “Photo Nuts and Gear – know your gear and take better photos” if you’re trying to decide what equipment you need to purchase. Spend a little on an eBook, so you don’t spend a lot on the wrong gear.

Post originally from: Digital Photography Tips.

Check out our more Photography Tips at Photography Tips for Beginners, Portrait Photography Tips and Wedding Photography Tips.

Portrait Gear Essentials – by dPS eBook author Gina Milicia

The post Portrait Gear Essentials – by dPS eBook author Gina Milicia by Gina Milicia appeared first on Digital Photography School.


Digital Photography School

 
Comments Off on Portrait Gear Essentials – by dPS eBook author Gina Milicia

Posted in Photography


Polarizing and Neutral Density Filters: Essentials for Landscape Photography

24 Oct

In landscape photography, just as in portraits, fashion, products, or any other subject matter, accurate color capture is crucial. What makes it so much more difficult with landscapes, however, is the wider disparity in dynamic range, not only between foreground and background elements, but primarily between the upper and lower halves of the frame– between the earth and the sky. If you are into shooting landscapes, overcoming this hurdle will require you to have one of two filters (if not both) in your arsenal, even if you don’t use filters in any of your other photography.

Polarizing Filter

Polarizing filters– sometimes called the secret weapon of professional landscape photographers– create richer, more vivid colors. The filter pulls double duty by (1) cutting down on reflections from bright surfaces like water and rocks, and (2) adding rich blues to skies by darkening them and increasing the color and tonal saturation throughout the frame. Polarizing filters are most effective when shooting at a 90-degree angle to the sun. It will therefore be least effective when the sun is either in front of or behind you. Polarizing filters will also enhance clouds, but you have you to be careful with your lens choice. Just like you can overdo it in post production, it’s quite possible to overdo it in-camera if you use a polarizing filter on a super-wide-angle lens. The result will be uneven shades of blue in an over-saturated sky.

Without a polarizing filter

Without a polarizing filter

With a polarizing filter

With a polarizing filter

Neutral Density Filter

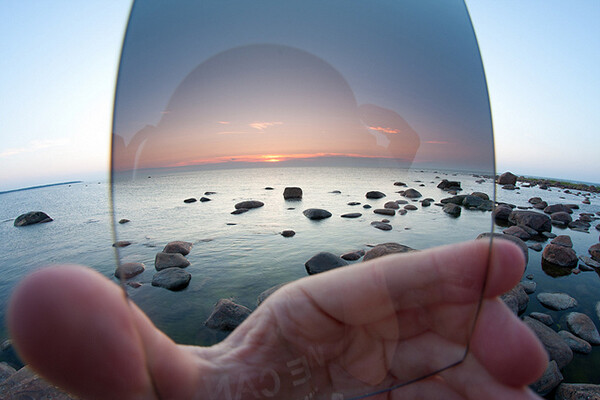
Neutral density gradient filters help balance the exposure between the ground and sky to capture a range of exposure that the camera cannot possibly handle on its own. If you expose for the ground, you’ll get a gray or white washed-out sky. Exposing for those awesome blues and soft, billowy clouds, on the other hand, will make the ground so dark you’ll lose much of the detail you set out to capture in the first place.

A wide view of a hand-held graduated neutral density filter illustrates how valuable it is to capturing accurate colors in landscape photography.

A wide view of a hand-held graduated neutral density filter illustrates how valuable it is in capturing accurate colors in landscape photography.

The filter itself is dark at the top, completely clear at the bottom, and essentially shades of gray in between. Available in two varieties, the circular version attaches to the front of the lens like any other traditional filter. The other type is a square or rectangular filter that you hand-hold in front of your lens. Both work the same way, darkening the sky to avoid blowouts, while leaving the ground untouched and unfiltered. It’s a seamless transition that ensures proper exposure throughout the frame– making sure you get vibrant, saturated, and (most importantly) accurate colors in all of your landscape shots.

Neutral Density Photo Credit: Flickr Creative Commons User Kain Kalju.

Post originally from: Digital Photography Tips.

Check out our more Photography Tips at Photography Tips for Beginners, Portrait Photography Tips and Wedding Photography Tips.

Polarizing and Neutral Density Filters: Essentials for Landscape Photography

The post Polarizing and Neutral Density Filters: Essentials for Landscape Photography by Jeff Guyer appeared first on Digital Photography School.


Digital Photography School

 
Comments Off on Polarizing and Neutral Density Filters: Essentials for Landscape Photography

Posted in Photography


NASA | Lunar Eclipse Essentials in 3D

01 Nov

When the moon passes through the Earth’s shadow, it causes the moon to look very unusual for a short period of time. This event is called a lunar eclipse, and it occurs roughly twice a year. There’s one viewable to folks outside of North America on June 15, so sit back and learn more about how lunar eclipses work in this video! This version of the video is presented in several formats of stereoscopic 3D that can be viewed by many kinds of 3D devices, including common red/blue paper glasses that you might have lying around! Just click the “3D” button on the playbar to pick which version works best for you. If you don’t see the version you need, click “Other options” from the pop-up. Credit goes to TheWusa from de.wikipedia.org for the illustrations that this video’s light scattering animations are based on. This video is public domain and can be downloaded at: ?svs.gsfc.nasa.gov Like our videos? Subscribe to NASA’s Goddard Shorts HD podcast: ?svs.gsfc.nasa.gov Or find NASA Goddard Space Flight Center on facebook: ?www.facebook.com Or find us on Twitter: ?twitter.com
Video Rating: 4 / 5

Example/ review of the Sony Bloggie 3D MHS-FS3 and the Aiptek i2 3D
Video Rating: 4 / 5

 
Comments Off on NASA | Lunar Eclipse Essentials in 3D

Posted in 3D Videos


Recommended Reading: Social-Media Marketing Essentials

23 Aug

This month I’m happy to have my article Social-Media Marketing Essentials featured in Digital Photo Pro magazine. In the article I provide a primer to social media marketing, discuss strategies and highlight the pros & cons of many of the most popular social media web sites used by photographers.  Be sure to check your recent copy of the magazine for it. If you’re not a subscriber be sure to pick up a copy or check it out line. Enjoy.

Copyright Jim M. Goldstein, All Rights Reserved

Recommended Reading: Social-Media Marketing Essentials

flattr this!


JMG-Galleries – Jim M. Goldstein Photography

 
Comments Off on Recommended Reading: Social-Media Marketing Essentials

Posted in Equipment


Total Training for Photoshop CS5 Essentials – Chapter 1: Lesson 2. Color

06 Feb

Description: Mastery of Adobe Photoshop CS5 requires a solid foundation in the fundamental tools and techniques used by the pros to create eye-popping effects, achieve stunning visuals. Total Training for Adobe Photoshop CS5 Extended: Essentials is intended for the beginner to intermediate user as a guide through comprehensive tutorials on color correction, layout techniques, special effects and image touch up. This series will give you the confidence and know-how to achieve fantastic results using Photoshop CS5 new interface and enhanced tools. The updates to Photoshop CS5 include the Adjustments and Masks panel, the 3D commands, annotations and an improved interface. In addition you will learn non-destructive color effects and color correction, how to set file format and image compression for use on the web and how to create and apply special effects. By the time youve finished watching Total Training for Adobe Photoshop CS5 Extended: Essentials, you will be proficient will the skills required for managing and manipulating images in Photoshop. You will know all about photo retouching, color correction and how to use the Quick Mask mode, work with selections, resize images and many more valuable and time saving techniques to use when working with Photoshop CS5. Five New Features covered in this title: 1. The Refine Radius Tool 2. Content-aware healing and fills 3. The Mixer Brush 4. Live Workspace updates 5. Mini Bridge

This video shows a quick use of Content Aware Scaling and shows the application and effects of a few Actions from Mama’s Lollipop Bundle which has caricature, art, and retouching Actions. To see more go to www.photoshopmama.net
Video Rating: 4 / 5


Total Training for Photoshop CS5 Essentials Chapter 1: Lesson 1. Pixels and Resolution

23 Jan

Mastery of Adobe Photoshop CS5 requires a solid foundation in the fundamental tools and techniques used by the pros to create eye-popping effects, achieve stunning visuals. Total Training for Adobe Photoshop CS5 Extended: Essentials is intended for the beginner to intermediate user as a guide through comprehensive tutorials on color correction, layout techniques, special effects and image touch up. This series will give you the confidence and know-how to achieve fantastic results using Photoshop CS5 new interface and enhanced tools. The updates to Photoshop CS5 include the Adjustments and Masks panel, the 3D commands, annotations and an improved interface. In addition you will learn non-destructive color effects and color correction, how to set file format and image compression for use on the web and how to create and apply special effects. By the time you’re finished watching Total Training for Adobe Photoshop CS5 Extended: Essentials, you will be proficient will the skills required for managing and manipulating images in Photoshop. You will know all about photo retouching, color correction and how to use the Quick Mask mode, work with selections, re-size images and many more valuable and time saving techniques to use when working with Photoshop CS5. Five New Features covered in this title: 1. The Refine Radius Tool 2. Content-aware healing and fills 3. The Mixer Brush 4. Live Workspace updates 5. Mini Bridge
Video Rating: 5 / 5

 
Comments Off on Total Training for Photoshop CS5 Essentials Chapter 1: Lesson 1. Pixels and Resolution

Posted in Retouching in Photoshop