You will learn some important steps of enhancing a night sky photo in this tutorial. It is specifically useful if your photos were shot in areas with notable light pollution. Light pollution could spoil your photo by outshining the comparatively dim stars in the sky. Here are the tips for bringing back those spectacular stars in the sky.
First a slight digression, I recommend to shooting your night sky photos in RAW format if you aren’t already. This is because RAW has an incomparable dynamic range which enables you to bring back the details of the photo, including the night sky in post-processing.
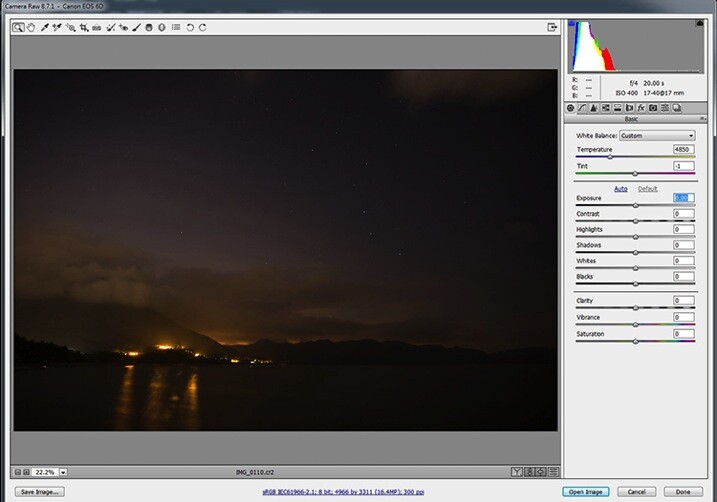
The photo in the above screen capture is underexposed. We will need to play around with the exposure adjustments in a RAW Editor first. Generally, if the exposure of a dark image is boosted too much, there will be tons of noise. It is because the sensor failed to capture sufficient photons when the photo was underexposed. Therefore, the differences in the number of photons among pixels are significant. Such differences are the culprit of noisy images.
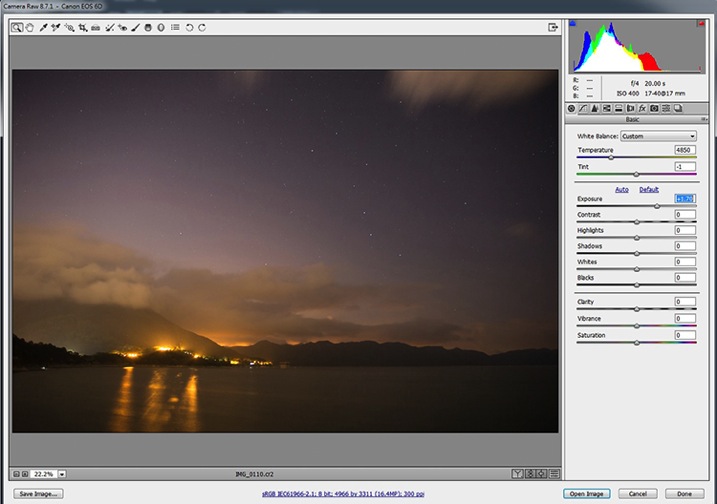
First, you have to increase the exposure until the brightness of the photo appears to be appropriate. While adjusting the exposure parameter, use the histogram in the top right corner as a reference.
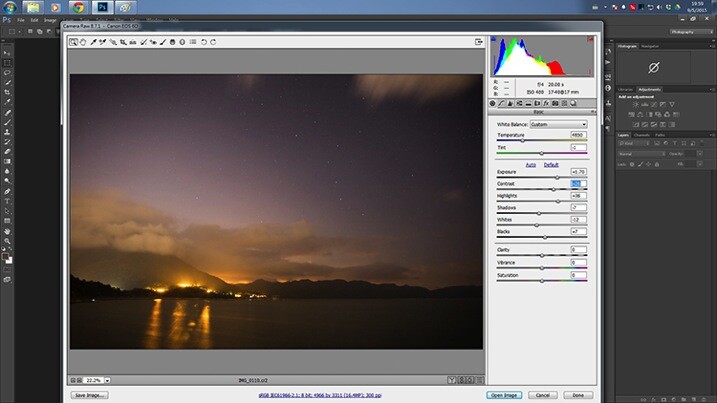
You may want to play around with the value of the Highlight, Shadows, Whites and Blacks sliders for fine tuning the exposure. After that, add some contrast to the photo, this will make the stars stand out a little bit.
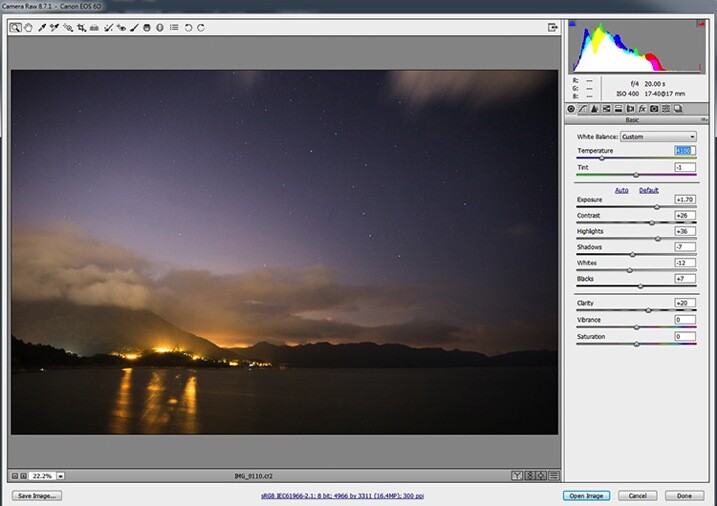
You will need to boost the Clarity here for the whole scene. This improves the sharpness of the photo, including the stars. In my opinion, a bluish night sky is far more impressive and, therefore, you will need to adjust the Temperature setting. I would recommend a color temperature between 3500-4100. This will strike a balance between realism and aesthetic. Then, click “Open Image” (if you’re using Lightroom right click and choose “Edit in Photoshop” to continue with the next steps).
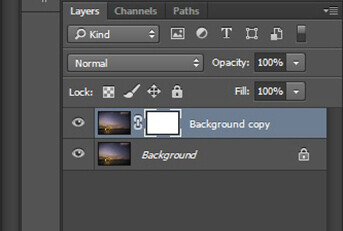
Make a duplicate a copy of the Background layer after opening the image. Right click on the original layer, and click on “Duplicate Layer” from the pop-up menu. After that, create a layer mask for the duplicated layer. To create a layer mask, you will need to have the new layer chosen and click on the third button at the bottom of the Layer panel. Then, select the image next to the layer mask in the Layer panel.
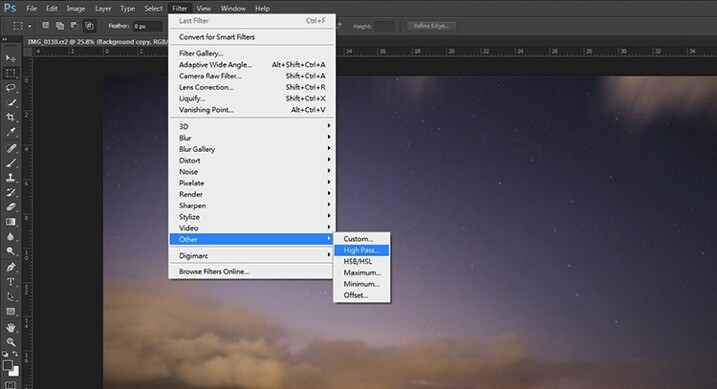
Now you are going to add a High Pass filter to the newly duplicated layer. Choose Filter > Other > High Pass. This is to further enhance the visibility of the stars.
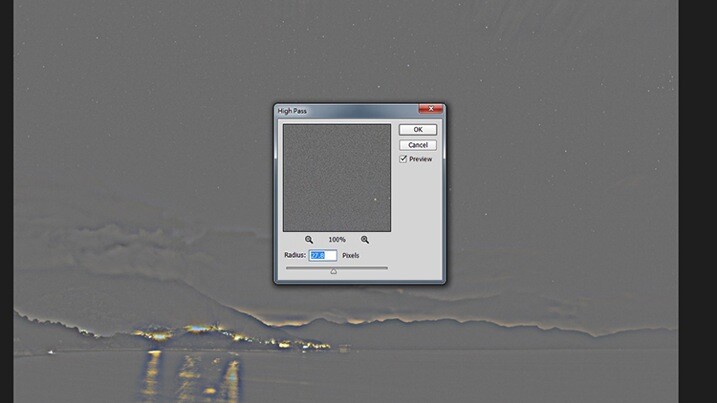
A pop-up window will appear, tweak the Radius until the stars are being highlighted in the preview.
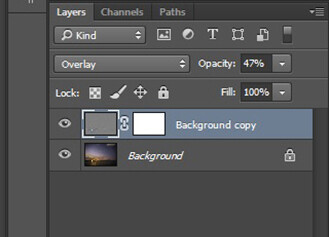
Head back to the Layers panel. You will have to switch the Blending Mode of the layer from Normal to Overlay. The whole image will be sharpened noticeably. If you feel like the image is over-sharpened, you can lower the Opacity of the layer.

You may find that the areas outside the night sky are being oversharpened. In order to remove the excessive sharpening from the other areas, you will have to erase (hide) them by painting on the layer mask that you created earlier.
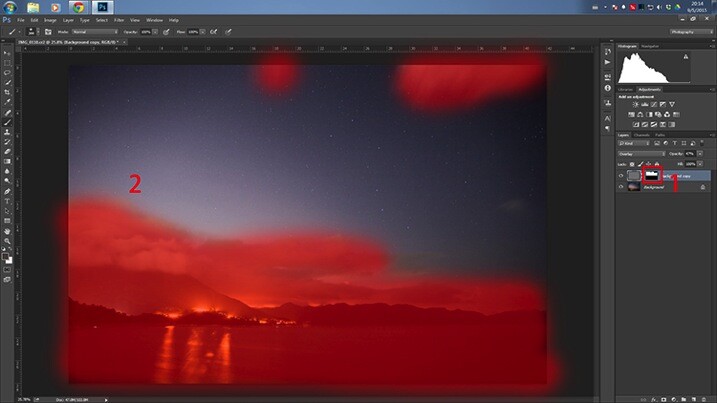
First, choose the layer mask in the Layer panel. Then, paint over the unwanted areas (the highlighted area in the above screen capture) with a black-colored brush.
Here is the final result:
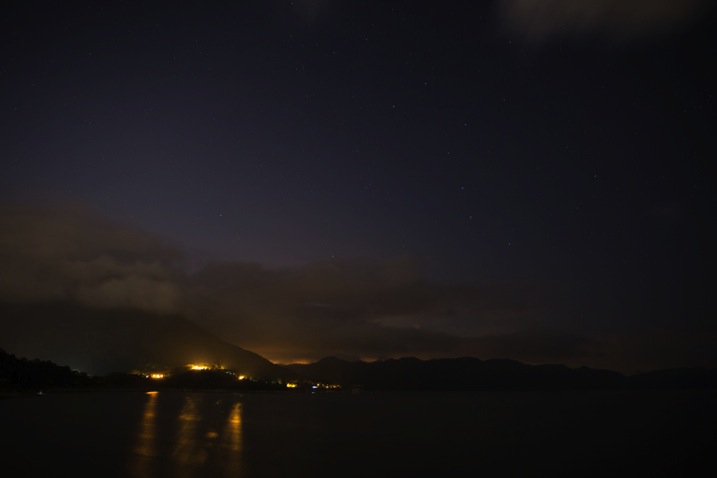
BEFORE

AFTER
Conclusion
There are three techniques for enhancing the visibility of stars in the night sky. First, adding some contrast to the photo will help to a certain extent. Secondly, increase the clarity of the whole photo. Lastly, don’t forget to use the High Pass filter sharpening for the final enhancement. Thanks for reading, I hope you enjoyed it.
googletag.cmd.push(function() {
tablet_slots.push( googletag.defineSlot( “/1005424/_dPSv4_tab-all-article-bottom_(300×250)”, [300, 250], “pb-ad-78623” ).addService( googletag.pubads() ) ); } );
googletag.cmd.push(function() {
mobile_slots.push( googletag.defineSlot( “/1005424/_dPSv4_mob-all-article-bottom_(300×250)”, [300, 250], “pb-ad-78158” ).addService( googletag.pubads() ) ); } );
The post Tips for Enhancing Night Sky Photography in Photoshop by Chris Yiu appeared first on Digital Photography School.
You must be logged in to post a comment.