The Following is an excerpt from the SLR Lounge Lightroom Preset System v5, a preset system designed to take you from Ordinary to Extraordinary photos in just a few seconds and clicks.
In this article, we have a beautiful bride who designed an amazing red dress with a lot of great details and jewelry. We want to edit this photo so that she has a nice soft portrait look and the details in her dress remain sharp and crisp. To do this, we’re going to be utilizing similar techniques in production as we covered in the previous Soft Flattering Color Portrait tutorial. But, we are going to go through the added step this time of utilizing our brush presets to make the image details pop. The written article is below, and if you like, you can also watch the original video tutorial towards the end of the article.
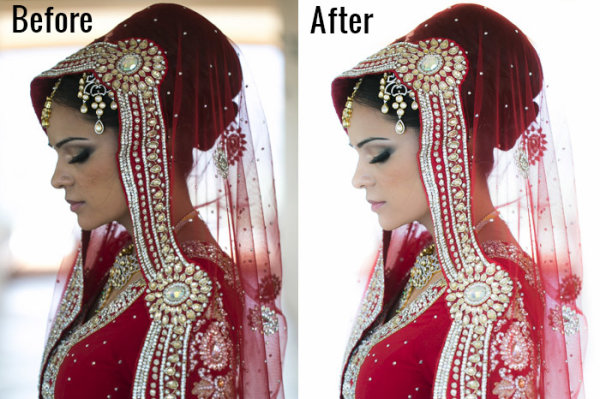
Here’s a quick sneak peak of our image before and after we’re done with our edit.
Read the Written Tutorial
Since this is a portrait, we have a preset that gets us to a nice soft portrait look quickly which we discussed in detail in the previous Soft Flattering Color Portraits tutorial. This preset adjusts the develop settings so that portrait skin tones looks nice and soft, and it also desaturates skin tones via a slight modification to Vibrance and Saturation to help even out skin tone colors. We also increased our exposure to +0.70 because an overall brighter image will look more flattering on our bride. Personally, I want to go with a more neutral/white look for the image, so that the red in the dress truly pops. So we’re going to adjust our Temperature to 4500. Here’s what our develop settings look after our preset and manual adjustments are applied.
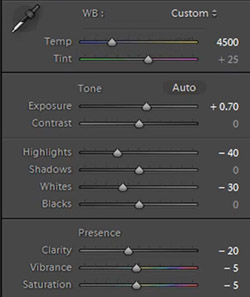
In the HSL our Red and Orange have been decreased slightly because once again, we want to subtly even out skin tone colors.
HSL
- Red: -20
- Orange: -10
In the Details our preset gave us the perfect amount of Sharpening and Noise Reduction. The Sharpening settings are doing a great job of showing the intricate details in the dress, while using a little bit of Noise Reduction to smooth out pores and fine detail in our subjects skin.
Sharpening
- Amount: 70
- Radius: 1.5
- Detail: 10
- Masking: 30
Noise Reduction
- Luminance: 15
- Detail: 70
- Contrast: 0
- Color: 25
- Detail: 50
Our preset also adjusted our Lens Vignetting to +30, because we want a nice even edge to edge toning.
Lens Vignetting
- Amount: +30
- Midpoint: 30
Now we’re going to do some more post processing with our Brush. The first thing we want to focus on is the beautiful red dress. We’re going to set our Brush settings for Clothing and Texture and apply it everywhere but her skin. If you press “O” you can bring up the brush mask overlay and see where the brush is being applied. (See video tutorial below for reference)
When you apply a brush onto your image, a “pin” will appear on your image (Press “H” on your keyboard to hide/reveal pins). If you click on the pin you can decrease or increase the strength of the brush settings by left-clicking and dragging to the left (weaken) or right (strengthen). We want our adjustments to be a little more subtle so we slightly decreased the strength of the brush.
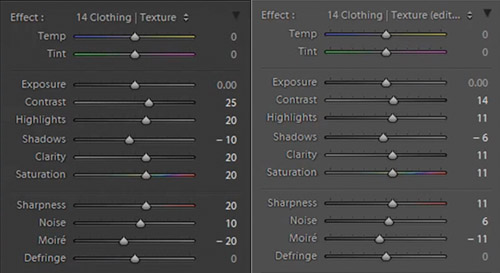
Original Brush Settings on Left, Lowered Brush Strength Settings on Right
We like the window in the background because it helps compose our frame, but there’s a distracting bar in the middle. For this particular image, we could keep the frame since it does a great job framing our subject. But, just to illustrate how capable Lightroom is, we’re going to remove the window entirely, making this a high key image with a nice bright background. To do this we’re going to use our Brush with strong dodge settings and apply it to the window.
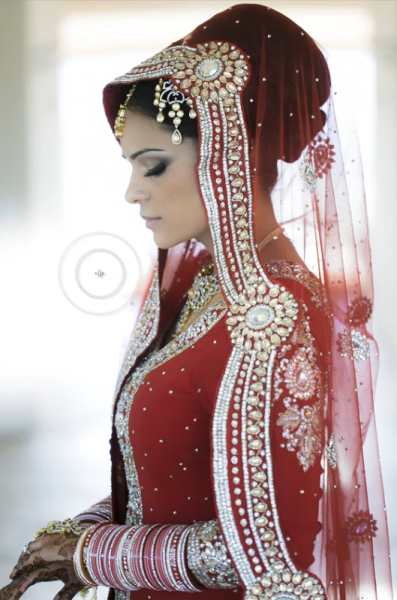
If you have additional questions, watch the video tutorial below to see exactly how this affect was applied.
Dodge Brush Settings
- Exposure: 4.00
- Contrast: 1.00
- Highlights: 1.00
We want to apply the brush to the inside of her hands, but it’s a tough spot to reach because the area is very small. This is a great place to use Lightroom’s Auto Mask function.
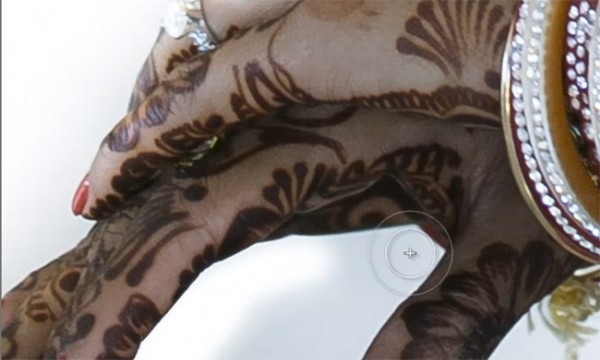
Her hands are slightly underexposed so we’re going to add a graduated filter and set the exposure to +0.90. We are then going to drag the filter from the bottom left of the image to her bracelets.
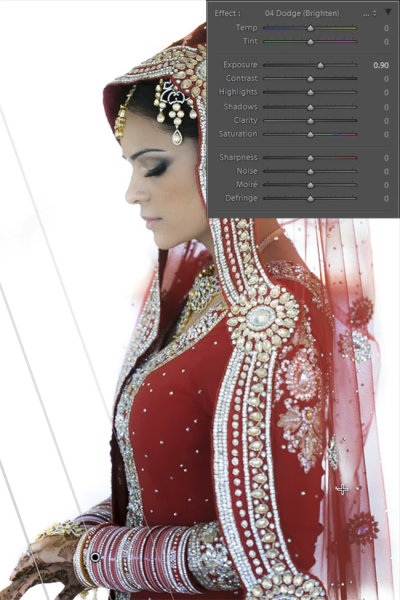
We also want another subtle graduated filter for the back of her veil, so we’re going to set the exposure on this filter to +0.30. We want to drag this up from the bottom right of the image to her bicep area just as we did for the previous graduated filter shown above.
Now that we’re done with the dress, we’re going to go back and touch up some details on our bride. The first thing we’re going to do is select our “Hair and Lashes” preset. This will give some nice contrast and sharpness in her eyes and eyebrows.
Hair and Lashes Brush Settings
- Contrast: 10
- Highlights: 20
- Shadows: -10
- Clarity: 15
- Saturation: 10
- Sharpness: 25
After the eyes, we’re going to move onto the lips. We’re going to select our Brush preset for lips which will give us some nice color and contrast on the lips.
Lip Brush Settings
- Contrast: 15
- Clarity: 15
- Saturation: 20
- Sharpness: -10
- Noise: 10
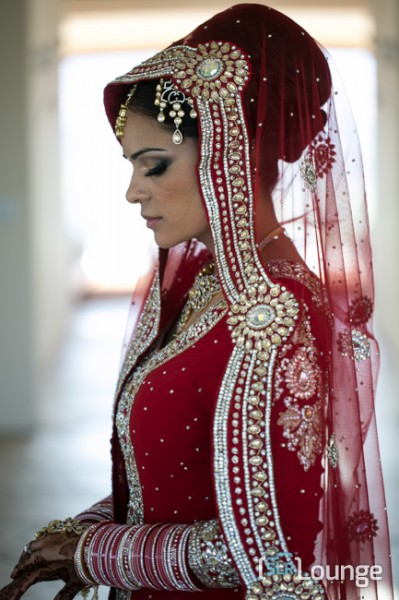
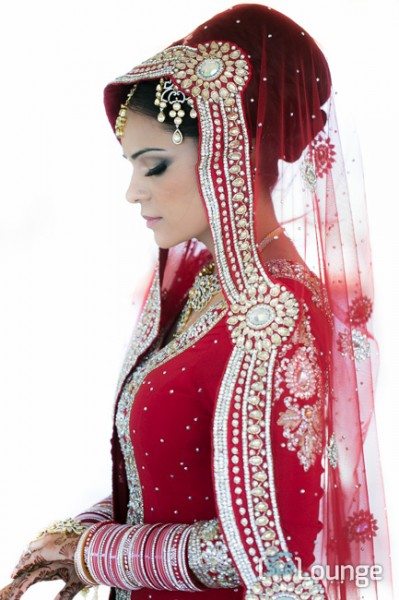
And now we are left with our final image. Here’s a before and after of our portrait.
Before
After
Watch the Video Tutorial
If you would like to see exactly how all of the settings and adjustments were applied, please watch the video below from the SLR Lounge YouTube Channel.
Conclusion and Learn More
We hope you all enjoyed this tutorial. If you are interested in learning more or purchasing the SLR Lounge Lightroom Preset System v5
Post originally from: Digital Photography Tips.
Check out our more Photography Tips at Photography Tips for Beginners, Portrait Photography Tips and Wedding Photography Tips.
Color Portraiture with Retouch and Enhancement in Lightroom 4 and 5
You must be logged in to post a comment.