RSS
 

Posts Tagged ‘Each’

Report: Nikon is only producing 1,000 units of its 500mm F5.6 lens each month

23 Aug

Since its release in August 2018, the Nikon AF-S Nikkor 500mm F5.6 PF ED VR lens has been perpetually out of stock. In past apologies, Nikon has said demand for the 500mm F5.6 lens has exceeded supply, but now we know just how limited supply is.

Almost immediately after launching the 500mm F5.6 PF lens, Nikon Japan issued an apology [Japanese], stating it wouldn’t be able to deliver all 500mm F5.6 pre-orders in September, as it had hoped to do. Six months later, it issued another apology, stating orders had exceeded expectations and they were working to deliver units as soon as possible.

Screenshot used with permission from Nikon Rumors.

Now, Nikon Rumors has shared a screenshot of the German Nikon Professional Service website noting only 1,000 units are able to be produced each month. The text in the screenshot, seen above, translates (via DeepL) to:

‘Delivery currently uncertain, since only about 1,000 copies are produced per month. We apologize for any inconvenience and will accept any pre-order.’

A screenshot from the current product page on Adorama showing the Nikon AF-S Nikkor 500mm F5.6 PF ED VR lens is ‘On Backorder.’

We contacted Nikon USA to check in on the current pre-order status and clarify whether or not production is at 1,000 units per month and received the following response:

‘Orders of the AF-S NIKKOR 500mm f/5.6E PF ED VR lens have exceeded our expectations. We appreciate our customers’ patience as we work to fulfill orders as quickly as possible.’

In other words, Nikon isn’t confirming the 1,000 unit per month limit, but it isn’t denying it either. Whatever the case is, it doesn’t look like the backorders are slowing down anytime soon, so don’t get your hopes up that you’ll have Nikon’s compact telephoto lens anytime soon.

Articles: Digital Photography Review (dpreview.com)

 
Comments Off on Report: Nikon is only producing 1,000 units of its 500mm F5.6 lens each month

Posted in Uncategorized


Day 5: 24 Photography eBooks, $9 each, 24 hours only

21 Dec

The post Day 5: 24 Photography eBooks, $ 9 each, 24 hours only appeared first on Digital Photography School. It was authored by Darren Rowse.

Day 5 The Photography Express

If you’ve been eyeing off some of our dPS titles, waiting for a sale, it’s time to make like a squirrel and go nuts! We’ve got the full Photo Nuts collection for 80% off and the rest of our eBooks just $ 9 USD.

We know that some of you may already have these titles. If so, please consider forwarding these offers to a friend who you’ve inspired with your own photography. We’d also love you to hit reply and tell us what topics you’d like covered in new eBooks or courses in 2019.

Deal #9 Learn the Nuts and Bolts of Photography with this Classic Collection 80% off

If you missed the recent 31 Days to Becoming a Better Photographer course, and you enjoy learning at your own convenience and pace, Neil Creek has covered all the fundamentals of photography in these Video Courses and Ebooks. You’ll be taking beautiful images in no time.

4 Photo Nuts eBooks

The collection includes:

  • Photo Nuts & Bolts Course – Normally $ 99
  • Photo Nuts & Shots Course – Normally $ 99
  • Photo Nuts & Bolts eBook – Normally $ 29
  • Photo Nuts & Shots eBook – Normally $ 29
  • Photo Nuts & Gear eBook – Normally $ 29
  • Photo Nuts & Post eBook – Normally $ 19

Pretty much everything you need to get off auto and confidently enjoy your photography.

Just $ 59 USD you save $ 245 (that’s 80% off) for just 24 hours only!

Take me to the deal

Looking to learn something new over the holidays? Browse our eBook titles and find something you can get started on this holiday season.

Deal #10 All dPS eBooks just $ 9 USD

With 24 titles in our eBook store there’s loads to choose from. If you see more than one that you like you can create your own little bundle of photography training and still not break the budget.

Includes our latest release Wedding Photography eBook and our most valuable title Going Pro (save 80% on this one). Other popular titles include:

  • Living Landscapes – Normally $ 19
  • Black and White Photography – Normally $ 19
  • Transcending Travel – Normally $ 19

All eBooks just $ 9 (save up to 80%) for just 24 hours only!

See all eBooks on sale

We hope you find a gem or two among our collection to learn something new for 2019.

We offer a 60-day money back guarantee, so you can easily buy now to secure the deal and if it’s not right for you, we’ll refund you.

Don’t miss the last two deals – sign up here for The Photography Express!

Disclosure: We receive a commission from our partners if you buy via our promotion, but it is at no cost to you. In fact, you’re getting an even better price than usual!

The post Day 5: 24 Photography eBooks, $ 9 each, 24 hours only appeared first on Digital Photography School. It was authored by Darren Rowse.


Digital Photography School

 
Comments Off on Day 5: 24 Photography eBooks, $9 each, 24 hours only

Posted in Photography


Focus on Photographing a Different Color Each Day to Practice the Art of Seeing

22 Mar

Color is all around us. As beautiful as black and white can be, color gives us variety and sometimes, unpredictability. But funnily enough, it’s also easy to take it for granted.

Over time, I’ve come up with a few exercises to keep color at the forefront of my mind. One of these exercises is to focus on photographing a different color each day. It’s great for keeping your photography fresh and training your eyes to look out for new photographic opportunities.

Getting started

Color may make up the majority of our world, but photographing it might not be as easy as you think. Sometimes the abundance of color can be overwhelming, and sometimes it’s hard to find the color you’re looking for at all! Before taking up the challenge, grab a pen and paper. Write down a heading for each color and list as many different things you can think of under each. Sometimes it’s even worth Googling specific color schemes, just to give you some ideas of what to look for.

Next, designate a day for each color you would like to photograph. And it doesn’t have to be the generic gamut of colors either. Why not try looking out for a more pastel pallet? Soft pinks, greys, and blues make wonderful, atmospheric photographs. More earthy colors like oranges, browns and dark greens are great colors to keep a look out for in Autumn.

Look for bold colors…

Humans have evolved to seek out bold coloration. Deep, saturated colors catch the eye and pull the viewer in for a closer look. A bold color scheme emphasizes texture and shape, especially within a limited color pallete.

Focus on Photographing a Different Color Each Day to Practice the Art of Seeing

Deep, saturated colors catch the eye and pull the viewer in for a closer look.

And a softer color pallete…

Color photography doesn’t always have to be about a bold color scheme. Subtle or almost monochrome color schemes emphasize detail and lend a softer atmosphere to a photograph.

Pastel photographs are best taken during cloudy or low-light days to minimize shadows for a more even-toned image.

Focus on Photographing a Different Color Each Day to Practice the Art of Seeing

Softer pastels like pink and purple can add color without overpowering the image.

Why not both?

Focus on Photographing a Different Color Each Day to Practice the Art of Seeing

The foreground of this image is made up of bold, contrasting colors while the background is predominantly made up of a soft pink pallet. The bold and soft colors emphasize each other and create a more dynamic image. The negative space around the top half of the image is important too, it maintains balance, making sure the full extent of the color palette isn’t too overwhelming.

The opportunity to combine both soft and bold colors doesn’t happen frequently, but you’ll know when it does. Combining the two color schemes creates a dynamic image where bolder and softer colors reinforce each other and bring the image together.

Using movement

Color can accentuate camera movement, and movement can accentuate color. It’s a well-loved dichotomy that is great for abstracted imagery.

Try taking photographs out a moving car window or bus. A slow shutter speed in the late afternoon will allow enough light to create a softness of color.

This image was taken with a slow shutter speed while traveling through the outback. The afternoon light mingles with the light of traveling cars to make a soft, atmospheric abstracted photograph.

Detail

Colour has the power to illuminate detail, adding to the depth of a photograph overall. In a good image, color is the cherry on top – the final pop of color to resolve your photograph.

Focus on Photographing a Different Color Each Day to Practice the Art of Seeing

The subtle yellow road sign and red symbols add detail to an image and invite the viewer in for a closer look.

Look for color in unusual spots

Like I mentioned before, finding your selected color of the day may prove surprisingly tricky. Focusing on red one day will take you on a completely different journey than if you were looking for blue subjects.

Try looking in less frequented locations for unusual colors and patterns. Or take a drive and explore a new location altogether. Changing your perspective or focusing on compositional techniques like leading lines and texture can help get those creative juices flowing.

Focus on Photographing a Different Color Each Day to Practice the Art of Seeing

A red pallete for Monday. Trying to look for unusual perspectives often yields unexpected results, revealing your color of the day in new and interesting ways.

Focus on Photographing a Different Color Each Day to Practice the Art of Seeing

Wednesday’s color pallete, green and blue tiles adorn an urban walkway.

Conclusion

While color is all around us, it’s easy to take for granted. Simple exercises like focusing on photographing a particular color each day help keep your practice fresh and unique.

Keep your eyes peeled and don’t be afraid to explore, color often reveals itself in unexpected and fascinating ways!

The post Focus on Photographing a Different Color Each Day to Practice the Art of Seeing by Megan Kennedy appeared first on Digital Photography School.


Digital Photography School

 
Comments Off on Focus on Photographing a Different Color Each Day to Practice the Art of Seeing

Posted in Photography


Disney’s Star Wars Hotel Will Make Each Guest a Character with a Storyline

20 Jul

[ By SA Rogers in Destinations & Sights & Travel. ]

Fans visiting Disney World’s upcoming Star Wars Land expansion, set to open in 2019, will have the opportunity to immerse themselves even more deeply into the fictional universe in an almost Westworld-style experience. At its D23 Expo in Los Angeles this week, Disney announced a new Star Wars-themed hotel where every window will offer views of ‘outer space,’ every employee will be in character, and every guest will be the protagonist of their very own Star Wars storyline.

Premiering as part of the new Disney 360 vacation concept, the hotel will be a ‘living adventure.’

“It’s unlike anything that exists today,” says Bob Chapek, Chairman of Walt Disney Parks & Resorts. “From the second you arrive, you will become a part of a Star Wars story! You’ll immediately become a citizen of the galaxy and experience all that entails, including dressing up in the proper attire. Once you leave Earth, you will discover a starship alive with characters, stories, and adventures that unfold all around you. It is 100% immersive, and the story will touch every single minute of your day, and it will culminate in a unique journey for every person who visits.”

Disney also unveiled models of the new park along with its name, Star Wars: Galaxy’s Edge. The park will also be an interactive experience with each guest as a character – so you don’t have to stay in the resort to enjoy that aspect of the action, but it certainly seems like it would add to the overall effect.

“One attraction will make you feel like you’re on a Star Destroyer inside a hangar bay. It’s an attraction built on a scale we’ve never done before.

The second attraction will give guests the opportunity to fly the Millenium Falcon, piloting the ship, shooting blasters or preparing for hyperspace – all while completing a critical mission. But how you perform on the mission holds even bigger stakes: perform with skill and you may earn extra galactic credits, while bringing the ship back banged up could put you on the list of a bounty hunter. End up on Harkos’s list and you may face a problem if you show up at the local cantina!”

Share on Facebook


[ By SA Rogers in Destinations & Sights & Travel. ]

[ WebUrbanist | Archives | Galleries | Privacy | TOS ]


WebUrbanist

 
Comments Off on Disney’s Star Wars Hotel Will Make Each Guest a Character with a Storyline

Posted in Creativity


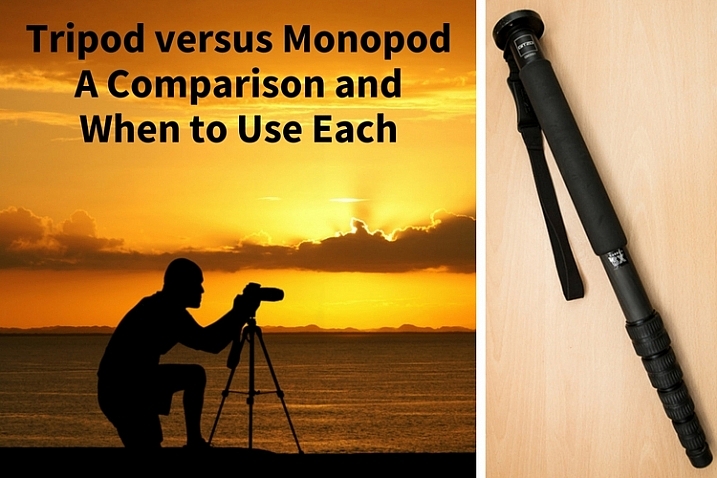
Tripod versus Monopod – a Comparison and When to Use Each

12 Oct

Tripods and monopods, you’re very likely to have seen them. They both have their uses and their purposes for existing. But when do you use one over the other and what advantages do each have? In this article, I’ll look to explain when you would use a tripod versus a monopod and how they’re not necessarily exchangeable in their properties.

Tripods

Jake Khuon

By Jake Khuon

Uses and pros of tripods

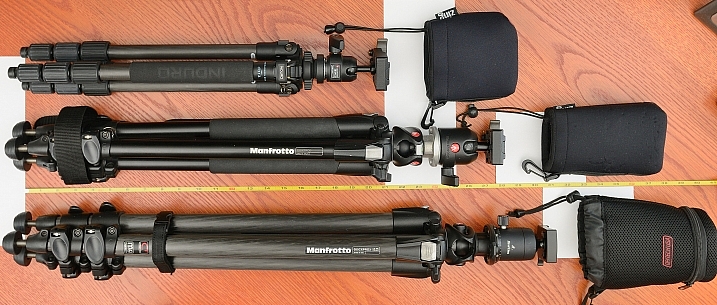
Let’s start off with tripods. You know, those three legged stands that nearly all photographers have?! They provide your camera with a sturdy platform to which you attach your camera. Tripods come in all different sizes and have a huge variety of heads (the actual mounting point) to suit different shooting styles. They are especially helpful for avoiding camera shake when using slow shutter speeds. This is most useful when you want to blur water in a stream, show car light trails at night or simply do a long exposure.

tripod versus monopod - use a tripod for long exposures

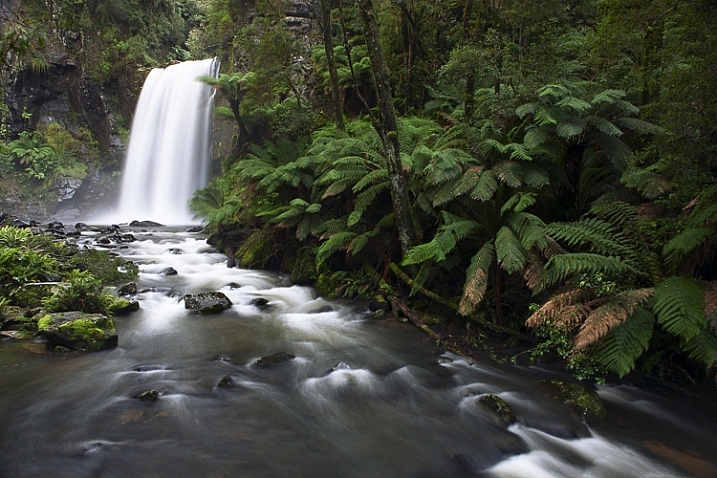
With this frame, I used a tripod to prevent camera shake that would have been caused by the 3.2 second shutter speed. This shutter speed was used to blur the water.

Tripods can also be extremely helpful with macro, still life, and studio photography as they hold the camera in the exact spot you want while you set your shot up. Time-lapse photographers can also benefit from using a tripod over a monopod as it will ensure that there is no jumping between each frame as the camera is securely locked in one position. However, tripods are not without their cons.

tripod versus monopod

Use a tripod for long exposures like this.

Cons of tripods

However, tripods are not without their cons. They can be heavy to carry around and take some time to set up. Depending on which head you are using, tripods can also be very limiting for quick camera movements which you may need when photographing moving objects. Everything about using a tripod is slower. So if it’s speed, and ease of portability that you’re looking for and stability isn’t your main priority, then perhaps a tripod is not the best item for you.

Monopods

tripod versus monopod - use a monopod for more mobility

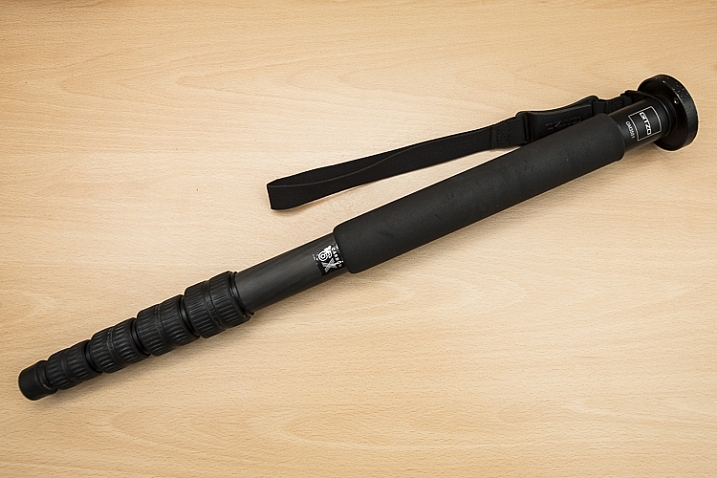
This is the monopod I use. Here, it is compacted (54cm/21.26″) but it extends to be 192cm (6’2″). It is made of carbon fibre and weighs in at only 620g (1.36lb) but can hold up to 18kg (39lb).

Uses and pros of monopods

When a rock solid platform for stability isn’t a priority many photographers turn to a monopod for their camera support needs. Just as the TRI in tripod means three, the MONO in monopod means – you guessed it – one! They are simply a single leg support on which you can mount your camera and/or lens. They too come in different sizes and will support different weight limits.

Monopods are perfect for taking the weight of a heavy lens/camera combination to stop aches and pains from a long day of shooting. If you’ve ever seen sports photographers with their long lenses, then you may have noticed that they are often being supported by a monopod. Monopods also offer much more versatility in movement as you now have only on one leg, not three, and they are much quicker to set up than their three-legged brethren.

tripod versus monopod - use a monopod for more mobility

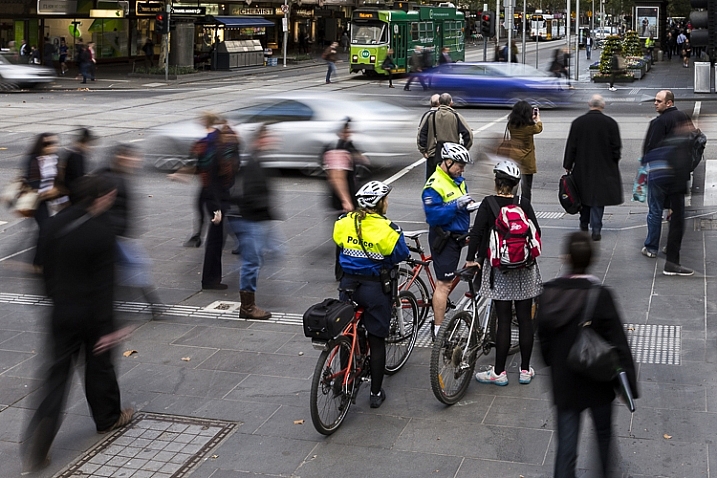
This photo was taken using a 400mm f/2.8 lens. These lenses are quite heavy, so using a monopod is a great way to take the weight off your arms. Daniel Smith/Getty Images.

Cons of monopods

A monopod, however, will not offer you the same stability as a tripod, so if you’re considering a monopod as a lighter alternative to a tripod, do remember this. If it’s milky streams and flowing car lights that you’re after, a monopod will not help you here at all; you will still need a tripod.

But if your arms get tired from holding your camera up all day, then a monopod may well be very suited to your needs.

Conclusion

tripod-versus-monopod

While tripods and monopods offer extra support and in some cases, stability for your camera, there are times when one is more useful than the other and one cannot always be used in place of the other. Generally, for very long shutter speeds or time-lapse photography you’ll want to use a tripod to avoid camera shake and to maintain consistency between each frame. But if it’s a little extra support and to take the weight of a camera/lens combination, you can’t go wrong with a monopod.

Do you have either or both of monopod and tripod? How do you find using each of them?

googletag.cmd.push(function() {
tablet_slots.push( googletag.defineSlot( “/1005424/_dPSv4_tab-all-article-bottom_(300×250)”, [300, 250], “pb-ad-78623” ).addService( googletag.pubads() ) ); } );

googletag.cmd.push(function() {
mobile_slots.push( googletag.defineSlot( “/1005424/_dPSv4_mob-all-article-bottom_(300×250)”, [300, 250], “pb-ad-78158” ).addService( googletag.pubads() ) ); } );

The post Tripod versus Monopod – a Comparison and When to Use Each by Daniel Smith appeared first on Digital Photography School.


Digital Photography School

 
Comments Off on Tripod versus Monopod – a Comparison and When to Use Each

Posted in Photography


5 Important Focal Lengths to Know and the Benefits of Each

05 Apr

5 Focal Lengths and Why You Should Use Them 1

Please note: all focal lengths mentioned in this article are in reference to 35mm full frame sensors.

There are photographers that favor the convenience and flexibility of zoom lenses, and those that favor their sharper, lighter and cheaper counterpart, the prime lens. Note: some modern zooms do have prime-like optics. Often, it’s your line of work that will make that decision for you. Whichever variant you favor, you owe it to yourself to experiment with different focal lengths to learn where they each excel, and which ones mesh best with your style. You can achieve this with primes, or zooms if you can commit yourself to not touching that handy zoom barrel. Among the many options, five focal lengths you want to use are the: 24mm, 35mm, 50mm, 85mm, and 135mm.

Let’s look at each one at a time.

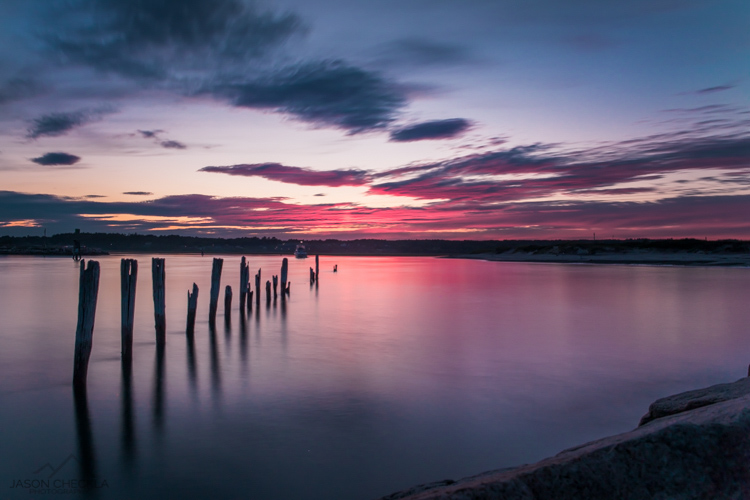
#1 – 24mm wide angle

Areas it excels in: landscapes, astrophotography, group portraits, and event photography.

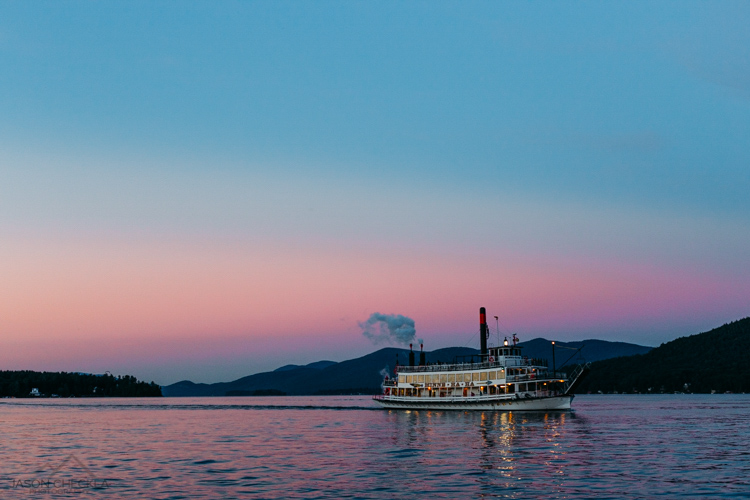
This one is easy to experiment with because not only are there many affordable prime options available, but you’ll find this focal length at the wide end of many full frame zoom lenses. The 24mm prime lens is sufficiently wide and remarkably sharp, making it an ideal candidate for landscape photography. Zooms are wonderful for landscape photography too, but the locked-in field of view (or a prime lens) will force you to think carefully about your compositions.
5 Focal Lengths and Why You Should Use Them 2

The 24mm focal length also excels in situations that don’t offer a lot of light. That includes astrophotography, where 24mm lenses with wide apertures (f/.8 or wider) will facilitate shots of the milky way, and in event photography, where you’ll have an ample field-of-view to shoot indoors and add context to your photographs. Additionally, the 24mm focal length is sufficiently wide to capture group portraits with minimal perspective distortion. Just don’t get too close, and watch the edges of your frame.
5 Focal Lengths and Why You Should Use Them 3

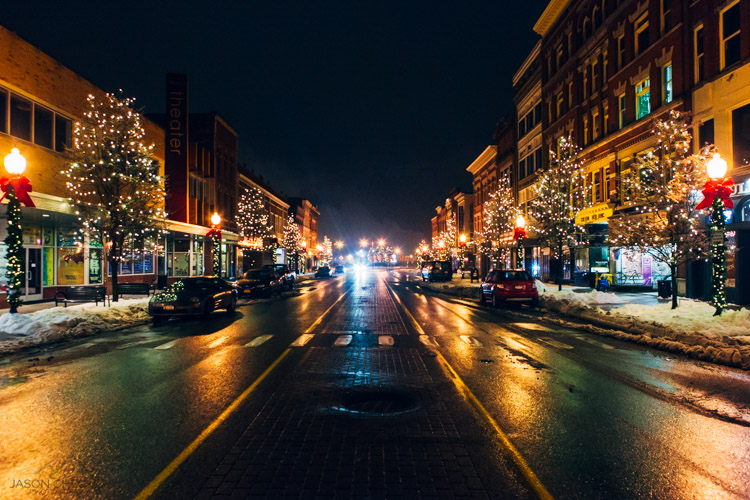
#3 – 35mm focal length

Areas it excels in: street photography, events, environmental portraits, and shooting-across-the-dinner-table photography.

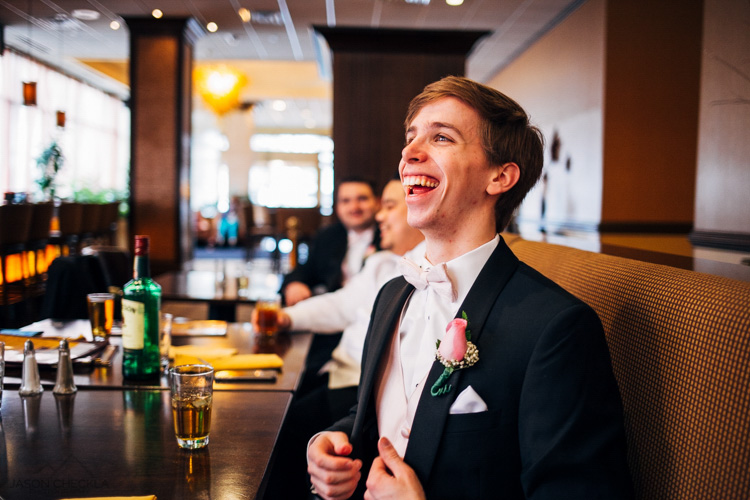
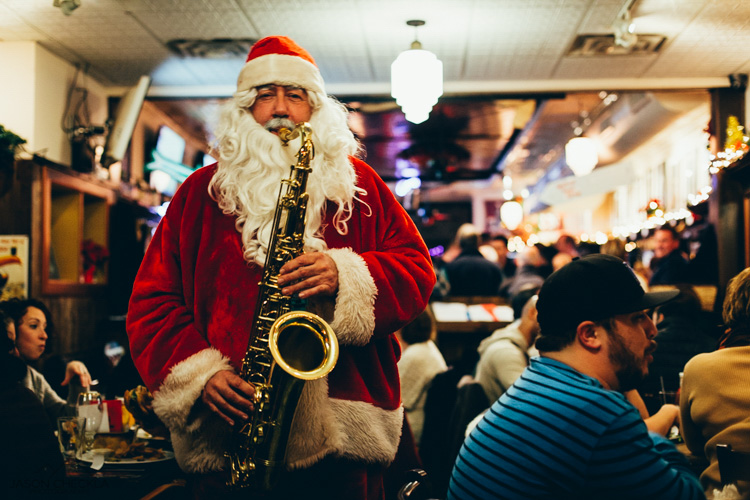
35mm is a classic focal length for many photojournalists. Part of that reason is that the field-of-view requires you to be close to the action, but still maintains enough of the environment surrounding your subject to give an image context. This same philosophy applies well to wedding or event photography, and makes the 35mm focal length a great fit.
5 Focal Lengths and Why You Should Use Them 4

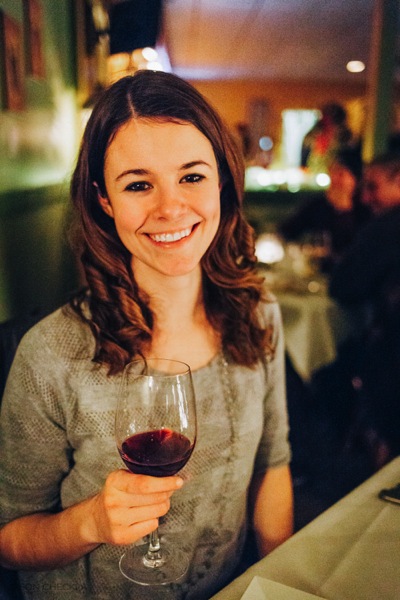
Another great thing about the 35mm prime lens is that it just so happens to be the perfect focal length for shooting a portrait from across the dinner table. Any wider and your subjects face will suffer from perspective distortion (exaggerating their facial features) and any narrower and you’d have to get out of your seat for the shot.
5 Focal Lengths and Why You Should Use Them 5

#3 – 50mm (normal) lens

Areas it excels in: street photography, full-body portraits, walk-around shooting.

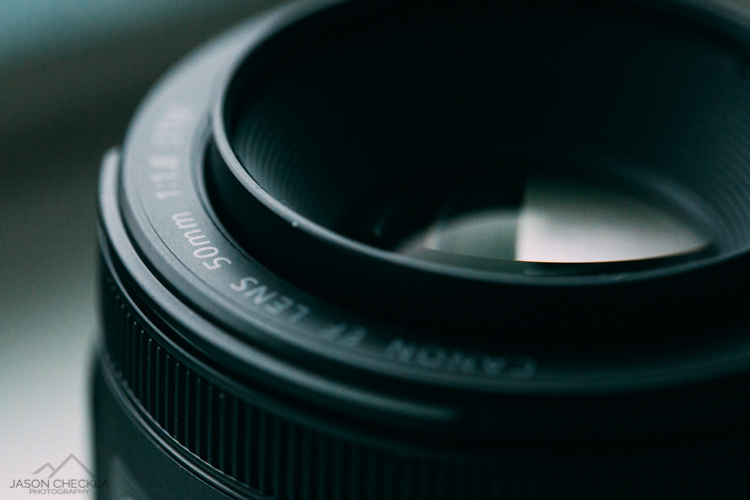
There are so many reasons to try shooting with a 50mm prime lens. Perhaps the best one is that they’re cheap. You can purchase a brand new 50mm lens for most DSLR systems for a little over $ 100. Also, they produce an image that is normal, or most-like the image that we see with our own eyes. There is a common misconception about this concept. The normal perspective that a 50mm lens offers refers to the perspective distortion (or lack thereof), not the field-of-view. For this reason, the 50mm lens is great for full-body portraits and walk-around or street photography.
5 Focal Lengths and Why You Should Use Them 6

5 Focal Lengths and Why You Should Use Them 7

The 50mm lens is another classic, and a large part of that reason is that often, the area in frame is just right. It’s narrow enough to create balanced compositions with ease, but still wide enough to create interest beyond your subject. That is why you will find a 50mm lens in the bags of most street photographers.

#4 – 85mm slight telephoto lens

Areas it excels in: portrait, events, and sports photography.

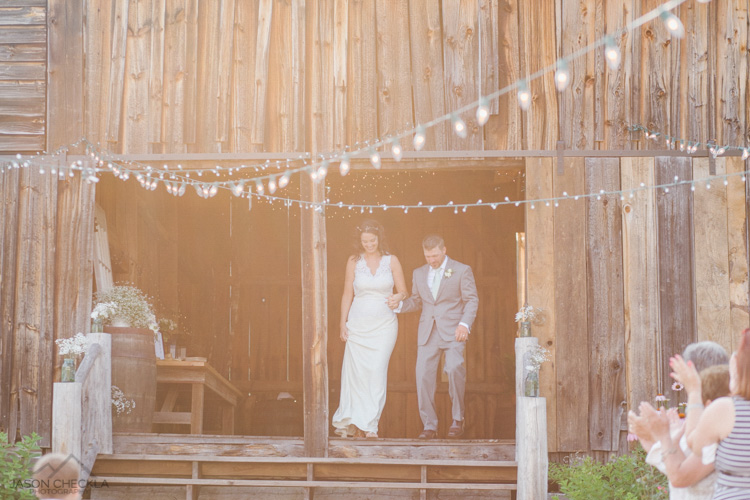
The 85mm focal length is one that you will find in the bag of many wedding and portrait photographers. It creates beautiful portraits with the ability to flatten one’s features, which is generally flattering, and brilliant background separation. The field of view is not so tight that you’ll feel like you need to be outdoors to use one, but it gives you a nice working distance that allows this focal length to sneakily capture candids at a wedding or family gathering.
5 Focal Lengths and Why You Should Use Them 8

That working distance is great for full body shots when you’re on the sidelines of a sporting event, too. The 85mm prime is also a great working distance for photographing your kids or pets.

5 Focal Lengths and Why You Should Use Them 9

#5 – 135mm telephoto

Areas it excels in: head-shots, portraits, and wedding photography.

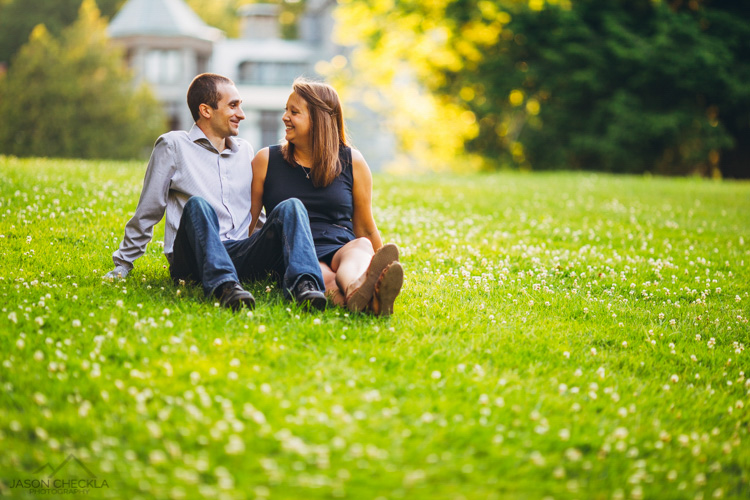
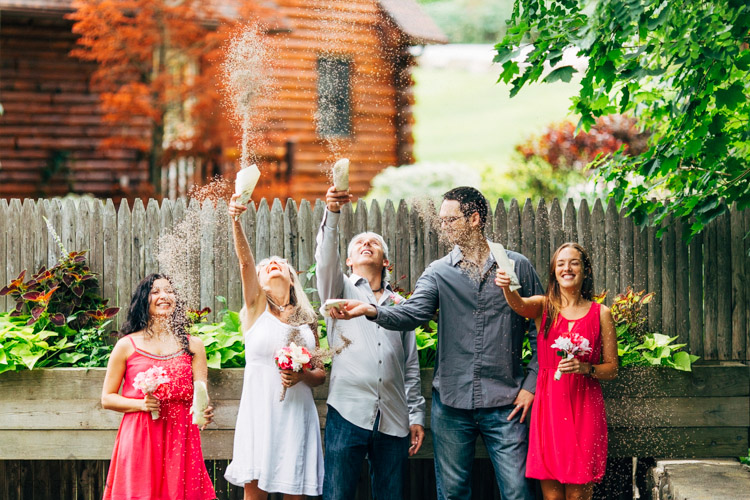
When you need to get in close, or if you just love bokeh, the 135mm lens is a great pick. For details and head-shots that bring your subject to life, grab this focal length. The background separation is fantastic, due to the increased compression of the image. The flattering flattening effect (say that five times) from the compression, makes this lens great for shoulder shots, senior portraits, candids, and more. You’ll have fun shooting wide open to create magical separation between your subject(s) and their surroundings.
5 Focal Lengths and Why You Should Use Them 10

5 Focal Lengths and Why You Should Use Them 11

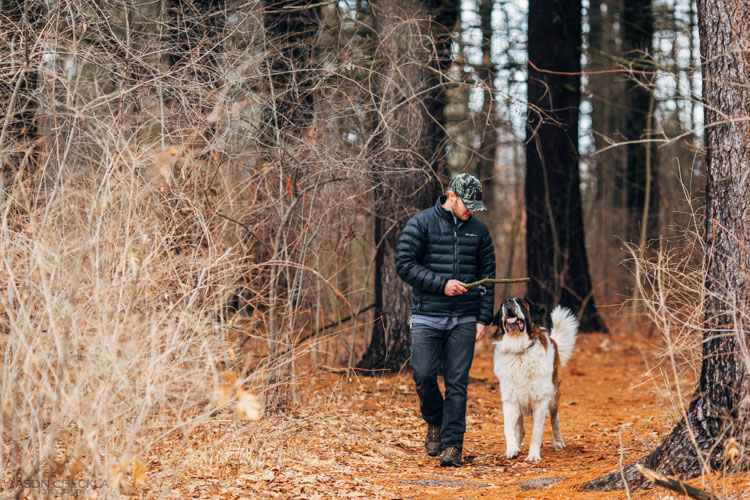
The drawback to this focal length is that you do need a lot of working room, and a lot of light. Remember the 1/focal length rule for shutter speed? In other words, you wouldn’t want to shoot a 135mm lens any slower than 1/135th of a second, without a very steady hand or a tripod. When light or space become a problem, it’s nice to have an 85mm lens to fall back on.
5 Focal Lengths and Why You Should Use Them 12

Chances are you will love some of these focal lengths and dislike others, but you’ll never know until you give them all a shot. Modern zoom lenses are remarkable in their optical-quality, but you do lose the connection you feel when you are truly in sync with your focal length. The more you shoot with a 50mm lens, the more you will start to see with a 50mm perspective. Good luck and happy shooting!

googletag.cmd.push(function() {
tablet_slots.push( googletag.defineSlot( “/1005424/_dPSv4_tab-all-article-bottom_(300×250)”, [300, 250], “pb-ad-78623” ).addService( googletag.pubads() ) ); } );

googletag.cmd.push(function() {
mobile_slots.push( googletag.defineSlot( “/1005424/_dPSv4_mob-all-article-bottom_(300×250)”, [300, 250], “pb-ad-78158” ).addService( googletag.pubads() ) ); } );

The post 5 Important Focal Lengths to Know and the Benefits of Each by Jason Checkla appeared first on Digital Photography School.


Digital Photography School

 
Comments Off on 5 Important Focal Lengths to Know and the Benefits of Each

Posted in Photography


Hasselblad gives away a camera each to the winners of its Masters competition

17 Jan

$ (document).ready(function() { SampleGalleryV2({“targetContainerClass”:”sampleGalleryImageViewerContainer”,”galleryId”:”4521431257″,”isEmbeddedWidget”:true,”selectedImageIndex”:0,”startInCommentsView”:false,”isMobile”:false}) });

Medium format equipment manufacturer Hasselblad has announced the winners of its Masters competition, and has awarded the winners of each category a high end medium format camera. The company does not specify which cameras will constitute the prizes, but they will be presented at a ceremony during September’s Photokina show in Germany, at which the company is speculated to be launching major new products. 

The competition winners will have their work featured in the Hasselblad Masters book, and will be able to use the title Hasselblad Master for ever. 

This year’s theme was ‘Inspiration’, which Hasselblad says was chosen to commemorate the 75th anniversary of the company’s founding. There were ten categories to enter, and the competition was open to ‘all photographers who have been active professionals for more than three years and who are using digital cameras of at least 16 Megapixel, or film cameras, regardless of brand and format.’ The ‘Project 21’ category was open only to those under the age of 21. 

The judging panel was made up of 23 professional photographers and editors, including some past competition winners. 

For more information see the Hasselblad website. 


Press release:

Hasselblad has announced the ten winners of its Masters Awards 2016 – widely acclaimed as one of the world’s most prestigious professional photography competitions. The winners were selected by a combination of a public vote and a professional Masters Jury – comprising internationally renowned photographers and imaging experts.

For the first time in Hasselblad Masters Awards history each winning photographer not only gains ‘Master’ status but also a brand new Hasselblad medium format camera.

Winners will receive their awards, cameras and trophies at a special photokina 2016 ceremony in Cologne this September.

The Hasselblad Masters Awards 2016 winners:

  • Swee Oh (USA) Architecture
  • Roy Rossovich (Sweden) Fashion/Beauty
  • Katerina Belkina (Germany) Fine art
  • Lars Van De Goor (Netherlands) Landscape
  • Natalia Evelyn Bencicova (Slovakia) Portrait
  • Georgio Cravero (Italy) Product
  • Jake Reeder (Australia) Project//21
  • Ali Rajabi (Iran) Street/Urban
  • John Paul Evans (UK) Wedding
  • David Peskens (Netherlands) Wildlife

Perry Oosting, Hasselblad CEO: “The Masters Awards have always been the ultimate showcase to capture talent that flourishes across the globe. Our 2016 Masters has again demonstrated the outstanding skills out there across the entire spectrum of photo-disciplines”.

Judges scrutinised thousands of supreme quality images from professional veterans to aspiring young photographers determined to make their mark.

Masters Jury member Jonathan Beer said: “Picking my favourites from the 2016 finalists was immensely tough. Some categories had obvious stand-out entries but others were much closer to call. Exciting creativity backed-up with technical excellence was what I was looking for.

He added: “The Hasselblad Masters has always been one of the most prestigious competitions in the industry. The winners can take pride in and benefit from the coveted title ‘Hasselblad Master’ for the rest of their careers. I cannot wait to see what the winners create for the 2016 Masters Book.”

* The ten winners will be tasked to create a new and unique set of images embracing the theme ‘Inspire’ (coinciding with Hasselblad’s 75th anniversary) for the latest edition of the Hasselblad Masters Commemorative Book.

Articles: Digital Photography Review (dpreview.com)

 
Comments Off on Hasselblad gives away a camera each to the winners of its Masters competition

Posted in Uncategorized


Getting the Most Out of Each Portrait Location Spot

29 Nov

159

Some photographers are very inefficient when it comes to shooting in a portrait location. They will take a photo here by this tree, then move over to another tree, then by the pathway, and one at the rock. Then they can’t figure out where to shoot next, because they’ve already used every “backdrop” they can see in that area, and they only have a handful of shots to show for their efforts.

I’d like to share a few tips with you for using your locations fully and completely, without leaving any leaf, tree, stone, or pose unturned. You’ll speed up your sessions, and get a lot more useable photos by adopting these habits.

158

First, find a background that you like. Look for good light, elements that frame your subject, colors that complement, something to lean or sit on, etc. Once you’ve found a spot or background to start with, use it completely and quickly before you move on to a new spot.

161

I’ve created a few lists that can help you remember all the ways that you can pose your subject(s), and use a background fully, before you move on. Use these ideas to create your own list that you can carry with you until “wearing each spot out completely” becomes second nature.

All subjects with any background

  • Standing
  • Seated
  • Smiling
  • Serious
  • Laughing
  • Looking away
  • Close-up
  • Far away
  • Portrait (vertical) orientation
  • Landscape (horizontal) orientation
  • Full body
  • Head shot
  • With a prop
  • Without a prop
  • Unexpected composition (such as subject on the very edge of the frame, subject centered right in the middle, etc.)

162

Families, couples, or groups with any background

  • All looking at the camera  and smiling
  • Looking at each other
  • Hugging
  • Laughing
  • All sitting
  • All standing
  • Some sitting, some standing
  • Parents
  • Kids
  • Boys
  • Girls
  • Parent with child
  • Individual portraits of each family member
  • Couple hugging facing each other
  • Couple hugging, one behind the other
  • Holding hands
  • Walking towards you
  • Walking away from you

171

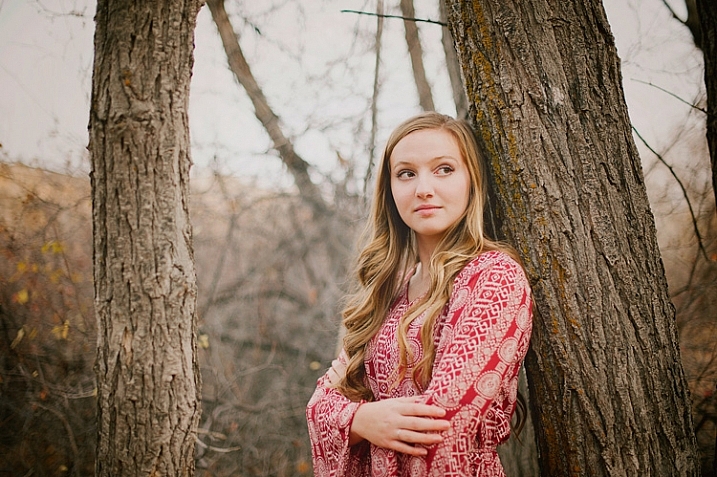
Individual with trees or walls (something to lean against)

  • Shoulder leaning on a wall or tree
  • Back to the wall or tree, looking at the camera
  • Hand to the tree or wall
  • Head leaning on the tree or wall
  • Arms folded
  • Hands in pockets
  • Hand on hip
  • Sitting against the tree or wall
  • Any of the above, looking away from camera
  • Funny/silly looking around tree or wall

169

If you move quickly through each of these poses, your subject won’t feel like she’s stuck in one place forever, but you will have so many options to choose from when you are sorting through the photos later. You might not choose to edit every pose, in every location. But, you may find as you go through the photos later, that you really like the serious face in one location, and you really love the close-up in a different location. Shooting so many options in each location at that moment gives you that choice, instead of being stuck with the one and only option you thought of in that moment.

168

Some of your photos may end up looking very similar to each other, but you may decide that you really like the full body pose better than the tighter shot. If you had only shot that location with a cropped pose, you wouldn’t have that option. Alternatively, if you don’t shoot a cropped-in pose at that time, youhave the option to crop it later, but you will lose photo quality by cropping it the file smaller.

173

As you learn to use each location fully, you will find that you can get many more useable photos in much less time, with less effort, and in locations that you might not have even noticed before. One tree and one person could be one photo, or it could end up being a hundred photos if you are extremely creative and efficient.

Give yourself a challenge to figure out at least 10 different photos in one location spot, and share a couple of your favorites in the comments! I’d love to see what you come up with.

googletag.cmd.push(function() {
tablet_slots.push( googletag.defineSlot( “/1005424/_dPSv4_tab-all-article-bottom_(300×250)”, [300, 250], “pb-ad-78623” ).addService( googletag.pubads() ) ); } );

googletag.cmd.push(function() {
mobile_slots.push( googletag.defineSlot( “/1005424/_dPSv4_mob-all-article-bottom_(300×250)”, [300, 250], “pb-ad-78158” ).addService( googletag.pubads() ) ); } );

The post Getting the Most Out of Each Portrait Location Spot by Melinda Smith appeared first on Digital Photography School.


Digital Photography School

 
Comments Off on Getting the Most Out of Each Portrait Location Spot

Posted in Photography


Deal: Portraits eBooks $7 Each [or $21 for the Whole Set of 5 eBooks]

08 Jul

Wow, we’re already up to our final offer of the sale — how the week has flown!

You’re going to love this lucky last deal, it’s BIG…

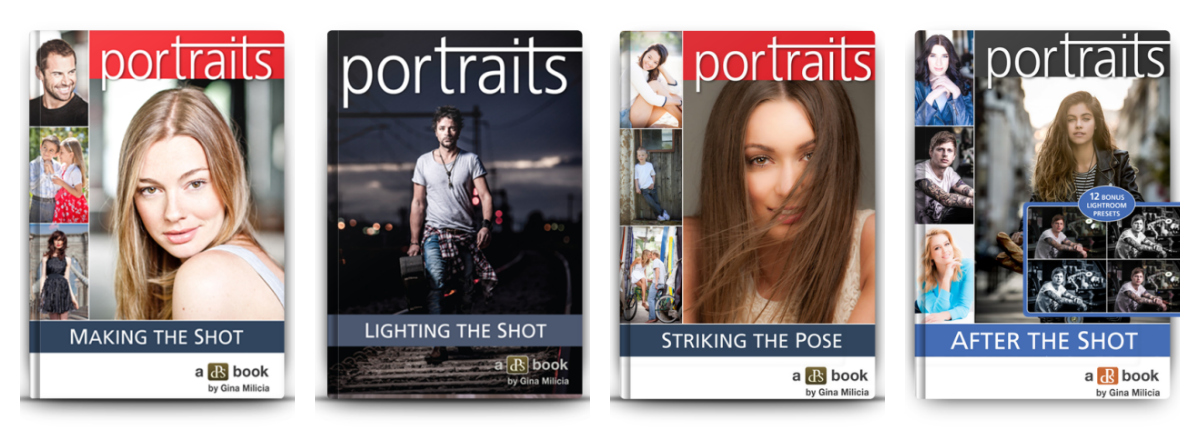
Our best-selling Portraits ebooks by the amazing Gina Milicia only $ 7 each!

portraits

Covering all aspects of portrait photography, the ebooks on offer are:

  • Portraits: Making the Shot
  • Portraits: Lighting the Shot
  • Portraits: Striking the Pose
  • Portraits: After the Shot (plus 12 FREE Lightroom presets)

And at just $ 7 each, you save an incredible 65%!

Can’t stop at one?

4You can pick up each Portraits ebook separately for $ 7, or…

Grab the whole set for an amazing $ 21!

Tens of thousands of photographers from all around the world have significantly improved their portrait photography with this series, and this is your chance to own them all.

We’ll even include our 14 Recipes for Amazing Portraits ebook as an added bonus, too.

So that’s 5 great dPS ebooks and close to $ 90 worth of value!

Individual Portraits titles, or the whole set plus bonus ebook. Whichever you decide, just be sure to get in before the deal ends in 24 hours’ time!

googletag.cmd.push(function() {
tablet_slots.push( googletag.defineSlot( “/1005424/_dPSv4_tab-all-article-bottom_(300×250)”, [300, 250], “pb-ad-78623” ).addService( googletag.pubads() ) ); } );

googletag.cmd.push(function() {
mobile_slots.push( googletag.defineSlot( “/1005424/_dPSv4_mob-all-article-bottom_(300×250)”, [300, 250], “pb-ad-78158” ).addService( googletag.pubads() ) ); } );

The post Deal: Portraits eBooks $ 7 Each [or $ 21 for the Whole Set of 5 eBooks] by Darren Rowse appeared first on Digital Photography School.


Digital Photography School

 
Comments Off on Deal: Portraits eBooks $7 Each [or $21 for the Whole Set of 5 eBooks]

Posted in Photography


Photographer creates picture of 100-man orchestra… with the same person playing each instrument

06 Jun

An Oslo musician and photographer has created a photo stitched together using 400 images, showing an entire orchestra with every instrument played by the same person. Violinist Alexander Light created the 200MP picture by shooting percussionist Heming ValebjØrg in every seat on a stage while he played the appropriate instrument for that position. Read more

Articles: Digital Photography Review (dpreview.com)

 
Comments Off on Photographer creates picture of 100-man orchestra… with the same person playing each instrument

Posted in Uncategorized