RSS
 

Posts Tagged ‘Don’ts’

20 Dos and Don’ts for Shooting the Moon

14 Feb

The post 20 Dos and Don’ts for Shooting the Moon appeared first on Digital Photography School. It was authored by Bruce Wunderlich.

20 dos and don'ts for shooting the moon

If you’ve ever tried shooting the moon, you’ve probably discovered that it’s actually a pretty tricky subject!

But don’t worry; there are some tips and techniques you can use to quickly improve your moon photography.

In this article, let’s look at some dos and don’ts to take your moon images from snapshots to stunning art.

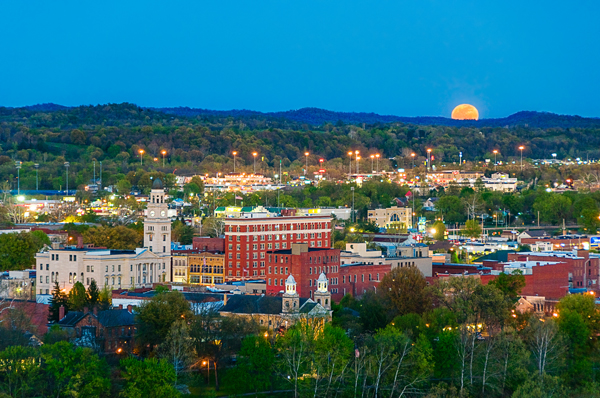
city with rising moon
The April moon, called the “Pink Moon,” rising over Marietta, Ohio. The setting sun lit the city with a warm glow.

1. Do use a tripod

One of the most important pieces of equipment for shooting the moon is a good tripod.

Since the moon is so small, it is very important to have a sturdy foundation, because even the most minute movement of the camera will cause your image to blur. 

You might think that, if you use a fast-enough shutter speed, you can handhold the camera. But since your subject is so small in the frame, even small movements will be exaggerated.

2. Don’t use a slow shutter speed

While it’s a good idea to use a tripod, you must avoid using a slow shutter speed.

Why?

Because the moon is actually moving very quickly around the earth. The moon is so distant, it doesn’t appear to be traveling very fast. But if you let your shutter speed relax too much, you’ll end up with all sorts of unwanted motion blur.

A good rule of thumb for tack-sharp moon photography is to shoot at 1/125s or faster.

3. Do use a telephoto lens

To successfully capture any kind of detail on the moon, you need at least a 300mm telephoto lens.

If you want the moon to take up the entire frame, you will need around an 800mm lens.

shooting the moon with a telephoto lens

4. Don’t use any filters on your lens

To prevent any chance of a blurry image, don’t use any filters.

Yes, even remove the UV filter. This may sound scary if you never remove the UV filter from your lens, but in this case, it’s best to set it aside.

Some may suggest using a neutral density (ND) filter for moon photography to cut back on the bright light of the moon. But all this will do is require a slower shutter speed, and you want to use the fastest shutter speed possible to get that crisp, tack-sharp image.

5. Do try the Looney 11 Rule

The Looney 11 Rule is similar to the Sunny 16 Rule. It’s designed to help you exposure properly when shooting the moon, while also ensuring you get a fast-enough shutter speed for sharp shots.

Here’s how it works:

Set your f-stop to f/11.

Then match the shutter speed to your ISO. 

For example, if your ISO is set at 200, set your shutter speed to 1/200s.

(This is not an exact science, but it should give you a good starting point.)

6. Don’t use the shutter button to start your exposure

Do not manually press the shutter button or even touch your tripod when initiating your moon shot.

Remember that even the slightest touch could add enough vibration to blur the image.

Instead, use a cable release or remote trigger to start your exposure. If you don’t have either of these gadgets, use the self-timer feature on your camera.

7. Do use mirror lock-up

If you’re working with a DSLR and it has the option, lock up your mirror. This can greatly increase your chances of getting a tack-sharp moon image.

You see, even the slightest shake of your camera’s mirror can be enough to blur the shot. So if your camera has this option, use it!

Lock the mirror up and wait a few seconds to allow any vibrations to settle before beginning your exposure.

(If your camera doesn’t have a mirror lock-up option, you can always shoot in Live View, which will have the same effect!)

8. Don’t use image stabilization

Your lens’s (and camera’s) image stabilization technology must be turned off as soon as you put your camera on a tripod.

Turning on an image stabilization feature with your camera mounted on a tripod will actually create blur in your image!

9. Do know the cycles of the moon

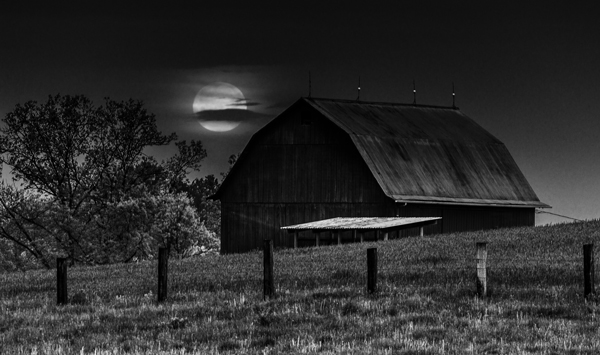
shooting the moon over a barn
Use The Photographer’s Ephemeris app to predict the location of the moonrise.

There are 29.5 days between full moons.

And by learning when the full moon will come, you can ensure you get the best-looking moon in your shots!

There are many online and smartphone applications that can help you track the phases of the moon. One must-have app is The Photographer’s Ephemeris, which will give you the phases of the moon, and also show you when and where the moon will appear in the sky.

This is especially useful when planning your moon shoots. The full moon is very popular and photogenic, but it’s also the brightest and the most difficult to expose correctly.

The side lighting of a gibbous moon produces some interesting shadows which may allow you to capture craters and mountains. The crescent moon is, of course, the darkest stage, but one that may offer some interesting effects when added to a nighttime landscape.

10. Don’t always place the moon in the center of the frame

Putting the moon in the center of the frame – especially if there’s nothing else in the shot – is boring.

It’s been done a million times before. So try to put the moon off-center.

Oh, and make sure to include other interesting objects in the frame!

That’s how you’ll end up with a truly impressive moon photo.

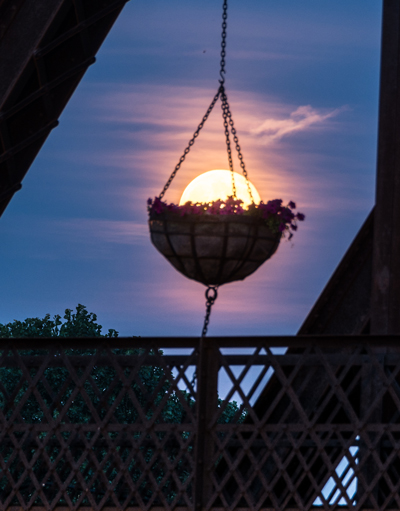
moon photography with a foreground object
Don’t just place the moon in an empty sky. Including a foreground object will create a more dramatic image.

11. Do switch to manual focus

There are a couple of different methods you can use to focus on the moon.

First, try using your camera’s autofocus to make the moon tack sharp. Then, once you have a desirable point of focus, turn off the autofocus and switch to manual focus.

Alternatively, you can start by setting your lens to manual focus. With your camera’s Live View feature turned on, zoom in on the moon and turn the manual focus ring until the moon becomes sharp. Then do not touch the ring again.

12. Don’t just shoot the moon at night

The best time to photograph the moon is just after it rises or just before it sets, when it’s low in the sky.

Why is this important?

For one, when the moon is near the horizon, it will appear larger in your images (due to a trick of the eye).

Also, as the full moon rises, the sun will be setting, and as the full moon sets, the sun will be rising. This can give you great lighting to accentuate foreground objects.

Note that shooting the moon in the daytime (e.g., in the late afternoon) will give you the opportunity to include foreground objects, and you may also be able to capture some craters on the moon’s surface.

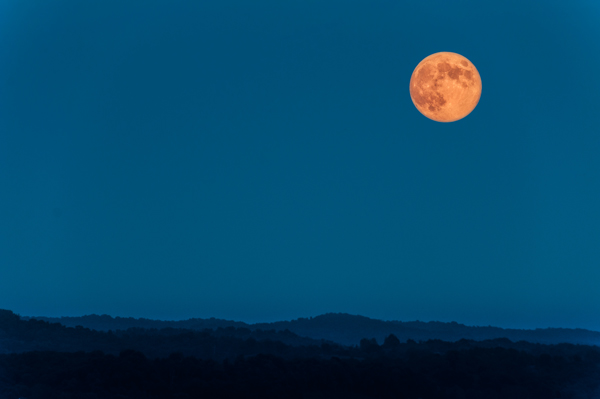
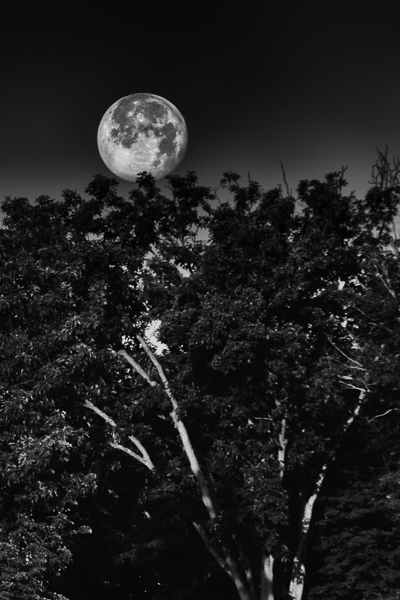
moon photography with a tree in the foreground
The June full moon, called the “Honey Moon,” captured as it sets at sunrise.

13. Do use exposure bracketing

Once you have found an exposure that you’re happy with, it’s best to bracket around that setting.

You see, the view of your images in the dark, on the back of your camera, can often be deceiving. In the dark, images always appear brighter on the camera LCD than they are when opened on your computer.

So after you’re satisfied with the exposure you have dialed in, bracket two stops under and two stops over, just to ensure that you get a result you’ll be happy with later.

14. Don’t use Auto White Balance

Using Auto White Balance will give you very inconsistent results.

Instead, I recommend you try the daylight white balance preset. And if you’re looking for a different effect, try the tungsten or cloudy presets.

Don’t be afraid to experiment.

And remember:

If you are shooting in RAW, you can change the white balance in post-production.

15. Don’t depend on your meter

In general, your camera’s light meter will be fooled by the amount of light reflecting off the moon.

So make sure you constantly check your LCD and histogram to ensure you’ve nailed the exposure.

Also, it is important to note that, as the moon rises, the exposure will change. The moon gets brighter as it rises, so you’ll need to keep adjusting your shutter speed to compensate.

16. Do shoot the moon in RAW

Shooting in RAW will allow you to capture more details of the moon’s surface, and also give you more latitude for adjustments in Lightroom and Photoshop.

So, unless you are not at all comfortable with using camera RAW software, always shoot the moon in RAW.

17. Don’t be afraid to crop your images

Unless you are shooting with a very large telephoto lens, you will want to crop your image to display the moon at a decent size.

But remember:

The more you crop, the more you reduce your ability to print at a high resolution.

18. Do tweak and sharpen

Most moon photography is going to require some post-processing in Photoshop or other photo editing software. Adding clarity and contrast will help bring out details, and this will enhance the craters and mountains of the moon.

As mentioned above, the white balance and exposure may also be adjusted to achieve a nice result, as both are somewhat difficult to perfect in-camera.

19. Don’t be afraid to get creative

Here’s the truth:

Most great moon photography has been manipulated in post-production, because of the difficulty of capturing a great moon shot in one image.

So don’t be afraid to get creative.

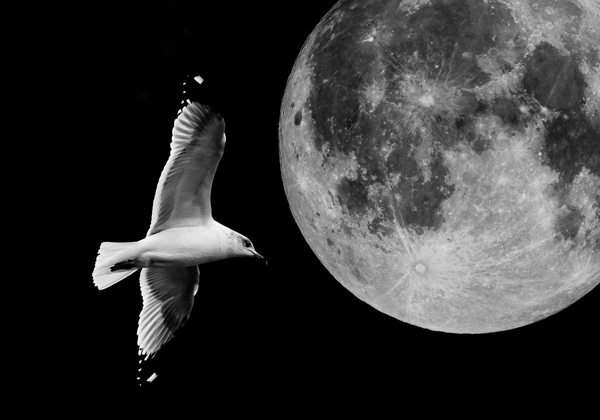
For instance, you might create a composite, as I did for this image:

the moon and a flying seagull
Be creative! I combined two images to make this composite.

A popular method used by many photographers is to combine two exposures: one set to bring out the best of the foreground landscape, and a second exposed for the moon. 

When combining these two images, try enlarging the moon slightly to achieve a more dramatic effect, but don’t overdo it to the point that it looks fake. The moon needs to look believable, unless you are going for a science fiction effect (which isn’t always a bad idea, creatively speaking!).

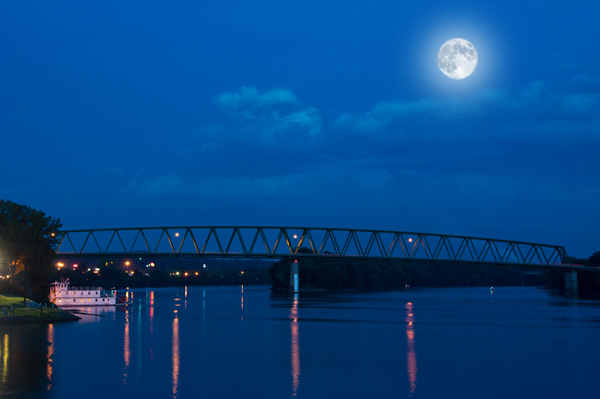
shooting the moon above a bridge at night
Two exposures were combined to make this final image. One image was exposed for the landscape and the other for the moon. The moon was enlarged slightly for dramatic effect.

20. Do practice, practice, practice

You now know everything you need to get started with moon photography.

So get out there and shoot the moon!

Remember that moon photography is not as easy as it looks, so if your first results are not as dramatic as you expected, then keep trying!

Now I’d like to see some of your moon images! Please share any moon shots in the comments below.

The post 20 Dos and Don’ts for Shooting the Moon appeared first on Digital Photography School. It was authored by Bruce Wunderlich.


Digital Photography School

 
Comments Off on 20 Dos and Don’ts for Shooting the Moon

Posted in Photography


Roger Cicala breaks down the do’s (and don’ts) of cleaning your camera gear and workspace

20 Mar

Roger Cicala, founder and owner of Lensrentals, is best known in these parts for tearing down, repairing and reviewing lenses. But not long ago (relatively speaking), it wasn’t just lenses Roger was mending; he was also a physician. As such, his experience in these two fields makes him uniquely qualified to talk about something we should all be mindful of — how to keep yourself and your camera gear disinfected through proper care and treatment of your equipment and workspace.

In the thorough blog post, Roger breaks down what cleaning supplies you should (and shouldn’t) use and what practices will help to ensure you’re being as safe as you can be during the ongoing COVID-19 pandemic (and beyond). From basic gear cleansing tips to advice for keeping your studio or office as clean as possible, he covers it all.

You can read the full blog post yourself over on the Lensrentals blog. If we’re lucky, Roger might even make an appearance in the comments below for those of you who have any additional questions.


Image credits: photos used with kind permission from Lensrentals.

Articles: Digital Photography Review (dpreview.com)

 
Comments Off on Roger Cicala breaks down the do’s (and don’ts) of cleaning your camera gear and workspace

Posted in Uncategorized


Do’s and Don’ts of Putting Together a Photography Portfolio

30 Jul

The post Do’s and Don’ts of Putting Together a Photography Portfolio appeared first on Digital Photography School. It was authored by Ana Mireles.

Are you having trouble landing a job? Do you keep showing your work but are not getting any clients? Maybe it’s time to review your photography portfolio. Whether you’re doing a digital or printed portfolio, here are some do’s and don’ts to improve the way you present your photography.

Travel photography example portfolio

Putting together a portfolio

It doesn’t matter what kind of photographer you are, a good portfolio is the most important tool you have to secure a job. The first thing to understand is that putting together a bunch of nice pictures isn’t enough. Your photography portfolio should be a sample of your work that showcases your technical abilities as well as your personal style.

Flower and nature portfolio

DON’T put watermarks

Let’s face it, if someone wants to steal your photograph, they will find a way to do so. A watermark can be cropped or deleted. Instead, it will make it more difficult for the viewer to appreciate your image. Also, watermarks give an amateurish look to your portfolio as a whole. See at the difference:

putting-together-a-portfolio

Watermarks can ruin a photo and don’t really protect your rights

To legally protect your images, you can have them copyrighted. To get familiar with this concept, read ImageRights – Finding and Pursuing Copyright Infringement. Another safety measure is to never publish or hand out high-resolution images. For this, I recommend my previous article on How to Understand Pixels, Resolution, and Resize your Images in Photoshop Correctly.

DON’T stick to one portfolio

Another big mistake is to collect all of your best photos and display them in one portfolio. You may think this shows quality, as they are a “best-of,” but it can make you look like a master of none. It is also a waste of time for your client. They want to see relevant examples that show how you would do their job, not how good you may be at other things.

You can specialize in different kind of photography

Take these two photos, for example – they don’t even look good together. And let’s face it, someone who needs a food photographer, doesn’t really care about how I can photograph a street fair and vice-versa. If you’re not convinced about limiting your practice, have a look at these 5 Things to Consider Before Deciding to Specialize or Not in Your Photography.

DO feature what you’re selling

I was talking before about the importance of having different portfolios. This means that each one should display a different specialty that you offer. It’s always important to be coherent and properly organize your work. For example, a portrait portfolio shouldn’t just include any kind of photography that features people. Let me illustrate this:

Different kinds of photography. Photography specialization

Take the two photos above, the one on the left comes from a photo-shoot I did for the press kit of a theater play. The one on the right is a behind-the-scenes job I was doing for a short movie. If I’m preparing a portfolio for a movie or theater producer I can include both. If I’m preparing a portrait portfolio then I shouldn’t include the one on the right.

DO ask for help

It’s always helpful to ask for opinions once you’ve shortlisted the images you want to use. If you can reach out to a colleague or an expert it would be great, but if you don’t, at least ask a friend. Often we have an emotional attachment to a photo we took that is actually not great. An external point of view can help you sort out your best images.

putting-together-a-photography-portfolio

Try putting two similar images from the same subject and asking them which one they prefer. A friend can also help you decide if you are putting too many or too few images in your portfolio. Keep in mind that you should never include something that is not good enough just to reach a certain number. Also, don’t overdo it – editors are busy people and have many portfolios to review.

Conclusion

To sum up, there is no specific formula for putting together a photography portfolio that is great, but I hope you found these tips useful and time-saving. DO remember that the most important thing is for you to have a strong body of work.

If you still need to work on that, here are some great readings to help you out:

  • How To Build A Portfolio Without Clients.
  • 6 Easy Photography Techniques to Diversify Your Portfolio.
  • How to Use a Photography Project to Build Your Portfolio.


putting-together-a-photography-portfolio

The post Do’s and Don’ts of Putting Together a Photography Portfolio appeared first on Digital Photography School. It was authored by Ana Mireles.


Digital Photography School

 
Comments Off on Do’s and Don’ts of Putting Together a Photography Portfolio

Posted in Photography


10 Dos and Don’ts for Mastering Your Tripod

15 Aug

Love ’em or hate ’em, tripods are an essential piece of gear for all photographers. It will keep your camera steady during long exposures, support the weight of those big lenses you need for wildlife photography, and hold your camera in what could otherwise be an awkward position for macro photography.

But just like any other tool, a tripod can be used the right way, and the wrong way.

10 Dos and Don'ts for Mastering Your Tripod - photographer under a rock arch

DO – Get a good tripod that fits your gear

First of all, make sure your tripod is sturdy and solid. There are a wide variety of models available that range anywhere from $ 20 on into the thousands, and there is a reason for that. A bargain tripod will hold a small point-and-shoot camera steady but is not strong enough to keep your heavy DSLR steady during a long exposure.

Even if you have a high-quality tripod, there are still some things to consider such as its weight limit and maximum height. Make sure your tripod is built to hold the weight of your camera, biggest lens, flash, and any other accessories you might put on it.

You might also want to consider if your tripod should be as tall as you are. If you need to look through your viewfinder, having a tall tripod will mean you can use it more comfortably without bending down. On the other hand, if you have an LCD screen that flips up, a tall tripod is less important.

A good tripod should last decades with proper storage and care, so it’s worth the investment.

photographer on sand dunes - 10 Dos and Don'ts for Mastering Your Tripod

DO –  Make sure your tripod is sufficiently weighted

The weight of the tripod itself is also something to think about. Typically they are made from aluminum which is relatively inexpensive but heavy. For a higher price, you can get one made of carbon fiber, which is strong and lightweight but more expensive.

A carbon fiber tripod is an excellent choice for nature and wildlife photographers who have to walk or hike long distances while carrying their gear. However, they are so light that a stiff breeze could potentially knock the tripod over, taking your camera with it. If you are using a lighter tripod and there is a lot of wind, anchor the legs of the tripod or hang a rock, sandbag, or your camera bag from the center to weigh it down.

I recommend going for a light tripod otherwise it will tend to get left at home. A light tripod is easy to carry and you can always weigh it down on a windy day.

sunset over Canyon de Chelly, Arizona - 10 Dos and Don'ts for Mastering Your Tripod

DO – Extend the thickest sections of the legs first

When a tripod folds up, its legs unlock and collapse into sections (usually three or four). The thickest sections of the leg are the most stable. So if you’re not raising your tripod to full height, extend the thicker upper sections before you bring the thinner lower parts into play.

DON’T – Raise the center column until the legs are fully extended

Raising the tripod using the legs offers much more stability than using the center column, which can sway slightly during long exposures. For maximum sharpness, the center column should be used to gain extra height only after the legs are fully extended.

DO – Remove the center column altogether

Consider whether you are more likely to require additional height, or if you would rather be able to get lower to the ground. Some tripods allow you to remove the center column, which means you can set up your tripod lower to the ground for super low-angle shots.

Gatklettur, or Arch Rock, in Arnarstapi, Iceland - 10 Dos and Don'ts for Mastering Your Tripod

DON’T – Touch the tripod or camera during the exposure

If you’re doing a long exposure, even a slight nudge on the tripod can cause blur. Make sure that nothing touches the camera or tripod while the shutter is open. A camera strap blowing in the wind comes to mind.

Ideally, you should use a remote shutter release or 2-second self-timer to prevent movement when you press the shutter button.

DON’T – Carry your camera mounted on the tripod

Okay, I have to admit I’m guilty of this one! It can be tempting to leave your camera attached to the tripod as you walk from location to location – it makes set-up and take-down so much faster when you need to get the shot.

But the release plates and screws that hold the camera to the tripod assume that gravity will be working with them. They aren’t built to hold the camera at an angle, especially with the bustling and bumping that can happen while walking around outside. By doing this, you risk your precious camera coming loose and taking a bad spill.

DO – Protect your tripod from water, sand and other debris

A good tripod should be fairly rugged, but tiny particles can get inside the tripod and erode the screws that make it move smoothly and fasten securely. Avoid submerging the joints and locks in sand or silty water, and if your tripod does get dirty, make sure it is clean and dry before folding it back up.

I often use my tripod on the beach and sometimes submerge it in salt water. A solution to the problem of getting sand and salt in the tripod is to not collapse it again. I just leave all the legs extended until I get home (or to home base if traveling) and can rinse it off.

Hraunfosser Waterfall, Iceland - 10 Dos and Don'ts for Mastering Your Tripod

DON’T – Over-tighten the screws

Some tripods have spinning screw locks that tighten the legs, and some fasten with clips that are held on with bolts that may need to be adjusted from time to time.

Either way, you want these screws to be secure enough, but you don’t want to muscle them so tight that they can’t be unlocked. Worse, you could strip and damage the threads. Most screws on a tripod should be firmly finger-tight, and no more.

DO – Turn off image stabilization

The image stabilization technology inside cameras and lenses is fantastic when hand-holding the camera, but can actually backfire when used on a tripod.

This is because the stabilization system itself causes vibrations, and when it’s mounted on a stable base such as a tripod, it actually detects its own vibration. It works harder to stabilize this, which causes it to vibrate, even more, compounding the problem.

Therefore, this setting should be turned off when your camera is mounted on a tripod.

10 Dos and Don'ts for Mastering Your Tripod - photographer in a desert valley

Over to you

There’s nothing worse than making a big investment in your photography only to find it isn’t helping very much. So make sure you are using your tripod properly to get those sharp images you are after.

The post 10 Dos and Don’ts for Mastering Your Tripod appeared first on Digital Photography School.


Digital Photography School

 
Comments Off on 10 Dos and Don’ts for Mastering Your Tripod

Posted in Photography


Do’s And Don’ts Of A Corporate Photo Shoot

25 May

Whether it’s a newly minted company or a well-established one, companies want their brand to stand out. One of the best ways to do so is with highly professional, well-executed corporate photography. Every business can benefit greatly from professional photographs. With the online marketplace continuously expanding its reach, the quality of your photographs will make all the difference. After all, Continue Reading

The post Do’s And Don’ts Of A Corporate Photo Shoot appeared first on Photodoto.


Photodoto

 
Comments Off on Do’s And Don’ts Of A Corporate Photo Shoot

Posted in Photography


Event Photography Etiquette: Avoid Embarrassment With These 10 Dos and Don’ts

06 May

Maybe you’re already a seasoned event photographer interested in improving your business, or perhaps you’re reading this because you’re about to photograph your first event and want some pointers. As a photographer, you want to be keenly aware of your image as well as behavior when working on-site with clients. A superior professional image shows the world that you’re both competent and worth the cost of your services for event photography.

This article provides my recommendations on how to appropriately conduct yourself before and during an event photography shoot. Positioning yourself to land assignments and inspire confidence in your clients starts with your demeanor and presence.

1. DO Wear Appropriate Clothing

Your apparel says a lot about you. On one event photoshoot, I was approached by a guest who appeared interested in hiring me for a freelance job. But he hesitated, saying “Honestly, you look expensive. I’m not sure I can afford you.” While that assumption may have been right, his reaction was far better than “You look cheap, maybe I can lowball you.”

man in tuxedo toasting - Event Photography Etiquette: Avoid Embarrassment With These 10 Dos and Don'ts

Always ask your client about the dress code ahead of the event. Did you forget to ask? Play it safe and dress your best. It’s better to be the sharpest dressed person in the crowd than the jeans-and-t-shirt person in a sea of tuxedos.

group in tuxedos -Event Photography Etiquette: Avoid Embarrassment With These 10 Dos and Don'ts

2. DO Respect Privacy

As a photographer, you’re probably familiar with the fact that not everyone likes being photographed, much less by a stranger. In order to make guests feel at ease, introduce yourself, “Hi, my name is John/Jane Doe and I’m here Photographing for XYZ Media.”

Guests might ask for further info, such as where the photos will be displayed. It’s wise to gather this info with your client ahead of time. Sometimes an introduction isn’t necessary. Once guests see you making the rounds with your camera, they might just grab you for a quick shot, no questions asked.

beef sliders - Event Photography Etiquette: Avoid Embarrassment With These 10 Dos and Don'ts

To avoid liability/privacy concerns, you can specify in your contract that it’s the client’s duty to inform guests of a photographer’s presence for the event. In my experience, clients have no issue with this.

3. DO Show up Early

Most of my event clients want to know that I’m willing and able to arrive early, which I do as a courtesy at no extra charge.

menu on a plate - Event Photography Etiquette: Avoid Embarrassment With These 10 Dos and Don'ts

Showing up early not only allows you to familiarize yourself with the venue and points of contact, but also shows your professionalism. Take precautions: Leave extra time in case of traffic, car troubles, or those dreaded wardrobe or equipment malfunctions. Plus, when you arrive early you can grab some preliminary test images of the venue/rooms as well as important detail shots.

4. DO Learn People’s Names

If you sometimes have trouble remembering names, as most of us do, take care to write down all client names (especially new clients) in BIG letters on your notes sheet for the event.

Everyone likes hearing their name, and a prospective client will subconsciously be more impressed if you can end the conversation with a friendly, “Well Kathy, I’m glad we talked and I’m looking forward to working with you.” Re-read that sentence in your head but without the name this time. It sounds a bit cold and dry, right?

5. DO Interrupt as Politely as Possible

As you make your rounds during a networking or cocktail hour, many people will be engaged in conversation. When it’s unavoidable interrupting a conversation, I recommend approaching while making eye contact.

Mexico Consulate Award - Event Photography Etiquette: Avoid Embarrassment With These 10 Dos and Don'ts

Typically someone in the group will notice you and your camera and know what you want. If nobody notices you, don’t be too shy or just stand there awkwardly. A gentle tap on the shoulder might be in order. Of the hundreds of times I’ve approached people for photos, I seldom get a “no”. People understand that photography is my job, and most are happy to pose for a photo.

6. DON’T Photograph People Eating

For most events over two hours in length, there will be a portion where guests are treated to a meal or hors-d’oeuvres. Photos of people eating should be avoided, so this is your chance for a work break.

Pay attention, however, because you can get some great candid photos of tables at the tail end of a meal when the satisfied diners are typically in a good mood. I’ve captured many great photos of guests post-meal laughing and chatting this way. I recommend standing back and using your zoom lens to capture these images.

people talking - Event Photography Etiquette: Avoid Embarrassment With These 10 Dos and Don'ts

7. DON’T Be Pushy With Public Figures or Celebrities

You might be excited to learn that someone notable, a political figure or even your favorite musician will be attending an event. Thanks to the bad behavior of so many paparazzi over the years, many public figures dislike or distrust photographers. Can you blame them?

Radio Show awards photo - Event Photography Etiquette: Avoid Embarrassment With These 10 Dos and Don'ts

Keep this in mind as well: most celebrities dislike being told what to do. If you’re photographing a meet-and-greet situation and it’s not an intimate portrait session, be careful about asking a celebrity to strike a pose or shift position, regardless of whether or not it would help the photo. Try to gauge the individual’s temperament and mood. If he or she ignores your question or reacts badly, don’t persist! Shooting around such non-cooperation will be necessary.

8. DON’T Show Alcohol or People Drinking

Not everyone cares if they’re photographed holding a beverage; in fact, some people like that image. Regardless, as a courtesy to guests, it’s best not to show them drinking alcohol. When photographing a group of guests standing around a table, it’s a good precaution to ask whether any of them would prefer to set their drinks down first.

Wiley Awards Ceremony lady with wine - Event Photography Etiquette: Avoid Embarrassment With These 10 Dos and Don'ts

Wiley Awards Ceremony image cropped - Event Photography Etiquette: Avoid Embarrassment With These 10 Dos and Don'ts

Cropped to remove the drink.

9. DON’T Drink Alcohol While Working

Quite often you’ll find alcohol flowing freely at events and parties, including even the high-level corporate get-togethers. You may be tempted to join in on the fun. If you are, I recommend waiting until your job is done and your camera gear is safely stashed away before indulging.

You wouldn’t want your client to give you the okay, only to have the CEO of the company or the bride’s father spotting you with a tall glass of whiskey in one hand and a camera in the other. You’re a professional, and that’s not a good look for you.

Editor’s note: I personally would recommend NEVER drinking at an event you are hired to attend, even if you are done shooting for the night. Other people can’t know that you’re off the clock. They just know that you’re the official photographer and that they saw you drinking. So use your own judgment.

wine bottles - Event Photography Etiquette: Avoid Embarrassment With These 10 Dos and Don'ts

10. DON’T Make Sales Pitches to Attendees

I recall reading a one-star review of a wedding photographer who acted completely inappropriately on a job and it stuck with me. Not only did that photographer allegedly flirt with the bridesmaids but he tried handing a business card to the groom during the cake-cutting ceremony instead of photographing his client’s special moment.

Take note: Bad timing and poor social awareness could land you poor reviews and do harm to your business and reputation.

That’s not to say that your conversations with attendees couldn’t turn out to be productive, just remember that your paid job at the event is to photograph. Assuming that you’re maxing out your assignment, it’s fine to chat with guests here and there. But let the subject of your services arise from their questions, not from your self-promotion.

Summary

In summary, there are many precautions to consider in order to come off as a professional at an event. Whether it’s a wedding, party or corporate engagement, self-awareness is key, and a little preparation can go a long way in demonstrating your competency and professionalism.

If you follow these tips and do your best work, your clients will undoubtedly be impressed and more importantly – happy.

The post Event Photography Etiquette: Avoid Embarrassment With These 10 Dos and Don’ts appeared first on Digital Photography School.


Digital Photography School

 
Comments Off on Event Photography Etiquette: Avoid Embarrassment With These 10 Dos and Don’ts

Posted in Photography


Do’s And Don’ts Of A Corporate Photo Shoot

08 Mar

Whether it’s a newly minted company or a well-established one, companies want their brand to stand out. One of the best ways to do so is with highly professional, well-executed corporate photography. Every business can benefit greatly from professional photographs. With the online marketplace continuously expanding its reach, the quality of your photographs will make all the difference. After all, Continue Reading

The post Do’s And Don’ts Of A Corporate Photo Shoot appeared first on Photodoto.


Photodoto

 
Comments Off on Do’s And Don’ts Of A Corporate Photo Shoot

Posted in Photography


Video Tips: Composition Dos and Don’ts For Creating Better Images

01 Dec

How you compose or arrange your frame is one of the keys to creating interesting and compelling images. So learning some composition rules, and when to break them is essential.

Here are three short videos to help you see what to do and what to avoid in your composition.

Composition Mistakes to Avoid

Learn what not to do in this video including:

  • Double subjects
  • Looking out of the frame
  • Tangents (lines cutting through the subject)
  • Lazy composition

Beginner’s guide to composition

In this second video, Jordan from Sleeklens gives you four tips you can use to help elevate your photography composition.

?

The four tips covered include:

  1. Rule of thirds
  2. Balance
  3. Symmetry
  4. Leading Lines

9 Composition Tips

Finally, in this last video from COOPH you will see nine more composition tips based on the images of master photographer, Steve McCurry.

?

Do you have any other composition tips you would like to share? Please do so in the comments section below.

The post Video Tips: Composition Dos and Don’ts For Creating Better Images by Darlene Hildebrandt appeared first on Digital Photography School.


Digital Photography School

 
Comments Off on Video Tips: Composition Dos and Don’ts For Creating Better Images

Posted in Photography


20 Dos and Don’ts for Shooting the Moon

01 Dec
Here the April moon called the "Pink Moon" rose over Marietta, Ohio. The setting sun lit the city in a warm glow.

The April moon called the “Pink Moon” rose over Marietta, Ohio. The setting sun lit the city in a warm glow.

The moon is a very popular subject for photographers of all skill levels to shoot. But if you’ve ever tried to photograph the moon, you’ve probably discovered that it’s not that easy to accomplish. In this article let’s look at some dos and don’ts to take your moon shots from snapshot to artwork.

To begin, the first and most important DON’T is: Don’t assume that photographing the moon is going to be easy.

#1 Do use a tripod

One of the most important pieces of equipment for any low light photography is a good tripod. Since the moon is so far away, it is very important to have a sturdy base as even the smallest movement of the camera will cause your image to blur. You might be tempted to think that if you use a fast enough shutter speed you can hand-hold the camera, but you need to realize that your subject is 238,900 miles away and even the slightest movement will be exaggerated.

#2 Don’t use a slow shutter speed

The moon is actually moving very quickly around the earth at a speed of 2,288 miles per hour (3,683 kilometers per hour). The moon is so distant, it doesn’t appear to be traveling very quickly to the naked eye. Because of the moon’s speed and the long focal length necessary to capture an image of the moon, you need to use the fastest shutter speed possible. A good rule of thumb for tack sharp moon photos is nothing slower than 1/125th of a second.

#3 Do use a telephoto lens

To successfully shoot any kind of detail of the moon in your image, you need at least a 300mm telephoto. For a full frame image, you will need around an 800mm lens.

Capture the moon

#4 Don’t use any filters on your lens

Remove ALL filters from your lens! To prevent any chance of distortion, don’t use any filters. Yes, even remove the UV filter. This may sound scary if you never remove the UV filter from your lens, but it’s best to remove to do so in this case. Some may suggest using a neutral density (ND) filter for moon photography to cut back the bright light of the moon. But, all this will do is require you to use a slower shutter speed, and you want to use the fastest shutter speed possible to get that crisp, tack sharp, image.

#5 Do try the Looney 11 rule

The Looney 11 rule is similar to the Sunny 16 rule. Set your f-stop to f/11, then match the shutter speed to your ISO. For example, if your ISO is set at 100, set your shutter speed to 1/125 of a second. (This is not an exact science but will give you a good starting point.)

#6 Don’t touch the camera to start your exposure

Do not manually press the shutter release or even touch your tripod when initiating your moon shot. Remember that even the slightest touch could add enough vibration motion to blur the image. Using a cable release or remote trigger is the best way to start your exposure. If you don’t have either of these gadgets, use the self-timer feature on your camera to begin your shot.

#7 Do use Mirror Lock-up

If your camera gives you the option to lock up your mirror this can greatly increase your chances of getting a tack sharp image. Even the slightest shake of your camera’s mirror can be enough to blur your image. If your camera has this option, use it! Lock the mirror up and wait a few seconds to allow any vibration to settle before beginning your exposure.

#8 Don’t use Image Stabilization

Canon’s IS (Image Stabilization) or Nikon’s VR (Vibration Reduction) must be turned off anytime your camera is on a tripod. Turning on any vibration reduction feature with your camera mounted on a tripod will actually create blur in your image.

#9 Do know the cycles of the moon

Use Photographers Ephemeris to predict the location of the moonrise

Use The Photographer’s Ephemeris app to predict the location of the moonrise.

There are 29.5 days between full moons. There are many online and smart phone applications that can help you track the phases of the moon. One must- have app is The Photographer’s Ephemeris which will not only give you the phases of the moon, but also show you when and where the moon will appear in the sky. This is especially useful when planning your moon shoots in advance. By far the most photographed stage is the full moon, which is also the brightest and the most difficult to expose correctly. The side lighting of the Gibbous stage produces some interesting shadows which may allow you to capture craters and mountains. The crescent moon is, of course, the darkest stage, but one which may create some interesting effects when added to a nighttime landscape.

#10 Don’t always place the moon in the center

While you can use all the usual rules of composition for your lunar photography, don’t be afraid to break the rules if the shot calls for it. Don’t just put the moon in the center of your image with nothing else –  it’s been done a million times before and there is nothing exciting about this. Try to include other objects in the frame with the moon.

Don't just place the moon in an empty sky, including a foreground object will create a more dramatic image.

Don’t just place the moon in an empty sky. Including a foreground object will create a more dramatic image.

#11 Do switch to manual focus

There are a couple of different methods you can use to focus on the moon: First, try using your camera’s autofocus, and once you have a desirable focus, turn off the autofocus and switch to manual focus. Alternatively, you can set your camera on manual focus, and with your live view feature turned on, zoom in on the moon and turn the focus ring until the moon becomes sharp. Then do not touch the ring again.

#12 Don’t just shoot the moon at night

The best time for photographing the moon is just after it rises or just before it sets, when it is very low in the sky. When the moon is near the horizon, it is closest to Earth and will appear larger in your images. Also, as the full moon rises the sun will be setting, and as the full moon sets the sun will be rising. This may give you great lighting to include or accentuate foreground or landscape objects. Shooting the moon in the day time will give you opportunity to include foreground objects, and you also may be able to capture some craters on the moon’s surface.

The June full moon called the "Honey Moon" captured here setting at sunrise

The June full moon, called the “Honey Moon”, captured as it sets at sunrise.

#13 Do use exposure bracketing

Once you have found the exposure that you feel happy with, it is best to bracket around that setting. The view of your images in the dark, on the back of your camera, can often be deceiving. In the dark, images always appear brighter on the LCD of camera than they actually are when opened on your computer. After you are satisfied with the exposure you have dialed in, bracket two stops under and two stops over, just to ensure that you get an exposure you will be happy with later.

#14 Don’t use Auto White Balance

Using auto white balance will give you very inconsistent results. What is the source for the light of the moon? That’s right, the sun! So try daylight white balance, but if you are looking for a different effect, try tungsten or cloudy. Don’t be afraid to experiment, but also remember that if you are shooting in RAW you can change the white balance in post-production.

#15 Don’t depend on your meter

Most likely your camera’s light meter will be fooled by the amount of light reflecting off the moon. Also it is important to note that as the moon rises, the exposure will continual change. It gets brighter as it rises, so you need to keep adjusting your shutter speed.

#16 Do shoot in RAW mode

Shooting in RAW will allow you to capture more details of the moon’s surface, and also give you more latitude for adjustments in retouching. So, unless you are not at all comfortable with using camera RAW software, always shoot the moon in RAW.

#17 Don’t be afraid to crop your image

Unless you are shooting with a very large telephoto lens, you will want to crop your image to display the moon at a decent size. But remember, the more you crop, the smaller the final image can be printed at high resolution.

#18 Do tweak and sharpen

Most moon photography is going to require some post exposure retouching in Photoshop or other photo editing software. Adding clarity and contrast will help bring out details which will enhance the craters and mountains of the moon. As mentioned above, white balance and exposure may also be tweaked to finish your optimal image, as both are somewhat difficult to perfect in camera.

Be creative: two images are combined together here to create this final image

Be creative: two images are combined to create this final image.

#19 Don’t be afraid to be creative

Don’t be afraid to get creative with your images of the moon. Most great moon images have been manipulated in post-production because of the difficulty of capturing a great moon shot in one image. HDR or exposure blending are great methods to enhance the captures of otherwise impossible moon images. A popular method used by many photographers is to combine two exposures: one set to bring out the best of the foreground landscape and a second exposed for the moon only. When combining these two images, try enlarging the moon slightly to achieve a more dramatic effect, but don’t overdo it to the point that it looks fake. It needs to look believable unless you are going for a science fiction affect (which isn’t a bad idea, creatively speaking!).

Two exposures were combined to make this final image. One image was exposed for the landscape and the other for the moon. The moon was enlarged slightly for dramatic effect.

Two exposures were combined to make this final image. One image was exposed for the landscape and the other for the moon. The moon was enlarged slightly for dramatic effect.

 #20 Do Practice, Practice, Practice

Now get out there and shoot the moon! Remember it is not as easy as it looks, so keep trying if your first results are not as dramatic as you expected.

If you have any moon images or other dos and don’ts that work for you, please share them in the comments below.

The post 20 Dos and Don’ts for Shooting the Moon by Bruce Wunderlich appeared first on Digital Photography School.


Digital Photography School

 
Comments Off on 20 Dos and Don’ts for Shooting the Moon

Posted in Photography


The Most Important Do’s and Don’ts of Portrait Posing You’ll Ever Read

03 Feb

Have you ever seen those photographers whose portfolios have so so many amazing portraits? You look at all of their pictures, wondering how they do their magic. They must have “great subjects” or work with people that aren’t camera-shy like your friend. The truth is that great portraits aren’t about the models or how photogenic or “picture-perfect” they are, but Continue Reading

The post The Most Important Do’s and Don’ts of Portrait Posing You’ll Ever Read appeared first on Photodoto.


Photodoto

 
Comments Off on The Most Important Do’s and Don’ts of Portrait Posing You’ll Ever Read

Posted in Photography