As the Editor-in-Chief of CLARITY, I believe that photography is one of the most unique forms of visual art. As a photographer, you must possess an ability to express yourself visually and also be technically proficient with the tools of your craft.
Thankfully, the technology is relatively simple to understand. Given a small amount of time, anyone can master the mechanics of their DSLR very quickly. I’m referring to the technical side of photography, or more specifically, how to use your camera.
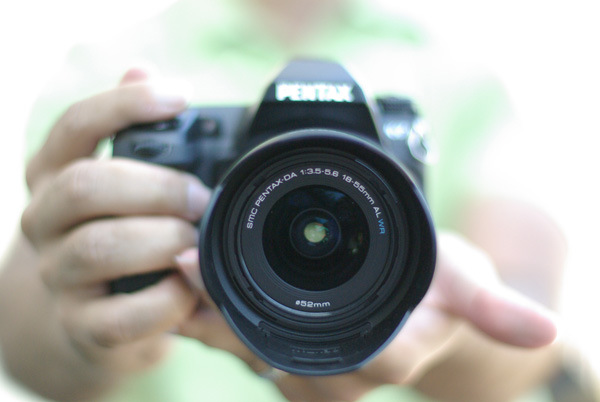
I’m sure you’ll agree, digital SLR cameras are pretty appealing contraptions. They constantly evolve with new bells and whistles, and shiny attractive buttons and dials, but at their very essence, a camera is quite simply a box that captures and records light through a small opening. Light enters the camera and hits a sensor for a certain period of time, and that’s it. Too much light and the photo will be over-exposed (too bright). Not enough light and the photo will be under-exposed (too dark). By the end of this article, if feel stuck in Automatic Mode you will be able to break free and let your true creativity reign!
So how do you know when you have the optimal amount of light? Thankfully, when you are shooting in Manual mode, your camera has a built-in light meter to show you if your exposure is going to be too dark, too bright, or just right. You simply need to know how to control the amount of light that enters your camera, and for how long the sensor is exposed to that light.
Start Right Here – learn how to master your DSLR
There are three ways to control the amount of light that enters your camera, and all three are used to make your photograph either brighter or darker.
The Exposure Triangle
The first is the size of the opening through which light enters, called the aperture of your lens. The next is the duration of time that your camera sensor is exposed to the light, referred to as the shutter speed. The final option controls how sensitive the camera is to light, known as the ISO. These three controls all interact with one another in a give-and-take relationship, and the following “Exposure Triangle” is a great tool to help you understand the dynamics of these relationships.
Now, the trick is to balance these three options to achieve a perfect exposure. Typically, you will choose two ways of controlling how light enters the camera, and then compromise on the third. The two choices you make are solely dictated by the aesthetic you would like to achieve. Aperture size, shutter-speed, and ISO all have individual benefits, but they also produce side-effect consequences that lend an aesthetic component of their own. Let’s explore how they work in more detail.
Part One – Aperture
The size of the “hole” through which light enters your camera is called the aperture. Mechanically, the aperture is a little diaphragm inside the lens that you can widen or narrow by telling your camera what f-stop you would like to use. The f-number is a funny measurement because a small f-number (like f/2.0) equates to a wide opening, whereas a large f-number (like f/22) equates to a small opening. As you would imagine, a large opening allows more light to enter the camera resulting in a brighter photograph, and a small opening lets in less light resulting in a darker photograph. Pretty straightforward stuff so far right?
Side Effect of Aperture
The aesthetic effect of varying the aperture is that light entering a wide aperture translates into less focus between the foreground and the background in the photograph. This is how photographers blur out the backgrounds in their photos. When you want to isolate a subject by blurring out the background, you would use a wide aperture.
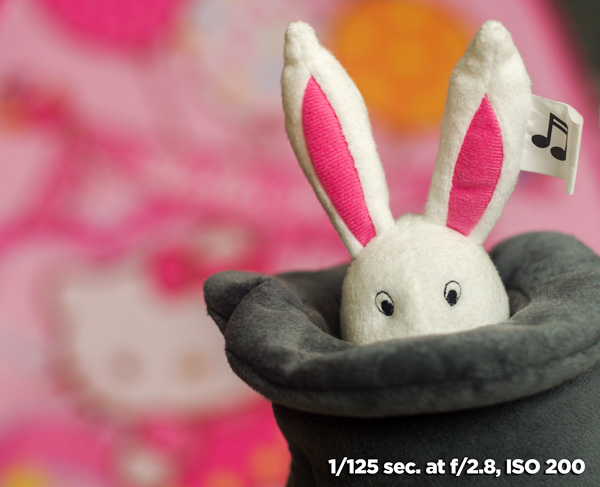
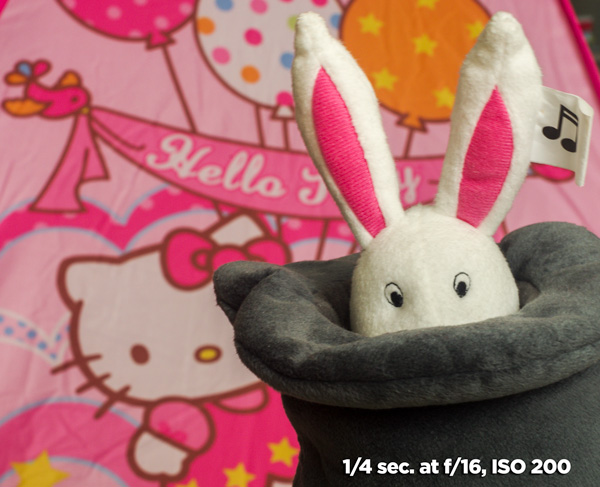
Light that enters through a smaller, tighter, aperture is more focused than light entering a wide aperture, and light that is more focused translates into sharper focus through the foreground-to-background depth in a photograph. So if you want everything as sharp as possible through the depth of your scene, you would want to use a narrow aperture.
Part Two – Shutter Speed
The shutter is basically a little curtain that opens and closes behind the aperture. It can be open for a long amount of time (like seconds, minutes, or even longer), or a short amount of time (like quick fractions of a second). As the shutter stays open longer, more light is captured by the sensor resulting in a brighter image. The shorter the shutter speed, the less light is captured resulting in a darker image.
Side Effect of Shutter Speed
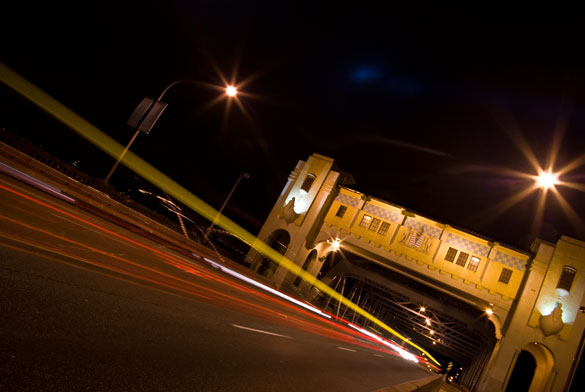
The aesthetic effect here is that a fast shutter speed allows you “freeze” any motion in the scene, whereas a slower shutter speed blurs any motion. Imagine taking a photograph of a falling water droplet. If your shutter speed was set to 1/1000th of a second, the shutter is open for such a brief fraction of time that the drop would appear frozen in mid-air when photographed.
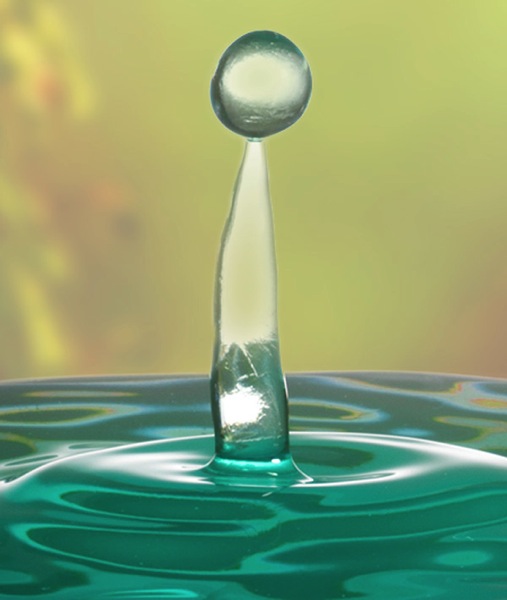
Alternatively, if you set a much slower shutter-speed such as half a second, then the movement of the falling drop would be captured as a blur.
Give-and-Take
Typically, fast shutter speeds require a larger aperture for the sensor to capture enough light to produce a well-exposed photograph. Conversely, slow shutter speeds tend to require a smaller aperture to limit the amount of light coming in over the longer duration. You can see how these factors are all starting to work together.
Part Three – ISO
The third way of adjusting the overall brightness of your photograph is the ISO, which controls how sensitive the camera sensor is to light. A low ISO (like 100) results in a darker photograph, while a high ISO (like 6400) results in a brighter photograph.
Side Effect of ISO
Of course, there is a trade-off here too. The aesthetic compromise of using a higher ISO means that while you will produce a brighter image, a higher ISO also introduces more grain (or “noise”) into a digital photograph.
Usually, you will first decide upon your aperture and shutter speed based on the combination of their aesthetic effects to your vision for the final image, while aiming to keep your ISO as low as possible. If you know that you need a certain shutter speed along with a certain aperture and the resulting image is still too dark, that’s when you increase the ISO.
Generally speaking, when you’re shooting in an environment that is dark or dimly lit, you’ll want to raise the ISO to make the sensor more sensitive to light. When the lighting conditions are bright, you can keep the ISO low.
It’s all about finding a balance between these settings to achieve the best exposure. Once you decide upon one or two of these settings, the camera will require some compensation on the other.
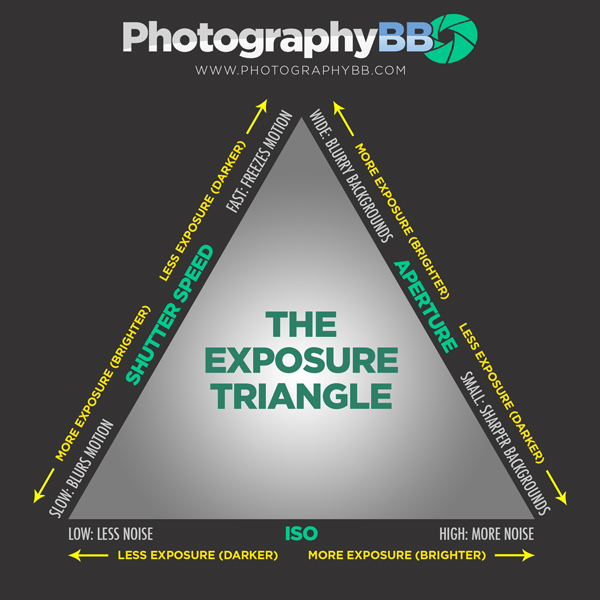
The Exposure Triangle is a great reference to demonstrate how increasing or decreasing any one of these three settings affects the exposure of the image. This stuff can be learned quite quickly, but it’s best to experiment with these settings to see how they operate in the real world. This will help you gain a technical understanding of how to use your camera, but there’s still a long way to go with regards to making photographs that communicate. Remember, photography is a visual language. Once you learn how to use the camera, you can then learn to translate your vision into captivating photographs.
Both the technical and artistic aspects play important roles in the making of a beautiful photograph. At CLARITY, we show our readers how to quickly learn the technical side, but we go even further to teach the importance of developing your creativity. We’ll show you step-by-step techniques to making stronger photographic compositions, and what to do when you feel like your vision and results don’t line up. Join other DPS readers, and we’ll give you everything you need to know to make great photographs with ease, in any situation. Get a subscription to CLARITY on sale now at SnapnDeals.com.

The post How to Master Your DLSR in One Afternoon a Beginner’s Guide by Dave Seeram appeared first on Digital Photography School.

 Last week we let you know about our brand new Trick Photography eBook with a 25% discount for early birds.
You must be logged in to post a comment.