RSS
 

Posts Tagged ‘Distance’

Hasselblad firmware update adds Distance Meter, improved Interval Timer features to its X1D II 50C, 907X 50C cameras

30 Oct

Hasselblad has released a pair of firmware updates for its X1D II 50C and 907X 50C medium format cameras that adds, amongst other improvements, an on-screen distance scale for measuring focus and improved intervalometer features.

Firmware version 1.4.0 for both the X1D II 50C and 907X 50C adds a new Distance Scale feature that effectively recreates the distance scale that’s traditionally on the lens and overlays it on the liveview display. It can be set to metric or imperial units and will work with any XCD lens updated to the latest firmware.

Hasselblad has also improved the Interval Timer feature, adding the option to capture up to 1,000 frames (previously, the limit was 99 frames or ‘No Limit.’ When shooting between 2 and 25 frames you can select any number; from 25–100 you can select intervals of five; and from 100–1,000 you can select intervals of 50. The ‘No Limit’ option also remains.

Hasselblad has also added the ability to meter the exposure for every shot. Previously, the first image captured served as the baseline by which all subsequent images’ exposure settings were shot at. Now, the cameras will be able to meter for each individual frame, which should help when capturing timelapses in varying lighting conditions.

The firmware updated also improves compataibility with Hasselblad’s Phocus Mobile 2 app, improving live view quality and addressing a bug that prevented the camera from changing its white balance settings when changed inside the app. Other changes include an array of unspecified bug fixes.

You can download firmware version 1.4.0 for the X1D II 50C and 907X 50C on Hasselblad’s website (at the bottom of the page — note you will need to be logged into your Hasselblad account).

Articles: Digital Photography Review (dpreview.com)

 
Comments Off on Hasselblad firmware update adds Distance Meter, improved Interval Timer features to its X1D II 50C, 907X 50C cameras

Posted in Uncategorized


Lensrentals bought a $10K machine to test the flange-to-sensor distance of more than 2,500 cinema cameras

04 Jun

Roger Cicala and his team over at Lensrentals have made the most of their COVID-19 downtime by spending the past few months painstakingly measuring the flange-to-sensor distance of more than 2,500 cameras to see just how much variation there is from cinema camera to cinema camera (even identical models).

In the first of a two-part series on the testing and results, Roger breaks down why flange-to-sensor distance is important, details ‘how accurate is possible,’ explains how the Lensrental team went about testing and shares the first bits of data from the meticulous testing of popular cinema cameras.

This is what using a $ 10,000 Denz Flange Depth Controller looks like.

To achieve this testing, Roger invested in a Denz Flange Depth Controller, which costs about $ 10,000 and can measure flange depth to the nearest 0.01mm. Even after receiving the new equipment, he and Aaron spent a month confirming its accuracy before eventually training ‘Poor Ben’ on how to use the machine.

Over the following weeks, Ben ended up measuring and re-measuring the flange-to-sensor distance of more than 2,500 cameras worth roughly $ 10M (yes, million).

The red circles denote Canon Cinema cameras that had more variation than is to be expected for the flange-to-sensor distance.

For this first part of the series, Roger breaks down the spread of Canon Cinema Cameras, Sony Cinema Cameras, non-Canon EF-mount cameras and Blackmagic cameras to show just how much variation the models and individual cameras had. To his surprise, there were a few outliers, but as always, Roger seems to have gotten to the bottom of it and has learned through this testing that the Lensrentals team can and will be able to better screen these less-accurate cameras so everything going out their doors is up to snuff.

You can check out the full breakdown on the Lensrentals blog, linked below. Part two will be out in the near future and will address the flange-to-sensor distance of ‘SLR style’ camera bodies.

Lensrentals: The Great Flange-to-Sensor Distance Article

Articles: Digital Photography Review (dpreview.com)

 
Comments Off on Lensrentals bought a $10K machine to test the flange-to-sensor distance of more than 2,500 cinema cameras

Posted in Uncategorized


Labyrinthine Loophole: Bar Entry Maze Beats 500 Meter Minimum Distance Law

17 Apr

[ By WebUrbanist in Architecture & Offices & Commercial. ]

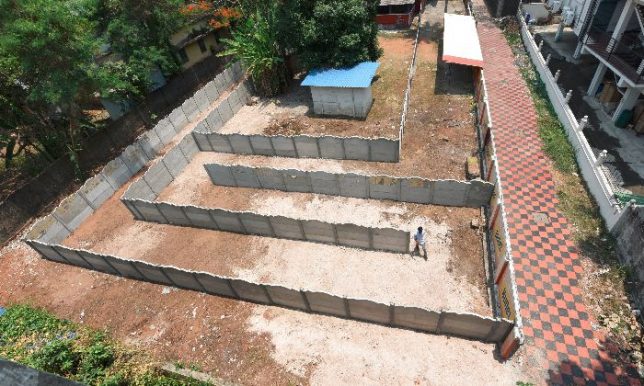
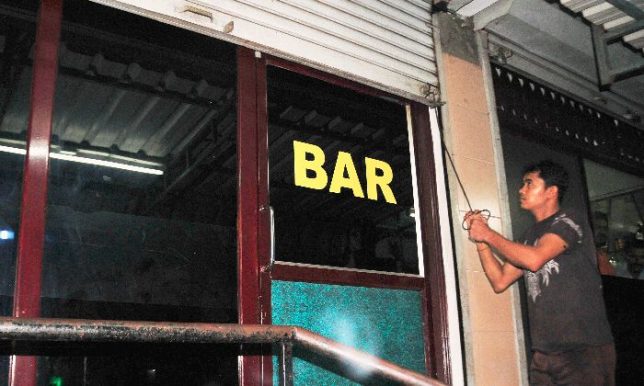
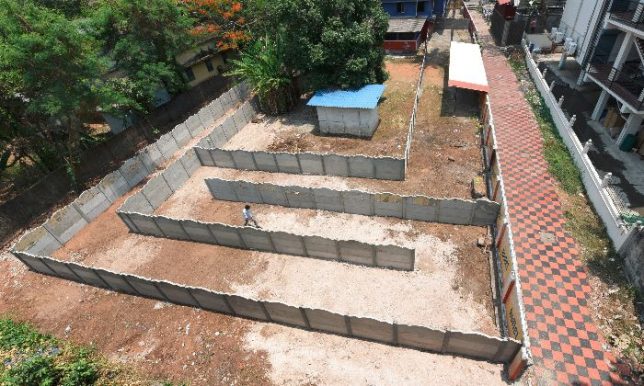
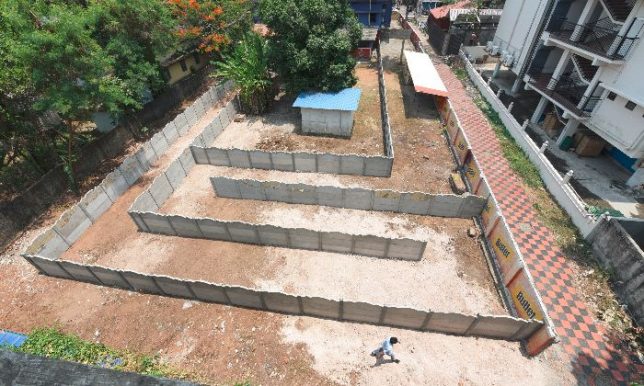
Following a Supreme Court of India ruling that bars must be a minimum of 500 meters away from highways, one intrepid watering hole wrapped itself in a 250-meter maze to effectively circumvent the law. Handed down earlier this month, the ruling has closed down liquor-serving establishments across the country prompting some to get creative.

Owners of the Aishwarya Bar in North Paravoor, a Kochi suburb, maintain: “We have done nothing illegal. The plot behind the bar also belongs to the owner and we have constructed an extended way to reach the bar. Now it is 520 meters from the highway. We are set to approach the circle inspector of excise with the new route map to authorize the reopening of the bar.”

Perhaps most remarkably: since the purpose of the law relates to walking distance (rather than linear), officials have given their blessing to this unusual solution — he intent of the legislation, after all, is to reduce intoxicated driving accidents. With that potential code violation remedied, the only accusation left leveled against the establishment related to changing around the property without a building permit, resulting in a small fine.

The solid-walled fence shaping the labyrinth was installed at minimal cost in a matter of days, expanding into adjacent property also owned by the bar’s manager. Pub crawlers, meanwhile, may find themselves somewhat lost when loaded, but at least there are no dead ends. However, bars like this one may still find themselves with fewer customers since the federal ruling also prohibits roadside signage directing drinkers to pubs. Other specific exceptions have been granted on a case-by-case basis, but this particular solution may lead to a series of similar approaches.

Share on Facebook


[ By WebUrbanist in Architecture & Offices & Commercial. ]

[ WebUrbanist | Archives | Galleries | Privacy | TOS ]


WebUrbanist

 
Comments Off on Labyrinthine Loophole: Bar Entry Maze Beats 500 Meter Minimum Distance Law

Posted in Creativity


Lighting 102: Distance

02 Aug

Just like your focus, light has depth of field.

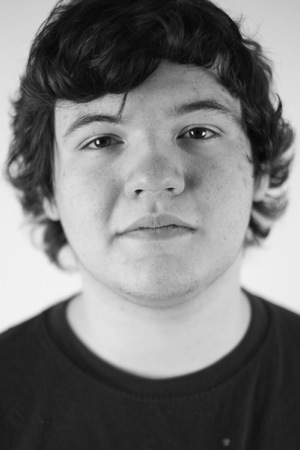
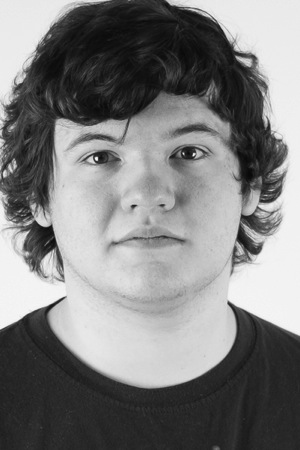
For this layer of control, we are going to look at two different pictures. Everything will be the same except for one thing: The distance from our light to our subject will change. Nothing else. In particular, the subject-to-background distance will not change.

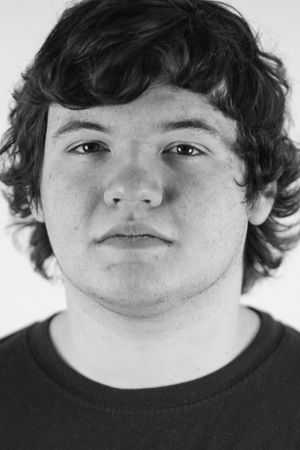
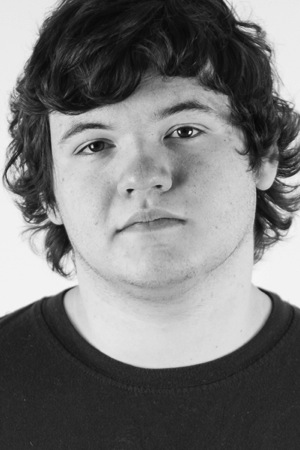
Exhibit number one is a dark portrait of Dean, situated a few feet in front of a white wall, pictured above.

White wall? Yes, white. But it doesn't look white, does it?Read more »
Strobist

 
Comments Off on Lighting 102: Distance

Posted in Photography


Lighting 102: Combining Distance and Two Lights

02 Aug

By using a second light to ensure legibility in the shadows, we can place a "floor" on how low the tones will go on our subject. But we can also combine this with the fast falloff of a closely placed key light to get total control of a subject with an inherently tough dynamic range.Read more »
Strobist

 
Comments Off on Lighting 102: Combining Distance and Two Lights

Posted in Photography


The ultimate hiking partner? Sony’s RX10 III goes the distance

10 May
Mount Rainier, captured from the trail up Mount Teneriffe, near North Bend in Washington State. ~200mm (equivalent), ISO 800. Still another 2 miles to go until lunch, and another 400mm to go before the RX10 III’s maximum telephoto setting.

Sony’s new Cyber-shot RX10 III might look a lot like the older RX10 II, but its lens is really something else. With an effective focal range of 24-600mm, the RX10 III is one of the most versatile cameras we’ve ever used. But focal range is only part of the story – it’s optical quality that impresses us most. And boy, are we impressed.

Hiking with the Sony Cyber-shot RX10 III

A very short shooting experience by Barnaby Britton

Caveat: This is not a review, nor is it sponsored content. This is a shooting experience based largely on a single day of picture-taking, during a hike. Four miles up a mountain in the sunshine, four miles down in the dark. One memory card half-filled, one battery half-emptied. All shots were processed ‘to taste’ from Raw and all are un-cropped. Your mileage (both literal and figurative) may vary.

I’ve been searching for the ideal hiking camera for years. Since I moved to the Pacific Northwest I’ve tried and rejected DSLRs, fixed-lens primes, travel zooms, super-zooms and several iPhones. Recently, I’ve been packing my Ricoh GR II for its small size and sharp lens, but the lack of a viewfinder really limits its usefulness in some conditions.

The last time I brought a DSLR on a mountain hike I almost left it tucked under a rock on the trail, rather than drag it all the way up (that was the old, famously brutal Mailbox Peak trail, for any PNW natives reading this…).

Pretty good flare performance, considering the complex lens. This shot was slightly adjusted in ACR to bring out a little detail in the shadows. 24mm equivalent, ISO 100.

It’s been a few years since I experimented with a superzoom compact camera, after a couple of bad experiences with sub-par lens performance. I’ve always liked the idea of them, but all too often I’ve been disappointed by the results in practice. These days, though, as my colleague Jeff likes to remind me, the good ones are actually pretty good.

OK, sure, but ‘pretty good’ for a super zoom is only ‘OK, ish’ by the standards of a shorter-lens compact or interchangeable lens camera, right? Well, that’s what I thought, too. Until…

We knew the sensor is good from our experience of using the RX100 IV, but the Sony Cyber-shot RX10 III’s major selling point is its lens. And the lens in the RX10 III is, as far as I can tell, made of magic. I genuinely have no idea how Sony’s engineers packed a 24-600mm equivalent lens of such high quality into a camera this small. It defies all reason. From wide-angle all the way to extreme telephoto, the RX10 III’s lens delivers impressive results. Weirdly impressive.

As well as distant details, the RX10 III is capable of capturing sharp images of tiny things, very close to the camera. Like these wildflowers. 24mm equivalent, ISO 100.

Now, obviously I could take technically better shots with a DSLR and a fast zoom, or for that matter a prime lens compact like the GR II. Portraits with shallower depth of field, landscapes with critically better edge-to-edge sharpness and all the rest. But this past weekend a DSLR was out of the question. If I’m hiking up a mountain in 80+ degree weather, I’m traveling as light as possible. Most of the weight on my back this weekend was drinking water, and although it’s a fairly chunky camera, the RX10 III was light enough to clip onto the shoulder strap of my backpack with one of these.

Mount Teneriffe on a hot day is a pretty demanding hike, but the view from the top makes it worthwhile. 40mm equivalent, at ISO 100.

The Ricoh GR II is lovely, but I knew that from Mount Teneriffe I’d be looking at three peaks – Mount Rainier, Mount Baker, and Glacier Peak, as well as Mount Si and Mailbox, a little closer at hand. So 28mm just wasn’t going to do the job. We timed our hike so that the sun would be go down shortly after we summited, and I knew that I wanted a nice, closeup (ish) shot of Mount Rainier’s famous purple glow (see the picture at the top of this page).

Exposed for the highlights, it was easy to brighten shadow areas in this shot using Adobe Camera Raw. 24mm, ISO 100.

You can’t really see here, but just where the blade of grass meets the horizon to the right of my subject, is Seattle’s distinctive skyline. See below for a shot taken from the same vantage point at 600mm.  

A lot of the prejudice about long zoom compact cameras comes from a misunderstanding of how to interpret their lens performance, especially at the long end. Atmospheric distortion and haze from moisture, pollen and pollutants will reduce the sharpness of any telephoto lens, especially on warm days.

So if your telephoto shots look like they were taken through a frosted bathroom window, the lens might not be the culprit. On the other hand, if everything in your pictures looks like someone went over the edges with a magenta highlighter pen – well, that’s the lens.

Seattle at sunset, from almost 40 miles away. 600mm equivalent, at ISO 100. Moderate ‘dehaze’ applied in Adobe Camera Raw. 

I had no such issues with the RX10 III (which was reassuring, since it costs $ 1500) but as always, I was shooting Raw, so what little fringing I did see in my images was easy to correct. Likewise, Photoshop’s ‘dehaze’ control in Camera Raw came in very useful to bring back some clarity to images taken at the telephoto end of the RX10 III’s lens. 

Mount Baker, seen through more than 90 miles of pollen-laden air, just before sunset. This shot didn’t require quite so much dehazing as the last one. 600mm equivalent, ISO 250.

During a day’s shooting during which my hiking partner and I walked a roundtrip of about 13 miles up and down a 4500ft peak, the RX10 III nailed virtually every shot. And that’s everything from a knee-level picture of some tiny wildflowers a few centimeters away from the lens, to a 600mm capture of Mount Baker, 90 miles away from my vantage point and half lost in haze (above).

We hiked about half of the trail back to the car in the dark. For the last half mile we were accompanied by an owl. This grab shot was taken at ISO 12,800, by the light of our headlamps. At 95mm equivalent, there’s no motion blur at 1/15sec.

From these sunset landscapes to ISO 12,800 snapshots of an owl that followed us back to our car at the trailhead, every time I looked at something and went ‘oooh’ and tried to take a picture of it, the RX10 III – and its insanely wide-ranging lens – got me the shot that I wanted. 

Hiking through the forest just before sunset. 50mm equivalent at ISO 6400.

We’re working on a more scientific assessment of the RX10 III’s lens right now, but in the meantime, I hope you enjoy our updated samples gallery (now with Raw files!).

I’ve only been using the RX10 III for a few days, and there are plenty of things I don’t like about it (confusing menus, clunky ergonomics, no touchscreen, laggy GUI, the aluminum lens and focus rings scratch the minute you look at them) but somehow, despite all that, I’m already planning next week’s hike.

$ (document).ready(function() { SampleGalleryV2({“containerId”:”embeddedSampleGallery_0737303360″,”galleryId”:”0737303360″,”isEmbeddedWidget”:true,”standalone”:false,”selectedImageIndex”:0,”startInCommentsView”:false,”isMobile”:false}) });
Articles: Digital Photography Review (dpreview.com)

 
Comments Off on The ultimate hiking partner? Sony’s RX10 III goes the distance

Posted in Uncategorized


Depth of Field and the Importance Distance to Subject Plays

12 Feb

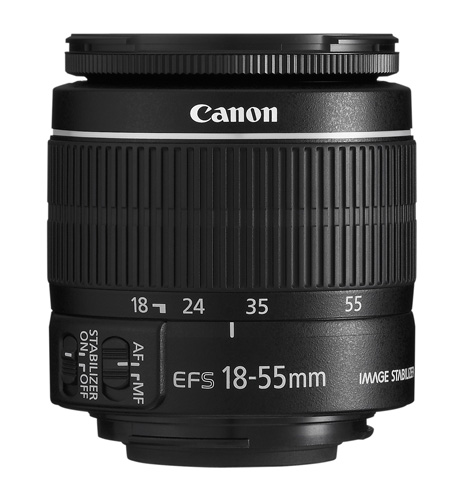
Let’s say that perhaps you’ve been taking photos for a while now. You’ve gotten yourself a good DSLR camera and have recognized that the standard 18-55mm kit lens that comes with your camera is nice, but just doesn’t give you the shots that you are looking for.

IMG

So you plunk down your money on the ever-popular 50mm f/1.8 prime lens that everybody is talking about, mount in on your camera, change your aperture to its widest (f/1.8) setting and start shooting. You spend all day shooting with this wonderful little lens and then you get home and put them on your computer and realize that 80% of your shots are out of focus.

In the past, when this used to happen to me, I would reason that shooting wide open was just not possible, because I ended up with too many shots that were out of focus. I incorrectly reasoned that I always needed to close down my aperture when shooting portrait subjects, or they would end up out of focus because the shallow depth of field was just too unusable wide open. For a while, I only used my 50mm 1.8 lens at f/4 because it was the widest aperture that I trusted to get the shot in focus. Crazy yes, I know. But then I figured out something that has changed my use of wide-aperture lenses forever.

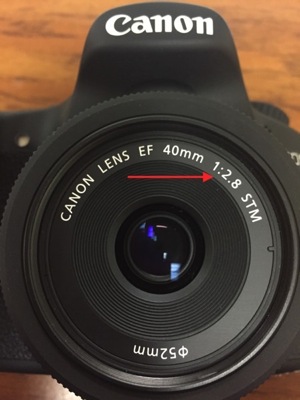
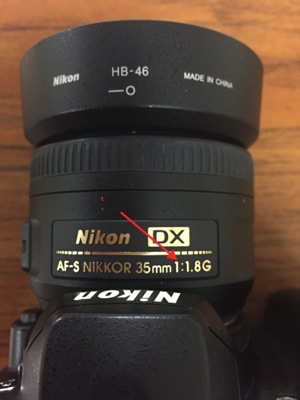
Before we continue, let’s break down the meaning of “wide open” and “fast prime lenses”. To shoot “wide open” means that you are choosing to photograph at your lens’ widest aperture setting or f-stop. On a lot of lenses, the widest aperture is listed somewhere on the lens itself with Canon usually listing it on the front of the lens, and Nikon listing this information on the body of the lens. Generally the ration looks something like this: 1:2.8 or 1:1.8. (See photos)

IMG 4418 IMG 4419

A “fast prime lens” is one that has one focal length (does not zoom) and has “fast” light-gathering ability (due to its wider apertures). Most photographers consider a fast lens to be one with an aperture number of f/2.8 or wider (the smaller the number, the wider the aperture). Two of the most popular features of fast prime lenses are their ability to obtain beautiful out of focus backgrounds and shallow depth of field, as well as their ability to handle low-light conditions because of the aforementioned large apertures.
Let me let you in on a little secret about shooting wide open – it’s about the distance to your subject. Most people learn that wide-aperture lenses blur the background and let in more light, but they never understand that the really neat shallow depth of field created by their lens is also affected by another factor; how close they are to the subject.

You won’t find many manuals on subject to camera distance. It’s kind of an assumed topic that doesn’t get enough attention. Let’s look at it as simply as possible: the closer you are to your subject, the shallower the depth of field is relative to your chosen aperture. In other words, if you are shooting at f/1.8 and you are 20 feet away from your subject, you will have MORE depth of field than you will if you are shooting 2 feet away from your subject.

To get more mathematical, if you’re using a 50mm lens at f/1.8 and photographing something at 4 feet, your depth of field will be around 1.5 inches deep. But if you photograph that same subject from 10 feet, you will have a depth of field of just under 10 inches deep.

2ft 35mmP

Shot at 2ft with a 35mm lens at f/1.4.

9ft 35mmP

Shot at 9ft with a 35mm lens at f/1.4. 

The right image cropped to similar framing as the left. Notice the increase in depth of field on the hair and ears, and also the reduction in lens distortion.

2ft 35mm

Shot at 2 ft with a 35mm lens at f/1.4.

9ft 35mm

Shot at 9ft with a 35mm lens at f/1.4. Cropped to similar framing. Notice how the pencils in the back row come into focus.

With this information, it is also very important that you get to really know your lens and its abilities. For instance, if you happen to know that you shoot a lot of portraiture close to your subjects, be aware of how much depth of field your lens gives you at three feet, four feet, and so on, when shooting wide open. In time, with experience, you will be able to immediately predict the depth of field your lens will give you based on the distance you are away from your subject.

5ft 85mmP

Shot at 5ft with an 85mm lens at f/1.4.

12ft 85mmP

Shot at 12ft with an 85mm lens at f/1.4.

The depth of field does increase slightly in the right image, but not as dramatically as the 35mm lens due to the 85mm longer focal length.

In conclusion, you can see that the reason your photos might be coming out blurry would be because of your distance to your subject when shooting wide open. So the next time you find yourself frustrated at your results shooting with that wide-aperture lens at its widest aperture, take a step or two back. You might like the results.

googletag.cmd.push(function() {
tablet_slots.push( googletag.defineSlot( “/1005424/_dPSv4_tab-all-article-bottom_(300×250)”, [300, 250], “pb-ad-78623” ).addService( googletag.pubads() ) ); } );

googletag.cmd.push(function() {
mobile_slots.push( googletag.defineSlot( “/1005424/_dPSv4_mob-all-article-bottom_(300×250)”, [300, 250], “pb-ad-78158” ).addService( googletag.pubads() ) ); } );

The post Depth of Field and the Importance Distance to Subject Plays by Al Jurina appeared first on Digital Photography School.


Digital Photography School

 
Comments Off on Depth of Field and the Importance Distance to Subject Plays

Posted in Photography


Landscape Photography and Hyperfocal Distance

20 Feb

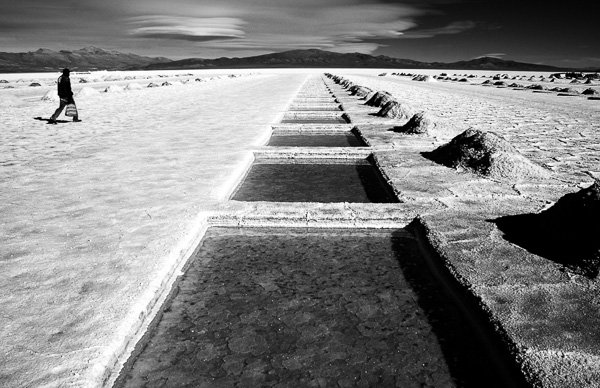
Salinas Grandes, Argentina

I can remember when autofocus was relatively new and many photographers distrusted it. Now it’s the other way around – autofocus has become so good and so ubiquitous that manual focus lenses are a rarity. It’s easy to forget that sometimes it’s better to turn it off and use manual focus instead.

A good example of this is when you use a wide-angle lens to take a landscape photo. In this situation, you probably want to record the entire scene as sharply as possible. But how do you do this when the nearest part of the scene may be only centimetres (less than an inch) from your camera?

The answer is that you need to understand depth of field and be willing to take control and decide exactly where you want to focus the lens, rather than leave it up to the camera.

What is depth of field?

Depth of field is the area either side of the point of focus that appears to be sharp. The amount of depth of field depends partly on camera settings (the focal length of the lens and the aperture) and partly upon other factors such as the size of the photo and the eye of viewer. Sharpness is subjective – what might appear to be sharp to one person may not appear so to another. Keep this point in mind as we progress through the article.

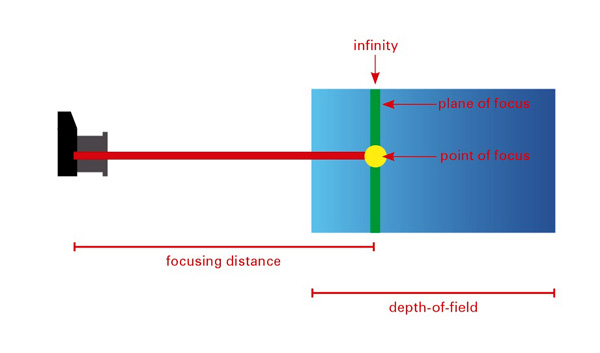
Hyperfocal distance diagram

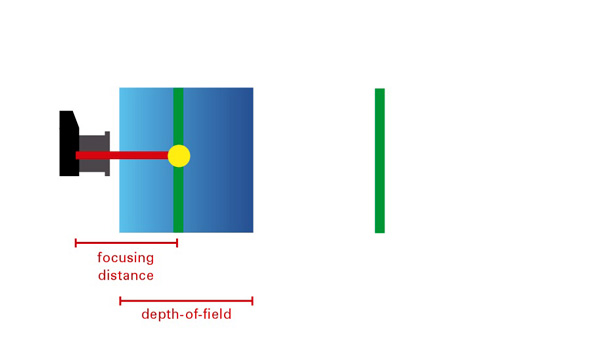
This diagram shows the depth of field when you focus on infinity. You can see that most of the zone of sharpness (another term used to describe the areas that are in focus) extends beyond the point of focus and is effectively wasted.

Depth of field in action

The best way to understand how depth of field works is with a practical example. Imagine that you are using a 24mm lens (or a zoom lens set to 24mm) on an APS-C camera focused on a point exactly one metre (3.3′) from the camera. You want a nice sharp image so you have set the aperture to f/11 (the sharpest aperture settings on most lenses are f/8 and f/11). In this case everything between around 73cm (28.75″) and 157cm (5’1″) will be sharp.
Hyperfocal distance diagram

This is what happens if you focus too closely to the camera. You will get the area around the point of focus sharp, but anything close to the horizon will not be sharp.

In reality, what is happening is that anything one metre (3.3′) from the camera (the point the lens is focused on) is sharp, and then everything either side gradually becomes less so until it reaches the point where it no longer appears to be in focus to the human eye.

Where did I get the above figures from? I used the depth of field calculator at DOF Master and selected EOS 7D as the camera. The camera is important as depth of field as affected by sensor size, as well as lens focal length and aperture.

We have already seen that focusing on infinity effectively wastes depth hyof field. You’ll get a better result using the hyperfocal distance.

What is hyperfocal distance?

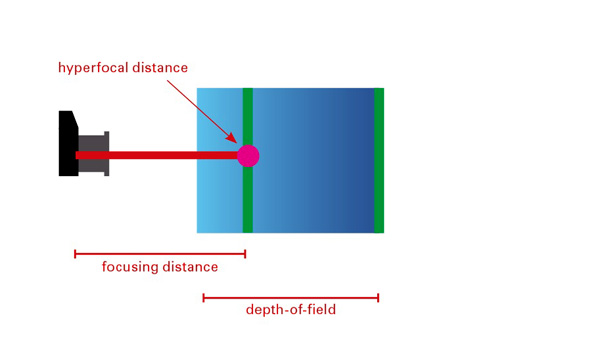
The depth of field calculator throws up another figure – the hyperfocal distance. This is the closest point at which you can focus the lens at this focal length and aperture settings, and still keep everything from the focusing point to infinity in focus.

In this example the hyperfocal distance is 2.7m (8’11″). Focus on this point and everything from 1.34 metres (4’5″) to infinity is in focus. That maximizes depth of field and helps you get the entire scene sharp.

Hyperfocal distance diagram

This diagram shows what happens when you focus on the hyperfocal distance. Depth-of-field is maximised, helping you to create a sharp image.

Note that the near focus point (1.34 metres or 4’5″) is half the hyperfocal distance of 2.7 metres (8’11″). This ratio holds true no matter the hyperfocal distance of your lens, aperture and sensor size combination.

Hyperfocal distance in action

The easiest way to use the hyperfocal distance is to print out or photocopy some hyperfocal distance tables to take with you on a shoot (the DOF Master website has tables you can print out here).

Alternatively, there are several smartphone apps that will perform the calculations for you such as these (do a search for DOF or hyperfocal distance, there are plenty of others)

  • Simple DoF
  • DOF Master
  • Tack Sharp
  • DoF Viewer
  • Digital Photo Calculator

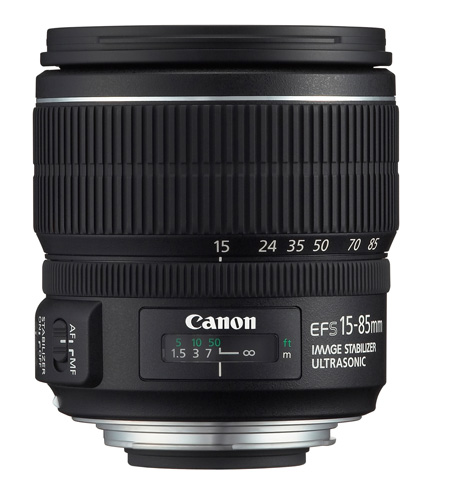
Once you have the information, you need a lens with a depth of field scale on the barrel to tell you the distance at which the lens is focused. Many lenses have these, but some don’t (including lots of kit and pancake lenses). Distance scales aren’t precise, so be prepared to work with approximate measurements.

Canon lens with distance scale

An example of a lens with a distance scale.

Canon lens without distance scale

A lens without a distance scale.

If your lens doesn’t have a distance scale, your only option is to guess the distance (or use a tape measure!). Luckily, it’s not hard to guess distances. In the above example, you would know that focussing on a point around 3 metres (approx. 10′) from the camera will maximize depth of field, so it’s not that hard to make a guess.

After you have taken a photo you can double check sharpness by playing it back on the camera’s LCD screen and enlarging it as much as you can. The usefulness of this depends on the clarity and size of your LCD screen, but you should be able to tell if the parts of the scene closest to you are unsharp. You will only really know for sure once you get home and look at the photo on your monitor, but checking the LCD screen reveals any major errors in your calculations.

Given all the variables and potential for mistakes, one way to apply hyperfocal distance is to use the calculations for one aperture setting (e.g. f/8) but set the camera to a smaller aperture (such as f/11). This gives you margin for error.

Notes on using hyperfocal distance

A couple of things to be aware of:

First, the depth of field calculations in this article are based on something called the circle of confusion. This is the maximum size at which an out of focus dot appears to be sharp to the human eye. Circles of confusion are necessary because they form the basis of depth of field calculations. Each camera and lens manufacturer makes its own judgement as to which size circle of confusion they will use for their calculations. That means the figures in depth of field calculations and hyperfocal distance tables vary according to the circle of confusion size the figures are based on.

If you didn’t understand that, don’t worry. This video explains it perfectly:

Second, you will often read that depth of field extends 1/3 in front and 2/3 behind the point being focused on. This isn’t true. Focus on something close to the camera and the split is closer to 50/50. Focus on something far away from the camera and the split may be 10/90. Advice that you should focus 1/3 of the way into the scene to maximize depth of field is well intended, but inaccurate.

More reading on this topic at Getting Landscapes Sharp: Hyperfocal Distances and Aperture Selection


Understanding Lenses ebooks

Understanding Lenses ebooksMy ebooks Understanding Lenses Part I and Understanding Lenses Part II will help Canon EOS owners decide what lenses to buy for their cameras. They are both filled with lots of tips to getting the most out of your Canon lenses. Click the links to learn more.

The post Landscape Photography and Hyperfocal Distance by Andrew S. Gibson appeared first on Digital Photography School.


Digital Photography School

 
Comments Off on Landscape Photography and Hyperfocal Distance

Posted in Photography


Microsoft Publisher 2010 – Nudge Objects Slightly and Configure the Nudging Distance

30 Oct

Move objects in Publisher 2010 publications slightly without using the mouse, and fine-tune this nudging distance.

Instead of always using the mouse in Microsoft Publisher 2010 to move objects around a publication, you can click on an object and then press the arrow keys to move objects slightly up, down, left, or right. You may find this convenient when fine-tuning a document layout.

By default, nudging moves objects by a very small distance (1 pixel). Depending on your needs and layout you may wish the arrow keys to nudge objects a larger distance. To make this change:…

Read more at MalekTips.
New Computer and Technology Help and Tips – MalekTips.Com

 
Comments Off on Microsoft Publisher 2010 – Nudge Objects Slightly and Configure the Nudging Distance

Posted in Technology