RSS
 

Posts Tagged ‘Displacement’

How to Create Cool Effects Using Displacement Maps in Affinity Photo

17 Feb

The post How to Create Cool Effects Using Displacement Maps in Affinity Photo appeared first on Digital Photography School. It was authored by Kevin Landwer-Johan.

create cool effects with displacement maps in Affinity Photo

Adding natural-looking text to a photo can be challenging. But with displacement maps in Affinity Photo, you can easily produce awesome-looking text blends.

In fact, it takes just a few clicks to merge text with a second photo, so that it looks like the text was there all along.

There are a couple of different ways to achieve this look in Affinity Photo. If you’re used to other image manipulation software, you may be familiar with some of the steps. And if you’re new to Affinity Photo, you may not be aware of the features that make creating cool effects using displacement maps even easier.

So let’s dive right in!

Blend overlay example of displacement maps in Affinity

What are displacement maps in Affinity Photo?

Displacement maps in Affinity Photo allow the texture of an image to be mapped onto another layer.

Displacement maps are commonly used to add natural-looking text to an image. You can use them when you want to place a logo or text on a t-shirt or make text look like a natural part of a scene.

example of displacement maps in Affinity

How to create a displacement map: Step-by-step instructions

As with pretty much any editing effect, there is more than one way to reach your end goal.

In this article, I will show you a simple, step-by-step method I use to create displacement maps in Affinity Photo.

Specifically, I’ll use Affinity Photo’s Displace filter.

Using the Displace filter is a great way to work with displacement maps. It’s quick, easy, and non-destructive.

This means you have a great deal of control. You can apply your Displace filter and tweak it as much as you like – without permanently altering the underlying photo.

Step 1: Open your mapping image

Select the image you plan to modify. Open it in Affinity Photo.

Locate the file with your text or logo, then drag and drop it onto the underlying image file.

You can use a TIFF or PNG file with transparency. Alternatively, type in the text you want to use, as I’ve done in my example file (below).

Position your image or text where you want it to appear. If you’ve chosen to type your text, pick the font and color you think will best suit your needs.
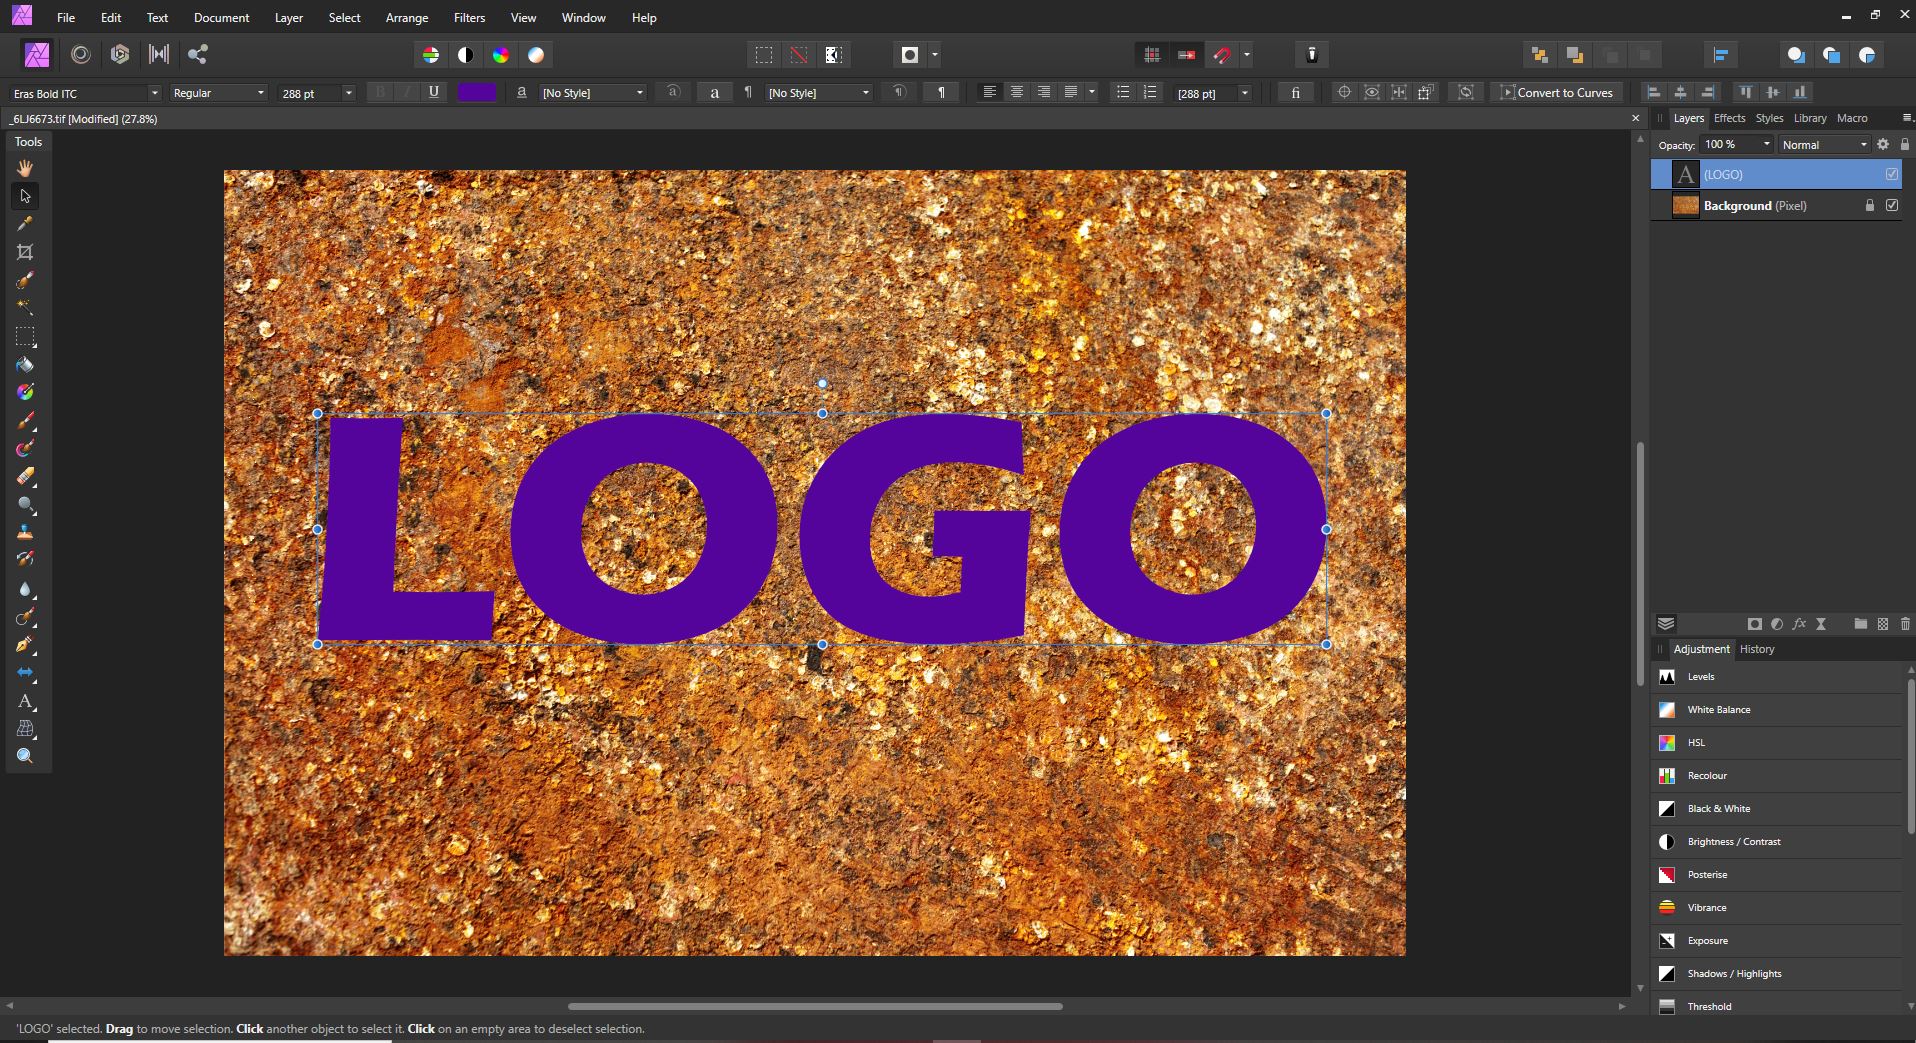
Screen grab from Affinity Photo showing displacement maps in Affinity

Step 3: Create a live filter layer

In the top menu, choose Layer.

Then go down to New Live Filter Layer>Distort>Displace Filter

Screen grab from Affinity Photo

In the Layers panel, you will now see a live displacement map filter added to your logo or text layer. 

Screen grab from Affinity Photo showing displacement maps in Affinity

Step 4: Choose a displacement map

In the displacement map dialog box, you will have the option of loading a map from a file or loading it from other layers. Sometimes you may have a separate image you want to use as your mapping layer. In this example, I will show you how to use the lower layer to create a displacement map, because this is what will typically provide you with a great result.

Click on the option to Load Map From Layers Beneath. At this point, depending on the resolution of the photo you are working with, you may begin to see the effects of the mapping filter.

(But don’t worry if you can’t yet see this; we’ll work on the effect in the next steps.)

Step 5: Adjust the displacement strength

Use the slider in the Displace filter dialog box to increase or decrease the strength of the filter.

Adjust the filter intensity until your top layer merges naturally with the image below.

Note that this is just the first level of adjustment. In the next steps, you’ll discover how to fine-tune the result, so don’t be concerned if you can’t yet get your image looking exactly how you want.

Screen grab from Affinity Photo

Step 6: Rasterize the text layer

At this point, if you are working with a text layer or some other non-rasterized layer, you need to rasterize it so the next step will work.

Right-click on the text layer and select Rasterize.

Step 7: Control your blending options

Now it’s time to further adjust how your text or logo blends with the layer beneath it.

Click on the cog icon in the Layers panel. (It’s between the blend mode drop-down and the padlock icon.)

A new dialog box will appear; this lets you control the blending options for your layer. Note the two curves graphs:

Screen grab from Affinity Photo

You’ll want to use the rightmost curve, labeled Underlying Composition Ranges. But before you start, make sure to uncheck the Linear box below it. 

Now click and drag from the top left of this curve. Watch as your text or logo further blends with the layer beneath. Continue to click and drag on the curve until you have a look you’re happy with.

Step 8: Tweak the displacement amount

If you’ve merged an image rather than text, you can now go back and tweak the Displace filter.

(If you merged text, this option won’t be available, because the filter is combined with the text layer when it’s rasterized.)

Step 9: Change the blend mode

For further control, you can select a different blend mode for your text or logo layer.

Scroll through the options in the blend mode drop-down box until you find one that best fits the look you want.

You can also decrease the opacity of the top layer so the underlying texture shows through more.

displacement maps in Affinity example

Using displacement maps in Affinity Photo: Conclusion

The key to success in all photo manipulation is experimentation.

So if you want to create a stunning result, use these steps as guidelines, but don’t be afraid to play around. Push the boundaries!

Using displacement maps in Affinity Photo is fun and non-destructive. This means you can try as many options as you like without permanently affecting your images!

Now over to you:

How do you plan to use displacement maps? Share your thoughts (and images) in the comments below!

The post How to Create Cool Effects Using Displacement Maps in Affinity Photo appeared first on Digital Photography School. It was authored by Kevin Landwer-Johan.
Digital Photography School

 
Comments Off on How to Create Cool Effects Using Displacement Maps in Affinity Photo

Posted in Photography


Get Creative with Displacement Maps in Photoshop

09 May
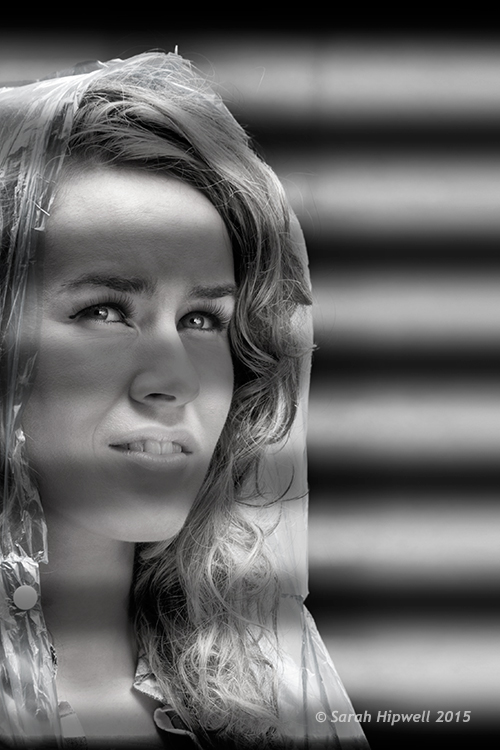
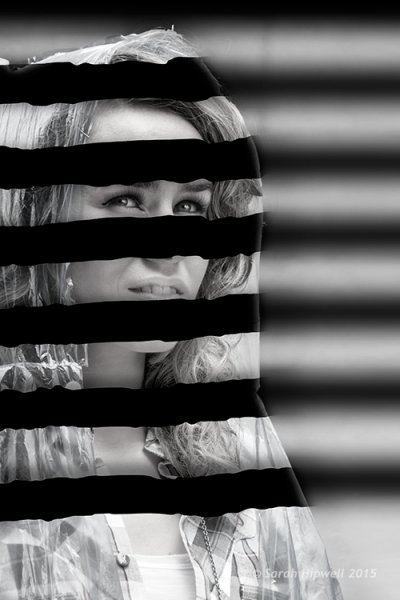
Creating a film noir look with a displacement map in Photoshop.

Creating a film noir look with a displacement map in Photoshop.

What is a Displacement Map?

If you are new to Photoshop, the mere mention of displacement maps can be daunting. The purpose of this article is to give you an introduction to them; guide you in easy-to-follow steps on how to generate simple grayscale displacement maps from an existing image, and show you how to effectively implement them using the Displace Filter in Photoshop.

A displacement map is a grayscale version of the same image that you are working on, saved as a Photoshop (.PSD) file. This displacement map is then used to apply a texture to a flat graphic via the Displace filter, and it distorts the graphic to conform to the shape of the map. This gives the flat graphic, or 2D object, a more realistic 3D look. You may have seen images online where a texture is mapped onto someone’s face or a logo contoured onto a textured surface.

Why use Displacement Maps?

Displacement maps are a great way to map texture onto 2D objects, such as logos or text, add give depth and a 3D perspective. I hope to illustrate that displacement maps are not as daunting as they might appear, although, I do realize that this article may suit intermediate users of Photoshop rather than complete novices.

How to implement a Displacement Map?

Once a displacement map has been generated. You need to use the Displace filter to distort the 2D object, or flat graphic, onto the map. The Displace filter has been in Photoshop since version 2.0. It hasn’t changed much since then, however, it’s still a filter worth getting to know. It may appear to be a convoluted process to use, but when you have tried it a couple of times, it is straightforward. What it does is move the light pixels up and to the left and the dark pixels are moved down and to the right. This creates an illusion of depth through light. This is why your displacement map needs to be quite contrasty.

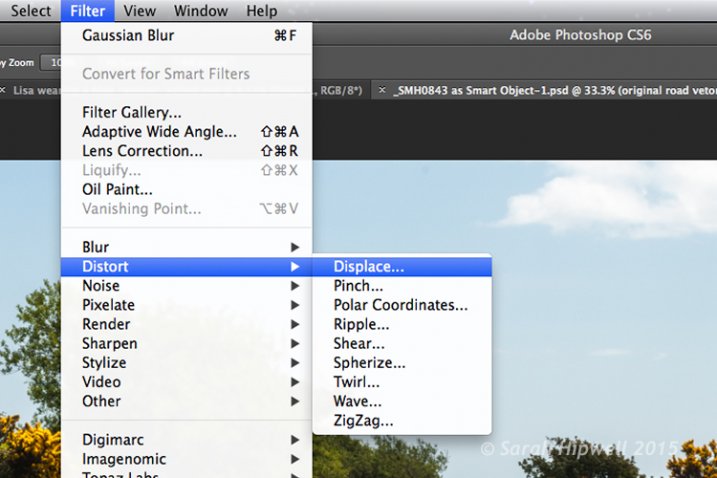
Filter-Distort-Displace

How to access the Distort filter in Photoshop.

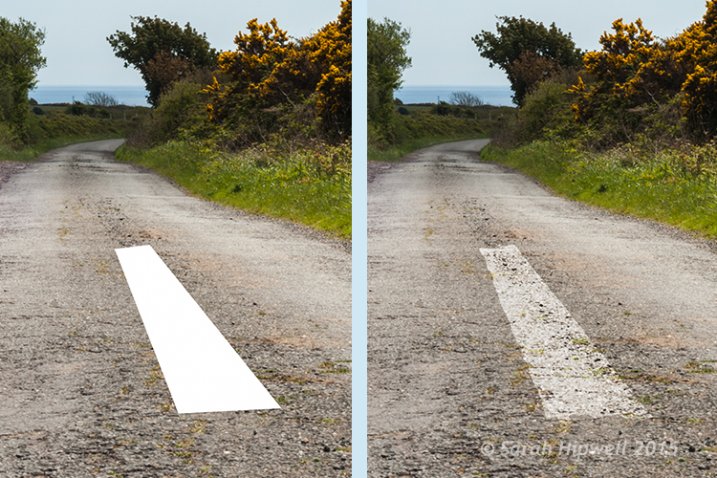
The first method I describe below shows you how to use a vector shape to create a road marking and map this onto a road surface. This process would be the same for applying logos or text on any textured background. In the other two examples, I describe how displacement maps can be used to create shadow effects. Let’s take a look.

1. Adding a realistic road marking

Before-after-road-marking

Before and after where the road marking has had a displacement map applied.

Aim: To create a realistic road marking from a vector graphic.

Let’s start with the base image of the road. The displacement grayscale map will be created from this image. The third image is the flat vector image of the road marking. I used the Polygonal Lasso Tool to draw a shape similar to a road marking and filled it with white. Convert this to a Smart Object, then hide this layer.

Displacement map process:

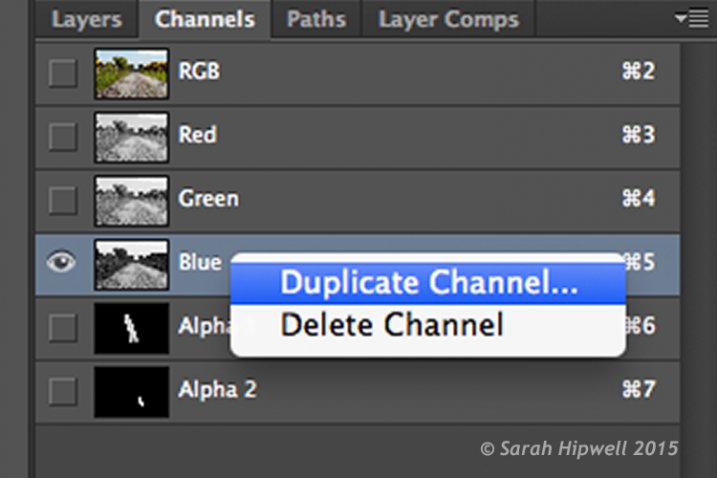
Open your Channels panel and click on each of the red, green and blue channels to see which has the most contrast. In this example, I chose the Blue one. Click and Duplicate this channel.

Duplicate-channel-panel

Duplicating the blue channel to create a displacement map.

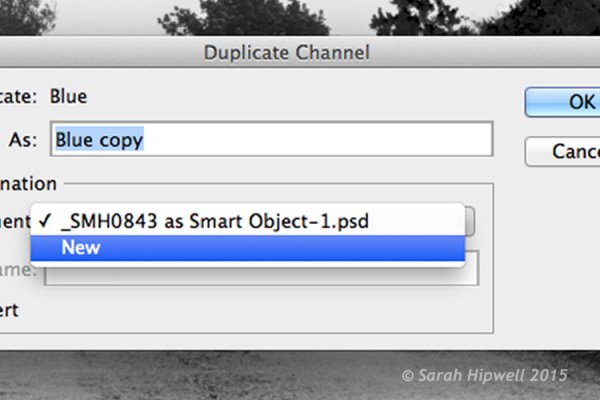
This brings up another dialog box (see below). Where it says Document, click on the tab and choose New. Name this file Displace road or whatever you want and click OK.

Duplicate-channel-new

Clicking on the Document tab to select New to create a new document for a displacement map.

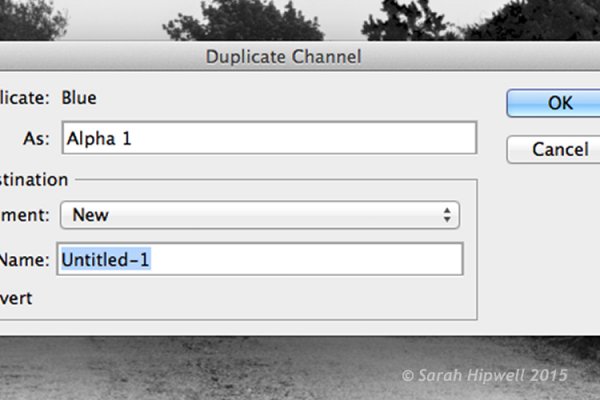
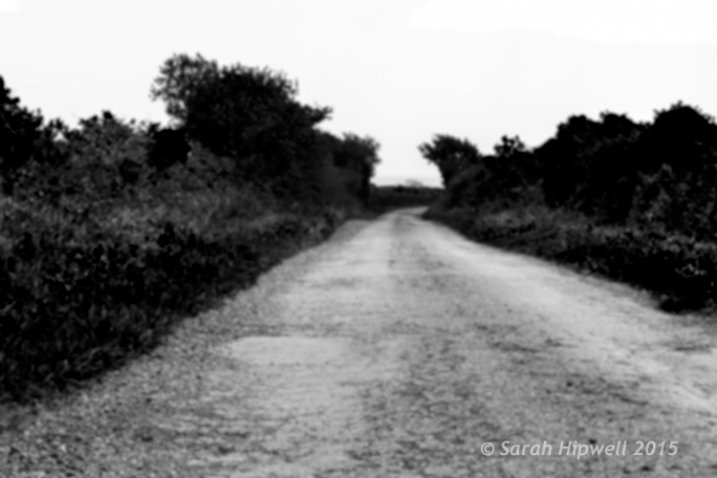
This creates a new document with the layer named Alpha 1. Before you save this document out as a grayscale PSD (Photoshop) file. You need to add some more contrast, go Menu> Image>Adjustments >Levels, then add Gaussian Blur of 9.9 pixels. This will allow the edges of the road marking vector shape to hug the contours of the road, rather than have a jagged edge. Convert this image to Grayscale and save it out as Displace road.psd. Close this document.

Duplicate-channel

This dialog box appears directly after selecting New in the previous step.

Displace-road

A grayscale displacement map of the road image.

Go back to the original document where we are still in the Channels panel and the blue channel is still highlighted. Click on the RGB layer, to bring back the image to colour.

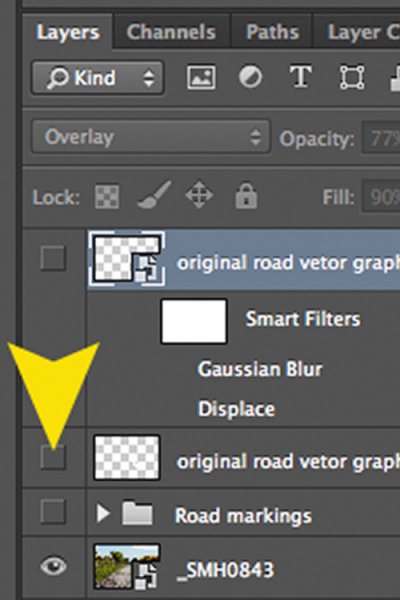
In the Layers Panel (I normally have this nested beside the channels panel) click on the square to the left of the layer thumbnail to bring back the visibility of the road vector shape that I had drawn before making the displacement map. See image below.

Layer-visibility

With this layer highlighted, go up to Menu>Filter>Distort>Displace. A small dialog box appears. The amount of distortion that you apply will depend on the values that you enter in the Horizontal and Vertical scale boxes. It defaults to 10 in each box. These values represent percentages.

The higher the values the greater the distortion. Experiment to see the desired effect that you want. When you convert your layers to Smart Objects, any adjustments that you make can be done easily and non-destructively. For this image, I chose 55 in the Horizontal scale and 80 for the Vertical one. I wanted more distortion on the road marking so that it would match the worn look of the road.

At this point your image may look a bit odd, follow the next step to make it look more blended and realistic.

Zoomed-in-road-marking

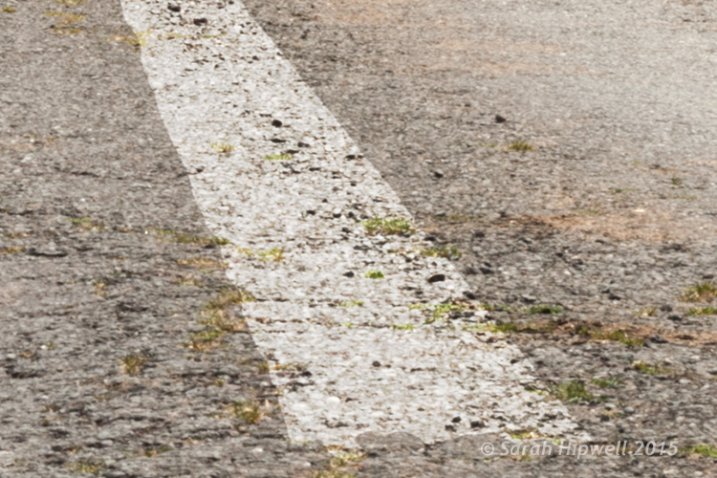
Close-up of the road marking after the displacement map and final tweaks have been applied.

Final tweaks: To give the road marking a more realistic look.

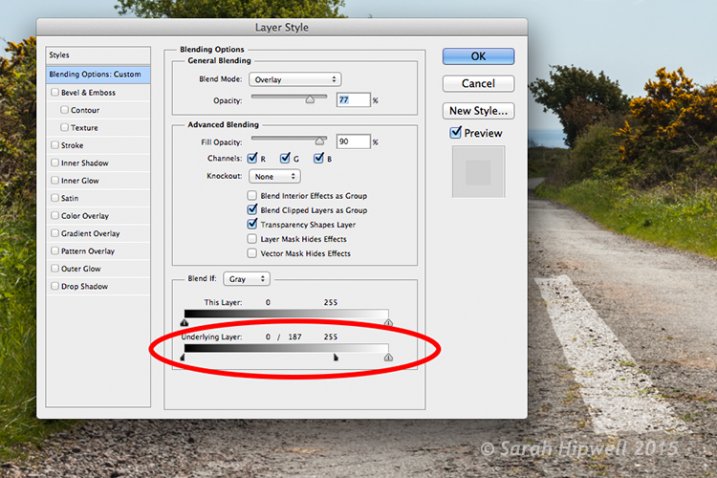
I added Gaussian Blur of 4px to get rid of the ever so slightly pixelated edge on the shape. Double-click anywhere to the right of the layer to bring up the Layer Style box. I changed the Blend Mode to Overlay, reduced Opacity to 77% and Fill to 90%. In the Blend If section, I moved the black slider to 187 on the Underlying Layer.

Tip. If you hold down the Alt/Option key when dragging the black or white sliders, this splits the slider arrow into two which makes the blend more smooth.

Layer-style

The black slider is split on the Underlying Layer in the Blending Options dialog box.

2. Shadow Effects – Water

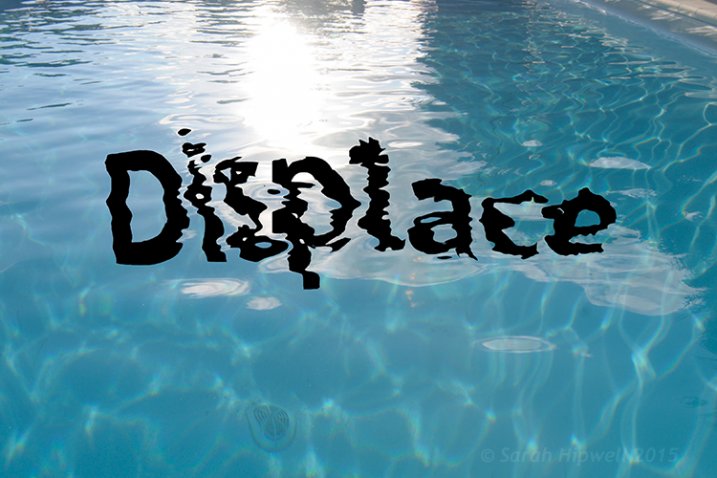
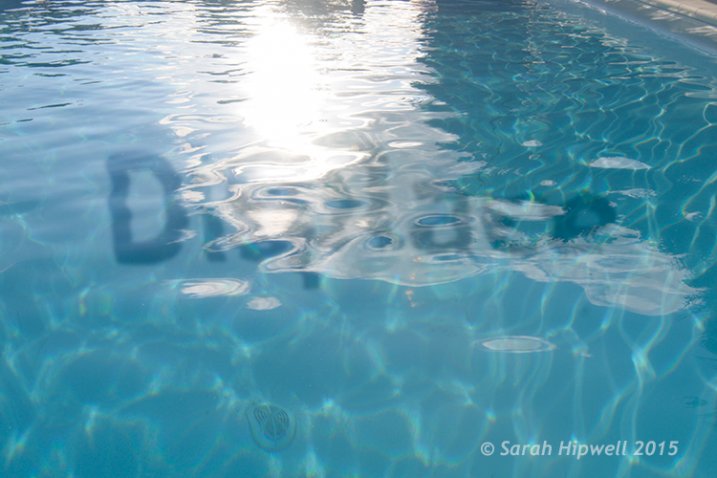
Displace-in-water

Displace-in-water-map-applied

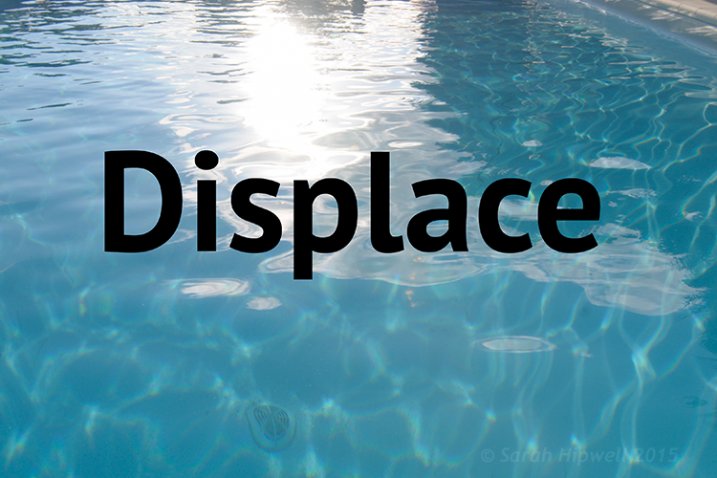
Before and after images showing the distortion on the word “Displace” when a displacement map has been applied.

Aim: To create a realistic reflective shadow in water with text.

I used the word “Displace” to show how a shadow in water can look quite effective and realistic. The displacement map I made for this image worked really well in distorting the text to wrap around the ripples of the water. I followed the same steps to generate the displacement as above but I applied a Gaussian Blur of 5.4px for this image.

The values I added in the Displace dialog box for the Horizontal and Vertical scales were 80 respectively.

For the final tweaks, I added Gaussian Blur of 10.1px. I changed the Blend Mode to Softlight, reduced Opacity to 78%, and Fill to 80%. In the Blend If section, I moved the black slider on the Underlying Layer to 148.

Displace-in-water-final

The word Displace distorted using a displacement map.

2. Shadow Effects – Film Noir Look

Woman-film-noir

Using black horizontal lines and a displacement map to simulate light shining through window blinds.

Aim: To create a film noir look or the effect of light coming through blinds.

For this image I had to do more work in Photoshop to get the final look. The process to generate a displacement map is the same here as in the other examples. Just bear in mind that the blue channel is not the best choice for subjects as the skin tones look awful.

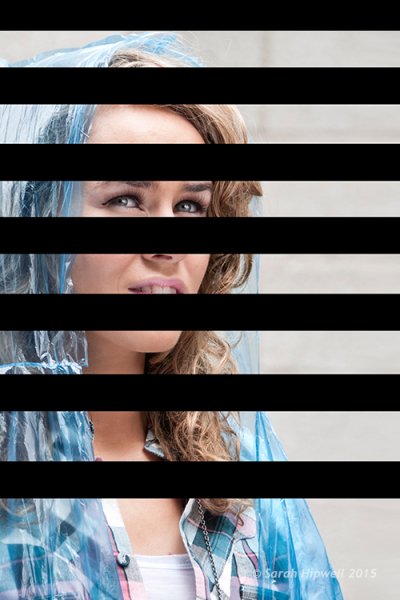
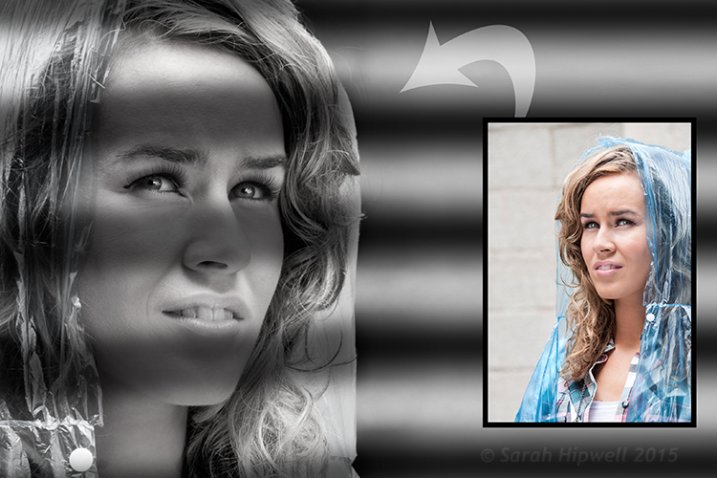
I isolated the model from this image and put it on a separate layer with a layer mask. I added a Black and White adjustment layer, then created thick black horizontal lines using the Rectangular Marquee Tool to resemble window slats on a separate layer. Next, I duplicated that layer. I used one for the background layer and added a significant amount of Gaussian Blur. I then moved the other layer above the model with the layer mask. I wanted to angle the black lines (window blinds) across the model’s face. I did this using the Free Transform Tool.

Woman-black-lines-film-noir

Black lines created using the Rectangular Marquee Tool.

I made a displacement map and distorted the slats over the model’s face using 15 and 20 as the values for the Horizontal and Vertical scales.

Woman-displacement-map-applied

The black lines have been distorted via the Displace filter using a displacement map.

This is only a brief description of the final tweaks: I applied a Gradient Overlay and some Burning to darken the left side of the model as the light source is coming from that directoin. I added Gaussian Blur of 28.9px and reduced Opacity to 40%.

Tips

  • Blue is the worst channel to choose if you are making a displacement map where skin tones are involved.
  • The green channel usually shows the most contrast.
  • Make sure to use Gaussian Blur when generating displacement maps.
  • Displacements maps must be saved out as a grayscale .PSD file.

I hope I have inspired you to start making displacement maps and use the Displace Filter if you have never tried it before.

googletag.cmd.push(function() {
tablet_slots.push( googletag.defineSlot( “/1005424/_dPSv4_tab-all-article-bottom_(300×250)”, [300, 250], “pb-ad-78623” ).addService( googletag.pubads() ) ); } );

googletag.cmd.push(function() {
mobile_slots.push( googletag.defineSlot( “/1005424/_dPSv4_mob-all-article-bottom_(300×250)”, [300, 250], “pb-ad-78158” ).addService( googletag.pubads() ) ); } );

The post Get Creative with Displacement Maps in Photoshop by Sarah Hipwell appeared first on Digital Photography School.


Digital Photography School

 
Comments Off on Get Creative with Displacement Maps in Photoshop

Posted in Photography