If you use filters in Photoshop CS6, Creative Cloud (CC) or CC2014 you may notice that some of your old favorites are missing. Some (sadly) are gone forever, and others are just less easy to find. So, here’s what you need to know about the filters that are gone, how to make those that are hidden more accessible and why that might be important.
Going…Going…Gone!
First to Photoshop CC 2014. Gone from this version is the Oil Paint Filter. This was the sole remaining filter left when support for the Pixel Bender plug-in was removed from Photoshop CS6.
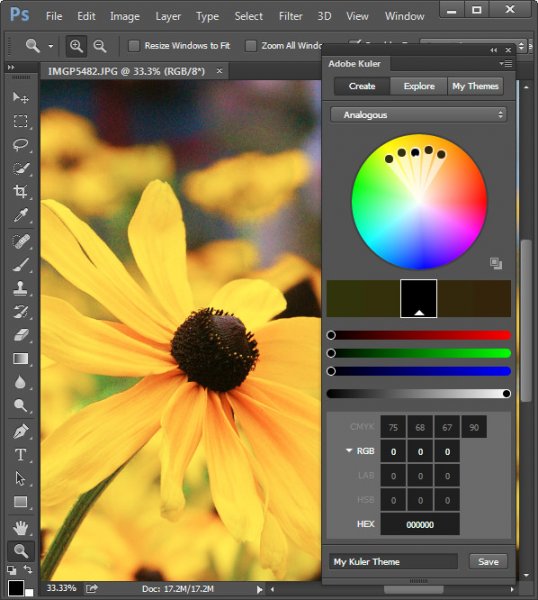
Also gone from this version is the Kuler Extension which you could get to by choosing Window > Extension > Kuler, and Mini Bridge too. In addition, any older Flash based extension panels are also no longer supported. That said there is a new html based Kuler extension with a different feature set that you can download from Adobe here.
Missing but not gone…
In Photoshop CS6, CC and CC2014 some filters groups are missing from the Filter menu. Those missing are the Artistic, Brush Strokes, Distort, Sketch, and Texture groups. The filters themselves are still available from the Filter Gallery but the actual menu options for those filters are no longer visible by default.
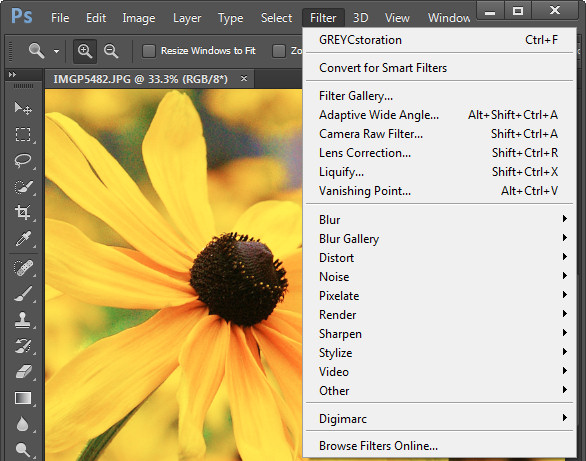
Luckily you can restore those filters to the Filter menu. To do this, go to your Preferences dialog on Mac by choosing Photoshop > Preferences (on PC select Edit > Preferences). Click the Plug-Ins group of preferences and locate and select the checkbox for” Show all Filter Gallery groups and names” and click Ok.

If the filter groups don’t appear on the Filter menu immediately, close and reopen Photoshop.
You may be wondering if there is any real reason to return these filters to the Filter menu when they are all still accessible via the Filter Gallery. The answer is that there is a difference in how the filter is referred to in the Layers palette depending on whether you select it from the menu, or the Filter Gallery.
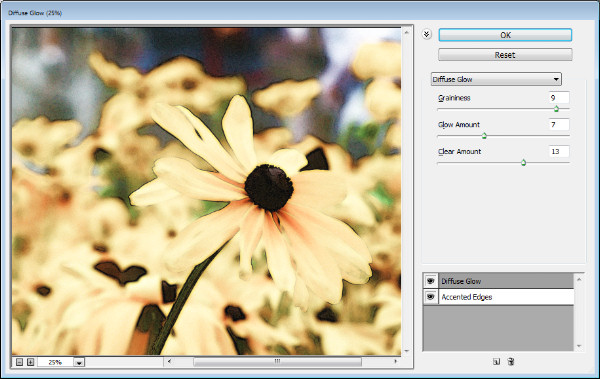
In the image below I first selected the image layer and chose Filter > Convert for Smart Filters to make the layer a Smart Object. I then applied the Diffuse Glow filter to the photo by choosing Filter > Filter Gallery. I selected the Distort group of filters and applied the Diffuse Glow filter and clicked OK.
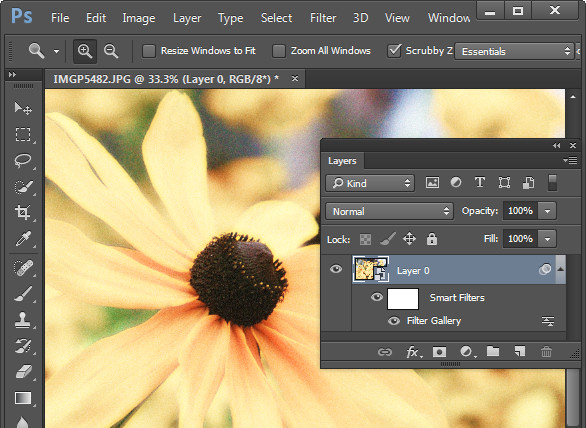
The Layers palette entry for this filter simply reads Filter Gallery, there is nothing to say what filter was applied to the image. Worse still if I were to apply multiple filters this way the entries in the Layers palette will each read Filter Gallery so I have no visible indication of what filters have been applied or in what order.
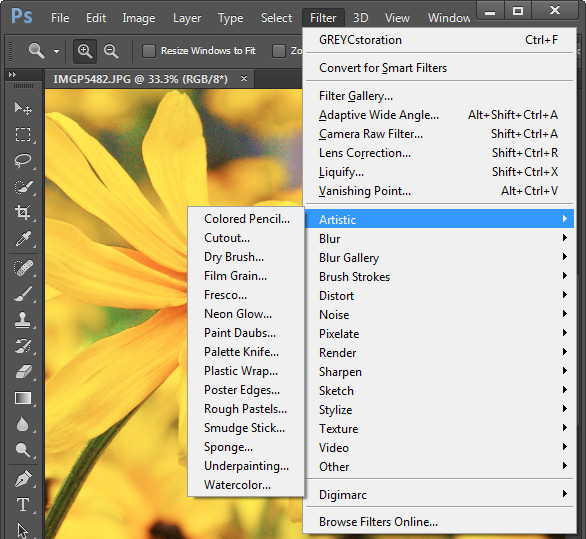
Contrast this to the image below where I applied the Palette Knife filter by choosing Filter > Artistic > Palette Knife > OK and the Layers palette shows the filter name. So, even though the settings for the filter are applied using the Filter Gallery dialog, the very fact that the filter was initially selected from the Filter menu results in the filter’s name appearing below the Smart Object layer in place of the less helpful “Filter Gallery”.
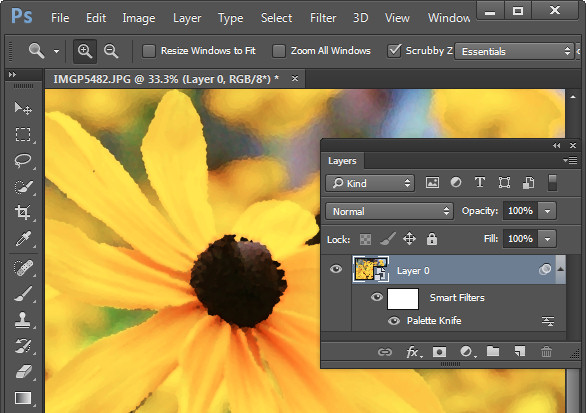
This is the case if you apply multiple filters from the Filter menu, and also if you select one filter from the menu and then change your mind and apply a different one when the Filter Gallery appears. The trigger seems to be that you start the process of applying a filter in the menus and not via the Filter Gallery.
If you use filters a lot then it’s best to have them appear on the Filters menu and to use them from that menu rather than the Filter Gallery.
An Oil Paint Filter option
If you’re bemoaning the demise of the Oil Paint Filter in Photoshop CC 2014 there are some options available. One option is to keep an older version of Photoshop on your computer so you can use that version when you need to use that filter.
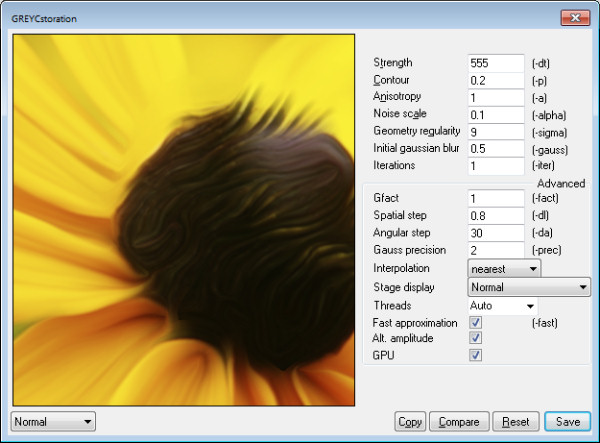
If you are using Windows, there is a Windows only plug-in called GREYCstoration which you can find more details about here. This is an open source filter typically used for noise reduction that will double as an Oil Paint filter which installs inside Photoshop. Make sure you download the correct version for your version of Windows (there are x86 and x64 versions), unzip the file and copy the 8bf and bin files into your Plug-ins folder. Then you will find the filter in your Filters > Noise category. To date there is no Mac equivalent for this filter.
Some sites have also suggested you try the Pixel Bender Accelerator for Photoshop that allows you to run Pixel Bender files in Photoshop CS6 and later. This will be of use to you if you want access to Pixel Bender filters that are available as .pbk files. Unfortunately the Oil Paint Filter was never distributed as a .pbk file so it appears that, inspite of suggestions to the contrary, this application won’t be of use for getting access to the Oil Paint filter.

That said, this application is great for running Pixel Bender filters in later versions of Photoshop so, if that’s what you’re seeking to do it is worth a look.
The post The Mysterious Disappearing Filters in Photoshop by Helen Bradley appeared first on Digital Photography School.

Digital Photography School















You must be logged in to post a comment.