The post 7 Tips – How to Add Depth and Dimension into Your Photos appeared first on Digital Photography School. It was authored by Andrew S. Gibson.

How can you add depth in photography? And how can you make your photos look stunningly three-dimensional?
Depth helps create a sense of place, and it draws the viewer into your images. Plus, it’s a great way to take your compositions to the next level, fast.
In this article, you’ll find seven techniques and tips, all designed to help you convey a stronger sense of depth in your photos.
Let’s get started!
1. Use leading lines
Here’s one of the easiest ways to convey depth in photography:
Use a wide-angle lens and include leading lines that move from the bottom of the frame to the top.
This technique is mainly used in landscape and architectural photos, but you can also incorporate leading lines into portraits, street shots, and more.
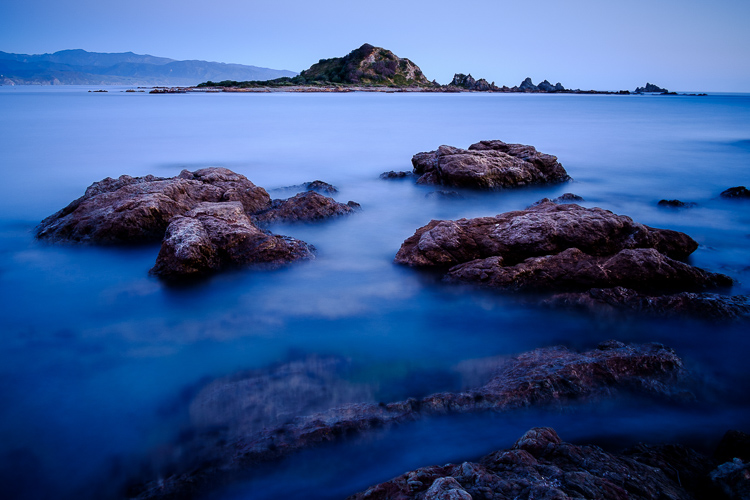
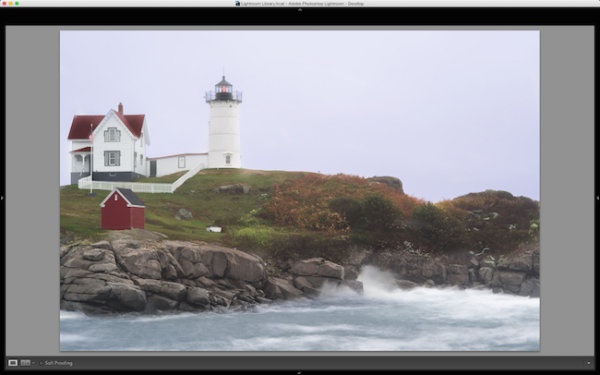
The lines don’t have to be obvious. For instance, take a look at this photo:

The rocks form natural lines that lead the eye from the foreground to the island on the horizon.

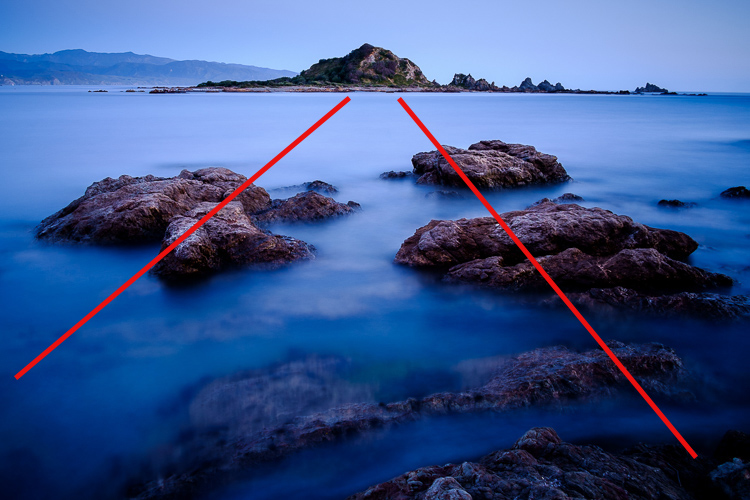
This photo has a similarly subtle set of leading lines:

The waterways in the middle distance lead the eye to the mountains. But the lines are meandering, rather than straight, which helps give the image a more organic feel – one that fits well with the theme of the landscape.
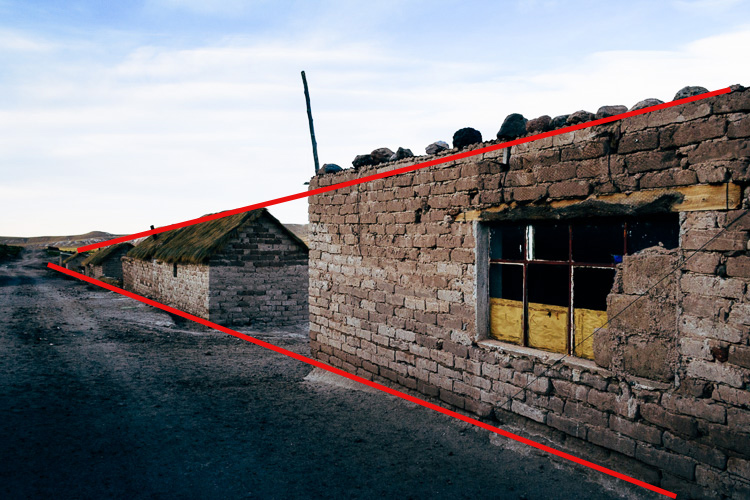
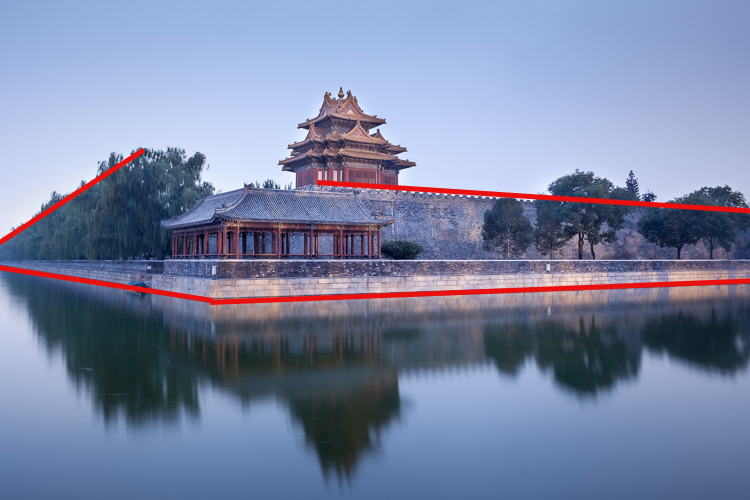
2. Use perspective
This photo demonstrates how lines can add depth in a different way:

The buildings form converging lines that disappear towards the horizon, creating an effective sense of depth.
Note that this technique is similar to an artist’s use of perspective. I’ve added an overlay so you can see how it works:

3. Think foreground, middle ground, and background
Most photographers are familiar with the rule of thirds, but when it comes to conveying a sense of depth, it is helpful to break the photo up into a different set of thirds:
The foreground, middle ground, and background.
What you’re looking for is a way of connecting each portion of the photo while pulling the viewer’s eye from foreground to background. Having three zones in the image – zones that are distinct but linked – will help create a sense of depth and three-dimensionality.
Leading lines are one way of linking the three zones, but lines are not always present in a scene. So when there are no lines to be found, you’ll need to work with some other compositional element.
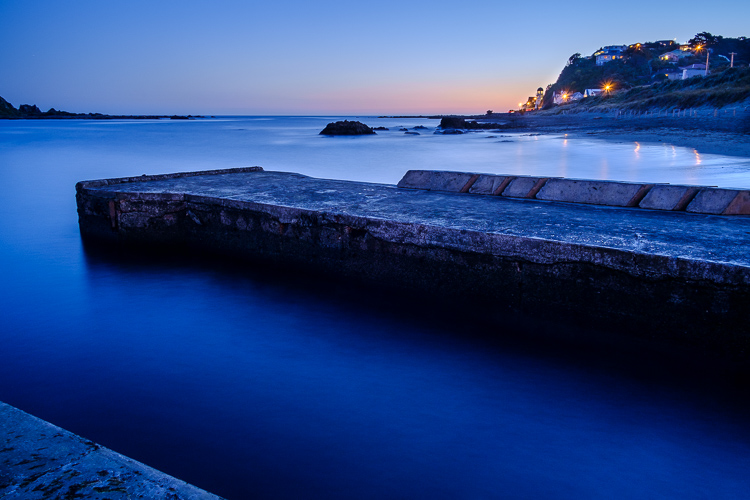
Often, this simply means including something interesting in the foreground.
For example, in the photo below, there are some buildings in the background, a concrete jetty in the middle ground, and the edge of another jetty in the foreground. I included the foreground jetty to help create a sense of depth.

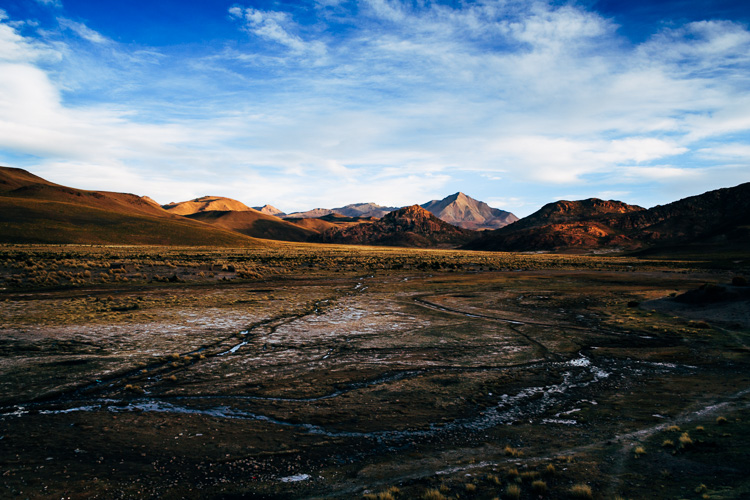
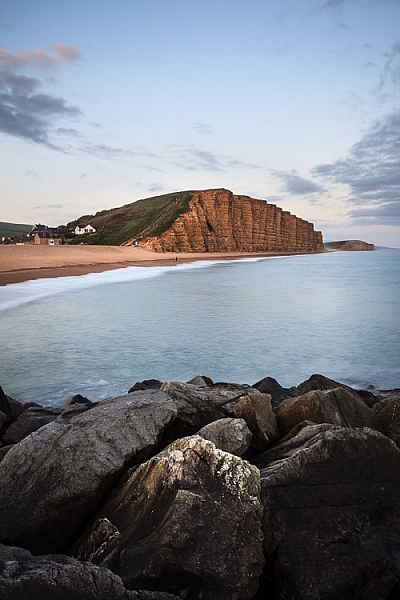
Here’s another example:

Do you see how adding the rocks to the foreground creates a composition with three distinct zones (foreground, middle ground, and background)?
And once the zones are present, you get a sense of depth, with the viewer’s eye moving through the shot.
It helps that the wide-angle lens makes the rocks seem quite large in comparison to the distant cliffs.
4. Use aerial perspective
Another technique that helps convey a sense of depth in photography is aerial (or atmospheric) perspective.
This is where the atmospheric conditions make objects in the distance appear hazy.
Of course, you’re often limited by the environmental conditions – but as soon as you see haze in the distance, I highly recommend you try to find a way to include it in your composition.
In the photo below, you can see that the trees in the distance on the left side are obscured by atmospheric haze, which adds depth:

And the depth is further enhanced by the converging lines formed by the walls. So the two techniques actually work together to give increased depth to the final shot:

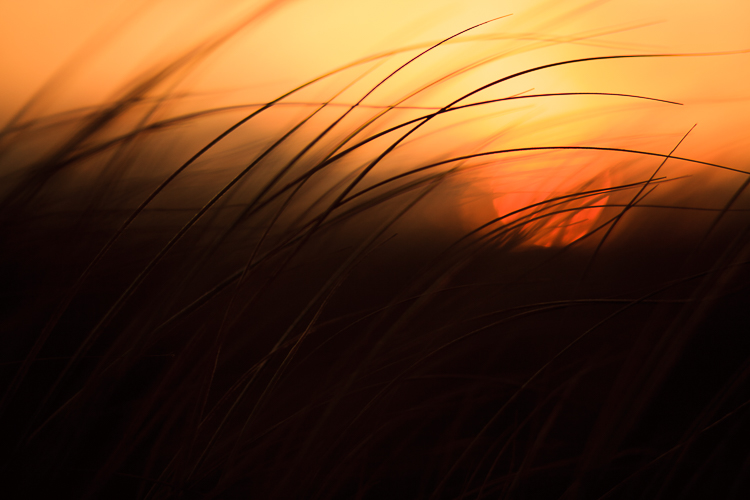
5. Shoot through a foreground object
The techniques I’ve shared above work well with wide-angle lenses, but are less helpful if you’re using telephoto lenses.
You see, telephoto lenses put distance between you and your subject, which leads to a flatter perspective overall (i.e., a perspective with less depth).
That said, there are still some techniques you can use with telephoto lenses to create a sense of depth.
One method is to shoot through something that is between you and the subject (such as grass, twigs, or windows).
In the photo below, the subject is the setting sun. I shot through the grass (and I actually focused on the grass, throwing the sun slightly out of focus) to add a sense of depth to what otherwise would have been a very flat image.

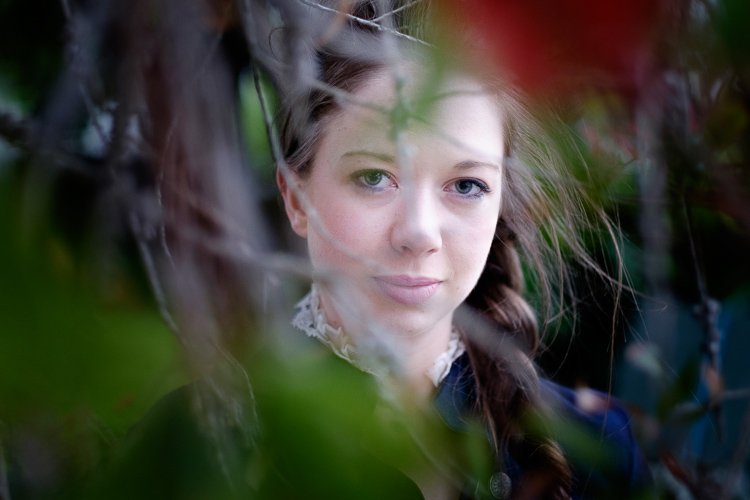
You can also use this technique with portraits. I created the portrait below by shooting through the branches of a tree:

So the next time you’re shooting a subject with a telephoto lens, look around for objects to shoot through. I guarantee you’ll find an object or two – which you can then use to create depth!
6. Use selective focus
Selective focus is a technique where you deliberately set a wide aperture and focus on the subject (and create a blurry background in the process).
It’s especially effective with portraits, as the blur helps separate the model from the background – and ultimately creates a sense of depth.
The following portrait was taken at f/2.0 with the lens focused on the model’s eyes:

Do you see how the blurry background and the sharp subject creates a three-dimensional image?
That’s the power of selective focus!
7. Convey depth through color
Here’s a question to ask yourself:
What happens to colors in the background when you use a selective focus technique (as discussed in the previous tip)?
You see, when the background is out of focus, colors merge into each other.
And if you arrange your colors carefully, you can achieve a nice contrast between the colors in the background and those on the subject.
What does this do?
It conveys depth!
For example, check out the colors in this portrait:

The background is nearly white, whereas the man’s sweater and hair is a darker red; this separates him from the background.
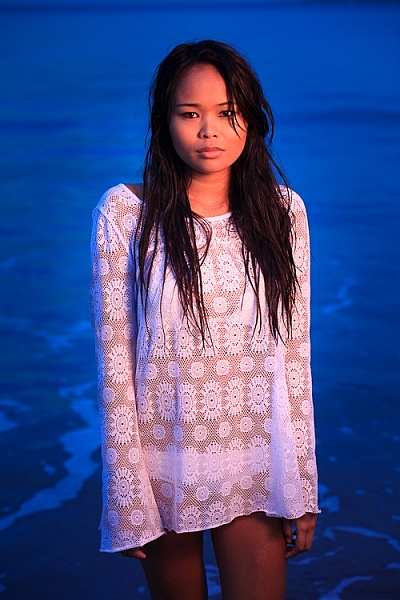
In fact, you can take this idea to its extreme by using an off-camera flash fitted with an orange gel. When you do this, the model will be lit by orange light (from the gelled flash), but the background will be lit by colder ambient light.
(This technique works well at dusk when the ambient light has a natural blue color.)
Ultimately, you’ll get a nice contrast between the warmer model and the cooler background. For the example below, the model was lit by a single speedlight fitted with a 60 cm softbox and an orange gel.

How to add dimension and depth in photography: Conclusion
Now that you’ve finished this article, you should be well-prepared to create photos with plenty of depth and dimension!
So go out and practice some of the techniques I’ve discussed.
Now over to you:
What other ideas do you have for creating and adding depth in photography? Please let us know in the comments below!
The post 7 Tips – How to Add Depth and Dimension into Your Photos appeared first on Digital Photography School. It was authored by Andrew S. Gibson.


You must be logged in to post a comment.