RSS
 

Posts Tagged ‘Diffuser’

Hähnel launches lantern diffuser speedlite accessory

06 Dec

Lantern Diffuser

$ 99 | Hähnel

Hähnel recently launched the Lantern Diffuser, a new speedlight diffuser that creates an exceptionally wide-angle spread of illumination in a very compact form factor by using a clever folding design. This new lighting accessory is just one part of Hähnel’s modular flash system and is designed to attach to hotshoe flash units via one of the company’s magnetic accessory clamps.

Key features:

  • Compact, folding design
  • Comes with six color gels
  • Works with Hähnel’s other modular magnetic accessories
  • Hähnel magnetic clamp is required and is a separate purchase
  • Compatible with most larger speedlight-style flashes from various manufacturers

The Lantern Diffuser is available now at B&H and other authorized Hähnel retailers for $ 99 USD.


What is it?

The Lantern comes in a kit that includes the diffuser along with a set of six colored gels and a gel holder that gets sandwiched between the magnetic clamp and the diffuser frame. The whole kit comes in a folding wallet that also has room for the magnetic clamp that isn’t part of the kit – but which is essential for its use. The clamp is central to the company’s range of clip-on accessories and needs to be bought separately.

The diffuser is made using a fan of concertinaed white material that both diffuses the light and sends it out over a 180° angle as the flash passes through it, with the idea of producing a very soft light that covers a very wide area.

I was initially concerned about how well the fanned out diffuser would survive lots of use, drops and getting its delicate design dented, but in all the use I made of it I didn’t manage to damage it. I guess if you dropped your flash with it attached and it landed face down the consequences mightn’t be good, but so long as you don’t do that it should be fine.

The kit comes in a roll-up pouch and includes 6 colored gels, a magnetic gel holder and the diffuser itself

When not in use it folds away into itself and is protected by the rigged plastic-covered metal ends. I haven’t used it long enough to know whether it will yellow with time, and the weather has been too good to test it outside in the rain – I’d be nervous to do that with the Lantern, while my softboxes would just dry out.

I’m a big fan of good speedlight accessories that are easy to use, which don’t take up a lot space and which have a dramatic impact on the characteristics of the light produced. And I have quite a collection, from inflatable frosted panels to snoots, softboxes and those yogurt-pot-like tubes the flash fires up into. This Lantern is quite different to anything else I’ve used, so I wanted to give it a try.


How it works

This video from Hähnel shows how the Lantern folds and attaches to a flash of your choice.

I used this diffuser on the Hähnel Modus 600RT flash unit, both on the camera and off using a Viper TTL trigger for Micro Four Thirds cameras and Panasonic full-frame S-series cameras. The Modus 600RT is the more powerful of Hähnel’s speedlights, and offers a guide number of 60m at ISO 100 at the 200mm zoom setting.

To attach the Lantern to the flash, I used the Module 600 clamp which, with its sprung grip, will fit most larger hotshoe style flash guns from all manufacturers. The clamp grips the head of the speedlight with the Hähnel logo facing forwards and the Lantern diffuser sticks to it when the magnets in each item attract. The gel holder can go on first, which offers a more obvious placement for the diffuser, but it doesn’t have to. Take a look at the video above for a clearer picture of how it all works.

Used in the hotshoe the light from the Lantern Diffuser is direct and straight on, but very much softer than you’d expect from such a small accessory.

Overall, the Lantern diffuses light more than you’d expect from such a small flash accessory. With a bare bulb the light would be much harder and highlight on the sun-creamed forehead would be dramatic and distracting. The accessory is small enough to create a definite direction, but the multi-layered diffusion makes that light seem quite gentle.

The Lantern diffuser folds in half, so we attach one half to the magnetic clamp and then unfold the other half to get the full 180° dome effect.


What it looks like

I started by testing the spread and the evenness of the light the diffuser gives by clamping the flash onto a stand using Hähnel’s Bowen’s mount adapter and firing the flash at a blank wall.

The difference in spread is immediately clear when you compare the Lantern-diffused exposure with that of the bare head and even when an 80cm/31in double-diffused square softbox was used instead. The Modus 600RT is a TTL gun, but if you shoot manually expect to lose about 2 stops of light due to the Lantern diffuser – about the same as when using the softbox with the extra internal diffuser sheet – but a much wider spread of illumination.

This is the coverage of the flash with no modifier The flash was left in the same position, but with the Hähnel 80cm softbox attached
Here’s the same arrangement but using the Lantern diffuser And the same again, but with a green gel in the gel holder

What is significant about this little diffuser is that it offers both a diffused and a bounced light effect, so the light is very soft once it reaches the subject. The softness is remarkable considering how small the accessory is and that the flash is still effectively a point source. Shadows are defined but filled at the same time, and lack the hard-edged contrast we get with a bare head.

The Lantern Diffuser avoids that artificial look of a direct burst from an uncovered flash bulb

I found that even when used with the flash mounted on the camera the light is dramatically altered, and still provides a nice softness when used quite close to the subject. It avoids that immediately artificial look of a direct burst from an uncovered bulb, or even that of a light bounced into a kicker reflector.

I tried the Lantern for some single-light still life shots with the flash at a relatively close range and a small subject – things that tend to bring out high contrast when hotshoe flash units are used. You can see though that the Lantern has done very well to produce a soft light that doesn’t display hotspots or reflections on the waxy surface of the avocado skin.

Click or tap-and-drag the arrow to see a soft box and the Lantern Diffuser differ.

The light is as soft as that produced by the 80cm softbox, though the shadow profile is slightly more defined due to the smaller surface area of the source. As the light from the Lantern is thrown around the room we get much more fill in the shadow areas too.

The spread of the light is also very impressive. The Lantern will light a room evenly when we are using a super-wide lens to fit it all in. This means we don’t have to worry about finding a clean white surface to bounce from. Fall off is more dramatic than with a bare bulb or a bounce, so a powerful gun will work best.

To give you an idea of the diffuser’s coverage, this was shot on the full frame Lumix S1R with a 9mm lens – at f/8 and 1/200sec at ISO 400. All the light on the foreground is from the flash. You can see that the post on the right as well as the tree trunk on the left are both lit with the flash. A 9mm lens has an angle of view of 135 degrees.

Conclusion

I’m very impressed with this Hähnel Lantern. It’s small, highly portable and weighs almost nothing, which means you can afford to carry it around in the camera bag even when you don’t actually get to use it without it having been a pain all day. The clamp is simple to fit and the gel holder and diffuser just snap on, so assembly is quick and easy too.

$ (document).ready(function() { SampleGalleryV2({“containerId”:”embeddedSampleGallery_3006859195″,”galleryId”:”3006859195″,”isEmbeddedWidget”:true,”selectedImageIndex”:0,”isMobile”:false}) });

I don’t often use colored gels with single flash set-ups, but they are handy for second and third guns for rim lighting and coloring a background. Background lights with these diffusers on will be very useful, and the lack of hotspots, and their size, means they are ideal for hiding within the shot without the danger of them producing give-away bright blasted areas.

I have a lot of rubbish accessories, and others that are well thought out but the size of studio modifiers so you can’t carry them around on the off-chance that you might need them. This though sits in a side pocket of a bag ready for that moment you want to soften a burst of flash whenever it happens to occur. I would also actively take this with me to light backgrounds, multiple people facing inwards, for filling in on a sunny day and for using as the main light for a portrait or a still life.

The flash was held just off-camera for this shot. The defined shadow is still there but the light on the subject is soft and attractive. The subject was in the shade and exposure was 1/200sec at f/9, so almost all the light on the subject was provided by the flash.

I love using speedlites for ‘proper’ photography especially on location (I used two Hähnel Modus 600RT units with a softbox and a small dish for the male model shots in the Hasselblad 907X sample gallery) and this will definitely be joining the collection of tools I use – and ousting a few that simply don’t do the job so well.

The Hähnel Module Creative Lantern Kit costs £59.99/$ 99.99. For more information see the Hähnel website.

What we like:

  • Amazingly well diffused soft light
  • Really wide, even spread of light
  • Small and easy to carry all the time
  • Quick to assemble
  • Nice pouch and accessories

Don’t like:

  • Dome feels a bit fragile, though it hasn’t dented yet
  • Gels are strong and for dramatic effects rather than colour correction

Star Rating

Articles: Digital Photography Review (dpreview.com)

 
Comments Off on Hähnel launches lantern diffuser speedlite accessory

Posted in Uncategorized


Flash Softbox Diffuser Review

27 Apr

The post Flash Softbox Diffuser Review appeared first on Digital Photography School. It was authored by Jackie Lamas.

flash-softbox-diffuser-review

In this article, we’re reviewing this budget-friendly flash softbox diffuser that fits over your external flash so that you too can have a great tool to add to your camera bag.

Flash Softbox Diffuser Review
The softbox diffuser only works for flashes with a larger head. The smaller Polaroid flash wasn’t compatible.

About the flash softbox diffuser

While the diffuser that comes with most external flashes gets the job done, this attachable softbox will work much better to spread light more evenly and create a softer light source for your portraits or other types of photography.

The softbox has no poles to assemble or extra equipment that might get lost in transport or by using it. It folds out, and you can straighten it into shape by simply using your hands. This is a plus when it comes to setting up and tearing down, which saves you much time and not having to worry about fiddling with assembly parts.

Flash Softbox Diffuser Review
The flash softbox diffuser attaches to your flash and you can use it on a stand or on your camera. 1/80 of a second, f4.5, ISo 400

The flash diffuser softbox comes with a case and holding strap. This allows you to attach it to your bag without any extra attachments or worrying about bending it while using it.

Flash Softbox Diffuser Review
The flash softbox diffuser comes with a handy bag. 1/100 of second, f/4.5, ISO 400

At Although the material the softbox is made out of is a clear indicator that it won’t stand up to longterm wear and tear, the softbox, measuring at 30cm length and 20 cm wide, it does what it’s supposed to diffuse and spread evenly the light of your external flash.

On camera, it adds nothing to the weight of your camera. It stays in place by using an elastic band that wraps around the flash head and is secured by a strip of Velcro.

Flash Softbox Diffuser Review
The flash softbox diffuser has a simple and easy opening for the flash head to place the flash head in. 1/125 of a second, f/4.5, ISO 400

On the inside, the flash diffuser softbox has a silver lining to help bounce light back out. It also has an added diffuser that crosses the front of the flash that is secured by Velcro. This can be useful in situations where you need softer light.

Flash Softbox Diffuser Review
There is an added diffuser inside the softbox too. 1/125 of a second, f/4.5, ISO 400

The universal size makes it perfect for one-light portraits, tabletop and product photography, and using it on or off your camera.

Flash Softbox Diffuser Review
1/160 of a second, f/7.1, ISO 400

Main features

  • The size and weight make it easy to set up and use.
  • No additional hardware or accessories needed with the Velcro closure.
  • It’s universal and fits most models of external flashes.
  • Additional diffuser inside of the softbox.
  • You can use it on-camera or off-camera.
  • Budget-friendly costing no more than US$ 10 dollars.

Ease of use

The soft box is really simple to use. It comes in its own zippered pouch ready to use right away as it easily unfolds. With a little pull, it shapes into the flash softbox diffuser you see in the photos.

Flash Softbox Diffuser Review
1/200 of a second, f/5.6, ISO 100 Flash at 1/8 power.

It has no wires, poles, or additional hardware making it really easy to set up and use on the go, in a studio, or anywhere your flash goes.

Does it really work?

Flash Softbox Diffuser Review
The first image has the flash pointed directly at the subject. The second photo is with the flash softbox diffuser. The third image is with the additional diffuser inside of the softbox. Taken at 1/60 of a second at f/5.6 with an ISO of 400.

Using the flash softbox diffuser for your flash is really easy, given that it simply pops out and attaches quickly.

You can notice how the light gets softer just by adding the softbox to your flash. It goes further in softening the light with the additional white diffuser strip that is inside of the softbox.

Flash Softbox Diffuser Review
In the catchlights, you can see where the softbox is positioned. 1/125 of a second, f/5.6, ISO 125 with flash at 1/8th power angled down at the subject.

In the images above and below, I angled the flash down at my model in a small bathroom. Using the flash softbox diffuser allowed me to be in a small space and use directional light on the subject without it being too harsh or creating undesired shadows.

Flash Softbox Diffuser Review
1/125 of a second, f/5.6, ISO 125 with flash at 1/8th power angled down at the subject.

In the following images, I placed the subject in harsh sunlight to see how the softbox would fill in shadows or otherwise light the subject.

Flash Softbox Diffuser Review
Without the diffuser, with the softbox, with the extra diffuser inside the softbox. 1/100 of a second, f/8.0, ISO 100

For these photos, I directed the flash straight onto the doll without the diffuser. The middle image is with the softbox diffuser on, and the third image is with the softbox diffuser and the added diffuser inside.

Flash Softbox Diffuser Review
1/100 of a second, f/8.0, ISO 100 with flash at 1/8 power with softbox diffuser on flash off-camera.

You can see a big difference in how the light from the flash got softer. These are not retouched and straight out of the camera.

Flash Softbox Diffuser Review
Flash power at 1/16th power with the flash softbox diffuser. 1/200th, f/7.1 ISO 400.

Here I used the flash at 1/16th power to fill in the shadows on the child. I also got really nice catchlights in his eyes that make the portraits pop a little bit more. The flash softens the catchlights making them appear more natural like a big window.

Flash Softbox Diffuser Review

Using the flash in darker lighting situations also proves effective. I photographed the toy in a dark room and used the flash off-camera and on-camera.

Flash Softbox Diffuser Review
1/200 of a second, f/8.0, ISO 160 flash was set to ETTL.

Pros

  • Easy to set up and to use. The softbox works, does its job well, and has an added diffuser inside to help soften the light more if needed.
  • It’s really affordable, lightweight, and convenient to transport and use on-location.
  • It does the job of softening the light. Most of the control is either in the flash or in the camera settings.
  • Fits most flash systems due to the universal build.
  • Folds flat and comes with a pouch.

Cons

  • The material on the outside is a little cheap.
  • The size means it’s not going to give you a large light source so you’ll get some fall off if you’re photographing larger groups.

Who is this flash softbox diffuser for?

This flash softbox diffuser is perfect for someone who is just getting into flash photography and learning about how to control and modify light. It is for someone who perhaps doesn’t have a lot of space to set up a full studio with bigger strobes or flash systems.

Flash Softbox Diffuser Review
1/200 of a second, f/5.6, ISO 100

Being that the diffuser is lightweight and can be taken outdoors, it is also perfect for the photographer who shoots outside a lot. For example, on the beach, macro photography to get close to the subjects, or someone who shoots tabletop and still life.

It’s perfect for the photographer who likes to keep their equipment simple and light when shooting or traveling.

The flash softbox diffuser would also be a perfect addition for a tabletop and product photographer who shoots in small spaces or travels for shoots.

Final verdict

The flash softbox diffuser works as is expected and does soften the harsh light the external flashes sometimes gives.

While the material the flash softbox is made from isn’t too convincing of its longevity, it is a great starter light modifier to help photographers control and soften lights for portraits.

Flash Softbox Diffuser Review

It is rather small in terms of size, which is a good thing and a bad thing. If you’re looking for something lightweight and portable, this is a good buy. However, the size limits the spread of light, then again perhaps with more flashes it could give a better effect.

Flash Softbox Diffuser Review
1/150 of a second at f/2.2, ISO 125, flash output power at 1/16 power.

For the price, at less than $ 10, it is an interesting purchase to play with and experiment without making a major investment.

The softbox diffuser would be more ideal for tabletop and product photography given the size.

Flash Softbox Diffuser Review
1/160 of a second, f/7.1, ISO 400 with flash a 1/16 power.

Either way, it’s a fun accessory to add to your bag in the event you are starting to experiment with flash and light modifiers. And you can’t beat the price!

The post Flash Softbox Diffuser Review appeared first on Digital Photography School. It was authored by Jackie Lamas.


Digital Photography School

 
Comments Off on Flash Softbox Diffuser Review

Posted in Photography


The Lastolite HaloCompact is a new reflector, diffuser with a collapsible design

13 Nov

Lastolite, a subsidiary of Manfrotto, has launched a new lighting tool it calls the HaloCompact.

The HaloCompact is a collapsible reflector/diffuser tool that comes in two versions: a double-sided reflector (with silver on one side and white on the other) and a two stop diffuser.

The defining feature of the HaloCompact is its RapidExoframe, a lightweight aluminum frame that slots together multiple sections to create a 85cm/33.5in base when fully constructed. When packed down, alongside the folding reflector/diffuser material, the HaloCompact is small enough to put inside your camera bag or attach to the outside.

The HaloCompact also has standard quarter-inch tripod threads along the frame so it can be attached to various arms and accessories for when you need an extra hand. Below is a video from Lensvid showing off the HaloCompact in person at Photokina 2018.

Both version of the HaloCompact has an MSRP of £71.95, but there’s no mention of availability and at the time of publishing this article the HaloCompact isn’t listed on the UK or US version of Lastolite’s online store. DPReview has contacted Lastolite for more information regarding US pricing and availability and will update this article accordingly when it receives a response.

Lastolite by Manfrotto Launch HaloCompact 85cm (33.5”)

Lastolite By Manfrotto, the world’s leading manufacturer of backgrounds and lighting control systems is proud to announce the launch of the HaloCompact Reflector and Diffuser.

The HaloCompact is a completely new, patent pending design concept that makes the everyday reflector and diffuser panel even more portable than ever!

Unlike many traditional reflector/diffuser panels that incorporate a steel rim pop up design, the 85cm (33.5”) HaloCompact is constructed using Lastolite By Manfrotto’s new innovative RapidExoframe™ technology. The collapsible lightweight aluminium frame quickly slots together and the reflector or diffuser fabric simply clips onto the frame. The cleverly designed RapidExoframe™ construction allows the frame to breakdown into small multiple sections and along with the folded fabric packs into a carry case measuring only 6.5 x 27 x 6.5cm (6” x 6” x 6”) weighing only 335g (reflector and case).

The ultra-compact folded dimensions make the HaloCompact the perfect solution for Photographers on the move or with very limited carrying space. It now means a reflector/diffuser can always be carried in the camera bag rather than having to consider whether to take an extra bag or not. A handy carabiner style clip also allows the user to clip the HaloCompact to their belt if out on location with their camera only and no camera bag.

The HaloCompact also features an ergonomically designed handle so it can easily be held and accurately positioned with one hand. The handle also incorporates a very useful ¼” thread (plus a ¼” to ¼” adaptor), enabling it to be easily attached to various different support systems, to offer secure positioning further away from camera position.

The HaloCompact is available in two versions – the first is a double-sided reflector, with silver one side and white the other. The second version is as a 2 stop diffuser.

The HaloCompact Reflector Silver/White (LL LR3300) has an RRP of £71.95.

The HaloCompact Diffuser 2 stop (LL LR3301) has an RRP of £71.95.

For more information, please visit www.manfrotto.co.uk/lastolite

Articles: Digital Photography Review (dpreview.com)

 
Comments Off on The Lastolite HaloCompact is a new reflector, diffuser with a collapsible design

Posted in Uncategorized


How to Use a Reflector and Diffuser to Enhance Flower Photographs

26 Jun

Photograph Flowers 2016-05-11at15-41-06

cover-fill-card

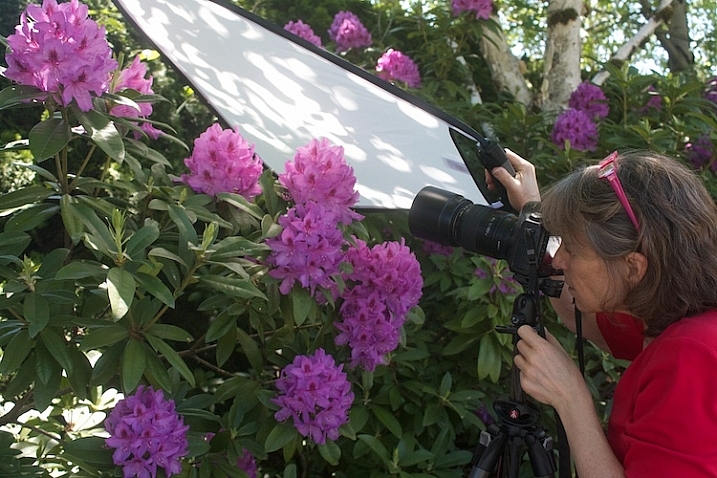
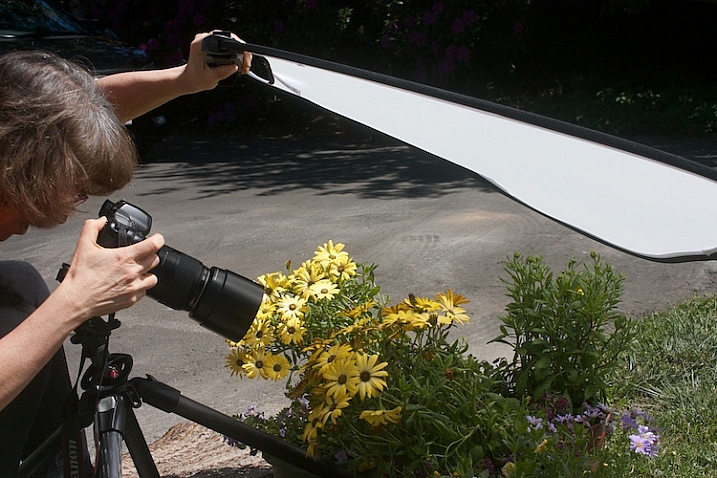
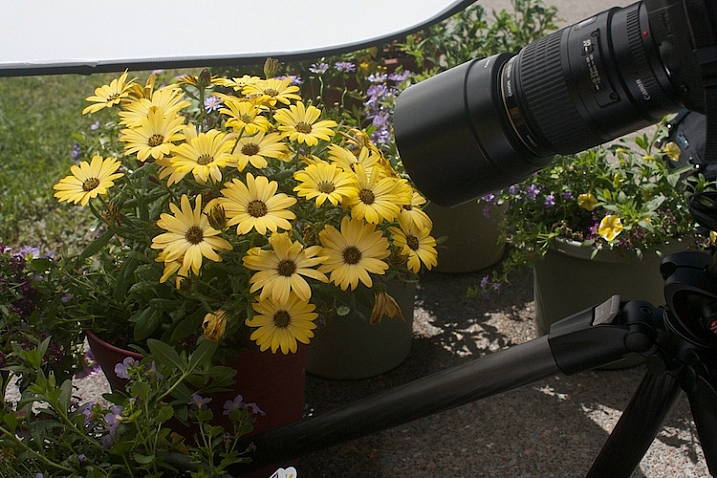
Learning to see and use light is one of the most important steps to creating great photographs. As you become more aware of what nice light really looks like, you can start to manipulate even the harshest conditions with some simple tools. The photo above was shot in bright sunshine using both a diffuser and a reflector.

full-sun-overview

Practice

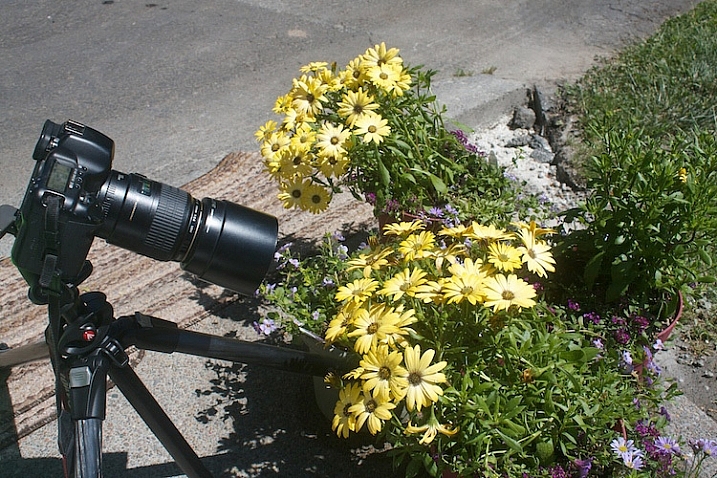
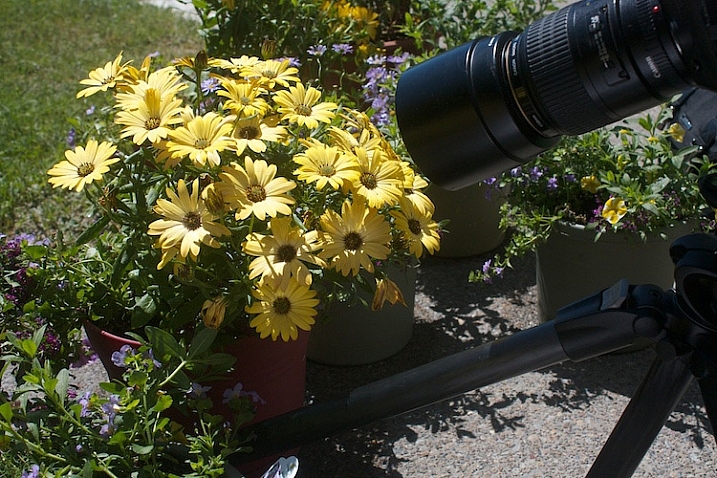
To practice this exercise, find some flowers in bright sun. You can photograph flowers that are planted in your garden, or in pots.

Photograph-Flowers-in-sun-3

Photograph-Flowers-in-sun-2

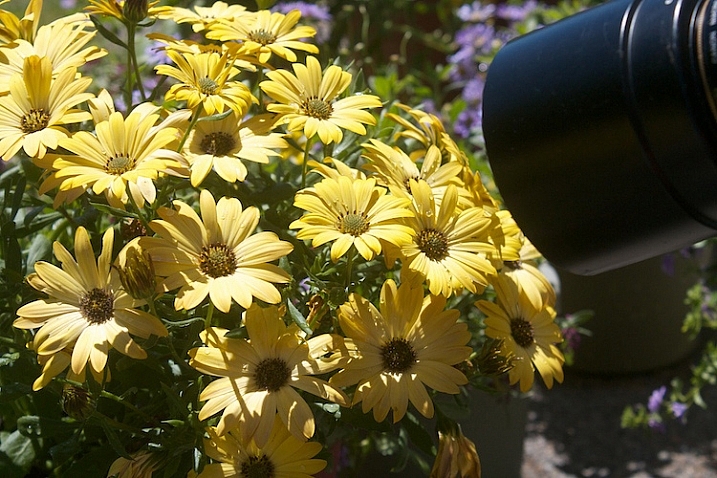
Notice the quality of light on the flowers. In bright sun, there are strong highlights and deep shadows. There is lot of contrast, which comes through in the image.

Photograph-Flowers-2016-05-11at15-34-44

Notice how you lose detail in the highlights. The bright spots caused by the sun don’t add anything to the photograph, in fact, they are very distracting. Our eyes tend to go toward the brightest spots in a photograph and in this situation, the highlights are drawing our eyes away from the center of interest – the flower.

Photograph-Flowers-2016-05-11at15-09-23

Add a reflector

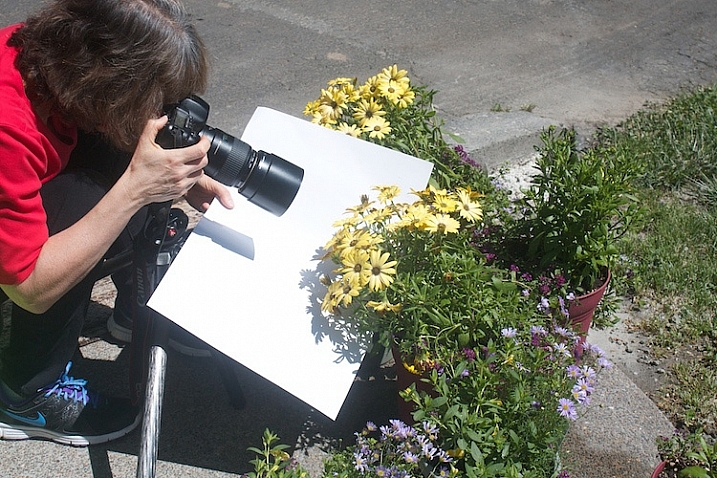
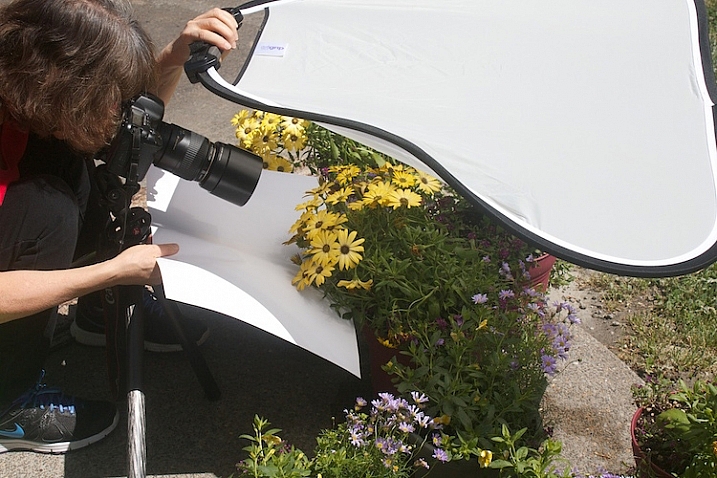
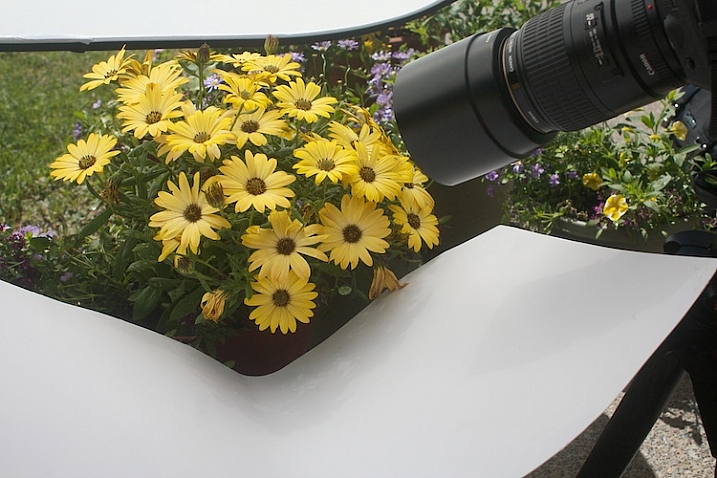
Now, try using a reflector. Light bounces just like a billiard ball. By placing a light colored, reflective surface opposite the light source, you can bounce light back into the subject. In this instance, our light source is the sun, so I placed the reflector under the leaves to bounce the light back into the shadows. You can use almost anything as a reflector. In this example, I’m using a piece of white poster board.

Read DIY How to Build and Use a Reflector to Take Better Portraits and 10 Ways to Use a 5-in-1 Reflector for more help on using reflectors.

Just-below-full-sun-using-fill-cards

Notice the difference in the image above, compared to the one without the reflector. Can you see how bouncing the light back in brightens up the flower? The exposure settings haven’t changed. The only difference is the reflector (also called a fill card) in the second shot.

Photograph-Flowers-2016-05-11at15-08-06

Diffuse the light

Now, we are going to use a diffuser to soften the light.

Photograph-Flowers-reflector-above-better2

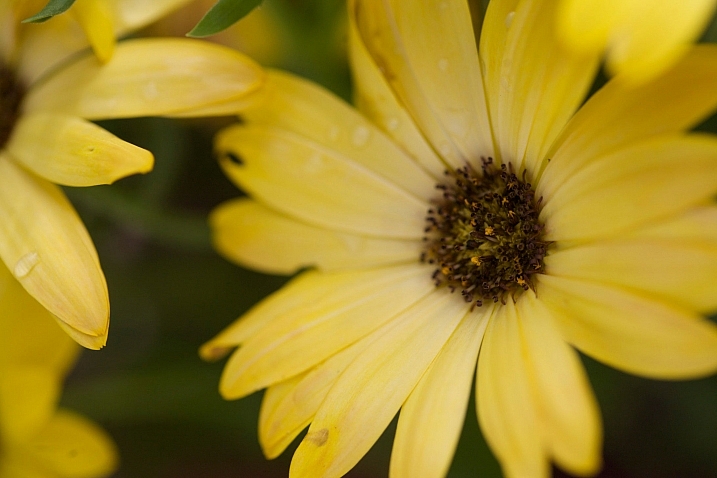
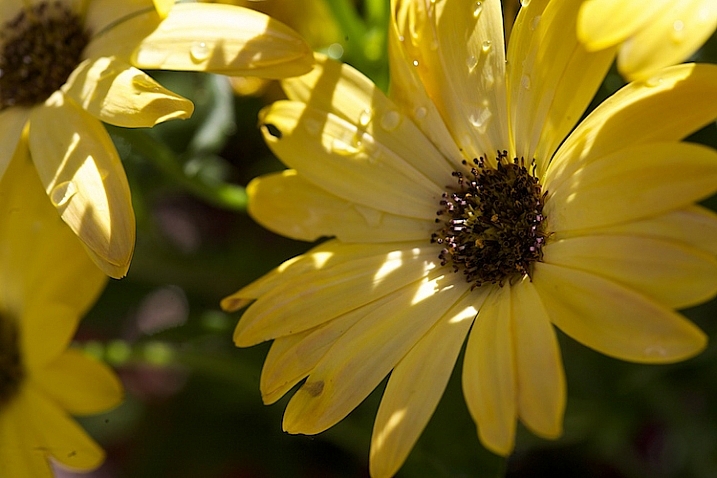
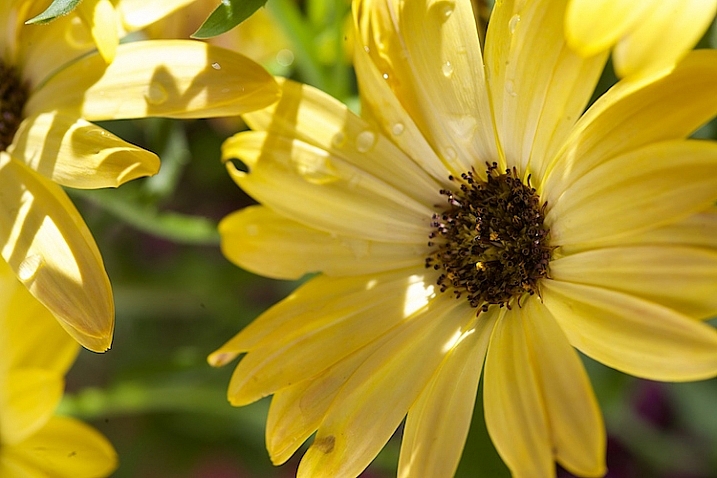
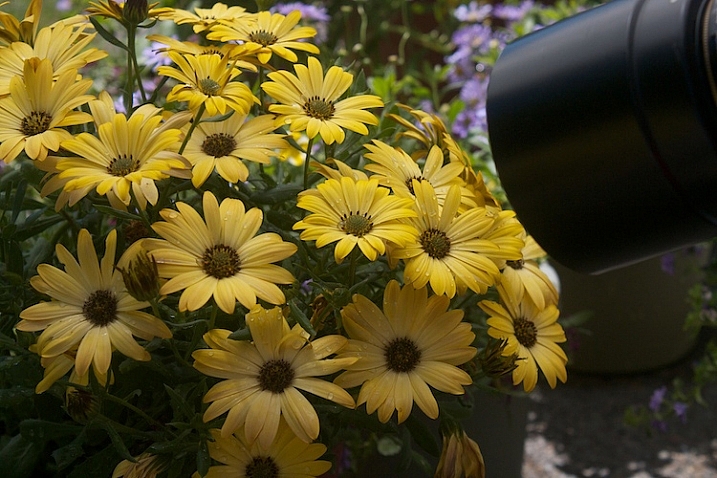
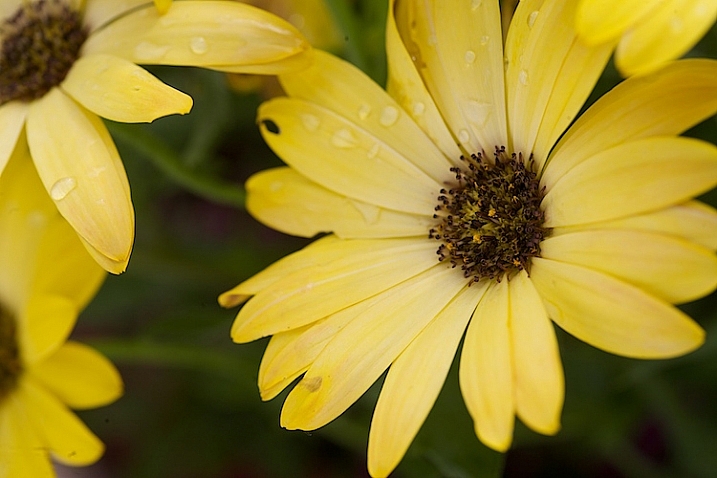
Here we are starting to see some really beautiful, soft light. Notice how even the light is and how much softer the flowers feel. The highlights and shadows are not as severe and harsh, and more detail is retained in both areas.

Photograph-Flowers-reflector-above

Use a reflector and diffuser

Take it a step further.

Photograph-Flowers-2016-05-11at15-09-41

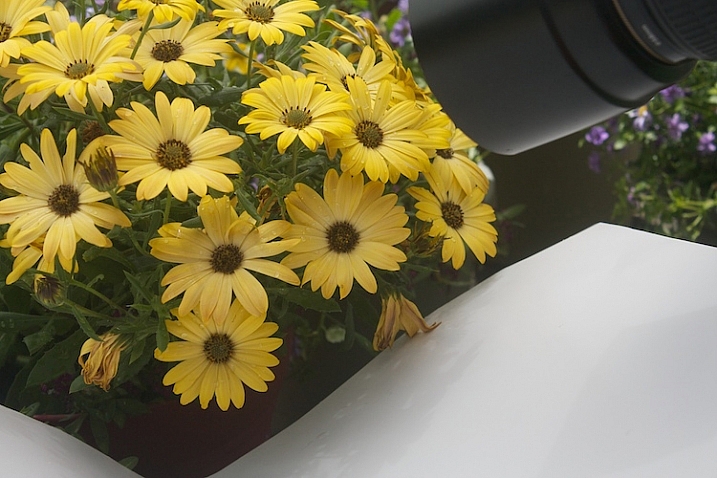
Let’s use a diffuser with a reflector, and see how that looks. Here’s a tip for you: If you can’t prop up your reflectors and diffuser and press the shutter button, you can use the 2-second self-timer on your camera to free up an extra hand.

Photograph-Flowers-reflector-above-and-below

With the diffuser above and a reflector below, the flowers start to take on a magical feel.

Photograph-Flowers-2016-05-11at15-12-20

fill-card-reflector-top-and-bottom

cover-fill-card

Now you can see how using a reflector and diffuser can drastically improve your flower photographs. I also want to add that none of these photographs were manipulated in Lightroom or Photoshop in any way, other than a little sharpening. The dramatic difference in the photographs was created entirely by manipulating light.

Please share you comments and questions below, then try this exercise at home and post your photos in the comments below. I’d love to see them!

googletag.cmd.push(function() {
tablet_slots.push( googletag.defineSlot( “/1005424/_dPSv4_tab-all-article-bottom_(300×250)”, [300, 250], “pb-ad-78623” ).addService( googletag.pubads() ) ); } );

googletag.cmd.push(function() {
mobile_slots.push( googletag.defineSlot( “/1005424/_dPSv4_mob-all-article-bottom_(300×250)”, [300, 250], “pb-ad-78158” ).addService( googletag.pubads() ) ); } );

The post How to Use a Reflector and Diffuser to Enhance Flower Photographs by Vickie Lewis appeared first on Digital Photography School.


Digital Photography School

 
Comments Off on How to Use a Reflector and Diffuser to Enhance Flower Photographs

Posted in Photography


Review: Lastolite 6×4 Foot Panelite Collapsible Reflector with Translucent Diffuser

12 Apr

review-lastolite-panelite-diffuser-0803

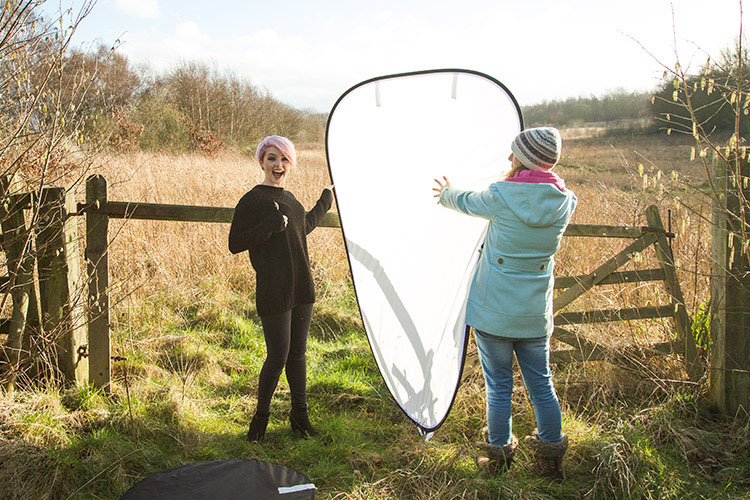
How many times have you heard that there are certain times of day you shouldn’t photograph people? For example, at midday in harsh sunlight. The logic is pretty sound. Direct, hard light can lead to unflattering shadows and ultra high contrast, which can result in unsatisfactory portraiture. However, if you follow this advice blindly, and only wait for the golden hours each day, you’re missing out on an enormous amount of time that could be spent photographing people.

There are several options to combat this problem, but one of the easiest and most effective, is a piece of gear called a diffusion panel.

What is a diffusion panel?

At its most basic, a diffusion panel is a piece of translucent material that allows harsh direct light to pass through it, so it effectively becomes a light source of its own. This softens the light and can allow you to obtain great, flattering, natural light portraits, in unfavorable conditions.

review-lastolite-panelite-diffuser-2745

There are many types of diffusion panels available ranging from very small, handheld ones, to giant ones that are many meters across and require dedicated stands.

When size matters

Small diffusion panels are useful, and if you happen to have a 5-in-1 reflector, you probably already have one. These are indispensable for still-life and tabletop work; however, in terms of portraiture, their small size often limits them to closely cropped images and headshots.

This is where the Lastolite Panelite Reflector comes in. At 6×4 feet (1.8m x 1.2m) it’s large enough to cover enough area for full length portraits. At $ 128 retail, its price also means that it isn’t way out of reach for the serious portrait photographer.

Putting it through its paces

To test it out, I took the Lastolite Panelite Reflector out on location, at mid-afternoon on clear days. The sun was low at this point, but still very harsh, and the high contrast would have been difficult, if not impossible, to manage without a modifier.

review-lastolite-panelite-diffuser-0385

By Diffusing the sun back lighting the scene, you can even out the exposure of the highlights and shadows which is far more pleasing for portraits.

review-lastolite-panelite-diffuser-0569

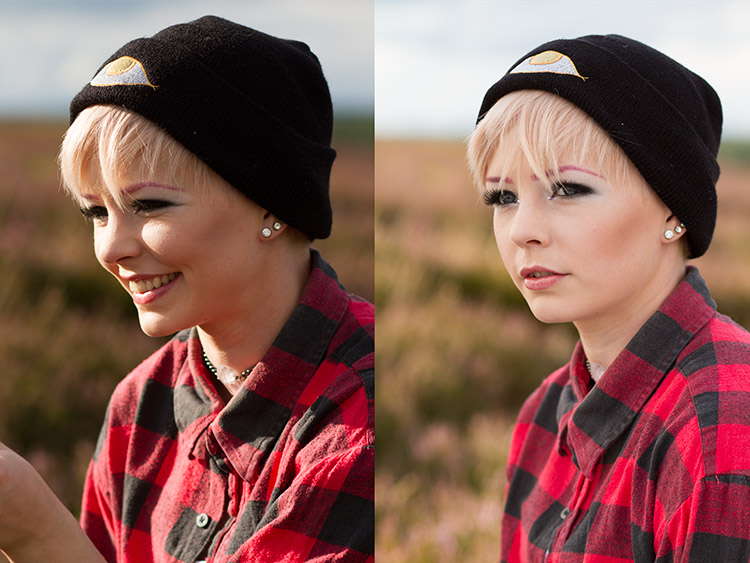
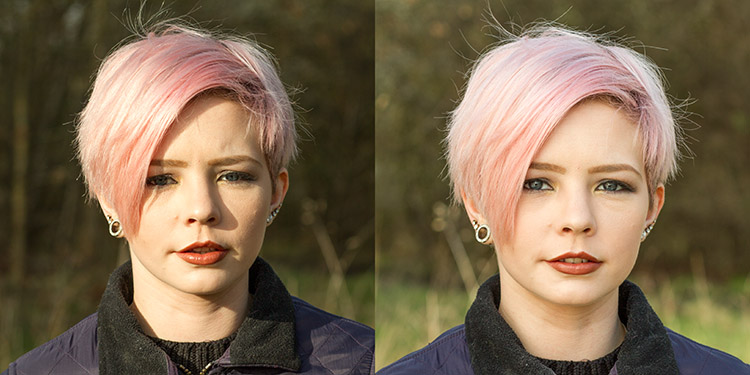
On the left, the bottom half of the image is shaded by the diffuser. You can see the two stop difference in exposure. In the image on the right, you can see how the hard directional sunlight has been softened (note that more exposure was needed overall so the background was also brightened in the process).

review-lastolite-panelite-diffuser-2621

Apart from the unflattering shadows in the left hand image, the direct sun made it painful for the model to look into the camera. With the diffusion panel (right image), her eyes were shielded from the harsh light.

review-lastolite-panelite-diffuser-2734

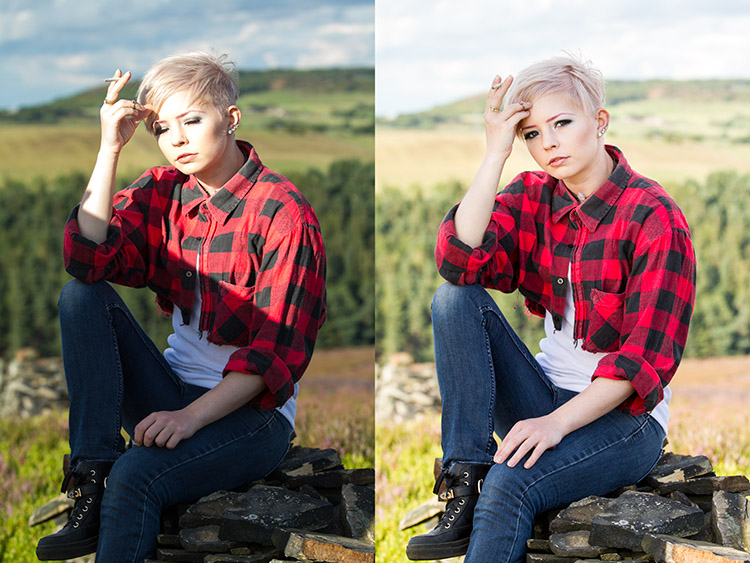
In the left hand image, the extreme contrast from the back lighting made exposing for the rest of the image a nightmare. By diffusing the back light, the exposure was evened out, but still allowed for a pleasing rim light (image above right).

Let’s look at some of the pros and cons of using this light panel.

PRO: Two stop diffusion

review-lastolite-panelite-diffuser-2737

By reducing contrast, the loss of two stops of light can be a huge help in some scenarios.

When working with the extremes of bright sunlight, it can be difficult to get away from small apertures like f/16. This is a problem because these settings won’t allow for a shallow depth of field. By reducing the light on your subject by two stops with the diffuser, that hypothetical aperture of f/16 becomes f/8 and makes background blur much easier to control.

PRO: Size

review-lastolite-panelite-diffuser-2656

This thing is huge. It’s not the biggest on the market, but it’s big enough for full length portraits, which is a major plus. I did not yet have the opportunity to test it on groups of people, but I believe it should work well for up to four people, with careful control.

review-lastolite-panelite-diffuser-0734

The ability to diffuse a large enough area for 3/4 and full length portraits is a big plus.

PRO: Portable

Like a lot of Lastolite’s product, the diffusion panel is collapsible, and folds up to a tiny fraction of its size. Packed in its case, I would compare it to the surface of a medium sized cafe table. Combined with its light weight, it’s easy enough to throw in the back of a car, and carry along on location with you, without strain.

PRO: Price

At $ 128, this is not a budget tool. However, for photographers serious about location based portraiture, the Lastolite Panelite Reflector comes in cheaper than lighting modifiers of moderate quality and unlike those, this doesn’t require lights to go with it.

CON: Extra hands

The Lastolite Panelite Reflector is large, and you will find it very difficult to manage without an assistant to hold it for you. If it needs to be held much higher than ground level, you may well need two people. It may be possible to rig it to some stands, but this leads into the next point.

CON: Be wary of wind

review-lastolite-panelite-diffuser-2695

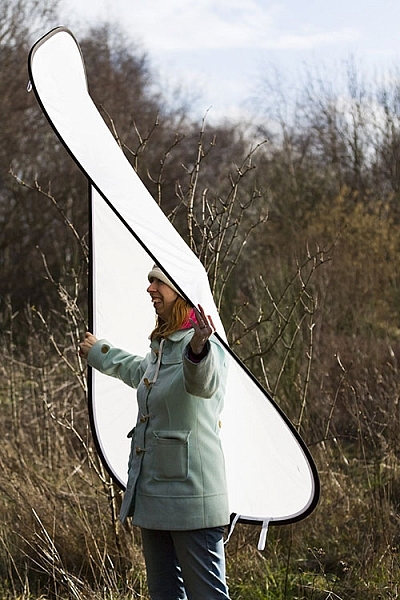
A small gust of wind sparked a several minute struggle to regain control over the panel.

The only real problem I came across while testing the Lastolite Panelite Reflector was that the slightest gust of wind will send it flying, and folding in on itself. Whoever is holding it for you needs to have a sure grip on it, and even then the whole process is still irksome.

If you’re into slapstick, this can be hilarious to watch, but any time spent trying to get the diffusion panel to play along, is time not spent taking photographs.

CON: Dirt

Like white reflectors, softboxes and white umbrellas, the Lastolite Panelite Reflector is really, really white and will be hard to clean when it inevitably gets dirty.

Overall thoughts

review-lastolite-panelite-diffuser-0640

If nothing else, when used head on, the Panelite Reflector creates some interesting catch-lights.

To sum it up easily, the Lastolite Panelite Reflector does exactly what it says on the tin. It’s portable, creates a beautiful diffused light, and is relatively affordable. Although, it can prove tricky to handle under some conditions, I found the results to be well worth the extra logistics and effort, and I am looking forward to a long an extended relationship with it in my photographic arsenal.

googletag.cmd.push(function() {
tablet_slots.push( googletag.defineSlot( “/1005424/_dPSv4_tab-all-article-bottom_(300×250)”, [300, 250], “pb-ad-78623” ).addService( googletag.pubads() ) ); } );

googletag.cmd.push(function() {
mobile_slots.push( googletag.defineSlot( “/1005424/_dPSv4_mob-all-article-bottom_(300×250)”, [300, 250], “pb-ad-78158” ).addService( googletag.pubads() ) ); } );

The post Review: Lastolite 6×4 Foot Panelite Collapsible Reflector with Translucent Diffuser by John McIntire appeared first on Digital Photography School.


Digital Photography School

 
Comments Off on Review: Lastolite 6×4 Foot Panelite Collapsible Reflector with Translucent Diffuser

Posted in Photography


Wing Light Flash Diffuser

02 Aug

Visit www.winglightstore.com for more information! Model Rebekka Clinton www.facebook.com www.maxim.com Make Up: Angie Hernandez & Cindy Nguyen’s School of Makeup. Photography: Dana Ng Editor: Dana Ng Co-Director: Yuhdo Aditya
Video Rating: 4 / 5

at the Talk Photography Convention 2012


Gary Fong launches Puffer diffuser for Micro Four Thirds

11 May

Flash accessory specialist Gary Fong has launched a version of its ‘Puffer’ flash diffuser for Micro Four Thirds cameras. The Micro Four Thirds Puffer clips into the hotshoe of the Panasonic GF and PEN E-PL series cameras and hangs a diffuser in front of the pop-up flash. The intent is to mitigate the harsh, direct lighting that can spoil portrait images with on-board flash, though it is likely to further limit the already low-powered internal flash output.
News: Digital Photography Review (dpreview.com)

 
Comments Off on Gary Fong launches Puffer diffuser for Micro Four Thirds

Posted in Uncategorized


Photography Tutorial – Outdoor Portraits Part2 Using Diffuser / Fill in Flash SB700 Beginner Lesson

07 May

Round Diffuser: www.amazon.com Flash Diffuser: www.amazon.com

Here is another rapid fire skype session with 5 great questions and time for some critiquing of a readers work. These calls are great, there fast, fun and informative. Keep an eye out for when these calls get randomly announced.
Video Rating: 3 / 5