RSS
 

Posts Tagged ‘decide’

Is it Time to go Full Frame? Weigh These Pros and Cons Before You Decide

08 Feb

The post Is it Time to go Full Frame? Weigh These Pros and Cons Before You Decide appeared first on Digital Photography School. It was authored by Bruce Wunderlich.

Is it time to go full frame?

Has anyone ever said to you, “That’s a nice photo; you must have an expensive camera”?

According to photography legend Ansel Adams, “The single most important component of a camera is the twelve inches behind it!”

Your camera is simply a tool, one that you use to create your vision of the scene in front of you. A camera can only do what you tell it to, so it’s not going to capture that “nice photo” all by itself.

But what if a camera doesn’t perform up to your expectations? Then it may be time for an upgrade – from APS-C to full frame.

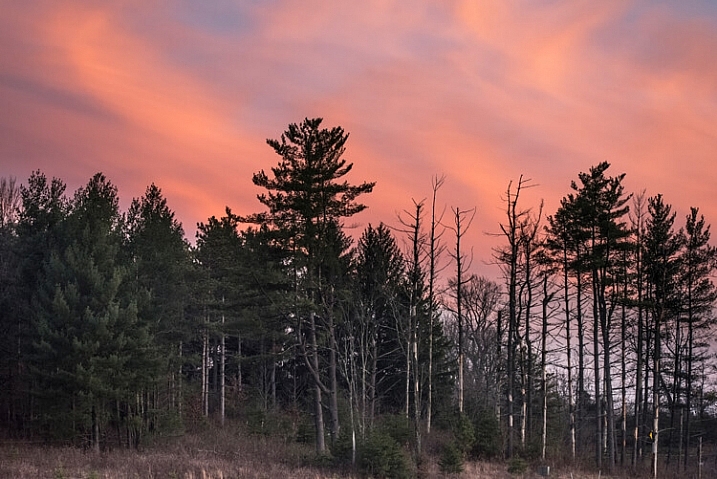
Full frame photo of a forest at sunset
Captured at ISO 6400 on a full-frame Nikon D750, this image shows great tonal range with acceptable noise levels.

I recently made the jump from a crop sensor camera to a full-frame body (a Nikon D750, used in all the images below). For this article, I am not going to get into a technical discussion about the differences between a crop sensor camera and a full-frame camera.

Instead, I want to talk about if and when upgrading to a full-frame camera is desirable, especially if you’re on the fence about purchasing a full-frame body.

Now let’s discuss some important full-frame pros and cons:

Advantages of full frame

  • Enhanced low-light performance: The larger sensor of a full-frame camera has bigger pixels, which create less digital noise at higher ISOs. In most cases, you will get a one- or two-stop improvement in high-ISO noise over crop sensor cameras, which allows you to shoot with faster shutter speeds in low light.
  • More control over depth of field: This is a commonly misunderstood benefit of full-frame cameras, because the larger sensor does not really affect the depth of field of an image. However, with the larger sensor of a full-frame camera, you can move closer to the subject while using an equivalent focal length, and this causes the depth of field to become narrower. Ultimately, you get smoother background bokeh.
  • Improved dynamic range and color depth: A full-frame sensor can record more tonal range within shadows and highlights. Detail and color are much improved at both ends of the spectrum.

Disadvantages of full frame

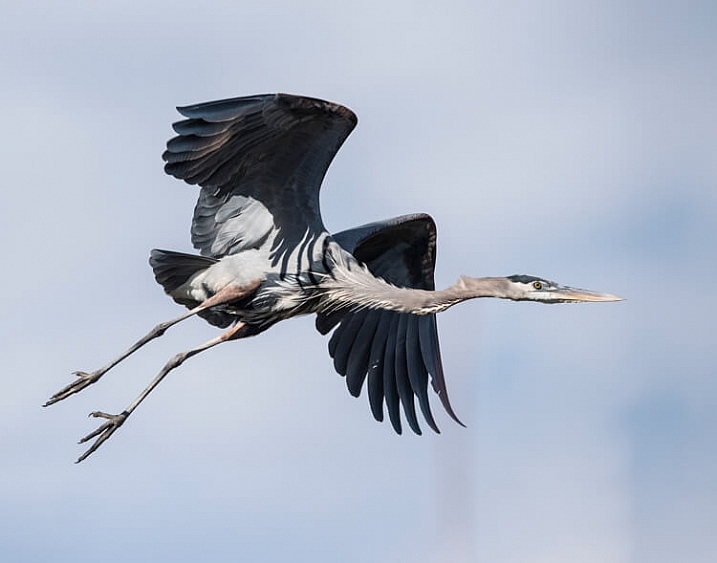
Great Blue Heron in flight
This heron in flight was captured at a high ISO to achieve the fast shutter speed needed to get a sharp wildlife image.
  • Expense: Not only is the cost of a full-frame DSLR or mirrorless camera higher than crop sensor alternatives, but you may also need to invest in full-frame lenses.
  • Size and weight: The overall size and weight of full-frame cameras is greater than their crop sensor counterparts. Full-frame lenses are also larger and heavier. This may not matter to many photographers, but if you frequently carry gear for long distances, it could be a factor to consider.
  • No crop factor: The telephoto reach of a full-frame camera is lessened by not having a crop sensor. A 200mm lens on a full-frame camera reaches to 200mm; a 200mm lens on a 1.5x crop sensor camera reaches to 300mm.

If you’ve made it this far and you still like the sound of a full-frame camera, it’s time to ask yourself a few key questions:

How much will it cost?

As mentioned above, the cost of buying a full-frame camera is significantly more expensive than a crop sensor one, plus you’ll likely need to purchase new lenses. There isn’t much use in changing to full frame if you are not going to use high-quality lenses designed for full-frame cameras. So if you plan to make the jump to full frame, you may want to begin by upgrading your lenses to those compatible with full-frame cameras.

What type of photography do you enjoy shooting?

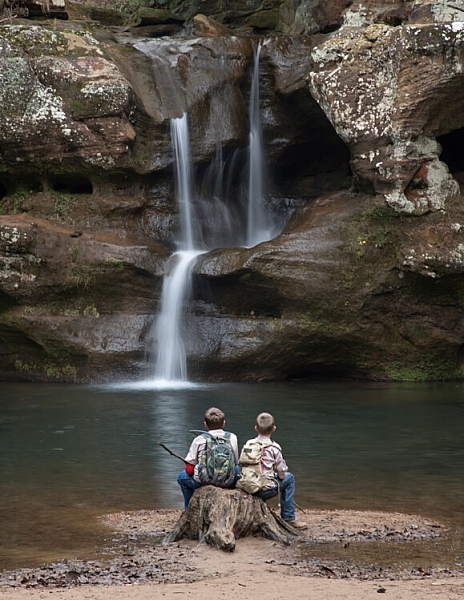
Boys sitting by a waterfall
Choosing a smaller aperture of f/22 produced enough depth of field to keep both the boys and the waterfalls in focus when using my full-frame Nikon D750.

Full-frame sensors offer advantages and disadvantages for different types of photography.

  • Landscape: Enhanced low-light performance and more detail are both key advantages of full-frame cameras for landscape photography. The only possible drawback here is the effectively shallower depth of field, but this can be compensated for by using a smaller f-stop.
  • Portraits: The larger size of a full-frame sensor will result in a shallower depth of field. For portraiture, this means the backgrounds can feature more blur and make the subjects stand out better.
  • Wildlife: A full-frame camera loses the telephoto reach that a crop sensor camera offers. Nevertheless, a lot of wildlife photography is shot in low-light situations, where a full-frame sensor gives a significant advantage.
  • Sports: As with wildlife photography, high-ISO capabilities are helpful for sports photography. However, the loss of increased reach may be a problem.

To summarize:

If you are a portrait or landscape shooter, there are many reasons to switch to full frame. But if you’re a sports or wildlife shooter, you’ll need to consider more carefully.

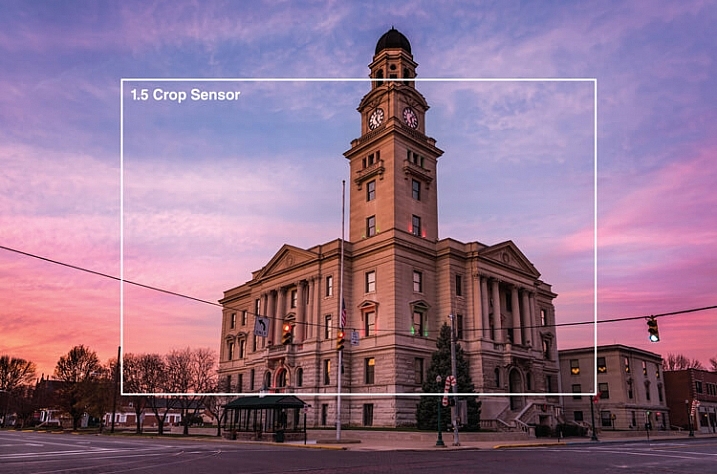
Architecture at sunset
This scene was captured at 24mm on a full-frame Nikon D750. The white line shows how much of this image would be captured on a crop sensor camera from the same shooting location.
Bald Eagles in a nest
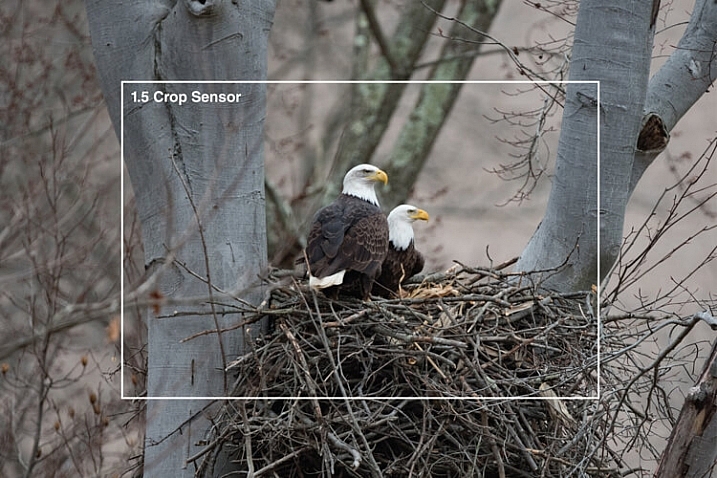
This image was captured at 600mm with a full-frame camera. The white line shows the reach advantage that a crop sensor camera would provide. Still, capturing this image in low-light conditions with an ISO of 2000 is possible thanks to my full-frame sensor.

Is your current camera holding you back?

Every camera has a limited number of shutter releases, so if your camera is nearing the end of its life cycle, it might be time to consider an upgrade. If your older crop sensor model is limiting your results in low light, and you are constantly frustrated by high levels of noise, you might benefit from an upgrade to full frame.

However, keep in mind that it’s convenient to blame a camera for taking poor images, but it may not be the camera that’s holding you back.

Many times, photographers don’t get the results they expect from high-end equipment simply because they struggle with more fundamental techniques. No matter what type of camera you shoot with, get to know it and how all of its features work before moving on to a different one.

Cityscape at sunset
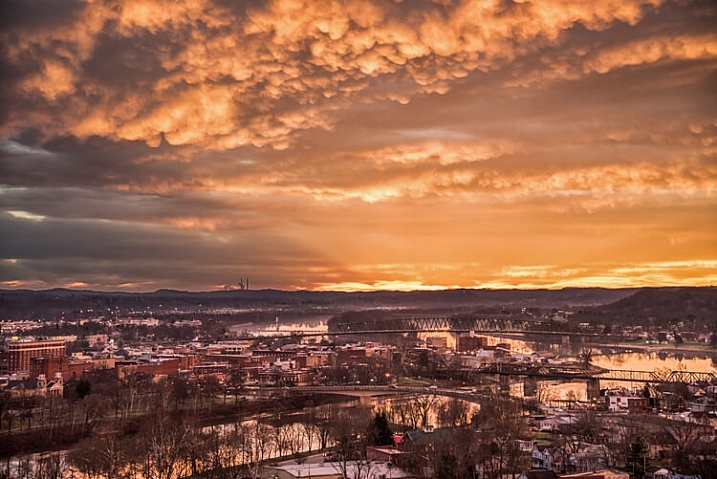
This cityscape was captured with a full-frame camera in low light by increasing the ISO.

What is your level of photography experience?

A full-frame camera is probably not the best option for beginners.

So if you are a beginner, I’d recommend starting with an entry-level camera and working up to a full-frame model. In fact, if you are looking for a camera to take photos of family and friends, a crop-sensor model is a great choice.

Having a good handle on the exposure triangle (aperture, shutter speed, and ISO) and how its key components work together is essential if you’re going to take advantage of a full-frame sensor. You must also be comfortable shooting in Manual mode.

Do you make large prints?

A full-frame sensor has larger pixels, which will capture more light – and this results in high-quality large prints. If you never make any prints larger than 8×10″, then a full-frame model won’t help you much here.

Bare trees at sunrise
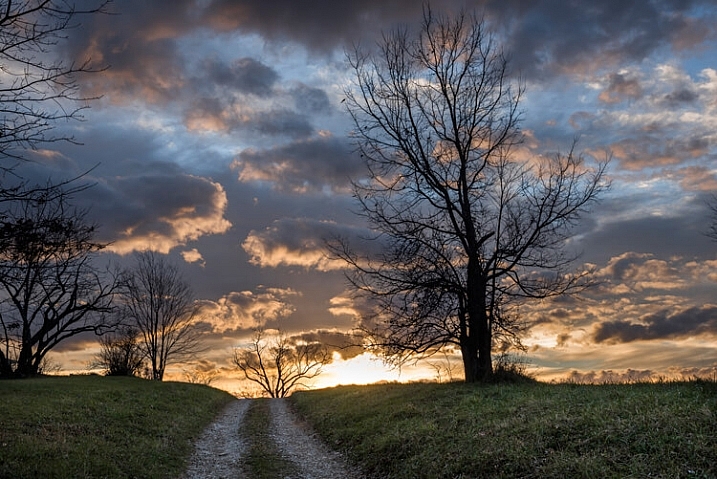
Captured with a full-frame Nikon D750, this sunrise image reveals a nice range of tones, without any of the digital noise in the shadows that is likely to be present with some crop-sensor cameras.

Will purchasing a full-frame camera make you a better photographer?

You may have heard this quote, “Skill in photography is acquired by practice, not by purchase.”

Do you need a full-frame camera to capture great images? No, of course not! Most new crop sensor cameras on the market today are engineered to take beautiful images!

But if you’re an experienced photographer, you may benefit from switching to full frame.

The bottom line

If you are thinking of upgrading from a crop sensor camera, be sure to consider the price, lens compatibility, and type of photography you do before you make the change to full frame. Jumping to a larger sensor can be intense – but if you’re ready for that big step, the results are often rewarding.

Now tell me:

Are you ready to go full frame? Please leave your answer in the comments below!

The post Is it Time to go Full Frame? Weigh These Pros and Cons Before You Decide appeared first on Digital Photography School. It was authored by Bruce Wunderlich.


Digital Photography School

 
Comments Off on Is it Time to go Full Frame? Weigh These Pros and Cons Before You Decide

Posted in Photography


Apple will stop automatically slowing down your iPhone, will let you decide

18 Jan
Photo by Suganth

Apple’s iPhone slowdown controversy has reached what seems like its final stage last night, when Tim Cook announced in an exclusive interview with ABC News that the company would give users the option to keep their older iPhones running at full speed, even once the battery had become, in Cook’s words, ‘unhealthy.’

The controversy began a few weeks ago when several iPhone users online shared benchmarks that showed older phones—iPhone 6 and 6s models—were being slowed down to less than half their original CPU performance. This led to wild speculation about so-called ‘planned obsolescence’: the idea that Apple was slowing down phones to encourage users to upgrade to newer models.

Apple admitted to releasing an update that slowed down iPhones whose batteries had become older, but the company was vehement that it was done in the users best interest—a way to prevent unexpected restarts. Cook reiterated this point in last night’s interview with ABC News.

“When we did put [the update] out, we did say what it was, but I don’t think a lot of people were paying attention and maybe we should have been clearer as well,” says Cook, explaining that Apple did notify users, probably in the update release notes. “And so we deeply apologize to anybody that thinks we had some other kind of motivation.”

In the short cut of the interview above, this apology is all that’s mentioned, but a longer version of the interview also revealed another very interesting tidbit: Apple’s forthcoming battery update will let users choose whether or not their phones are slowed down once the battery becomes ‘unhealthy.’

As MacRumors quotes from a longer cut they were able to embed:

We’re also going to… first in a developer release that happens next month, we’re going to give people the visibility of the health of their battery.

[…]

…we will tell someone we’re reducing your performance by some amount in order to not have an unexpected restart. And if you don’t want it, you can turn it off. Now we don’t recommend it, because we think people’s iPhones are really important to them, and you never can tell when something is so urgent. Our actions were all in service of the user. I can’t stress that enough.

Whether or not these changes—and the discounted battery replacements announced a couple of weeks ago—will be enough to get Apple out of a few of the lawsuits currently being pursued against the company is yet to be seen. But for users who wanted more transparency from the company, it’s definitely a step in the right direction.

Articles: Digital Photography Review (dpreview.com)

 
Comments Off on Apple will stop automatically slowing down your iPhone, will let you decide

Posted in Uncategorized


7 Questions That Will Help You Decide Which Camera To Buy

09 Aug

People often ask me for advice on which camera to buy. Most often they expect me to say, “Buy a Nikon” because that’s what I use. But that is not what I tell them.

If you were to ask me which camera you should buy I would first ask you a series of questions. From the answers, you give me I would guide you towards either a compact camera, mirrorless, or DSLR. So if you aren’t sure which camera to get, ask yourself these seven questions before you go shopping.

1. Why do you want a camera?

Doesn’t your phone take good enough photos? I’m not joking, this is a serious question.

Phone - 7 Questions That Will Help You Decide Which Camera To Buy

I know if you are asking questions about buying a new camera you’ve already given some thought to the decision and are reasonably serious about it. I’m looking for an answer telling me how your phone is failing you in your endeavors to make photos. I want to know what you are hoping a camera will do that your phone cannot. Your answer will help me guide you towarwd the type of camera that will best suit you and your needs.

2. How and when will you use your camera?

The answer to this question will help determine what size camera to buy. Recently I’ve had two friends who are embarking on a once in a lifetime traveling experience ask me about what camera to buy. Both were thinking of buying DSLRs, expecting that those big cameras would give them the best results. But, I encouraged them each not to buy a DSLR because they are big and heavy!

It’s often said that the best camera is the one you have with you. If your camera is reasonably small you are more likely to want to carry it everywhere with you while traveling. Read more on this subject here: Must Have Gear for Travel Photography Newbies.

Compact travel camera - 7 Questions That Will Help You Decide Which Camera To Buy

If you want to mainly use a camera to photograph products for your online store or to take pics of your garden I would be more likely to suggest you look at DSLRs (depending on the answers you give to some of the following questions).

The size and weight of a camera must be seriously considered because it’s no good buying a camera you find too big and heavy to carry with you. You will not use it often and will be disappointed with your purchase.

3. What will you use the photos for?

Enthusiast - 7 Questions That Will Help You Decide Which Camera To Buy

Your answer to this question will ascertain the level of image quality you will need. These days most people want photos to share on social media. If this is you, then you will not need a camera with the maximum megapixels available! Most compact cameras these days will produce images of high enough pixel quality for social media posting.

Producing prints, photo books or photos to sell online will require a camera with a larger sensor. For people who enjoy time in front of their computers post-processing photos, more megapixels and a larger sensors in DSLR and mirrorless models will be an advantage. Which leads me to the next question.

4. Do you take time to post-process your photos?

Full frame dslr - 7 Questions That Will Help You Decide Which Camera To Buy

If you enjoy taking the time to do some post-processing on your photos and want to maintain high technical results, this starts to narrow down your camera options. Generally, cameras with larger sensors will produce photos that hold up to more post-processing. For example, a full frame sensor (36mm X 24mm) containing 24 megapixels will allow more post-processing before the image starts to deteriorate than a smaller 24 megapixel micro four thirds sensor (17.3mm X 13mm.)

You want to have confidence that your image quality will remain intact as you apply some color balancing and filters or more advanced post-processing techniques.

5. How big are your hands?

Small hands - 7 Questions That Will Help You Decide Which Camera To Buy

Seriously! If you have small hands you will find it difficult to use a large camera. If you have big hands, you will find it more difficult to use a small camera. You will need to consider the layout of the buttons and dials on a camera so you are comfortable using it.

Some camera manufactures manage to design small cameras which have well configured layouts and are easy to use, others do not seem to do such a good job. Before you buy, go hold the cameras you have short listed in your hands and see how they feel.

Small hands - 7 Questions That Will Help You Decide Which Camera To Buy

6. What’s your budget?

This is an obvious consideration for most people, but you are best to consider it along with these other questions, not separately. Sometimes budget limits your choice considerably. Sometimes the answers to other questions will lead you to purchase a camera and spend less than you may have thought initially. I think both my friends who asked for travel camera advice found this to be the case.

You may find a high-end compact camera with a one-inch sensor will give you more pleasure and provide high enough quality photos than a DSLR … because it’s small and you will take it with you everywhere.

Compact happy - 7 Questions That Will Help You Decide Which Camera To Buy

7. Do you have a preferred brand?

I do have a preferred brand of camera. But I will never push people to buy the brand I use just because I like it. If you are already familiar with a camera brand and are happy with it, that is a good reason to stick with it.

Dslr - 7 Questions That Will Help You Decide Which Camera To Buy

Camera manufacturers often configure their cameras to feel and function the same with each upgrade they produce. I like it when I purchase a new camera that has the same feel in my hand as the one from which I’m upgrading. It makes it quicker and easier to start using the camera intuitively.

If you do not have a preferred brand I encourage you to stick with one of the major brands that fit within your budget.

Conclusion

Doing some careful research will help you make a decision to be able to buy a camera you’ll be satisfied with, one that will hopefully last you a long time. Using your new camera frequently and enrolling in a course or taking a few workshops will help you up-skill more quickly and gain more enjoyment from your purchase.

What other questions might you ask yourself before making a decision on which camera to buy? Do you have any other tips or advice for photography newbies just starting out? Please share in the comments section below.

The post 7 Questions That Will Help You Decide Which Camera To Buy by Kevin Landwer-Johan appeared first on Digital Photography School.


Digital Photography School

 
Comments Off on 7 Questions That Will Help You Decide Which Camera To Buy

Posted in Photography


Top 6 Considerations to Help You Decide on Color or Black and White for Your Image

07 Nov

As soon as humans discovered that it was possible to capture black and white tones in a photographic image, a practical means of color photography was sought by those who dreamed of harnessing the full spectrum of visible light. Some of the very first photographic color experiments began in the mid-19th century with scientists trying to discover a material that could capture the color properties of the light that fell upon it.

In 1886, physicist and inventor Gabriel Lippmann created what was to be the first color photograph without the aid of any pigments or dyes. By 1906, Lippmann exhibited his process along with color images of a parrot, a bowl of oranges, a group of flags, and a stained glass window. His discovery earned him the Nobel Prize in Physics.

blackworcolor03

But Lippmann was onto something else in his experiments. Selecting subjects for his photographs that are not only inherently colorful but are also strongly associated with color within the human brain. Perhaps without realizing it, Lippmann was one of the first photographers to draw a line between color and black and white photography. Deliberately selecting subject matter that was exemplified by radiant colors to reproduce in a color medium.

Nowadays, digital photography grants photographers with both the blessing and the burden of being able to choose between color or black and white in post-production. It can often be a painstaking process deciding between the two. Although making a deliberate decision between a color or a black and white image is a skill that requires practice and trial-and-error, ultimately the choice is down to you, the individual.

blackworcolor07

However, there are a few points to consider if you find yourself stuck between the two. Here are the top six tips for deciding whether to go with color or black and white.

#1 Color Relationships

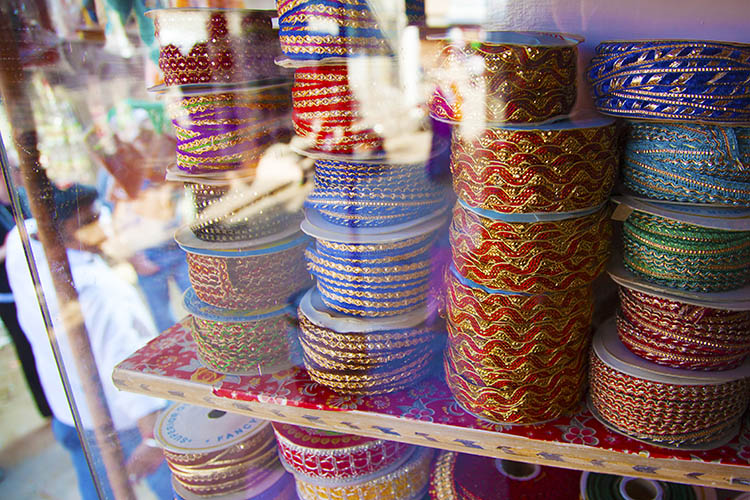
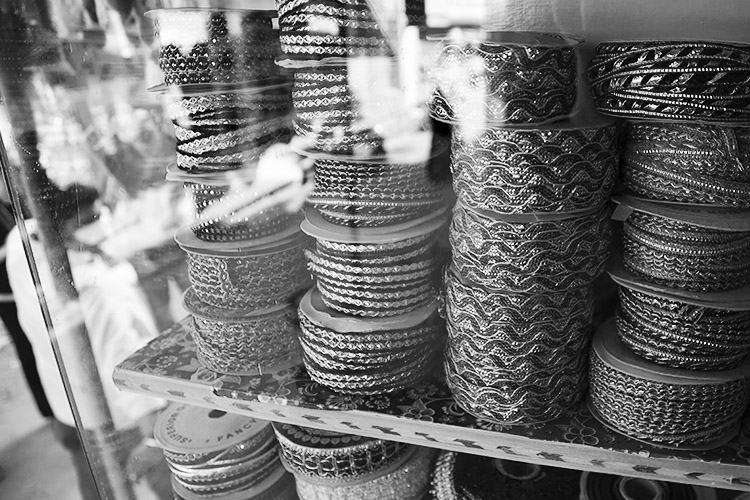
The first thing to consider when choosing between color or black and white is in fact, color itself! Ask yourself; what is it that draws you to the image? If you find that the relationship between distinct hues in your image are important, color is your best bet. Color doesn’t always translate to a black and white image successfully. An image with contrasting hues such as red and green often appears similar in tone in a black and white conversion, making for a less striking or muddy image.

blackworcolor04

black-white-or-color-considerations-04b

#2 Mood

Just as artists have used color in paintings to denote mood for centuries, the colors in a photograph can also create the emotional atmosphere of an image. Color is a powerful messenger. It can impact a viewer’s emotions, draw associations between ideas, and guide the eye around an image.

While black and white images generally evoke a sense of sensuality or seriousness due to its association with documentary photography, color can emphasize a feeling of joy or sadness depending on the color scheme. Just as we associate warm colors like red and orange with comfort and warmth, so do we relate to the colors in a photograph, giving the viewer clues about the image and creating a more immersive experience.

The tone or color balance of a photograph can point to a time of day or season which conveys a particular emotion or experience within the image. Black and white photographs appear to be more timeless than color images because they are free from color schemes associated with particular types of film, processes, or trends in digital processing. Black and white photojournalism is often hard to date with a cursory glance, so the subject matter remains relevant to the present day.

blackworcolor05

black-white-or-color-considerations-05b

See how the color version has a completely different mood?

#3 Attention

We see it all around us in marketing, architecture, and print. Color is used to grab a viewer’s eye and draw them in. But it is a fine balance and can often become complicated or convoluted if too much is happening with the picture. Look for a dominant color or color combination in your work. The most visual impact is often created by either isolating a particular color or having two colors from

The most visual impact is often created by either isolating a particular color or having two colors from well-separated areas of the color spectrum included in the one image. Colors such as red and green, or orange and purple (complementary colors) play off each other when they reach the human eye and create a sense of movement and action.

If your image has these combinations it might be better to stay with color and spend time emphasizing the colorful components of the image rather than converting it to black and white. A lack of color accentuates the light and shadows rather than eye-catching color combinations. Emphasis on particular colors can also be useful in forming a cohesive body of work, using color to contrast different imagery in a series, or uniting each piece with harmonious trends in color schemes.

Black&WorColor01

#4 Viewing time

Many photographers prefer black and white images for their tendency to distance the subject matter from reality. In documentary photography, the reverse is also true as humans see the world in color, and a rendition of the world in monochrome gives us pause to investigate. In both cases, removing color from a picture helps the viewer to focus on what is happening in an image. Due to the lack of cues that we naturally look for in color imagery, the viewer tends to look at a photograph more closely to ‘read’ what is happening in the image. A slower viewing time means that there is more time for the image to communicate with the viewer, impart emotion to a greater extent and perhaps stay with the viewer even after they have stopped looking at the work physically.

Due to the lack of cues that we naturally look for in color imagery, the viewer tends to look at a photograph more closely to read what is happening in the image. A slower viewing means that there is more time for the image to communicate with the viewer, impart emotion to a greater extent, and perhaps stay with the viewer even after they have stopped looking at the work physically.

blackworcolor09

#5 Content

To put it simply, black and white images create an emphasis on light, form, or texture. If the content of the photograph is more important than the color of the subject, or you feel that the color in a photo serves only as a distraction from the message you want the image to convey – then black and white is probably a good choice.

The focus shifts from colors to tones in black and white. So subjects like smoke, shadows, subtle changes in light and dust become more obvious in a black and white image. Because of our associations with these subjects and their otherworldly appearance, a sense of drama can become more apparent in a black and white image than that of a color image.

blackworcolor06

#6 Simplicity

Often a color photograph looks too busy or convoluted if it has too many colors going on at once. Sometimes converting the image to black and white is a way of separating those tones out into an image that is easier on the eye. Images with a wide range of tonal values tend to work well for black and white imagery. As well, most black and white images work best when there is a definite range from the blackest black through to the whitest white, with varying gray tones in between.

A few words of advice…

Beware the quick fix! Inexperienced photographers can sometimes fall into the trap of converting a sub-par image to black and white in order to quote, “save it”. Photographs that are out of focus, blurry, or poorly exposed may or may not be saved with a black and white conversion. But they do look suspiciously obvious when they are presented within a series of images that is mainly in color.

The problem with relying on black and white as a crutch is that you aren’t investigating what you did wrong in the first place. While a black and white conversion may or may not save a photograph, relying on converting images will not help you develop your own technical practice.

blackworcolor02

Digital photography is amazing, in that we have the option of shooting in color and switching to black and white in post-production. With film, this was at least a pain in the neck and at most, impossible. If you are unsure about an image, play around with it in Photoshop! Tools in Photoshop like the premade settings for black and white conversion are designed to give you a good set of variations to experiment with. If an image looks busy and over saturated, but you don’t want a full black and white conversion, try desaturating the image with the Vibrance adjustment layer or the Curves tool which are located in the Adjustment Layers panel.

Conclusion

Experimenting with color and black and white is fun, but no matter what option you do go with, be certain that you know why you chose that particular color scheme and make sure it adds to the sum of the image rather than detracting from it!

googletag.cmd.push(function() {
tablet_slots.push( googletag.defineSlot( “/1005424/_dPSv4_tab-all-article-bottom_(300×250)”, [300, 250], “pb-ad-78623” ).addService( googletag.pubads() ) ); } );

googletag.cmd.push(function() {
mobile_slots.push( googletag.defineSlot( “/1005424/_dPSv4_mob-all-article-bottom_(300×250)”, [300, 250], “pb-ad-78158” ).addService( googletag.pubads() ) ); } );

The post Top 6 Considerations to Help You Decide on Color or Black and White for Your Image by Megan Kennedy appeared first on Digital Photography School.


Digital Photography School

 
Comments Off on Top 6 Considerations to Help You Decide on Color or Black and White for Your Image

Posted in Photography


How to Decide What Gear to Pack for a Wilderness Trip

11 Apr

AK-ANWR-Kongakut-108094-162

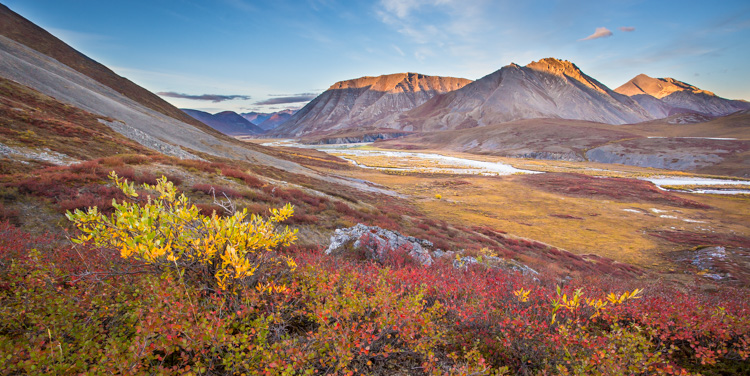
Each year, I spend many weeks guiding, and exploring, in the mountains and rivers of Alaska. The trips are a mishmash of different adventures; base-camp trips, mellow canoe trips, backpacks over rugged terrain and high peaks, or multi-day whitewater rafting trips.

One thing that always plays a part, no matter what type of journey I’m taking, is photography. The gear however, varies. Different types of trips demand different kinds of equipment, and there are a number of things that need to be taken into consideration. For me, photo equipment decisions are a multi-step process, and there are a few things to consider. Here are three and my tips at the end for packing a kit.

#1 – Weight Limitations

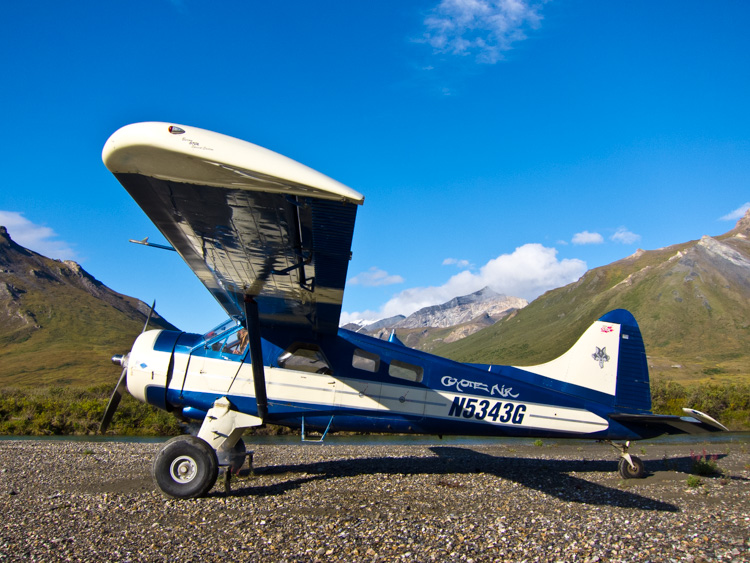
A DeHaviland Beaver, classic Alaska bush plane on a riverside gravel bar in the Brooks Range of northern Alaska.

A DeHaviland Beaver, the classic Alaska bush plane, on a riverside gravel bar in the Brooks Range of northern Alaska.

This is a constant in the backcountry. Weight is always, ALWAYS an issue. On backpacking trips, every ounce of camera gear has to be added to clothing, tents, food, cookware, and safety equipment that cannot be left behind. When I’m guiding backpacking trips in Alaska’s wilderness, this can mean that on top of my usual backpacking gear, I also have an expedition first aid kit, satellite phone, ground to air radio, and more than my own share of food. My pack is heavy, long before I add camera gear. Making sure that anything extra is as light as possible, is my priority.

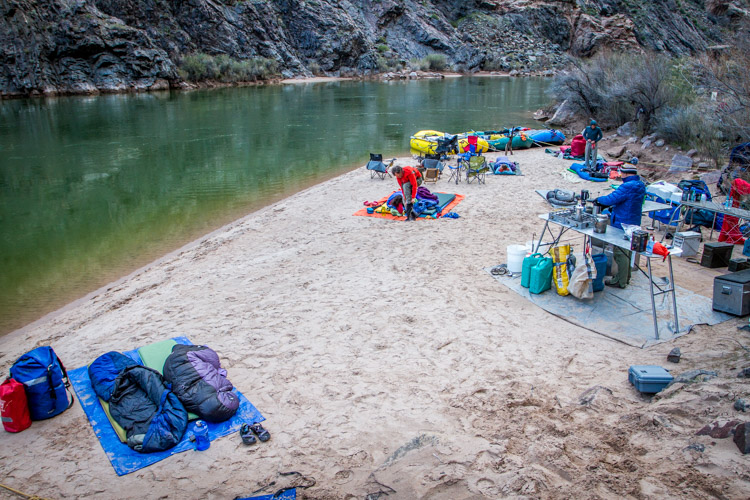
Sometimes you can carry a lot of gear, as you can see from this camp along the Colorado River in the Grand Canyon, but even here every pound has to be loaded and unloaded daily.

Sometimes you can carry a lot of gear, as you can see from this camp along the Colorado River in the Grand Canyon, but even here every pound has to be loaded and unloaded daily.

Other types of trips are not as restrictive, but weight is always a concern. Most of the trips I lead involve small bush planes to get to and from our start and end points. These tiny aircraft have limits on the amount of weight that be carried. So even it’s a rafting trip where there is plenty of space in the boats, the number of pounds of excess gear is still a concern.

Even photography-specific trips are limited. Any time you are in the backcountry, you will have to carry your gear, so it’s got to be compact and light enough that you can get it where it needs to go, quickly, and without fuss.

I often find it helpful to run the numbers. How many pounds of total gear can I handle? For example, on backpacking trips I know that the most weight I can carry comfortably for extended periods without risking injury is around 70 lbs (31.75 kg). If non-photography gear weighs 60 (27.2 kg), then I’ve got 10 (4.5 kg) to play with (though I’m always happier with less!). For the guided trips I lead, we set a weight limit on our clients which is necessary to keep our cargo under the required limit of the small airplanes we use. Usually that number is around 50 lbs (22.7 kg) per person, less for backpacking. Start there, weigh your mandatory clothes and equipment, and then figure out what is left over for camera stuff. Safety first!

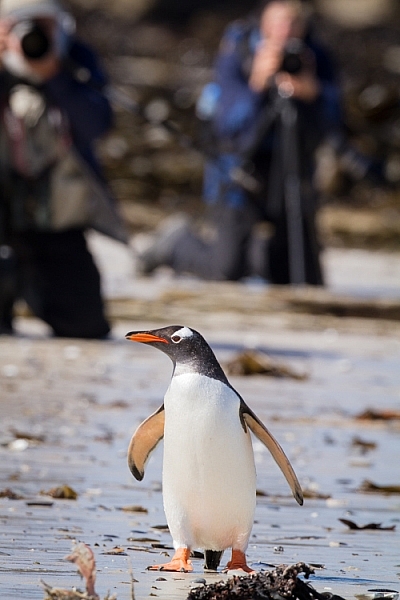
Falklands-2Jan10-CarcassIsl-114
#2 – Photographic Priorities

Are you hoping to shoot primarily wildlife or landscapes? Do you plan to make formal portraits along the way? Will you need a flash or light modifiers? Ask yourself these questions, and know about the trip you are making.

On the night before, I get together with my clients to talk about the upcoming trip. I’ve been surprised how often photographers really don’t know anything about where they are going. Since they don’t know what to expect, they are often carrying far too much gear. Do your research, find out your likely photo subjects, and make educated decisions about your equipment. If you are primarily expecting landscapes, but may have a chance at shooting wildlife, then consider a compact telephoto rather than a monster 600mm f/4. If wildlife is a major target, then by all means, take that big lens, but consider cutting out some of the smaller glass. Maybe you can get by with a single wide-angle zoom?

#3 – Trip Types

AZ-GCNP-FebMar12-510

Base-camps:

Photography trips that I lead into Alaska’s wilderness are often based out of single site. We set up a comfortable camp somewhere beautiful, where we can explore the surroundings for a few days. These kind of trips (keeping in mind airplane weight limitations), usually permit a broad array of gear, and few special precautions are needed. To haul your equipment around,  a standard camera backpack or daypack with a rain cover, is all that is needed. If the weather is really sour, we are usually drinking hot chocolate and playing cards back at camp.

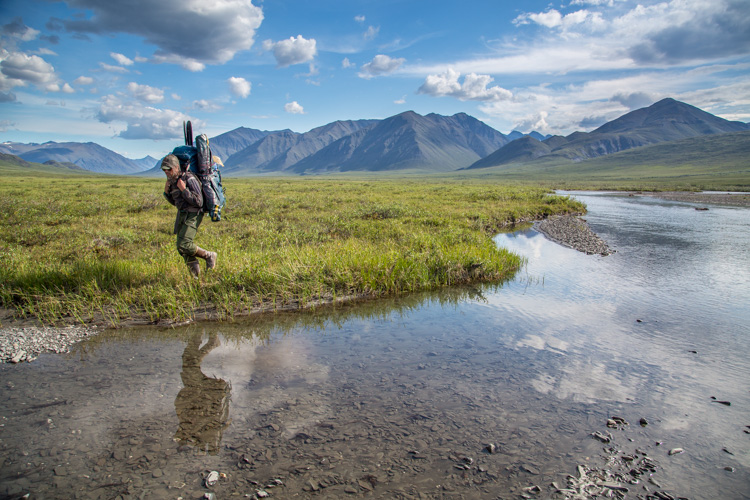
Backpacking means every piece of gear needs to be carried, so think light.

Backpacking means every piece of gear needs to be carried, so think light.

Backpacking:

On most backpacking trips, weight limitations will keep you to the bare minimum of gear. My standard kit is a lens or two, and a single body. I attach a holster style case to the chest straps of my pack with small carabiners. My camera is always there when I need it, and I don’t have to take the pack off every time I want to make a photo. Any extra gear is placed in convenient outside pockets.

AK-Noatak-Aug-1505

Mellow River Trips:

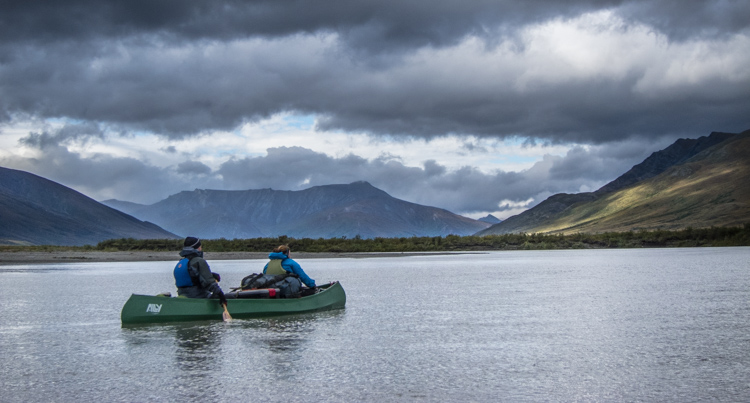
Even on the quietest of rivers, accidents happen. A camera, left carelessly on the seat of a canoe can slip into the water with an unexpected wobble of the boat. Splashes from riffles can soak an unprotected camera. Your gear needs to be protected from these threats. On an easy river, where the risk of a flip, or rock-induced swim is small, I usually store my gear in soft-cases, placed inside a larger, roll-top dry bag. Such protection is sufficient to fend off splashes, or even short dunks, as long as the seals on the bags are closed tightly.

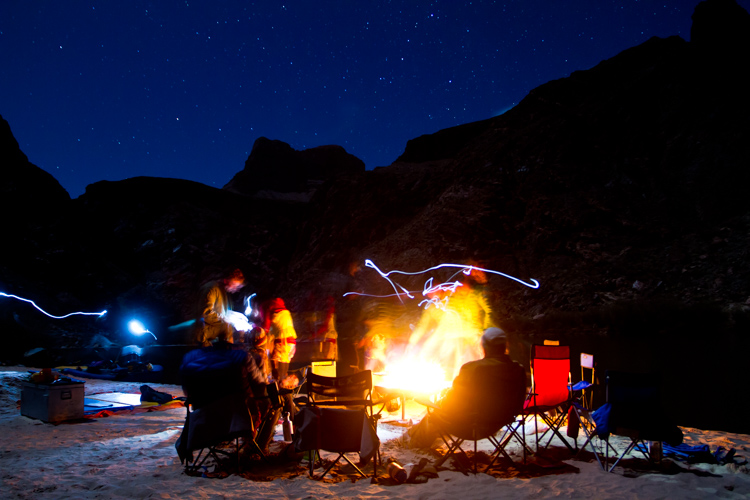
AZ-GCNP-FebMar12-246

Whitewater:

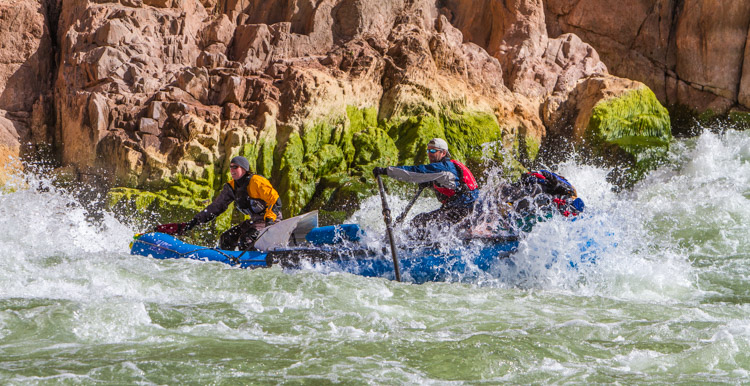
In big rapids, bad things can happen. Boats hit rocks and canyon walls, tipping, or flipping over entirely. Big waves routinely flood boats. No matter how perfectly a rapid is navigated, you and your gear will get wet, and may be submerged. This is not the time to mess around with ziplocks and cheap dry bags. If you are headed out on a whitewater trip, invest in a hard-sided water-tight case like a Pelican. Not only will these keep your gear dry, they will also protect your delicate electronics from impacts and the inevitable jarring they will receive in rough water.

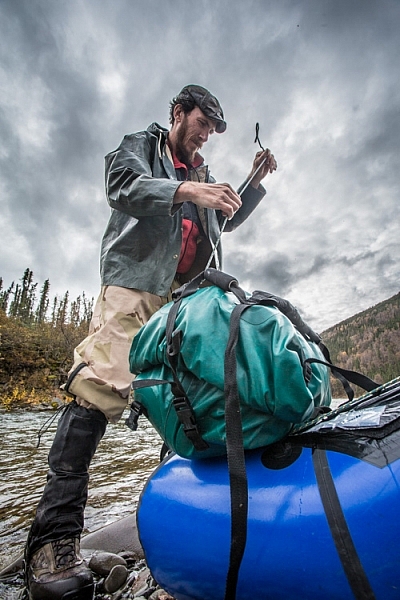
Securing well-sealed dry bags to the front of a packraft, a daily chore on a remote river trip.

Securing well-sealed dry bags to the front of a packraft, a daily chore on a remote river trip.

Sample Gear Kits

Base-camp: DSLR (or two), wide angle zoom, mid-range lens, telephoto (even a big 500mm or 600mm f/4), backpack, tripod, and accessories.

Backpacking Heavy: DSLR, wide angle zoom, telephoto zoom like a 100-400mm, soft cases, ultralight tripod, and ultralight nylon dry bags.

Backpacking Light: DSLR, wide-mid range zoom (24-105mm), case, and an ultralight nylon dry bag.

Mellow River: DSLR, wide angle zoom, fixed mid-range lens (40 or 50mm), telephoto zoom (100-400mm), tripod, second body or backup camera, dry bags. (If wildlife is a top priority, I’ll replace the 100-400 with a 500mm f/4).

Whitewater River: Same as mellow river with the addition of a suitably large pelican case.

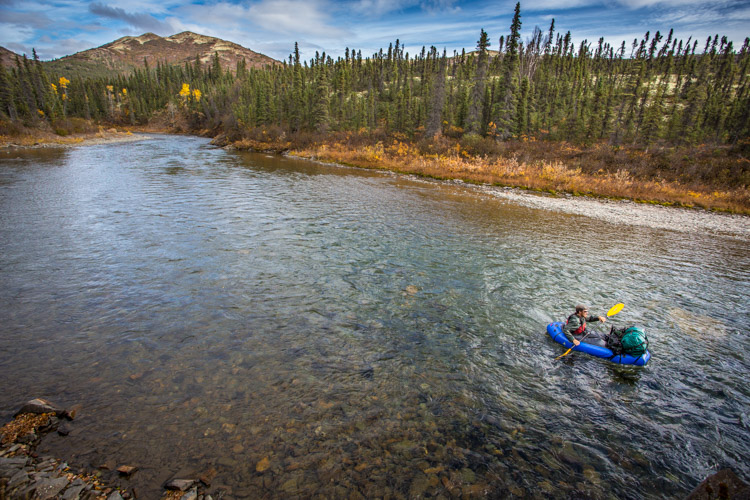
Packrafting in western Alaska.

Conclusion

If you pay attention to your photography gear choices at the beginning of your trip, you are unlikely to have any troubles along the way. Think about the limitations of your journey, what it is you are planning to photograph, and how you are going to protect and transport your gear. When those decisions are made, actually selecting what to take gets easier.

A final note of warning from someone who as been there: Please don’t overpack. It’s happened too many times to count, when have I stood around with clients at a pre-trip meeting and been forced to ask them to remove some of their precious gear due to plane, boat, or pack, weight limitations. Too much gear is just as bad, maybe worse, than too little during a wilderness trip, so pack thoughtfully.

googletag.cmd.push(function() {
tablet_slots.push( googletag.defineSlot( “/1005424/_dPSv4_tab-all-article-bottom_(300×250)”, [300, 250], “pb-ad-78623” ).addService( googletag.pubads() ) ); } );

googletag.cmd.push(function() {
mobile_slots.push( googletag.defineSlot( “/1005424/_dPSv4_mob-all-article-bottom_(300×250)”, [300, 250], “pb-ad-78158” ).addService( googletag.pubads() ) ); } );

The post How to Decide What Gear to Pack for a Wilderness Trip by David Shaw appeared first on Digital Photography School.


Digital Photography School

 
Comments Off on How to Decide What Gear to Pack for a Wilderness Trip

Posted in Photography


Is it Time to go Full Frame? Weight These Pros and Cons Before You Decide

24 Jan

Has anyone ever said to you, “That’s a nice photo, you must have an expensive camera!”?

According to photography legend Ansel Adams, “The single most important component of a camera is the twelve inches behind it!”  

Your camera is simply a tool, that you use to create your vision of the scene in front of you. A camera can only do what you tell it, so it’s not going to capture that “nice photo” all by itself. But, what if the camera doesn’t perform up to your expectations? Then, it may be time for an upgrade.


Captured at ISO 6400 this image shows great tonal range with very acceptable noise levels.

Captured at ISO 6400 on a Nikon D750 full frame, this image shows great tonal range with very acceptable noise levels.

I recently made the jump from a cropped-sensor camera to a full frame body (a Nikon D750, used in all the images below). For the purpose of this article I am not going to get into a technical discussion about the differences between a crop sensor (APS-C), and full frame camera (the main one being is that the full frame has a larger sensor, the size of a frame of 35mm film).

But how do you know if, and when, upgrading to a full frame camera is desirable? What follows are some points to consider if you’re on the fence.

Advantages of full frame

  • Improved low light performance: Because of the larger sensor size, a full frame camera is able to capture more light, which allows it to attain focus in darker environments.
  • Higher ISO performance: The larger sensor of a full frame has larger pixels, which creates less digital noise at higher ISOs. In most cases you will get a one or two stop improvement in high ISO noise, over crop sensor cameras, though many new models of APS-C models have a much improved performance in noise reduction.
  • More control over depth of field: This is a commonly misunderstood benefit of full frame, because the larger sensor does not really affect the depth of field of an image. However, with the larger sensor of a full frame, you can move closer to the subject which causes the depth of field to become smaller. This, in turn, creates a smoother bokeh.
  • Improved dynamic range and color depth:  A full frame sensor can record more tonal range within shadows and highlights. Detail and color are much improved at both ends of the spectrum.

Disadvantages of full frame

Bird in fight was captured here at high ISO to achieve fast shutter speed to capture a very sharp image.

This heron in flight was captured at high ISO to achieve the fast shutter speed needed to get a sharp wildlife image.

  • Expense: Not only is the cost of the full frame DSLR higher than a crop sensor, you will most likely need to make additional investment in compatible lenses.
  • Size and weight: Not only are the sensors larger in a full frame DSLR, the overall size and weight are as well. Also, the lenses have more glass elements, and are also larger and heavier. This may not matter to many photographers, but when carrying gear for long distances it could be a factor to consider.
  • No crop factor: The telephoto reach of a full frame DSLR is lessened by not having a crop sensor. For example: a 200mm lens on full frame doesn’t have the reach of the approximate focal length on a cropped sensor  camera (about 300mm).
  • Slow frame rate in burst mode: Because a full frame DSLR has a larger sensor, there is more information to record to the memory card. Therefore, it will take longer to save images to the card, resulting in fewer frames per second when you are shooting in burst mode.

So, how do you know if you are ready to make the jump to a full frame camera? Ask yourself these questions:

How much will it cost?

As mentioned above, the cost of buying a full frame camera is significantly more expensive than a crop sensor one, plus new lenses will most likely need to be purchased. There isn’t much use in changing to full frame if you are not going use high quantity lenses designed for full frame cameras. If you plan to make the jump to full frame, you may want to begin by upgrading lenses to those compatible with full frame DSLRs.

Choosing a smaller aperture of f/22 gave enough depth of field to keep both the boys and the waterfalls in focus.

Choosing a smaller aperture of f/22 produced enough depth of field to keep both the boys and the waterfalls in focus using a full frame Nikon D750.

What type of photography do you enjoy shooting?

Full frames have advantages and disadvantages for different types of photography.

  • Landscape: Low light performance, more detail and improved ISO performance are all great advantages of full frame for landscape photography. The only possible drawback here is the effectively shallower depth of field, but this can be compensated for by using a smaller f-stop.
  • Portraits: The larger sensor size of a full frame will result in a shallower depth of field. For portraiture this means the backgrounds can feature more blur and make the subjects stand out better.
  • Wildlife: A full frame camera loses the telephoto reach that a crop sensor has. Nevertheless, a lot of wildlife photography is shot in low light situations, where a full frame gives a much improved advantage.
  • Sports: As in wildlife photography, limited reach and low light factors apply to sports photography. Shooting with a full frame, the improved focusing in low light is a helpful benefit for sports. However, the slower frame rates of a full frame can be a drawback in photographing a fast moving sport.

If you are a portrait or landscape shooter, there are many benefits that might convince you to make the switch to full frame.

This scene was captured with at 24mm on full frame Nikon D750. The white line shows how much of this image would be captured on a crop sensor from the same location.

This scene was captured at 24mm on a full frame Nikon D750. The white line shows how much of this image would be captured on a crop sensor from the same shooting location.

This image was captured at 600mm with a Nikon D750. The white line shows the extra reach that a crop sensor camera would give you. This image was also captured in low light conditions with ISO of 2000 with very acceptable noise level.

This image was captured at 600mm with a full frame. The white line shows the extra reach advantage that a crop sensor camera would provide. Still, capturing this image in low light conditions with an ISO of 2000 results in a desirable noise level.

Is your current camera holding you back?

Every camera has a limited number of shutter releases, so if your camera is nearing the end of its life cycle, it might be time to consider an upgrade. If your older crop sensor DSLR is limiting your results in low light, and you are constantly frustrated by high levels of noise, you might benefit from an upgrade to full frame.

Keep in mind that it’s convenient to blame a camera for taking poor images, but it may not be the camera holding you back. Many times photographers don’t get the results they expect by underutilizing high-end equipment. No matter what type of camera you shoot with, get to know it, and how all of its features work, before moving on to a different one.

shooting here in low light, this shot was able to be captured in low light by increasing the ISO without adding digital noise to the image.

This cityscape was captured with a full frame in low light by increasing the ISO, without adding digital noise.

What is your level of photography experience?

A full frame camera is probably not the best one to use as a beginner. Start shooting with a more entry level DSLR, and work up to a full frame model. If you are looking for a camera to take photos of family and friends, a crop sensor DSLR is a very satisfactory choice. Having a good handle on the exposure triangle (aperture, shutter speed and ISO) and how they work together is a must if you’re going to take advantage of all the benefits of full frame. You must be comfortable with shooting in manual mode. If you earn any part of your income from photography, you may benefit from switching to a full frame camera.

Do you make large prints?

A full frame sensor has a larger pixel size, which will capture more light and detail, which results in sharper images that are conducive to making large prints. If you never make any prints larger than 8×10″, then a full frame DSLR may not be of benefit to you.

Here this sunrise shot has a nice range of tones without any noise in the shadows that you might get with some crop sensor cameras.

Captured with full frame Nikon D750, this sunrise image reveals a nice range of tones, without any of the digital noise in the shadows likely to be present with some crop sensor cameras.

Will purchasing a full frame make you a better photographer?

You may have heard this quote, “Skill in photography is acquired by practice, not by purchase.”

Do you need a full frame camera to capture great images? No, of course not! Most new crop sensor cameras on the market today are engineered to take beautiful images! But if you are an experienced photographer who makes money with your camera, you may gain an advantage by switching to full frame.

The bottom line

If you are thinking of upgrading from a crop sensor camera, be sure to consider the price, lens compatibility, and type of photography you do, before you make the change to full frame. Jumping to full frame can be quite a leap! But if you are ready for that big step, the results can be rewarding.

Are you ready to go full frame? Please leave your comments below.

googletag.cmd.push(function() {
tablet_slots.push( googletag.defineSlot( “/1005424/_dPSv4_tab-all-article-bottom_(300×250)”, [300, 250], “pb-ad-78623” ).addService( googletag.pubads() ) ); } );

googletag.cmd.push(function() {
mobile_slots.push( googletag.defineSlot( “/1005424/_dPSv4_mob-all-article-bottom_(300×250)”, [300, 250], “pb-ad-78158” ).addService( googletag.pubads() ) ); } );

The post Is it Time to go Full Frame? Weight These Pros and Cons Before You Decide by Bruce Wunderlich appeared first on Digital Photography School.


Digital Photography School

 
Comments Off on Is it Time to go Full Frame? Weight These Pros and Cons Before You Decide

Posted in Photography


Let’s Decide Once and For All: Canon or Nikon?

20 Aug

Which is better? Canon or Nikon?

It feels like this debate’s been going on longer than the “chicken vs. the egg” one.

So we’re gonna help you decide–once and for all!–whether you belong on “Team Canon” or “Team Nikon.” (Spoiler alert: they’re both great so you’ll be a winner either way.)

Read a little about each camp and what makes them special. A decision won’t be far behind!

(…)
Read the rest of Let’s Decide Once and For All: Canon or Nikon? (604 words)


© Taylor for Photojojo, 2015. |
Permalink |
No comment |
Add to
del.icio.us

Post tags:


Photojojo

 
Comments Off on Let’s Decide Once and For All: Canon or Nikon?

Posted in Equipment


4 Tips to Help you Decide Between Black and White or Color for your Image

09 Jul

Why do black and white photographs speak to us? In nature, colors are meant to attract, and cause things to catch our attention. Still, even without color, black and white images are a mainstay of our craft, and are powerful representations of the artistic spirit.

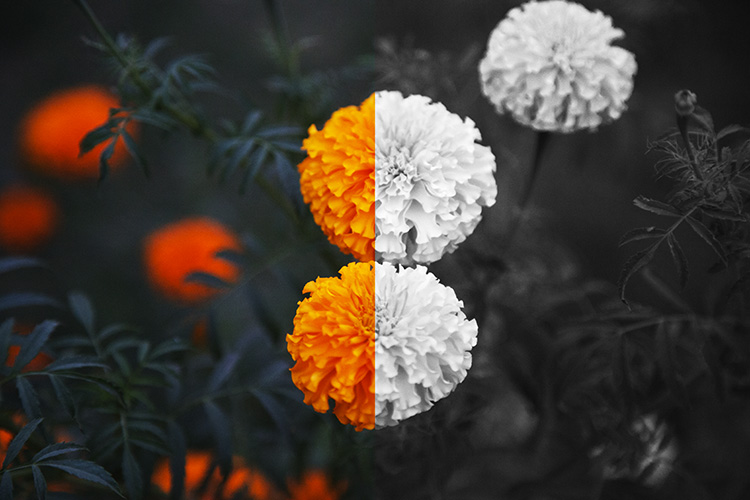
Half Color

There are many differing opinions when it comes to black and white photography. Some photographers love it, and shoot black and white exclusively, while other photographers absolutely shun the notion and shoot only in color. Then you have the majority of our lot who fall somewhere in between the love and hate poles. Luckily, the digital imaging age allows photographers to decide after the fact whether our images make us happier in full color, or in black and white. However, this ease of conversion can become somewhat of a problem because it is in fact so simple to switch from color to black and white, that it can cause conflicting feelings about which route to take. While there is really no absolute magic formula to determine the best choice for your particular image, there are some guidelines that you can follow to make your decision a little easier.

Here are four tips to help you decide if an image will be more appealing in black and white than in color.

Black and white or color?

#1 Does color have a large impact on the image?

This may seem like an easy judgment to make, but it is not always so simple. Color can be a fickle thing, and can either add to, or unintentionally detract interest from a photograph. Ask yourself, “does this image rely exclusively on color or are there other interesting aspects that can be emphasized?” Just how nice would it be to look at as a colorless rainbow? This not to say that all colorful objects and scenes won’t do well as black and white, but as a general rule most highly or diversely colored subjects should remain just that – colorful.

Silhouette
This image really had nothing to say in the way of color, so I made use of the heavy backlighting to create a strong contrast with the subject.

Two Giraffes
The original image didn’t have a lot going on as far as color, so I choose to convert it to black and white to really make the patterns pop.

The opposite of this usually proves to be true also. When you have an inherently bland scene or subdued colors, the image will usually do well when converted to black and white and this leads us to tip #2.

#2 Are there interesting light or contrasts?

This is where new photographers tend to encounter a little bit of difficulty because seeing good light or contrasts usually requires quite a bit of pre-visualization. Don’t worry! Developing an eye takes, well, some developing. The more you force yourself to look past what is readily apparent, the more you will learn to almost see in black and white.

When you remove color from the photographic equation, you are left with only differences in tone; lights and darks. These differences are what truly make good black and white images, and the differences in light and shadow bring contrast to the photograph. So, when you see that a given scene or subject presents the opportunity to exploit stark contrasts and unique lighting or shadow, it might be a great opportunity to try black and white. Take a look at this image of the leaf of a house plant.

Plant Leaf

I used a single flash behind the leaf to really bring out the contrasts within. Ordinarily these details might have gone unnoticed, and the black and white treatment really compliments the lighting.

The great Ansel Adam’s said that he; “could convey a greater sense of color with well executed black and white images using only light, shadow, and even subtleties in texture to express the qualities of the photo”. It’s that last variable, texture, that brings us to tip #3.

#3 Are there interesting textures?

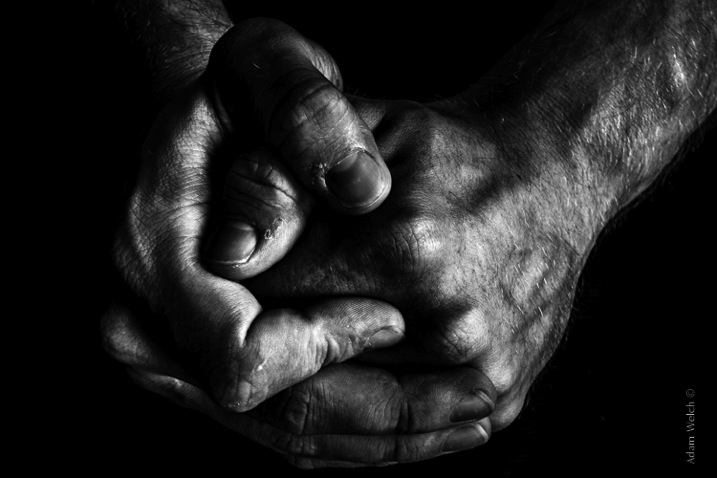
When we think of texture, we can easily describe it in terms of how things feel physically, when we perceive them through our sense of touch. Texture in photography, however, can be a little more challenging to put into words. Texture in a photograph has to be perceived with our eyes and then we determine if it’s smooth, rough, or coarse. Transforming the tactile tangible into a visually tangible image takes practice and a trained eye, and this is where working in black and white can be the best choice. Examples of textures that work well for black and white photos are wood, metals and stone, even plants and human skin. Directional lighting (light from largely one source coming from the side) compliments, and helps emphasize textures.

This image was made with natural lighting coming in directly from one side. This really brings out the texture, imperfections, and grittiness of the photograph.

Hands

This last tip goes beyond the physical attributes of an image and delves into the feelings we want to convey through a photograph. This is where black and white photography can really shine.

#4 What is the mood you want to create?

Have you ever looked a photograph, and been immediately struck by how the photograph felt? This is often referred to as the mood of a photo. It could be a bleak and rainy street scene, or an image of a warm and welcoming sunset. In any case, using black and white is a good way to convey a sense of mood in your photography. Admittedly, black and white usually imparts dark, bleak, somber, or an etherial overtone to a photograph, but that does not mean that it doesn’t work well for more upbeat images. Convert some of your landscapes to black and white to see how the mood can change. Experiment with black and white portraits which can portray your subject with a more stoic and brooding persona.

This photo of a hot day on Boston Common had lots of differences in lighting, along with some great coloring especially in the sky. Still, I chose black and white because it simply felt better to me, and matched what I saw in my mind more closely.

Boston Common

Keep in mind that you may run into some different terms if you decide to work more with black and white photography. These terms are usually interchanged, but in reality they are not all the same. It will help you to understand the differences in each so you can know what to expect.

Monochrome

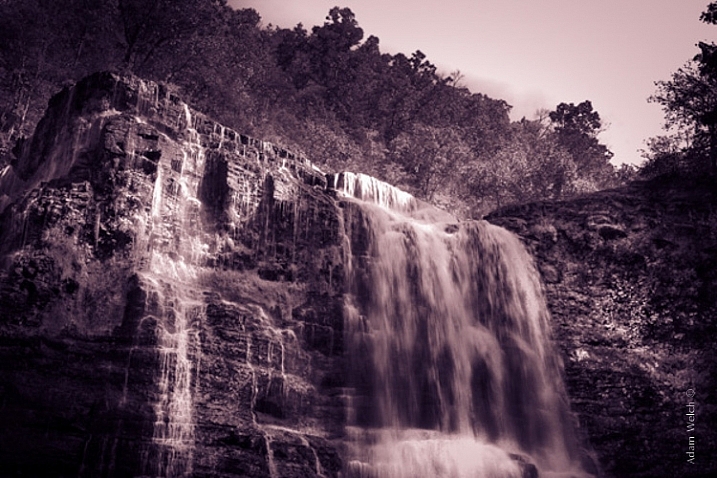
Monochrome simply means varying shades of only one color are used to make an image. This is often thought of as black and white (which are technically monochromatic) but in reality any color can be used. Sepia toned photographs are a good example of images which are monochrome.

This is an example of a monochromatic photograph that is not black and white.

Sepia Waterfall (2)


Grayscale

The term grayscale is another one that gets thrown around to label black and white images. Though not completely incorrect, grayscale images use only varying shades of gray (256 to be exact), and no other color. Grayscale can be a very bland when no other edits are used because it tends to leave the entire photo as middle gray. Notice how bland and uninteresting the below image looks when it’s converted to grayscale.

Grayscale

True Black and White

As I have said, black and white images are indeed monochromatic but not all monochrome images are black and white. True black and white photos use only black and white to produce the image although the majority still use a mix of gray tones.

This is the same image as above after it has been further processed to be closer to a true black and white photo. The differences in tones become becomes more apparent, and the photo becomes much more pleasing.

True BW

Black and white photography has been a staple genre since literally the inception of photography, and has evolved into a high art-form. Of course there are some people who simply do not like black and white images and prefer everything in color. Still, black and white photography is something that should not be discounted, and certainly not underestimated in terms of artistic expression. Today’s processing software makes converting color images to black and white nearly effortless, so use these tips and give it a try!

googletag.cmd.push(function() {
tablet_slots.push( googletag.defineSlot( “/1005424/_dPSv4_tab-all-article-bottom_(300×250)”, [300, 250], “pb-ad-78623” ).addService( googletag.pubads() ) ); } );

googletag.cmd.push(function() {
mobile_slots.push( googletag.defineSlot( “/1005424/_dPSv4_mob-all-article-bottom_(300×250)”, [300, 250], “pb-ad-78158” ).addService( googletag.pubads() ) ); } );

The post 4 Tips to Help you Decide Between Black and White or Color for your Image by Adam Welch appeared first on Digital Photography School.


Digital Photography School

 
Comments Off on 4 Tips to Help you Decide Between Black and White or Color for your Image

Posted in Photography


DSLR versus Mirrorless: Guide to help you decide which is right for you?

07 Dec

Recently there has been a great deal of buzz in the photographic community regarding a few terms that might sound a little odd or strange, like “mirrorless” or “micro four thirds.” These refer to different types of cameras that might not be as popular as standard DSLR models right now, but many think are the future of photography. However, just understanding what everything means can be an exercise in frustration, especially when all you likely want to do is buy a camera you can enjoy using.

Nadir Hashmi

By Nadir Hashmi


To that end, I’m going to try and dispel a bit of the confusion regarding mirrorless cameras and hopefully give you some information so as to make an informed choice the next time you are in the market for a new piece of photography gear. We’ll explore some of the history of how cameras are constructed, as well as discuss some of the benefits and drawbacks to this new technology, but I’m going to stop short of making the subjective judgement call about whether mirrorless cameras are better than DSLRs. For me it’s not about which camera is better than the other, it’s about finding one that works with your style and lets you shoot the photographs you want. You can debate all this in the comment section if you like, but what I’m here to do is simply present information and try to be as unbiased as possible.

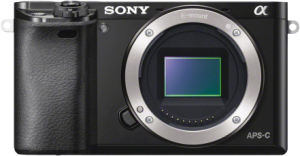
a6000

The Sony a6000 mirrorless camera has all the features of most standard DSLRs, but is much smaller and weighs far less. (Image courtesy Sony)

What is a mirrorless camera?

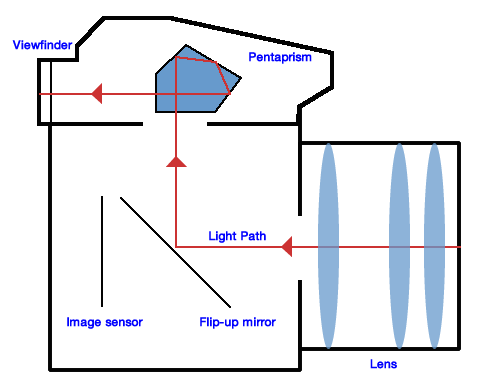
To understand the word mirrorless it helps to know a bit about the way most DSLR cameras are built. Almost all Canon, Nikon, Sony, and Pentax interchangeable-lens cameras share a similar industrial design: light enters through the lens and gets bounced off a mirror, through a special prism, to end up at the viewfinder. When you click the shutter button, the mirror flips up, which allows light to hit the actual image sensor on the camera, and voila your photograph is taken. This process might seem like a high-tech solution, but it’s actually a bit of an anachronism. Long before digital cameras existed, most of their film-based counterparts employed this same method to get light to the viewfinder, because it was a useful way to compose your photo before clicking the shutter. But thanks to advances in modern technology, this flip-up mirror method is no longer necessary, and a whole new breed of cameras is beginning to make inroads into modern digital photography. These new models have no flip-up mirror, and thus the term “mirrorless” was born.

There are many different types of mirrorless cameras on the market: some have interchangeable lenses, others offer a single built-in lens, and some with their own types of image sensors and other characteristics that are suited to more niche markets. But the one thing they all have in common is the absence of a flip-up mirror.

CameraDiagramDPS

Believe it or not, you probably already own a mirrorless camera. All smartphone cameras are mirrorless, as are most point-and-shoot models. Instead of a tiny little viewfinder that you hold up to your eye, you can see a preview of your image right on the phone or on the back of the camera itself. And if you like shooting your DSLR in “Live View” mode, where you look at the rear LCD screen to compose your shots instead of the viewfinder, you are essentially using it as a mirrorless camera already. (The click you hear when you enter Live View is the mirror flipping up. It stays like that until you exit Live View.) In fact, many of the higher-end mirrorless cameras have even gone so far as to replicate the traditional eyepiece viewfinder, but instead of reflecting incoming light from a mirror, it simply shows a very tiny version of what would normally be displayed on the back of the camera.

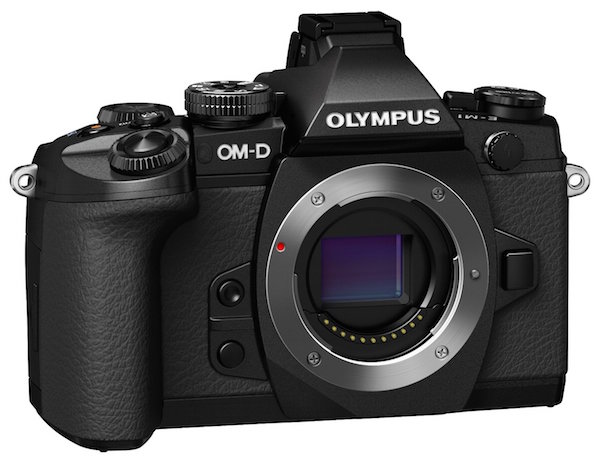
OMD-EM1

The Olympus OM-D EM-1 is a mirrorless camera that also includes a traditional-style viewfinder. (Image courtesy of Olympus)

Sensor size

Another component of mirrorless cameras that is a bit more technical in nature, but just as important to understand, is that of sensor size. In digital cameras the image sensor is essentially a piece of digital film that captures light, in much the same way actual film does. Full-frame DSLR cameras have image sensors that are the same size as a piece of 35mm film, but most consumer-grade DSLRs, and virtually all mirrorless models, are crop-sensor cameras. This means that the image sensor is smaller, which has two notable implications:

  1. They are not as sensitive to incoming light as full-frame cameras.
  2. They affect the way lenses behave when it comes to focal lengths and depth of field.

The most common format of mirrorless cameras are in a category developed by Olympus and Panasonic called Micro Four Thirds, which refers to the size and shape of the image sensor itself as well as the types of lenses that can be used on these models. Other mirrorless cameras use an APS-C sensor, which is the same size sensor used in common DSLRs such as the Canon Rebel T5i and Nikon D3200 (however, even Canon and Nikon use slightly different image sensor sizes), but there are some models such as the Sony A7R that use full-frame sensors as well.

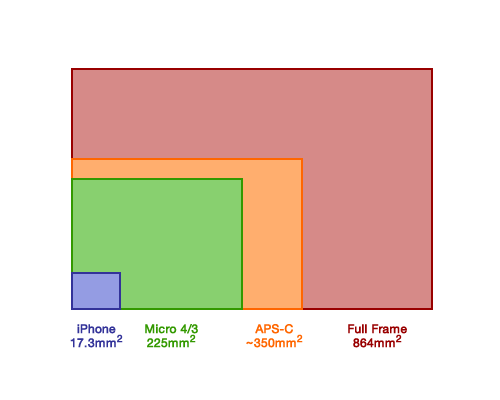
SensorSizeDPS

In terms of surface area, full frame image sensors reign supreme. But cameras with smaller sensors are still quite capable, and there is more to a camera than the size of its sensor.

While it’s doubtful we will see crop-sensor cameras (whether micro four thirds or APS-C) reach the same high ISO sensitivities as full-frame models, many of them today are perfectly capable of shooting at values such as 3200 or 6400 without too much degradation in image quality.

As for the lens behavior, shooting on a crop sensor camera means that your focal lengths will not look the same as on a full-frame camera. For example, on a micro four thirds camera a 30mm lens behaves similar to a 60mm full-frame lens. A 100mm lens acts like a 200mm, and so on. For most people this is fine, and they learn to adapt to the differences in lens behaviour over time. For some photographers this a significant detriment that, combined with how depth of field behaves a little different on crop versus full frame cameras, ends up being a deal breaker.

As I mentioned earlier, it’s not about finding out which type of camera is better – that question is unanswerable. Instead, it’s important to simply know the various details of micro four thirds and other mirrorless cameras, in order for you to make an informed decision if you are thinking about purchasing new gear.

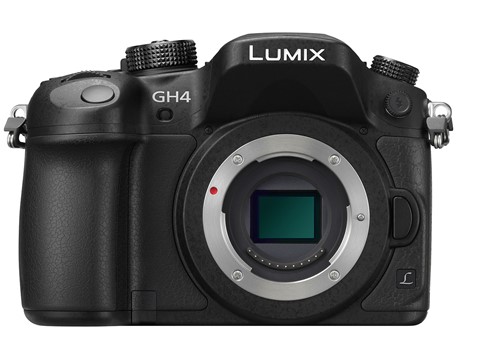
lumix-gh4

Even though the Panasonic Lumix GH4 is uses a smaller micro-four-thirds sensor, it produces photos on par with most APS-C sensors and even shoots 4K video. (Photo courtesy of Panasonic)

However, one benefit of crop sensor cameras that is important to note is their price; they are significantly cheaper than their full-frame counterparts. The cheapest full-frame camera costs around $ 1500 and they can easily cost many times that amount. On the other hand, some micro four thirds models start at a couple hundred dollars which makes them much more affordable for most people. It’s important to know that mirrorless cameras are not just for beginners, or those who like to shoot in Auto. Many photographers are buying these cameras, and some professionals have even switched entirely from heavy, expensive, DSLR models to their much lighter and more portable mirrorless counterparts.

As you can see, thanks to advances in modern technology the age-old flip-up mirror design in most cameras is not really needed anymore, but we are still a little way off from mirrorless replacing traditional DSLR designs entirely.

Benefits of mirrorless cameras

These new types of cameras offer some significant benefits over traditional DSLRs, but come with some important limitations as well. Remember, we’re not here to discuss which one is better – that’s something that only you can answer, given your unique needs as a photographer. It is important to know that mirrorless cameras do have some notable selling points, but also some drawbacks as well.

Size

K?rlis Dambr?ns

By K?rlis Dambr?ns

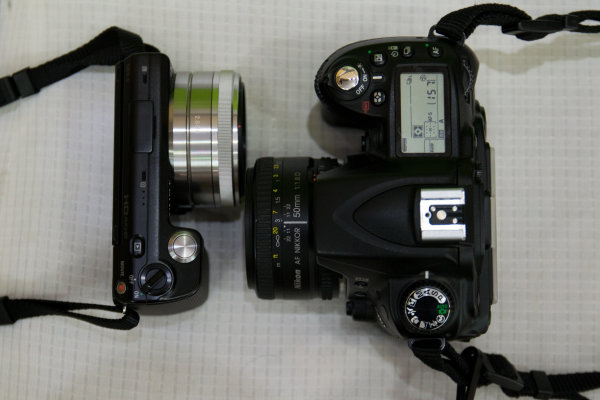
Perhaps the most significant difference between mirrorless and traditional DSLRs is their size: because the flip-up mirror mechanism, combined with the light-reflecting prism, are no longer needed these cameras are typically much smaller in size and weigh less too. This can be important if you are someone who likes to take your camera with you wherever you go, especially if the weight of your DSLR starts to drag you down after a day of shooting. It also means the lenses are smaller too, so you can fit several in your camera bag whereas before you might have only had room for one or two.

More accurate image preview in the viewfinder

Another benefit that mirrorless cameras enjoy over DSLRs, is a viewfinder that displays a more accurate representation of what your final photograph will look like. If you look through the viewfinder of your DSLR and adjust settings like ISO, aperture, and shutter speed, you might notice that the image in the viewfinder doesn’t change. It’s not until you actually take a photograph that you see what effect your alterations had on the photograph. At that point you can look at the picture on the rear screen and judge whether you need to change things for subsequent pictures. Because mirrorless cameras use electronic viewfinders, you can see in realtime the effect that things like aperture and ISO adjustments will have on your pictures before you press the shutter. This can have a dramatic effect on how you shoot, as it removes some of the guesswork with your camera settings.

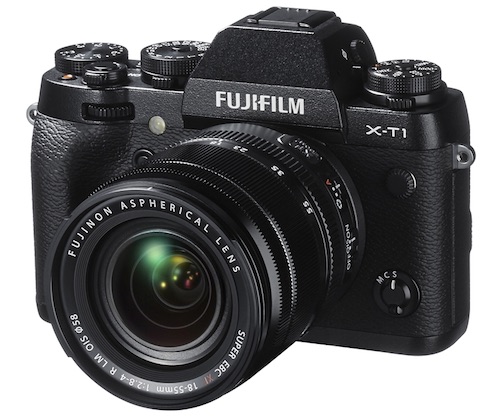
The mirrorless Fuji XT1 uses an APS-C size sensor but is much smaller than traditional DSLRs, making it a compelling option for photographers who value portability along with excellent image quality.

The mirrorless Fuji XT1 uses an APS-C size sensor but is much smaller than traditional DSLRs, making it a compelling option for photographers who value portability along with excellent image quality. (Photo courtesy of Fujifilm)

Focus peaking and sound

There are other benefits to mirrorless cameras as well such as focus peaking (the ability to see, when focusing manually, the exact pixels on your image that are in focus), quieter operation due to the lack of a flip-up mirror, and fewer overall moving parts which means a longer theoretical lifespan. But in order to get an accurate view of the situation, let’s take a look at some of the disadvantages as well.

Drawbacks of mirroless cameras

Things are looking quite promising over in Mirrorless Land, but it’s not all sunshine and roses just yet. There are some notable drawbacks to this technology, and if you don’t look at all the details you might end up with a camera that is ill-suited to your needs as a photographer.

Battery life

Currently one of the most significant limitations is that of battery life: they just don’t last as long. The only time a traditional DSLR draws power, when not in Live View mode, is when it is actively metering the scene or writing picture data to the memory card. No power is used at all if you hold the camera up and look through the viewfinder, and because of this it is fairly common to get up to a thousand pictures or more on a single battery charge. Power usage is a bit different on mirrorless cameras for two reasons. First, batteries are smaller because the cameras themselves are smaller, and second they essentially operate in live view mode 100% of the time. Mirrorless cameras generally get a couple hundred shots on a single battery charge, which is nothing to sneeze at, but nonetheless a significant difference between them and their old-school brethren.

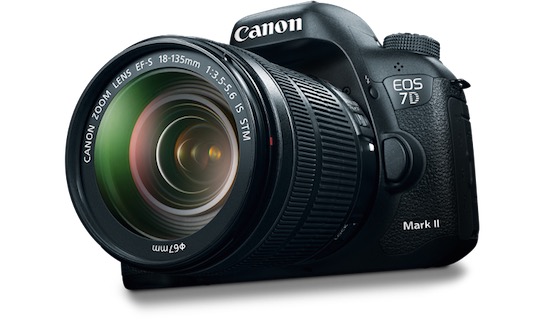
Canon7DMarkII

DSLRs might be based on old technology, but don’t count them out just yet. They are preferred by many photographers, and still have some advantages over mirrorless cameras. (Photo courtesy of Canon)

Focusing system

Another limitation that is worth mentioning is the focusing system. Most mirrorless cameras use a technology called contrast detection, which is simply not as fast as the traditional phase-detection method used in DSLRs. While the former gives you access to a wider area of the frame in which to focus, it simply cannot match the speed of the latter which limits the appeal of mirrorless camera for things like sports and fast-moving wildlife photography. Some manufacturers are starting to utilize phase detection in their mirrorless models, as well as hybrid systems that offer the best of both worlds, but for now it’s safe to say that standard DSLRs are generally better suited for sports, wildlife, and other types of action photography.

Other

Of course there are other limitations such as fewer lens options, LCD screen refresh rates that can’t always keep up with DSLR viewfinders, and more, but as technology advances much of this is being addressed.

Which is best for you?

Will mirrorless cameras ever reach full parity with DSLRs? Some think so, but others are not fully convinced. The important thing to remember is it’s not about what other people think; it’s about what matters to you. If you find a camera you like, and it serves your purposes as a photographer, then it really doesn’t matter whether it’s a DSLR, micro four thirds, full frame, medium format, or plain old 35mm film camera. If it can take the pictures you want to take, then it’s probably the right camera for you.

googletag.cmd.push(function() {
mobile_slots.push( googletag.defineSlot( “/1005424/_dPSv4_mob-all-article-bottom_(300×250)”, [300, 250], “pb-ad-78158” ).addService( googletag.pubads() ) );
} );

The post DSLR versus Mirrorless: Guide to help you decide which is right for you? by Simon Ringsmuth appeared first on Digital Photography School.


Digital Photography School

 
Comments Off on DSLR versus Mirrorless: Guide to help you decide which is right for you?

Posted in Photography