Digital cameras may be making incremental improvements with dynamic range capabilities, but are still lacking in terms of what they can capture. Bracketing multiple exposures of the same scene and merging them together with tone mapping software is one way of creating an HDR photograph allowing you to capture the full range of the scene in front of your camera.
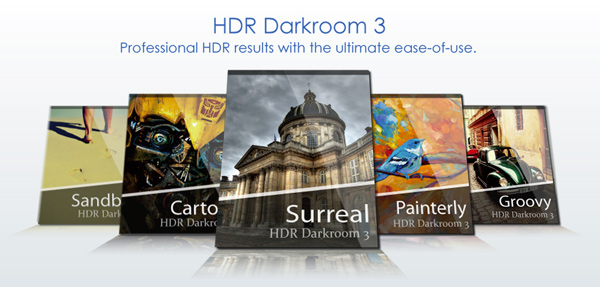
The people at Everimaging have recently upgraded their HDR tone mapping software offering to its third edition, and as a result today we’re going to talk about HDRDarkroom 3. It’s available for both Mac and Windows users, and a free trial version can be downloaded from their site.
What’s Cool About HDR Darkroom 3?
The number one thing that stands out to me is the user interface. The simplicity of the way that HDR Darkroom 3 uses presets to get you started with tone mapping is unique, and takes a lot of the work out of finding the right starting point. The program is also stripped down in a way that gives even the most novice HDR photographer an easy learning curve to get started.
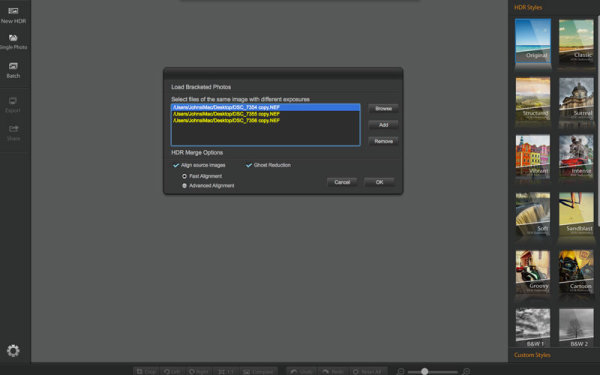
When you launch the program you can choose from three different import methods: New HDR, Single Photo and Batch. These work as you might expect where New HDR allows you to choose the set of bracketed images that you’d like to work on, single photo allows you to tone map a single photograph and batch processing allows for processing a batch of HDRs using the same settings.
For this review I’ll be using a three bracket set I took while photographing waterfalls recently. When importing photographs you can have HDR Darkroom 3 align the images by either a fast method or advanced method. When switching between the two options there is no difference to the user interface (both options are completely software driven) so I’m assuming this is just going to depend on the amount of time it takes for the merge to be completed.
On top of the alignment you can also have HDR Darkroom 3 take care of ghosting effects by checking the appropriate box. Again, this is a very simplistic approach, where the user is left at the mercy of the algorithm inside the program with no ability to customize which areas of the photograph to focus on, or the intensity of the ghosting effect removal.
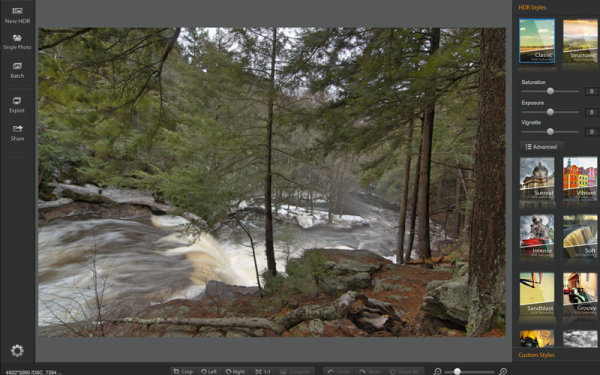
After importing your image you are defaulted to the ‘Classic’ preset which is a very standard almost uninteresting HDR image. On top of this preset the program comes packed with 15 more for you to choose from and the option to save any modifications that you’ve made as custom presets.
HDR Darkroom 3, unlike the other programs in the industry, actually forces you to start with a preset. You choose which one you like best for the image that you’re working on and each one will change the image to achieve a particular look.
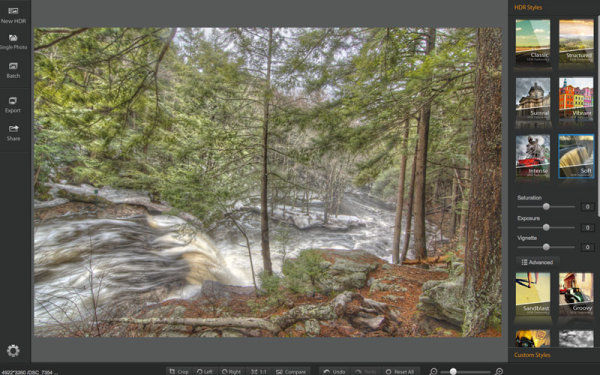
When you have found a preset that you like for the image, you can then customize it to your liking with three different sliders for Saturating, Exposure and Vignette as well as an advanced button for more freedom in the editing process.
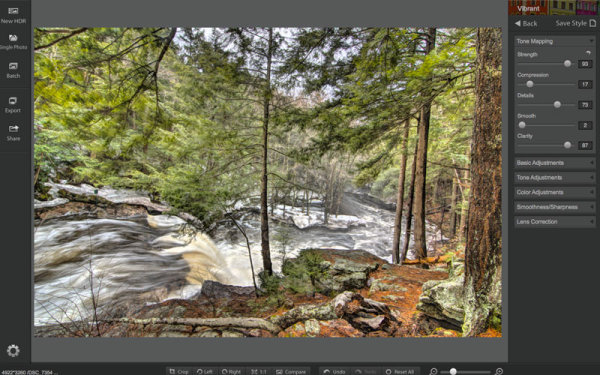
Once in the advanced section you have access to many of the tools you might expect like: tone mapping, basic exposure and contrast control, highlight and shadow adjustments, white and black point adjustments, and other tools for color, smoothness and even lens correction.

Overall, HDR Darkroom 3 does do a good job at processing a bracketed set of photographs with a slick, easy to use interface to boot. However, for those who do want a little more control, it might be just a bit too limiting. One of the biggest things that I felt was missing was a local adjustment brush for finer control over where effects were being applied.
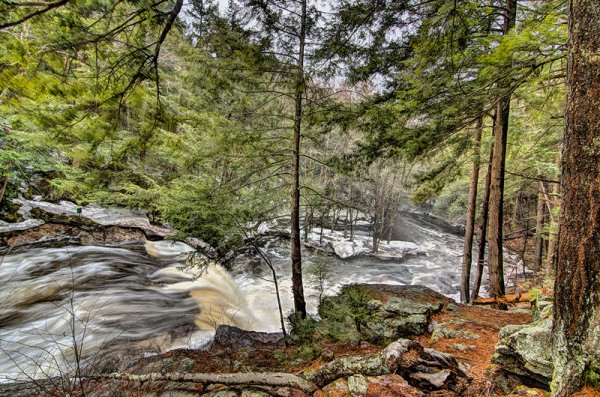
How’s HDR Darkroom 3 handle worst case high dynamic range?
The waterfall photo above that I used for the walkthrough is a fairly easy shot for an HDR process as its low on dynamic range and won’t really push the software to its maximum potential. But, I didn’t want to be too unfair in the introduction.
So let’s take it a bit further, let’s try and and do something close to a worst case scenario HDR. The image below is made up of three bracketed images shot at +2, 0, -2 directly into the sun. Plus there’s snow and shadows in the foreground to deal with as well, making for a truly difficult shot.
Admittedly HDR Darkroom 3 did struggle here, I tried to recover those highlights in the sky, but no matter what I did they were always blown out. Below are screenshots of three different presets plus advanced adjustments that I applied in order to try to control the image.
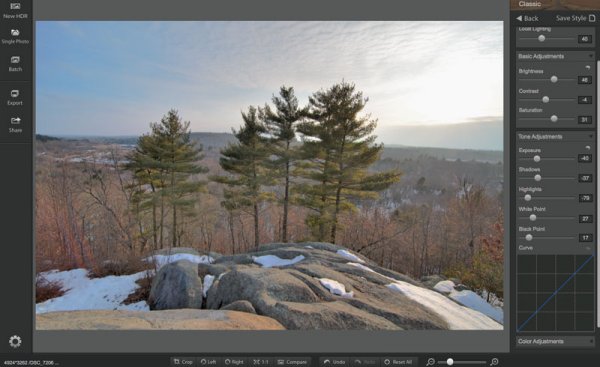
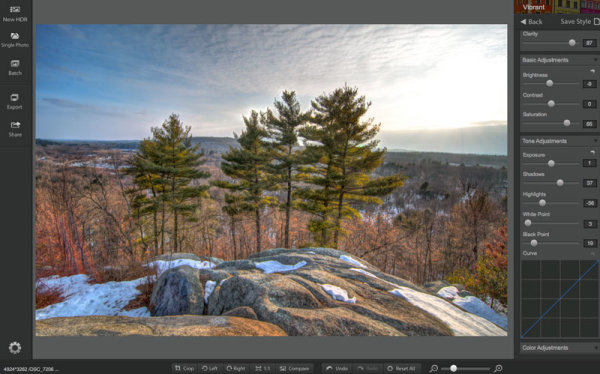
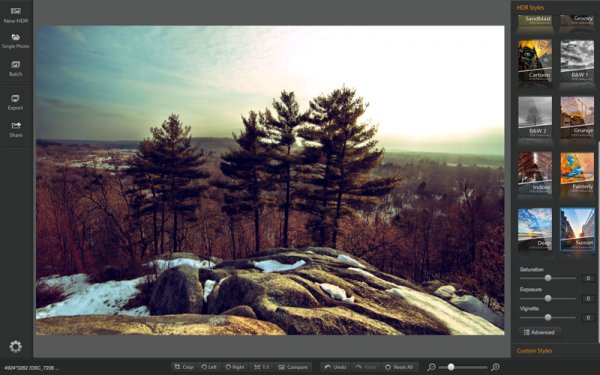
While the presets make for some easy switching between different effects of HDR, the overall fine-tuning control of the process is lacking in some situations. On most occasions when I went to reduce the highlights I was left with something that was lacking detail and muted in color. Not to mention the sliders are very heavy handed and effect a much larger portion of the tone curve than the respectively named ones in Lightroom.
The best I was able to come up with, shown below, has a few issues with haloing around the trees (the blown out highlights around the sun. It’s something that you may be able to fix in Photoshop later by masking in the sky from one of the brackets, but that’s beyond the scope of this review.
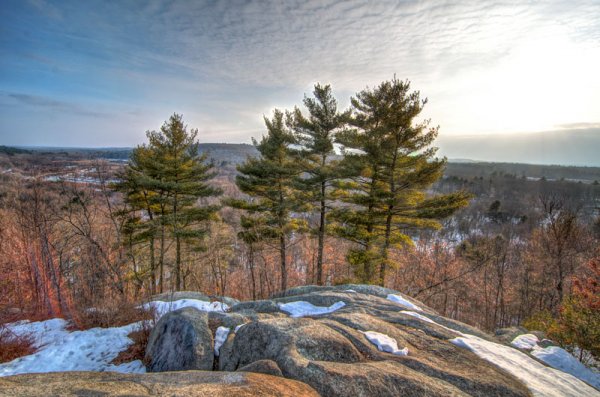
HDR Darkroom 3 Final
Compared to the Merge to 32-Bit Lightroom Plugin by HDR Soft
Being that this was a challenging photograph it’s worth checking out two other HDR options to see how they would handle the same scene. Both of the options I’m testing below are offered by HDRSoft. One of these is very budget friendly at a price of $ 29, while the other one is more comparably priced to HDR Darkroom 3 listing for only $ 10 more at $ 99.
Our budget friendly option is a plugin called Merge to 32-bit HDR for Lightroom. It’s a very simple process that really strips out the tone mapping process of creating an HDR image, but still allows you to merge the data from a bracketed set of photos directly inside of Lightroom 4 and greater. For more about how it works you can read Five Minutes to Realistic HDR using Lightroom and a 32-Bit Plugin.
Now it’s not surprising that the 32-bit plugin struggled with this photograph, as after all, it is very limited. However, because it imports the 32-bit TIFF file back into Lightroom for you to work on, I think it may have handled the highlights in the sky slightly better than HDR Darkroom 3, it’s a judgement call, but for the price difference I’d say it’s a win.
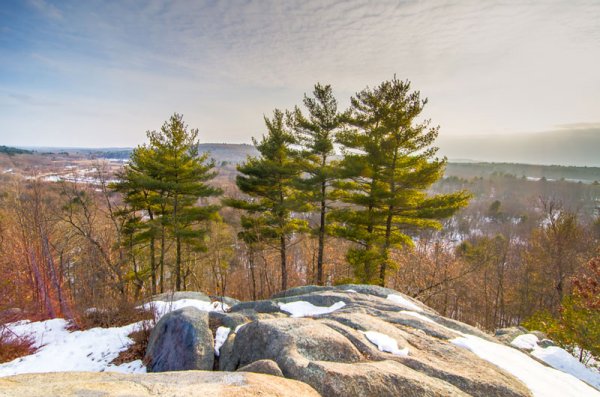
Merge to 32-Bit HDR Plugin for Lightroom
HDR Darkroom 3 Versus Photomatix 5.0
Next up would be the flagship offering from HDRSoft, and one of the leaders in the HDR tone mapping word, Photomatix 5.0. It’s no surprise to me that Photomatix did a fairly decent job with the foreground detail and even most of the sky, it still had some problems with the sun, but that’s not surprising given the circumstances of the image set.
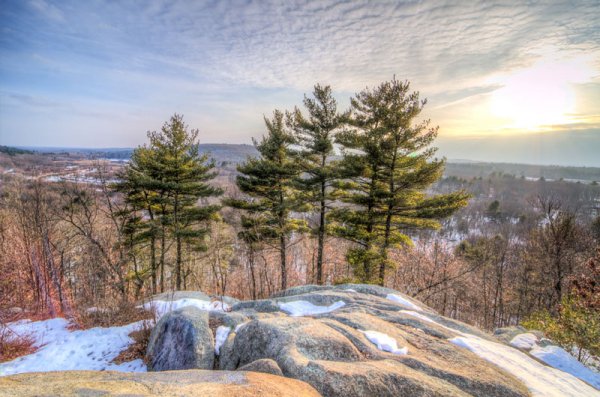
Photomatix 5.0 + Quick Lightroom Cleanup
Overall I’d argue that this particular image set is one of the more challenging that you will run through an HDR tone mapping software, and all three options above gave it a fair attempt.
My thoughts on the three software in terms of how they did overall:
- Photomatix 5.0 – Probably did the best overall job at merging the three images. However, it’s a more involved process, requires more training, and ultimately isn’t a standalone editor you’re going to need to clean up the tone mapped image in LR or some other program after the fact.
- Merge to 32-Bit plugin – It’s quick and dirty. You are able to collect more data from the scene and basically create an HDR image without ever leaving Lightroom all for less than 30 dollars. Yes it’s limited, but it’s also affordable.
- HDR Darkroom 3 – Like I said at the start of this article – I think HDR Darkroom 3′s best features are its user interface and intuitive preset oriented process of tone mapping images. I’d argue that it struggles the most when it comes to complicated scenes mainly due to the fact that the localized tone controls of highlights and shadows are a bit heavy handed and could stand to be more refined.
Would I Recommend HDR Darkroom 3?
HDR Darkroom 3 is a bit more affordable than some of the other premium tone-mapping solutions out there and does make a fair attempt at providing a good amount of the basic functionality into a nice looking and affordable package.
I think it boils down to this…
If you’re the type of person who likes to keep it simple and you don’t mind giving up a bit of control for the sake of simplicity then HDR Darkroom 3 might be the best option for you. But I’d urge you to check out the Merge to 32-Bit plugin first, as it may be all you need considering the price points.
However, I just can’t recommend it to those who are looking for a full featured product with total control over the HDR tone mapping process – there are better tools for the job such as Photomatix Pro and the small amount of savings here just doesn’t justify what you’ll give up.
Have you used HDR Darkroom 3? Tell us your own thoughts on it in the comments below – after all I’m just one opinion.
The post HDR Darkroom 3 Software Review by John Davenport appeared first on Digital Photography School.

Digital Photography School


You must be logged in to post a comment.