RSS
 

Posts Tagged ‘Cull’

Canon shows off new AI-powered plugin for Lightroom Classic that will cull images for you

10 Jan

Canon has announced it will soon be releasing a new AI-powered plugin for Adobe Lightroom Classic that will be able to cull through images and sort them based on image quality.

The ‘Photo Culling’ plugin, as it’s so aptly named, uses Canon’s Computer Vision AI engine and ‘technical models’ to select images for ‘sharpness, noise, exposure, contrast, closed eyes, and red eyes.’ As the plugin analyzes images, it will flag the photos with different colored flags within Lightroom Classic for easier curation.

Canon says the settings will be customizable so photographers can ‘remain in complete control,’ but doesn’t elaborate on how exactly the parameters will be controlled. There’s no mention of whether or not this plugin will work with images captured with other cameras, but we’ve contacted Canon for clarification and will update this article accordingly when we hear back.

The Photo Culling plugin will be available exclusively on the Adobe Exchange App Marketplace in Q1 2020 for a monthly subscription.

Articles: Digital Photography Review (dpreview.com)

 
Comments Off on Canon shows off new AI-powered plugin for Lightroom Classic that will cull images for you

Posted in Uncategorized


Cull Your Photos Carefully – 5 Steps to Follow Before You Hit Delete

27 Jun

When to keep and when to hit delete on an image can be a tough decision to make sometimes. In this article I’ll give you five things you consider before you hit delete to help you with the process of how to cull your photos.

The emotional attachment lessens with time

I was shooting high on a mountain pass this past winter. Low clouds and scattered sun danced across the snow-covered slopes, blown by a chill wind from the north. The view below came and went as fog blew past, opening and closing the scene like curtains. Enthralled, I snapped photos, the stark mountains, the pale sun, the glowing patches of light on the snow. “These shots are going to be awesome.” I thought to myself.

Cull Your Photos Carefully - 5 Things to Consider Before You Hit Delete

A few hours later, I opened my computer and downloaded the images. And I could see then, that they were awesome. I sat and I stared, certain that these were some of the best of the trip. The way the light played across the mountains, the storm-light on the rock and snow slopes. Yeah, these were great.

A week later, as I was putting together images from the trip, I revisited those photos. Huh, I thought, I could have sworn those were better. I mean, they were decent, but not extraordinary. What happened?

Cull Your Photos Carefully - 5 Things to Consider Before You Hit Delete

I had distanced myself from the images for a time, and was able to separate myself emotionally from the experience of making them. I’d been able to view those shots almost as though someone else had made them. As a result, many more of those photos ended up in the delete pile than I would have expected at first glance.

But time away from your photos is just one thing to can do as you try to segregate the keepers from those to delete. Here are the five things to keep in mind as you cull and assess your images.

Cull Your Photos Carefully - 5 Steps to Follow Before You Hit Delete

Step #1 – Check the technical Details

After importing the photos of a recent shoot into my Lightroom Catalog, look at each image quickly, at full-screen size, and assess each for any technical faults.

Is the image out of focus (check at 100% or 1:1 view)? Is the composition obviously wonky? What about exposure, is the exposure so wrong that you can’t correct it? If the answer is “Yes” to any of these questions, immediately delete the image (or flag it as a reject by hitting X) and move on to the next.

Cull Your Photos Carefully - 5 Steps to Follow Before You Hit Delete

The trick in this first step is not to try and go beyond the technical details. This is not the time to try and gauge overall image quality. This is the time, merely to delete the obvious screw-ups.

Step #2 – The second round

If I’m eager to spend some time with my photos, or I’ve got a deadline, I’ll go back through them quickly a second time. Lightroom, and many other catalog programs, give you the ability to flag images with different colors, and/or rating codes.

Scrolling through the images, I’ll color code the good and bad standouts. Images that I like get coded green, purple or blue (the color relates to my own filing system), while images that I don’t particularly like, for one reason or another, get flagged red.

Cull Your Photos Carefully - 5 Steps to Follow Before You Hit Delete

Red flagged images are imperfectly sharp, have clear composition issues or other technical problems, while the green images are selects and the un-marked images are ones to hold onto for future consideration.

Some images do not get flagged at all. These are usually images to which I’m ambivalent. They are good enough not to get the dreaded red flag, but not so good that I want to highlight them immediately.

At this point, I’ll start post-processing my favorites, but I don’t delete anything. Not yet.

Cull Your Photos Carefully - 5 Steps to Follow Before You Hit Delete

A screenshot of my Lightroom Catalog after a shoot of this Rufescent Tiger Heron in Argentina. Of the 26 images, I selected two as keepers, one vertical, and one horizontal image.

Step #3 – Let them rest

Immediately following a shoot, we get emotionally caught up in our images, for better or for worse. If a shoot went well, like my experience on the mountain, you may have the feeling that your images are better than they actually are. If it went poorly, you may feel like they all suck, when in fact, they may not.

The solution is to give the images some space. Pull back for a few days, don’t look at them, don’t edit them. Put your new photos out of sight, and give yourself some emotional distance from the experience of making your images.

After a few days, a week, or even longer, you can have another go.

Step #4 – Consider how your images will be used

As you dive back into your collection, think for a moment about how an image will be put to use. If you are shooting for a client, then you may already have a good idea of the kind of images you needed to make. For example, the conservation groups I work for usually provide me a brief on the project. In that document, they will note specific types of images or video they need or want. As I’m pulling selections for them, I’ll consider their needs, and put special effort into finding and editing images that match.

Usually, there are no clients telling me which images are best. Without anyone guiding me, I lean toward variety.

Cull Your Photos Carefully - 5 Steps to Follow Before You Hit Delete

Variety includes more than framing, but also panoramic compositions like this one.

When I first started shooting seriously, I saved almost every image. I was too attached to each one. Later, as my image catalog and hard drives began to swell, I became heartless with images, deleting all but one or two from a series, even good alternatives to my selects. Now, I’ve settled somewhere in between because I don’t always know how an image will be put to use, so I like to have some variety available.

Magazine editors will often be looking for images with big areas of negative space which can be used for text placement. Large size wall prints require images that are immaculately sharp and high resolution. Illustrative shots, often sold for stock, or for small use in publications, need to be tight with only the bare minimum of room around the subject. While editing, I plan for these eventualities and select four or five images, in a variety of compositions, from any given scene, but not more.

Keep some variety of shots

As an example, below are my five selects from an encounter with a Brown Bear in southeast Alaska. Each of the five images have been published in national magazines. Each time, the editor wanted the image for a different layout, some involving text, some as a simple stamp-size illustration. The bottom line is you never know what is going to appeal to different viewers, so retain some diversity from within your shoots.

Cull Your Photos Carefully - 5 Steps to Follow Before You Hit Delete

Throw Away Your Photos Carefully - 5 Things to Consider Before You Hit Delete

Throw Away Your Photos Carefully - 5 Things to Consider Before You Hit Delete

Throw Away Your Photos Carefully - 5 Things to Consider Before You Hit Delete

Cull Your Photos Carefully - 5 Steps to Follow Before You Hit Delete

Don’t get caught up in what you think is the best image from a series. Rather, give thought to how you might want to use images from the shoot in the future. Red code (or however you tag your images) the faulty ones, or near-duplicates, but retain some variety.

Step #5 – The final cut

By this time, your collection of images will be a checkerboard of red and green. The red images flagged for deletion, the greens (and other colors) set aside as “keepers”. If you are like me, you’ve made enough duplicate, failures, and screw-ups that the reds wildly outnumber the greens and unlabeled images.

Throw Away Your Photos Carefully - 5 Things to Consider Before You Hit Delete

This image lay in my Lightroom for years before I finally noticed that it was pretty decent.

Before I hit delete, I give each image one more look, just to make sure I’m not cutting something that I might want to keep. Sometimes if an image is unique, even if it’s not what I think of as “good”, I’ll decide to hold onto it.

Throw Away Your Photos Carefully - 5 Things to Consider Before You Hit Delete

This image was taken Mexico in 2010. I found it a month ago, lingering on a hard drive. I had completely forgotten about that sunset over the Caribbean. Hard drive surprises can be great, but I recommend being more organized than I was at the time.

More than once, I’ve scrolled back through my Lightroom Catalog and stumbled on an image that, for one reason or another, I never gave a close look. At the time I created it, I must have considered it unremarkable, but didn’t consider it bad enough to delete. Years later, I’ve found some gems in those un-flagged images.

Bottom Line

Selecting keepers from a series of images is not always as straight forward as what is “good” and what is “bad”. Consider each image carefully, and use your delete key, but don’t get too enthusiastic pushing that button. Deleted images can never be recovered.

The post Cull Your Photos Carefully – 5 Steps to Follow Before You Hit Delete by David Shaw appeared first on Digital Photography School.


Digital Photography School

 
Comments Off on Cull Your Photos Carefully – 5 Steps to Follow Before You Hit Delete

Posted in Photography


How to Cull Your Images to Tell a Stronger Story in Your Blog or Social Media Posts

13 Sep

I have this photographer friend. This person is wildly talented, with impeccable images and an amazing eye. I love seeing what she is going to create next until she puts up a blog post. So let’s talk about how and why to cull your images.

These posts are usually a long, meandering wander through her shoots, with no thought to tell a story. Images that you swear are repeats – until you look closely and realize the model’s left pinky finger has maybe moved ever so slightly. Blurry shots that should have been culled in the first round. It boggles my dang mind to look at these posts because we as photographers should know better.

Cull-Images-top


You are better served to share your images in a way that compels viewers to keep coming back for more. While I may not be a pro-level blogger, I still think it’s an excellent way to share your images, and there are a few tricks that I always try to keep in mind as I’m putting together a blog post.

Step 1: Be Brutal

Think about this from the viewer’s perspective. They weren’t at the shoot. So how can you tell them the story in a concise way that shows off your best work? To do this, you have to be brutal. Cull like a maniac, and then cull some more.

Does it hurt to eliminate images that you love from the narrative of your post? Yep, it’s like choosing your favorite child, but you gotta shrink down the number of images you share. You must. Beyond the obvious culling— things like strange facial expressions, awkward hands, etc., there are so many photographers who feel they need to share each and every image that they love. Unfortunately, this is a good way to head straight to Boring Postville.

Do not share the same scene, and the same pose five times in a row! The viewer’s eye will get bored and start to skip over. Your goal is for each new image to draw the eye, and surprise the viewer in some way. If the images start blurring together, the surprise element is gone and you’ve lost their interest. Be brutal in editing: your posts will thank you.

culling (2 of 2)

culling (1 of 2)

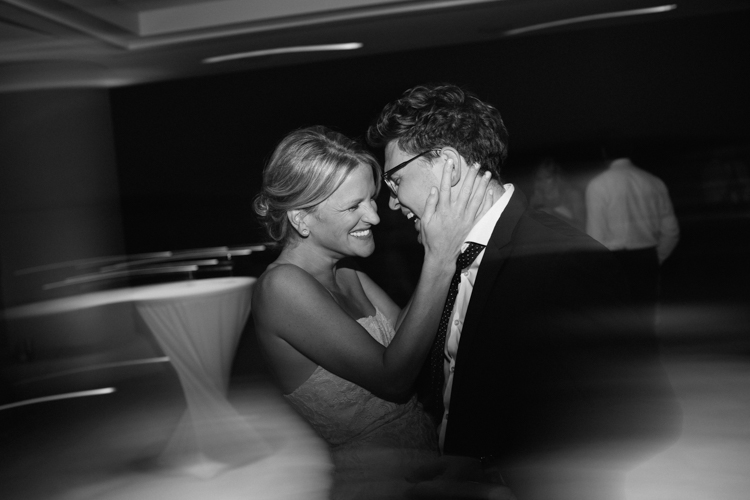
Lovely people, lovely images, but they’re so much alike and it’s killing me softly. These do not both need to be in a post together.

Step 2: Change Your Perspective

If you were an invisible spy at the photo shoot, how would you absorb all the information of the day? You’d start far away and move in closer. Too many posts start with the super-tight ring shot, or the close up of the hand on the face, and the viewer is left wondering subconsciously, “How did we get here?”

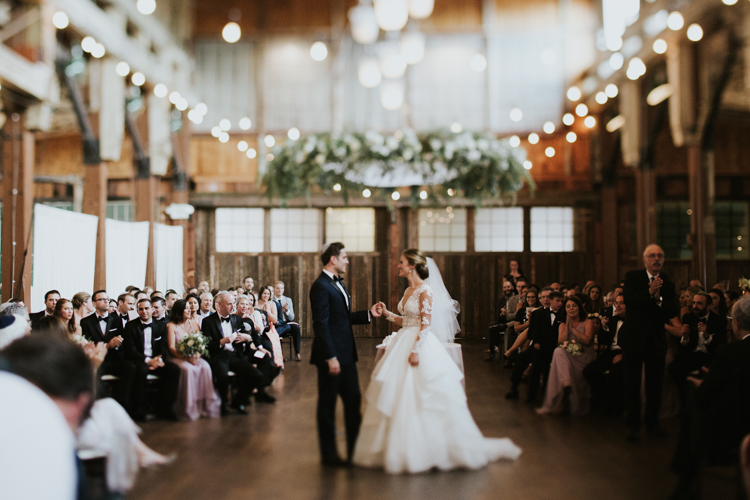
So aim to tell your story from the perspective of someone who was peeking over your shoulder. A great example is a wedding day. You don’t start a wedding day with the big dramatic first kiss, right? Set your scene. Show the viewer your location. Introduce them to the setup, then move in close to get the detail shots. It’s a much closer proximation to the reality of the day, and it helps our brains understand what’s going on when we’re viewing it on a computer after the fact.

Start broad.

Start broad.

Then move in for more detail...

Then move in for more detail…

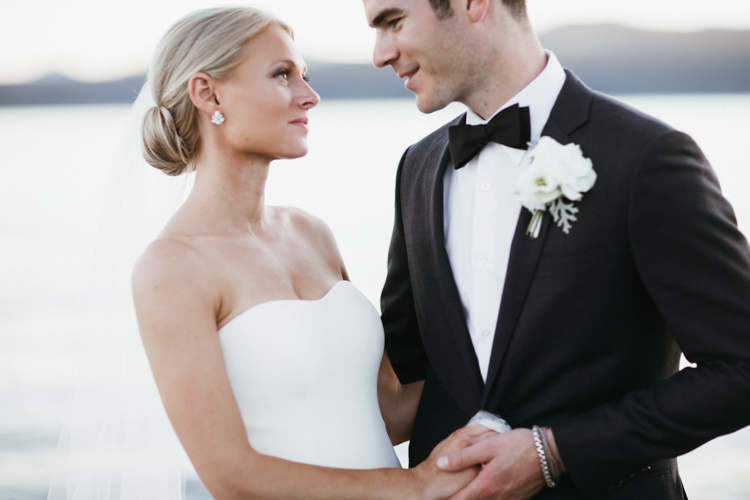
... and then even more detail.

… and then, even more detail.

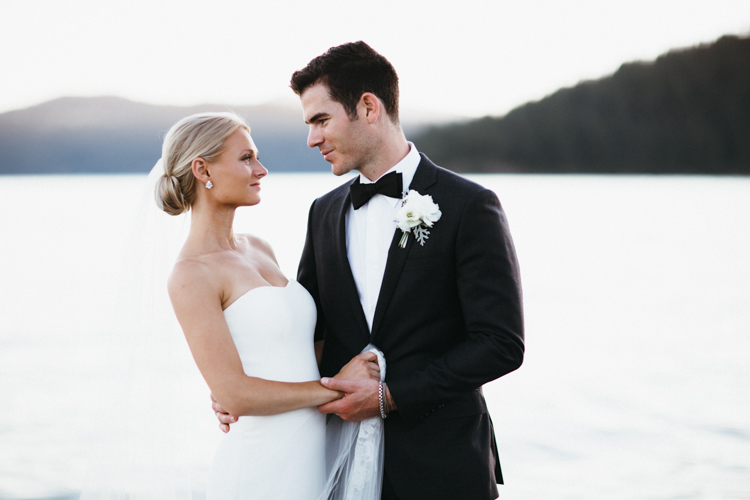
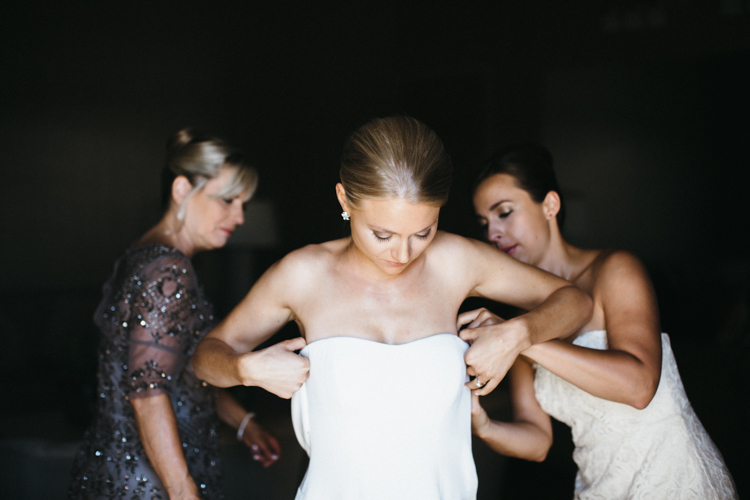
From there, remember to include varying visual perspectives. If you’ve already shared a couple’s full-body portraits, don’t overdo it with the same angle. Move into a closeup of their faces, or a detail of their outfits. Or share a different detail from the day altogether. But for the love of Richard Avedon, please don’t share a dozen nearly-identical photos! Find a new perspective, and make it memorable.

culling (4 of 1)

Far away!

culling (3 of 1)

Close up! And it’s unique enough of a perspective, that including this shot rounds out the story of the previous one.

Step 3: Tell the Truth – Kind of

My favorite Emily Dickenson line is, “tell all the truth but tell it slant.” This is advice straight from a poet to a photographer, so use it wisely. Friends, there is no grand blog court that has ruled that you must share every image, from every scene, in every shoot. YOU are the artist, and YOU get to decide how you’re going to tell the truth! Let’s not squander that freedom! You’re an artist, and you can unfold a story in the most artistic way you deem worthy. Here’s what you do NOT have to do:

  • Share images in the precise order you shot them.
  • Share images from the scenes or poses that you wanted to try but didn’t quite work (and hey, good job trying new stuff!).
  • Share images the client asked you to take that don’t totally represent your vision or your brand.
  • Share images that don’t progress the story you want to tell.

The science of photography is that you always get to tell the truth. The art of photography is that you can tell it slant. Play that line because you can.

culling (5 of 1)

Step 4: Stay in the Flow

So, now that you’ve culled only the very best of your images, laid them out in a compelling story, shared your artistic skill with the world, and put together a bomb post, make sure the little details aren’t subtly throwing shade onto your creation.

Step away from your computer, go for a walk, have a glass of wine, do you… and then come back to review what you’ve written, shared, and how it all comes together. Try to have fresh eyes.

Is anything too repetitive? Do your shots flow together? Do your black and white images land in places throughout the post that make sense? If you include captions, do they add or detract from the overall effect of your story? These little details can take a post from good to truly excellent, so make sure you give your post another look before you click “Publish.”

culling (6 of 1)

What are your tips for culling photos for a great social media or blog post? What are your big no noes? I’d love to hear them.

googletag.cmd.push(function() {
tablet_slots.push( googletag.defineSlot( “/1005424/_dPSv4_tab-all-article-bottom_(300×250)”, [300, 250], “pb-ad-78623” ).addService( googletag.pubads() ) ); } );

googletag.cmd.push(function() {
mobile_slots.push( googletag.defineSlot( “/1005424/_dPSv4_mob-all-article-bottom_(300×250)”, [300, 250], “pb-ad-78158” ).addService( googletag.pubads() ) ); } );

The post How to Cull Your Images to Tell a Stronger Story in Your Blog or Social Media Posts by Laura Sullivan appeared first on Digital Photography School.


Digital Photography School

 
Comments Off on How to Cull Your Images to Tell a Stronger Story in Your Blog or Social Media Posts

Posted in Photography