RSS
 

Posts Tagged ‘Crucial’

5 Crucial Mistakes You Need to Avoid When Photographing Clients

12 Jul

Don’t make these 5 crucial mistakes when photographing clients!

Over the years I have read dozens of articles explaining tips, tricks, and things to keep in mind for successful photo sessions. As I was wrapping up a family shoot recently I started to think about the situation from the opposite end of the spectrum. Kind of as a way of giving some advice to my younger self or other photographers who might still be honing their craft.

So instead of five tips to try here, are five things you should never do if you want your photo sessions with clients to run smoothly.

5 Crucial Mistakes You Need to Avoid When Photographing Clients - family photo

Mistake #1 – Not showing up on time

This one is a bit of a carryover from my childhood and is based on a lesson my dad taught me at a very young age. Whether my siblings and I were going to church, to school, or even just to a friend’s house he would repeatedly stress that we ought to arrive at our destination at least 10 minutes early. If we show up on time, he reminded us over and over again, we’re already late.

That might have been a bit of an oversimplification but the lesson still sticks with me to this day. It’s also one that is especially true when it comes to photographing clients.

If you are to meet at a certain location at a certain time, do not arrive when you have agreed to. Instead, make sure to get there at least 10 minutes early, and that’s the bare minimum. The earlier you arrive the more you can prepare, especially if the session is outdoors or in another type of uncontrolled environment.

fossil watch - 5 Crucial Mistakes You Need to Avoid When Photographing Clients

As my dad would say – if you get there on time you’re already late.

Arriving early allows you to assess the situation, get your cameras and lenses in order, double-check your settings (did you remember to turn on Image Stabilization? Are you still shooting at ISO 3200 from last night’s star-trail experiment?) and mentally prepare yourself for the photo session.

It also sends a message to your clients that you’re responsible and you care about the job. If you show up on time you might end up arriving after your clients. If they’re like my father and got there early they may be wondering where their photographer is. It doesn’t take much effort to arrive well in advance but it can pay huge dividends and set a positive tone for the rest of the photo session.

Mistake #2 – Don’t dress casually

portrait of a couple in a garden - 5 Crucial Mistakes You Need to Avoid When Photographing Clients

Your clients go out of their way to dress for the session. You should too.

This one is a big deal for me because I’m perpetually wearing the same clothes I wore in college: jeans and a t-shirt. It’s my go-to outfit for just about any situation and there were a few times early in my photography work with clients that I treated sessions as just another day out when I could dress casually. However, doing that sends an unfortunate message to your clients that you can easily avoid with very little effort.

Jeans and a t-shirt might seem fine to you but your clients might take this as a sign that you are a bit of a slacker or that you don’t care enough about your work (or them) to look the part. Clients are more likely to see your work as high-quality if you take the time to dress up a bit.

Wear nice clothes as a way of projecting a professional image. It will help clients have a more positive view of you, your work, and the session as a whole.

family sitting on the grass - 5 Crucial Mistakes You Need to Avoid When Photographing Clients

Some clients prefer a more casual style for themselves, and that’s fine. But it never hurts for you to wear nicer clothes as a way of projecting an image of professionalism.

Mistake #3 – Don’t make fun of your clients to get a laugh

Tell me if this sounds familiar. You’re doing a photo session and it’s going reasonably well but your clients aren’t responding quite how you would like. You’re trying to get them to loosen up, relax, and smile but they still seem a bit reserved and hesitant. As a result, your pictures just aren’t quite as good as you know they could be.

So you decide to crack a joke at the expense of one of your clients who is balding, wearing mismatched socks, doesn’t realize his shirt is un-tucked, or maybe just not quite paying attention.

Oh no, the glare from Bob’s head is messing up my camera! Hang on a second, I’m being blinded over here!

Does that scenario ring a bell? I have almost done this on a couple of occasions but stopped each time, and I’m so glad I did. You might think your comments are benign and all in good fun, but the person might be sensitive about the very thing you are pointing out. You could easily cause some hurt feelings or even downright anger.

Your clients might respond to these quips with laughter but on the inside, they may feel something entirely different that could cost you referrals, repeat business, or in-person sales.

family walking on a pathway - 5 Crucial Mistakes You Need to Avoid When Photographing Clients

This family was an absolute joy to work with. I would never want to sacrifice meaningful professional relationships with them or anyone else just for a quick laugh.

The damage that is done by what seems like benign comments could linger for a long time and have consequences well beyond the session itself. Instead of aiming for a cheap laugh, strive to maintain a level of professionalism when interacting with and photographing clients on a shoot.

If you get to know them a bit (another benefit to showing up early!) they will be more likely to loosen up, cooperate, and give you the type of pictures you are really striving for.

Mistake #4 – Don’t use your phone during the session

I know how tempting it can be to reach for your phone during a photo session, and there might even be a thousand good reasons to do so. What if it’s a text from your landlord? Maybe your cousin sent you a Snapchat message about his new job? What if your spouse is going to be home late and needs you to pick up the kids? Certainly, your clients would understand if you peeked at your phone for just a bit…right?

They might understand, but they might also wonder why you are getting distracted while they are paying you to do a job. One little peek at your phone often turns into two, then three, and pretty soon you find yourself missing shots or watching your clients roll their eyes in exasperation because you’re looking at your phone more than your camera.

portrait of teenagers - 5 Crucial Mistakes You Need to Avoid When Photographing Clients

My advice is simple, just ignore your phone. Better yet, leave it in your car or put it on silent and stick it in your gear bag. If you think you might need to check it during a session, tell your clients in advance (yet another reason to arrive early) and ask their permission to take a minute at a certain pre-planned time to do so.

This might seem overly restrictive, but it’s so easy to get caught up in the alerts and messages on your phone that you might not even realize how much you are actually using it. Your clients will probably not notice if you are NOT using your phone, but they will certainly notice if you ARE using your phone and they might not want to hire you back as a result.

Mistake #5 – Don’t over-extend the session

Many photographers charge clients a certain amount based on the length of time that they offer for sessions. One-hour portraits, two-hour engagements, 15-minute minis, or 3 hours of wedding plus 2 hours of reception coverage, for example.

This usually works well and gives both the photographer and the clients a set of shared expectations, but it can backfire in some unexpected ways depending on the type of clients you are working with.

little girl in a blue dress - 5 Crucial Mistakes You Need to Avoid When Photographing Clients

15 minutes in and this precious little girl was ready to be done. Extending the session would have made her fussy and stressed out her parents too.

Know when to fold

There’s a line in an old Kenny Rogers song that’s quite à propos for photographers, “You got to know when to hold ’em and know when to fold ’em”. As a photographer, you need to learn how to read the situation, watch your client’s body language, and get their input on how to proceed when you feel like the session needs to draw to a close.

Your clients might be paying you for a one-hour session but if the kids are fussy, the grandparents are tired, and the shirts are getting sweat marks after only 40 minutes then you really need to find a way to shut it down tactfully and gracefully.

The best way I have found to do this is to keep an open dialog with clients throughout the session. Talk with them as you take their pictures and let them know that you are willing to adjust as needed especially if kids are involved. Your clients expect you to be in charge and they often won’t speak up for fear of being rude or confrontational.

So read the situation closely and take the initiative if you think it’s time to put the camera away. Your clients will probably be glad you did.

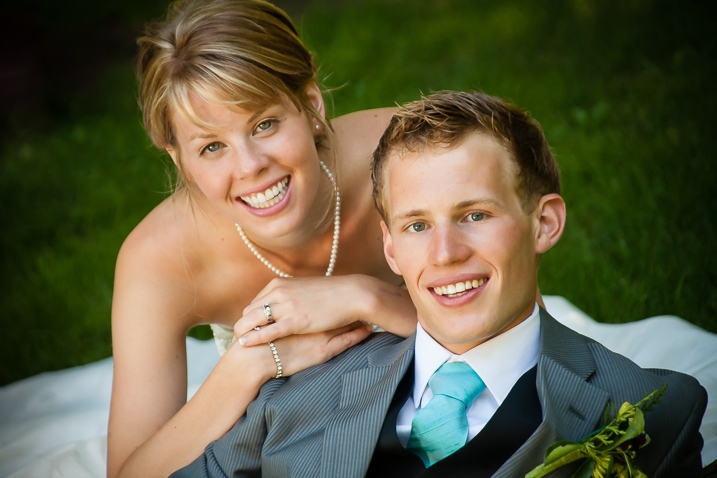
couple portrait - 5 Crucial Mistakes You Need to Avoid When Photographing Clients

Talk to your clients and make the call

I have had parents thank me profusely for ending sessions early because their children were wilting after only 30 minutes. I once did an entire one-hour family session in 20 minutes on a single spot in a grove of trees because three generations were involved and the elders were exhausted and tired.

In both situations, I got input from the clients constantly and let them know that I was aware that people were ready to be done even though there was still time left on the clock.

The time might not be up, but if the session needs to be over then you have to bring it to a close. Extending it needlessly just to fill the time allotted could cause more headaches than it’s worth. Alternately, don’t go over your time unless you get permission from your clients. If they are expecting one hour and that time is up, don’t keep shooting unless you’re sure it’s fine with them. Doing otherwise could come across as rude or insensitive, no matter how good the pictures turn out.

Conclusion

I hope this gives you a few ideas to try or, more accurately, to avoid the next time you are photographing clients. If you have any tips on what to avoid I’d be glad to have your input in the comments below, and I’m sure other dPS readers would as well!

The post 5 Crucial Mistakes You Need to Avoid When Photographing Clients appeared first on Digital Photography School.
Digital Photography School

 
Comments Off on 5 Crucial Mistakes You Need to Avoid When Photographing Clients

Posted in Photography


10 Crucial Things You Need to Think About for Portrait Photography

20 Oct

Darlene’s Portrait Fundamentals course is on sale for $ 75 (50% off) now until November 3rd only. Find out more or grab the deal over at Snapndeals.com.


There are many pieces to doing a portrait – it’s not easy. You have to think about the technical stuff like exposure and focus, as well as the non-technical stuff like composition and working with a live subject. It can be daunting if you’re just starting out doing portrait photography so let’s break it down into all the pieces so you can work on one at a time, then put it all together.

Portrait tips dps717px 04

Here are the 10 crucial elements you need to think about when doing portrait photography:

  1. Lighting Pattern
  2. Lighting Ratio
  3. Quality of light
  4. Lens selection
  5. Background
  6. Exposure/metering
  7. Sharpness – getting it in focus
  8. How to position the subject (posing)
  9. Facial view and camera position
  10. Expression

THE TECHNICAL STUFF

#1 Lighting pattern

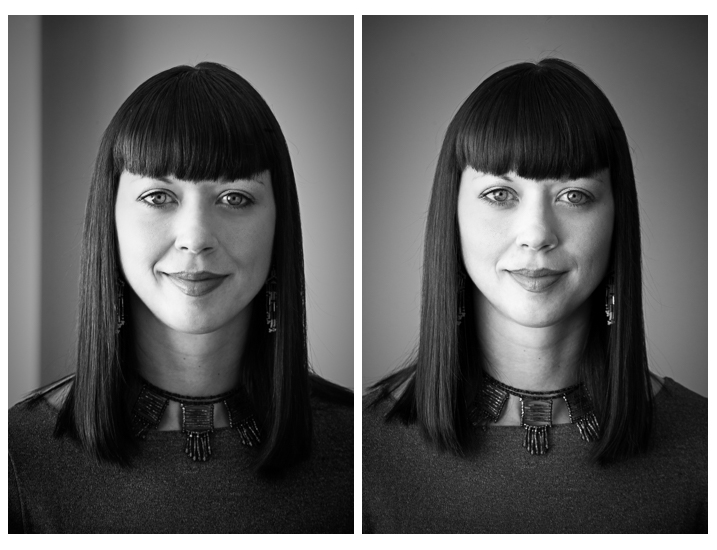
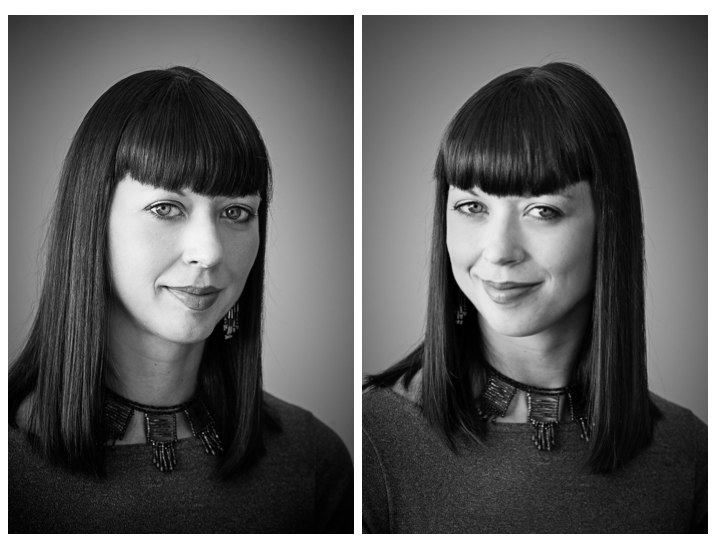
This is how the light falls on the subject’s face. How you set up the light will determine the mood of the final portrait and whether or not the subject is flattered. Lighting partner is a critical piece to get right. There are four main type of patterns and two styles, they are:

  • Split lighting
  • Loop lighting
  • Rembrandt lighting
  • Butterfly lighting
  • Short lighting
  • Broad lighting
Portrait tips 02

Left – Split lighting. Right – Loop lighting.

Portrait tips 01

Left: Broad lighting. Right: Short lighting. Notice how different she looks in each image, particularly her nose!

Knowing what each looks like and when to use them is very important. Read more here: 6 Portrait Lighting Patterns Every Photographer Should Know.

#2 Lighting ratio

A ratio is a comparison of one thing to another and in terms of lighting it is comparing the dark and light sides of the face. How much difference is there is from the shadow, to the highlight side? The greater the ratio, the more contrast the image will have, and the more moody the portrait will become. The lower the ratio, the less contrast, and the portrait will have a lighter, fresher feeling.

Look at the following examples:

Portrait tips 03

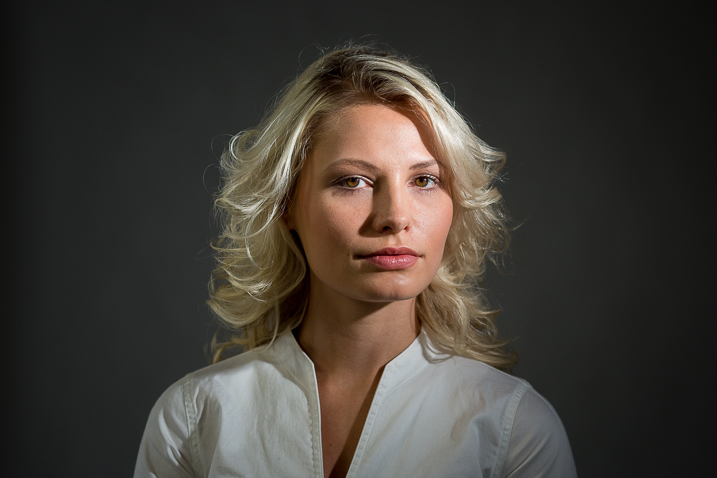
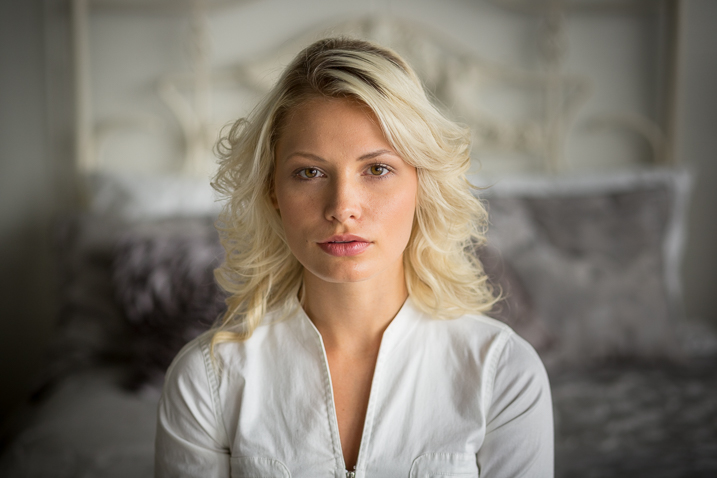
In the images above the ratio on the left is very strong, about 16:1 or four stops. The missing is about 4:1 or two stops, and the right is almost 1:1 or even. The only difference from one to the next is use of a reflector. Notice how the mood and feel of the portrait changes, as the contrast is adjusted.

For more detail on ratios read: Lighting Ratios to Make or Break your Portrait

#3 Quality of light

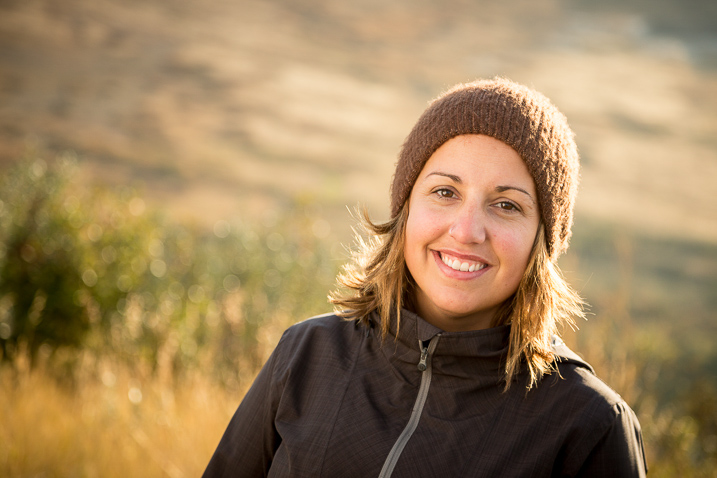
Another aspect of lighting you need to decide is whether you will use hard or soft light.

Hard light is produced by a small light source and is characterized by high contrast, enhanced texture of the subject, added drama, and harsh well edge-defined shadows. Examples of hard light sources are:

  • The sun (even though it is large, it is far away so its relative size is small)
  • A bare light bulb
  • The small built-in flash on your camera (including your speedlight without modifiers)

Here are two portraits done using hard light. Which is more appropriate use of this type of lighting for the subject?

Portrait tips dps717px 08

Portrait tips dps717px 05

Soft light is produced by a very large light source. It is low contrast (or can even be quite flat), less textureenhancing, and is more forgiving and flattering for people photography. Examples of soft light sources are:

  • The sky on an overcast day
  • Large studio softboxes
  • A large reflector like 42” or 52”
  • An on-camera flash that has been bounced off a ceiling or wall

Here are two portraits done using soft light. Which is more appropriate use of this type of lighting for the subject?

Portrait tips dps717px 09

Portrait tips dps717px 07

So along with the ratio, the quality of light will have a great affect on the mood and feeling of your portrait. Choose soft light for portraits that flatter the subject, and choose hard light for an edgier look with more grit and drama.

#4 Lens selection

The lens you select will change the appearance not only of the subject, but the background as well.

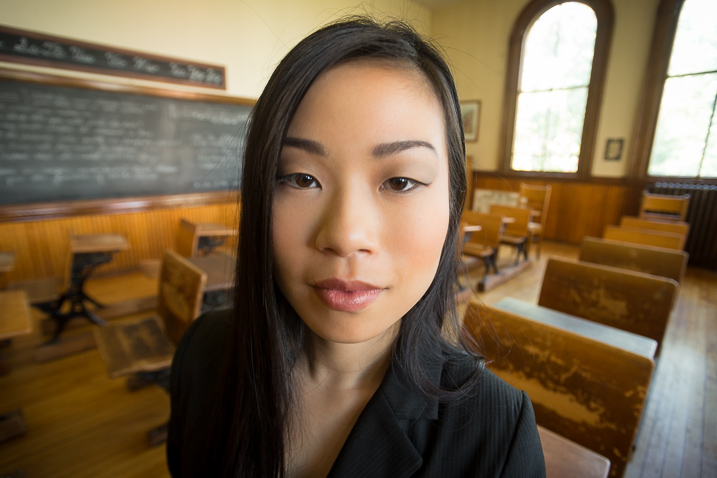
Using a wide angle lens will introduce distortion and cause the subject’s face to look abnormal, sort of stretched. It will also allow you to see a large sweeping view of the background behind them.

Portrait tips dps717px 13

Notice how the shape of her face and her features are distorted? This is not something most people will desire.

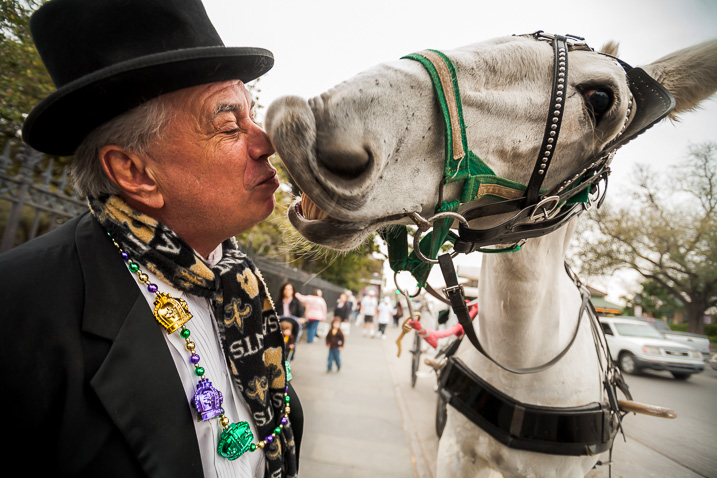
However, there may be instances where you want this look such as a humorous portrait, kids, or an editorial style portrait of a street vendor at a market where you want to see his environment.

Portrait tips dps717px 12

The wide angle view adds to the comical nature of this portrait.

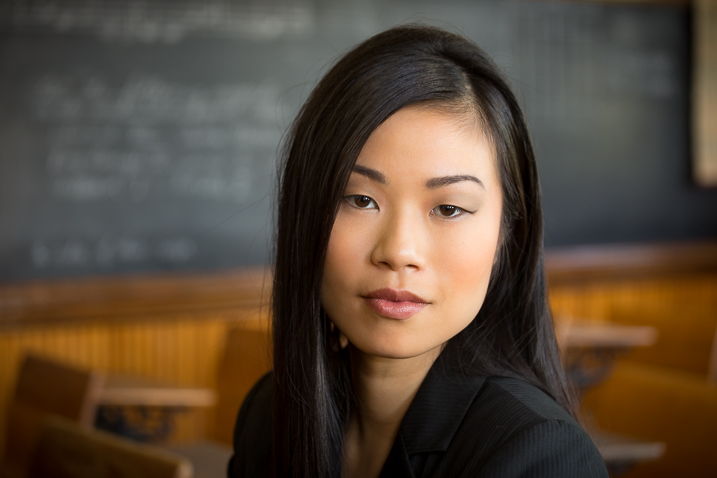
Telephoto lenses compress perspective – this does two things. First it is usually more flattering to the subject, their facial features look less distorted. Second, it simplifies the background by seeing less of it, and often it’s less in focus as well (dependant on distance to the background) putting more emphasis on the subject, which is what you want. Read more at: How to Achieve Blurred Backgrounds in Portraits.

Portrait tips dps717px 14
Same girl as the portrait above. Compare her face in the two images, and take note of the background as well. See how much less of the room, and how it is more out of focus than the wide image above?

Portrait tips dps717px 11
The long lens used for this image has compressed the background and because it is so far away (across the river on the other side) it is really out of focus and provides a soft background to enhance the portrait, not take away from the girl.

#5 Background

One thing many of my students forget to control and think about is the background. It’s so easy to be focused on all the other stuff and working with your subject that you forget to even look at the background.

Two things you want to make sure about for the background are: it makes sense with the portrait, and doesn’t distract the viewer from the subject. There are four things that can do that, watch for them in your background and adjust your camera position or composition accordingly if they show up:

  • Contrast
  • Bright colours (warm tones are the worse for distraction like red and yellow)
  • Sharpness
  • Bright areas
Portrait tips dps717px 15

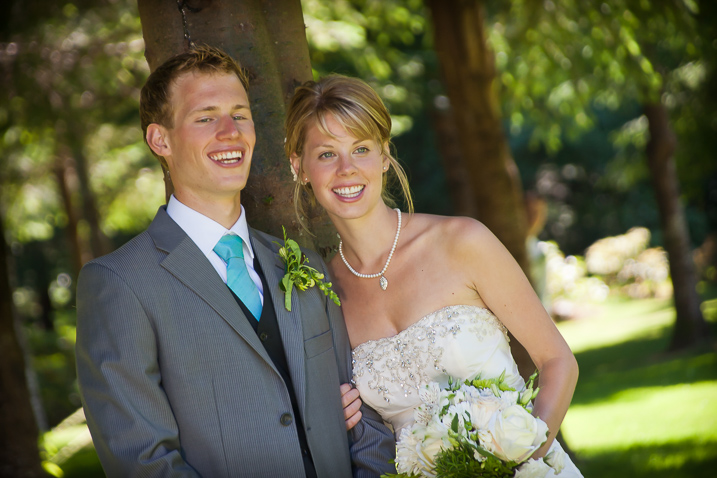
See how the bright areas, which are also high contrast, in the background draw your attention away from the wedding couple?

Any or all of those can draw the eye away from the subject if they are in your background. The eye is attracted to the brightest area of an image, as well as the sharpest. So get your portrait subject away from the background far enough to get it out of focus, and watch for hot spots that grab the eye. Sometimes simply moving your camera a foot or two to the left or right can eliminate trouble areas and give you a cleaner background – allowing the subject to be the star.

Portrait tips dps717px 16
Use of multiple techniques here have drastically improved this portrait over the one above. The background is now solid, out of focus, and it does not take your eye away from the couple but rather compliments the overall portrait.

#6 Exposure and metering

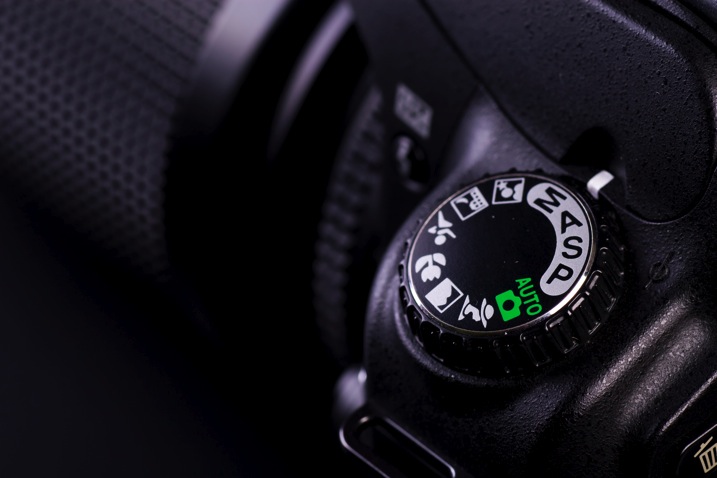
For a portrait where the subject is not moving, I almost always use the following camera settings:

  • Manual shooting mode
  • Single shot drive mode (when I press the button it takes one image only)
  • Single point focus (not multi or zone)
  • One-shot or AF-S focus mode to focus and lock (not continuous)
  • Shade White Balance preset (as I am usually working in the shade, if you’re in the bright sun choose that – but pick one that matches your lighting condition and leave it, anything but AWB!)
  • Shoot in RAW

That gives me the most control over doing one very important thing – having a consistent exposure from one frame to the next. That may not seem like a bit deal but if you ever decide to do portraits for a friend or have real paying clients – you want to be able to show them the images on the back of the camera and not worry about the one in the middle that was black cause you forgot to adjust the exposure.

Photodune 1733468 camera controls m

The other thing it does is makes editing in the post-production stage much faster.

So basically set your exposure, do a test shot (review it for exposure using the histogram), then don’t touch it unless you either move to a new location, or the light changes.

#7 Sharpness – getting it in focus

I already mentioned the settings I use for focus above. Back button focus is something I highly recommend as well. It allows me to lock focus on the subject, precisely on their eye if I’m in close enough, and then recompose my portrait and shoot away. Unless the subject or I move, changing the distance between us, there is no need to refocus.

Here are a few more focus tips from a past article I did: 5 Tips for Getting Sharper Images. Obviously if you’re shooting a moving target, like kids in action, you’ll want to choose different focus settings. Try Continuous focus (Servo or AF-C) and burst mode (continuous shooting mode or drive).

THE AESTHETIC STUFF

#8 Posing the subject

Getting your subject or model into a comfortable, yet flattering pose can be tricky. People are generally nervous when being photographed and will look to you for guidance on how to stand, hold their body, turn their head, and adjust their hands. So you need to have a few ideas ready for them, making sure they can hold it comfortably and they look good at the same time.

Here are a few tips:

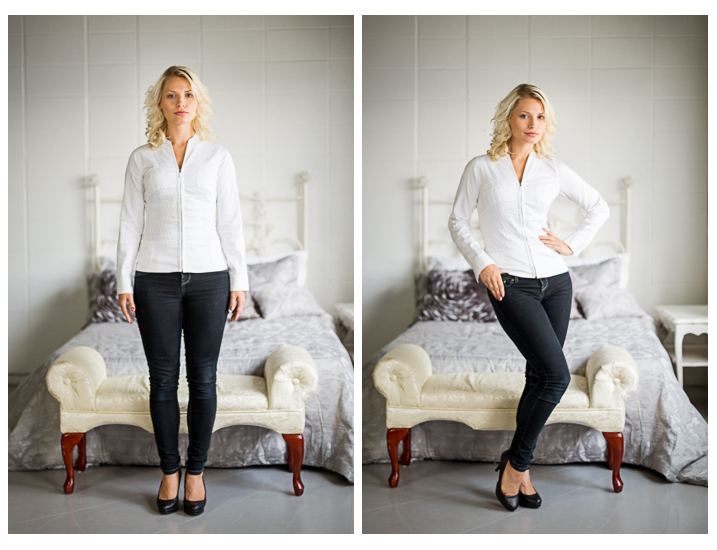
  • You’ve likely heard this before, but if it bends – bend it. Meaning get them out of a stiff body position bending one leg slightly, and bending elbows and wrists.
  • Get them to shift their weight away from the camera (hip away) it will be more flattering that way.
  • Add a slight head tilt for ladies to add a touch of femininity.
  • To get people to turn their body when standing – tell them to turn and point their feet, the body will follow naturally.
  • Turn shoulders slightly to narrow the body width, which is more flattering for most people.
  • Let them pose naturally and just make slight tweaks or adjustments. Watch how they move on their own so it still looks like them.
Portrait tips dps717px 17

Left – stiff and boring. Right – bend the parts that bend and make a more dynamic pose, it’s also more flattering, and in this case feminine.

For more tips on posing read these dPS articles:

  • Portrait Posing Tips- How to Help People to Relax and Take Better Photos
  • Tips for Posing Men
  • Posing Guide for Photographing Women: 7 Poses to Get You 21 Different Photos
  • Or grab the dPS ebook Portraits: Strike the Pose

#9 Facial view and camera position

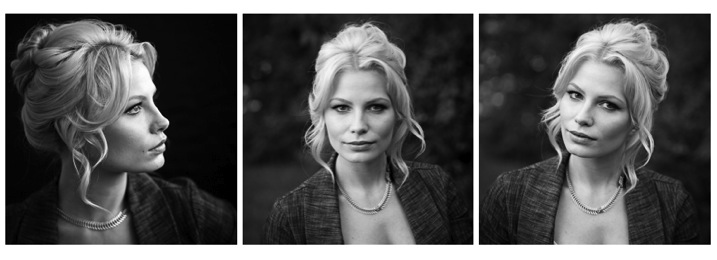
How you position the subject’s face is another factor that determines how flattering the portrait will be, and the mood. Some people look really great in full face view (facing the camera directly) while most benefit from turning slightly to one side, thus narrowing the face a little.

Profile view is something people cannot see in the mirror, so many have never seen theirs, and have no idea what they look like from the side. Only by trying it out will you see and know if it’s flattering for them.

The key to choosing the right angle for their face is to observe them. Do they tend to turn slightly when talking to you? Take note – that is probably the side the subconsciously prefer.

Portrait tips dps717px 18
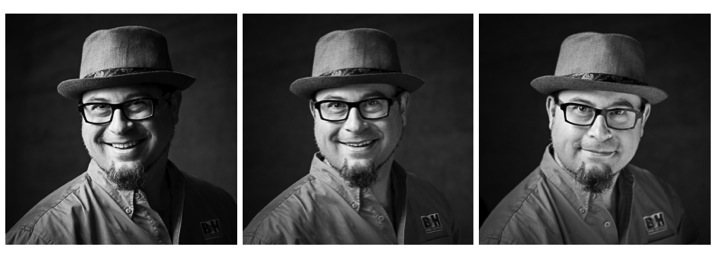
Three different views of the same girl’s face (above). She has a really gorgeous profile and a square jaw. I think the profile and last image (¾ face view) are the most flattering for her but she looks great in any image. Not all your portrait subjects will have that, so you have to help them look their best by making choices like this. If in doubt, shoot all three and choose later, or let them pick. You’ll learn from the subject what they like and what they think looks flattering.

Tip: for people who have a bump on their nose that do not want it to show – try photographing them facing both ways. One way will show the bump, the other it will be hidden. How you do that is shoot one way with the light say off to camera right. Then trade places with them so the light is coming from the other way and do a second shot. See which shows, and which hides the bump – then you’re ready to go.

What camera position you choose will decide what you’re emphasizing on the subject. A low camera angle can show height (especially if shooting full body) and make someone look taller, but it also emphasizes the body more. Not a good choice if someone wants to appear slimmer. Getting low down near kids level puts you closer to the action and makes them appear less small.

A slightly above eye level camera angle will emphasize the face and minimize the body, a good choice for most people. It also makes kids look smaller and can be effective if that’s the look you want. A really high angle will make the forehead prominentant (perhaps not the best choice for a receding hairline).

Just be conscious that where you place your camera will affect the final look of the portrait.

#10 Expression

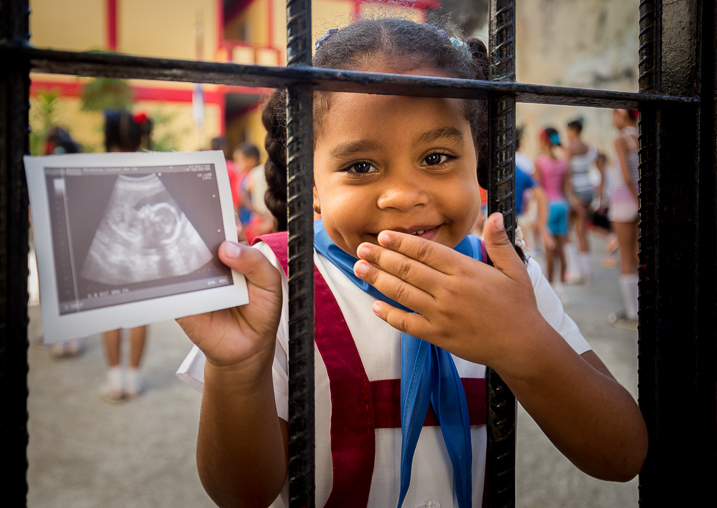
Portrait tips dps717px 20

Even though my Spanish is limited I was able to talk to this little girl and got this reaction and expression. She is holding a photo of her auntie’s ultrasound and her new baby cousin to be that she was really excited about. I just asked her to show me her baby primo (cousin) and she did this.

Okay, this is the ultimate thing you need to get right for great portraits. You can nail all nine points above, but if the subject has a bad expression, they will not like the image. There is one big tip I have for getting the best expressions in your portraits – talk to the subject and interact with them. There is one huge barrier to doing that which I see happen all the time.

There is a big black thing in between you and the real person sitting in front of you!

Yes, I mean the camera. Try this exercise if you dare:

Get a friend, or one of your kids or grandkids, to pose for you. Now put the camera up to your eye and take a few shots. How did it feel to you? Did you feel connected to your subject? Ask them how they felt?

Now put the camera on a tripod – yes the dreaded beast we all hate but it a necessary evil – and take a few shots using a remote trigger to fire the camera. How did you feel then? What about your subject? Were you able to make them laugh or smile? I’m going to go out on a limb and guess that you both had a better experience the second time and you got better expressions in the photos.

The key to expression is eye contact and you cannot do that with a camera between you.

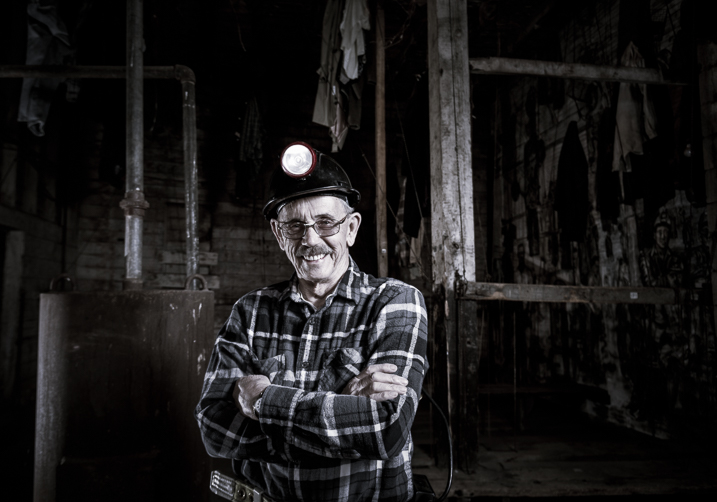
Portrait tips dps717px 21
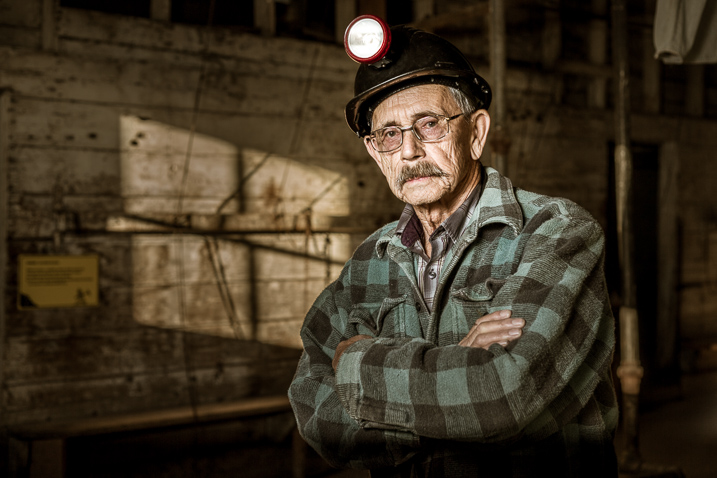
I’ve photographed Bob many times. He is a volunteer at an old coal mine where I do a workshop twice a year. He was a miner way back in the day and is as spry in his 70s as many people who are 40! He loves telling stories about the mine and ghosts so I just get him talking and let him go. We have fun, he loves being a “model” for a day, and it shows in the images.

Try it and see if it doesn’t make a difference. The tripod will also make you slow down and think about your camera, settings, and everything. Your tripod is not evil, it is your friend. Make friends with your tripod and use it.

Putting it all together

Whew! See I told you doing portraits is a lot to think about. But you can do this, you got this. Just take it one step at a time. If you aren’t at the stage of getting all 10 of these things yet, just pick one at a time and work on that. Choose patient models that will help you and practice. The only way to get better is by doing.

My students often ask me, “How do you make it look so easy?” – then answer – I’ve been doing this a really long time and it becomes instinct and subconscious after so many hours. Put in your 10,000 hours and we’ll talk!

If you have any questions or want to share your images – please do so in the comments below.


snapdeal-330-x-220Darlene’s Portrait Fundamentals course is on sale for $ 75 (50% off) now until November 3rd only. Find out more or grab the deal over at Snapndeals.com. Take more professional looking portraits in 30 days! The Portrait Fundamentals course covers everything you need to know, from camera basics to using a multi-flash set-ups. Over 6.5 hours of video lessons with two experiences instructors.

googletag.cmd.push(function() {
tablet_slots.push( googletag.defineSlot( “/1005424/_dPSv4_tab-all-article-bottom_(300×250)”, [300, 250], “pb-ad-78623” ).addService( googletag.pubads() ) ); } );

googletag.cmd.push(function() {
mobile_slots.push( googletag.defineSlot( “/1005424/_dPSv4_mob-all-article-bottom_(300×250)”, [300, 250], “pb-ad-78158” ).addService( googletag.pubads() ) ); } );

The post 10 Crucial Things You Need to Think About for Portrait Photography by Darlene Hildebrandt appeared first on Digital Photography School.

Digital Photography School

 
Comments Off on 10 Crucial Things You Need to Think About for Portrait Photography

Posted in Photography