I do a lot of cosplay (short for costume play) photography with friends, and I was asked by some to do a cosplay crossover photo shot (Shingeki no Kyojin / Psycho Pass) with them. They sent me some reference shots from which I decided to create a slightly futuristic, detective movie kind of look. I also thought I’d experiment with shooting to fit a wide movie crop to suit the look of the shoot. In this article I’ll show you how I set up, shot and processed two photos from the shoot, including the one above. If you’d like to see more photos from the shoot, you can do so here.
So on to how the shot was done . . .
The right location
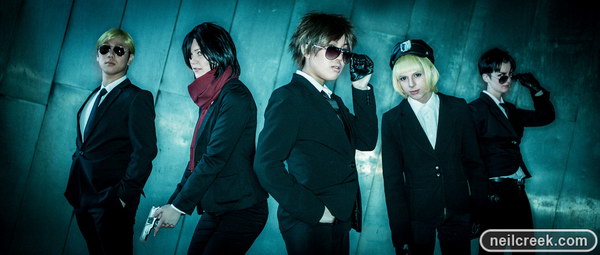
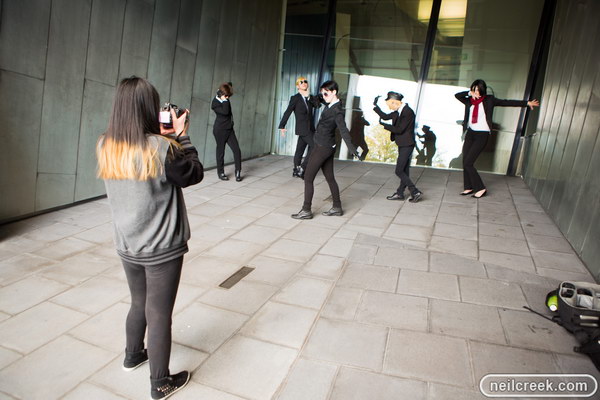
Our location for the shoot was the rear of Federation Square in Melbourne, Australia. It’s a futuristic looking building with lots of metal, glass and interesting angles in its construction. For the shot above I wanted to take advantage of these textures to accentuate the futuristic look, so we first went to the alcove depicted below in this behind the scenes photo.
Lighting the shot
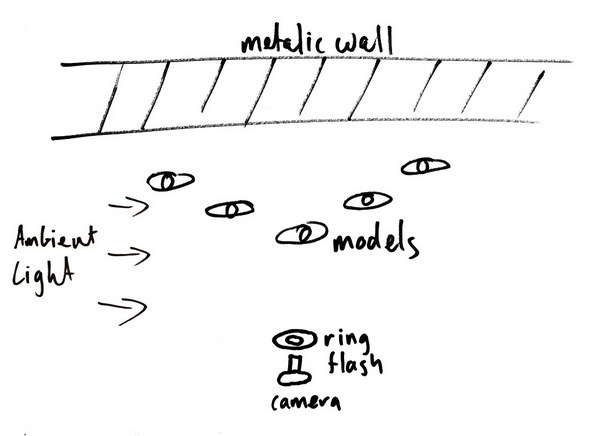
It was dusk so there was little light getting into the alcove from what became camera left. I wanted to keep that light in the shot as a fill, but my key light was going to be a ring flash – my Orbis ring flash. This kind of light gives a dramatic look with almost no shadow. It’s stark and flat but works well with this kind of scene. In my first test shot I noticed a fantastic unexpected effect of the brushed metal backdrop: anistropic reflection. This created a bright diagonal streak across the back of the shot.
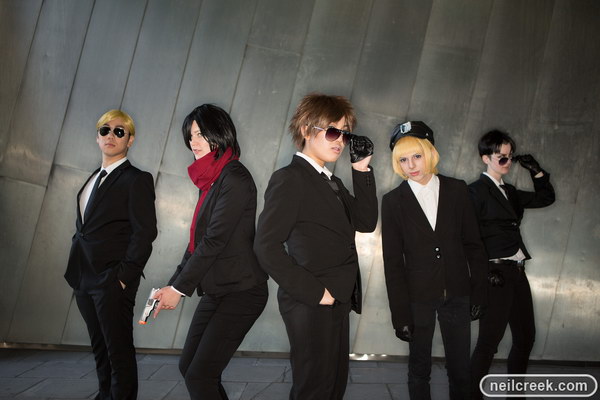
To get the right balance of fill to key, I set the camera to 1/125sec f/2.8 ISO160 and adjusted the power on the flash to get the right brightness for the shot. This ended up being towards the bottom end of the flash power. Following is a lighting diagram and the photo as it came out of camera:
Processing the image
In post processing the major changes I made were to increase the contrast and clarity, as well as a significant temperature move towards blue, and tint shift to green. With a movie aspect ratio crop and heavy vignette, plus a few small tweaks to the exposure settings, I ended up with this final photo (below).
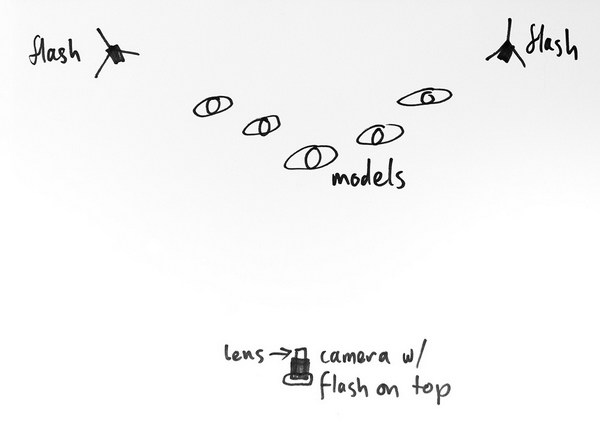
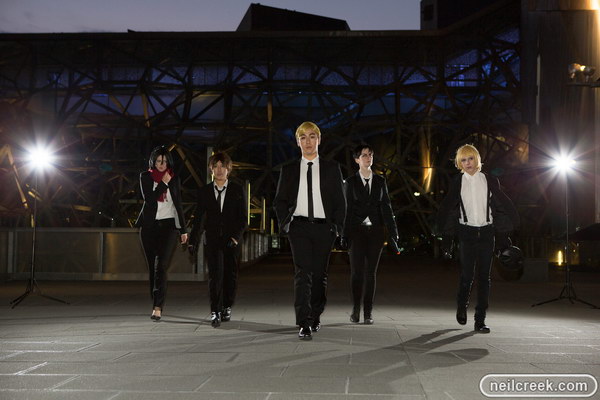
The second location shoot
I love the self-conscious, melodramatic, slow motion walking scenes in movies, and these guys’ outfits were perfect for a shot like that. I wanted to keep a consistent look with the first shot, but give this one its own twist. To do this I took the group out into an area with more space and a cool geometric glass patterned wall as the backdrop. I added a pair of flashes behind the group for some rim lighting, but I deliberately chose to keep them in view for some dramatic lens flares. I replaced the ring flash with an on-camera flash and balanced that to be under the exposure from the rim lighting. This gave me a low key dramatic look (drama was the theme of the night!). Again I set the camera exposure to just give a hint of the background – 1/40sec f/4.5 ISO500 – and dialed the power of the flash to get the balance I was after.
Rather than try and pose the shot, which would look too forced, I got them into a staggered starting position and simply asked them all to walk toward the camera. To get them in an appropriate mood and make them feel badass, I played this tune (which I consider to be the best slow walking music ever) on my phone and it totally did the trick.
Following is a lighting diagram and the photo straight out of the camera.
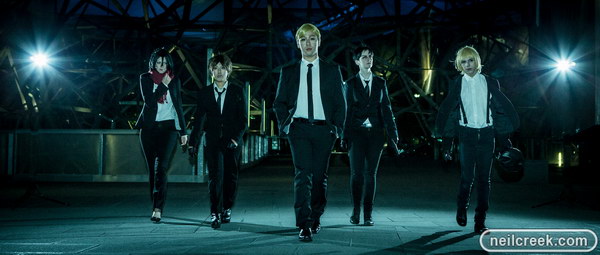
I processed this photo in essentially the same way as the previous shot, to get a consistent look and feel between it and the rest of the photos in the shoot. Please visit this gallery to see all the images at a decent size.
I really love cosplay photography because I get to go crazy and pull out all the creative stops, to make over the top photos, that suit the over the top characters and plot from anime. I’m fortunate to have fun, creative and energetic friends to work with to create these shots. If you’d like to see more of my cosplay and other photo shoots, you should like my Facebook page where I post photos regularly, and occasionally discuss how they were made.
Which of the two shots is your favourite, and why?
Models featured in these photos:
- Ettelle
- Jase Lube-Sama
- KnRai
- Kobito Cosplay
- Mei at Play
The post How the Shot was Done: SNK Police Cosplay by Neil Creek appeared first on Digital Photography School.

Digital Photography School


You must be logged in to post a comment.