The post Photoshop Eraser Tool: A Comprehensive Guide (2021) appeared first on Digital Photography School. It was authored by Ana Mireles.
Are you wondering how to use the Photoshop Eraser Tool? And more importantly, are you wondering when you should use it?
You’ve come to the right place. In this guide, I’ll show you how the Eraser Tool works – and I’ll give you some tips that’ll help you master it. You’ll also learn when to use the Eraser Tool, along with several helpful alternatives.
Let’s get started!
The Eraser Tool: 3 different versions
Nearly every tool in Photoshop comes in several different versions; to reveal these options, click and hold a tool icon. A menu will appear with each tool variation:
In the case of the Photoshop Eraser Tool, you’ll find three variations:
The regular Eraser Tool
The Background Eraser Tool
The Magic Eraser Tool
Let’s see what each can do and how they are different from each other, starting with the standard Eraser Tool:
1. Eraser Tool
The standard Eraser Tool is as straightforward as it gets. It erases the pixels underneath the cursor – whatever they are.
You can determine whether to use the Eraser Tool as a Brush, a Pencil, or a Block. For the Brush and the Pencil, you can choose the size, hardness, and opacity of your cursor’s brush.
Click once, and you’ll erase whatever is underneath the cursor (though a big brush will delete more than a small brush, of course).
Make sure the layer you’re working on is unlocked, and that transparent pixels are unlocked, too (the transparent pixels can be locked or unlocked via the checker icon on top of the Layers panel; see the circled icon in the image above).
2. Background Eraser Tool
The Background Eraser Tool tends to confuse and disappoint Photoshop beginners. The name suggests that it automatically erases the background of your image, thus eliminating the tedious work of selecting – but I’m afraid that’s not how it works.
Instead, the Background Eraser Tool samples whatever is underneath the middle of the cursor (marked with a +) and deletes areas that match the sampled color.
You can adjust how the Background Eraser Tool conducts its sampling. Continuous Sampling means that it will update the sample as you move the cursor. On the image above, for example, I can drag the Tool along the edge between the sky and the trees and it will delete only the blue from the sky. However, if I touch the branches, the Background Eraser will start deleting the trees.
Switch the sampling to Once, and the Background Eraser will erase anything with the color it sampled upon your first click. This is ideal when you want to remove intricate areas like sky between leaves.
Finally, the Background Swatch sampling mode will delete anything matching Photoshop’s current Background Color. This is best used with solid colors because a graduated blue – like the one in the sky, above – will leave a lot of areas untouched.
The Background Eraser Tool is only available as a brush, but you can adjust the Limits and Tolerance to fine-tune according to your needs.
3. Magic Eraser
With one click on a sample point, the Magic Eraser deletes bigger areas where the pixels have the same or a similar color.
The Magic Eraser works like the Magic Wand selection tool, except it erases pixels instead of selecting them; one click, and it erases anything that matches the color under the cursor.
You can adjust the Tolerance to delete more or fewer shades of the sampled color. You can also determine if you want to erase only adjacent areas or if you want to delete anything with that color, regardless of its location in the image. Check the Anti-alias option if you want to minimize jagged edges.
How to use the Eraser Tool: the basics
Using the Photoshop Eraser Tool is dead simple. Just follow these steps:
Unlock the layer you want to eraser. Make sure transparent pixels are unlocked, too.
Select the Eraser Tool you want to use (regular Eraser, Background Eraser, or Magic Eraser).
Customize the tool. Depending on the type of Eraser you’ve selected, you’ll have different customization options.
Click and drag to erase the desired area.
Check for any remaining pixels. If necessary, go back and erase over areas again.
Save the image as a PNG file to preserve the transparency of deleted pixels.
Tips for using the Photoshop Eraser Tool
Now that you’re familiar with the Eraser Tool basics, I’d like to share some simple tips and tricks to improve your results:
1. Always keep an original backup
The Photoshop Eraser is a destructive tool, so always work on a copy.
The Eraser is a destructive tool. In other words, if you delete pixels, they’ll be gone for good. You can bring them back with the Undo command, but that’s only if you haven’t closed and re-opened the file.
So before using the Eraser, always, always, always make a backup of your work.
For instance, you can duplicate the layer you plan to Erase; that way, if you mess up, you can always delete your worked-on version and start over with the duplicated layer.
Another option is to work with a copy of your file, rather than the original. Then, when things go downhill, you always have the original to save the day.
2. Use the keyboard shortcuts
To move more efficiently through your editing process, you can use the ‘E‘ key to activate the Eraser Tool.
Then tap ‘Shift + E‘ to toggle between the different types of Erasers.
3. Erase to History
If you’ve saved a state or made a snapshot, the Erase to History option will erase the changes made since that last save.
You can find this feature in the Options bar of the Erase tool.
When should you use the Eraser Tool in Photoshop?
The Photoshop Eraser Tool has limited applications. But for those few times when you need it, you’ll be happy it exists!
Here are several situations when the Eraser Tool can make a big difference:
1. When you need transparency
Sometimes, it’s not enough to hide pixels in the current document – you actually need to keep the area empty and transparent for use on images elsewhere.
This can happen when you’re preparing several images for a photo composite, or when you’re creating a logo to place on top of other images.
(Remember to save your file as a PNG. Otherwise, the transparent areas will be filled with white pixels by default.)
Always use a PNG format to save a partially erased image.
2. When you need to fine-tune channel masks
When you make a layer mask, you’ll notice that a new channel is created.
If you head to this new channel and use the Eraser Tool in Block mode, you can make adjustments to the black pixels to modify the mask (though make sure you zoom in for better results).
Eraser Tool alternatives
Not sure if the Eraser Tool is the right way to go? Here are several alternatives to the Eraser Tool that will help you achieve similar results.
Layer masks hide the pixels instead of deleting them.
1. Layer masks
Layer masks are a non-destructive way of “erasing” parts of your image. Technically, you’re not deleting those pixels – that’s why it’s non-destructive.
Instead, you’re just hiding the pixels you don’t want. If you change your mind and decide to make them visible again, you can disable the layer mask – or unmask the parts that you want visible.
2. Auto Erase
Despite the name, this isn’t a feature found as part of the Photoshop Eraser Tool. Instead, you’ll find it in the Pencil tool.
When you activate the Pencil and enable the Auto Erase option, you paint – with the background color – any pixels that have the foreground color. And if you paint over an area that doesn’t have the foreground color, you replace that color with the foreground color.
The Photoshop Eraser Tool: final words
I hope this article clarified your doubts about the mysterious and often underestimated Photoshop Eraser Tool. Go ahead and test it out the next time you’re in Photoshop. See how it goes. Yes, it has something of a niche effect, but it’s occasionally very helpful.
Now over to you:
Do you have any tips or advice for using the Eraser Tool? Share them in the comments below!
The post Photoshop Eraser Tool: A Comprehensive Guide (2021) appeared first on Digital Photography School. It was authored by Ana Mireles.
The post iPhone Live Photos: A Comprehensive Guide appeared first on Digital Photography School. It was authored by Simon Ringsmuth.
Baked into every iPhone is a neat trick – one that combines the serendipity of photos with the magic of video to produce a Live Photo. These aren’t the same as normal photos, but they’re not exactly videos, either.
Live Photos are images that can be edited, adjusted, and shared just like any other image. But they are also tiny video clips: each contains three seconds of video showing a brief moment right before, during, and after you take the picture.
To learn more about Live Photos, including how to use and edit them, keep reading!
What are iPhone Live Photos?
First introduced in the iPhone 6s, Live Photos are a great way to add a bit of context to your iPhone pictures.
Instead of just taking a picture of your kids, you capture the photo – but you also get a brief clip of them running and laughing. Rather than photographing only a flower, your iPhone captures the flower, but it also displays the wind, moving insects, and background noise. A snapshot of your friend holding a freshly caught fish becomes a short clip where you can see the fish wiggling and flopping free.
These short bits of video might not sound like much, but they can go a long way toward bringing a still scene to life. A simple Live Photo can trigger emotions and memories years later that you never knew you wanted to save. The best part about Live Photos is that you don’t have to do anything to create or view them – they’re captured automatically by your iPhone unless you turn the option off manually.
That said, despite the prevalence of Live Photos, there’s still a great deal of confusion among iPhone users. For instance, how do you use Live Photos? How do you edit and share them? What are their benefits and drawbacks? That’s what I aim to cover in the rest of this article.
I shot this as a Live Photo on my iPhone, so I get a bit of motion to go along with the still image.
How to use Live Photos
As with a lot of things in the Apple ecosystem, using Live Photos requires almost zero effort. Any time the camera interface is open, there is an icon in the top-right corner that looks like three concentric circles (pictured below). If there is a line through the icon, Live Photos is turned off. If there is no line, it means Live Photos is enabled. Tap the icon to switch between On and Off.
Tap the concentric circle icon in the top-right corner to enable or disable Live Photos.
When Live Photos is enabled, you don’t have to do anything different when you take a picture. Any time you press the shutter button, your iPhone automatically captures the picture and a bit of video. It’s almost like a short animation, or like a moving picture you might see in one of the Harry Potter movies.
If you don’t want to toggle the Live Photos setting every time, navigate to Settings and then choose Camera>Preserve Settings. If you have Live Photo checked, the camera app will remember whether you had Live Photos enabled or disabled the last time you used it. That way you won’t have to click the Live Photos icon every single time you want to take a picture – it will be enabled or disabled depending on your previous settings.
To make your iPhone remember whether you had Live Photos turned on or off, toggle the Preserve Settings>Live Photo option.
Once the Live Photos setting is enabled, all you have to do is snap a picture and your phone takes care of the rest. There are no parameters to tweak, no options to configure, and no changes from one iPhone to the next. Every time you take a picture, your phone automatically saves a Live Photo.
What can you do with Live Photos?
Apple cofounder Steve Jobs once said that people don’t know what they want until you give it to them. Live Photos are kind of like that, in that they give you a tiny glimpse into the context of your images.
People take pictures with their phones every day, but those images are devoid of the audiovisual context that Live Photos provide. Live Photos aren’t life-altering or world-changing, but the few seconds of video alongside each photo is so nice that it’s hard to give up once you’re used to it.
In fact, the real benefit of Live Photos isn’t readily apparent until you start scrolling back through images from months or years ago. You see a picture of a parent, child, or loved one – and you suddenly realize you also have a few seconds of their voice and past life. That’s when Live Photos become indispensable.
Personally, I don’t find Live Photos to be particularly useful for landscapes, animals, or everyday objects, but it’s those images of the people in my life that make me glad to have Live Photos as an option.
I didn’t remember what was going on in this picture of my relatives from several years ago. But since it was a Live Photo, all I had to do was tap and hold. Turns out they were caring for a small animal.
How to view Live Photos
While taking Live Photos is easy, viewing them can be a bit confusing. As you scroll through your photo library, there aren’t any indicators that separate Live Photos from normal photos. And when you tap on a Live Photo, all you see is a still image.
Viewing a Live Photo sent by someone else can be tricky, too, because it looks like any other picture.
When scrolling through your iPhone photo library, there isn’t any way to automatically distinguish Live Photos from normal photos.
The key to viewing Live Photos lies in the key to operating your phone: You have to use your fingers. So to view a Live Photo, whether in your own photo library or one sent to you in a text message, you have to press and hold. The pressure will activate the Live function and start playing the video.
(Note: If you are viewing Live Photos on a Mac computer in the Messages or Photos apps, you have to click and hold on with the mouse cursor.)
Viewing Live Photos is one thing, but what about finding them in the first place? With scant visual clues to separate Live Photos from normal images, locating them can be confusing. Fortunately, you can use the Media Type option in your iPhone photo library to show all Live Photos; this eliminates the need to scroll through all your images in the hopes of randomly stumbling across a Live Photo.
Open the Photos app on your iPhone, then tap Albums. Finally, scroll down to Media Types to see all your Live Photos.
There are also a few hints embedded in every Live Photo to help you know what you’re looking at: Every Live Photo has the word “Live” in the top-left corner, along with the Live Photos bullseye icon. And when you receive a Live Photo over text message, you won’t see the word “Live” – but you will see the Live Photos icon, which means you can tap and hold to view the clip.
How to edit Live Photos
One of the most compelling features of Live Photos is how they can be edited and tweaked just like any other image.
You can use the iPhone Photos app to crop, adjust color, change brightness, add a vignette, and even use filters such as Mono, Silvertone, Dramatic, and more.
You can also change the Key Photo – the image that shows up when you first view a Live Photo (before video playback begins).
When editing a Live Photo, you can tap and drag the horizontal bar at the bottom of the screen to change the displayed still photo (also known as the Key Photo).
I’m a fan of Live Photo editing capabilities; they reinforce the idea that Live Photos aren’t to be treated differently from any other picture. Editing prohibitions or restrictions would be a big drawback – but at present, the only thing you can’t do with a Live Photo is use markup effects to draw on it.
(If you do want to add markup, the Live Photo is discarded and you’re left with a still image. It’s not necessarily a bad tradeoff, just something to keep in mind.)
Apple also gives you some fun ways to edit your Live Photos that go beyond what you can do with normal images. When viewing a Live Photo, you can tap the Share button to save it as a movie, which can then be sent to anyone for viewing on any device – iPhone, Windows computer, etc. You can tweak things even further with some fun effects, too.
For instance, tap and hold on a Live Photo, then – without letting go – swipe upward. This brings up an Effects menu, where you can make a Live Photo loop, bounce back and forth from the end to the beginning, or create a long exposure that blurs all the frames together. These can be shared like other Live Photos, exported as movie files, or uploaded to websites like Giphy.com, which can turn the content into animated GIFs.
If you sync your pictures to iCloud then download a Live Photo to your computer, you get two files: a still image and a movie, which is the Live Photo.
If you have your iPhone pictures synced to your Mac via iCloud, you can even separate a Live Photo into its component parts: a single HEIC image file and a QuickTime movie file. (HEIC files are similar to JPEG files, but they offer more color information and better compression.) You can then edit and share each file individually, or you can use software such as iMovie or Adobe Premiere to stitch multiple Live Photo QuickTime movies into a single video.
Drawbacks to Live Photos
There are a few caveats to keep in mind when using Live Photos.
For one, while Live Photos are a great way to add a bit of context to your memories, they do take up more storage space than traditional photos. The exact file size varies, but Live Photos are generally about twice as large as normal photos. Even if you have 256 GB or 512 GB of storage space, Live Photos can eat through this pretty quickly.
That’s not to say you shouldn’t take Live Photos; just be aware of your storage limitations.
If you find yourself running low on iPhone storage, it’s possible that Live Photos are part of the problem.
Also, Live Photos exist only within the Apple ecosystem. Other Apple users can see the entire three-second clip – but if you send a Live Photo to an Android user, they’ll only receive a single JPEG image. There is a process you can use to export a Live Photo as a movie clip or animated GIF file, but those extra steps are an obvious inconvenience.
And Live Photos offer no customization options, which might bother folks who enjoy tweaking things to fit their own preferences. Every Live Photo is exactly 3 seconds – no more, no less. Every Live Photo is also shot at the same resolution and quality settings, and these limits can be somewhat frustrating. It would be nice if Apple had the option to shoot longer Live Photos, but I wouldn’t count on that changing anytime soon.
This still image turned out great. But what if I had just a few seconds of him swinging at the tennis ball? Thanks to Live Photos, I do. Once you start using Live Photos, you might never want to go back to still images.
iPhone Live Photos: final words
Live Photos are a great way to get more enjoyment out of everyday images.
While drawbacks exist, the benefits mostly outweigh the negatives – and it can be incredibly rewarding to look back on these brief video snippets years later. You will find yourself enjoying your images in a whole new way, and the creative sharing options might open up new doors you never knew existed.
Now over to you:
What do you think of iPhone Live Photos? Do you plan to use them often? Do you prefer them to still images? Share your thoughts in the comments below!
Live Photos FAQ
How do I turn on Live Photos?
With your camera app open, tap the little bullseye icon in the top-right corner. If the icon is yellow, then Live Photos are enabled. If the icon is white, Live Photos are disabled.
How much storage space do Live Photos use?
As a rule of thumb, Live Photos are about twice the size of a normal image. Most Live Photos are about 6-7 MB in size, though this varies depending on the subject you’re shooting.
How do I share a Live Photo to an Android phone?
When you tap the Share button, use the “Save as Video” option. This will convert your Live Photo into a movie file, which you can send to an Android phone (or share with someone who uses a Windows computer).
How can I turn a Live Photo into an animated GIF?
Your iPhone can’t do this by itself, but you can save a Live Photo as a movie and then upload the movie to a GIF website such as Giphy. The GIF website will convert your movie into an animated GIF, which you can share with others.
The post iPhone Live Photos: A Comprehensive Guide appeared first on Digital Photography School. It was authored by Simon Ringsmuth.
The post The Rule of Space in Photography: A Comprehensive Guide (+ Examples) appeared first on Digital Photography School. It was authored by Megan Kennedy.
In this article, I’m going to answer all your questions about the rule of space in photography:
What it is. How it works. And how you can use it for amazing results.
Specifically, by applying the rule of space to photography, you can embrace the quieter moments in visual imagery – and you can amplify the impact of your subject by balancing positive and negative compositional elements.
Let’s dive right in.
Canon 5D Mark II | Canon EF 50mm f/1.8 II with extension tubes | f/2 | 1/8000s | ISO 500
What is the rule of space in photography?
The rule of space in photography is a method of incorporating visual absence to give a subject room to breathe.
Although the rule of space is more like a guide than a rigid rule, it is a handy compositional device. It’s a great way to add a sense of vastness, depth, and/or motion to a photograph.
Why is the rule of space important?
To understand the rule of space, we first need to take a brief look at positive and negative space.
Photographers use the terms positive space and negativespace to contrast impactful and more subtle areas in a photograph.
Generally, positive space refers to specific subjects that command a viewer’s attention. Negative space, on the other hand, is less visually demanding and provides a frame for the main event in an image.
For example, in the image below, the clouds represent positive space, whereas the sky and dark shadows create the negative space that frames the main subject:
Canon 5D Mark IV | Canon EF 24-105mm f/4L IS USM | f/10 | 1/500s | ISO 100
So where does the rule of space in photography fit in?
In general terms, the rule of space governs the use of negative space within an image. By understanding the nature of the rule of space, a photographer can harness the intent of a subject, as well as add depth and perspective to the image.
The rule of space is important because it aids a photographer in articulating the energy of a photograph – and it guides the viewer’s eye by sculpting key visual events and affording the subject more room to move.
Working with the rule of space: the basics
To work with the rule of space in photography, first consider the behavior of your subject.
Ask yourself: What is the subject doing? Is it moving or stationary? How does it occupy space?
At the same time, visualize what you want to convey in the photograph. Is it movement? Perspective? Depth? Narrative?
The nature and behavior of your subject plus your intent should together determine how you apply the rule of space.
Perspective
One of the main ways the rule of space can impact a photograph is through perspective. Abundant space around a subject can make the subject appear smaller or larger depending on the camera angle.
For example, a subject photographed from a high angle, surrounded with minimal detail, can seem smaller and more immersed in negative space:
Canon 5D Mark IV | Canon EF 24-105mm f/4L IS USM | f/5.6 | 1/200s | ISO 100
Conveying momentum
The rule of space in photography can help you create the impression of movement.
To convey action, the rule suggests that space should be left either in front of or behind the subject (or both).
For example, if a subject is moving across a scene, you can aim to capture both the subject and the negative space surrounding the subject. The extra space conveys the subject’s movement, adding the momentum a tight crop may lack.
Allowing a subject room to move adds momentum. Canon 5D Mark II | Canon EF 24-105mm f/4L IS USM | f/10 | 1/640s | ISO 250
Adding depth
The rule of space in photography is not limited to highly active subjects; it works for stationary subject matter, too!
For example, in portraiture, your composition can be governed by pairing the gaze or gesticulations of the subject with negative space. A subject’s gaze naturally directs our attention – we want to see what the subject sees.
But when a gaze is met by negative space, the viewer’s eye will often naturally return to the original source of the gaze. The rule of space provides an organic way of adding depth and directing viewer attention.
You can also use the rule of space with non-human/animal subject matter – based on their movement, perceived gesticulations, and extensions. By following the momentum, composition, or behavior of a non-human subject, you’ll find ideal placements for negative space.
In the example below, I surrounded several blossoms with negative space; this additional room suggests growth and depth. It also highlights the detail in the individual florets.
Leaving extra room around specific flower heads to articulate their elemental composition is one way to emphasize non-human subjects through the rule of space. Canon 5D Mark II | Canon EF 50mm f/1.8 II with extension tubes | f/2.5 | 1/1250s | ISO 200
Rule of space challenges
The process of applying the rule of space to photographs is not that difficult in itself. However, a tendency to cram each image with as much visual information as possible can get in the way of exploring negative space.
Instead, deliberately and mindfully take a minimalist approach. You can also zoom out or physically take a few steps back from a subject to refocus on the rule of space.
Tips and techniques for working with the rule of space
Here are a few tips for working with the rule of space:
Tip 1: Use other compositional rules, too
Applying the rule of space to your photography doesn’t have to come at the cost of other compositional rules.
In fact, combining compositional tenets with the rule of space in photography can increase the chances of creating a successful photograph.
Compositional rules such as the rule of thirds, leading lines, depth of field, and repetition can all be used in conjunction with the rule of space to create engaging imagery.
Canon 5D Mark IV | Canon EF 24-105mm f/4L IS USM | f/5 | 30s | ISO 100
Tip 2: Let it breathe
The rule of space is all about giving a subject or a scene room to breathe.
So step back, zoom out, or even try a wider lens; that way, you can add a sense of spaciousness to your photos.
Tip 3: Experiment with different camera settings
Your choice of camera settings can help follow the rule of space more effectively.
For instance, you might use a shallow depth of field to surround a subject with negative space. You could also try using a slow shutter speed and panning your camera while leaving space before or after a subject to amplify movement.
You can amplify perspective with the rule of space in photography. Canon 5D Mark II | Canon EF 100-400mm f/4.5-5.6L IS II USM | f/5.6 | 1/125s | ISO 200
The rule of space in photography: conclusion
The rule of space aims to create a mindful harmony of positive and negative space.
And by applying this rule, you can emphasize and frame positive subject matter while generating an evocative balance of weight and weightlessness within an image.
So the next time you’re out with your camera, remember the rule of space – and do what you can to apply it in your images!
Now over to you:
Have you been using the rule of space in your photos? How are you going to change your compositions to improve your use of space? Share your thoughts (and photos!) in the comments below.
Rule of space FAQs
What is the rule of space?
In visual art, the rule of space guides your inclusion of negative space within an image.
What is negative space?
Generally, negative space refers to areas in a photograph that are not occupied by the main subject matter. Often, negative space serves as a frame to emphasize the key subjects in an image.
How do photographers use the rule of space in composition?
The rule encourages photographers to make use of negative space. There are many ways to do this. You can focus on coupling subjects with negative space by selecting minimalist backdrops, or you can pair the gaze of a portrait subject with additional negative space.
Who are some photographers that use the rule of space?
There are countless photographers who make use of the rule of space. For example, photographers Martin Parr and Helen Levitt made striking use of the rule, as well as Hiroshi Sugimoto, Michael Kenna, and Eric Kim.
When can I break the rule of space in photography?
Photography is all about developing personal creative instincts and approaches. That’s why compositional rules can be broken. The rule of space in photography is simply a guide – so if an image looks better without extra space, then go with your instincts. And if you aren’t sure, try taking a series of photos with different spatial approaches and analyze the results.
The post The Rule of Space in Photography: A Comprehensive Guide (+ Examples) appeared first on Digital Photography School. It was authored by Megan Kennedy.
The post Dodging and Burning in Lightroom: A Comprehensive Guide appeared first on Digital Photography School. It was authored by Rick Ohnsman.
Digital photographers who have never worked with film or never even set foot in a darkroom still encounter terms from the early days of photography. The phrase “dodging and burning” is a throwback to those times.
Now, the reasons for using this technique still apply, but the tools and methods for dodging and burning are much easier today. In fact, you can do effective dodging and burning in most post-processing programs, including Lightroom.
So let’s dig into the what, why, and how of dodging and burning in Lightroom – and show you how this technique can improve your photos.
Working with an enlarger in the orange glow of a safelight. This is how photos used to be printed.
A history lesson
Adobe’s “Lightroom” is a tip of the hat to the place photos were made in days gone by, the darkroom. I had a makeshift darkroom in a corner of my garage and remember the tanks and trays of smelly chemicals, working in the orange glow of a safelight, developing negatives, and making prints. It was a laborious process, and one for which there was no “undo” when a mistake was made.
The standard darkroom workflow went something like this:
Load the film (sheet film for larger “view cameras,” roll film for smaller cameras)
Make shots in the field
Return to the darkroom, and in total darkness or using a film bag, put the film in a developing tank
Develop the film in a multi-step series of chemical baths (develop, rinse, stop bath, rinse, fix, rinse, Photo-Flo, rinse, dry)
At this point, you’d have your negatives, which were film with reversed lights and darks (and colors if you were using a color film.) Next, you’d need to print. Photos were prints; you couldn’t view images on a computer screen.
(Later came reversal film, “slides” that still were physical renditions of your photo but able to be shown with a projector.)
If you were a DIY photographer and made your own prints in a darkroom, you had to have a lot of tools – including a device like this, called an enlarger. People who think photo printing is challenging today have no idea how it used to be!
At this point in the darkroom workflow, you’d be getting to the dodging and burning part.
You’d put your negatives in an enlarger – a projector of sorts which would shine the negative image down onto a piece of photo paper.
(This was all done in the darkroom under a “safelight,” which allowed you to see your work because the orange color wouldn’t expose the photo paper.)
Now, you had to decide how much time was needed to expose the photo paper to the light in order to make a proper exposure. Often, you’d create a “test strip,” a print where you’d create a succession of incremental exposures (shown below). Of course, that would have to be developed in a series of chemical baths, too.
How long should you expose the photo paper to the negative image projected by the enlarger? Better print a test strip.
Finally, you’d be ready to make your print. You’d put a piece of photo paper under the enlarger, set your timer for the exposure duration you established, hit Start, and expose the paper to the light of the projected negative image.
But wait! What if you wanted some parts of the image to be darker and others lighter?
Well, the amount of time the paper was exposed to the light determined how dark the image was.
So if you used an instrument to block light from portions of the image during the projected exposure or, in a second exposure, exposed select portions of the paper to more light, you’d selectively brighten or darken parts of the final print.
The term for selectively blocking the light from the photo paper is “dodging,” and the term for exposing areas of the photo paper to more light is “burning.”
You could buy a dodging kit – or you could just get some wire and make some cardboard cutouts.
Granted, that was a long story just to explain these key terms, but you need to feel the pain just a bit. Imagine doing all those things, then developing the photo paper, spending time and money, only to find that your print didn’t turn out as you hoped. Frustrating, right?
(Guess you weren’t the…wait for it…”artful dodger” you thought you were.)
These are the origins of the terms: “Dodging” meant using various tools to block the light from reaching the photo paper, thus lightening that part of the print. Burning used tools to allow extra light to reach portions of the paper, thus darkening those areas of the print.
Lighten and darken
We have it so much easier, cheaper, and safer with digital photography. No chemicals, no working in the dark, and maybe best of all, the ability to experiment, undo, and replicate the finished results with ease.
So while you will still hear about dodging and burning in Lightroom (as well as in Photoshop and most other digital editing programs), and the tools are still labeled as such, let’s substitute something easier to understand:
Dodging = Lightening.
Burning = Darkening.
Why dodge and burn?
When we use the sliders in Lightroom to adjust our image, we are working with “global” controls. These uniformly apply the effect to the entire image.
For instance, increase or decrease the Exposure slider, and the entire image will get lighter or darker.
What we may want to do is selectively control portions of the image, making some areas darker and some areas lighter. A major reason for doing this is because viewers tend to look at brighter portions of an image first, concentrating less on darker areas.
So to emphasize and deemphasize portions of our image, we may wish to selectively lighten or darken them.
(Remember, lighten=dodge and darken=burn).
The “quick and dirty” method
Dodging and burning in Lightroom can be complicated – but it can also be very simple, and that’s what I’m going to discuss in this section.
Here’s how it works:
Bring up the image you wish to edit in the Develop module of Lightroom. Perform whatever global adjustments you like using the sliders.
Select the Adjustment Brush tool. Double-click the word “Effect” to zero all the sliders. First, we’ll work on areas we wish to lighten (dodge) in the image.
Now let’s “load” the brush. In the Basic panel, drag the Exposure slider up to about +1.0. Set your Feather, Flow, and Density all to 100. This will likely create too much of an effect, but will make it easier to see what you’re doing. You can always back off the brightness later by bringing down the Exposure slider.
Pick an area of the image you wish to lighten and start painting on it with the brush. You will see the area get lighter. Only work on one area. When you’ve painted over all the desired sections, go back to the Exposure slider and drag it up or down to get the final amount of lightness you desire. Click Done when finished with this area.
To work on another area of the image, click the Adjustment Brush again (which will add a new “pin”) and repeat the steps explained above. Because adjustments with the sliders will affect everything done via that “pin” adjustment, you will have more control if you work on multiple smaller areas, rather than lightening multiple areas all at once so you’re forced to apply the same degree of lightening (dodging) to each one.
To darken areas of the image, you can use the same procedure, though you’ll need to drag the Exposure slider in the negative ( -) direction.
Combine global adjustments with simple dodging and burning in Lightroom and you can get a nice result. Before (left) and after (right).
With the Adjustment Brush and the Exposure slider, you can selectively lighten (dodge) and darken (burn) areas of your image.
It works, but maybe you’d like to refine your skills a bit, which is what the next sections are all about:
Tools of the trade
When we talk about dodging and burning in Lightroom, we have three tools we can use:
Adjustment Brush
Radial Filter
Graduated Filter
These tools allow you to select areas of your image where you can apply lightening and darkening.
Let’s discuss how each of these tools might be used and look at some examples that illustrate these concepts.
The Adjustment Brush
The Adjustment Brush in Lightroom allows you to selectively “paint” the area of the photo you wish to affect. It might help to think of how you’d control an airbrush rather than a regular paintbrush.
You can make several changes to the Adjustment Brush, including:
Size: Changes the size of the brush. Roll the mouse wheel, use the left and right bracket keys, or use the slider.
Feather: Changes how hard the edge of the brush is and how rapidly the effect falls off. Use Shift while rolling the mouse wheel, Shift and the bracket keys together, or the Feather slider.
Flow: Controls how quickly the effect is applied with each stroke of the brush. Use the slider to adjust the flow, or with the Adjustment Brush selected, change the flow with the number keys on the keyboard. Using multiple strokes will build up the effect.
Density: Controls the maximum opacity of the brush effect. For example, if the Flow was at 100 but the Density was at 50, one stroke of the brush would apply the effect at 50% opacity.
The Radial Filter
The Radial Filter works somewhat like the Adjustment Brush – but rather than allow you to paint randomly, your adjustments are restricted to a circle or oval shape.
You can control the size and shape of the Radial Filter, and you can also feather the edges. Plus, you can control whether the effect takes place inside the circle or outside the circle.
I often use the Radial Filter with the Invert box checked (so only the inside of the circle is affected), and then adjust the filter strength with the Exposure and Feather sliders. You can create what appears to be a spotlight and use it to selectively lighten (dodge) areas of your image.
Some other tips for working with the Radial Filter:
Hold down the Shift key when you drag out the Radial Filter to constrain it to a circle
Use the “handles” on the top, bottom, and sides to drag the Radial Filter into other oval shapes
Once the Radial Filter is created, move the cursor just outside the shape until you see the double-headed arrow and then drag to rotate the shape
Get another “spotlight” to use on a different area by right-clicking a previously-created Radial Filter pin, choosing Duplicate, and then dragging the new Radial Filter off to the next place you want to work.
The Coquille River Lighthouse near Bandon, Oregon doesn’t use the light any longer. But with some creative use of the Radial Filter…
…we can turn the light on! A Radial Filter was used to dodge the lighthouse itself, to put a light in the tower, and (as highlighted by the green overlay) to create a light beam.
The finished result.
A Radial Filter was applied to the first window to dodge it, then the Filter was duplicated and moved to each of the other windows. The window at the bottom-right shows how the round shape of the filter can be modified using the Erase brush – which you can switch to by holding down the Alt (Option on Mac) key. The window is showing red because the mask overlay is turned on.
The Graduated Filter
The Graduated Filter can also help you lighten and darken selective areas of your image, but in a more gradual way.
While you might not immediately think of the Graduated Filter as a dodging/burning tool, the concept is the same – you can use it to choose which areas of your image are affected. While it’s a separate subject, combining the Graduated Filter with range masking in Lightroom can provide a very powerful method of selective dodging and burning, which is why I suggest you also read up on range masking.
You might want to burn (darken) a sky in Lightroom. The Graduated Filter is a great tool to use – and combined with the Range Mask, it can help you keep the effect where you want it and away from where you don’t, such as the trees in this shot. The red overlay shows where the effect will be placed.
The vignette
A vignette is used for darkening or lightening the edges of your photo.
When used to darken the frame edges, a vignette puts more attention on the center, brighter areas of the image, and helps direct the viewer to the center of the photo.
The Post-Crop Vignetting option is found under the Effects tab in the Lightroom Develop module.
Behind the mask
Any of the tools you use for selective dodging and burning – the Adjustment Brush, the Radial Filter, or the Graduated Filter – are all applying “masks” to your work, controlling how and where the effect is applied.
Often, it can help to see exactly where the masks are applied.
When we first choose one of our dodging and burning tools and begin to work with it, Lightroom will create a “pin,” a marker showing that an effect has been applied.
There is a control to choose when a pin will be displayed, which pins are active, and where the mask has been applied. You can even choose the color of the mask to help you best see it while editing. Hold down Shift, and each time you tap the “O” key, the mask will cycle through its available colors: red, green, white, and black. Use whichever color helps you best see where you’re working.
Turning on the mask overlay can help you see where your effect is being applied.
Paint on, paint off
Even once you’ve created a dodge or burn effect, there are ways to further refine your selected areas.
Let’s take a quick look at a few of them.
Adjustment Brush: If you need to erase portions of your mask, turn on the overlay so you can see what you’re doing (hit the “O” key). Hold down the Alt (Option on Mac) key, and the “+” sign in the middle of the brush pin will change to a “-” sign. Keep holding down the Alt key, and erase the portions of the mask you don’t want.
Radial and Graduated Filters: After applying a radial or gradient mask, click the word Brush (at the top of the adjustment panel). Then hold down the Alt/Option key so the symbol turns to a “-” sign. Finally, brush out portions of the radial mask you don’t want.
Auto Mask: Checking this box will help the Adjustment Brush find edges and may assist you in selectively masking areas. I suggest you do some further reading to understand how this tool works.
Using the histogram
One feature of the histogram is the ability to show any shadow or highlight clipping. Tap the “J” key, and if any shadows are clipped they will show in blue, while clipped highlights will show in red.
By using the tools we’ve already discussed, you may be able to “rescue” such areas by selectively lightening or darkening them.
There could also be images where you purposely want to black out or white out areas. The “J” key will show you any clipping, then you can dodge or burn areas you wish to black out or white out.
Have a look at the images below, where I used this technique:
You don’t want to completely clip your highlights or shadows in a photo…except when you do. This was the straight-out-of-camera (SOOC) photo. It needed some cleanup.
Here, I’m using the Adjustment Brush for some “extreme burning,” a way to black out the background and remove distractions in this shot.
Here is the final edited shot.
I used the same technique for this photo. The rose shot against the black background was cleaned up by burning the background until the shadows were totally clipped. The rose on the white background was cleaned up by dodging the background until the highlights were totally clipped. Turn on the clipping indicator (hit the “J” key), set up your Adjustment Brush, check the Auto Mask box, and go to work.
Complexifying the light
When I was first learning to use Lightroom, I spent quite a few hours watching French photographer Serge Ramelli’s Youtube videos. He would often use the term “complexifying the light” when speaking about dodging and burning, and when talking about how you could use dodging and burning to make images more interesting.
I suggest you take a look at some of his tutorials; below is an image I edited with similar techniques.
Less is more
A good chef knows that a little salt can enhance the flavor of a dish, but too much can ruin it. A good photo editor learns that any manipulation of an image needs to be subtle, enhancing the image while not drawing attention to itself.
After a session of dodging and burning, it’s a good idea to get away from the screen for a while, then come back and view the image again. If you didn’t know, would you suspect that areas had been lightened or darkened with dodging and burning techniques?
I think you’ll often find that – especially when learning – you’ll need to dial back the sliders a touch to make the effects more subtle.
The technical and the aesthetic
As with all of photography, there are two sides to dodging and burning.
First, there’s the technical side, which requires learning the tools and techniques for dodging and burning in Lightroom.
The other component is aesthetic; you need to understand how to artistically view your image and decide where to dodge and burn to better direct the eye of your viewer to and through the image.
The technical side requires study to learn the tools. The aesthetic side requires artful contemplation and practice.
The Union Pacific 844 is a “thundering beast,” the only steam locomotive owned by a North American Class I railroad that has never been retired. I wanted to capture its might. This unedited shot didn’t quite do it.
But bring to bear the diversity of editing tools in Lightroom, including some dodging and burning, and you get an edited version that does a much better job of capturing my vision.
Dodging and burning in Lightroom: Conclusion
There are many photo-editing programs, tools, and techniques for dodging and burning your photos.
Some photographers may favor Photoshop, Luminar, ON1, Corel PaintShop Pro, or any of the dozens of other choices.
So feel free to choose your weapon.
But realize that no one will ask you what tool you used to improve your image. Master the tool you choose and wield it well. For me, dodging and burning in Lightroom is one tool for adding flair to my photos.
Now over to you:
Do you do dodging and burning in Lightroom? Do you want to? Share your thoughts, tips, and tricks in the comments below!
The post Dodging and Burning in Lightroom: A Comprehensive Guide appeared first on Digital Photography School. It was authored by Rick Ohnsman.
The post PortraitPro 21 Review: A Comprehensive Editor for Portrait Photographers appeared first on Digital Photography School. It was authored by Carl Spring.
It was only a few months ago that I reviewed Anthropics PortraitPro 19, where the ease of use, the speed, and the AI technology really impressed me. Here we are only a few months later, and Anthropics has introduced PortraitPro 21. I was lucky enough to get my hands on a copy to see what has improved, what is new, and whether the updated software is worth the investment.
Also, spoiler alert: We have a special offer at the end of this PortraitPro 21 review, so make sure you take a look!
What’s new in PortraitPro 21
As always with Anthropics, there’s a long list of new features that really make PortraitPro 21 stand out. These include:
Sky replacement
Lighting brushes
Clone tool
Denoising/Sharpening
History tool
Color styles
Color copying
Hair highlights
There are actually even more new features, including a master slider for skin lighting and coloring, layer presets, optimized color-space handling, the ability to move catchlights, SVG backgrounds, new layers, backgrounds and overlays, free stock photos, and new tutorials from the creators.
If I offered an in-depth discussion of every new feature, you would probably be reading this for days. Instead, why not go and download your free trial of the software on the website? That way, you can check out the program for yourself.
In the meantime, let’s look at some of the new PortraitPro 21 features in greater detail.
Sky replacement
This feature is one that portrait photographers will love. There is nothing worse than capturing amazing shots against a blank sky, knowing you will need to edit them later. Swapping the sky on multiple images can be laborious and time-consuming. But in PortraitPro 21, replacing skies can be done with the click of a button.
Using technology from Anthropics LandscapePro software, this feature does not simply mask and drop in the new background. It also changes the color and tone of the image to match the new sky, giving a more natural result.
PortraitPro has quite a few skies for you to choose from, but if you are looking for something specific, you can always add in your own.
Lighting brushes
PortraitPro 21 includes a series of lighting brushes. These can be used to create specific effects such as light streams or realistic relighting elements.
You are able to select exact colors and alter the strength of the brushes, which allows you to quickly get the perfect effect. These brushes are able to separate the background and foreground for you, so you can really get creative.
Clone tool
The addition of the Clone tool means you can remove troublesome areas from your photos. And the presence of the Clone tool means there is no reason to use other software to perfect your edits.
As with all tools in PortraitPro 21, the Clone tool is easy to use and allows completely adjustable precision so you can get the exact result you want.
Ultimately, it’s a great addition to the feature set of PortraitPro. And while it is a tool that most will recognize and is not as groundbreaking as others, it’s one that will be hugely appreciated by all users.
Denoise/Sharpening
Denoise and sharpening tools are another new addition to this version of PortraitPro.
Yes, these tools are available in other editing programs. But as you are probably beginning to see, the addition of these features to PortraitPro 21 means that you have no real need to switch between programs to get your final result – making PortraitPro 21 a more all-in-one editing solution for portrait photographers.
History tool
The History tool continues the trend of the Clone tool. It’s a feature that users of other editing software will be well aware of, and it’s highly valuable.
Specifically, it allows you to move back to a specific point in your edit so you can rework an image without needing to start over.
Color styles
Filters will be familiar to everyone who reads this, because we frequently have these in our social media apps.
PortraitPro now includes a series of color styles that can dramatically change your image in just a few clicks.
Hair highlights
PortraitPro 21 features a variety of new tools for working with hair.
These include tools that add highlights, as well as change hair color and vibrance. And you can fine-tune these to achieve “salon-level” results.
PortraitPro 21 review: Performance
As always, I spent some time getting to grips with PortraitPro 21. Having used previous versions, I was familiar with the interface. But as with PortraitPro 19, I was amazed by Anthropics’s excellent tutorials.
In fact, there are many more tutorials in PortraitPro 21, which give new users confidence right away. Even as a previous user of PortraitPro, it was good to go through a series of tutorials on the new features. These allowed me to immediately understand what is possible in PortraitPro 21.
I started with the hair tutorial, which gave convincing results quickly and easily. From there, I fine-tuned to my liking.
I loved how the tutorials helped me get started, but then I fine-tuned to my own taste.
After that, I experimented with the new sky replacement feature. Due to my lack of outdoor photography over the last 12 months, I used the tutorial image as a starting point for this feature, and the results were impressive.
Changing the sky on the test image highlighted the importance of choosing your replacement sky wisely. Certain skies won’t work on certain images.
However, Anthropics has included so many different skies for you to choose from that, for every situation, there will be a replacement sky that matches your scene. Again, the ability to fine-tune really allows you to dial in the detail and increase the realism.
There are so many different sky options built into the software.
Using TIFF files
After working on the many image tutorials, I wanted to use some of my own images. I always feel this is the real test.
And I was hugely impressed.
My images worked exactly the same as those in the tutorials. Everything was fast, and the software’s AI technology picked features out flawlessly. The highest compliment I can pay the software is to say that I didn’t notice any slowdown between the images I used myself and those in the tutorials.
Even with a shallow depth of field, PortraitPro 21 picked out the face almost perfectly.
To push the software, I used 16-bit TIFF files in the Adobe RGB color space. The images opened fast, and PortraitPro 21 picked out the features flawlessly. Applying presets took a little longer than the test images, but considering I was working on 16-bit TIFF files, I was really impressed.
I loved the fact that little tips popped up in the bottom corner of the screen, reminding me of how to tweak things. I used an image with an incredibly shallow depth of field to test the feature-finding abilities, and again, I was very impressed.
For the first image I tested, I used the Clone tool to remove a couple of small blemishes. Even though I was editing TIFF files, the software worked perfectly.
With the blemishes cloned out, I simply added a preset and tweaked it to taste. I had a finished image in less than 5 minutes. This was much quicker than when I edited the image manually. One quick and simple export later, I had a beautiful image ready to go.
This full retouch only took 5 minutes.
The only thing I will say is that some of the presets are a little more extreme than my personal style. However, the great thing about PortraitPro is that you can create your own presets simply and easily.
In fact, I tend to do this on a shoot-by-shoot basis, starting with a preset and tweaking it to suit the shoot I am working on. I can then apply these presets quickly and easily to the whole set of images from the shoot before sending proofs to a client.
Working with presets is taken to a whole new level with the Studio Max version of PortraitPro 21, where you can batch process several images in seconds.
Batch processing
Import images, select your style, and click Go. Batch processing is an incredibly powerful feature in PortraitPro 21.
For a working photographer, the batch processing in Studio Max is a huge timesaver when you need a consistent retouch across a range of images. PortraitPro’s face recognition means that you can trust the software to pick up the face and apply the retouch for you automatically.
To test this feature, I exported full-sized JPEGs from a styled shoot. After creating a look with a single image, I used the batch feature of Studio Max to apply this style to a group of ten images. In less than one minute, all the images had saved and were ready to go. I simply clicked two buttons.
This feature alone changes how I deliver portrait and headshot proofs to clients. For so many working photographers, batch processing is going to be a game-changer. Imagine being able to deliver headshot proofs to clients with such little effort.
A variety of poses didn’t fool the software. Everything was ready to deliver in under a minute.
Who is it for?
In my last review of PortraitPro, I said, “PortraitPro is an amazing tool for those who are new to retouching portraits. It is simple yet incredibly powerful, and gives you pleasing results within seconds. However, it offers much more and encourages you to go back to the software and personalize your retouching.“
So much has changed since then. In fact, PortraitPro 21 has more features that make it even easier for me to recommend. It is possibly the most feature-rich portrait editing software out there.
If you’ve loved previous versions of PortraitPro, then you will love this even more – especially with the special offer for dPS readers (see below!).
Note that there are three PortraitPro 21 versions: Standard, Studio, and Studio Max.
PortraitPro 21 Standard is great for many people. It is a standalone software that allows you to work with JPEG or 24-bit TIFF files. For many photographers, this will be perfect.
By upgrading to PortraitPro Studio, you get the Photoshop/Lightroom plugin that so many of you will love, as well as the ability to work with RAW, DNG, and 48-bit TIFF files. It also has color-space conversion.
Finally, for those who shoot professionally or need the ability to retouch a batch of images in a few clicks, the Studio Max version of PortraitPro 21 will save you so much time (and professionals all know time is money!) that I cannot help but recommend it.
Sounds amazing! How do I get it?
You can download your free trial of PortraitPro 21 right here.
But if you’re thinking about purchasing the software, note that there is a 50% off launch offer, plus dPS readers get an extra 15% off with the coupon ZC1990. So click here to grab your discounted copy of PortraitPro 21!
Anthropics is a paid partner of Digital Photography School.
The post PortraitPro 21 Review: A Comprehensive Editor for Portrait Photographers appeared first on Digital Photography School. It was authored by Carl Spring.
The post 7 Tips for Stunning Black and White Photography (Comprehensive Guide) appeared first on Digital Photography School. It was authored by Jaymes Dempsey.
How do you achieve stunning black and white photography?
Black and white photography is one of the most intimidating genres out there, mostly because it’s associated with lots of established names, as well as the “fine art photography” label.
But here’s the thing:
Black and white photography isn’t actually difficult. In fact, it’s just like any other genre of photography: There are a few tips and tricks that, once you apply them to your shooting process, will instantly improve your black and white photos.
And that’s what this article is all about. I’m going to share with you seven tips for stunning black and white photography. And you’ll come away with the ability to take masterful black and white photos wherever you go.
Sound good?
Let’s dive right in:
1. Shoot in high-contrast light for the most impactful photos
Here is the number one thing you need to remember about black and white photography:
It’s all about the contrast.
In fact, if that’s all you take away from this article then you’ll have profited enormously, because contrast is the lifeblood of black and white photography.
Now, there are a number of ways to create contrast in your photos. And I’ll explore these different techniques below.
So let’s start at the very beginning:
With light.
If you can’t make the light work for you, your black and white photos are just going to look like a muddy mess. Instead, you need to recognize the type of light you’re working with, and you need to try to use that light to achieve as much contrast as possible.
The best light for black and white photography is (no surprise!) high-contrast light. More specifically, light on sunny days.
If you’ve explored other genres of photography, you’ll know that light on sunny days is harsh, it’s unpleasant, and it just doesn’t look good.
Unless you’re a black and white photographer.
Because bright, sunny light enhances dark tones and creates intense light tones. This looks amazing in black and white photos, and it’ll really take your black and white images to the next level.
If you want to do some shooting but end up with softer golden tones from later in the afternoon or early in the morning, you can try using heavy backlighting to create additional contrast.
2. Find contrast-heavy tones and put them together
You already know about the importance of contrast in black and white photography. And you know about the importance of using contrast-heavy light.
But even once you’ve got the best light, you still have to make sure that the tones of your photo lend themselves to the overall black and white look.
Now, the best black and white tones are very dark and very light. For instance, a great black and white might include a white sky and a dark house, or a bright character standing in front of a black building.
So when you’re out and about, look for tones that contrast. Try not to think in terms of colors, because the colors will just distract you. Instead, think about the relative brightness of tones.
And look for blacks and whites that go together.
Once you’ve found them, however, you’re going to need to follow a piece of compositional advice:
3. Simplify your black and white photos as much as possible
All photography, for the most part, benefits from a simple composition.
However, black and white images benefit from a simple composition the most. This is because black and white photography is meant to be simple. It has no complex colors. No chaotic color-contrasts.
Instead, it’s just…black and white.
So whenever you go to take your black and white shots, stop and think. Consider whether there are ways to simplify the shot.
Could you remove something distracting in the background? Could you use a wide aperture to make the background blur more? Could you change your angle so as to create a more non-distracting option!
Do anything you can to make your shot simple.
Simpler is better, all else being equal.
4. Try to capture raw emotion for compelling black and white photography
Here’s one of the great things about black and white photography:
It’s a genre that loves to capture emotion.
The smile of a person on the street. The laugh of a person crossing the road. The frown of a sad child.
These are all very photographable moments, moments that you shouldn’t miss out on. And black and white is the perfect way to record it.
In fact, I recommend you try to capture emotion with black and white photography. The somber look of a high-contrast black and white will take emotion and make it even more powerful in a photo. It might even give you a three-dimensional effect.
5. Use minimalism to make your compositions stand out
What is minimalism?
Minimalism is a compositional technique that emphasizes intense simplicity. And not the simplicity as I explained above, but a true, deep simplicity – one that’s built into the composition.
Let me explain:
Minimalism uses lots of white space to draw attention to your main subject. White space is just empty space in a photo. (It doesn’t have to be white – it can just easily be gray or black, as long as there’s nothing going on in that part of the image).
This is a minimalistic photo:
Minimalistic photography uses the weight of negative space to emphasize your subject. So you don’t have to be afraid of photos that are extremely minimalistic. And they’re pretty easy to pull off.
To create minimalist black and white photos, I recommend you find a background that’s smooth and pure, such as a white sky. Then place your main subject small in the frame, along one of the rule of thirds power points (or even just above or below the power point).
If all goes according to plan, then you should have a beautiful minimalistic photo! Don’t be afraid to play with the placement of your subject.
6. Shoot against the sky to achieve a silhouetted look
In the previous tip, I mentioned that a white sky makes for a nice minimalistic background.
And it’s true. A bright white sky can be used in a black and white photo to emphasize a darker subject, which is exactly what you want to do! When the sky’s especially bright, you might even produce a partial silhouette, where the main subject has no detail but stands out against a white background.
So here’s how it works:
Find the main subject. It can be any color, but darker tones work best.
Then get down low, so that the main subject is framed by the sky. If you’re shooting on a cloudy day, you’ll have plenty of bright light behind your subject (even if it doesn’t seem like it). If you’re shooting on a sunny day, a bright part of a blue sky should do the trick.
Experiment with different possible angles, while making sure that your main subject doesn’t overlap with anything around it or behind it.
Then experiment with different exposures. Take a few shots that are drastically underexposed, a few shots that are nicely exposed for the subject, and a few shots that are overexposed.
Eventually, you’ll find a technique you’ll like!
7. Shoot in color, then use post-processing to convert your photos
I’ve been talking all about capturing amazing black and white photos in-camera.
But a big part of the black and white photography process is the post-processing. After all, this is where you should be converting your color images to black and white shots!
When you first open your photos in an editing program, they may look bland. They might even look a little bad.
But don’t worry. Because here’s what you do:
First, you drop the saturation all the way down, until it’s completely gone. This should give you a photo that’s full of grays.
Then you lift the contrast so that contrast shines through, and makes the photo pop off the page.
I also recommend boosting the Whites and lowering the shadows. This will add further contrast to the photo. It also ensures a greater tonal range overall, which looks quite good!
Conclusion
If you’re looking to create stunning black and white photography, then you’ve come to the right place.
You hopefully now know all about black and white photography.
All that’s left…
…is to get out and start doing some shooting of your own. Amazing photos await!
The post 7 Tips for Stunning Black and White Photography (Comprehensive Guide) appeared first on Digital Photography School. It was authored by Jaymes Dempsey.
The post Your Comprehensive Guide to Photography Post-Processing Software appeared first on Digital Photography School. It was authored by Herb Paynter.
My recent article, 3 Alternative Post-Processing Applications that Challenge the Adobe Throne, presented just three of the many post-processing software packages available (both free and paid) that provide excellent post-processing capabilities. In this article, I’ll give you a much longer list of post-processing software. To be impartial, I’ll list the titles in alphabetical order.
DXO Photolab 2
A few of the titles added by readers in the Comments section of the “3 Alternatives” article impressed me with their power and innovative design. I’ve been editing digital images with every software package available since late 1986, and I thought I’d seen most of them. However, it seems that the list of capable editing software grows weekly.
As you will notice, I do not mention ALL the software available for download or online use. Those that made the cut will be actual production titles with a minimum set of well-designed editing functions.
To be honest, I’ve looked at a significant number of offerings that are little more than public domain routines. They are not fully implemented or even adequately defined. These were considered but not listed.
Listed below is a wide variety of packages on both mobile and laptop/desktop platforms; a true variety pack that covers the field from hobbyist to professional users. No matter what your preference, you’ll find something here to tickle your fancy and meet your demands.
ACDSee Photo Studio Professional
As was welcomed in my first article, additional post-processing software titles should be added to this list by readers who have discovered (and used) them.
It is important to recognize all such products in a desire for fairness and sharing information. Because this list includes many more titles, I will not mention individual features of these titles, only a brief mention of the product’s most notable features.
This is where you can really contribute…
I’ll rely on you to describe your favorite features and benefits of your favorite titles. Let’s make this a very collaborative group effort BUT with one important request: please be brief and succinct with your comments. Limit your comments to one or two of the features that make your favorite app stand out from all others. That way, we learn from each other without monopolizing the mutual pulpit.
Apple Website: https://apps.apple.com/us/app/snapseed/id439438619
Price: Free
Sumo Paint
Publisher: Sumo
Website: https://www.sumopaint.com
Trial: Free/30 days
Price: Free version, but Sumo Pro is $ 4/month
Topaz Studio 2
Publisher: Topaz Labs
Website: topazlabs.com
Trial: Free/30 days
Price: $ 100 Mac/Win
Anthropics Smart Photo Editor
Conclusion
Some titles didn’t make this list’s cut simply because they are only marginally useful. Needless to say, in today’s market, there is an innumerable slew of entertainment-level phone/tablet-based image “editing” apps also available. There are way too many even to mention, let alone keep current information on.
Many of these apps are made for the amusement of the younger social media crowd who appreciate more unicorns and stickers than serious editing power. Not to sound judgmental, there is an app for everything and everyone, but this listing is “focused” on actual photo editing capabilities more than the social media aspect.
The post Your Comprehensive Guide to Photography Post-Processing Software appeared first on Digital Photography School. It was authored by Herb Paynter.
Peer-to-peer equipment rental platform KitSplit has expanded its insurance cover for equipment owners. Gear that is rented out via the platform is now also covered for theft by the renter, in addition to previous coverage which included damage, loss and theft from the renter.
‘The trust of our community and the safety of their gear is of utmost importance to us. With the Owner Guarantee, and our improved vetting, we are excited to give our owners even more peace of mind, ” said Lisbeth Kaufman, CEO and co-founder of KitSplit. ‘Trust has been a focus of ours from day one, and we’re excited to build the safest way to rent cameras in the industry.’
Previously theft from the renter, or ‘voluntary parting’ as it is called in the industry, was excluded from coverage which according to KitSplit is industry standard. KitSplit says that in the past voluntary parting on KitSplit has been very rare at about one case in 5000 rental transactions. Still, when it happened the consequences for equipment owners could be very painful.
In addition to the expanded insurance coverage, the company uses a proprietary 40 point risk vetting system to ensure only trustworthy professionals can offer and rent equipment on the platform. You can find more information on the KitSplit website.
Photo software developer On1 has introduced an update to its Raw photo processing application that it claims is up to 50x faster than the previous version and which includes a host of new features. The company says that every feature added and each improvement made in Photo RAW 2019.5 is a direct result of customer feedback.
The greatest speed increases will be felt when exporting processed images, though preview images taking on the effects of pre-set adjustments and other exporting functions happen in less than half the time they did before, according to On1.
New features include an edit history that can be rolled back, the ability to run the edit and browse windows on different screens, as well as a new keyword system that allows creating keywords inside keywords to separate a collection even more.
The changes make the software quicker to use and easier to archive images so they can be search more thoroughly, making On1 Photo RAW a bit more of an alternative to Adobe’s Lightroom.
Compatibility with 21 additional cameras has also been included in the update with the company promising it is working on bringing support for Canon’s CR3 files to the application as soon as it can. Photo RAW 2019.5 also brings compatibility with 29 additional lenses.
Below is an introduction video from On1 that walks through On1 Photo Raw 2019.5 and its latest features:
On1 Photo Raw 2019.5 is available to download immediately and will cost from $ 63.99 for new users. The update is free for existing users of the current edition.
For more information see the On1 website.
Press release:
{pressrelease}
ON1 Photo RAW 2019.5 – Available Today
In April we announced the upcoming release of ON1 Photo RAW 2019.5 and today we are excited to announce it is officially available for the ON1 community. Since the first release of ON1 Photo RAW, we’ve given our community a say in the features and technologies they want in their photo editor of choice. Every feature and improvement we’ve made in the latest release is a result of community input through the ON1 Photo RAW Project. We want to take this chance to say, thank you. We’ve come a long way and are excited for what the future holds here at ON1.
One of the most significant improvements in the latest release is performance and speed in several areas. Some of these optimizations give customers up to a 50x improvement compared to the previous version. Here are a few of the areas where customers will notice a significant increase in speed.
Preset Previews — Up to 3x faster — When navigating through presets and previewing each effect on the photo
JPG to JPG Export — Up to 2.5x faster — This is an example of creating “proof” sized JPGs for a client and takes advantage of a new resizing algorithm
RAW to JPG Export — Up to 2.5x faster — This is an example of creating JPGs for social media with your watermark
Export in Edit — Up to 5x faster — This is an example of saving a full-sized file for sharing or editing in another app
Export Edited Photo — Up to 50x faster — This is an example of exporting a large JPG from a previously edited 45MP RAW photo
New Features in Version 2019.5
Dual Mode — Easily undock the Browse Module from the Edit Module, use a second display, or make sales or client presentations on a projector or TV. The dual mode allows photographers to customize how they want to work when browsing and editing photos.
Edit History — A full edit history is added when working on photos. Each editing step is viewable, along with the ability to roll-back and compare adjustments. Photographers can also revert to the beginning of the editing session.
Settings Applied Info — Photographers can now quickly view which modules, tools, and filters are applied to a photo. This non-linear approach also allows photographers to double-click on a setting and jump straight to it for further adjustments.
Selective Sync — Enhanced granularity in which settings to apply when syncing your settings (or pasting and saving a preset) has been added. For example, photographers can drill down and only apply a white balance adjustment. The ability to sync cropping, retouching and brush strokes between photos is also be included.
Hierarchical Keywords — The master keyword list now supports nesting keywords inside of other keywords. Nested keywords allow photographers to organize keywords as they see fit. Importing a list of nested keywords from other apps like Adobe Lightroom® is also supported.
Apple® Photos® Extension Enhancements — Integration with Apple Photos now supports the full raw data, improving adjustments to tone and color. It also supports re-editable non-destructive editing and more native ON1 Photo RAW features like layers, crop, and text.
First Launch Experience — If it is your first time using ON1 Photo RAW, there are new walkthroughs to help you learn the basics. This gives photographers a running start and directs them where to learn more.
Tool Tips — Tool tip animations are added to improve the usability and shorten the learning curve for each tool.
Additional Enhancements in Version 2019.5
Layers Enhancements — Create a new canvas of any size or change the size of the existing canvas.
Text Tool Enhancements — Add a background color to a text box and control its opacity. Easily control the character and line spacing. New options also allow photographers to duplicate and change the order of text boxes and automatically insert text from a photo’s metadata.
Performance Improvements — Zooming, panning, and brushing are now much faster. A new preview quality option can help increase performance on lower-end and integrated video cards as well. Export is now up to 10x faster when resizing or exporting a photo or photos already edited.
Local Adjustments — The Local Adjustments tools are faster to brush and adjust.
Windows High-DPI — Support for high-dpi displays on Windows is dramatically improved. The scaling of the fonts and controls work much better, especially on 4k displays and laptops.
Keywording — Keywords are now easier to search, add, delete, and modify. Also, keywords are now case sensitive.
Soft Proofing in Resize — The soft-proofing feature is also be available in ON1 Resize (Genuine Fractals®).
Drag and Drop from Film Strip — Drag and drop photos from the film strip to add them as new layers.
Increased Thumbnail Size Range — The range of thumbnail size is increased, so photographers can go all the way up to two giant thumbnails or down to tiny thumbnails to survey an entire folder.
Default Photo Location — Now control the default photo location in Browse. This is where ON1 Photo RAW looks to find photos instead of the Pictures folder.
Preview the Resize Algorithm — When using the Genuine Fractals algorithm, photographers can preview the resulting quality at 100% zoom to more accurately adjust the options and sharpening.
Persistent Crop Preset State — The crop tool settings are persistent and remembered across photos.
Search by Adjustments Added — Search for photos based on specific adjustments applied such as cropped, retouched, etc.
Update to Lightroom Migration — The Lightroom Migration tool now migrates the pick and reject flags.
Added support for these cameras
Sony SLT-A55V, A33, A6400, RX100VA, Olympus OM-D E-M1X, Panasonic FZ1000 M2, TZ95 (ZS80, TZ96, TZ97), S1, S1R, Ricoh GR III. Note: we are still working on Canon CR3 support and it is a high priority to come in the next free update to ON1 Photo RAW
Added lens profiles for the following lenses or non-interchangeable lens cameras
Canon EF 24mm f/1.4L II USM, Canon EF-M 11-22mm f/4-5.6 IS STM, Canon FD 200mm f/2.8 SSC, Canon PowerShot A1200 & compatibles, Canon PowerShot G1 X Mark III & compatibles, Canon PowerShot G3 X & compatibles, DJI FC2103 & compatibles, Hasselblad L1D-20c & compatibles, Huawei Huawei P10 Lite & compatibles, Huawei Huawei P20 Pro & compatibles, Leica DMC-LX10 & compatibles, Leica X Vario 18.0-46.0 mm f/3.5-6.4, Leica Camera AG Summicron TL 1:2 23 ASPH, Minolta Minolta AF 85mm f/1.4G (D), Nikon AF-P Nikkor 70-300mm f/4.5-5.6E ED VR, Nikon Nikkor AI-S 85mm f/2.0, Nikon Nikkor Z 24-70mm f/4 S, Nikon AF Nikkor 24mm f/2.8D 54, Nikon AF-S Nikkor 18-35mm f/3.5-4.5G ED, Nikon AI 80-200mm f/4.5 Zoom, OLYMPUS M.12-200mm F3.5-6.3, Olympus M.Zuiko Digital ED 14-150mm f/4.0-5.6 II, Opteka 15mm f/4 Wide Macro 1:1, Panasonic DC-ZS200 & compatibles, Pentax smc Pentax-A 50mm f/1.4, Pentax smc Pentax-F 28mm f/2.8, Samyang 10mm f/2.8 ED AS NCS CS, Samyang AF 35mm f/2.8, Sigma 14mm f/1.8 DG HSM | A, Sigma 18-300mm f/3.5-6.3 DC Macro OS HSM, Sony DSC-RX100 VI & compatibles, Sony E 18-135mm f/3.5-5.6 OSS, Sony FE 35mm f/2.8 ZA, Sony 35mm F1.4 G (SAL35F14G), Sony Carl Zeiss Planar T* 50mm F1.4 ZA SSM (SALF0F14Z), Tamron SP 70-300mm f/4-5.6 Di USD, Venus Laowa 60mm f/2.8 2X Ultra-Macro, Venus Laowa 9mm f/2.8 Zero-D, Voigtländer Super Wide-Heliar 15mm f/4.5 III, Zeiss Milvus 1.4/50.
You’re spinning through our solar system on a gorgeous blue marble which offers jaw dropping views of an astronomical phenomenon we call The Milky Way. Wait for our marble to line up just right, and you’ll have a perfect opportunity to create awe inspiring images that harness that galactic chandelier hovering over your head.
My students are often delighted to learn that capturing spectacular images of The Milky Way is easy, once you know a few essential tips. Planning when and where to do Milky Way photography is just as important as the techniques and equipment you’ll be using.
If you want to get truly majestic shots of The Milky Way you’ve really got to consider your location and timing. I’ll tackle that first, before we move on to the shooting technique.
1 – Where and when to see the galactic core
The full galactic core is only visible during certain months, at certain locations. You can see the rest of The Milky Way throughout the year, but for truly eye-popping results it’s the galactic core that you’ll be hunting for, so let’s discuss the best times of year to see it in all its glory.
Northern Hemisphere
Parts of The Milky Way are visible all year round but the galactic core is present only from late April to late July and can be seen in the southeastern to southwestern sky. That’s when you’ll get to see what I call The BIG C. As the summer progresses, you’ll see the core move west so that by the end of summer it appears to rise in the southwestern sky.
You have no chance of seeing the galactic core in winter.
Southern Hemisphere
Photographers who live in the southern hemisphere are lucky because they get to see the core from February right through to October, with peak visibility being in June and July. I’m rather jealous.
Don’t forget lunar phase
For super clear Milky Way photography you’ll need minimal light pollution, which means you’ll want to avoid a bright moon. However, I’ve actually captured good shots of The Milky Way even with a first quarter moon in the sky (so don’t feel like it’s not worth shooting when the moon is present) but obviously a full moon is to be avoided.
The other thing to consider is the position of the moon in relation to The Milky Way. For example , a first quarter moon isn’t such a problem if it’s way off in the west while your Milky Way appears in the southeast. But, if the moon lines up dead centre in the Milky Way, it could be too bright, right where you don’t want it.
How do you know where The Milky Way is going to be?
There are a multitude of phone and desktop apps that can help you to plan your Milky Way shoot but my favourite is the free app called Stellarium. There’s a phone and desktop version, I prefer the latter to plan my shoots.
You can enter a location and time to see when and where things are going to line up. You’re mainly looking to see where the galactic core is present during a darker lunar phase. Stellarium will show you a picture of The Milky Way, and its position, at the times you specify. You can also see where and how bright the moon will be.
Check out some of the other popular apps like; The Photographers Ephemeris and Starwalk.
2 – Find a dark location
Purists will say that you MUST be in a dark sky area and of course that will give you a much clearer shot, but don’t let a little bit of distant light pollution stop you from shooting The Milky Way. If you can see it, you can shoot it. The image I shot below in Death Valley shows light pollution from two large cities and I honestly think it adds to the contrast in the image. That glow on the horizon adds a great separation of earth and sky.
If you want to discover the best dark sky locations, the International Dark Sky Places site is a great resource.
3 – Wait for clear weather
Most landscape shooters love clouds and hate blue skies. Once you get into shooting nightscapes, you’ll quickly reverse that thinking.
In this shot of Mono Lake the small clouds actually added a little interest to the shot, without obscuring too much of the galactic core.
A blanket of cloud is bad news if you want to get clear shots of The Milky Way, but don’t be put off by the presence of light cloud cover. Sometimes a few clouds can add drama and framing to a Milky Way shot so it’s still worth shooting if the clouds aren’t completely blanketing the entire sky.
4 – The Milky Way is only half the shot
For me, the most awe inspiring Milky Way images are those that show the galactic core in relation to earthly locations and objects. Something as mundane as a person on a camp chair can look really dramatic when framed by the phenomenon of The Milky Way.
Think hard about what you’d like to put in the foreground of your Milky Way shot. If you get perfect conditions and execute perfect technique you’ll still get a boring shot if you don’t put something else in your frame to ground the viewer. Pick an interesting foreground feature and maybe try a little light painting to make your Milky Way shots truly awesome.
That could be anything from an interesting rock formation like a sea stack or arch, right through to a derelict shed, or an interesting tree. Think about locations that feature a point of interest and then consider how that place lines up with The Milky Way.
5 – Using the right gear
Lens choice
While there’s something to be said for using the gear you’ve already got, night photography is something of a challenge because of the absence of light. You’ll need a fast lens that ideally has a maximum aperture of f/2.8, or even brighter like an f/1.4.
Super wide angle lenses are ideal for shooting nightscapes because they don’t usually produce much bokeh. By that, I mean that even when set to maximum apertures of f/1.4 you’ll still be able to get a great deal of your image in focus – if you focus correctly. The last thing you want is a sharply focused Milky Way with a foreground that is completely blurred in soft, creamy bokeh, so leave the lovely Sigma 85mm f/1.4 at home.
The other great thing about super wide lenses is that you can fit a lot of The Milky Way into your frame, and there’s less magnification which allows for longer shutter speeds before the stars in your shot begin to trail.
It’s not the end of the world if you’ve got a standard, all-purpose, kit lens that isn’t very fast. You’ll still get some decent Milky Way shots because you’ll be using long exposures and high ISO settings to maximize your camera’s sensitivity to light.
On the left we have the Rokinon/Samyang 24mm f/1.4 ($ 549) which costs a third of the price of the Canon 24 mm f/1.4 ($ 1549).
If you really get into shooting nightscapes you’ll be glad to learn that some of the most popular wide angle lenses for nigh photography are actually quite affordable.
Rokinon (AKA Samyang/Bower) offer two lenses that have something of a cult following among night shooters with their 14mm f/2.8 and their 24mm f/1.4 lenses. The build quality is atrocious but as long as you treat them with kid gloves (carefully), they usually perform well.
These are popular because they offer sharpness, speed, a wide field of view, and much less coma than other more costly lenses. Coma is the amount of elliptical aberration around stars in the corners of the frame. Some more expensive lenses, like the Canon 16-35mm f/2.8, have really bad coma on stars in the corner of the frame, which isn’t the end of the world, but it’s not ideal.
6 – Camera choice
With night photography you’ll be forced to use high ISO settings during your long exposures so it’s vital to have a camera that can operate at ISO 3200 and above, but more importantly still produce good image quality. No matter what camera you use, the image quality will take a major hit when you start to crank up the ISO numbers, that’s unavoidable.
Camera sensors have come a long way in the last couple of years so even if your camera isn’t top of the range you might be pleasantly surprised at the image quality of your high ISO images.
The Sony A7S has become something of a legend among astrophotographers but it isn’t cheap.
Some of the best performers of the last couple of years have been the Sony A7R, Nikon D810 and the absolutely brilliant Sony A7S, which is known for its amazing low light capability. These are all full frame cameras, and will deliver the best image quality as they typically offer better noise performance. But if you’re rocking a MFT (mirrorless four thirds) or APS-C sensor, don’t let that stop you from going out and getting some Milky Way action.
Don’t feel that you absolutely MUST have the most expensive gear. Work with what you’ve got, then upgrade when you become addicted, and can’t resist the temptation to splurge.
The one thing you’re going to really need your camera to have is a good Live View screen or an EVF (electronic viewfinder). You will use this to focus and compose your shots.
7 – You need a tripod
It’s dark, you’re going to be doing long exposures, and that means you have to use a tripod. Read my article on the reasons why a good tripod is essential for any kind of outdoor photography. For night photography a tripod is obligatory.
Shooting technique
Ok, you’ve planned everything right, The Milky Way is looming large above you, and you’ve framed up a lovely composition of it with some fascinating foreground object. It’s time to set up your camera for Milky Way shooting. Here’s where I start:
NOTE: For now you’ll want to turn off your in-camera noise reduction, as this will just slow down your test shots.
8 – Shoot in M (Milky Way Mode) and Shoot RAW
You want full control over every aspect of your shot so set your camera to Manual mode. This allows you to control the ISO, the shutter speed, the aperture and white balance. Always shoot in RAW.
9 – Use Live View or the EVF (if you have one)
This is where we’ll set our focus. Make sure you switch auto-focus OFF as we’ll be focusing manually. Before we do this you need to crank your ISO up to something like 5000 to make your sensor really sensitive to light.
10 – Set your focus on a star
Set your aperture to the widest, fastest setting it can achieve (smallest number such as f/2.8). This wide aperture will expose your sensor to the maximum amount of light.
Using your camera’s Live View or EVF, point it at the brightest star you can see until a small dot of light appears in the centre of your view. Zoom in (magnify the view NOT zoom the lens) so that you see that tiny little dot as large as possible. Now turn the focus wheel on your lens until the star becomes a sharp, tiny pin-point of light. Try turning the focus wheel passed that point until the star blurs again and you’ll have gone too far, so just back it up until you’re able to get the star as sharp and small as possible. Don’t rush this, take your time and get it right.
If your camera has a feature called Focus Peaking or Focus Assist, that can sometimes help you to determine perfect focus on a star. If you’re into calculating hyperfocal distance, you could do that too, but I prefer this method.
Whatever you do, don’t blindly set your focus to infinity by cranking your focus wheel until it reads Infinity (?), you’ll just end up with blurred images.
11 – Compose your shot
Now that you’ve focused your lens on the brightest star, it’s time to compose your shot. Use your headlamp to illuminate the scene so that you can see what you’re looking at in your Live View. If your camera has a digital level for perfect horizon lines use that – if not, you might want to invest in a bubble level for your hot shoe attachment.
Set your shutter speed to about 10 seconds (at ISO 5000 if you have it), and take a test shot. At this point all you’re doing are some rough test shots to get your composition sorted, so there’s no point in shooting a full 30 second exposure and waiting around while you take a whole bunch of test shots.
Once you’ve finished taking test shots and made your final tripod adjustments for the perfect composition, it’s time to dial in your camera settings.
13 – White Balance
When shooting The Milky Way I prefer to shoot with my White Balance set to Incandescent (aka Tungsten) which I believe is Sony’s version of Tungsten. I like the blue hue and it also displays a lot of contrast in my camera’s EVF so that I can clearly see The Milky Way. When I process my images later I often reset the White Balance back to Auto (AWB) mode for a more realistic neutral color temperature.
This RAW file was shot with Incandescent White Balance. You can see how it looks in Adobe Camera RAW when set to Auto.
I advise you to experiment with different WB settings to get the colour temperature you like best. Shooting with the Incandescent/Tungsten prest will almost always produce good, neutral results, which you can change later in Lightroom or Adobe Camera RAW.
14 – Set your ISO
You used ISO 5000 for the test shots so that you could compose your shot quickly. But, for your actual Milky Way shot you want to use the lowest ISO setting you can get away with so dial it down to ISO 2000 and see if that gives you good results. You can always increase it to ISO 3200 after a few more test shots. I personally rarely go above ISO 3200 as my RAW files tend to degrade significantly at that point.
15 – Shutter speed versus ISO
From this point on you’re going to be juggling your shutter speed and ISO setting to get the most light sensitivity, while still having a shutter speed fast enough to avoid getting star trails. Star trails are great if you’re going for the that effect (read my star trails photography tutorial here) but even a very small star trail just results in a Milky Way shot that lacks clarity. That may just be okay for web images, but for prints you’ll want more sharpness.
Try to limit your shutter speed to a maximum of 15 seconds so that you can keep the stars in your image sharp and trail free.
As you can see, the 30 second exposure on the left has a motion trail on each star. The 15 second exposure on the right has sharper stars, although it is darker.
With a shutter speed of 15 seconds, take a look at your camera’s light meter reading. If it’s telling you that the image is overexposed you might be able to dial your ISO number down a bit, or shorten your shutter speed to 10 seconds.
Sometimes I like to overexpose the image and ignore my light meter reading entirely. When shooting the Milky Way I’m guided more by what I see in my test shots than what my light meter is telling me to do. With my Sony cameras I use Multi metering mode, for what it’s worth.
After your shot is complete and you’re reviewing it, be sure to zoom in and check the details.
16 – Try a 30 second exposure
I know I just said to keep your shutter speed to a maximum of 15 seonds but I always like to take an additional shot with a 30 second exposure to capture a much brighter Milky Way. I do this if I’m planning on publishing a web-only (low resolution) image because the slight star trail caused by the longer exposure won’t be very evident in a low-res web image. The stars will still look sharp enough but will have a much brighter appearance than a 15 second exposure. For prints, I’ll almost always use the 15 second exposure version for the extra sharpness.
In-camera Noise Reduction
Some cameras do a great job of processing and reducing noise reduction. But, this will double the amount of time it takes to complete your shot, so it’s always a good idea to switch this function off, at least temporarily. If you like the results of your in-camera noise reduction you can always switch this function back on once you’ve finished all of your test shots.
I personally prefer to do my own noise reduction in Adobe Camera Raw and Photoshop which gives me more control and allows me to shoot faster while on location.
Now it’s your turn
Okay, so now you know how to get gorgeous clear photos of The Milky Way. I hope you get some great results and have as much fun as I do when shooting this awe inspiring sight. If you’d like to learn how I process my Milky Way shots please post a request in the comments and if there’s enough interest I’d be delighted to share my techniques.


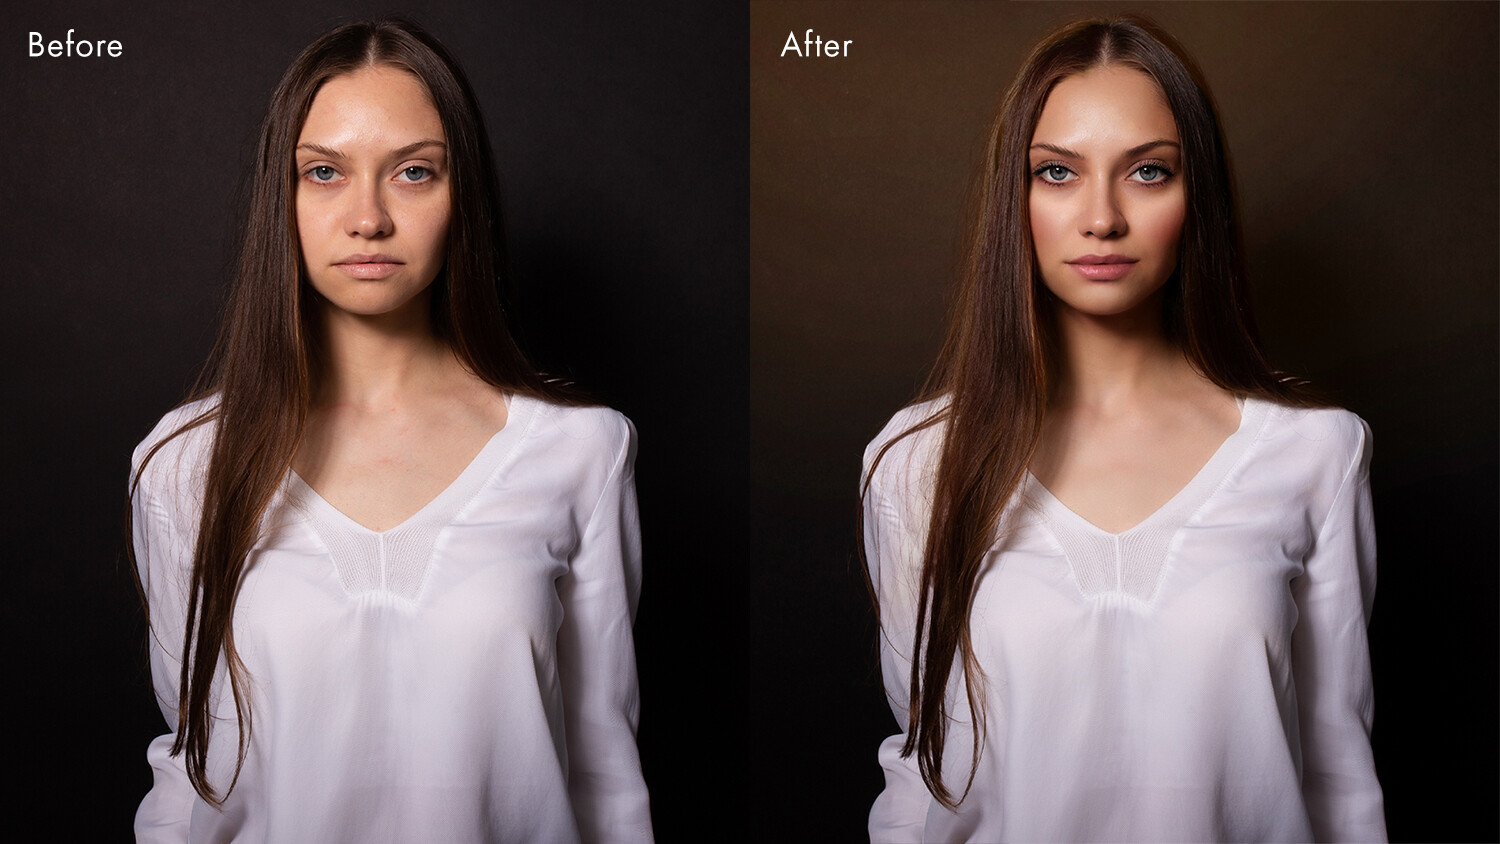
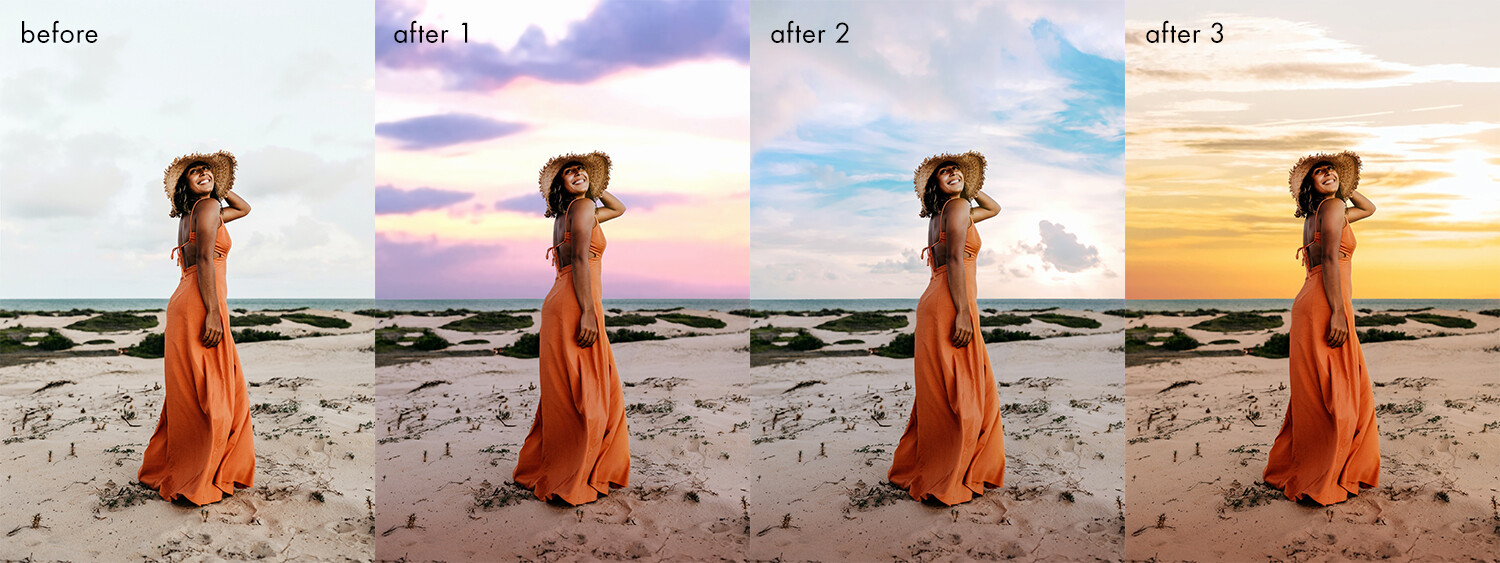


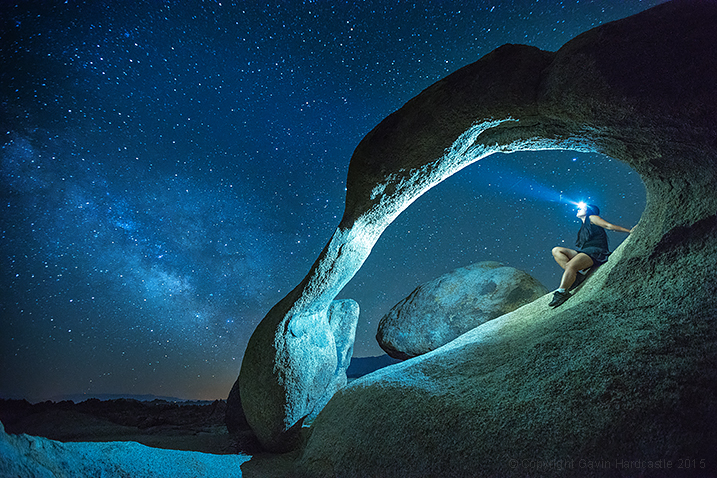
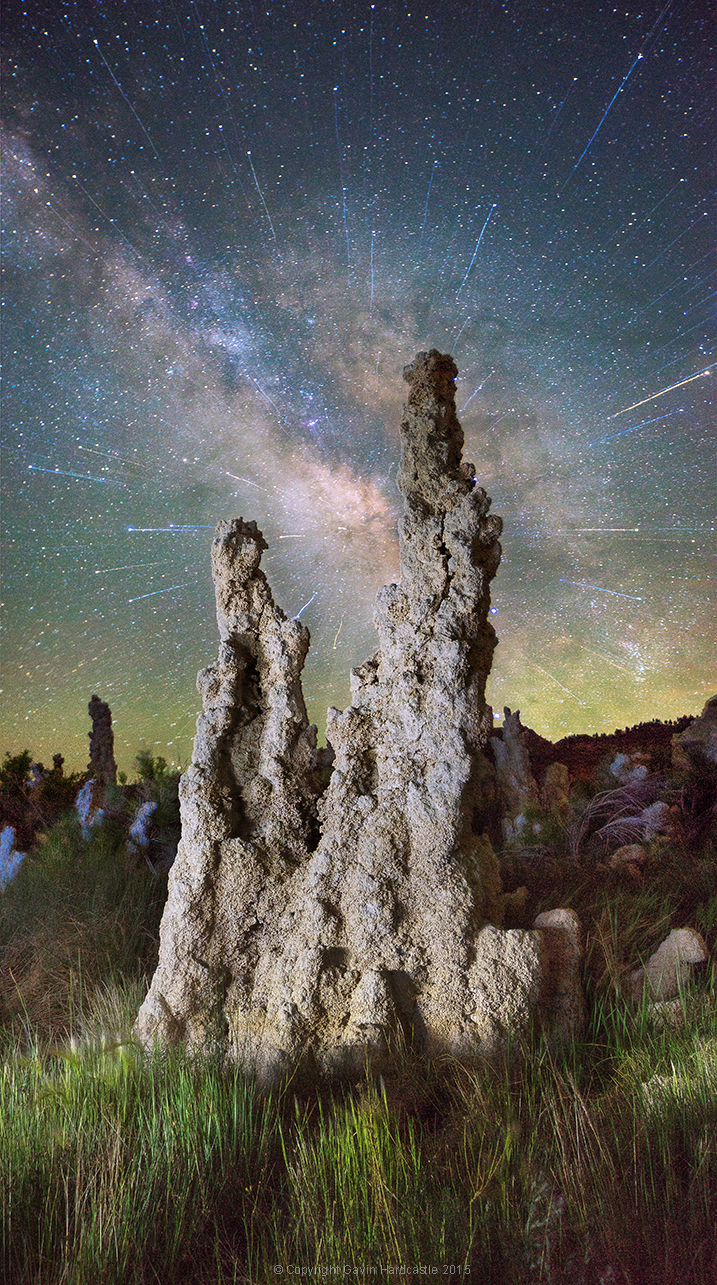
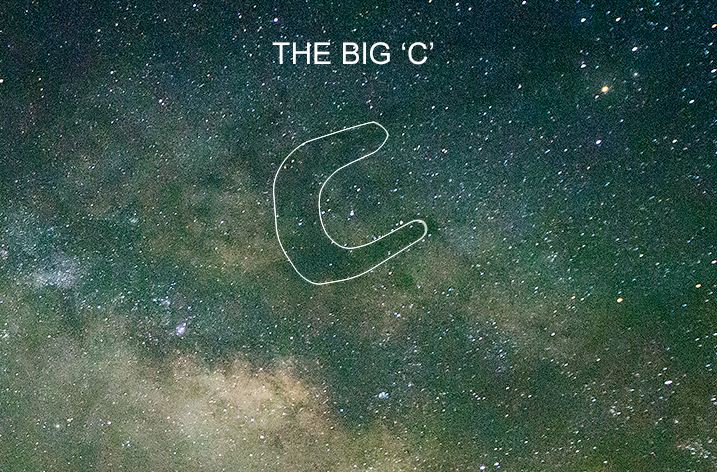
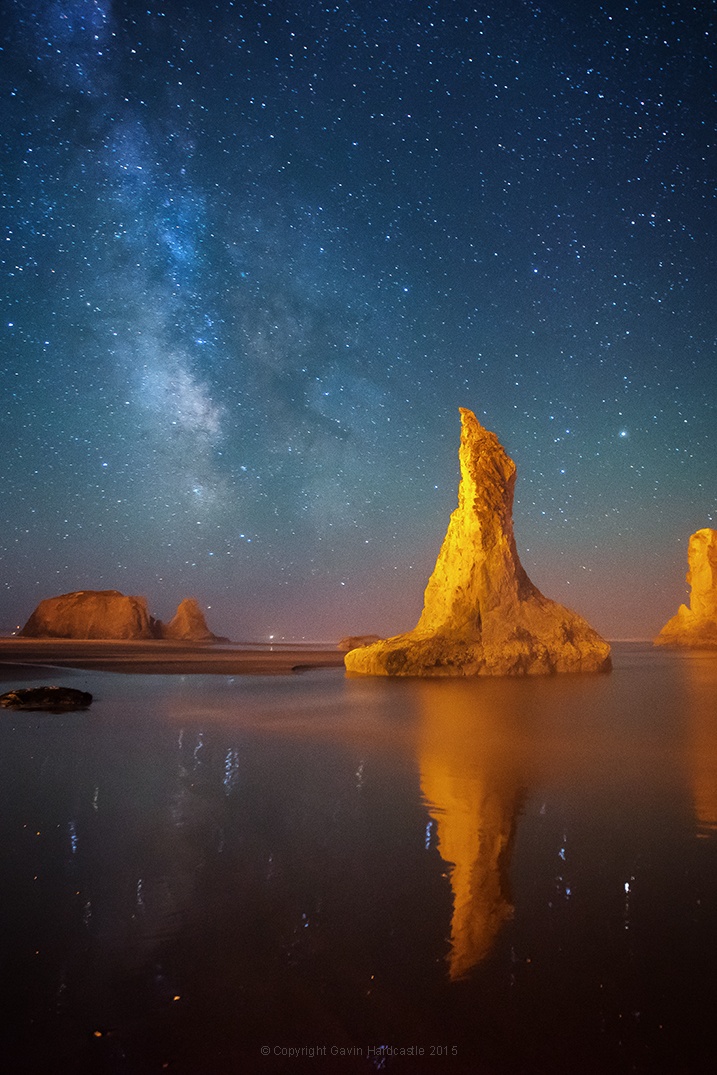

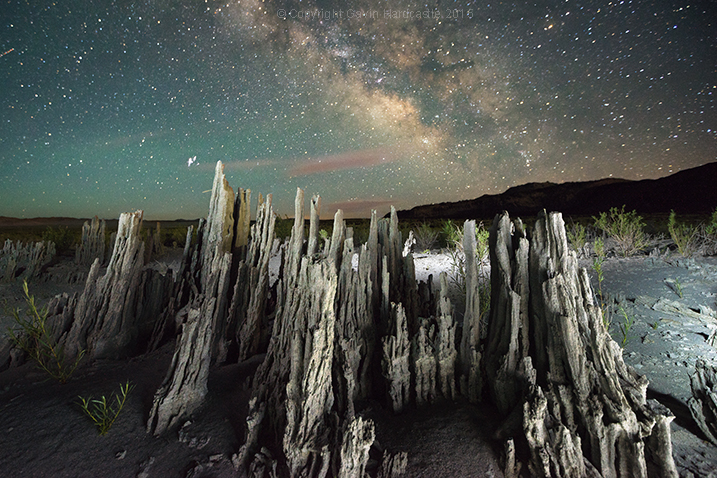
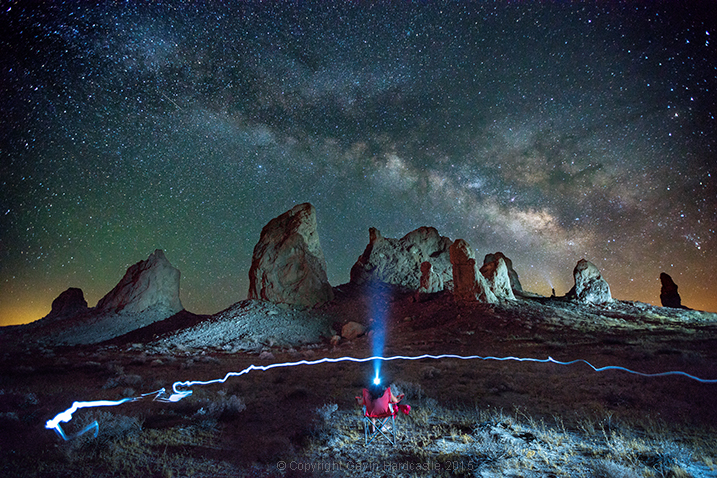
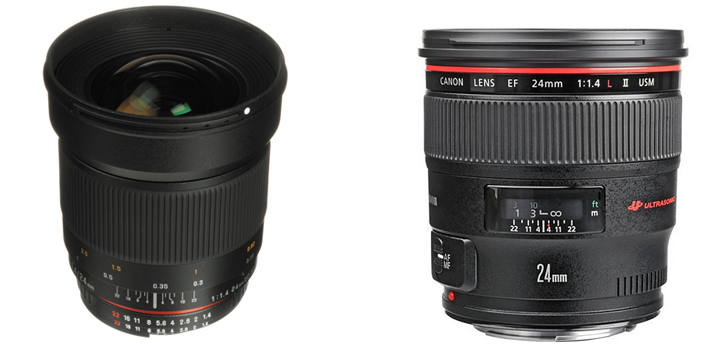
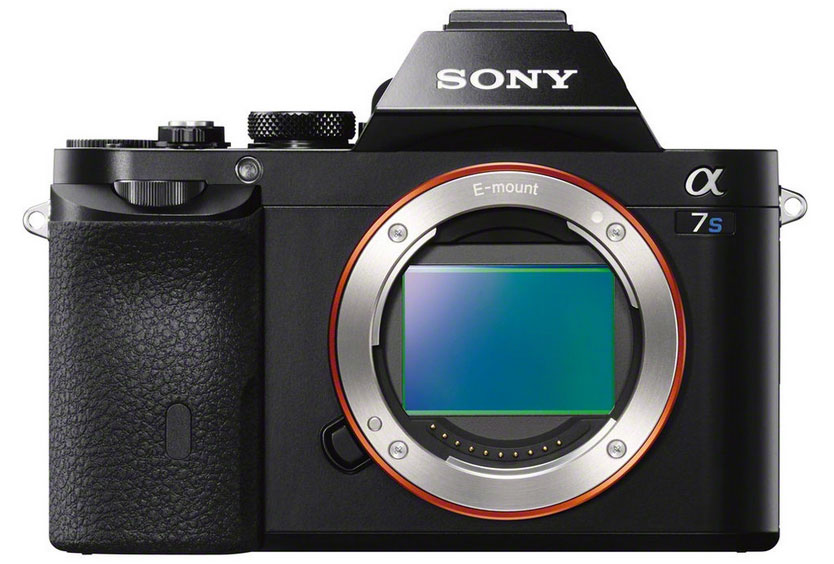
 8 – Shoot in M (Milky Way Mode) and Shoot RAW
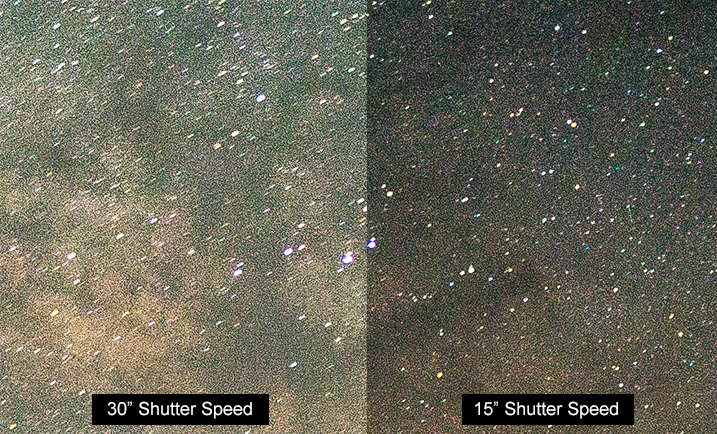
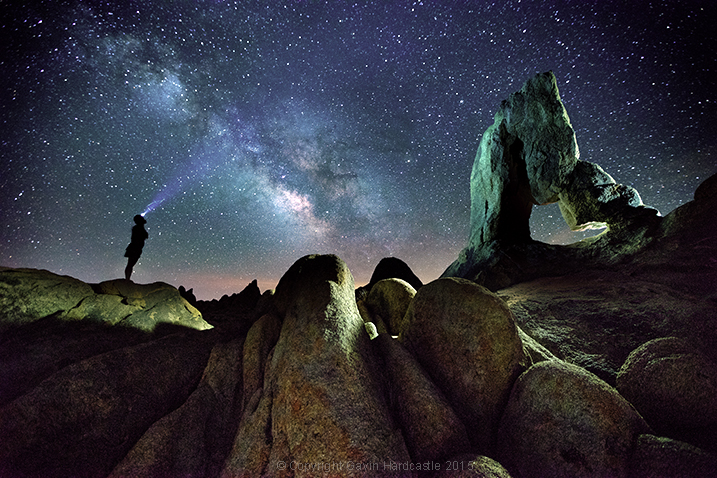
You must be logged in to post a comment.