The post Comparing a 24mm Versus 50mm Lens for Photographing People appeared first on Digital Photography School. It was authored by Meredith Clark.

How does a 24mm lens compare to a 50mm lens when photographing people? Both are great options, given the low price point, but they do have slightly different strengths when it comes to people photography.
In this article, I’ll show you several different images of the same model, location, and pose, photographed with both a 24mm and a 50mm lens. This will provide a good visual of the difference between the two lenses, and should give you insight as to when you might want to reach for each option.
Equipment used
For continuity, all images in this post were taken with a Canon 60D and either the Canon 24mm f/2.8 or the Canon 50mm f/1.8 lens.
The Canon 60D is an APS-C (cropped-sensor) camera, so you’ll need to multiply the focal length of each of your lenses by 1.6x in order to determine their effective focal length on this camera (though if you use Nikon APS-C cameras, your crop factor is 1.5x).
So on a cropped sensor camera, a 24mm lens functions roughly as a 38mm lens, and a 50mm lens functions as an 80mm lens.
24mm shows off the background
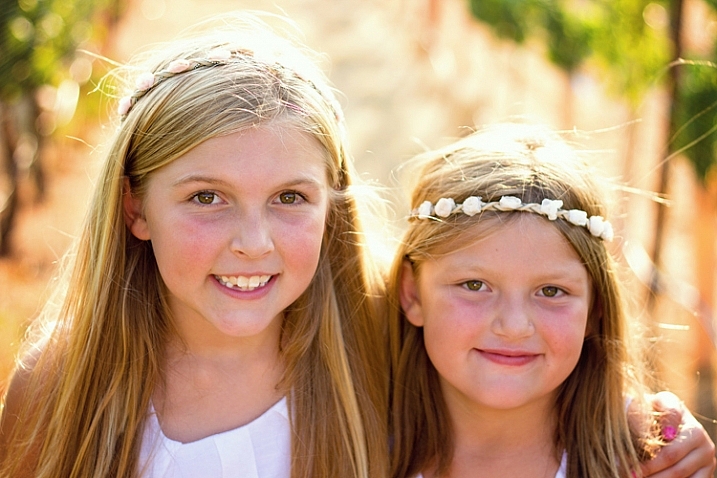
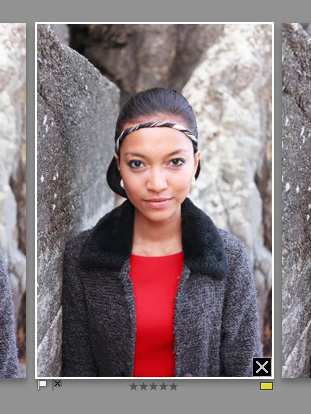
When it comes to photographing people, a 50mm lens emphasizes the subject, whereas a 24mm lens shows the environment.

That’s why a 50mm lens is great for head and shoulders portraits, while a 24mm lens is great for photographing people in the context of their surroundings. In the above example, you can see that the 50mm lens provided a tight shot of these two sisters, with a blurred background that keeps all the attention on their faces.
However, the context for this session is also important – it took place at a family vineyard, and the clients wanted to be sure that the grapes were visible in the background of some of the images. As you can see above, the grapes weren’t visible in the portrait taken with the 50mm lens, nor would closing down the aperture really give the perspective of the vineyard that my clients were looking for.
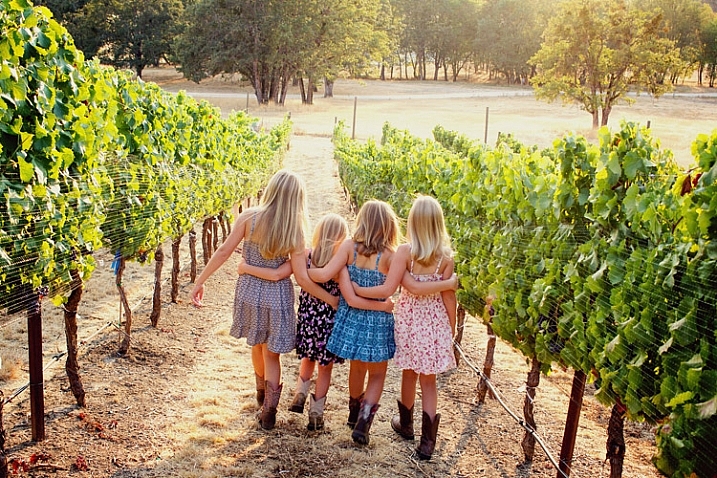
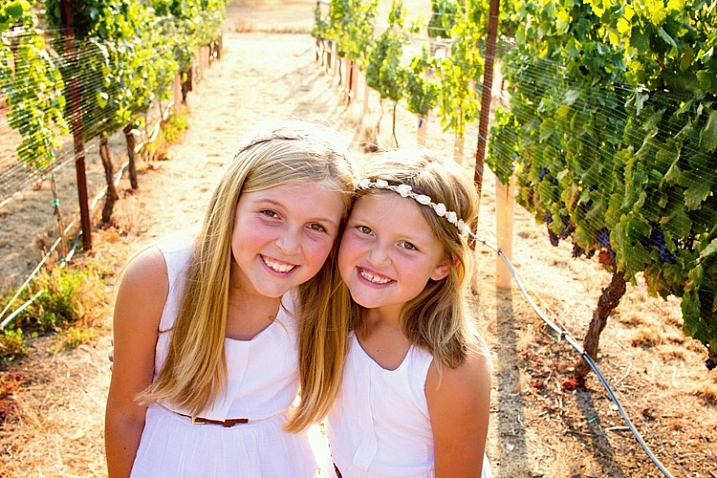
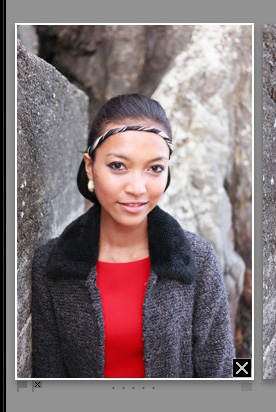
So after taking a few portraits with the 50mm, I switched over to my 24mm lens in order to capture a few wider shots.

The shot above shows the same girls, the same exact location, and a very similar pose. The only real difference is that, with the switch to the 24mm lens, you can see more of the girls and the area around them.
In some instances, you may want to minimize the area around your subject, in which case the 24mm lens would not be ideal. However, in this case, it allowed me to capture images that highlighted both the girls and the vineyard, which was what the clients were after.
Bonus tip: Photographing sibling sets with a 24mm lens also allows you to see the height differences between siblings more easily (thanks to the wider perspective), which is something that a lot of parents really enjoy.

Think about the background color
Another thing to consider, besides the contents of the background in your images, is the coloring of the background.
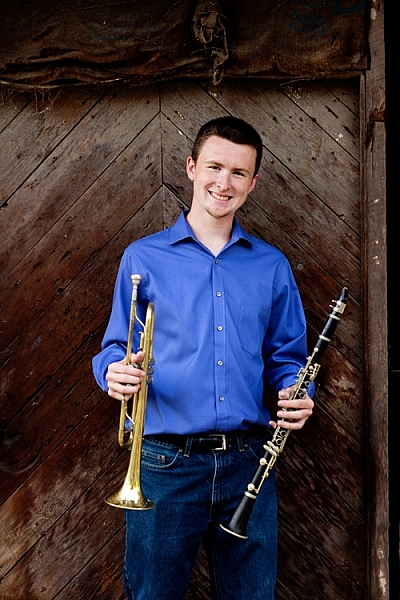
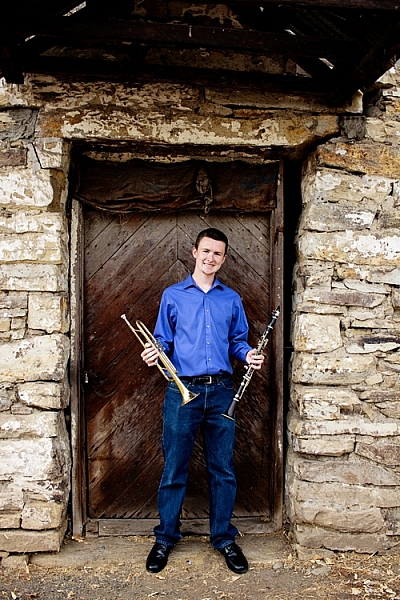
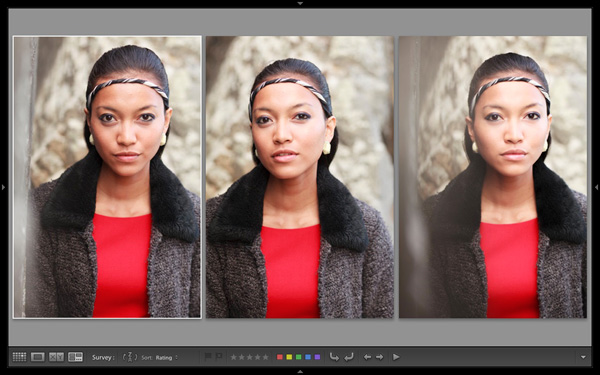
In the image above, the deep-colored wood background brings a moodiness to the image that could be appropriate for a musician. However, the interesting thing is that the overall feeling of the image changes quite a bit when you look at it from the 24mm angle of view:

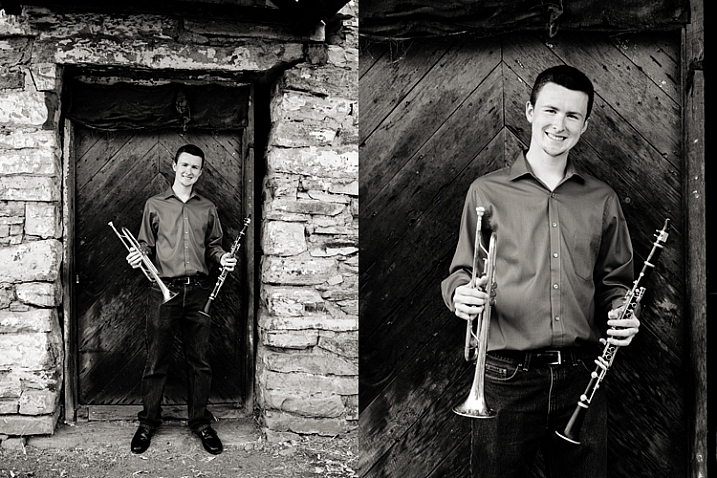
The second image, though in the same location, feels a lot less moody and dramatic than the first. The lighter stonework around the door brings a sense of balance to the image that just wouldn’t be achieved as well with the 50mm lens in this location.
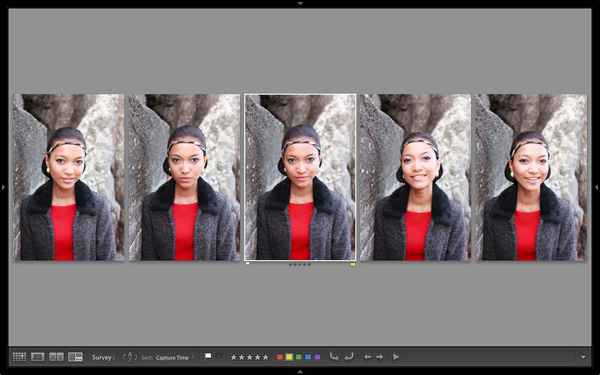
In my experience, this balance is especially important when it comes to converting images to black and white.

As you can see in the left image, the lighter stonework around the darker door serves as a frame for the subject and naturally draws your eye in toward him.
In addition, the increased contrast and texture provides some of the key ingredients for black and white images, which makes the image on the left more aesthetically pleasing than the image on the right.
24mm vs 50mm: Try using both!
Overall, while there may be instances in which the content or coloring of your background may cause you to reach for one of these lenses over the other, I’m very much in favor of using both of them whenever possible.
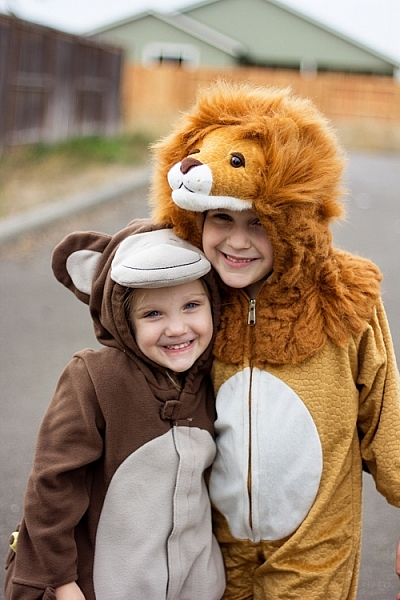
Here’s a quick example from my own life to explain why both are so great for their own reasons. I recently photographed my girls in their Halloween costumes. I started with the 50mm lens because it’s my favorite:

I love this image of both girls – the 50mm lens really lets you see their faces and expressions, and the bokeh of the 50mm f/1.8 helped soften the construction site in the background of the image. However, the closer crop also means that only a small portion of their costumes is visible.
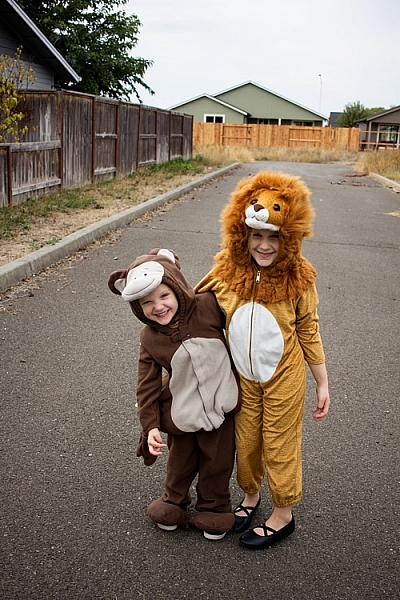
So I switched over to my 24mm lens to take a full-length photo (below) of my little monkey and lion.
Now I can really see them from head to toe. I can see the little fake feet of the monkey costume that freaked out my youngest daughter so much that she begged her sister to switch costumes with her. I can see the height difference between the two of them. I can see the black flats that my oldest daughter is so proud of and wears to any event that she deems remotely “fancy.”
Those are all things that I want to look back on and remember. I love both images for different reasons and am so happy to have them both, thanks to my trusty 24mm and 50mm lenses.

24mm vs 50mm for photographing people: conclusion
I hope this has given you a good idea of how these two focal lengths compare when photographing people.
Have you tried a 24mm lens? How do you use it? Do you have a 50mm lens and do you use it for people photography? Which lens is your favorite? Please share your comments and images below!
The post Comparing a 24mm Versus 50mm Lens for Photographing People appeared first on Digital Photography School. It was authored by Meredith Clark.


You must be logged in to post a comment.