There are two ways you can approach color reproduction in photography. The first is to try and reproduce the colors of the subject as accurately as you can. If you take a photo of someone wearing a red sweater, then you want the photo of that sweater to have exactly the same shade of red as the real thing. The other way is to produce colors that are pleasing to the eye, rather than accurate.
The key point to understand here is that your camera isn’t designed to produce accurate colors, it is biased towards the second approach. The reason behind this is probably quite simple. Camera manufacturers want you to be happy with the photos that your camera produces, and that means tweaking colors so that they look more attractive.
The way your camera records color is determined by the color and white balance settings selected when you take the photo. This is especially true for JPEG files – if you use the Raw format you have the freedom to change those color settings when you process the file.
Each manufacturer has a different name for the setting used to control color. Canon calls it Picture Styles, Nikon – Picture Control, Sony – Creative Style, Pentax – Custom Image, Olympus – Picture Mode and Fujifilm – Film Simulation.
Let’s look at Canon’s Picture Styles as an example (I’m familiar with these as a long time Canon user). Their neutral and faithful Picture Styles are designed to give reasonably accurate colors, but the others aren’t. Portrait is designed to give good skin tones, landscape for strong greens and blues, and standard to make good reds. You will not achieve accurate color with the portrait, landscape or standard Picture Styles, but you may well end up with pleasing colors.
But what if you simply want accurate color? There are a number of reasons why you might want to do this.
- When photographing something that needs to be recorded accurately, such as product shots for a commercial client.
- When photographing flowers, where it is very difficult to tell if the colors are accurate.
- To make sure that photos taken with two different cameras match as closely as possible.
- To simply start with a photo that has accurate colors as the first step in post-processing, so you can decide in which direction to go, from a neutral starting point.
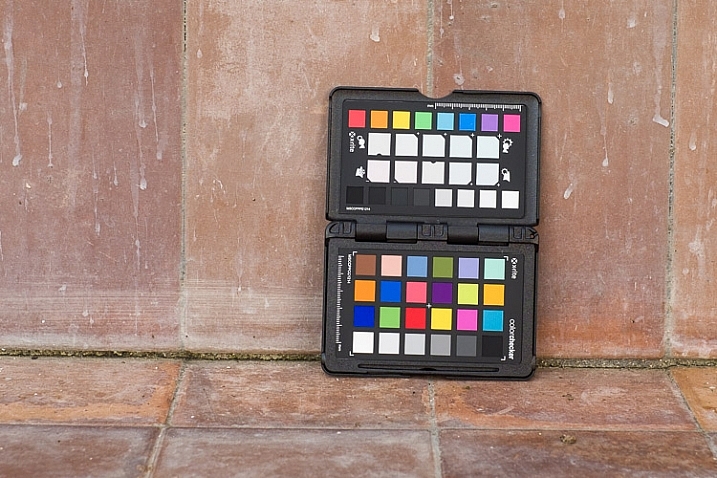
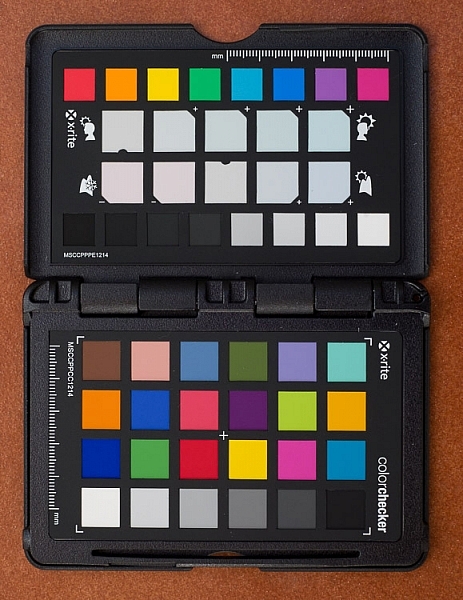
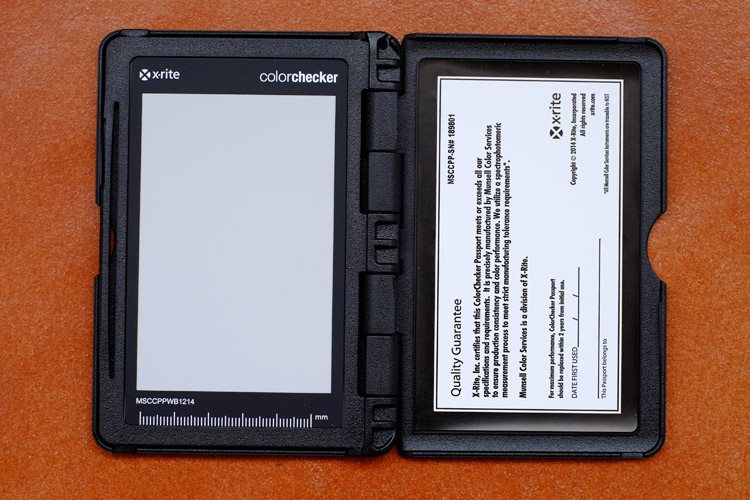
The X-Rite ColorChecker Passport
The truth is that if you want accurate color, then for the reasons mentioned above, you can’t rely on your camera’s settings – you need some outside assistance. That’s where the X-Rite ColorChecker Passport comes in. This relatively inexpensive device is simple to use, and just as importantly from the point of view of a Lightroom user, integrates neatly with Lightroom.
The X-Rite ColorChecker Passport itself is made of grey plastic, and opens up to display the color patches shown here.
The ColorChecker Passport is easy to use. Simply take a photo of the Passport in daylight (using the Raw format), convert it to DNG (use the Export option in Lightroom to do so) and drag the DNG file to the ColorChecker Passport software.
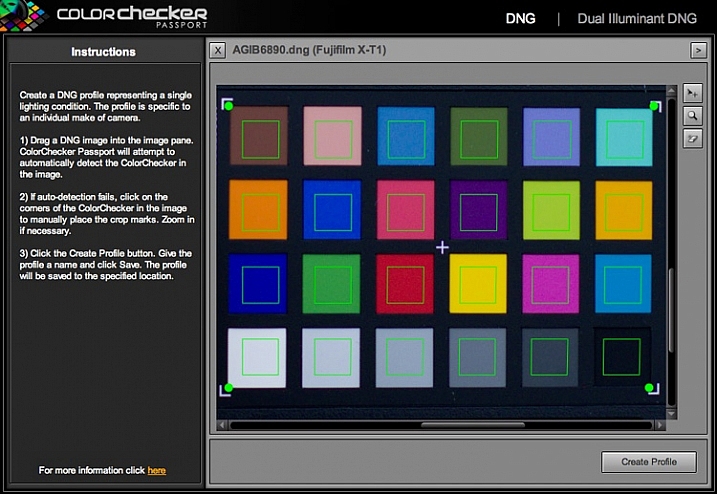
The software creates a profile, calibrated for your camera, and stores it along with the other profiles found in Lightroom’s Camera Calibration panel. You’ll need to restart Lightroom to see it, but once you have done so, you can apply that profile to any photo taken in daylight with that camera. The profile is also available in Photoshop’s ACR if you need it.
Note: The software also installs a Lightroom plug-in that you can use to create the profile by selecting the photo containing the ColorChecker Passport, going to File > Export and selecting the ColorChecker Passport preset.
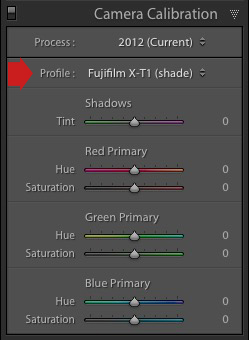
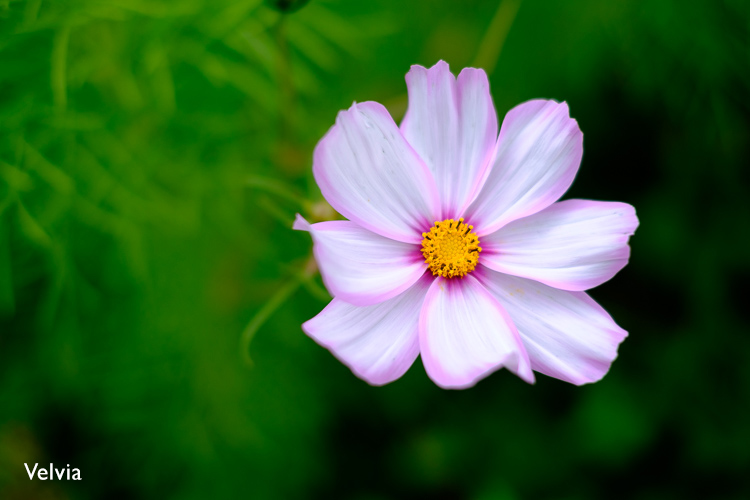
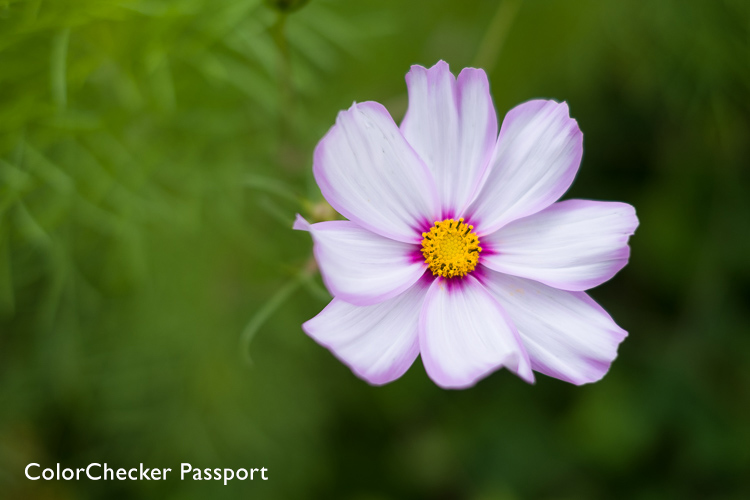
The next two photos show the difference that using the calibrated profile can make. Both were created from the same Raw file. The first uses the Velvia camera profile specific to Fujifilm cameras. The second uses the Camera profile that I created using the ColorChecker Passport. This photo has the most accurate color, although it may not be as pleasing to the eye as the first, which uses a profile designed to make the photo look good.
Dual Illuminant Profile
You can also create a different type of profile called a Dual Illuminant Profile. To do so, you need two photos of the ColorChecker Passport taken with the same camera at the same ISO setting, but under different light sources. One should be daylight, and the best light source for the second one is probably tungsten. A Dual Illuminant Profile is more accurate as it takes into account the way sensors record light differently, under different light sources.
Using the ColorChecker Passport for White Balance
The final part of the color accuracy equation is white balance. You really shouldn’t rely on your camera’s auto white balance setting, as it can be misled by scenes that have more than average amounts of colors like red or blue in them.
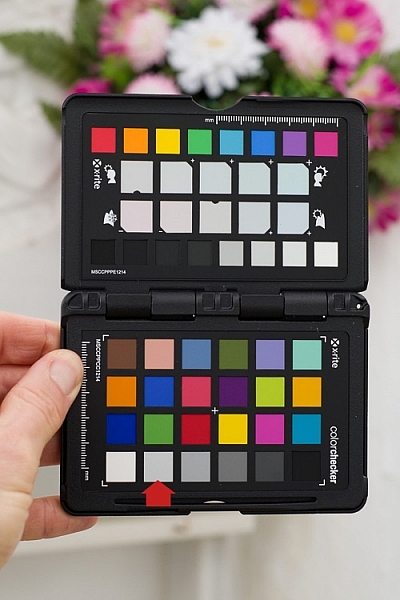
The ColorChecker Passport is small enough to carry around with you just about everywhere. That means you can use it on location, to record colors accurately, and set white balance. The Passport also has another panel that you can use to take a white balance reading, and create a custom white balance setting on location.
Alternatively, you can take a photo of the Passport’s color swatches in the same light as the subject, and use it to create a new profile. Then, in Lightroom’s Develop module, you can use the White Balance Selector to click on the 18% grey swatch second from left on the bottom row (indicated below). This method ensures both accurate color (from the profile) and accurate white balance (from the 18% grey swatch).
Have you use a Coler Checker before? Please share your experiences and comments below.
The Mastering Lightroom Collection
My Mastering Lightroom ebooks are a complete guide to using Lightroom’s Library and Develop modules. Written for Lightroom 4, 5, 6 and CC they show you how to import and organise your images, use Collections, creatively edit your photos and how to work in black and white. Grab this book on sale now at 40% off over at Snapndeals, for a limited time only.
googletag.cmd.push(function() {
tablet_slots.push( googletag.defineSlot( “/1005424/_dPSv4_tab-all-article-bottom_(300×250)”, [300, 250], “pb-ad-78623” ).addService( googletag.pubads() ) ); } );
googletag.cmd.push(function() {
mobile_slots.push( googletag.defineSlot( “/1005424/_dPSv4_mob-all-article-bottom_(300×250)”, [300, 250], “pb-ad-78158” ).addService( googletag.pubads() ) ); } );
The post How to Use the X-Rite ColorChecker Passport to Obtain Perfect Color by Andrew S. Gibson appeared first on Digital Photography School.

Digital Photography School


You must be logged in to post a comment.