RSS
 

Posts Tagged ‘Close’

This 4K video tour of the International Space Station is probably as close as you’ll get to being an astronaut

02 Nov

Halloween’s not over yet – NASA has released a 4K treat. The 18 minute UHD video features a fly-through of the International Space Station. Get out your headphones, flip into full-screen mode and pretend your dreams of becoming an astronaut have finally come true.

Related: NASA astronaut Jeff Williams showcases ISS photography equipment

Articles: Digital Photography Review (dpreview.com)

 
Comments Off on This 4K video tour of the International Space Station is probably as close as you’ll get to being an astronaut

Posted in Uncategorized


Close Calls: 12 Breathtakingly Creative Garage Doors

07 Aug

[ By Steve in Art & Street Art & Graffiti. ]

FINAL1

A garage door’s main function is keeping what’s inside safe from prying eyes but these creative garage doors keep all eyes focused on the outside.

creative-garages-1a

creative-garages-1b

creative-garages-1c

Sometimes great garage doors aren’t planned, they end up being thrust upon us. Such was the case of a corrugated garage door belonging to Imgur user elusive92. When the door’s owner discovered some unsightly and unskilled graffiti had disgraced his garage door one May morning in 2013, he didn’t get mad, he got even… even better.

creative-garages-1d

creative-garages-1e

creative-garages-1f

Taking the old adage “when life gives you lemons, make lemonade” to heart, elusive92 hired local graffiti artist Lake13 to not only cover the anonymous scrawling but replace it with a work of graffiti art – with the emphasis on the art part. We think he succeeded rather well, don’t you?

Community Communion

creative-garages-2a

“Every time I drive by this house, I marvel,” admits Flickr user William Keckler., who titles his photo taken in early December of 2012 “The Holy Sacrament of the Garage Door”. No telling what’s parked inside… perhaps the Popemobile.

“To The Broke-Ass Batcave!”

creative-garages-3a

creative-garages-3b

Looking to produce an ultra-low-budget Batman flick? Well look no further than South St. in Philadelphia, where one creatively painted corrugated roll-up garage door says so much with just two colors. Eric from Geekadelphia snapped the bargain-basement Batcave door way back in July of 2008 – let’s hope it hasn’t been painted over by Alfred since then.

Arts Of The West

creative-garages-4a

The above creative composition was included in a portfolio of garage doors by RC Cabinets & Closets as an example of a “garage door decal”. We’ve seen garage door decals and frankly, this ain’t no garage door decal. The above tableau doesn’t appear to be a decal at all – note how the painted portions extend off the garage door itself. Odds are this exquisite door is a unique creation as well.

Next Page – Click Below to Read More:
Close Calls 12 Breathtakingly Creative Garage Doors

Share on Facebook


[ By Steve in Art & Street Art & Graffiti. ]

[ WebUrbanist | Archives | Galleries | Privacy | TOS ]


WebUrbanist

 
Comments Off on Close Calls: 12 Breathtakingly Creative Garage Doors

Posted in Creativity


Getting up close: Canon EF-M 28mm macro hands-on review

24 Jul

Hands-on review: Canon EF-M 28mm Macro

This is the Canon EF-M 28mm F3.5 Macro IS STM. It is a compact, light weight, close-focusing lens designed exclusively for Canon’s EOS M lineup. It’s image-stabilized and uses a quiet stepping motor mechanism for autofocus. It’s priced at $ 299.

Hands-on review: Canon EF-M 28mm Macro

The lens comes with a removable cover for the front

$ 299 places it below a majority of macro primes for cost. However, the Nikon Micro?Nikkor 40mm F2.8 does still beat it out in price by around $ 50, and is 2/3-stop brighter.

All the trump cards held by the Micro-Nikkor fold when other features of the EF-M 28mm Macro are brought in to consideration, though. First, even though it is a wider FOV lens, its nearest focus distance is 3.7″, nearly 3″ closer than the Micro-Nikkor. Even taking the slightly longer field of view of the Micro-Nikkor in to account, the Canon is able to achieve a 1.2x magnification in “Super Macro” mode over the Nikkor’s 1x magnification.

When working at such diminutive focus distances, there’s an inherent issue that many experienced macro photographers have learned to work around. The camera, lens, and sometimes even photographer start blocking light from the itty bitty subject. To get around this, macro photographers will use specialized lights, typically ring lights mounted to the filter thread. 

Canon has gone the extra mile (inch?) and included a pair of LED lights (hidden under their cover in this shot) mounted on the left and right hand side of the front of the lens, diffused by a clear white ring, eliminating the additional requirement of a macro light kit for those extreme close-ups.

Hands-on review: Canon EF-M 28mm Macro

3.7″ is quite an extreme working distance, and this means a maximum reproduction ratio of 1.2x in ‘Super Macro’ mode. Image stabilization is included and is effective for shooting in a wide range of scenarios, although for the extreme close-ups it’s better left switched off and replaced with a tripod.

A subject at minimum focus distance illuminated by the two LED’s together receives about 8.9 EV illumination in normal macro and 9.1 EV in super macro mode when measured with an incident light meter. The lights have two levels of brightness, and are switched on via a button on the lens barrel. Both come on with a single press, and a press and hold switches to one light only. Sadly, there’s no ability to have just one LED on at full brightness and the other dimmed. They’re either both on at the same power level, or illuminated independently.

The lightweight construction and STM focus motor also help this lens focus reasonably quickly, especially when compared to the painfully slow-focusing macro lenses of yore. It isn’t as fast as some of the quickest we’ve seen, but does very well, especially considering how close its MFD is.

Hands-on review: Canon EF-M 28mm Macro

By itself, this lens weighs 130 grams, making it so light Canon boasts about the 28mm F3.5 being the ‘world’s lightest autofocus macro lens for an ILC system.’ When mounted to the EOS M3 the total weight is a featherweight 492 grams, exemplifying the lightness and convenience benefit of mirrorless systems compared to DSLRs. By comparison, a Nikon D5500 body weighs 420 grams. Add another 235 grams for the 40mm Micro lens, then another 200+ for an LED macro light kit, and the total comes out to 855 grams, or nearly double the weight of the Canon kit.

This diminutive size means weight can also be saved when making a tripod selection, as long as it is sturdy enough for work that is incredibly sensitive to vibrations.

Less weight means less fatigue and more reasons to bring the camera on location.

It resolves well…

This graph shows the maximum resolution (as a percent of Nyquist) attained by our copy of the lens at various apertures. It uses MTF-10 criteria, which is a measure of the finest detail that can be resolved with at least 10% contrast. If that sounds complicated, just keep in mind this figure is well correlated to total resolution, though isn’t as great a representation of perceived sharpness, which correlates more with MTF-50 measurements (more on that on the next slide).

Our results here show that center resolution peaks at 80% the linear resolution that can be theoretically attained, at F5.6 – a decent result. If this were resolved across the frame, you’d get about a 16MP image from this 24MP sensor. Of course it’s not, but corners aren’t too far behind, at 67% by F6.3. Not bad when you consider the higher resolving power demands placed on the lens by the smaller APS-C sensor… but what about perceived sharpness?

… and is fairly sharp

The MTF-50 result – better correlated with perceived sharpness – tells a slightly different story, indicating only around 875 line pairs per picture height resolved, which translates to ~4.6MP, or 19% of the total sensor resolution. It’s not a terrible result, but does indicate that while the lens resolves a lot of detail, it doesn’t quite maintain as much contrast as a higher performing lens might. This is no surprise, given the lens’ size, weight, and price.

While performance isn’t state of the art in terms of macro lenses (the Sony FE 90mm F2.8 deserves a shout out here), it does a good job throughout the aperture range, with good field uniformity, and fair ability to resolve fine detail, particularly when you factor in the disadvantages of the smaller APS-C sensor (which places high demands on lens’ resolving power). It doesn’t have L-series levels of contrast and perceived sharpness – but we wouldn’t expect it to.

See our gallery for a set of infinity shots to see how this tiny macro resolves real-world detail on a flat plane.

How well does it work with EOS M3?

The EOS M3’s articulating touch screen is great for close-up work when using this lens. It takes a lot of strain out of working low when one doesn’t need to peer through a viewfinder or crouch low to see the screen. Magnifying the image for focus checking also works brilliantly on the M3. There’s no pixel binning or frame rate drops in 100% magnification mode, which helps the touch-enabled panning function to operate quickly and smoothly, helping ensure the narrow focus plane is placed exactly where you want it.

It’s creative

Even club soda can make an interesting photo when shooting this close

Or rather, it can be used creatively. 1.2x magnification means that objects are 1.2 times their actual size on the sensor plane. This means objects, details or textures can completely fill the frame, creating wonderful abstract shots that aren’t usually possible without a fair bit of kit. Combine this ability with a set up that is easily carried around and opportunities for interesting shots begin to pop up everywhere, as it offers a whole new view on the seemingly mundane.

It isn’t perfect…

This image was taken with just the built-in LED lights for illumination, and was cropped and brightened in post.

Well, for $ 300, expecting absolute perfection is unrealistic, especially in the photo world. 

First, it isn’t the sharpest lens out there. It’s pretty good, but in the macro world there are better options. That said, none of them have those lovely lights and will probably cost more.

The lights and image stabilization aren’t powerful enough to make this a hand-holdable macro, so don’t make the mistake of expecting that. The handheld spider shot above illustrates the pitfalls of lighting exclusively with the on board LEDs.  

First, the light cast by the LEDs isn’t particularly intense. It’s bright enough to light subjects at minimum focus distance outdoors, but only when its overcast. Any direct sunlight will overpower the light and will make the lens’ shadow very obvious. By itself, the light needs to be combined with a tripod, and should be thought of as a way to avoid the complications of a ring light system (batteries, cables, etc) instead of an all-purpose fill light.

Second, when working with a high reproduction ratio, depth of field is inherently incredibly shallow. The LED lights aren’t bright enough to allow for stopping down for deep depth of field while shooting handheld in dim ambient light. 

…but is still very usable

Using a narrow aperture can achieve deep depth of field when close focusing, but diffraction will decrease sharpness, as can be seen in this shot at F18.

It is important to remember that shallow depth of field is a challenge with all macro lenses. One way to get around that issue is by focus stacking. There are many software solutions to focus stacking, and Olympus has even gone as far as to include it as an automatic function in some of its cameras. One can only hope Canon does eventually as well.

The only other gripe is with the lights and their configuration. It would be nice to be able to rotate the lights 90 degrees for a sort of “clamshell” lighting instead of being stuck with the “copystand” lighting constantly, or to be able to have them configured either way regardless of wether the camera is being used in portrait or landscape orientation. 

As a standard lens, it performs fine in normal working distances, but vignetting is strong wide-open, making the EF-M 22 F2 a better general use prime lens if you don’t need the macro performance. 

Hands-on review: Canon EF-M 28mm Macro

This image used a combination of the built-in lights and a back lit semi-transparent surface

For beginners looking to shoot macro, the EF-M 28mm F3.5 Macro is a great place to start. Its close focus abilities mean it has a wide range of macro use cases, and the built-in LEDs mean one doesn’t have to budget for a set of lights when just getting started. It’s a great starting point for learning the challenges and pitfalls of macro photography, and will produce great results when applying those lessons.

Articles: Digital Photography Review (dpreview.com)

 
Comments Off on Getting up close: Canon EF-M 28mm macro hands-on review

Posted in Uncategorized


Let’s Get Up Close with Extension Tubes

26 Jan

If you want to get up close to your subject, closer than you can by setting your lens to its minimum focusing distance, then extension tubes are an excellent way of doing so.

Extension tubes and close-up photography

When you turn the focusing ring of your lens away from infinity, the front element moves out from the lens body. The distance between the front element and the sensor (or film) plane is called extension. When your lens is set to its minimum focusing distance, the front element can move no further forward. You have reached the limit of the lens’s design.

An extension tube is a hollow tube that fits between your lens and camera body. It moves the lens further away, increasing the extension of the front element. In turn, this lets you move the lens closer to the subject, increasing magnification, and in some cases even matching the 1:1 magnification of a true macro lens.

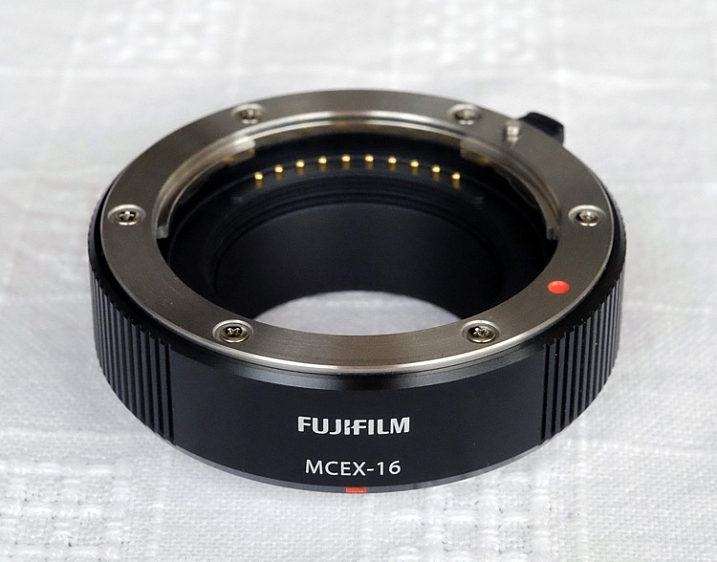
This is the Fujifilm MC-EX 16 extension tube that I use. The electrical contacts, that allow the lens and camera body to communicate, are visible at the back (more on the importance of this later).

Extension tubes and close-up photography

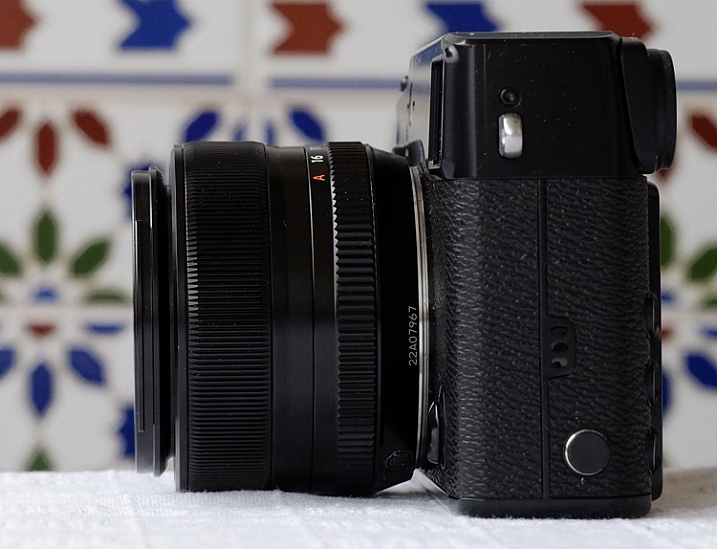
This is the Fujinon 35mm f/1.4 lens mounted to an X-Pro 1 camera. The distance between the front lens element and the sensor plane is the extension. This figure helps determine the closest point the lens can focus on (in this case 28cm), and subsequently the magnification.

Extension tubes and close-up photography

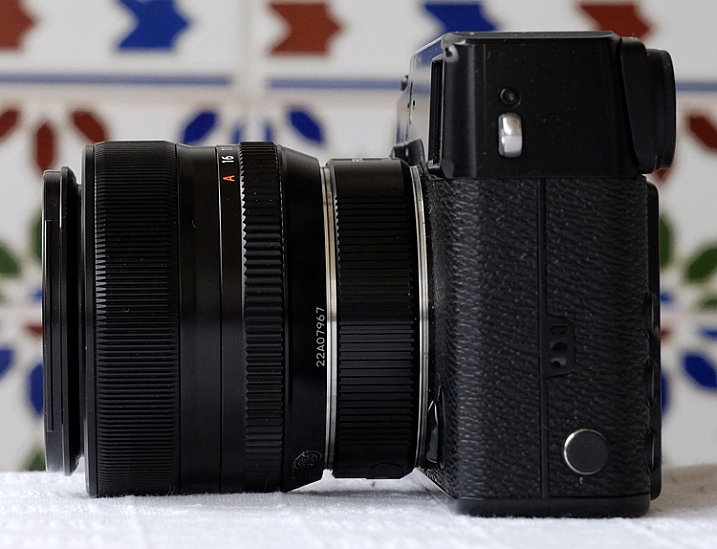
Below is the same lens with the MC-EX 16 extension tube added. You can see that the front element of the lens is now 16mm further away from the sensor plane. Now the lens can focus on a much closer point.

Extension tubes and close-up photography

Extension tubes versus macro lenses

Extension tubes are a great tool, but for the best possible optical quality and the most versatility you should choose a macro lens if you can. The reason for this is that increasing the extension of a non-macro lens means that you are using it outside the limits it is designed to work within. Macro lenses, on the other hand, are designed to give their peak optical performance at close focusing distances. They can also focus at infinity – whereas a lens fitted with an extension tube cannot.

The main benefit of extension tubes is that they are small and light. You can carry them around in case you need them, and leave your macro lens (if you have one) at home. They are ideal for anybody who travels a lot, or who wants to keep the weight of their camera bag down.

Cheap extension tubes versus good quality ones

You can buy inexpensive extension tubes from Amazon or eBay. These may look like a great deal but they break the electrical connection between your camera and the lens. If your lens has an electronically controlled aperture that means, you can’t stop the lens down. The camera also can’t record the aperture setting in the EXIF data.

Your camera will still work, and meter the subject to give you the correct exposure. But, given that depth of field at the widest aperture is incredibly narrow, and that you need to stop down to improve image quality, these cheap extension tubes are not of much practical use. They are only useful if you have a lens with a manual aperture ring.

The best ones to buy are those made by your camera manufacturer, or by a third party like Kenko or Vivitar, who make extension tubes that maintain the electronic connection between lens and camera. There is usually a choice of two sizes. The widest will get you closer, and the narrowest will come in useful when you don’t need to be quite so close. You may want to start off buying one or the other, but will probably end up buying both to cope with different situations.

Extension tubes and magnification

Extension tubes are most effective when used with lenses of focal lengths between 24-100mm. They are not so effective when used with telephoto lenses (for these, use a close-up lens). You can’t use an extension tube with some wide-angle lenses as it becomes impossible to focus with it fitted.

To see how much magnification an extension tube will give you with a specific lens, check the specifications on B&H Photo Video (United States) or Wex Photographic (UK). You may also be able to find the information on the manufacturer’s website. The instruction sheet that comes with the extension tubes also has this information, and you may be able to find a copy online.

There’s an easy formula for calculating how much extra magnification an extension tube will give you:

Increase in magnification = extension distance/lens focal length

For example, my Fujinon 35mm f1.4 lens has a magnification of 0.17x at its closest focusing distance of 28cm (I found this information in the spec sheet). Adding a 16mm extension tube means the increase in magnification is 0.45 (16/35), giving a total of 0.62x (0.45 + 0.17). This figure is a little academic, but it’s useful for evaluating whether you can add an extension tube to your lens and reach the 1:1 (1x) magnification, offered by most macro lenses.

Extension tubes in action

These photos show you how much difference an extension tube can make.

Extension tubes and close-up photography

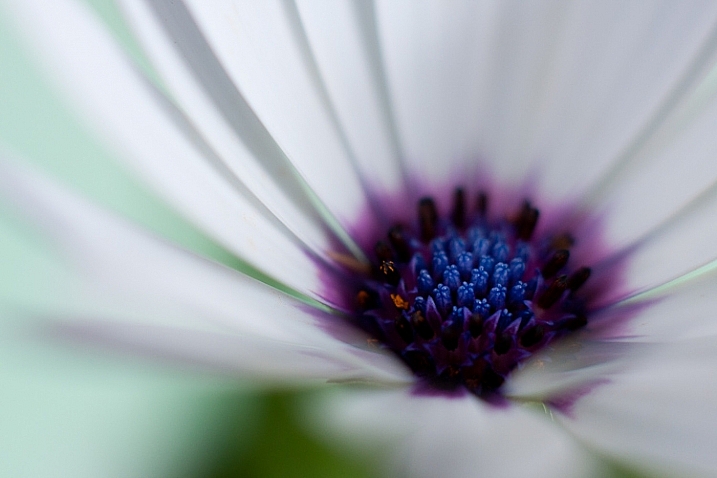
This first image was taken with my 35mm lens. This is the closest I could get to the flowers.

Extension tubes and close-up photography

This was taken with the 35mm lens plus 16mm extension tube. Look at the difference.

Extension tubes and close-up photography

This photo was taken with a Canon 85mm lens fitted with a 12mm extension tube.

Extension tubes and close-up photography

This was taken with the same lens fitted with a 25mm extension tube. It shows the huge difference a different sized tube makes to the magnification.

Your turn

Do you own an extension tube? Which ones do you have and how useful are they? Let us know in the comments, it will be useful for other readers who are thinking about buying some.


Mastering PhotographyMastering Photography ebook by Andrew S. Gibson

My ebook Mastering Photography: A Beginner’s Guide to Using Digital Cameras teaches you how to take your camera off automatic so you can take control and start creating the photos you see in your mind’s eye. Click the link to learn more or buy.

googletag.cmd.push(function() {
tablet_slots.push( googletag.defineSlot( “/1005424/_dPSv4_tab-all-article-bottom_(300×250)”, [300, 250], “pb-ad-78623” ).addService( googletag.pubads() ) ); } );

googletag.cmd.push(function() {
mobile_slots.push( googletag.defineSlot( “/1005424/_dPSv4_mob-all-article-bottom_(300×250)”, [300, 250], “pb-ad-78158” ).addService( googletag.pubads() ) ); } );

The post Let’s Get Up Close with Extension Tubes by Andrew S. Gibson appeared first on Digital Photography School.


Digital Photography School

 
Comments Off on Let’s Get Up Close with Extension Tubes

Posted in Photography


CES 2016: Close up with Kodak’s new Super 8 movie camera

14 Jan

In a bit of a surprise, one of the hottest products to make an appearance at CES 2016 was an analog product: Kodak’s Super 8 movie camera. Built around the classic Super 8 film format, the camera does make some nods to contemporary digital technology: instead of an optical viewfinder there’s a flip out LCD screen, and there’s also a SD card slot for recording sound.

But the film is the real star of the show, and processing is included in the cost. If you’re into the retro thing looking to make some films (or even just someone on a quest for the nostalgic look of Super 8) this might be just the camera you need to go along with your vinyl albums. DPReview editor Dale Baskin talks with Kodak’s Josh Coon to learn a bit more about this camera.

Articles: Digital Photography Review (dpreview.com)

 
Comments Off on CES 2016: Close up with Kodak’s new Super 8 movie camera

Posted in Uncategorized


Photograph Close to Home to Improve Your Photography

05 Jan

Think about the most interesting place that you could possibly go to take an incredible photograph. What comes to mind?

Maybe it’s Machu Picchu, New Zealand, Yosemite, a safari in Africa, a city like New York or Paris, or wherever is featured in the latest National Geographic Magazine. These locations are very special occasions for travel and photography. However, they are usually once in a lifetime trips, and once you are there, you often have a very limited amount of time for photographing, along with everything else planned.

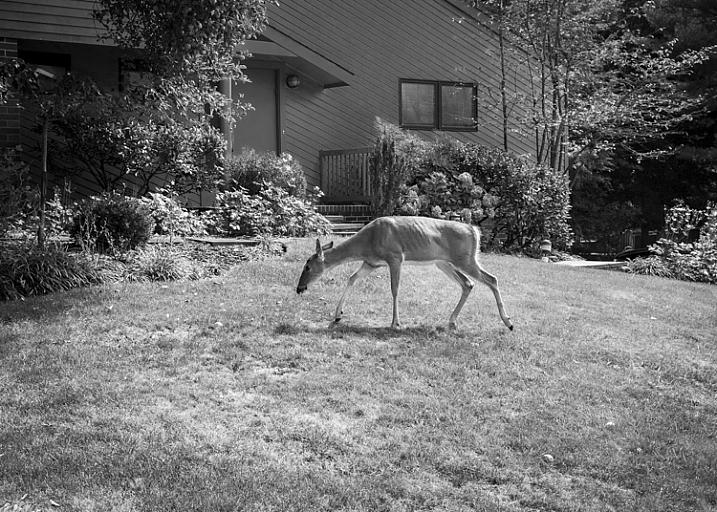
Deer, Backyard, New Jersey by Neil Persh

All images in this article courtesy of my student, Neil Persh. Here is his backyard.

So what if I told you that the most interesting place you could photograph is much easier to get to? It’s in your own neighborhood, and its surrounding locations.

I am told fairly frequently by photographers and students that they cannot, or do not feel like, photographing where they live. “It’s too boring” they say, or “There’s nothing interesting to photograph. I only do my photography when I travel.”

This is great of course, as passion for travel and photography go hand in hand, and it’s often when people do their best work. But, thinking that way can also make you miss the whole point of photography.

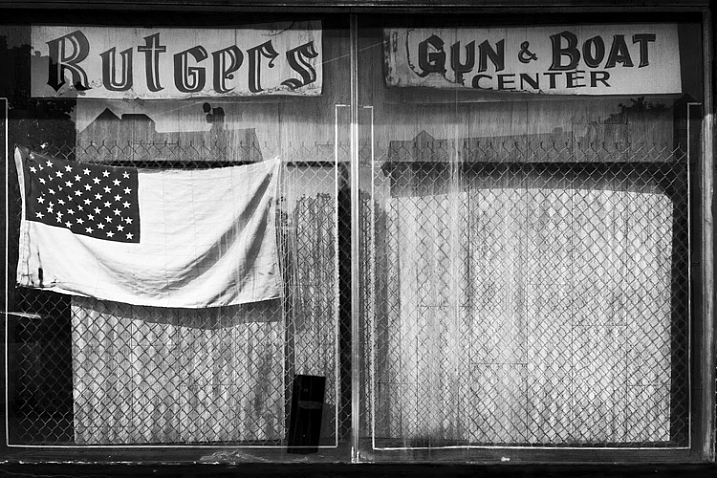
Shop Window, Rutgers, New Jersey by Neil Persh

Shop Window, Rutgers, New Jersey by Neil Persh.

When students mention this to me, I get them to do a specific exercise, I suggest that you try it as well. Spend a few weeks photographing areas within close proximity to your house. Leave your home and go for a long walk in any random direction. Take it even further by thinking about the most uninteresting area that you can imagine photographing, and go there. Maybe it’s a mall parking lot, an empty street corner, or behind a convenience store. Stay there, and figure out how to take an interesting photograph.

Many people tend to take their own location for granted. Your surroundings may seem routine and banal to you, but they’re not. If you were to take someone from a different part of the world, or from a different time period, and park them right where you are – they would probably find things very weird and fascinating. They would probably photograph so many things that you may currently be overlooking.

Step outside, and try to see these areas in that way. What makes this area interesting? How are these scenes going to look as the world changes? How can you make these everyday things beautiful and interesting? Figure out why you might find an area uninspiring, and then photograph that. That is an fascinating idea in itself.

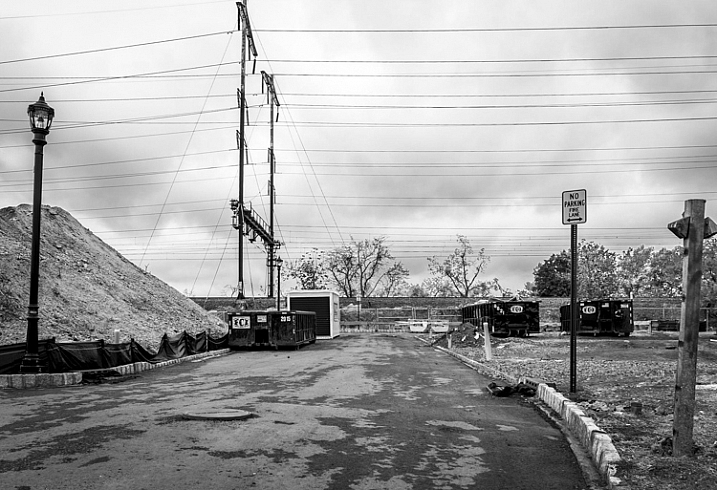
Road, New Jersey by Neil Persh

Road, New Jersey by Neil Persh.

The most experienced photographers have learned how to take unique and interesting photographs anywhere. They usually do not take anything for granted. I think this is a skill that you can practice and learn, and it goes to the heart of what being a good photographer is all about. On a practical note, these areas are right outside your door, so you don’t have to pack up all your equipment and plan a lengthy trip. You can walk outside three times a week for 30 minutes with your camera, altering the times of day and the route. If you are a once or twice a month photographer, this will have you practicing much more often. This alone will make you a much better photographer, over the longterm.

Photography is an exciting past-time. I first got into it for the simple fact that I liked to walk and daydream. As you improve and learn more about photography, as you eye better gear, as you think about creating grander images, and as you look at the work of well-traveled photographers on a daily basis, it can pull you away from this simple idea. One of most powerful aspects of photography is that it is a reason in itself to go and take an enjoyable walk. It is a reason to relax and daydream; it is an excuse to wander. It is also a great ice-breaker for meeting other people.

Subdivision, New Jersey by Neil Persh

Subdivision, New Jersey by Neil Persh.

Take a look at the work of William Eggleston, Lee Friedlander, or Alec Soth. Look at some of the areas where they photographed. The places probably did not feel that special, or inspiring, to the photographers on the surface. But these photographers were able to see past it, and show in their images how the areas were unique.

Any time that doubt creeps in, and you think that it is impossible to take a good photograph somewhere, I want you to stop yourself and slowly look around. Figure out how to take the best possible image that you can right there, and then go explore another block. Something new will be around the corner.

New Jersey by Neil Persh

New Jersey by Neil Persh.

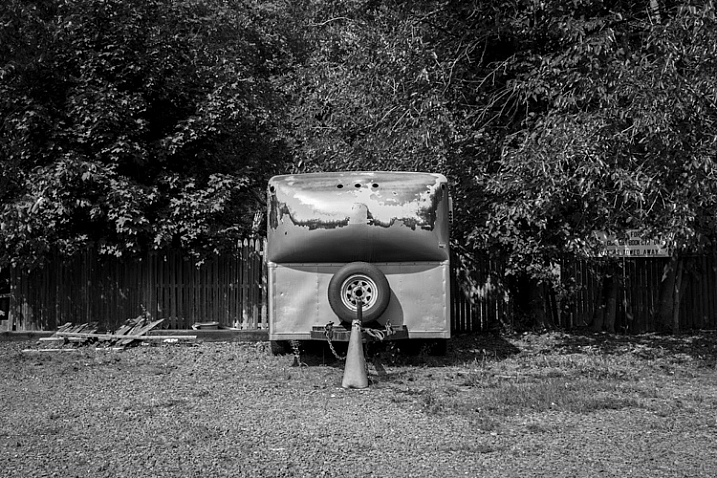
The work of one of my students, Neil Persh is shown throughout this article. Neil frequently takes day trips into New York City, along with traveling to many interesting places to capture wonderful images. His work in these areas has gotten very good, and he clearly has an enthusiasm and passion for photography that is contagious. However, when he had to go photograph his neighborhood for an assignment, he struggled with the idea for a while. Then, when he finally commit to it, he began to get over his trepidation, and started to photograph his area more frequently. I was blown away by the images. The work shown here was taken over months, not years, and I find them to be much different from what you normally see.

You can do the same. Go for a walk this week!

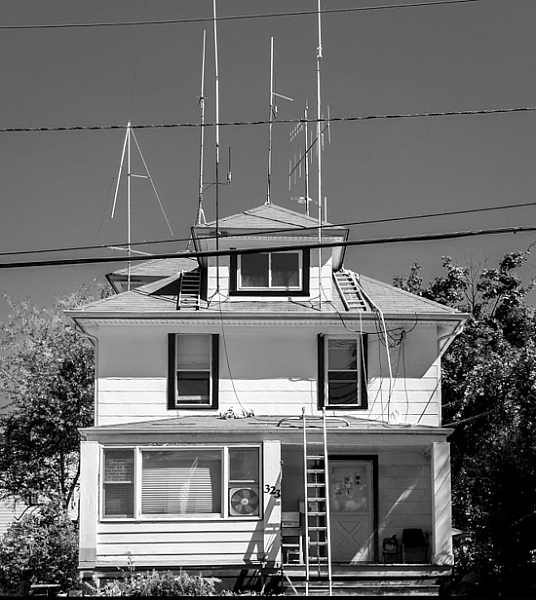
Ham Radio Operator's House, New Jersey by Neil Persh

Ham Radio Operator’s House, New Jersey by Neil Persh.

googletag.cmd.push(function() {
tablet_slots.push( googletag.defineSlot( “/1005424/_dPSv4_tab-all-article-bottom_(300×250)”, [300, 250], “pb-ad-78623” ).addService( googletag.pubads() ) ); } );

googletag.cmd.push(function() {
mobile_slots.push( googletag.defineSlot( “/1005424/_dPSv4_mob-all-article-bottom_(300×250)”, [300, 250], “pb-ad-78158” ).addService( googletag.pubads() ) ); } );

The post Photograph Close to Home to Improve Your Photography by James Maher appeared first on Digital Photography School.


Digital Photography School

 
Comments Off on Photograph Close to Home to Improve Your Photography

Posted in Photography


Close Encounters: Will Burrard-Lucas’ wildlife photography

22 Feb

Based in the UK, nature photographer Will Burrard-Lucas is highly dedicated to wildlife photography. He’s even developed his own remote-controlled camera system for getting as close as you can with dangerous animals like rhinos, lions and… meerkats. The photographer spent an entire year living in Zambia where he used new technologies like drones, camera traps and remote-control devices to capture nature from tricky perspectives. See gallery

Articles: Digital Photography Review (dpreview.com)

 
Comments Off on Close Encounters: Will Burrard-Lucas’ wildlife photography

Posted in Uncategorized


CP+ 2015: Up close and personal with Ricoh’s full-frame Pentax mockup

12 Feb

After announcing the development of a full-frame DSLR recently, Ricoh is showing a very early mockup at the CP+ show in Yokohama Japan. Although details are extremely limited (limited, in fact, to the words ‘Full-frame’ in the press release and ‘Pentax’ written on the front) Ricoh’s mockup does give some clues as to the camera’s specification. Kind of. Click through for images and some – frankly – rampant speculation. 

Articles: Digital Photography Review (dpreview.com)

 
Comments Off on CP+ 2015: Up close and personal with Ricoh’s full-frame Pentax mockup

Posted in Uncategorized


3D-Printed Spider Dress Attacks When Anyone Comes Too Close

25 Dec

[ By Steph in Drawing & Digital. ]

spider dress 1

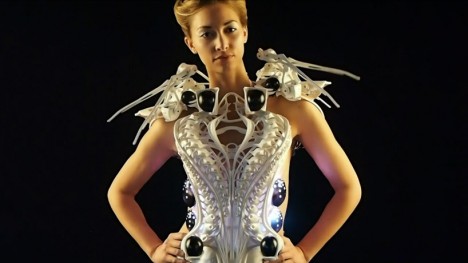
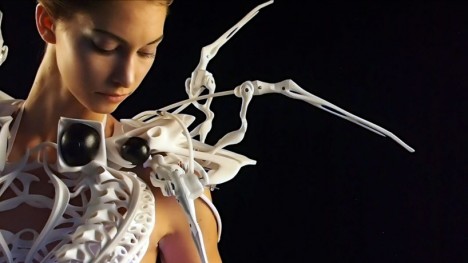
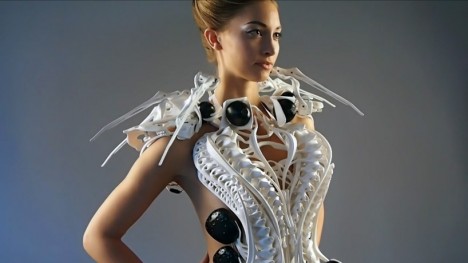
No worries about anyone invading your personal space when you’re wearing this intricate 3D-printed dress, which extends animatronic spider-inspired arms when it senses another person’s presence nearby. ‘Spider Dress 2.0′ by Dutch designer Anouk Wipprecht responds with defensive gestures if anyone approaches too quickly, or come-hither motions to friendlier, slower-moving people.

spider dress 2

Equipped with proximity and respiration monitors and an Intel Edison processor, the dress acts as a shield between the wearer and the outside world, interpreting the intentions of people who come near. The 3D-printed white components have a skeletal appearance, while LED lights add a bit more sci-fi appeal.

spider dress 3

spider dress 4

As seen in the video, the movements of the spider arms are creepily realistic. The design is an improvement upon Wipprecht’s ‘Spider Dress 1.0,’ which had a more mechanical appearance with arrow-like legs. The artist sees fashion as lacking in ‘microcontrollers,’ and seeks to combine fashion design with engineering, science and interaction.

spider dress 1.0

The mechanisms that create the movement in Wipprecht’s wearable tech designs are left visible on the outside so viewers can “witness the designs creating their own unique forms of interaction, movement and meaning.”

Share on Facebook


[ By Steph in Drawing & Digital. ]

[ WebUrbanist | Archives | Galleries | Privacy | TOS ]


WebUrbanist

 
Comments Off on 3D-Printed Spider Dress Attacks When Anyone Comes Too Close

Posted in Creativity


Finding Great Subjects to Photograph Close to Home

05 Aug

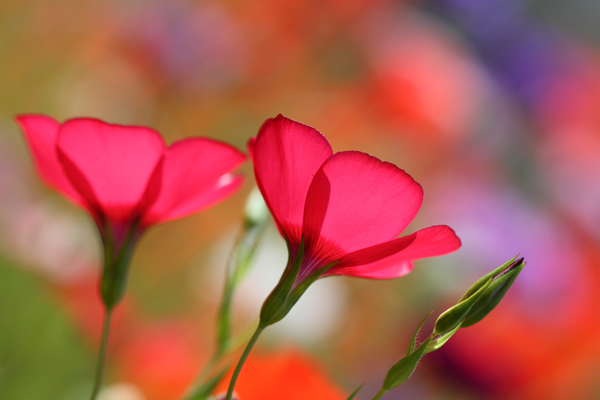
You don’t need to take expensive and exotic trips to make good images. So if staying at home is more your thing then a few simple ideas can help you create beautiful images. What you might view as commonplace and bland can still be photographed in an imaginative and skillful way to produce an image that shows a far more striking aspect of the subject or scene. I am not suggesting you get all creative with software manipulation either. I am suggesting explore your imagination and creativity; perhaps push your technical boundaries a little and this will further enhance your photographic skill.

flowers-home

The ability to take an everyday scene and construct from it a superb image will require your application of some or all of the following:

  • vision to see the various elements that might be included in an image
  • concentration and time to develop the idea and assimilate all the components
  • awareness to recognize the potential of a color, shape and form
  • observation to study the scene and time enough to mentally collate the aspects of the image and to try them out in camera
  • willingness to try something new

This skill of making the mundane magnificent is not dependent on the type of camera and lens you use, it works with anything. My particular interest is nature and wildlife, but the skill can readily be applied to most of your chosen genres of photography.

Getting started

To start you should be looking for a spark or catalyst to kick off the mental process. This can be anything that takes your fancy such as color, shape, pattern or motion.

Once you have selected your particular environment, and isolated some elements for a composition, then take some time to arrange and rearrange them in your mind. Walk around, kneel, lie down and test different perspectives. Work the opportunity and let the image evolve, don’t rush it. You may get a few strange looks in certain circumstances, but that is the price you pay.

Something simple like a field of rapeseed (or field of other flowers or crops depending on where you live) is a common, beautiful, bright yellow sight which also heralds the arrival of summer. The endless fields of yellow can be monotonous, but they can provide you with a colorful subject in their own right, or a backdrop for a smaller subject. You can use the color, the size of the field and the detail of individual flowers. Look about for a subject, choose a perspective and include other elements such as: blue sky, clouds, a tree, a car, a sunrise or sunset, or all of the above. Let the image unfold.
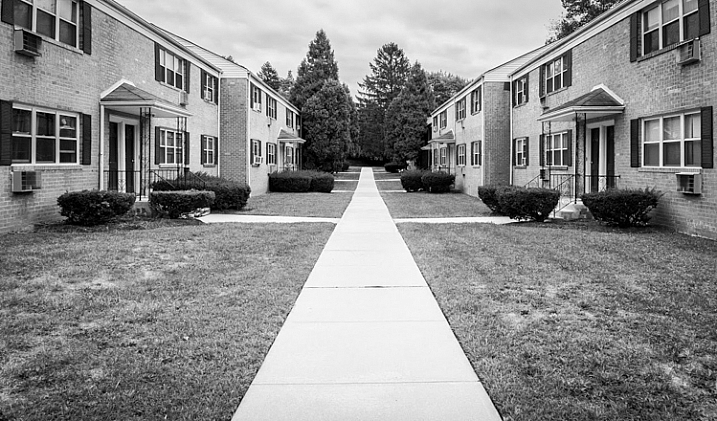
Finding subjects close to home

The images here are all taken this year, with this article in mind, all within a couple of miles of my house. This is to demonstrate that there is much on our doorsteps that might keep our photographic needs satisfied, well some of them at least.

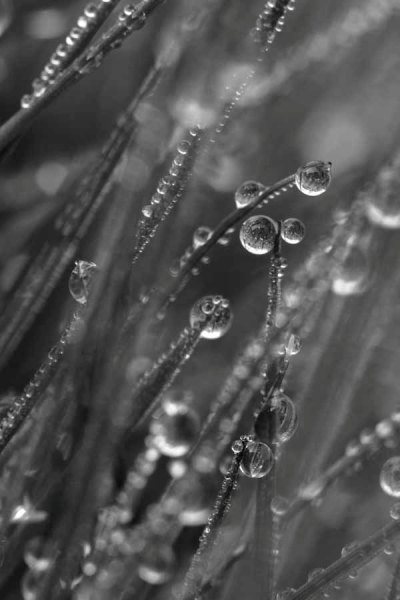
Choose any patch of grass on a dewy morning and have a look for a good collection of dew drops and try a backlit shot. The sparkles and perfect shapes of the droplets make an intriguing subject. Here I have turned the image into a black and white just to emphasize the shape and patterns, but often you’ll want to keep the lovely green of the grass.

001 Dewy Morning in the Grass

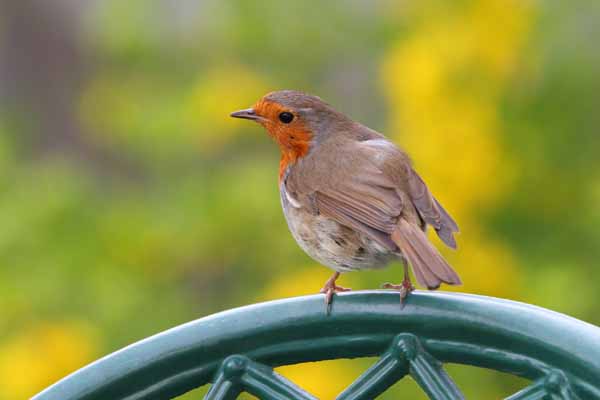
Garden birds are probably the most accessible wildlife for you budding nature photographers. With some simple skills you can go beyond just taking a record shot, but can create lovely images. Place a bird feeder in a good position, with a decent background, and a thoughtfully placed perch and sit back and wait. Change the perch and change the background at will and you have a whole suite of different images available to you.

002 Robin on Chair

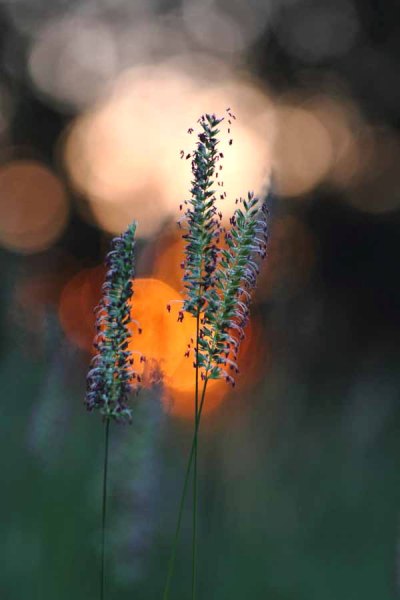
A sunrise over a meadow may be a regular occurrence in your home patch, but to make it a little different get down low in the vegetation. Here I have obstructed the sun with a tree at the edge of the meadow, and thus broken the sunlight up into many light sources coming through the foliage. The background is formed by selecting an aperture that provides sizeable circles of confusion (out of focus light sources) behind the subject. The subject is just a few seeding grass heads, but you can turn the simple into the stunning by constructing an image.

003 Meadow Sunrise

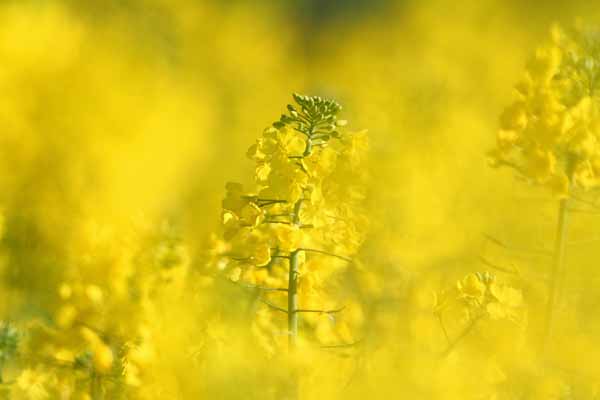
Vast fields of cultivated crops can provide you with a wonderful opportunity. A bright yellow rapeseed field for example. Look for something to isolate within the vast swathe of yellow that provides a point of interest in an image full of color. Sometimes it is simply a color that can spark your thinking, but spotting a dewy web provides a focus for the image. Prowling the edge of the fields on a bright and sunny day will also yield a lot of insect life, which could become your whole new world.

004 Rapeseed Field

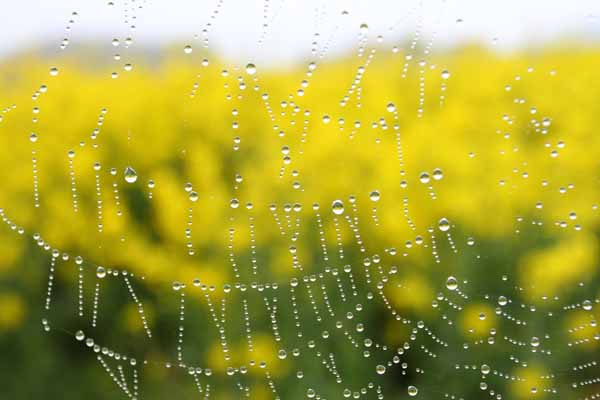
You can choose a different day and different weather to change your image. On a foggy day dewdrops collect on spider webs and can give you an abstract view of the rapeseed field. The spark here was the pattern effect of the drops and then the gorgeous yellow background.

005 Rapeseed Field Dewdrops

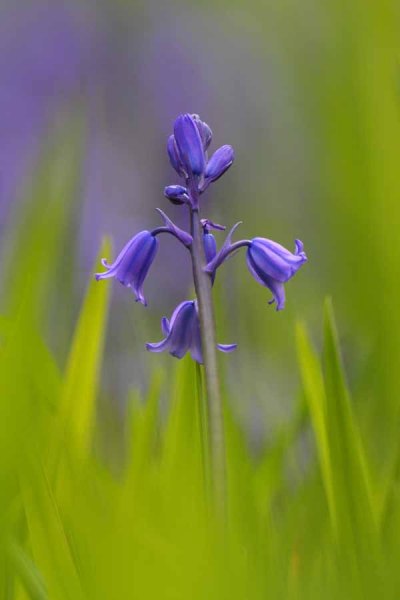
This image was created by using a long lens that can accommodate a lot of foreground (has a lot of reach and you can stay back from the subject) and can throw the background and foreground out of focus with a shallow depth of field, while filling the frame. If you shoot into the sun, then the sunlight passing through the green foliage will bring out the bright, and almost luminous, green of the leaf with which you can compose the foreground and background. The spark was the beautiful color of the backlit green foliage, completely different from the front-lit color.

006 Garden Bluebell

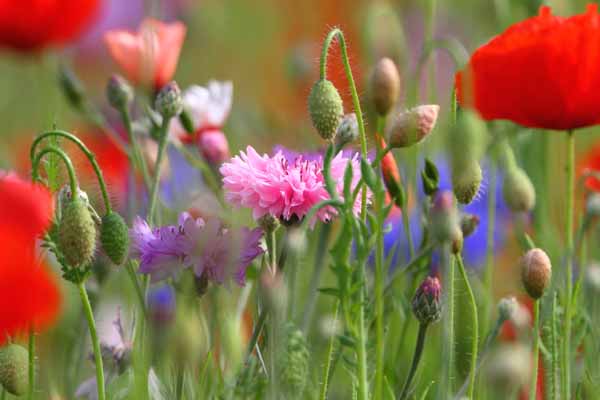
Sometimes simplicity is the only catchword you need to remember. Find a patch of wildflowers, pick the most concentrated spot and shoot away, picking various subjects. The color and the profusion will give you all you need to create an intriguing and colorful image.

007 Summer Flowers

Spring and summer are obviously the prime times for encountering wildlife, and therefore photographic subjects for your nature images are abundant. Unless you live in the tropics, the winter season can be a lot more mundane, so you are probably going to have to work harder. Colorful weeds and insects are always a feature of summer. Putting them together works a treat, although it may take some patience.

008 Dandelion and Ladybird

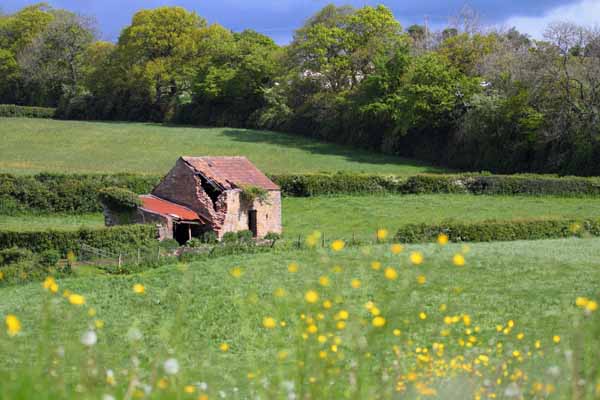
It is not all about your hands and knees or the hedgehog perspective, so a few leading lines and an old barn will give you a far superior image to a snapshot of endless cultivated fields. Throw in a few colorful wildflowers in the foreground, a dark stormy sky and the farm fields you drive past routinely may take on a new perspective.

009 Old Barn in Fields

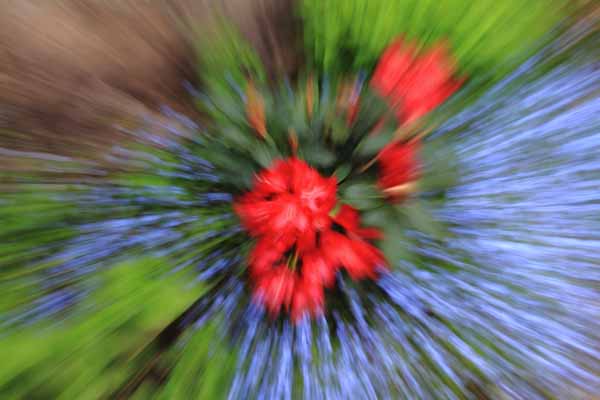
A very sparse little patch of flowers, with color being their only redeeming quality, can still provide you with a good opportunity. This technique is purely an in-camera one and utilizes controlled motion of the lens. Slow the shutter speed (low light, low ISO, dull weather or a combination) and zoom in or out by hand while the shutter is open gives the resulting motion blur. This can be used in a variety of ways and once you start your imagination may take hold. If you don’t have a zoom do the same with your prime lens but twist the camera in your hands.

010 Flower Burst

So just to show you that you can make great images close to home with a little effort.

Do you have any other tips or tricks for finding ordinary things and making great photos? Please share in the comments below.

The post Finding Great Subjects to Photograph Close to Home by Richard Taylor appeared first on Digital Photography School.


Digital Photography School

 
Comments Off on Finding Great Subjects to Photograph Close to Home

Posted in Photography