RSS
 

Posts Tagged ‘Cityscapes’

5 Tips for Shooting Waterfront Cityscapes at Blue Hour

28 Aug

The post 5 Tips for Shooting Waterfront Cityscapes at Blue Hour appeared first on Digital Photography School. It was authored by Joey J.

When you hear the term “cityscape photography,” what kind of image comes to your mind? It could be those photographed from elevated viewpoints or light trail of city traffic. To me, nothing beats the beauty of waterfront cityscapes – especially those photographed at blue hour.

waterfront-cityscapes-at-blue-hour

Hong Kong skyline (18mm, f/10, 199 seconds, ISO100)

Gyeongbokgung Palace (Korea) (24mm, f/8, 30 seconds, ISO100)

Gyeongbokgung Palace (Korea) (24mm, f/8, 30 seconds, ISO100);

waterfront-cityscapes-at-blue-hour

Shanghai skyline (18mm, f/11, 164 seconds, ISO100).


In order to capture stunning waterfront cityscape photography, there are a few key points to get right.

Shooting Waterfront Cityscapes at Blue Hour

1. Good sky and light

Michael Freeman, the author of Capturing Light: The Heart of Photography, has this to say.

“In almost all photography it’s the quality of light that makes or breaks the shot.”

This is very true with waterfront cityscape photography as well. If you want your photo to look good, only shoot on a (mostly) clear evening (dark clouds are our nemesis!). The quality of light on sunny evenings is much nicer than that of cloudy evenings, which can be easily noticeable in the resulting photos.

2. Sunset direction

Over the years of shooting cityscapes at blue hour, I’ve come to realize one thing affects the results rather significantly – where the sun has set. If the sun has set towards the direction you’re shooting, you typically see beautiful twilight hues leftover from the fading sun, which makes your blue hour photos extra special.

Image: Singapore skyline (18mm, f/5.6, 409 seconds, ISO100). The sun went down on the right edge of...

Singapore skyline (18mm, f/5.6, 409 seconds, ISO100). The sun went down on the right edge of the frame, adding a beautiful gradient of colors ranging from reddish-orange to deep blue.

On the contrary, your cityscape photos at blue hour will look dull and monotonous if the sun sets behind you (i.e., you’re shooting towards the sky that is 180-degrees opposite of where the sun has set).

In such a scenario, the quality of light is inevitably affected. The sky lacks the beautiful hues you typically see in the sun-setting side of the sky. With the sky like that, your photos won’t get much better no matter how hard you try editing in post-production.

Image: Shanghai (China) skyline (18mm, f/13, 163 seconds, ISO100). Despite shooting on a clear eveni...

Shanghai (China) skyline (18mm, f/13, 163 seconds, ISO100). Despite shooting on a clear evening, the sky looks noticeably dull, as this is the sky that is 180-degrees opposite of where the sun went down (the sunset occurred behind me shooting).

3. Long exposure

What I particularly like about waterfront cityscapes is it lets me create silky smooth water effects by doing a long exposure. As seen in the photo below, such smoothed-out water adds a dreamy feel that is very distinctive to long exposure photography. It’s the very reason I fell in love with waterfront cityscapes.

Image: Marina Bay (Singapore) (35mm, f/11, 194 seconds, ISO100).

Marina Bay (Singapore) (35mm, f/11, 194 seconds, ISO100).

By default, the limited available light at blue hour allows your shutter speed to naturally get longer, especially with the use of a small aperture like f/13. That said, without using a neutral density (ND) filter, the shutter speed probably won’t go beyond several seconds. This isn’t long enough to achieve a silky smooth water effect that you see in the photos above.

Image: Marina Bay (Singapore) shot with 2 seconds of exposure (at f/13) without using any neutral de...

Marina Bay (Singapore) shot with 2 seconds of exposure (at f/13) without using any neutral density filter. This is way too short to a create silky smooth water effect.

If you don’t own an ND filter yet, get yourself one! There are different densities available (2, 3, 6 and 10-stops are popular), but I’ll recommend a 6-stop ND filter (especially if you’re only getting one), as it hits a sweet spot for photographers shooting waterfront cityscapes.

Let’s say that you get a base shutter speed (when no filter is attached) of 2 seconds, which is quite a typical scenario around 10 minutes before the end of dusk (check your local dusk time at gaisma.com).

As seen in the photo above, 2 seconds of exposure hardly smooths out the water, but by attaching 6-stop ND filter, the exposure gets extended to 128 seconds (2 minutes 8 seconds). Each “stop” of ND filter approximately doubles the exposure time (2 seconds > 4 seconds [1-stop] > 8 seconds [2-stops] > 15 seconds [3-stops] > 30 seconds [4-stops] > 64 seconds [5-stops] > 128 seconds [6-stops]), which is long enough to create silky smooth water effect.

Image: Neutral density (ND) filters help extend shutter speed lengths by reducing light entering the...

Neutral density (ND) filters help extend shutter speed lengths by reducing light entering the camera lens.

I own 3 and 10-stop ND filters as well, but the 3-stop is too mild (2-second exposure can be extended to 15 seconds only) while 10-stops is way too strong (2-second exposure can be extended to a whopping 34 minutes, 8 seconds).

I have found 2 to 3 minutes of exposure is enough to create a silky smooth water effect. You could go longer like 5 to 6 minutes (I won’t go beyond 7 minutes, as long exposure noise starts to creep in), but it won’t change much beyond 2 to 3 minutes.

4. Reflections on water

Colorful reflections of city lights reflected on the water are one thing that gives your blue hour photos a “WOW” feeling. That said, this doesn’t always happen. Even when you shoot the same city view from the same spot for two evenings in a row, you may get completely different results when it comes to the clarity of reflections on the water.

To achieve good photographic results, like in the first photo below, the water has to be relatively still. If the water surface is rough, you hardly get any reflections (the second photo below). Unfortunately, this isn’t something we can control, so we need a bit of luck here.

waterfront-cityscapes-at-blue-hour

Marina Bay (Singapore) (TOP: 18mm, f/13, 142 seconds, ISO100;

waterfront-cityscapes-at-blue-hour

19mm, f/13, 162 seconds, ISO100).

5. Having thin clouds

While long exposure works best with water, it also works well with clouds, too. This might not be as important as other points above, but if the sky has some clouds, long exposure helps get them rushing across the sky. It adds interesting movement to your photos, as seen below.

waterfront-cityscapes-at-blue-hour

Singapore skyline (18mm, f/10, 257 seconds, ISO100).

Alternatively, if you want a greater effect, try evenings with more clouds. That said, if too cloudy, your photos will look just flat and ugly (as the quality of light is severely affected) or might come out crazy like the photo below. I prefer a clear sky with no clouds or just a little bit of thin clouds.

waterfront-cityscapes-at-blue-hour

Singapore skyline (20mm, f/5.6, 412 seconds, ISO100).

Conclusion

I hope these tips help you capture epic waterfront cityscape photos at blue hour! Looking back, my love for waterfront cityscapes comes from earlier days shooting sunny beachscapes, which was the primary reason I got into photography a decade ago.

Over the years, my interest has shifted from sunny daytime beachscapes to cityscapes at blue hour, but I’m still in love with water! I frequent cityscape photography spots located at the waterfront locally as well as on trips abroad.

Lastly, if you have any questions or info to share about shooting waterfront cityscapes at blue hour, feel free to do so in the comments below.


waterfront-cityscapes-at-blue-hour

The post 5 Tips for Shooting Waterfront Cityscapes at Blue Hour appeared first on Digital Photography School. It was authored by Joey J.


Digital Photography School

 
Comments Off on 5 Tips for Shooting Waterfront Cityscapes at Blue Hour

Posted in Photography


How to Achieve Cool Urban Cityscapes

14 May

The post How to Achieve Cool Urban Cityscapes appeared first on Digital Photography School. It was authored by Mark C Hughes.

Cool Urban Landscapes through post-processing

Creating an emotional response

How you present your images can really affect one’s emotional response to them. Certain styles of image lend themselves to stylistic changes because they can create a specific emotional response when the viewer sees them. For example, film-based black and white images, when done well, present a sense of timelessness and can make things seem more serious. Similarly, high dynamic range images (HDR), when done well, can add “pop” to landscape photography. One particular style of image that lends itself to stylized treatments through post-processing is urban landscapes. Particularly if you are trying to make an already interesting image look more appealing based upon the lighting already present.

Crushed black and blown highlights on a street scene

Gritting and moody

Similar to black and white images, a high-contrast, selectively saturated look works well to create urban landscapes with a gritty and moody feel.

Using filters for effect

Nowadays, smartphone and some consumer cameras, have a great deal of pre-packaged stylistic treatments available that you can apply to photographs to try to evoke an emotional response. Someone, somewhere, has spent a great deal of time creating those filters to make your images feel as though they are from a different time or place.

For example, the classic 1970s snapshot look is full of color shifts and light leaks. They were common at that time because of the use of unstable film stocks and cheap cameras. Digital cameras don’t suffer the same issues that were present at that time. So, to simulate these conditions, adding light leaks and color shifts can make images feel vintage. There are many filters out there – each with their own effects.

Lit up Las Vegas

Make your own filters

To put the idea of emotional response to images in context, think about a familiar treatment that you are probably already aware of: black and white images. These photographs are rarely just images with the color drained. Good black and white images are contrast-rich with deep blacks and bright whites. The grey middle ground of many images can lose their impact when drained of color. Many black and white films had specific response curves that created the contrast-rich images. So now, with digitally-captured images that are black and white, they can appear a little sterile and plain. Adding high-contrast effects and grain to simulate film black and white tends to create an emotional response and mood.

To improve as a photographer, most people start, at some point, to try to take a more artistic approach to their images. Many newer photographers may start with simple prepackaged filters and presets, and apply them to their images. Currently, there is no end to the filters available in pretty much any photo sharing application and many cameras. From terms like “cool,” “50s,” “vintage,” and “grunge,” all these filters are stylizing the image for an emotional effect. Instagram was built on filters. People are very used to stylized images.

Old Montreal

Creating your own style

Becoming a better photographer involves the deliberate use of styles to create your desired effect. You may find there are particular filters you gravitate towards; styles that evoke an emotional response you like.

This is the beginning of finding your own style of image making. As you advance, you might explore manipulating images with Adobe Lightroom, Adobe Photoshop, Skylum Luminar or some similar program.

When you get to the point where you are working with and creating your own filters, you create your style. You can start by playing with filters or dissect other photographer’s images that you really like to see if you can recreate that style.

Surprisingly, creating set styles in many photo imaging software packages is quite easy. It allows you to recreate your style and apply it repeatedly to multiple images.

Notre Dame in Montreal

Create your filter

Let’s consider the urban, gritty look for urban landscapes.

Here are two treatments of the same image, split for comparison. On the right is the Straight Out Of the Camera (SOOC) jpeg and on the right is the treatment with the blacks crushed, highlights blown, oranges highlighted and an almost selective color approach.

It is easy to create for yourself with whatever tweaks you like to create a style for yourself.

Comparison of straight out of the camera to the final product

A word of warning is necessary at this point. When you start stylizing your images with intentionally weird effects, you may generate some negative comments from people who don’t like the look you create. This does not mean you have failed to create something interesting. However, it means you have generated an emotional response to your image by someone who doesn’t care for that look.

Remember that some people find that they can only validate their work by diminishing others. Whereas, most find growth in encouraging others to take risks with their art. A true artist picks their vision and follows it. Sometimes it can be a bumpy road if you are only expecting validation from others.

It is important at some time for you to consider yourself an artist and not just a recorder of images.

All art is about creating an emotional response. Beyond capturing a moment, it is how that moment makes you feel. Emotional responses can be positive or negative.

Atwater Market in Montreal

It turns out this crushed-blacks, blown highlights, contrasty, desaturated, and the almost selective color look isn’t that tough to create for yourself. However, for this particular effect, you may do some damage to your photos by intentionally making some parts too black and other parts too bright.

So let’s look at the images I think work for this type of treatment. Shots typically taken at dusk/night, with artificial illumination present, add interesting artistic character for the urban landscapes shot.

Use a Raw Image Processor or Lightroom

I use Adobe Camera Raw to do most of the edits to these images, but you can use Lightroom or any image processing software to create a similar style. My suggestion is you modify and tweak it to your liking to get the desired effect.  The tools are similar, but just in different places. Also, even though I process these images with a raw converter, you don’t have to use a RAW image (although that is always the best starting point) and can use a JPEG or DNG file.  The treatment will look very similar.

To start, open your image with the raw converter.

Opening up the Raw Processor


With your raw converter, you have access to many parameters that act globally on your image.

Change the sliders as shown on the panel below.

Specifically, you want to make sure you have the desired white balance (it may be fine from what your camera selected, or you may want to resample).  You want to up the Contrast hard, more than you probably have done previously to make those hard edges at the light and dark parts of your image. You then do two things that seem contrary – you are going to pull the details out of the shadows (increase the Shadow slider) and make the Blacks blacker (crushing the blacks).

Finally, boosting the Clarity increases the midtone contrasts, boosting the Vibrance boosts the midtone colors and toning down the Saturation prevents them from looking too candy-colored.

Here’s my panel for example:


Adjustments for the effect

Once you have made a look that you like the effect of, you can make this a repeatable look by creating a user preset.

Switch to the presets tab and then make a new preset.

You will be prompted to add a preset name. Pick something relevant to your style and save it. Next time you pull up an image (or multiple images) in your raw processor, you can simply highlight them all and apply the presets at once.

How to save the effect

A lot of these settings may cause parts of your image to clip. The crushed blacks mean that much of the detail in the blacks disappear. The boosted colors lead to clipped highlights. However, in the end, that’s okay because that is the desired effect.

Here’s a Pro-Tip: All those presets you can buy for Lightroom and Photoshop essentially do a version of this. You can create those presets if you have the time and the inclination to do it yourself. By doing it yourself, you create an image style that appeals to you.

Edmonton Skyline

Conclusion

Art is about evoking an emotion. Sometimes photographers try too hard to make an image that looks too lifelike and loses emotional impact. You can create urban landscape images that are moody and gritty by making them dark with blasted colors and blown highlights. It also opens doors to other types of manipulations used for images warranting other types of emotional reactions.

Old building in the Westmount area of Montreal


The post How to Achieve Cool Urban Cityscapes appeared first on Digital Photography School. It was authored by Mark C Hughes.


Digital Photography School

 
Comments Off on How to Achieve Cool Urban Cityscapes

Posted in Photography


How to Find the Best Possible Time to Shoot Cityscapes at Blue Hour

19 Jan

Blue hour, especially the one in the evening (yes it happens before sunrise too!), is probably the most popular time of day to take cityscape photography with dazzling city lights illuminated. But exactly when is the prime time of blue hour that could result in you getting the best possible shots?

Singapore - How to Find the Best Possible Time to Shoot Cityscapes at Blue Hour

Singapore skyline at blue hour.

Hong Kong - How to Find the Best Possible Time to Shoot Cityscapes at Blue Hour

Hong Kong skyline at blue hour.

Blue Hour Photography Requires a Tripod

One note before we get started. Although you could shoot handheld at blue hour by bumping the ISO up, it’s always advisable to use a tripod in order to shoot clean (noise-free) photos with low ISO (e.g. 100). It also comes with an added bonus of letting you do long exposure photography with smoothed-out water, etc.

For your information, sample photos shown in this post are all shot using my trusty Manfrotto MT190CXPRO3 carbon-fibre tripod.

Tripod - How to Find the Best Possible Time to Shoot Cityscapes at Blue Hour

Setting a tripod up and getting ready for blue hour.

Finding out Your Local Sunset and Dusk Time

Let’s get down to business. In terms of timeline, SUNSET comes first, followed by DUSK 20+ minutes later. The time between sunset and dusk is called TWILIGHT, and NIGHT falls once dusk is over.

To find out your local sunset and dusk time, simply go to timeanddate.com and search for your city (e.g. sunset and dusk time in Singapore on January 26th, 2018 will be 19:18 and 19:40 respectively). Or alternatively, search Google using “dusk date city” format (e.g. dusk January 24th, 2018 Singapore). Then, Google returns a dusk time even before the first result. Checking a dusk time has become a second nature to me whenever I’m shooting at blue hour, locally as well as traveling abroad on holidays.

Note: Apps like PhotoPills are also really helpful for planning shooting times and figuring out the sunrise, sunset and dusk times daily in any location worldwide.

Timeline - How to Find the Best Possible Time to Shoot Cityscapes at Blue Hour

Sunset to dusk in timeline. Towards the end of dusk is the best time to shoot blue hour photos with beautiful bluish hue in the sky.

Aim for Shooting the Last 10 Minutes of Dusk

In this 20 or so minutes between sunset and dusk, the first 10 minutes are still not quite “ripe”, as city buildings are not yet fully lit up, and the sky hasn’t yet taken on the beautiful bluish hue that appears towards the end of dusk. Use this time to decide on your composition, do some test shots, etc.

Singapore - How to Find the Best Possible Time to Shoot Cityscapes at Blue Hour

This Singapore skyline was shot 15 minutes before the end of dusk (six minutes after sunset) at f/13, 1.6 seconds, ISO 100. The stage isn’t quite set yet, as the sky is still bright and not many of the city lights are illuminated.

When there are about 10 minutes left before dusk, more city buildings will be lit, and bluish hue starts to appear in the sky, getting deeper and deeper with every single passing minute. It’s these last 10 minutes of dusk that are undoubtedly the prime time to shoot blue hour photography.

In addition, the limited available light at blue hour allows for your shutter speed to naturally get longer, especially with the use of a small aperture. Shoot in Aperture Priority mode and use a bigger f-stop number such as f/13, which helps create smoothed-out water and rushing clouds effects (provided that you’re shooting with a tripod).

ND filter - How to Find the Best Possible Time to Shoot Cityscapes at Blue Hour

A neutral density (ND) filter is an item that will enrich your blue hour photography experience and images.

Add an ND Filter

To enhance such effects, try shooting with a neutral density (ND) filter attached. ND filters help reduce the light that is coming through the lens, allowing you to use much slower shutter speeds.

For example, with a 3-stop ND filter attached, a base shutter speed of 2-seconds is extended to 15 seconds. For a greater effect, use 6-stop ND filter to extend a base shutter speed of 2-seconds to 128 seconds (just over two minutes), which gives your photo a surreal and dreamy feel that is typically seen in long exposure photography, like Marina Bay (Singapore) photo below.

Singapore - How to Find the Best Possible Time to Shoot Cityscapes at Blue Hour

This Marina Bay photo was shot three minutes before the end of dusk (f/13, 135 seconds, ISO 100). The blue hour sky looks just right – not too light, not too dark, not overly vibrant. Also, an exposure of 135 seconds (with a 6-stop ND filter attached) helped create a silky smooth water effect.

Blue Hour Suddenly Ends after Dusk

Blue hour photography is sometimes mixed up with night photography, which starts once dusk is over. You might be surprised to find out that night falls almost suddenly after dusk. It doesn’t even take 10 minutes for the blue hour sky at dusk to turn into pitch-black night.

Personally, I never shoot after dusk. Photos shot after dusk tend to come out very dark and colors look muddy as there is little bluish hue left in the sky. Your photos will look considerably different if you miss this prime time of blue hour even by a mere few minutes.

Hong Kong - How to Find the Best Possible Time to Shoot Cityscapes at Blue Hour

This Hong Kong skyline was shot 8 minutes after the end of dusk. The bluish hue in the sky quickly disappeared, and the scene turned into the dark night rather abruptly.

Conclusion

In fact, what we call blue “hour” seems to last only approximately 10 minutes towards the end of dusk (depending on where you are located relative to the equator).

Blue hour photography is quite a time-sensitive genre, as this prime time of blue hour sky ends in the blink of an eye. So, stay focused, otherwise, you could suddenly miss it passing you by under the fast-changing dusk sky. I really wish blue hour could literally last for an hour!

Editor’s note: it does in some parts of the world, at certain times of the year. If you want more blue hour time – travel farther away from the equator! Where I live in Canada blue hour is almost a full hour in the summer, versus 20 minutes where the author lives in Singapore.

The post How to Find the Best Possible Time to Shoot Cityscapes at Blue Hour by Joey J appeared first on Digital Photography School.


Digital Photography School

 
Comments Off on How to Find the Best Possible Time to Shoot Cityscapes at Blue Hour

Posted in Photography


Tips for Shooting Cityscapes Through a Window at Blue Hour

10 Nov

Shooting cityscape photos from inside a building (such as an observation deck of a tower, hotel room, etc.) pose a different set of challenges that you won’t experience shooting outdoors. Here are a few easy-to-follow tips for shooting the city at blue hour, with a focus on how to eliminate unwanted reflections from the glass.

Japan - Tips for Shooting Through a Glass Window of an Observation Deck at Blue Hour

Shanghai - Tips for Shooting Through a Glass Window of an Observation Deck at Blue Hour

Vietnam - Tips for Shooting Through a Glass Window of an Observation Deck at Blue Hour

The reflection-free shots above of Fukuoka skyline (Japan, top), Shanghai skyline (China, center) and Ho Chi Minh City skyline (Vietnam, bottom) were shot through glass windows of Fukuoka Tower, Shanghai World Financial Center Observatory and Bitexco Financial Tower respectively – following the methods described in this tutorial.

Bring a mini-tripod

In order to shoot at blue hour, a tripod is essential whether you’re shooting indoors or outdoors. But some observation decks don’t allow tripods because they are seen as a hindrance for other visitors. In that case, you may try to bring in a mini-tripod like a Gorillapod, as it’s unlikely to disturb other non-photography visitors.

Even if tripods are allowed, you may as well bring a mini tripod just in case, as it comes in handy when there is no suitable space to set up a regular tripod.

Gorillapod - Tips for Shooting Through a Glass Window of an Observation Deck at Blue Hour

Wipe the glass with a cloth

Glass windows of an observation deck aren’t always clean. Make sure to keep a cloth in your camera bag so that you can wipe an area to shoot through if it’s dirty. Obviously, you can’t wipe the other side of the window, though, so choose an area that has no stains, etc.

How to eliminate reflections off the window

This is the biggest challenge when taking photos through a glass window. The window works much like a mirror and it’s hard to completely prevent reflections (e.g. such as yourself, room lights) from showing up.

Typical tips to follow are shooting in close and as straight as possible to the glass (i.e. leaving a little gap between the glass and the lens so as not to let indoor lights creep in) and using a polarizing filter which helps cut reflections to some extent. Aside from these tips, I’d recommend the following “tools”.

Reflections - Tips for Shooting Through the Glass Window of an Observation Deck at Blue Hour

Ho Chi Minh City skyline (Vietnam) shot through the window of Bitexco Financial Tower. I tried my best by getting the lens really close to the window (almost touching it) and using a polarizing filter, but the room interior and stray lights still got reflected in the glass.

Using a DIY blackout curtain

This might be an old-school method, but I recently came across a photographer doing this on the observation deck of Shanghai World Financial Center (see below). Not advisable to use such a large curtain, though, as it blocks the view for other visitors and you’ll run the risk of being asked to leave by floor staff.

Blackout curtain Tips for Shooting Through the Glass Window of an Observation Deck at Blue Hour

Using a black jacket

I used to rely on this method and it worked relatively well. Set up a tripod very close to the window, and cover the whole rig (camera and tripod) with a black jacket to create a closed-in area around the camera so that no indoor lights get inside the jacket. Make sure to use a “black” jacket to reduce reflections, as a lighter-colored jacket does more harm than good and causes even more reflections.

Using black neck gaiter

This used to be my favourite method, as it doesn’t really catch the unwanted attention of other visitors (compared to using the jacket, etc.). The concept here is the same as using a jacket. To block any stray lights from getting in, wrap the black neck gaiter (neck warmer or scarf) around the lens and push the whole setup (camera and tripod) onto the window to completely shade the front element of the lens.

Jacket neck gaiter - Tips for Shooting Through the Glass Window of an Observation Deck at Blue Hour

Using a black jacket (left) and a black neck gaiter (right) to shade the front element of the lens and cut reflections from the window.

Using a lenskirt

A lenskirt is a tool specifically created to cut out reflections. This is what I’ve been using for the past few years with great success. By attaching a lenskirt to the front of your lens and the pushing suction cups onto the window, it shades the front element of the lens. This helps cut reflections from the window, leaving no chance for any stray light to get in.

With a black neck gaiter, I always had to make sure not to have vignetting (dark corners) by checking through the viewfinder (due to the edges of the neck gaiter getting too close to the lens). But the window-facing end of a lenskirt opens up like a softbox, so there is no worry of any edge vignetting being introduced.

Lenskirt - Tips for Shooting Through the Glass Window of an Observation Deck at Blue Hour

Conclusion

I hope these tips help you take reflection-free cityscape photos through glass windows of an observation deck on your next visit.

Lastly, you may wonder why I didn’t mention a rubber lens hood (which is said to work well for shooting through glass). I’ve tried it before but found it prone to vignetting, especially at a wide angle like 18mm or wider. And, when shooting cityscape photos from high above like an observation deck, you’re very likely to shoot wide, therefore I’ve excluded it from the list.

If you have any other tips or experiences using these suggested tools in this post, please share them in the comments below.

The post Tips for Shooting Cityscapes Through a Window at Blue Hour by Joey J appeared first on Digital Photography School.


Digital Photography School

 
Comments Off on Tips for Shooting Cityscapes Through a Window at Blue Hour

Posted in Photography


Gritty Cities: Oil Painter Captures Cityscapes at Dusk & Dawn

04 May

[ By WebUrbanist in Art & Drawing & Digital. ]

construction

Artist Jeremy Mann works in early in the day or evening, and it shows in the dark, smudged and ultimately riveting way in which he captures streetscapes of major cities from New York to San Francisco.

urban rooftops

Wiping, smoothing and layering oil paints with rollers, sponges and brushes, his works, like urban environments, are executions of complex and chaotic addition, evocative yet forever incomplete pictures of a place. He often applies broad marks with an ink brayer and wipes sections away with solvents. Getting increasingly experimental, he has even tried applying and moving paints with doorstops, window wipers and liquor bottles.

urban street

“Even that banana which turned out to actually be a good blending tool, painting with lettuce, though, I can tell you might be useless,” said the artist in an interview. “In this process of experimenting with tools, an artist inevitably discovers new techniques as a result of accidents and learning how to recognize those accidents as worthy or not, and then harness them or bury them.”

urban street shot

His paintings are as much about capturing the spirit of a place as its details. Rather than appearing as normal paintings, the pieces start to blend and blur, looking more like photographs shot on a rainy day with all the reflections of puddles, drips, and reflections enhanced. If anything, his recent works also seem to be growing more obscured and abstract over time, perhaps in part as his pallete of artistic tools expands.

oil complex painting

As art writer Christopher Jobson explains: “Mann applies and wipes away areas of the canvas to recreate these hazy environments, adding layers of paint back on top of the slightly smeared works with more detailed strokes. This layered effects makes the works appear like double exposed images, two scenes gently blurring into one. The resulting paintings are dark and atmospheric, urban streets seemingly drenched in rain and mystery.”

oil urban landscape

Mann’s work goes beyond just urban landscapes, and some of his pieces can be seen come June in the John Pence Gallery (you can also see more of his work on Instagram and Facebook).

Share on Facebook


[ By WebUrbanist in Art & Drawing & Digital. ]

[ WebUrbanist | Archives | Galleries | Privacy | TOS ]


WebUrbanist

 
Comments Off on Gritty Cities: Oil Painter Captures Cityscapes at Dusk & Dawn

Posted in Creativity


Playable Landscapes: Custom Concrete 3D Puzzles of Cityscapes

13 Nov

[ By WebUrbanist in Design & Products & Packaging. ]

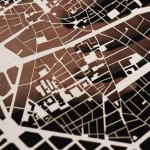
3d city maps

Pick any spot in the world and this company can print out a custom mould for a concrete pour, which, when cured, will make a 16- or 32-piece puzzle out of your favorite place.

3d cityscape

Using Open Street Map data, Logiplaces has already created a preliminary set of popular places voted up by fans for mass production, including downtown San Francisco and the Grand Canyon.

Liked a traditional puzzle, the sides of each piece can be matched up to create the whole, but unlike most puzzles, it is the vertical rather than the horizontal shapes that allow for matching. It becomes a matter of figure and ground, connecting building scales and typographies rather than colors and 2D patterns.

3d puzzles

At this point, fully-custom selections are cost-prohibitive for consumers, but the goal of the company is to make these accessible to mass markets as well. “When we came up with the idea of LOGIPLACES, we believed it had the potential to go global with loads of different places to cover. However, right now, we would first like to see, what are your favourite places that we can start manufacturing, and of course, we’re interested in what our first consumers think.”

Share on Facebook


[ By WebUrbanist in Design & Products & Packaging. ]

[ WebUrbanist | Archives | Galleries | Privacy | TOS ]


WebUrbanist

 
Comments Off on Playable Landscapes: Custom Concrete 3D Puzzles of Cityscapes

Posted in Creativity


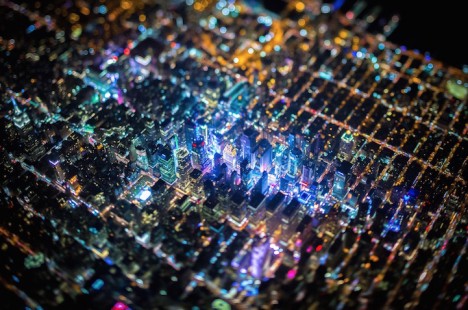
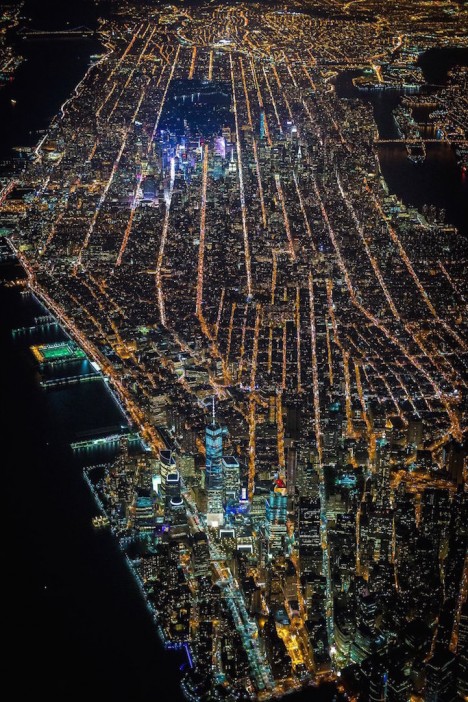
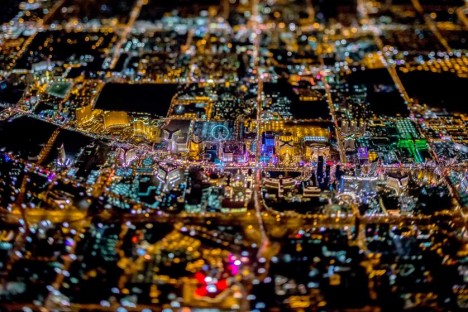
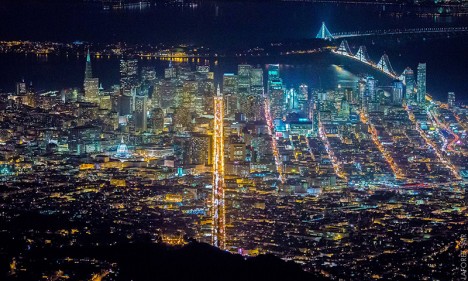
Griddy Cities: Aerial Cyberpunk Cityscapes Shot from 7,500 Feet

23 Apr

[ By WebUrbanist in Art & Photography & Video. ]

aerial new york city

Flying over New York City, San Francisco and Las Vegas, this photographer has managed to both capture the essence of each city he shoots from the night sky above while also turning these places into surrealistic, faux-futuristic versions of themselves.

aerial new york

aerial vegas tilt shift

Using a full-body harness to hang out of helicopters, adventurous artist Vincent Laforet went to great lengths and high altitudes (in some cases nearly 10,000 feet) to take pictures of each setting (NYC and LV shown above, SF shown with making-of video below).

aerial downtown sf city

Special permission needed to be obtained to use flight paths normally reserved for passing planes. Tilt-shift techniques make the scale more comprehensible and help highlight areas of focus in each shot. What is truly remarkable, though, is how each set both reflects the photographer’s personal style but also very much embodies the character of each distinct location.

Next Page – Click Below to Read More:
Griddy Cities Aerial Cyberpunk Cityscapes Shot From 7500 Feet

Share on Facebook


[ By WebUrbanist in Art & Photography & Video. ]

[ WebUrbanist | Archives | Galleries | Privacy | TOS ]


WebUrbanist

 
Comments Off on Griddy Cities: Aerial Cyberpunk Cityscapes Shot from 7,500 Feet

Posted in Creativity


Celestial Cityscapes: Photographing Dubai from Above the Fog

16 Jan

[ By WebUrbanist in Art & Photography & Video. ]

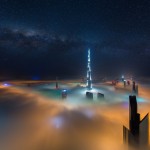
dubai skyscrapers above fog

Home to the tallest building in the world, Dubai is a city rich in skyscrapers that seem almost otherworldly when seen piercing through seasonal layers of urban fog.

dubai city aerial view

dubai sunrise cloud city

Photographer Daniel Cheong resides in this surreal desert city and has taken to capturing images of it from above, particularly during times when the weather is transitioning from warm to cool and producing the effects seen in these shots.

dubai cryogenic marina

dubai dawn cloud city

In some cases the viewer can see glimpses of the streets, buildings and marina below, but in others the entire built landscape appears perched on a layer of clouds.

dubai fluidity urban photo

dubai landing planet

While his photographs do represent reality, they also employ digital blending techniques that combine multiple exposures to make them seem almost more real than reality (but without the stretched effects sometimes seen in overly-processed HDR).

dubai fog blues

In doing so, he emphasizes “this slight element of the surreal, or hyper-reality often found in painting.” A world traveler, Cheong was “born in Mauritius, originally of Chinese descent, and French by nationality.” Of his picture-taking prowess, he writes: “I’ve always loved photography, but only became serious about it when I bought my first DSLR in Singapore, back in 2006.”

dubai cryogenic sunrise

“I then aimed to perfect the technique of Digital Blending, which consists of manually blending multiple bracketed exposures in order to obtain the maximum dynamic range, while trying to keep a very natural look and avoiding the common mistake of many ‘overcooked’ HDR images. This slight element of the surreal, or hyper reality often found in painting is what I am trying to achieve”

Share on Facebook


[ By WebUrbanist in Art & Photography & Video. ]

[ WebUrbanist | Archives | Galleries | Privacy | TOS ]


WebUrbanist

 
Comments Off on Celestial Cityscapes: Photographing Dubai from Above the Fog

Posted in Creativity


Iconic Camouflage: Painted People Disappear into Cityscapes

28 Nov

[ By WebUrbanist in Art & Photography & Video. ]

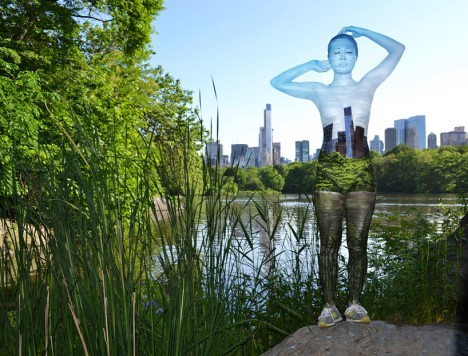
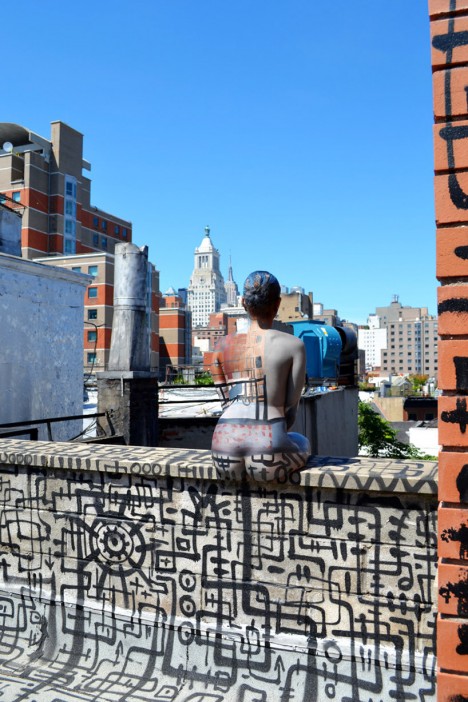
body paint central park

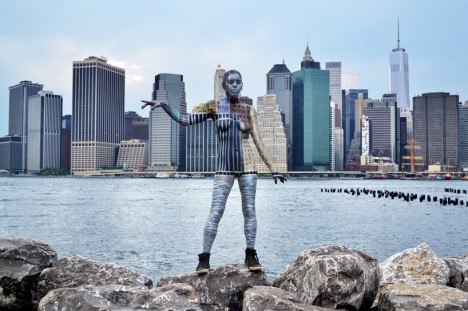
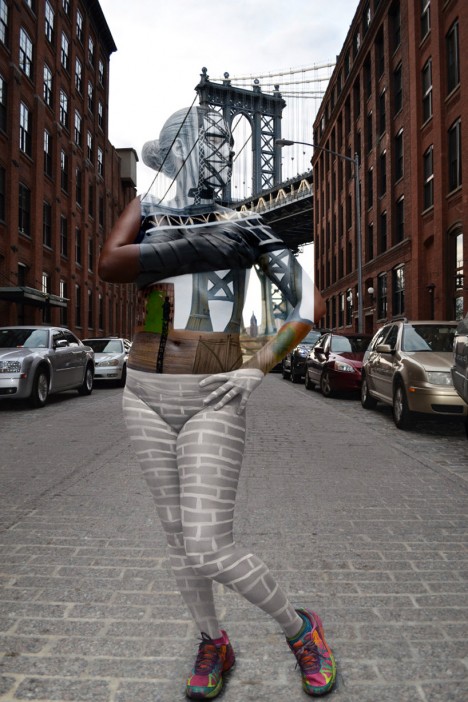
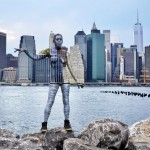
Unlike some other prominent artists working with more seamless urban camouflage in strange or offbeat settings, this work in NYC by Trina Merry allows for curves and distortions, and operates with the interplay between painted nudes in more public and iconic surroundings.

body paint manhattan skyline

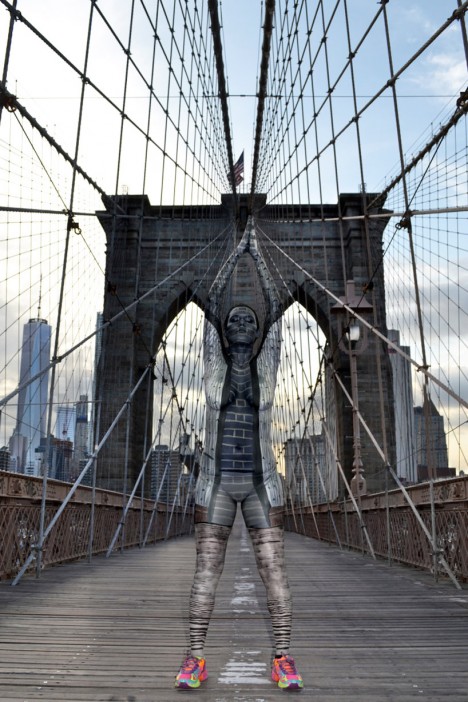
body paint brooklyn bridge

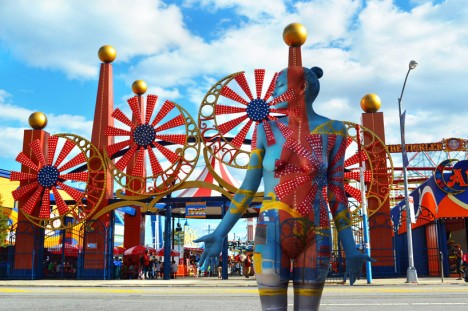
In this series, her work features backdrops that are prominent points of interest and world-famous landmarks of New York City, from famous architecture and infrastructure (the Guggenheim Museum, Empire State Building and Brooklyn Bridge) to urban and organic landscapes (like Coney Island and Central Park).

body art coney island

body painted guggenheim museum

Thanks to the prominence of these locations, this colorful work naturally becomes a live spectacle beyond the sculptural photographs taken of the models in place.

body painted empire state building

body painted art photography

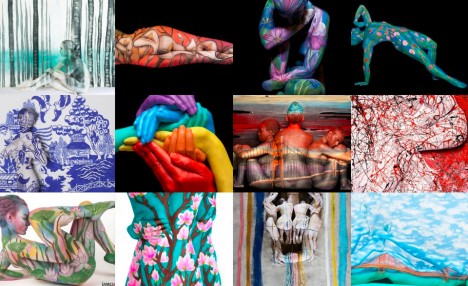
Other body paintings by Trina range from referential to abstract, with blank black or white backgrounds in some cases and period or modern artwork in others.

body with manhattan bridge

From the artist: “my surface is living, breathing human beings, making this a highly relevant & immediate. I use non-toxic hypoallergenic paint applied with a brush or airbrush. the painting is temporary like a Tibetan sand painting, beginning to [shift] into another work as soon as I stop painting, changing texture and color.”

Share on Facebook


[ By WebUrbanist in Art & Photography & Video. ]

[ WebUrbanist | Archives | Galleries | Privacy | TOS ]


WebUrbanist

 
Comments Off on Iconic Camouflage: Painted People Disappear into Cityscapes

Posted in Creativity


Weekly Photography Challenge – Cityscapes

03 May

Earlier today I shared a set of images of cityscapes. That’s designed to inspire you, make you say “wow” and want to get out there and photograph your city.

This week I’d like to challenge you to photograph close to home. If you live in a city, you’re all set! If you’re in the country or smaller town, you just need to get more creative or take a short drive.

You’ll notice that many of the cityscape images in the collection are shot at night. That’s when the city and the lights really come to life and dance for the camera. Find the best location and angle to photograph your cityscape. Try looking up at the buildings, or getting up high on a rooftop or balcony and looking down. Change up your perspective to create something different and striking.

Maybe try some black and white photography or even some HDR of the city skyline. Go capture the same scene at different times of day including: sunset, the blue hour (twilight), and after dark. Shoot wide and get the whole vista, and try some closer up and focus in on details. Here are a few images to give you more ideas:

By joiseyshowaa

By Chris Smith

By Christopher

By Pedro Szekely

By Justin Brown

By jesuscm

By Paolo Margari

By Pedro Szekely

By Justin Brown

By ZeroOne

By Nathan Congleton

By Shawn Hoke

By David Yu

Share your cityscape photos!

Simply upload your shot into the comment field (look for the little camera icon in the Disqus comments section as pictured below) and they’ll get embedded for us all to see or if you’d prefer upload them to your favourite photo sharing site and leave the link to them.

The post Weekly Photography Challenge – Cityscapes by Darlene Hildebrandt appeared first on Digital Photography School.


Digital Photography School

 
Comments Off on Weekly Photography Challenge – Cityscapes

Posted in Photography