RSS
 

Posts Tagged ‘Christmas’

Weekly Photo Challenge – Christmas

19 Dec

The post Weekly Photo Challenge – Christmas appeared first on Digital Photography School. It was authored by Sime.

While we don’t all celebrate all of the celebrations, it’s Christmas time this coming week, so we’d like to see how you celebrate or don’t celebrate it.

Tag your photos on social media and @ us! #dPSChristmas

Christmas can mean many different things to different people, and photographs can tell all of those different stories. We would love to see how you tell your Christmas story through photographs.

If you have some downtime over Christmas, make sure you revisit our weekly challenge from this year and try out the ones you missed, and remember, there’s a couple of days left on our Christmas ‘under $ 10’ sale if you’re interested!

Weekly Photo Challenge - Christmas
‘This Tree is Just for Christmas’

A statement on discarded Christmas trees or a lone mince pie, what will your story of Christmas be?

Weekly Photo Challenge - Christmas
Get your hands off my pie!

As ever, we’d love you to share your photograph in the comments on this post, or you can share them on social media and tag us, find the details and instructions below.

Great! Where do I upload my photos?

Simply upload your shot into the comments field (look for the little camera icon in the Disqus comments section) and they’ll get embedded for us all to see. Or, if you’d prefer, upload them to your favourite photo-sharing site and leave the link to them.

Weekly Photography Challenge – Looking Up

Share in the dPS Facebook Group

You can also share your images in the dPS Facebook group as the challenge is posted there each week as well.

The post Weekly Photo Challenge – Christmas appeared first on Digital Photography School. It was authored by Sime.


Digital Photography School

 
Comments Off on Weekly Photo Challenge – Christmas

Posted in Photography


How to Create Twinkle Lights for Christmas Tree Portraits in Photoshop

23 Dec

The post How to Create Twinkle Lights for Christmas Tree Portraits in Photoshop appeared first on Digital Photography School. It was authored by Jackie Lamas.

how-to-create-twinkle-lights-in-photoshop

Christmas is almost here and like you, many photographers are getting ready to photograph their holiday sessions and are likely using Christmas trees. In this article, we’re going to show you how to add a little more twinkle to your Christmas photos so that you can wow your clients. Even if your trees have lots of lights, this will show you how to create twinkle lights in Photoshop so you can add more cheer to your photos!

Image: Learn how to add twinkle lights to your holiday photo sessions in this article.

Learn how to add twinkle lights to your holiday photo sessions in this article.

Step 1. Create your twinkle lights pattern

In order to add the twinkle lights to the lights and create more lights, you’ll need to first create the brush preset. This isn’t as difficult as it seems. Of course, you could download brush presets online, but there’s nothing like having the perfect brush you’ve created for your photos.

1.1 Create a new document. It doesn’t have to be a large document. Use a predetermined one and make sure you aren’t using artboards and that your resolution is at 300dpi. A white background will help you see what you’re doing.

Image: Create a new document. It doesn’t have to be large since you’ll end up with a bru...

Create a new document. It doesn’t have to be large since you’ll end up with a brush preset that can be sized after.

1.2 Next, go into Brush Settings. If you don’t see this on the icon menus on the left (or where you have your tools), you can open it by going to Windows -> Brush Settings and the window with the settings will pop up.

How to Create Twinkle Lights for Christmas Tree Portraits in Photoshop

Choose the round brush with zero hardness – it should be brush 30 in the brush menu. It’s a predetermined brush.

Here, you’ll want to select the roundness of the brush to around 8%. This will make sure your brush is flat to make the different strokes of the twinkle.

For this tutorial, we’ve made our twinkle with 5 points, but you can get creative with the size and add in additional points if you like.

Image: You can see how the brush is flattened.

You can see how the brush is flattened.

1.3 Choose the angles of your brush. Respectively, they are 90-degrees, 180-degrees, 45-degrees, and -45-degrees to make the five points. You can set a ruler to help guide you, making sure the lines intersect in the middle. For this one, I just painted with the brush by eye.

How to Create Twinkle Lights for Christmas Tree Portraits in Photoshop

1.4 Once you have all five points or as many points as you want for your twinkle, go back to the Brush Settings and change the roundness back to 100%. With this brush, go to the center of your star and fill in the middle with a couple of clicks to add more to the middle.

This will give the twinkle a little more fullness and make it look like an actual light in the Christmas tree.

How to Create Twinkle Lights for Christmas Tree Portraits in Photoshop

1.5 We’re almost done! Finally, we’ll add in a nice Gaussian Blur to the twinkle so it looks more real in the background and the points on the starburst aren’t too harsh when you’re adding them into the images.

Of course, this is preference and you can make one brush with the blur and another brush without so you have options. We’ve added the blur to our starburst. Go to Filter -> Blur -> Gaussian Blur and choose how much blur you want.

How to Create Twinkle Lights for Christmas Tree Portraits in Photoshop

1.6 Now you have a nice full twinkle light! From here, we’ll need to create the Brush Preset pattern so that you can use it in the future on any image in Photoshop. Go to Edit -> Define Brush Preset -> Change the name to what you’d like to call it and click OK.

How to Create Twinkle Lights for Christmas Tree Portraits in Photoshop How to Create Twinkle Lights for Christmas Tree Portraits in Photoshop

This will create your brush pattern! Now you have your twinkle light brush ready to use and you can change the color and size.

Step 2. Clone lights to make the twinkle lights look more real

If you add your twinkle lights to the photo, it will look oddly out of place. This is because it needs an actual light to shine off of an actual light source. The best way to do this is to clone a light in the original photo to other parts of the tree before using the twinkle light brush.

While you could just paint on dots, they don’t have the same color and gradient as a light that is already in the tree and may look out of place.

2.1 To do this, first create a new layer so that your twinkle lights can become moveable after you’ve added them. Also, this will keep you from cloning and using the brush on the original image in case you need to start over, you can simply delete the layer.

How to Create Twinkle Lights for Christmas Tree Portraits in Photoshop

2.2 Now go to the layer of your original image, click on the Stamp Tool. In the menu bar at the top, make sure that you uncheck where it says Aligned. This will make sure to only clone the light as you click on various parts of the layer.

How to Create Twinkle Lights for Christmas Tree Portraits in Photoshop

Click on ATL and click a light. Make sure the brush is just large enough for the light tip so you don’t clone too much of the tree/background.

2.3 Once you’ve made your selection of which light you’ll clone, go back to the new layer and click on the parts of the image you see that you want to add the lights in. Don’t worry, you’re not cloning on the image itself, this layer is transparent and that’s why you can see the photo in the layer below. It helps to see where you’re putting the extra lights.

How to Create Twinkle Lights for Christmas Tree Portraits in Photoshop

2.4 All right, now that you’ve added more lights to the tree, you are ready to add in the twinkle lights brush! Go to Brush and choose the brush you just created. Usually, new brushes show up at the end of the brush list.

Choose your twinkle light brush. Make sure that the color for your brush is set to white. Alternatively, you can choose the color picker and get a warmer yellow color that matches the lights. It’s your choice! You can also add colored lights if you wish!

Leave the hardness and opacity at 100%, go to your new layer where you’ve cloned the lights on. Go to each light and add in the twinkle onto it. Adding the lights and the twinkle makes the twinkle look real and not too fake.

How to Create Twinkle Lights for Christmas Tree Portraits in Photoshop How to Create Twinkle Lights for Christmas Tree Portraits in Photoshop christmas-twinkle-lights

Change the size for a few of the twinkles so they look more random.

How to Create Twinkle Lights for Christmas Tree Portraits in Photoshop

3. Add in additional colors

The great thing about doing the twinkle lights this way is that because you’ve added them onto a transparent layer, you can move them around and resize them as you need.

The amazing part is that you can duplicate the twinkle lights layer, move it around, and add colors to it to create colored twinkle lights. Here’s a break down of how you do that for multiple colors:

3.1 Duplicate the twinkle lights layer.

How to Create Twinkle Lights for Christmas Tree Portraits in Photoshop

3.2 Move it around and transform it so that it’s not directly on top of the other twinkle lights. If you’re going to add in more colors, I suggest that you don’t add in too many twinkle lights in the original layer so that you can fill in those empty spots with the colored twinkle lights.

3.3 Go to Layer -> New Fill Layer -> Solid Color. Choose a color. I did blue, green, and red. But you can add in any color.

How to Create Twinkle Lights for Christmas Tree Portraits in Photoshop

3.4 You’ll end up with a solid color onto your images. Don’t worry, right-click on the layer and choose Create Clipping Mask to clip it to the twinkle light duplicate layer.

How to Create Twinkle Lights for Christmas Tree Portraits in Photoshop

How to Create Twinkle Lights for Christmas Tree Portraits in Photoshop
3.5 Go to Blending modes at the top of the layer window and choose Color. This will overlay the color on the twinkle lights and make it look more real.

How to Create Twinkle Lights for Christmas Tree Portraits in Photoshop

How to Create Twinkle Lights for Christmas Tree Portraits in Photoshop

3.6 A great tip is to merge each color to the twinkle lights layer. Then add a mask so that you can go into the layer with your brush and take out the twinkle lights for that layer without having to deal with the color clipping mask and all that.

It’ll make removing them easier. This is ideal in case you need to remove one from an ornament or face.

How to Create Twinkle Lights for Christmas Tree Portraits in Photoshop

You can also add a clipping mask to the original twinkle lights layer to help brush out unwanted twinkle lights as well.

Image: Using a mask on the layer can help you to take out unwanted twinkle lights.

Using a mask on the layer can help you to take out unwanted twinkle lights.

And that’s it! That’s how you add in additional twinkle lights in color to your image!

Image: Before and after with the twinkle lights in color. You can make it more subtle by adding fewe...

Before and after with the twinkle lights in color. You can make it more subtle by adding fewer twinkle lights.

Use in non-holiday images as well

Use this tutorial on other images where you’d like to add in some twinkle too! It doesn’t have to just be for holiday sessions, simply just use the brush only with a color set.

Image: Use the twinkle lights brush on other portraits that you’d like to add some sparkle to.

Use the twinkle lights brush on other portraits that you’d like to add some sparkle to.

Make sure you’re working on the transparent layer and play with opacity levels and additional colors.

How to Create Twinkle Lights for Christmas Tree Portraits in Photoshop

In a new transparent layer, I selected the twinkle lights brush and added the twinkle lights to various parts of the layer in white in different sizes. Then, set the blending mode to Overlay to get the right look. I also lowered the opacity.

Twinkle lights with more than 5 points

The great thing about adding in twinkle lights is that you’re creating your own brush preset! This lets you create different types of brushes, and one might be adding more points to the twinkle light.

Image: Here’s a comparison of no twinkle lights, a five-point twinkle, and a multi-point twink...

Here’s a comparison of no twinkle lights, a five-point twinkle, and a multi-point twinkle light.

Go through all of the steps in Step One, only this time add more angles and add in more points. It also looks great when you change the size within the same brush.

Image: In the close-up, you can see that the brush preset has more points than the five-point twinkl...

In the close-up, you can see that the brush preset has more points than the five-point twinkle light brush we made previously.

It’s really all about preference, so play around and see what look is the right one for your portraits.

In conclusion

Image: Before and after on another photo. This is more subtle and only uses white twinkle lights.

Before and after on another photo. This is more subtle and only uses white twinkle lights.

It may sound complicated the first time you give it a try, but with time it gets easier! Adding in additional twinkle lights can give your holiday photos a little more twinkle and pop that will make your clients very happy to see in their final images!

Will you be using this tip to add in twinkle lights to your images?

The post How to Create Twinkle Lights for Christmas Tree Portraits in Photoshop appeared first on Digital Photography School. It was authored by Jackie Lamas.


Digital Photography School

 
Comments Off on How to Create Twinkle Lights for Christmas Tree Portraits in Photoshop

Posted in Photography


Weekly Photography Challenge – Christmas

21 Dec

The post Weekly Photography Challenge – Christmas appeared first on Digital Photography School. It was authored by Caz Nowaczyk.

This week’s photography challenge topic is CHRISTMAS!

Weekly Photography Challenge – Christmas

Aaron Burden

It’s almost Christmas! OMG! Where did the year go?

Thanks to everyone who has taken part in the challenges this year – it’s been great fun, and often inspiring to see all your images. And I hope you continue to take part in this coming new year too.

So, for the last weekly photography challenge of 2019, with the theme of Christmas, you can take photos of anything that has a Christmas feel – portraits by the Christmas tree, with Santa, kids opening presents, or the family enjoying a Christmas feast.

Image: Mike Arney

Mike Arney

Alternatively, you might like to capture the Christmas lights on the tree, or ones around your city or town. Capture a still life of Christmas items, decorations, do some food photography or just capture the overall vibe of Christmas.

So, check out these inspiring pics, have fun, and I look forward to seeing what you come up with!

Weekly Photography Challenge – Christmas

Philippe AWOUTERS

Image: Chantal DeGaust

Chantal DeGaust


Check out some of the articles below that give you tips on this week’s challenge.

Tips for Shooting CHRISTMAS

5 Ways to Light Your Christmas Tree Portraits This Festive Season

How to Take Beautiful Bokeh Christmas Images [With 39 Stunning Examples]

How to Shoot Festive Lights from a Car

How to Capture Candid Moments This Christmas

16 Digital Photography Tips for Christmas

5 Ways to Take More Meaningful Photos This Christmas

How to Take Photos of Kids with a Christmas Tree Bokeh Background


Simply upload your shot into the comment field (look for the little camera icon in the Disqus comments section) and they’ll get embedded for us all to see or if you’d prefer, upload them to your favorite photo-sharing site and leave the link to them. Show me your best images in this week’s challenge.

Share in the dPS Facebook Group

You can also share your images in the dPS Facebook group as the challenge is posted there each week as well.

If you tag your photos on Flickr, Instagram, Twitter or other sites – tag them as #DPSchristmas to help others find them. Linking back to this page might also help others know what you’re doing so that they can share in the fun.

The post Weekly Photography Challenge – Christmas appeared first on Digital Photography School. It was authored by Caz Nowaczyk.


Digital Photography School

 
Comments Off on Weekly Photography Challenge – Christmas

Posted in Photography


10 Christmas Portrait Locations (with Bonus Lighting and Composition Tips)

19 Dec

The post 10 Christmas Portrait Locations (with Bonus Lighting and Composition Tips) appeared first on Digital Photography School. It was authored by Mat Coker.

christmas-portrait-locations

Everyone loves to see a nice portrait of the kids at Christmas. But it can be tough to brainstorm new Christmas portrait locations year after year.

Whether you’re photographing your own kids, or you’re a family photographer, this list of Christmas portrait locations will give you plenty of ideas including tips for lighting and composition.

1. Golden hour

Christmas can feel magical and golden hour is a magical time of day for light. You can find some evergreens for the golden sunlight to filter through and create a magical feel for your portrait. Consider using the golden sunlight as a beautiful source of backlight.

Christmas portrait locations

Golden hour is approximately the first and last hour of the day when sunlight looks almost golden. Personally, I love to work with the last 15 minutes of sunlight. I scout my location a few days in advance and take note of the exact time the sun is at its best.

2. Christmas lights in the background

Christmas lights can also be a good source of warm light. They work especially well if you prefer to stay indoors. Keep the tree back in a darker corner and use a window to light your person (this works well when photographing holiday food too).

You may find that a fully decorated Christmas tree can be a bit of a background distraction. A simple tree with lights adds a festive feel without being overwhelming.

Christmas portrait locations

The Christmas lights in the background echo the golden polka dots of her shirt. The catchlights in her eyes (created by the window light) help to bring the portrait to life.


Christmas portrait locations

You can see where she was positioned in relation to the window and the tree.


Christmas portrait locations

If you don’t have a window for a light source, you can use the flash on your camera. If you’re using your camera’s flash, there are two things to keep in mind. Keep the person away from the Christmas tree and get close to them with your camera. By staying close to them and keeping them away from the tree, the flash will light the person nicely but not overwhelm the tree with light.

3. While it’s snowing

If you live in a part of the world where there is snow, this is really fun for a Christmas portrait. But there are a couple of problems that you will likely run into.

The first is that your photo may turn out looking very dark. This is because the snow is so bright that your camera meter naturally wants to darken the photo. One way around this is to shoot in full manual mode, then you can get the exact brightness that you want. Personally, I shoot on aperture priority and use exposure compensation to get the correct brightness for my photo.

The second problem that you will run into when photographing during a snowfall is misfocused pictures. Your camera may autofocus on a snowflake in the foreground, leaving your subject out of focus. So, make sure to check your photo closely before packing up your camera. That way, you won’t be disappointed when you sit down to edit your photos and realize they’re all out of focus.

Christmas portrait locations

A darker background makes the snowflakes stand out more.

Be sure to protect your camera in cold weather too.

4. Christmas tree at home

This is a perfect opportunity to capture both posed and candid moments. Again, window light will be your friend when lighting your subject.

Notice that in the first photo I positioned the subject so that he is against a clean background. This way he stands out more and is not lost among the decor.

Christmas portrait locations

5. A quaint storefront

Our downtown street is filled with beautiful storefronts throughout December. These storefronts are a perfect Christmas portrait location. When using a storefront for a background, remember to frame the person neatly.

Once your subject is framed, go for a natural smile! You’ll probably have to say something funny.

Christmas portrait locations

Notice how the boy is framed in this photo. He is balanced by the tree on the left and the windows on the right. His head is in a clean space with nothing distracting protruding from it.

6. Rustic barnboard

If you like a rustic aesthetic at Christmas time, look for an old barn to use as a Christmas portrait location.

Christmas portrait locations

In this first photo, she is placed right up against the wall. I’m using a 50mm lens with an aperture of f/1.8 so the boards are a little out of focus.


Christmas portrait locations

I brought her a few feet away from the wall in order to make the background go more out of focus.

7. Use props

You can use all sorts of props in your photos. Sometimes a prop to sit on is more than enough to add visual interest to your portrait.

Christmas portrait locations

With an overcast sky, you can make portraits any time of day without having to worry about harsh shadows from direct sunlight.

8. Wrapping paper backdrop

Find a wide roll of paper with a nice design to use as a backdrop. Place it next to the window and you will have a wonderful natural light source.

Christmas portrait locations

9. Decorate the wilderness

It’s so much fun to bring a sack of Christmas ornaments on a hike and decorate a tree deep in the woods! Once you’ve done that, you’ve got a perfect Christmas portrait location.

Christmas portrait locations

10. Choose a theme

When thinking of Christmas portrait locations, consider building your portrait around a meaningful theme.

Christmas portrait locations

When my son was just two, I couldn’t resist creating a portrait inspired by Charlie Brown.

11. Storytime

Create a storytime theme using a big book as a prop. Remember that a window is a great source of light.

Christmas portrait locations

Try a posed portrait.


Christmas portrait locations

Once you have a nice pose, try a photographing a candid moment too.


12. Go to a tree farm

Perhaps you don’t have any nice scenery nearby. If that’s the case, then find a tree farm to use for your Christmas portrait location. If you don’t like the manicured look of rows of trees then go for an angle that doesn’t make it obvious that you’re at a tree farm.

10 Christmas Portrait Locations (with Bonus Lighting and Composition Tips)
Christmas portrait locations

The perfect gift

Have fun trying out several of these Christmas portrait locations! When you’re finished, your printed portrait will be one of the most meaningful gifts you can give to friends and family over the holidays.

Do you have any other ideas for Christmas portrait locations? If so, please share them with us in the comments!

The post 10 Christmas Portrait Locations (with Bonus Lighting and Composition Tips) appeared first on Digital Photography School. It was authored by Mat Coker.


Digital Photography School

 
Comments Off on 10 Christmas Portrait Locations (with Bonus Lighting and Composition Tips)

Posted in Photography


Weekly Photography Challenge – Christmas Lights

22 Dec

The post Weekly Photography Challenge – Christmas Lights appeared first on Digital Photography School. It was authored by Caz Nowaczyk.

In the spirit of the Christmas season, this week’s photography challenge topic is CHRISTMAS LIGHTS!

You could take portraits using christmas/fairy lights, use the lights for creative bokeh, photograph Christmas trees or houses all lit up. So many possibilities!

Some Instagram Inspiration:


View this post on Instagram


A post shared by Brandon Woelfel (@brandonwoelfel) on


View this post on Instagram


A post shared by Chris Spoons (@chris.spoons) on


View this post on Instagram


A post shared by Iggy & Michalina (@kanapowy_team) on


View this post on Instagram


A post shared by Alyssa (@justagirlwithbraids) on


View this post on Instagram


A post shared by Nikolay Dimitrov (@nikolay_dimitrov_photography) on

Check out some of the articles below that give you tips on this week’s challenge.

Tips for Shooting Christmas Lights

Step-by-step Guide to Long Exposure Photography

6 Tips for Shooting Long Exposure Night Photographs

How to Take Photos of Kids with a Christmas Tree Bokeh Background

How to Take Beautiful Bokeh Christmas Images [With 39 Stunning Examples]


Weekly Photography Challenge – Christmas Lights

Simply upload your shot into the comment field (look for the little camera icon in the Disqus comments section) and they’ll get embedded for us all to see or if you’d prefer, upload them to your favorite photo-sharing site and leave the link to them. Show me your best images in this week’s challenge.


Share in the dPS Facebook Group

You can also share your images in the dPS Facebook group as the challenge is posted there each week as well.

If you tag your photos on Flickr, Instagram, Twitter or other sites – tag them as #DPSChristmasLights to help others find them. Linking back to this page might also help others know what you’re doing so that they can share in the fun.


The post Weekly Photography Challenge – Christmas Lights appeared first on Digital Photography School. It was authored by Caz Nowaczyk.


Digital Photography School

 
Comments Off on Weekly Photography Challenge – Christmas Lights

Posted in Photography


5 Ways to Light Your Christmas Tree Portraits This Festive Season

04 Dec

The post 5 Ways to Light Your Christmas Tree Portraits This Festive Season appeared first on Digital Photography School. It was authored by Mat Coker.

You want to snap a picture of the kids around the Christmas tree. But after finally getting a photo where they’re all looking happy, you’re disappointed with how it turns out.

In this scene both the tree and the people are nicely illuminated.

Why is it so dim? Where’s the ambiance? Why can’t I capture what I’m seeing with my eye?

The classic Christmas tree portrait can be problematic. And many of those problems have to do with light. So today I’m going to walk you through the five major lighting solutions for better Christmas tree portraits.

I want you to be able to set up a quick shot in front of the tree and have it turn out well. And to do that you need to light the people in the photo without ruining the mood of the Christmas tree lights.

Nighttime vs Daytime Tree Photos

There’s a big difference between taking a Christmas tree portrait at night and taking one during the day. What’s the difference? Light. During the day you can make use of natural window light. However, at night you have to create your own light, which means you’re often taking your tree portrait in a dimly lit room.

So let’s cover nighttime tree photos first, then daylight. Because shooting photos in daylight is easy.

1. Ambient Light by Accident

Ambient light simply refers to the light already present in the scene – the light from your tree, whatever other bulbs you have on in the room, and maybe some lamps or an overhead light.

Many people prefer using ambient light to their camera flash because the flash often ruins the mood of the scene. Working in ambient light can be wonderful providing you’re intentional about it. You can’t just turn on the tree lights and hope for the best.

This was our first ever family photo around the Christmas tree. Like most families, I propped up the camera and set the ten-second timer. But clearly, it didn’t work. Even though the tree is glowing nicely, we’re not lit at all.

2. Ambient Light on Purpose

If you’re going to rely on ambient light for your photos (rather than using your camera flash), you need to get extra light on the people without it spilling onto the Christmas tree. You don’t want to spoil the mood and glow of the tree lights, but you still want the people to be lit nicely.

Try moving some lamps around. Don’t just turn them on to get more light. Move them closer to the people.

This portrait was taken using only the tree lights and a small lamp. Because of the way they diffuse light, lamps create soft light.

3. Pop-Up Flash

Sometimes the ambient light just doesn’t work. So how else can you light the scene? By using the pop-up flash on your camera.

I can hear you groaning. “But I hate the look of flash.” Me too. But there are things you can do to make it look better. And what you rather have – a photo lit as well as possible with flash or no photo at all?

Remember, the idea is to light the people without ruining the mood of the tree lights.

Here’s how to do it:

  1. Move the people in your photo away from the tree a little (three feet or more).
  2. Get as close to the people as you can.

Why do it like this? Because when you’re closer to the people, the flash sends out a smaller burst of light. Once it reaches the people in your photo it fades out quickly, which means it won’t light up the tree too much.

In this photo the pop-up flash has lit the entire scene, ruining the ambient light of the Christmas tree. I need to bring her away from the tree and closer to the camera so the flash lights her but not the tree.


While I also used the pop-up flash in this photo, this time she’s further away from the tree. Now she is lit nicely by the flash, while the tree remains untouched by the flash.

4. External Flash

If you don’t like your pop-up flash blasting light directly at your subject, you could try using an external flash instead. It still attaches to your camera, but you can aim it at the ceiling or a wall to bounce the light off that surface and onto your subject.

I used an external flash for both of these photos. For the photo on the left, I pointed the flash at the wall so the light bounced back to light her up. In the photo on the right, I pointed the flash at the ceiling.

Bouncing light can be tricky when it comes to color. As well as the light, it will also reflect the color of the wall or ceiling it bounces off. (Direct flash is a much cleaner light than bounced flash.) As you can see, the photos I took with the external flash look much warmer. But I can adjust that with a program such as Lightroom.

Notice how her eyes are a little dark in this photo? The light is being bounced off the ceiling above her and isn’t lighting up her eyes. To avoid that, back up a little farther so the light bounces back in front of her and not just above.

Tip: If your flash seems too bright, turn down the power with flash exposure compensation.

I turned the flash power down all the way in order to add just a little bit of light to the scene.

5. Window Light

Window light is is my favorite form of natural ambient light. It’s bright and soft, and illuminates people wonderfully for photos.

This works best when the tree is tucked into a corner out of the window light so it still has some glow for the photo.

Here the tree is tucked into a dim corner so the lights can glow. The kids will sit on the stool and be lit by the window.

Have the light from the window lighting people from the side to create some dimension in the photo through shadow.

The window light provides soft light with just a hint of contrast from the soft shadow. Notice that her left cheek is just a little bit darker than her right.

Notice the glow of the tree and the nice soft light illuminating the portrait.

However, try not to get split light. Have them look toward the window slightly.

Because she’s turned away from the window, a shadow is now dividing her face. Even though it’s still a soft shadow, the light on her face isn’t as pleasing.

In this group portrait, you can even see catch lights in their eyes.

They are turned ever so slightly toward the window, ensuring their faces are nicely illuminated.


Even though I had no idea what I was doing at the time, this is a good example of a glowing Christmas tree combined with window light. There’s a small window illuminating his face, and a larger one creating edge light around his arm and head.

Practice Makes Perfect

Remember, your goal is to set up a quick shot in front of the tree where you’re lighting the people without ruining the glow of the tree lights.

Practice using both flash and window light so you’re prepared for anything. Feel free to share examples of your christmas tree portraits that you’ve taken and how you lit them in the comments.

The post 5 Ways to Light Your Christmas Tree Portraits This Festive Season appeared first on Digital Photography School. It was authored by Mat Coker.


Digital Photography School

 
Comments Off on 5 Ways to Light Your Christmas Tree Portraits This Festive Season

Posted in Photography


How to Capture Candid Moments This Christmas

02 Dec

The post How to Capture Candid Moments This Christmas appeared first on Digital Photography School. It was authored by Mat Coker.

Ever since I was a little kid with a 110 camera and little rolls of film, it’s the candid moments I love to capture.

At Christmas, that often meant the expression on someone’s face as they opened a gift. However, over the years I discovered that there is a lot more to Christmas than the excitement of opening gifts.

I’ll show you a few specific ingredients to use if you would like to better capture candid moments this Christmas.

1 - How to Capture Candid Moments This Christmas

Our living room window is a backdrop for candid moments to happen. Many times I have passed through the living room, only to stop and fumble for my camera to capture something interesting.

Why Candid Moments?

Taking candid photos is a fun challenge. You don’t get to direct the scene, and you have to take whatever the moment offers.

The benefit to this is that you really get to see what is going on. Many people complain that they miss out on a group or family experience because they’re always taking pictures. If you focus more on seeing than on clicking, you may find that you’re more in-tune to events than ever before.

“The camera is an instrument that teaches people how to see without a camera.” – Dorothea Lange

Even though you’re not in control of the scene, you can still make the most of the moments given to you by:

  1. Understanding the type of moment
  2. Choosing the best angle
  3. Paying attention to your background
  4. Learning to write about your photos
2 - How to Capture Candid Moments This Christmas

When our kids were young they always napped over the Christmas holidays. The days were packed with activities and they were exhausted by the afternoon. My little girl fell asleep with an LED lantern. I couldn’t help but sneak in for a photo. I pushed my camera to its limits with this low light photo. 56mm, f/1.2, 1/15th, ISO 6400.

1. What kind of moment is it?

This first question I ask about a candid moment is whether it’s an action moment or an emotional moment.

What inspired you to pick up the camera? Are you anticipating a burst of excited emotion? Is somebody about to do something?

Action vs emotion is a quick way to understand the nature of the moment that is about to happen. This becomes more intuitive over time so you won’t have to overthink it.

3 - How to Capture Candid Moments This Christmas

I consider this to be an action moment. It is about my son playing with his model plane. Action is often about gesture. He is holding the plane precisely, and you can even see by the shape of his mouth that he is making the sound of the airplane. The plane is in focus so we likely look at it first, but then we’re led back to his face. His eyes are looking at the plane, so our focus is brought back to it as well. The more engaged a person is in an action moment, the more interesting the photo will be to you.


4 - How to Capture Candid Moments This Christmas

This is more of an emotional moment. It’s not a high energy moment like laughter or tears, rather it’s soft and subtle. It’s among my favorite portraits of my daughter. The only thing that indicates Christmas in this photo is the paper crown from her Christmas cracker, a tradition carried on for at least four generations in my family.

2. What is the Best Angle to Use?

There are five main angles from which you can choose:

  • Bird’s eye view
  • High angle
  • Face to face
  • Low angle
  • Bug’s eye view

My favorite angles for candid moments are high-angle because it often makes the scene appear more dramatic, and face-to-face, because it’s such an engaging angle.

5 - How to Capture Candid Moments This Christmas

This is an action moment. My son was playing with his new helicopter. I went for a low angle because I wanted to be looking up at the helicopter. Normally, we see helicopters in the sky, so let’s go for a more dramatic looking angle. In this action moment, you can even see him lifting his foot for balance. When kids play, they get right into it!


6 - How to Capture Candid Moments This Christmas

High angles are great for looking over shoulders. Some moments are tough to define as simply action or emotion. Though my son is looking at the pictures in his new book, it’s not exactly what we think of as an action moment. We can’t see his face to detect any emotion. But this photo comes to life in my mind as I think of all the times I read him this book while he was tucked into bed or sitting on my lap. In that sense, I would call it an emotional moment.


7 - How to Capture Candid Moments This Christmas

I jumped up on the coffee table to get this bird’s eye view angle of my son. He had just tried crawling for the first time and collapsed after using all his energy trying to reach a can a play dough!

3. Pay Attention to the Background

Backgrounds can be a distraction in your photo if they are messy or cluttered. But they can also add to the mood or story of your photo.

I try for one of two types of backgrounds:

  • Clean and simple
  • Scenic

You can see that the photos above either had a clean and simple background or something more scenic, but not cluttered.

8 - How to Capture Candid Moments This Christmas

I love this humorous photo of my daughter, but the background is really cluttered and distracting. One thing I could have done while taking the picture is to get closer to her. That way she would appear larger and there would be less background. But another way to deal with a cluttered background is to crop it away!


9 - How to Capture Candid Moments This Christmas

This face to face angle draws me right into this photo. The background is clean and simple with no distracting elements. I find that black and white often draws out the humanity and emotion of the moment.

4. Journal

Many photographers understand themselves to be creative people. Creative people are often compelled to write.

Take time this Christmas season to write about what is happening in your life. You can write about your kids, your parents, or your traditions. Think of it as a way of preserving some of your family history. Write about the moments of days gone by and the new moments happening around you.

Christmas can be a very difficult season for people who struggle with depression or anxiety. It can be a very sad time of year when you miss loved ones. Many people have found that writing helps you wrestle with and take control of what you’re struggling with.

10 - How to Capture Candid Moments This Christmas

Inspired by photojournalists, take time to truly reflect this Christmas. Add words to your photos.

This Christmas

As you grab your camera to take candid photos this Christmas, think:

  • Is this an action or emotion moment?
  • Which angle would look best?
  • Is the background clean or scenic?
  • What will I write about?

I would be thrilled to see some of your favorite Christmas photos when you post them in the comments below!

The post How to Capture Candid Moments This Christmas appeared first on Digital Photography School. It was authored by Mat Coker.


Digital Photography School

 
Comments Off on How to Capture Candid Moments This Christmas

Posted in Photography


5 Ways to Take More Meaningful Photos This Christmas

13 Dec

Christmas goes by in the blink of an eye. But taking photos helps us to savour the moments long after the tree is gone and the kids are grown up. When you follow these 5 tips, you’ll have better and more meaningful photos this year.

First - 5 Ways to Take More Meaningful Photos This Christmas

1. Don’t Get Caught Off Guard

The first step to photographing an upcoming event like Christmas is to do a little planning. Start by considering the traditions and moments that you want to look back on in photos. Write an actual list so that you don’t forget what’s on it.

When you’re finished writing out your list, do this exercise to help you figure out what is truly meaningful about those moments. When you do this exercise, you’ll be able to capture deeper themes in your photos.

Take each moment and ask yourself, “What about this moment is important to me?”

For example, you might put “opening presents on Christmas morning” on your list. That’s an obvious one. But ask yourself, “What about the kids opening presents is important to me?” Perhaps the answer is something like, “seeing the look of delight on their faces.”

But don’t stop there; you’ve only gone a little bit below the surface. Now ask yourself, “What about seeing the look of delight on their face is important to me?” Maybe the answer is, “I remember what it was like as a kid and I want to pass that magic and excitement on to my kids.”

Sleep - 5 Ways to Take More Meaningful Photos This Christmas

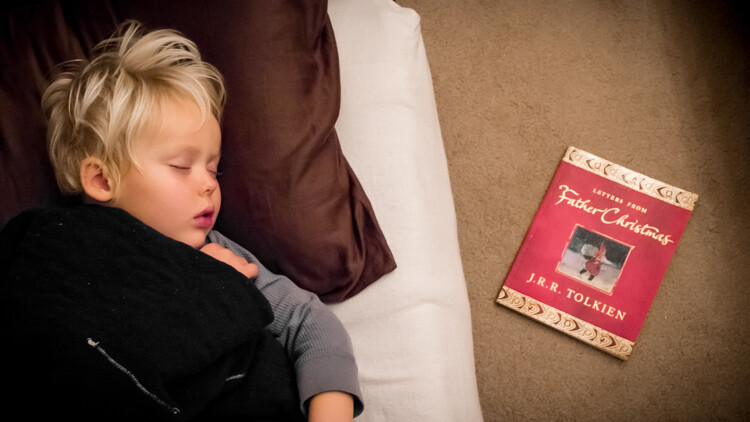
Do you remember when you were a kid how hard it was to fall asleep on Christmas Eve? After putting the presents under the tree, I snuck in to take this photo of my son as he lay sleeping. This is the book we were reading for his bedtime story.

Now you’re getting somewhere! But you can still keep asking that question until you get right to the bottom. What about “passing on magic and excitement” to your kids is important to you? “Well, this is such a short time in their life. Soon they’ll be grown up and stressed out like me. I just want to slow that down and make their childhood good.”

You’re finally getting deep, so ask the question one more time. “What about slowing down and making their childhood a good one is important to me?” Maybe the answer is that “these are the most formative years of their life. If their childhood goes well, they’ll likely grow up and become good and strong adults themselves.”

By asking the question, “what about this moment is important to me,” you will discover the deeper themes in your photos. Now you can look for those themes in other moments too. Where else do you find the magic and excitement of growing up?
Get in touch with the things that will shape your children as they grow and the things you care most about.

Instead of a few random snapshots of Christmas morning chaos, you can photograph all sorts of meaningful moments to look back on.

Better Christmas photos 01

This is one of the most meaningful photos I have of Christmas time. Not only do I love the quiet moment and beautiful candlelight, but the photo was taken at my grandma’s church on Christmas Eve. It was my son’s first Christmas Eve church service and it was our first Christmas without my Grandma. The photo reminds me of the traditions and hope that is passed down the generations in our family.

Sick - 5 Ways to Take More Meaningful Photos This Christmas

A tender moment between mom and daughter. Our daughter came down with a fever this Christmas. Giving our kids gifts is an exciting part of parenting, but so is comforting them when they are sick. I knew this was a moment worth capturing.

2. Prepare for the Light

You’ve got your list of moments to photograph and you’ve checked it twice! Now you need to consider the type of light in which you will be photographing. When you’re able to handle the light, your photos will look better.

Go ahead and use the flash on your camera (or phone) if you have to. It’s better to have a photo lit with flash than a dark and blurry photo that isn’t worth looking at.

Better Christmas photos 02

This was our first Christmas together as a family. I had read that you shouldn’t use the flash on your camera, so I didn’t. Unfortunately, the photo is so dark you can’t see us. I wish I had used the flash!

Better Christmas photos 03

I used the popup flash on my camera for this photo. It doesn’t always work out this nice though. If you’re going to use the little built-in flash on your camera, then get as close as you can to your subject. The flash will light them up, but not affect things in the background so much.

If you have a DSLR camera and you’re going to use flash, consider using an external flash called a speedlight. When you use an external flash you can bounce the light and your photos will look far better than the little pop-up flash on your camera.

Better Christmas photos 04

An on-camera speedlight was used to light this photo. It was pointed up toward the ceiling so that the light would become softer as it bounced back down toward my son. The Christmas lights in the background are far enough away that they weren’t affected by the flash.

But whenever possible, use natural light. When you’re taking indoor photos, one of the best sources of natural light during the day is a large window. Many of your holiday events will happen in the living room, and most living rooms have a large window which lets in lots of light.

Place your Christmas tree beside the window instead of in front of it and allow the window to become a large, soft light source, making your photos look beautiful.

Better Christmas photos 05

Here the kids are at Grandma’s house. There is a large window to the right which is lighting them up. The Christmas tree is tucked into a corner away from the window.

Better Christmas photos 06

Again, there is a large window providing light for this photo. The tree is tucked away from the window allowing the lights to keep their glow.

When the sun goes down, and you don’t want to use flash, try using lots of lamplight in your photos. The lower placement of lamps simulates the position that the sun is in during golden hour or sunset. The lampshade diffuses the light making soft sidelight for your photos.

Better Christmas photos 07

This photo was lit with two lamps. The warm, soft light provides ambiance for the moment.

3. How to Make Your Photos Look More Exciting

There is a secret that will instantly make your photos look more exciting. Use a low angle! It sounds simple and it is. Just crouch down a little bit and look up at the person you’re photographing. If it’s an exciting moment then use a low angle to make it look exciting in the photo.

You should take note that low angles are not generally good for formal portraits. A low angle exaggerates a person’s size and adults don’t usually like that. But, if it’s a portrait of an athlete or rock star then a low camera angle is a must.

Better Christmas photos 08

We all remember how fun it was to play with the empty wrapping paper rolls as kids. I wanted to make this moment look epic so I crouched down for a low angle.

Better Christmas photos 09

When my son unwrapped his emergency set he wanted to play with it immediately. I went for a low angle because in real life we always look up to see a helicopter flying. It’s just a photo of a boy with his toy helicopter, but I wanted a more dramatic effect. Notice the burst of backlight coming from the big window in the background.

Better Christmas photos 10

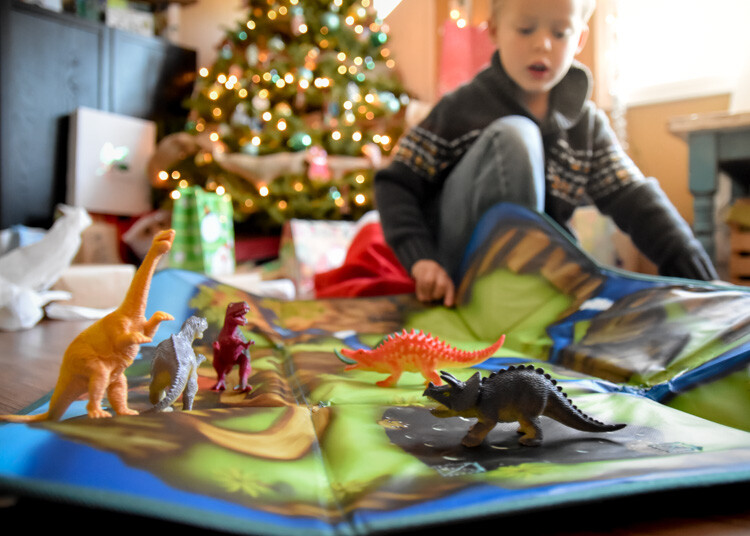
This low angle gives us the fun perspective of the toys looking up at everyone.

4. Tell a Story With Your Photos

As you’re photographing your most important moments, in beautiful light, from interesting angles, be mindful of the fact that you’re photographing a story. Your story is filled with characters (your friends and family), with an emotional plot that takes place in many settings (around the dinner table, the Christmas tree, at church, in front of the fireplace).

Photograph the unique personality of each character. Take more than one photo of each moment and link them together to show the plot-line. Make sure to include the background as part of the setting for your character’s story.

The photos below illustrate a story being told over time.

Better Christmas photos 11

This was the year that my son first learned to print letters and read simple words. Here, he’s writing the tags for Grandma’s presents.

Better Christmas photos 12

The following Christmas he had begun to spell out words on his own.

Better Christmas photos 13

After our family Christmas trip to Grandma’s house was over, both of the kids were really sad. So as they went to bed that night, they drew pictures to mail to Grandma. But my son wrote her a whole letter. He had never done anything like that before.

It’s exciting when we bring our kids into our traditions. Something as simple as filling out a gift tag is a huge step in their growth and part of a bigger story.

5. Practice Before Christmas Day

Christmas isn’t just about what happens on December 25th. For most families, Christmas has a month-long lead up. So work on your list of things to photograph, but remember to start photographing Christmas before it even gets here.

Practice looking for deeper moments in beautiful natural light (or using your external flash). You’ll be far more confident when the big day arrives and you don’t have time to over think the photos you’re taking.

Better Christmas photos 14

This was my first Christmas using a speedlight with my camera. As soon as our tree was up I began experimenting so that when Christmas arrived I would know how to use it. This shows a pretty good balance of ambient light from the tree mixed with the light from my flash.

Listen to Your Heart

When your heart tells you to pick up your camera and snap a photo, do it. Don’t hesitate, just take the photo. It may not turn out to be the perfect moment or the best angle. But at least you’ve got a photo.

Better Christmas photos 15

This is one of the most precious photos I have.

The photo above is my daughter and my grandma. It was just a fun little moment that they were having together. My camera is never out of arm’s reach at Christmas time. I saw this moment and clicked a few photos. I didn’t know then that these would be the last photos I would take of my grandma. My little girl won’t remember this moment, but she will always be able to look back and see the love that her great-grandma had for her.

Your Checklist for Deeper Christmas Photos Than You’ve Ever Taken Before

  1. Make your list of important moments
  2. Look for beautiful light and have your external flash ready
  3. Use low angles to make exciting events actually look exciting in your photos
  4. Tell a story with your photos
  5. Practice before Christmas day

The post 5 Ways to Take More Meaningful Photos This Christmas by Mat Coker appeared first on Digital Photography School.


Digital Photography School

 
Comments Off on 5 Ways to Take More Meaningful Photos This Christmas

Posted in Photography


Photographer Dad creates epic Star Wars Christmas card for his family

07 Dec

$ (document).ready(function() { SampleGalleryV2({“containerId”:”embeddedSampleGallery_4561903709″,”galleryId”:”4561903709″,”isEmbeddedWidget”:true,”standalone”:false,”selectedImageIndex”:0,”isMobile”:false}) });

Photographer Josh Rossi is no stranger to creating epic photography for and of his family. His portraits of his daughter as Wonder Woman swept across the Internet like wildfire, and he’s continued doing amazing work, including this touching series where he transformed disabled kids into Justice League superheroes.

So why did he let some run-of-the-mill “family photographer” take last year’s Christmas pictures for him!?

He didn’t know either. In fact, he felt deeply ashamed by this lapse in judgement, and so he set to work creating something amazing to redeem himself this Holiday season. Cue Star Wars theme.

“I’m a huge Star Wars fan, and my wife has been asking me to do some pictures of us so I went all out this year for our family photos,” Rossi tells DPReview. And by all-out, he means he recreated the Star Wars: The Last Jedi posters featuring himself, his wife, and their two children instead of the lead actors.

“I had such a fun time doing this with my family,” he told us, “especially with my 1 year old.”

Rossi sent over a few behind the scenes images for us (below) and you can see the final shots in the gallery at the top.

$ (document).ready(function() { SampleGalleryV2({“containerId”:”embeddedSampleGallery_5449957447″,”galleryId”:”5449957447″,”isEmbeddedWidget”:true,”standalone”:false,”selectedImageIndex”:0,”isMobile”:false}) });

To see more of Rossi’s work, or if you just want to say hello and kudos for another really creative and well-executed project, head over to his website or give him a follow on Instagram and Facebook.


All photographs by Josh Rossi and used with permission.

Articles: Digital Photography Review (dpreview.com)

 
Comments Off on Photographer Dad creates epic Star Wars Christmas card for his family

Posted in Uncategorized


dPS 12 Days of Christmas: Save up to 85% on Some Great Photography Training and Tools

13 Dec

NewImage

In 24 hours our dPS 12 Days of Christmas celebration begins!

This is when you’ll score HUGE savings on our most popular products and MASSIVE discounts with some very special dPS partners so that you have the best resources to reach your photography goals for 2017.

It works just as you’d expect. Over 12 days, we’ll announce a brand new deal every 24 hours.

To get notified of each deal just add your email address below.

(function(d, s, id) {
var js, fjs = d.getElementsByTagName(s)[0];
if (d.getElementById(id)) return;
js = d.createElement(s); js.id = id;
js.src = “//forms.aweber.com/form/33/1265496433.js”;
fjs.parentNode.insertBefore(js, fjs);
}(document, “script”, “aweber-wjs-srgepzl3e”));

Each day you’ll receive an email from us with a special offer from us or a partner.

Many of our deals are offering 70% to 85% off the normal price.

We’ll also share the deals on our Facebook page, but the best way (so you don’t miss a thing), is to sign up for the emails above.

On signing up you’ll also get a special free downloadable gift from dPS – our mini-guide and checklist for photographing the holidays.

NewImage

Our annual 12 days of Christmas is the most anticipated event on the dPS calendar – and this year is going to be bigger than ever! It starts in less than 24 hours and is always lots of fun. We hope you’ll join us.

We can’t wait to unveil the first deal with you…just 24 hours to go!

Again – to get the deals via email just sign up below.

(function(d, s, id) {
var js, fjs = d.getElementsByTagName(s)[0];
if (d.getElementById(id)) return;
js = d.createElement(s); js.id = id;
js.src = “//forms.aweber.com/form/33/1265496433.js”;
fjs.parentNode.insertBefore(js, fjs);
}(document, “script”, “aweber-wjs-srgepzl3e”));

googletag.cmd.push(function() {
tablet_slots.push( googletag.defineSlot( “/1005424/_dPSv4_tab-all-article-bottom_(300×250)”, [300, 250], “pb-ad-78623” ).addService( googletag.pubads() ) ); } );

googletag.cmd.push(function() {
mobile_slots.push( googletag.defineSlot( “/1005424/_dPSv4_mob-all-article-bottom_(300×250)”, [300, 250], “pb-ad-78158” ).addService( googletag.pubads() ) ); } );

The post dPS 12 Days of Christmas: Save up to 85% on Some Great Photography Training and Tools by Darren Rowse appeared first on Digital Photography School.


Digital Photography School

 
Comments Off on dPS 12 Days of Christmas: Save up to 85% on Some Great Photography Training and Tools

Posted in Photography