RSS
 

Posts Tagged ‘Choose’

How to Choose the Right Location for Your Photo Session

15 Feb

The post How to Choose the Right Location for Your Photo Session appeared first on Digital Photography School. It was authored by Jackie Lamas.

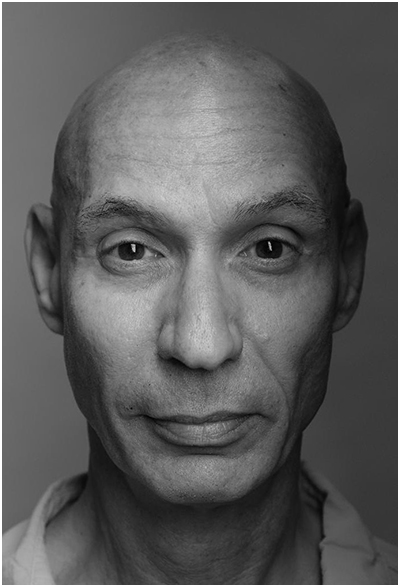
It’s thought that clients are the ones who choose the location for their portraits, but more often than not, choosing the right location is left entirely up to the photographer. In this article, we’ll outline a simple formula to help you and your client settle on the perfect location for the session.

1. It’s not about location, it’s about the look and feel

When you talk to your client about possible locations, change the language you use. Instead of “have you thought of where you want your session to take place” with “what look and feel would you like your photos to have?”

That simple change in language will help your clients to visualize their final images. I’ve listed a few words that can help your client choose which look and feel they want for their final images. Thus, helping you to choose the best location for the session.

These two locations offer different “feelings”.

  • Ethereal: This can be an open field, nature park, or a bright location with little to no busyness in the background like buildings.
  • Nature/natural: Here you can offer a park with lots of green grass and tall trees. Giving them a more natural feel to the photos. You can also offer a field of wildflowers.
  • High fashion/urban: This is definitely in a busy neighborhood or downtown area with lots of big buildings, reflective windows, and metal accents. Giving lots of contrast to the photos and the look and feel of a busy city.
  • Vintage: This can mean either old architectural buildings with wooden doors and big arches or it can mean that they want a location where there are lots of vintage accents, like a neighborhood of restored or historical homes.
  • Warm/homey: These words are a little broad but they can mean that the session can happen at a nice warm location like a field or during sunset at the beach. Homey can mean that they want to feel comfortable and relaxed, which can mean a location they frequent or even their own home.
  • Beach: This one is pretty easy, you can offer the beach if you are near one as a location. The time of day will give you the look and feel. The morning will give you a more blue and pink hue whereas during sunset you’ll get the beautiful golden hour lighting. Make sure to explain both options to your client so you can choose the right time for the look and feel they are visualizing.
  • Meaningful location to the client: Yes, this is an option as well! Especially for engagement sessions because it can be really meaningful to have the photo session at a location where the couple met, or where they got engaged, or simply where they spend a lot of their time together. This is also important for clients celebrating anniversaries or a really important milestone, like graduating from high school or college.

Two different locations for the same maternity portrait session to offer variety.

2. Ask what their home decor looks like

Another way to set a location for the portrait session is to find out what kind of home decor, theme, or color scheme they already have. This way, when it comes time to hang beautiful photos in their home, you can be sure that it won’t clash with the rest of the home.

Your clients will appreciate that you took the time to find out what would look best in their home before even taking a single photo. This makes you look even more professional because you are going to choose the perfect location so that when they are ready to frame, they are reassured that the photos you took will match their home decor perfectly.

This can also help you to upsell items like albums because you’ll know the right album cover and color to choose for each one of your clients. It will make them see that you care more about how their photos will match their home rather than simply choosing an easy location for all of your photo sessions.

For example, choosing a black leather cover for an album can look great in a contemporary modern home whereas a fabric cover album would look better in a more country style home. Or another example would be if the home has brown, beige, and reds in the decor then a perfect location would be a field of flowers.

3. Time of the session

Time can be a huge factor in choosing the right location. Some families need to keep nap times and energy levels in mind when scheduling a session. For example, if your clients need to keep in mind a little one’s nap time at 2 pm, you can choose to have the session in the morning or in the evening when the child is at his best. Photographing in a park that is rich in trees and greenery can help shade you from afternoon light or keeping the sun off your clients.

Or, you could schedule the family during the golden hours at a nearby beach or lake so that the child can play and still have had his nap time earlier.

Sometimes the time is dictated by the location itself. For example, photographing in an urban setting where tall buildings can shade the sun during sunset means that you might have to photograph your client at an earlier time to have enough light.

Or, if you’re photographing in a field, sometimes the early morning hours are best when it’s cool and not so bright. Golden hour is also perfect for fields and beaches.

Midday sun at the beach may be a little harsh but it is still doable. Speak with your clients to choose the best time that works for their schedule.

Talk with your client to see if time will be the determining factor in choosing the right location.

4. Use your website to help choose the location

Chances are, your clients have already looked through your website and have fallen in love with your style! This is great because this can also help your clients to choose the perfect location for their portraits.

This photo is a common favorite on my website since most family sessions are on the beach and during sunset.

If your clients are having trouble visualizing what they want their photos to look like, have them go over to your website and point out a photo that they like the most.  The one that just jumps out at them and had them convinced they wanted you to photograph them.

If the location is nearby or accessible, offer that same location to your client! They loved the photo and it is what led them to contact and hire you, so why not photograph them there? It’s guaranteed that they’ll love the final photos.

5. When they leave it up to you

Even though you’ve gone through all the steps above, some clients don’t know what they want for their photos. They’ll look to you to offer up the best locations because what they want is to have the best photos possible so any location, look, and feel is okay with them.

When this happens, don’t be afraid to take charge. Choose a location that perhaps you’ve been wanting to photograph in for a while, or a location that you know has great golden hour lighting.

Sometimes, clients just need more of a visual to get an idea of what they are actually looking for. Send your clients links to two or three specific locations that you’ve chosen so that they can see with their own eyes what the images will look like. Blog posts and images from your website would be perfect examples.

This way, even though they don’t know what they’re going for, they can choose the one that seems more interesting to them. Giving them the final decision on where they would like the location for their session to take place.

6. More than one location

Depending on your portrait business model and what you have offered your client, and if you’re willing, you can do one session in multiple locations.

For example, if you are photographing an engagement session and they are going for a natural park look but got engaged in front of the downtown theater, then you could offer your clients to photograph in both locations for their session. Either on the same day or on different days.

Photographing in multiple locations offer your clients a variety in their photos so that they can showcase different photos in different rooms in their house as well!

Of course, sticking to one location where there is variety in looks can also be an option to add variety to the photos without having to go somewhere else.

In conclusion

Each session is different and each client is different, using the tips above will help you to determine the perfect location for all of your sessions. When you guide and help your client visualize the perfect location for their session, you will not only look more professional, you will be giving your clients a very personalized experience that they will appreciate. Resulting in more referrals and return clients!

The post How to Choose the Right Location for Your Photo Session appeared first on Digital Photography School. It was authored by Jackie Lamas.


Digital Photography School

 
Comments Off on How to Choose the Right Location for Your Photo Session

Posted in Photography


How to Choose the Right Photography Backdrop

21 Jan

The post How to Choose the Right Photography Backdrop appeared first on Digital Photography School. It was authored by Mark C Hughes.

So, you’ve picked up some strobes to help light your subjects and are in the process of setting up your studio. This is a very exciting time: so much to photograph, total control of the lighting, what an opportunity…. but how to choose the right photography backdrop? How you shoot and what you shoot will affect your decision, as will your budget.

1 - How to Choose the Right Photography Backdrop

Model with a black seamless paper backdrop

Photography backdrops make your photographs pop

If you haven’t figured it out already – you soon will – most photographers realize that one of the essential features of a good photograph is the thing that nobody notices: the background. When it works, people “oohh” and “aahh”. However, if it doesn’t work, people can’t figure out why they don’t like your image. One of the secrets of any successful photographer is paying attention to what’s behind your subject. This applies to any photograph, not just those taken in the studio. You might want to consider purchasing commercial backdrops that can significantly improve the quality of your shots.

2 - How to Choose the Right Photography Backdrop

Model with a white seamless paper backdrop

Beyond lighting

Assuming you already know what’s involved in lighting a studio (if not check this out), the next question is what to use as a backdrop. There are multiple types and sizes with pros and cons for each. Backdrop mounting and portability are also necessary.

It is one thing to have a backdrop for use in your studio, but what if you are asked to set up somewhere else? How do you make your backdrop portable? What goes best with the subject? If you are shooting a white subject, you probably don’t want a white backdrop because the white may disappear into the background (same with black on black). The color doesn’t need to be complementary (although it helps if it is) but should provide contrast. Lighting tricks can alleviate some of this, but sometimes it’s just easier to use a contrasting backdrop.

3 - How to Choose the Right Photography Backdrop

Model with a white seamless paper backdrop

Types

There are multiple types of backdrops but they all function similarly. They all tend to be relatively thin and only intended as backgrounds (not designed for subjects to interact with). Then can be constructed of seamless paper, muslin, hand-painted canvas or vinyl. The most expensive, least flexible, and the fanciest backdrop is the cyclorama or cyc studio.

Seamless paper

Seamless paper is a versatile and inexpensive backdrop and is a staple for many studios. They are available in many colors, with the most common being black or white. You can produce gray from white backdrops by altering your lighting setup, so a dedicated gray backdrop isn’t necessary. You can also modify white backgrounds with gelled lighting to created colored backgrounds.

4 - How to Choose the Right Photography Backdrop

Product photo on a seamless white paper backdrop

There are pros of using seamless paper: the look is clean, you can modify the background colors with lighting, and the images can be cut out for background replacement. The cons of using seamless paper are: the rolls can be awkward to transport if a wide size (even just from the store to the studio), the paper can be easily damaged, and the backgrounds have no texture. In addition, if you have colored paper, the background colors can seep into the edges of your subject.

Seamless paper provides flooring as well as the backdrop without a visible interface between the floor and the background. This makes it ideal for product photography as well as studio shots. The lack of a seam makes the image appear to float with an infinite background.

Muslin

Muslin backdrops are constructed from a cotton fabric. They come in various weights and sizes and can be dyed in a single color, have color splotches, or be hand painted. Because muslin backdrops have been in use for a long time, some photographers don’t pay much attention to them. They are, however, very portable and generally look good. Another great feature is that you can easily wash them if soiled. However, you may need to clean larger sizes in a commercial machine. Muslin backdrops can look modern or retro, depending upon the style of lighting. They are a great addition to every photographer’s arsenal of backdrops.

5 - How to Choose the Right Photography Backdrop

Model in front of dyed muslin backdrop

Similar to paper, you can use longer muslin as flooring for the subject. Solid colors function much like seamless paper, but you need to be cautious about folds in the muslin as they can be distracting from the subject. Muslin backdrops produce many of the same effects as a seamless paper but are much easier to transport.

6 - How to Choose the Right Photography Backdrop

Dog in front of muslin backdrop showing flooring

There are a few downsides to muslin backdrops. Depending upon how you light them, you may see folds in the fabric behind your subject. As your subject moves, the backdrop may also move, disrupting your background. People may even trip over the material as they walk across the muslin. If you are not careful, solid colored muslins will wrinkle, detracting from the appearance of the background. Because muslins were popular for so many years, certain styles appear particularly old or dated. Photographers need to take care in choosing the style of the muslin backdrops.

7 - How to Choose the Right Photography Backdrop

Dog in front of muslin backdrop

Hand-painted canvas

If you have ever flipped through a copy of Vanity Fair or seen images from Annie Leibovitz, you know the look of a hand-painted canvas backdrop. They look amazing. These studio backdrops are hand painted onto large sheets of canvas. The paint is done in multiple layers to give the perception of depth and texture. The ones used in many of the fashion or movie-star photoshoots tend to be specialty canvases that are custom made. The effort to paint the backdrops, and the large space required to create them, tends to make these expensive.

8 - How to Choose the Right Photography Backdrop

Cat in front of hand-painted canvas backdrop

Hand-painted canvas backdrops provide a vibrant appearance. A lighting change does not generate this richness, but purely because of the reflective surfaces on the backdrop. The paint adds texture, and the various layers of the paint add depth and tonality you cannot achieve with seamless paper. Because they are hand-painted, each canvas tends to be unique.

9 - How to Choose the Right Photography Backdrop

Hand-painted canvas backdrop

The downsides of hand-painted canvas backdrops are cost and care in handling. You don’t want people stepping on your canvas backdrops because they are easily damaged and difficult to clean. That said, the visual effect of a hand-painted canvas backdrop can be stunning.

Vinyl

Vinyl backdrops consist of large images printed on pliable vinyl. Many images are suitable for a vinyl backdrop, but this form is limited to the vertical surface in the background. Flooring is separate. You can purchase separate vinyl sheets for flooring to simulate flooring (such as hardwood floors).

10 - How to Choose the Right Photography Backdrop

Unimpressed dog in front of a vinyl backdrop

Vinyl backdrops can feature unusual or creative backgrounds. They are great for children, parties or events and are washable, so they work for different types of cake smash, food fight or spray images (be careful about the rest of your studio). Also, they are quite pliable so they can be moved about without much difficulty. Finally, they can feature images that appear three dimensional (like a bookcase).

On the other hand, vinyl backdrops are a little reflective, so you need to be cautious about how your lights are set up. You also need to be aware that the backgrounds are two dimensional even though they can appear to be three dimensional.

Cycloramas or Cyc Studios

A cyclorama or cyc studio is a fixed (built in place) backdrop consisting of two intersecting wall sections that have been curved seamlessly into one another and the floor so that there are no visible corners. By curving the corners, the background flows from wall to wall to floor.  A cyclorama is a practical and durable backdrop. However, it is also the least flexible (it won’t move) and is only one color (usually white). It makes the subject appear to be floating with an infinite background and is a great way to create cut outs to modify your background.

This type of backdrop takes a lot of space, time and effort, but makes for great photographs.

Sizes and handling

Seamless paper doesn’t usually have any texture. It comes in large rolls of varying widths, with 53 inches and 107 inches being the two most common sizes. Seamless paper also provides the flooring in front of the background without a corner edge. Because it is paper, you need to be aware of dirty or wet footwear because they leave marks and can damage the paper. When the paper is too damaged, you roll out more paper and discard the dirty or damaged section. The rolls generally have lots of paper, somewhere in the range of 9-12 yards (27-36 feet). White seamless paper is often ideal for a studio set up when you want to cut out the background and replace it with something else.

11 - How to Choose the Right Photography Backdrop

Santa in front of black muslin backdrop

Muslin backdrops come in different styles: standard, washed, crumpled and hand-painted. Standard sizes are 10 feet wide by 12 or 24 feet long. They can be challenging to manage but cover a wide area. Ideally, they come sewn with a pocket at the top that allows you to run it on a rod. Folds in the backdrop can evoke an older photographic style, so most contemporary photographers try to flatten out the muslin. Wrinkle elimination sometimes requires a steamer.

12 - How to Choose the Right Photography Backdrop

Model with a large muslin backdrop

Because canvas is a much heavier material, these backdrops typically come on rolls. If you don’t manage them as rolls, they can be difficult to handle. Standard sizes are about 6 feet wide by 8 feet tall. Most suppliers have a range of sizes. Canvas tends to hang in stretched out to avoid any folds. If you are doing full-length photographs, you will need to consider what you are using for the floor.

Vinyl backdrops vary in size. Similar to canvas, you need to stretch them to eliminate folds. Some vinyl backdrops come with printed flooring (such as hardwood floors) and can be used together, provided you deal with the interface. Stretching the vinyl on the mounting allows for the image to present well. When shooting with vinyl, you need to ensure that the lighting does not reflect into the camera lens. If you’ve used a backdrop with a three-dimensional image, a reflection will make it clear that the background is not real.

Mounting

There are a few options for mounting backdrops. The determining factor tends to be the size and type of backdrop you are using, as well as the frequency with which you plan on changing them. In general, you want some ability to change and mix up the backgrounds.

The basic options for mounting are fixed bars or portable stands. If you have a permanent studio and never plan on taking any of your backgrounds on the road, fixed bars or rollers are ideal. You mount them on the ceiling or wall so that they are suitably high, and allow the paper or fabric to roll off. Mounting on the ceiling means the backdrop will be high enough for your tallest subjects. Framing can be done merely with conduit and small size piping. There are also large electrically controlled rollers available. The costs can range from very cheap to very expensive.

13 - How to Choose the Right Photography Backdrop

Stands, allow for flexibility of the configuration. Some stands are intended for backdrops and often come as a set with clamps included. With portable backdrops, clamps play an integral role in making the background smooth and even. It is particularly the case with muslin or canvas backdrops, but seamless paper also benefits from strategic use of clamps to ensure that it does not keep unspooling as you hang the rolls.

There are also pop-up stands that you can use for canvas or vinyl backgrounds. You simply clamp the background to the edges of a springy stand. There are multiple systems for this, and many come with their own backgrounds as a complete set.

Using

Regardless of your backdrop choice, keep the subject at least 3 feet away from it to avoid casting shadows onto the backdrop. This all ties to the strategic use of lighting setups. Your goal is to have the backdrop disappear behind the subject, making it the center of attention.

Some backdrops, particularly white seamless paper, may need to be lit separately. If you don’t light the backdrop you may have uneven colors behind the subject that detract from the image or prevent the easy masking of the backdrop.

14 - How to Choose the Right Photography Backdrop

Dog in front of muslin backdrop

In general, keeping backdrops clean can be a challenge. Some are easier to clean than others. However, hand-painted canvas and paper backdrops can’t be cleaned without damaging the surfaces, while muslin and vinyl backdrops are easier to clean. You may need to wash large muslins commercially. It is also important that any washing gets done in such a way that the fabrics don’t become altered or damaged.

Conclusion

Choosing the right studio backdrop can affect the mood and overall feel of your images. My personal favorite is hand-painted canvas, but I have used them all (except a cyclorama) effectively. The use of backdrops work hand in glove with your chosen lighting setup, and you should consider both together. If used well, you can make your images pop by having the backdrops pull focus onto your subjects.


The post How to Choose the Right Photography Backdrop appeared first on Digital Photography School. It was authored by Mark C Hughes.


Digital Photography School

 
Comments Off on How to Choose the Right Photography Backdrop

Posted in Photography


How to Choose the Right Tripod for Landscape Photography

31 Oct

A tripod is an essential piece of equipment for a landscape photographer. Sure, you won’t always need to use it. But you’ll find yourself in situations where it can help you capture a high-quality image you wouldn’t be able to get otherwise.

But how do you choose the right tripod? There are hundreds (if not thousands) of options out there, with prices ranging from $ 10 to more than $ 1,000. How do you know which one will best suit your needs? Should you just go for the most expensive tripod you can find? It must be the best, right?

Not necessarily.

Why You Need a Tripod

Before we get into the best options for you, I want to go over a few key reasons why you need a tripod.

Tripods are essential for capturing razor-sharp images, especially in low-light situations where you want to keep your ISO low.

While increasing the ISO lets you use a quicker shutter speed, it can introduce unwanted grain/noise and reduce the overall quality of your image. But keeping the ISO low means you’ll need a longer shutter speed. (Yes, you can adjust the aperture. But I won’t be talking about that here).

Capturing a sharp image using a shutter speed of 1/10th of a second or slower with a handheld camera is almost impossible. It’s very difficult to avoid any camera movement which, with such a slow shutter speed, means you’ll introduce some blur into the image.

How to Choose the Right Tripod for Landscape Photography

Mounting the camera on a tripod lets you use slower shutter speeds and still capture sharp images. The camera sits still on the tripod, so you don’t have to worry about the motion of you holding it.

Using a tripod also allows you to use even slower shutter speeds and capture long exposures (i.e. images that make use of extra slow shutter speeds).

What to Consider Before Buying a Tripod

The first tripods I bought were cheap $ 20 aluminum models from the local electronic shop. While most photographers start with such a tripod, I strongly advise you not to buy one. For landscape photography, they simply won’t do a good job. In some situations, they may even do more harm than goods. These also break more easily than something of a higher quality.

So what should you consider before purchasing your next tripod? Here are a few things to keep in mind:

  • Price and quality (i.e. what does your budget allow?)
  • Flexibility
  • Weight (aluminum vs carbon)

Taking these topics into account before you buy will make it easier to find the best one for your needs.

1. Price

The first thing most of us consider is the price. Photography equipment is rarely cheap, and if you want quality you need to pay for it. As I said earlier, a tripod can cost you anything from $ 10 to several thousand. But are more expensive tripods necessarily better?

In general, yes. A $ 1,000 tripod will outperform a $ 200 tripod in most tests. But that doesn’t mean it’s the right one for you. Ask yourself what you need. What type of photography do you do? Do you need the most expensive model? For most people, the answer is no.

Chances are a mid-range ($ 200) tripod will be more than adequate and perform perfectly in most scenarios.

2. Flexibility / Height

What about the specs? Should you choose a short one or a tall one? Can the legs spread wide, or are they locked into a fixed position? Flip-lock or twist-lock?

Let’s start with the height. In most situations, you won’t need a tall tripod. But there may well come a time where you need that extra leg length. Is it worth paying extra for? If you often find yourself in rivers, rocks or rugged seascapes, then yes. But if you’re not into extreme landscape photography and mount your tripod on flat and stable ground instead, I wouldn’t bother.

While a tall tripod is nice, it’s also nice to have one that lets you get close to the ground. For this image, the tripod held my camera just a few centimeters off the ground, which allowed me to get extra close to the flowers.

How to Choose the Right Tripod for Landscape Photography

So what’s more important to you? Having a tall tripod, or being able to take photographs from a low perspective?

The good news is that some of the more expensive tripods can give you both. While they can stand close to two meters tall, they can also lay more or less flat on the ground for those extremely low perspective shots. 

3. Weight

The final thing to consider is the tripod’s weight. This is important, especially if you head out on long hikes to reach particular destinations. Your backpack can get quite heavy once you add all the gear you need, so the last thing you want is unnecessary weight from a tripod.

Now, a lightweight tripod doesn’t necessarily mean a low-quality tripod. In fact, some of the best tripods out there are lightweight. You just need to make sure they’re sturdy and can support the weight of your camera. However, these tripods are rarely cheap and are often found in the higher end of the price range.

If you’re an avid hiker and tend to go a long way to photograph your subjects, I strongly recommend looking into a lightweight carbon-fiber tripod. These tripods are just as sturdy (if not more sturdy) than the heavier aluminum alternatives.

How to Choose the Right Tripod for Landscape Photography

But if you’re not into hiking, weight might not be such an issue. In fact, if you photograph in rough conditions you may prefer the extra weight. When photographing beaches in Arctic Norway I depend on having a sturdy tripod that won’t break when hit by waves or move when the waves are receding. In these situations, a low-quality travel tripod is far from ideal. Even strong winds can make these tripods vibrate, leading to blurry images. A heavy and solid tripod is a much better option.

What types of landscapes do you normally photograph? And what do you need to capture those scenes?

Which Tripod is Best for You?

Unfortunately, I can’t answer this question for you. It really depends on who you are and the kinds of photographs you take. But when you’re ready to buy one, consider what I’ve talked about and ask yourself what you need. Do you need a light tripod you can easily bring on long hikes? Do you need a sturdy tripod that can handle wind and rough conditions? Perhaps you need a combination of the two.

And what about the price? Do you really need the most expensive model, or will a medium-priced alternative do the job?

Answering these questions should help you narrow down the options, and help you find the tripod that is best for you.

Personally, I have two tripods: a lightweight travel tripod I can bring on long hikes, and my main tripod that’s a little heavier (and more expensive) but solid enough to use in even the roughest Arctic conditions.

Let us know what tripod you ended up choosing. We’d love to hear about it.

The post How to Choose the Right Tripod for Landscape Photography appeared first on Digital Photography School.


Digital Photography School

 
Comments Off on How to Choose the Right Tripod for Landscape Photography

Posted in Photography


SLC-OE-03: How to Choose a Softbox for your Speedlights

23 Aug

Umbrellas are a great first light mod: cheap, easy to use, easy to transport. But softboxes can give you more control, both in the beam's edge and with reduced light leakage. The photo above was shot with a single speedlight and a small softbox.

Today we'll look at how to choose a softbox that will marry well with your speedlight, and do so without spending a lot of money.

Read more »
Strobist

 
Comments Off on SLC-OE-03: How to Choose a Softbox for your Speedlights

Posted in Photography


How to Choose Your Next Travel Photography Destination

19 Jul

If you’re anything like me, your love for photography is matched only by your love for travel. Your days consist of dreaming of epic landscapes, amazing cities, and unlimited air miles. Unfortunately, my friend, you have the travel photography bug, and I’m sorry to tell you that it’s incurable.

beach with chairs and umbrella - how to choose your next travel photography destination

It’s easy to get down about your inability to see and photograph everything right now. There just aren’t enough hours in the day, and for most of us, not enough money in the bank. The thing that keeps me from getting down is planning my next trip.

Planning is the easy part, the hard part is choosing where to go. You might get overwhelmed by the options, so here are a few things to consider which may help you choose your next travel photography destination.

Look in Your Own Backyard

First up, your next trip doesn’t need to be an epic destination across oceans to places like Iceland or Patagonia. I’m always trying to find ways to get to big bucket-list locations that I know I would love, but sometimes looking closer to home may be a better option.

Unless you live on an island in the middle of the ocean, there’s likely somewhere nearby that you’ll be able to get to sooner to satisfy your wanderlust.

Is there anywhere within driving distance that you’ve always wanted to visit or a place that people have been saying you should check out? Somewhere in your own backyard that others spend thousands of dollars and countless hours traveling to see? It may be somewhere you’ve been before but could revisit to try to photograph better. The benefits of looking in your own backyard are many.

lake with rocks and mountains - how to choose your next travel photography destination

Make a Bucket List

You likely already have an idea of some of the places that you would like to visit and photograph. If you ask me, I can rattle off a long list of dream destinations. If you haven’t already done so, make a list and write it down. You could even make more than one list – local and international.

My bucket list has nested sub-locations within each item because I keep seeing new locations within a given country that I want to see.

I also encourage you to try and get past the big-name travel destinations. Add them for sure, I certainly have, but there’s more to the world than Iceland, New Zealand, and Yosemite. These places are insanely popular, which makes them expensive to get to and you’ll often be competing with huge crowds.

Instagram is a great place to find inspiration, but again, try to look for more than the uber-popular locations. Also, try asking people who love to travel for their recommendations. I’m always happy to make suggestions if you’re stuck for ideas.

egypt - how to choose your next travel photography destination

Talk to Your Travel Buddy

Who will you be traveling with? Do you have a buddy that you go everywhere with? Share ideas with them and come up with a shared list. Do you usually travel alone? Great, that gives you some freedom to do whatever and go wherever you want. It might be worth considering a travel buddy for a change. There are many benefits to traveling with somebody else or even a group.

If your travels usually come in the form of family vacations, then your plans will need to work for them too. Maybe try asking your kids where they would like to go for your next family trip? They might suggest something you have not considered. Is there somewhere your partner has always wanted to go but never mentioned?

Multi-Task

Is there a way that you can kill two birds with one stone? Sometimes there are ways to justify travel that you may not have considered. Do you have family somewhere that you could visit? Maybe an old friend that you haven’t seen for years?

Not everyone has the ability to travel for work, but if you do – is there a way you could tack on some personal travel to the end of a work trip? If you’re crafty you might be able to get your boss to pay for you to go to a conference somewhere. If you don’t ask the answer is always “No”.

cathedral how to choose your next travel photography destination

It’s worth considering photography workshops also. Although it will still be all about the photography, you’ll be investing in your craft. They can be expensive, but if you find one close to home you can keep the travel costs down. Your photography will benefit from a workshop far more than it would just by taking a trip.

Budget

The biggest barrier for most of us is cost. If money were no object, I’m sure many photographers would spend more time traveling than they do at home. Unfortunately, travel costs a lot so it needs to come into consideration.

Depending on where you live, you can use seasonal fluctuations to help you choose your next destination. Virtually everywhere in the world will have a high and a low season. These seasons affect travel costs significantly, so it’s worth doing some research into where’s the best place to visit at a given time of year. Either side of high season (shoulder season) is often cheaper, while the weather is still okay.

It’s also worth considering exchange rates as they can fluctuate a lot. If your home currency is performing well against another country’s currency, it could be worth considering traveling there while you’re able to get more for your money. I’ve planned travel at short notice a few times due to an unusually good exchange rate, and it’s saved me hundreds of dollars.

Expand Your Portfolio

It’s worth taking a look at your travel photos and asking yourself if there’s a subject or medium that you really want to add. Maybe you have loads of images of beaches and the ocean and could diversify by getting into the mountains?

Do you primarily photograph nature and could stretch yourself by spending a weekend photographing cityscapes? Always wanted to try out some astrophotography? Go spend a few moonless nights as far away from light pollution as possible.

I’ve always wanted to take my camera underwater, so next month I’m spending a few weeks in Queensland, Australia exploring the Great Barrier Reef.

cityscape how to choose your next travel photography destination

As photographers, we naturally seek out subjects that we’re drawn to and are comfortable with, but it’s worth trying something different from time to time. Choosing your next destination based on the subject or medium you want to photograph is a great way to learn something new and maybe go somewhere you wouldn’t usually choose.

Available Time

I’m a big advocate of slow travel. You can see and experience a place in a completely different way when you spend a few months there rather than a couple of days or weeks. That said, not everyone wants to or can quit their job and go live somewhere new for a few months.

It’s worth considering how much time you have available for your next trip. If you only have a weekend, you’re not going to want to spend 20 hours flying in each direction. If you have a month, you probably don’t want to spend the whole time in a small town down the road. Use your time wisely.

spices how to choose your next travel photography destination

There are places that I want to visit that I wouldn’t really enjoy if I rushed it. So I’m leaving them for when I can explore it at my own pace. There are also many places that would happily spend a couple of nights and be satisfied.

Make it a Road Trip

It’s pretty hard to beat a good road trip. You have the freedom to go where you want when you want. You’re not dependent on public transport or an itinerary.

You can even sleep in your vehicle if you like and get to obscure locations away from the crowds. Drive as far as time allows.

mountains how to choose your next travel photography destination

A road trip opens up many possibilities for travel photography destinations. It can turn one location into many. I always wanted to visit Yosemite National Park in California, so I did an epic road trip on the entire west coast of the USA.

Next, I wanted to see the Canadian Rockies, so I drove all the way from Vancouver through British Columbia, into Alberta and the Rockies, then down through northern Washington. I saw so much more on those road trips than I ever would have flying or busing between locations. Maybe a road trip should be next on your list?

Where to Next?

You probably can’t pack your bags and get on the road tomorrow, but choosing and planning your next travel photography destination can give you something to look forward to and prepare for. I hope this has helped you to consider new possibilities and narrow down your options.

If it’s helped your next trip come around sooner, even better. What’s on your travel photography bucket list? I would love to hear what you’re thinking or planning, please share in the comments area below.

The post How to Choose Your Next Travel Photography Destination appeared first on Digital Photography School.


Digital Photography School

 
Comments Off on How to Choose Your Next Travel Photography Destination

Posted in Photography


Updated: Which RX100 should you choose?

17 Jul

There have now been seven variants of the RX100 series, and at least six of them are still current models. Confused? Here’s an updated look at their differences, and our recommendations among them now that we’ve tested the Mark VI.

Articles: Digital Photography Review (dpreview.com)

 
Comments Off on Updated: Which RX100 should you choose?

Posted in Uncategorized


How to Choose the Right Color Profile For Sharing Images Online

01 Jul

Many people have problems with the color of their photos when they publish them online. There are several reasons why this might be so, but the most common culprits are the color space of the image and whether or not the profile is embedded. Both color settings can radically affect web browser color and how your photos look.

Let’s look at some of the potential pitfalls more closely.

The Importance of Embedding the Color Profile

Whenever you edit your photos in an editing program like Photoshop, you are doing so using a specific RGB working color space. To be sure of preserving the color you see when you’re editing, you need to embed the profile before saving the image.

In simple terms, the ICC profile is a translator. It enables different apps and devices to interpret the color as you intended. If you get into the habit of embedding profiles into your images as you save them, you’ll reduce the chances of color looking wrong on the web or in print.

ProPhoto RGB image with embedded profile - How to Choose the Right Color Profile For Sharing Images Online

The rich color in this ProPhoto RGB image will look okay in many browsers despite not being sRGB as normally advised. If it looks muted and drained of saturation to you, it’ll be because you are viewing it in a non-color-managed browser. By embedding the profile, I’ve given it the best chance of looking as intended to the majority of people. On a wide-gamut monitor, the colors will pop a bit more.

Embedding the profile into an image adds about 3-4 kB to the file size, so the only time it makes sense to exclude it is when you’re uploading vast quantities of photos to the Internet.

If you must leave the profile out, making sure that the image is in the sRGB color space will limit any resulting damage. Two or three of the more popular browsers will still display the color faithfully because they automatically guess the profile correctly (i.e. sRGB).

Although most browsers have improved in their handling of color recently, it’s still good practice to embed the profile. Don’t leave it out without good reason.

Prophoto RGB image with no profile - How to Choose the Right Color Profile For Sharing Images Online

Because the profile has been left out of this same ProPhoto RGB image, the brightness and color will look terrible in most browsers and on most monitors. By contrast, a missing profile for an sRGB file would be undetectable to a large number of people.

How to Embed the Profile

Embedding the profile into images is usually just a case of checking a box when you export the photo. If such an option doesn’t exist, the default will either be the predefined working space of the program, or it’ll be sRGB for web-specific output.

If you want to check the color of your web images before publishing, open them directly in a browser (preferably a reliable one like Chrome) and see how they compare to the original in your photo-editing program. Be a little wary of uploading images to platforms that strip out the profile, though these will not typically be photo gallery sites.

embedding the profile into web photos - How to Choose the Right Color Profile For Sharing Images Online

Embedding or stripping out profiles usually only requires you to check or uncheck a box when saving. This is the “save as” pane in Photoshop.

Converting to Profile

You can use “convert to profile” in Photoshop to create an sRGB image, which is the safest color space choice for the web. Be sure not to overwrite the original file and save it this way, because larger color spaces are a better choice for outputs such as inkjet printing.

Do not use “assign profile” for profile conversion, as it causes a color shift and is not meant for this purpose.

Using convert to profile in Photoshop - How to Choose the Right Color Profile For Sharing Images Online

Using “assign profile” in Photoshop to convert between profiles will cause a color shift. Color in the right-hand image above has gone flat as a result of assigning an sRGB profile to an Adobe RGB image. You must use “convert to profile” if you want to create an sRGB version of your photo for the web.

Why Monitor Gamut Matters

Color management needs at least two profiles to work (image profile and monitor profile in this case). If you publish images without profiles embedded, you’re relying on the viewer’s browser to guess the color space correctly.

When color management is absent from the browser or app for whatever reason, the following statements are true:

  • An Adobe RGB image looks roughly correct on a wide-gamut display.
  • An Adobe RGB image looks muted in color on a standard-gamut display.
  • sRGB images look roughly correct on a standard-gamut display.
  • An sRGB image looks oversaturated in color on a wide-gamut display.

Note that an Adobe RGB image without a profile embedded looks muted in most situations and must be avoided. Browsers will guess the color space to be sRGB if they guess at all.

standard gamut monitor exceeding srgb - How to Choose the Right Color Settings For Sharing Images Online

The graph above shows the difference between a standard-gamut Dell monitor (colored outline) and the sRGB profile (dotted outline). Even on a regular desktop monitor, some colors are quite likely to exceed the sRGB color space and look too saturated when viewed in Microsoft browsers.

In the monitor above, it’s reds that are most exaggerated in that situation. If you haven’t profiled your monitor or if the gamut of the screen is contained by sRGB, you won’t encounter this.

Browser Behavior 2018

To understand color profiles, it helps to know how different browsers behave with color. I tested five browsers for this article to give you an idea of what to expect. Feel free to query this if you think any of these observations are wrong:

Google Chrome

Chrome is a fully color-managed browser that assigns sRGB to any “untagged” images (i.e. those without profiles embedded). It reads all embedded profiles.

Opera

Opera is a color-managed browser that automatically assumes photos to be sRGB if the profile is missing. Like Chrome, it reads all profiles, including Adobe RGB or ProPhoto RGB.

Firefox Quantum

You can configure Firefox to assign sRGB to any untagged photo. It reads all embedded color profiles.

If you happen to run two monitors, Firefox does not maintain full color management across both of them. For optimum color, you must dial in one monitor profile then stick with that monitor. This only applies if your monitors have custom profiles.

Microsoft Edge/Internet Explorer

Microsoft Edge has a half-baked solution to color management. It reads different color profiles and converts everything to sRGB for display. The main problem is that it doesn’t use the monitor profile. Thus, it works best if your monitor does not exceed sRGB in gamut. Otherwise, you’ll see wayward colors.

Safari (for Windows)

Safari can read profiles in images and uses the monitor profile (unlike MS Edge or MS IE), but it does not assign a profile to an image if one is missing. In that situation, it displays color wrongly as Microsoft Edge does.

Web browser proof colors - How to Choose the Right Color Settings For Sharing Images Online

In Photoshop, you can use “Monitor RGB” proof colors to show you what the photo will look like in Internet Explorer on your own monitor. You’ll need to convert the image to sRGB first. If colors look brighter than they do without proofing, it means your monitor’s native gamut exceeds the sRGB profile.

A second experiment is to view the proof colors of an Adobe RGB or ProPhoto RGB image using “Internet Standard RGB”. This will show you how photos in bigger color spaces look on the internet if you omit the profile.

Choosing sRGB for the Web

The reason why sRGB is a safer choice of color space for the web is that most displays or monitors are not wide-gamut. Thus, if the profile goes astray or is stripped out, or if a device or app doesn’t support color management, the color will still look okay. This is what Microsoft’s browsers rely on to work.

If you want the color of your photos to look “okay” to the widest possible audience you need only do two things:

  1. Make sure the image is in an sRGB color space either by using it as your working space or by converting to sRGB before uploading to the web.
  2. Embed the sRGB profile into the image before saving.
Photoshop save for web - How to Choose the Right Color Settings For Sharing Images Online

Photoshop’s “Save for Web” lets you convert to sRGB at the very last moment by checking a box. If you leave the box unchecked, the photo is saved in whatever color space you edited it in. You can’t strip the profile out with this checkbox: it’s purely for conversion.

Other Choices: Adobe RGB and ProPhoto RGB

Since most popular browsers are now color savvy, the possibility of using other color spaces on the web exists. You could, for instance, publish photos with an Adobe RGB or ProPhoto RGB profile embedded, and they’d still look good to most people. To a minority, they’d look better.

The color of wide-gamut monitors typically exceeds Adobe RGB in places. Hence, there is theoretically a reason for publishing photos in ProPhoto RGB. However, this is offset by the dire color that results when the profiles are missing or ignored. It’s high risk.

Adobe RGB is an interesting prospect for the web because it still benefits users of wide-gamut monitors. Importantly, it doesn’t look as bad as ProPhoto RGB when things go wrong. However, if you publish in Adobe RGB, you’ll still be doing so for a relatively small audience.

If you do use these wider-gamut color spaces for the web, you absolutely must embed the profile. As soon as that goes astray, the color in your photos will look a bit flat to many people. In the case of ProPhoto RGB, it’s likely to look awful.

sRGB color vs wide gamut monitor color - How to Choose the Right Color Settings For Sharing Images Online

This 3D diagram (above) shows the sRGB profile encompassed by the profile of a wide-gamut monitor. In particular, you’ll note the extended range of cyans and greens in the latter.

The idea of using larger color spaces on the web is appealing, especially if you’re a landscape photographer for whom these colors are often truncated. It means you’d be making more use of your camera’s capabilities. However, it’s inherently riskier and you’ll be playing to a relatively small audience. The safe choice is still sRGB.

In Summary

Although modern browsers are more flexible, sRGB is still the safest choice of color space for the web. Again, this is because it roughly matches the gamut of most electronic displays. Using bigger color spaces risks draining your photos of color, especially on tablets or smartphones that may not be color-managed.

I hope this has been of some use. Feel free to ask questions if you need any clarification.

The post How to Choose the Right Color Profile For Sharing Images Online appeared first on Digital Photography School.


Digital Photography School

 
Comments Off on How to Choose the Right Color Profile For Sharing Images Online

Posted in Photography


How to Choose a Lens for Night Sky Photography

20 Jun

There is a big distinction to be made when it comes to night sky photography, which is whether or not you plan on photographing the stars in the night sky. If you do not plan on including stars in your shots, things are a lot simpler for you. That is true in a lot of ways, in that you don’t need to worry as much about the clouds and weather, the impact of the moon, or light pollution.

When it comes to lens selection, it means that you can pretty much use whatever lens you want. Therefore, if that is the type of night photography you plan to do, continue using whatever is your favorite lens at present.

Photo of the Milky Way at night - How to Choose a Lens for Night Sky Photography

Issues doing Night Sky Photography

On the other hand, if you plan on shooting the night sky and capturing the stars, things get trickier. This stems from two facts. The first is that starlight is extremely dim. It is only a tiny, tiny fraction of what you have at sunset (let alone the middle of the day). Even moonlight is many times more powerful.

The second issue is that the stars are moving across the sky (or, rather, that the earth is spinning, but it appears as though the stars are moving to your camera). This is happening more quickly than you might realize.

As a result, you need to do everything possible to maximize exposure, and you need for that to happen quickly. In other words, the dim light means that you need a lot of exposure. Exposure stems from a combination of three things: shutter speed, aperture, and ISO.

In other types of photography, you might simply open up the shutter for a long time. In night sky photography, however, you don’t have that luxury since the stars are moving. That means your shutter speed is going to be capped somewhere between 15 and 30 seconds. If you expose any longer, the camera will pick up that movement and it will show up as tails or blur in your pictures. That won’t work.

How to Choose a Lens for Night Sky Photography - night shot with cliffs and stars

That means you’ll have to look at the other two exposure options – ISO and aperture. To deal with the dim light, you will have to crank up your ISO to at least 3200 and in many cases 6400. At present, that’s about as high as you should go. Even if your camera goes up to something like ISO 25,600, as many cameras do these days if you use an ISO that high you risk noise completely taking over your picture.

Use a Fast Lens

Because of these caps on shutter speed and ISO, the only remaining exposure control is aperture. To maximize exposure and still successfully capture the night sky, you will need a fast lens. How fast?

A lens that opens up to f/2.8 or wider is ideal. A lens with a maximum aperture of f/4.0 is acceptable. Anything less than that (meaning a higher f-number) probably won’t work. This is one situation where your kit lens might serve you well. Most kit lenses open up to f/3.5 at their widest focal length, which is actually 1/3 stop brighter than your typical f/4.0 lens.

As a side-note, you might be worried about depth of field when using these large apertures. You need not worry about that though. You will always set your focus at infinity and everything in your scene will be on that plane of focus. Even if there are objects in the foreground, at wide angles things quickly go to infinity on your lens. Unless something is very close to you (say, within 10 feet or so), it will be on the same plane of focus and depth of field will not be an issue. If you want to include anything closer than that, you’ll likely need to focus stack.

desert trees and Milky Way - How to Choose a Lens for Night Sky Photography

Shoot with a Wide-Angle Lens

You may be familiar with something called the Reciprocal Rule. It will help you make sense of why you need a wide angle lens for night sky photography. That rule states that the slowest shutter speed (exposure time) you can use when shooting handheld and still avoid blur in your pictures is the reciprocal of your focal length. So, for example, if you are using a 100mm lens, your minimum shutter speed should be 1/100th of a second.

This rule shows that there is always a direct correlation between focal length and the longest shutter speed you can use to avoid blur. That also holds true when it comes to photographing the stars. When you photograph the night sky, the wider the lens you use, the longer you can open up the shutter.

How wide of a lens do you need? There is no clear answer. If you are familiar with photographing the stars or the Milky Way, you may have heard of certain rules of thumb where you divide a number by the focal length of your lens to get a maximum exposure time (such as the Rule of 600, 500, or even 400) before the stars start to arch and blur.

For example, using the Rule of 500, a 24mm lens would allow you to use a shutter speed up to 20 seconds (500 divided by 24 mm is 20.8 seconds). But if you use a 16mm lens instead, you can expose up to 30 seconds (500 divided by 16 is 31.25). As you can see, wider is better. Here is how it works out for the widest focal lengths.

Rule of 500 chart - How to Choose a Lens for Night Sky Photography

Before moving on, let me point out two things about this standard. First of all, it is not absolute, and there are those who advocate for a stricter standard (meaning that you should use even shorter shutter speeds for these focal lengths). Be sure to test out different speeds and see what works best for you.

Second, if you use a crop factor camera, be sure to adjust these numbers to the Effective Focal Length, which is based on a full-frame or 35mm format (i.e. 20mm on a 1.5x crop factor camera is effectively a 30mm, so the maximum exposure then is only 16.7 seconds before the stars arch).

Measuring Sharpness

It goes without saying that you want a sharp lens. But how do you determine what is a sharp lens and what isn’t? The best way, of course, is to try them out for yourself. It may not be practical to test out a whole series of lenses though.

We all rely on lens reviews. I’m certainly no expert on optics, so I definitely do. These are usually extremely helpful, but sometimes it is difficult to get an apples to apples comparison of different lenses. To do that, there is an extremely helpful resource called DXO Mark.

The reason DXO Mark is so helpful is that they score all lenses in the exact same manner. For example, they give scores for sharpness, distortion, and vignetting (as well as other criteria, and an overall score) and grade each lens the same way. That lets you look at numbers very quickly, rather than comparing images from different lenses and attempting to quantify the differences. If nothing else, it gives you a good place to start.

DXO lens comparison chart - How to Choose a Lens for Night Sky Photography

Of course, sharpness isn’t the only thing you need to consider. Lenses all have different amounts of distortion as well. One type of distortion that is important in night photography is called coma distortion. It adds little wings to points of light, which in the case of photographing stars is not ideal. Unfortunately, this is not something that is often included in lens tests, so you’ll have to check for this with whatever lens you are considering.

Narrowing Your Choices Down

We have now established the three most important criteria for picking a lens for your night sky photography. Your lens needs to be wide, fast, and sharp. In terms of how wide, how fast, and how sharp, that is up to you. But you can use your own criteria to create a list of available lenses.

For example, you might decide to only consider lenses that are 20mm or wider, open up to f/2.8, and are at least moderately sharp.

lens comparison chart - How to Choose a Lens for Night Sky Photography

Once you narrow the list down to your particular brand of camera, you will probably find that the list is not very long. There may actually only be a few models from which to choose.

The Top Picks

Once you start looking at the widest, fastest lenses made, the list quickly gets pretty short. Once you add in the reviews and ratings, some pretty clear choices emerge. Of the Big Three manufacturers, I think you would have to strongly consider the following lenses (if you can afford them, as they are quite pricey):

three good lens choices - How to Choose a Lens for Night Sky Photography

  1. Canon EF 16-35mm f/2.8 III
  2. Nikon AF-S NIKKOR 14-24mm f/2.8G ED
  3. Sony 16-35mm f/2.8 GM

That’s not to say you necessarily need to rush out and purchase one of these lenses. The point of this article is really to help you establish the criteria for picking your own lenses. At the same time, I don’t want to be coy about these obviously great lenses, as they fit the criteria for night sky photography very well.

A Sleeper

When you start putting price limitations on lenses, the list gets short real quick! Most lenses in this range cost well over $ 1000, and many approach $ 2000. You may be looking for something more affordable, as I was. Once I looked at the list further, the Tokina 16-28 mm f/2.8 jumped out at me.

It is under $ 700 in most places and meets all three criteria of being wide (16 mm), fast (f/2.8), and sharp (scoring a 22 on my camera per DXO Mark). I picked one up and like the results. It works great, although there is definitely some coma distortion going on. Still, for the price, it is a great option. This lens is available for both Canon and Nikon cameras.

How to Choose a Lens for Night Sky Photography - Milky Way and spooky trees

A Wildcard

There is another affordable option if you don’t mind manual controls – Rokinon lenses. They have several wide angle options to choose from, ranging from 12-24mm. They are prime lenses and are very fast. All have maximum apertures of at least f/2.8. These are all manual lenses though, which means that you will need to focus manually. It also means that you will set the aperture with a ring on the lens, rather than with your camera.

Still, that should not be a problem with night sky photography. You just set the lens at its widest aperture and set the focus at infinity. You might never change it. Because of these manual controls, you can often pick up these lenses for well under $ 400 (check out the Rokinon 14mm). Again, this is just another good option if you don’t mind manual control lenses.

Note: Rokinon also has 12mm and 8mm fish-eye lenses available with mounts for Canon, Nikon, Sony, Fuji, and Micro 4/3 cameras if you want to go really wide. 

How to Choose a Lens for Night Sky Photography

The Lens for You

Just remember that if you are considering a lens for night sky photography, you’ll want to limit the lens selection to wide-angle lenses (generally 24mm or wider). You can get away with longer focal lengths, but you’ll need them to be extremely fast (probably f/2.0 or greater).

Once you have narrowed down your selection in this fashion, look at fast lenses. Try to get one that opens up to f/2.8 or better. That usually means you are looking at fairly expensive lenses, but as mentioned above there are some affordable options that will get the job done. After that, be sure to check the DXO Mark ratings. But don’t stop there – a simple Google search for the lens(es) you are considering will likely yield a lot of reviews. I am partial to The Digital Picture and DP Review as well.

Hopefully, this article has gotten you familiar with the criteria you need from a lens for night sky photography and has spurred a few ideas. It isn’t meant to limit your alternatives, so if there are other lens options I’ve missed, please let me know in the comment area below.

The post How to Choose a Lens for Night Sky Photography appeared first on Digital Photography School.


Digital Photography School

 
Comments Off on How to Choose a Lens for Night Sky Photography

Posted in Photography


How to Choose Your Lightroom Export Settings for Printing

19 May

If you haven’t yet printed some of your favorite photos, trust me you are missing out on a lot. The joy and pleasure that you get by looking at the prints cannot be matched by the digital copies. This article might excite those photographers who have gotten their photos printed at least once. But if you haven’t yet, this might be the beginning, give it a try!

The majority of you may already be using Adobe Lightroom to post-process and color correct your photos. But did you know that you might be saving your final digital copy to be sent to the printer using the wrong export settings? Do not panic, this article will help you cross-check some of the key export settings that you want to follow.

Getting the Dimensions Correct

Trust me, this is one of the most basic and silliest mistakes that you might make while exporting the final copy to be sent for printing. To make sure that you get the dimensions correct, simply crop the image (if needed) using the desired aspect ratio the moment you import the photo to Lightroom. This will make sure that the final prints are in the perfect dimensions and you do not have to pay the printer extra to correct the ratio.

Note: You can use a Virtual Copy to crop for print and leave the original for online.

crop sizes and ratios in Lightroom

Select the Correct Color Space

A good quality print is one which has the most accurate color representation. If you have been getting a difference in colors between what you see on your screen and what you get on your prints, something might be wrong with the color space.

The color space of a digital image is the most important aspect of accurate color representation in a print. You need to make sure that you are selecting the AdobeRGB or any other color space as advised by your printer. AdobeRGB is a larger color space as compared to the sRGB, which is the default color space in the export setting. To know more about the color space, read: AdobeRGB vs sRGB Color Space.

Some printers may have their own custom color profiles, which they may or may not share with you. So, in that case, they would ask you for AdobeRGB color space file and later export the file as per their custom profile. If you are unsure about the printer, simply export the photo as AdobeRGB color space.

Note: Many labs and printers in the USA use the smaller sRGB space, so if you send AdobeRGB files for printing you will get unexpected color in your prints when they come back. Be sure and ask the lab what they use and prefer beforehand.

Once you have selected the color space, make sure to keep the Bit Depth as 16 bits/component. This will make sure that the color transition and falloff is gradual.

Select the Correct Image Format

Once you are done with selecting the required color space, it is important to choose the correct image format. You can go with the JPEG format but if you are opting for high-quality or a big print, save it as a TIFF. This file format has much more information as compared to a JPEG and is vastly accepted by the printers.

Note: Again check with your lab first. Some will not accept a TIFF file.

Select the Correct PPI (Pixel Per Inch)

PPI in a photo print means the number of pixels that are there per inch of the photo. The ideal and the best possible quality is 300ppi, but you can also choose 240ppi if required. Basically, the more the PPI the better print quality you would get. If you are getting bigger prints and do not want the photo to look pixelated, try saving the photo with maximum possible PPI (ideally 300ppi in the case of prints).

Note: Once again ask your lab. Some may have a standard PPI that they use and prefer. Canvas prints, for example, are often at 150ppi. 

Finish up

Once you are done selecting these four major export settings, you shall be good to export the file for prints. You can always experiment with these settings as there are no hard and fast rules. These were just some tips and suggestions I wanted to share as per my experience.

One other thing to make note of is whether or not you are enlarging the image. Be careful when upsizing files as there are good and bad ways to do that, but that is beyond the scope of this article. Read more here: Image Size and Resolution Explained for Print and Onscreen

The post How to Choose Your Lightroom Export Settings for Printing appeared first on Digital Photography School.


Digital Photography School

 
Comments Off on How to Choose Your Lightroom Export Settings for Printing

Posted in Photography


How to Choose the Perfect Macro Lens

16 May

A common question among those starting out in macro photography is, “What lens should I choose?” Given the number of options, this is difficult to answer and depends on a number of factors (physical requirements, budget, subject, style, etc.). There is no one ideal macro lens. However, this article will provide a guide to choosing the ideal macro lens for your needs, focusing on three main considerations: focal length, image quality, and price.

macro photography abstract hibiscus - How to Choose the Perfect Macro Lens

A Note About Image Quality

When it comes to choosing lenses, photographers often focus on image quality, especially sharpness.

I am happy to tell you that, for macro photography, this is generally less of an issue. Why? Macro lenses are incredibly sharp. Even lenses on the lower end of the price spectrum offer professional-level sharpness, especially when stopped down slightly. I have used a half-dozen macro lenses over the course of my photography career, and I have never been dissatisfied with the level of sharpness.

However, this does not mean that low-end macro lenses are indistinguishable from the pricier options. Expensive macro lenses do often provide better sharpness and bokeh.

macro photography flower abstract - How to Choose the Perfect Macro Lens

Furthermore, cheaper macro lenses do sometimes have problems with chromatic aberration (generally purple and yellow fringing that occurs in the high contrast parts of images). This can be corrected with post-processing, but I prefer to avoid chromatic aberration whenever I can. When I discuss different lenses below, I note any chromatic aberration problems that I’ve experienced.

Focal Length

I will center this discussion around focal length; this is an easy way of narrowing down potential macro lenses because focal length often determines and limits your macro photography options.

Macro lenses can be classified into three focal-length categories: short (35-60mm), mid-range (90-105mm), and long (150-200mm).

The Short Macro Lens

  • Pros: Lightweight and inexpensive.
  • Cons: Less impressive bokeh, short working distance (bad for insects).
dahlia abstract macro photography flower - How to Choose the Perfect Macro Lens

I took this dahlia image using a short macro lens, the Nikon 60mm f/2.8D.

Short macro lenses tend to be used for more casual macro outings, or as “all-purpose lenses” that you switch to macro when needed. They’re easy to store, easy to carry, and pretty inexpensive. They’re also easier to hand-hold because of their small size.

However, a big drawback with short macro lenses is the short working distance. Working distance refers to the distance from the end of the lens to the subject. In order to do high magnification photography with, say, a 60mm macro lens, the subject has to be extremely close to the lens. This can cause problems. First of all, insects generally require a bit of distance when photographed, so getting close often isn’t an option.

macro photography tulip abstract flower - How to Choose the Perfect Macro Lens

This tulip photograph was taken with a Nikon 60mm f/2.8D.

Additionally, your head (or your camera) might cast an unwanted shadow onto the subject, depending on the lighting conditions. Shorter lenses also tend to have less pleasing bokeh.

However, if you are looking to do casual macro photography with more portable equipment and strong image quality, then a shorter macro lens might be just the thing for you.

If you’re a Canon shooter on a budget, you should look at the Canon 60mm f/2.8 (at $ 399)or the Canon 35mm f/2.8 IS (at $ 349). The latter offers image stabilization, which can often be quite useful for handheld macro photography. For Nikon photographers, look at the Nikon 40mm f/2.8G (only $ 225).

How to Choose the Perfect Macro Lens - tulip macro photo

Another tulip photograph that was taken with the Nikon 60mm f/2.8D.

If you’re a photographer with a bit more to spend, you should consider the Nikon 60mm f/2.8G (at $ 596) or the Tamron 60mm f/2.0 for Nikon ($ 524) and for Canon ($ 524).

Finally, you might consider the Nikon 60mm f/2.8D (at $ 517). This lens is near and dear to my heart because it was the first macro lens I ever purchased. I was always quite impressed by its sharpness. It is worth noting that the autofocus is quite slow, but I always use manual focus when shooting macro (and you probably should, too!), so this was not a problem.

60mm nikon macro photography tulip flower - How to Choose the Perfect Macro Lens

A final photograph with the Nikon 60mm f/2.8D.

Mid-Range Macro Lenses

  • Pros: Larger working distance, somewhat inexpensive, very good bokeh, lightweight.
  • Cons: Working distance still fairly short.
macro photography abstract purple flower - How to Choose the Perfect Macro Lens

A flower image that was taken at 105mm.

Mid-range macro lenses are my personal favorite among the macro options. They are a great option for flower photography, especially more abstract level flower photography like I tend to do. Why?

First of all, these lenses are relatively lightweight, which means that I can hand-hold them without much trouble at all, even in low light. This allows for much greater flexibility.

Second, a mid-range macro lens offers a perfect working distance for flower photography. I like to get very close to the flowers that I am photographing. Not so close that I am nearly touching the flower, but not so far that other flowers, leaves, and branches get in the way.

macro photography Canon 100mm f/2.8L rose abstract - How to Choose the Perfect Macro Lens

A rose image which was taken with the Canon 100mm f/2.8L.

Third, these lenses offer high-quality optics for what is often a very low price. For example, the Tamron 90mm f/2.8, (which is generally the least expensive of these mid-range macro lenses at $ 649), affords images with outstanding sharpness and bokeh.

If you desire to do insect photography, or if you often photograph with a tripod and want the increased image quality of a 150-200mm, I would recommend looking at a longer macro lens. However, if you are interested in doing handheld flower photography or if you’re on a budget but want a more dedicated macro lens, I recommend one of those mid-range lenses mentioned above.

First among the less expensive options is the aforementioned Tamron 90mm f/2.8 for Nikon and for Canon. At one point in time, this was my workhorse lens. While I had occasional issues with chromatic aberration, the sharpness, bokeh quality, and price more than made up for it. Another option around this price-point is the Tokina 100mm f/2.8 for Nikon and for Canon.

daisy abstract macro photography bokeh - How to Choose the Perfect Macro Lens

This daisy image was taken with the Tamron 90mm f/2.8 (non-VC) lens. I love the bokeh this lens produces.

Looking toward medium-level prices: the Canon 100mm f/2.8 Macro USM gets great reviews, as does the upgrade of the previously mentioned Tamron 90mm f/2.8, which has been modified to offer vibration compensation technology. Sigma also offers the 105mm f/2.8 macro with optical stabilization.

macro photography abstract Canon 100mm f/2.8L - How to Choose the Perfect Macro Lens

I took this image with my favorite lens: the Canon 100mm f/2.8L.

Finally, on the pricier side, we have the Nikon 105mm f/2.8G VR ($ 896) and the Canon 100mm f/2.8L IS ($ 749), both of which offer vibration reduction/image stabilization.

I must say, if I had to pick one lens to use foreverout of all the lenses that I’ve owned or even held in my handsit would be the Canon 100mm f/2.8L. It’s pin sharp, the image stabilization allows for shooting handheld in low light, and the bokeh is a dream come true.

Long macro lenses

  • Pros: Best working distance, generally excellent bokeh and image quality.
  • Cons: Heavy, often very expensive.
macro photography abstract dandelion Sigma 150mm - How to Choose the Perfect Macro Lens

I took this high magnification image with the Sigma 150mm f/2.8 (non-OS).

Longer macro lenses tend to have astonishingly good image qualityfor a (generally hefty) price. The bokeh and sharpness on the Sigma 150mm f/2.8 (for $ 1099), for instance, is excellent.

macro photography aster abstract bokeh Sigma 150mm macro - macro lens

I’m very impressed with the bokeh offered by the Sigma 150mm f/2.8 macro lens.

These lenses also offer the best working distance of the bunch, which is often essential for insect photography.

Another advantage of the longer working distance is the ability to use a creative macro technique: shooting through out of focus flowers.

sunflower abstract macro photography Sigma 150mm macro lens

A third image was taken with the Sigma 150mm macro. I shot through several other flowers to give this image a colorful wash.

Yet these lenses are quite heavy, which makes hand-holding for long periods difficult, and doing so in low light nearly impossible. You’ll want to consider these lenses if you wish to do high-level insect photography, or if you desire top-notch image quality and don’t mind the weight or price.

The long macro lenses include the less expensive Sigma 150mm (non-OS), which is a bit harder to find, but offers excellent image quality and is built like a tank. It’s my backup macro lens (after the Canon 100mm f/2.8L), and I turn to it when I want a bit more working distance.

Next, we have the Tamron 180mm f/3.5 and the Sigma 150mm f/2.8 OS.

And then, offering stunning image quality with a high price tag, are the Nikon 200mm f/4 ($ 1792), and the Canon 180mm f/3.5L ($ 1399). While I have not used either of these lenses, I have read rave reviews of their optics, especially the Canon 180mm f/3.5L.

macro photography abstract coneflower Sigma 150mm macro lens

This is another image taken with the Sigma 150mm macro. I shot through another coneflower to give this image a purple wash.

Conclusion

While most macro lenses allow for high-quality images, different ones will meet certain needs better than others.

To summarize:

  • If you are looking for a more general purpose lens for casual macro shooting, choose one of the short-range lenses.
  • But if you are looking for a more serious macro photography lens and prefer to shoot handheld with greater flexibility, go with one of the mid-range lenses.
  • Finally, if you want to shoot insects or want perfect image quality, choose a long macro lens.

Still uncertain about which lens to purchase? Ask your questions in the comments section below, and I will do my best to help!

macro photography abstract flower - macro lens

The post How to Choose the Perfect Macro Lens appeared first on Digital Photography School.


Digital Photography School

 
Comments Off on How to Choose the Perfect Macro Lens

Posted in Photography