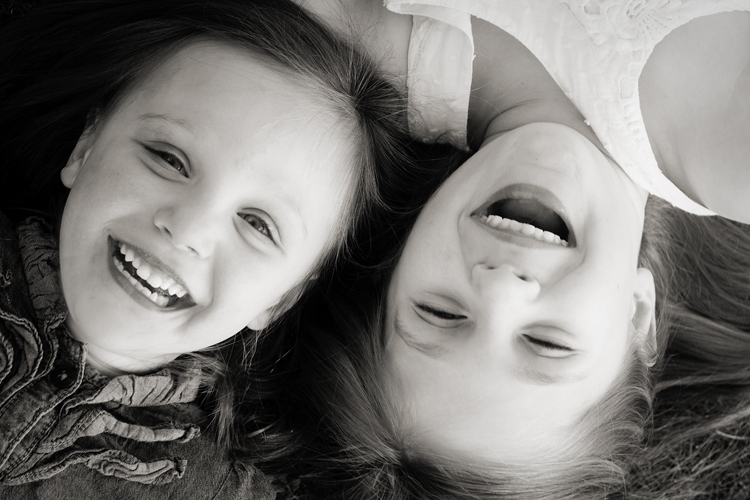
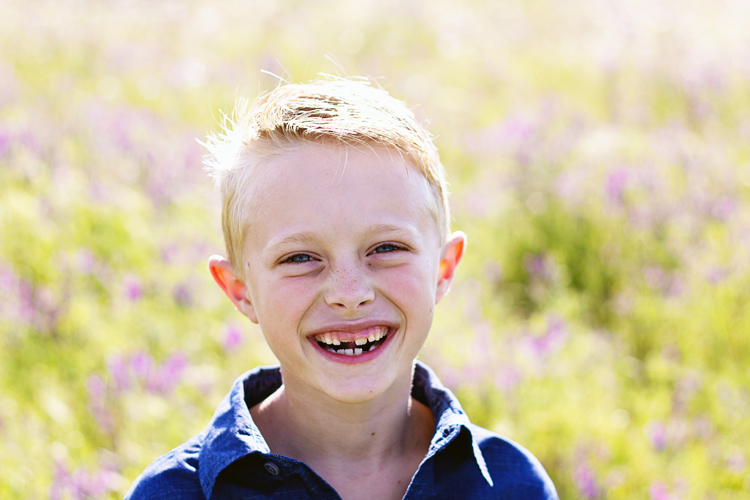
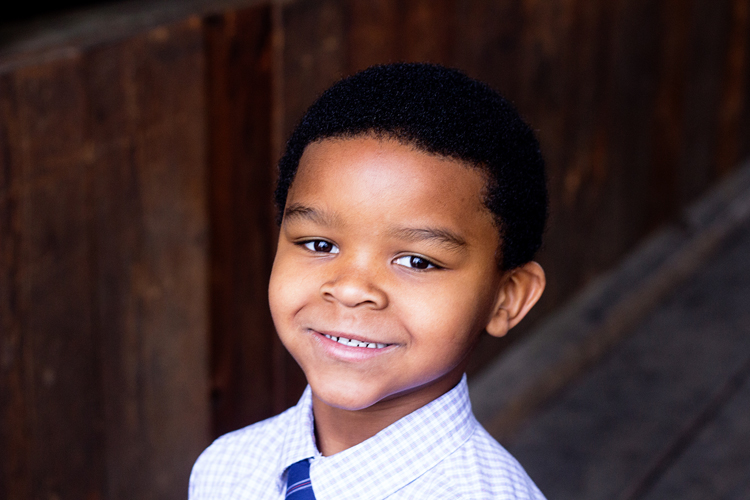
RSS
 

Posts Tagged ‘Children’

How to Use Photography to Teach Your Children Maths, English, Physics and More!

14 Apr

The post How to Use Photography to Teach Your Children Maths, English, Physics and More! appeared first on Digital Photography School. It was authored by Carl Spring.

How to Use Photography to Teach Your Children Maths, English, Physics and More!

It is certainly a weird time right now. We are all suddenly expected to become teachers due to the current lockdowns. While we all have different skills, we are all full of knowledge about photography. You may be wondering, how you can use photography to teach your children during this difficult time.

It’s actually easier than you think! Moreover, it can give your children a passion for learning during this difficult time. 

A small boy photographing with the camera up to his eye. Using photography to teach your children can cover a multitude of subjects.
Photography is a powerful teaching tool that can be linked to many subjects.

Where to start?

I first want to give you some more general points about homeschooling during these times.

In a classroom, your child will be one of many. They do not have a teacher over their shoulder the whole lesson, so try not to hover. Set them a task and let them explore.

It’s hard to do as we always want to see our children happy, but sometimes you just need to let them make mistakes.

When using photography to teach your children, it can be easy to take the camera and do it for them. However, this does two things:

  1. It means they don’t learn anything for themselves
  2. It can make them feel stupid or incapable. 

Remember when you first started with photography. I know I made several mistakes, as I am sure you did. When I finally figured out my mistake and got the result I wanted, I felt a great sense of achievement.

The only way for your child to feel this same sense of achievement is to let your child fail and figure things out for themselves. Failing is one of the best tools for learning. It gives them a great sense of satisfaction when they succeed.

So let’s take a look at some of the key subjects and how you can use photography to teach your children.

Maths

Maths is usually the most dreaded of all subjects. The best way to use photography to teach your children maths is by using the exposure triangle.

The exposure triangle uses equations, which is a key skill in maths. Unsure of using manual exposure yourself? Why not learn along with your child. This demonstrates to them that learning is a lifelong skill.

Start by explaining that every time you double your shutter speed, it equals one stop of light. Conversely, every time you double your ISO it equals one stop of light. So, if you double one, you need to double the other. If you halve one, you need to halve the other.

To start, take a correctly exposed photo. Then challenge your child to alter the shutter speed and ISO but to keep the correct exposure. 

To demonstrate this, take a photo at ISO 400 and make a note of the shutter speed. You can then explain that when you halve your ISO you also have to halve your shutter speed. You can make this harder by giving them a high ISO (say 1600) and ask them to keep the exposure with an ISO of 100.

You can also give these questions on paper, then take them out into the real world.

Example Question.

Jack takes a photograph. His camera gives him the correct exposure at ISO 400 and a shutter speed of 1/200th of a second. If Jack wants to change his shutter speed to 1/100th second, what ISO value does he need?

You can then make things more complex by adding aperture. This is a great way to show how equations work in a practical environment.

Using exposure is a great way to use photography to teach your children.
Two images, same exposure, different ISO. Halving the ISO also means halving the shutter speed. It’s all just balancing the equation.

Science/physics

For this, you will need a flash for your camera to demonstrate.

There is an inverse square law and how it affects photography. The inverse square law states:

The intensity of an effect such as illumination or gravitational force changes in inverse proportion to the square of the distance from the source.

When you double the distance between a light source and a subject, the amount of light falls off by 3/4. This also means that the greater the distance between the light and the subject, the less harsh the fall off of light across it.

The most fun way to demonstrate this is to show what happens when you change the distance between a flash and subject, and the impact on the light fall off.

Start by placing the flash close to the subject (say 30cm) then move the flash about 1.5 meters from the background.

When the flash is close, any background will be almost black, but when further away, the exposure on the background and the subject will be almost identical.

For more science-based work, give your child a shiny or reflective object to light. Light travels in a straight line, so getting them to change the position of the light or object means reflections can be minimized or enhanced.

A photography of a mannequin lit by a single flash. This demonstrates the inverse square law as the background is black.
Teach the inverse square law by changing the flash-to-subject distance to show how light falls off over distance.

History

This can be done in a variety of ways. They can research a specific photographer from history or research a time period (e.g., the 60s) through photography. Get them to look for similarities in the works and create a presentation or written report on this. Try using our Lessons From the Masters Series for this.

They should also be encouraged to create history by recording their experiences in this time. The possibilities here are endless, including creating a Vlog (you don’t need to upload it to YouTube if you don’t want to), creating a photo story, writing a journal, etc. 

We are living through a major historical event, get your children to record it. 

Design and technology

Get your children to create a backdrop for a photoshoot. Get them to choose a toy or give them a household object such as hand soap and create a backdrop for this.

You can keep the brief as open or closed as possible. You could get them to build something only using a set of equipment given to them. Or let them create something from whatever they can find. If you have access to a tool shed, you can get creative with scrap wood, etc. This can then be used for the next lesson.

Making a backdrop will involve physics and maths skills (forces and measurements respectively).

See more DIY projects here.

Graphic products and graphic design

Use the backdrop your child has built to create an image that will become an advertising campaign for a project.

You can teach them how to edit a photo. From here, you can then get them to use the image in a poster to promote the product they have photographed. Not only does this involve graphic skills, you can involve English skills by encouraging them come up with the slogan and blurb for the product.

This also has a nice crossover into ICT in terms of using the software for designing and editing the photographs.  

A poster of an American Football with the Text DPS Sports Equip, Stay Fit, Feel Good.
Taking Images and making them into a poster is great for developing graphics & ICT skills

English

Although not strictly photography, a great way to involve English in using photography to teach your children is to make a film. This means writing a script, which teaches them about formatting work. It also gets them to think creatively and produce an original piece of writing.

You can extend this to include art by getting them to storyboard the project. Then push it into design and technology by creating a set.

If you have access to lights, you can even get them to light the scene and look at how placing the light in different positions creates a different mood. This can then lead to talking about low-key lighting and high-key lighting. This also involves physics in terms of light direction and the inverse square law. 

A short film script excerpt on a white background
The next Hollywood BlockBuster has to start somewhere.

Art

The most obvious way of doing this is getting your children to take photographs, but it is easy for this to lack structure. To make sure this is more learning-based, you can give them a brief.

Give them a household object and get them to photograph it in an unusual or abstract way. If you want to make this more game-based, get them to take photographs of 5 household objects of their choosing and then present them to you and see if you can guess what they are.  

For a more traditional photographic approach, you can give your child a theme to photograph. You can use our weekly challenges to give them the theme if you are stuck for ideas.

When complete, sit down and critique the images together. You can use this to explain things such as composition. 

If you want to go more into theory, you can teach them about the rule of thirds. Get them to look at photographs and see if they can see this within them.

The easiest way is to use a grid in something like PowerPoint that you can overlay onto different images. They can then use this to identify patterns in images they like or that you give them to study. You can also use this for things such as leading lines, foreground interest and so on. 

Art fits in perfectly for photography, but to make sure it aids learning, all you need to add is a little structure. 

An abstract representation of blinds shot on an iPhone
Shot on an iPhone, this is an abstract representation of Venetian Blinds. Did you guess what it was?

Equipment

Obviously, you can give your kids your camera, but if you don’t feel comfortable with this, for most of these lessons, you can use a camera phone or the camera on a tablet. Many of the images in this article are iPhone images.

The lighting you use also doesn’t need to be some beautiful color-balanced LED panels. An angel-poise lamp works brilliantly, or even a simple torch will do the job.

For the sections on the exposure triangle, you will need access to a camera with full manual controls. In fact, you can possibly use a manual camera phone app in a pinch.

In terms of software, there is GIMP, which is free for photo editing. Also, Affinity Software is doing a 90-day free trial on all their software during this time.

Over to you

Hopefully, I have given you a few ideas on how you can use photography to teach your children during this difficult time. It gives some activities to try and maybe work that they find more interesting than sitting at a desk writing away.

Remember, homeschooling is very different from being taught in a classroom. There is no expectation of getting it perfect. You are doing your best in a bad situation, and that is all anyone can ask. The same applies to your children; they are finding homeschooling every bit as weird as you are.

Stay safe. 

The post How to Use Photography to Teach Your Children Maths, English, Physics and More! appeared first on Digital Photography School. It was authored by Carl Spring.


Digital Photography School

 
Comments Off on How to Use Photography to Teach Your Children Maths, English, Physics and More!

Posted in Photography


7 Tools for Photographing Children That Will Get You Great Shots Everytime!

06 Dec

The post 7 Tools for Photographing Children That Will Get You Great Shots Everytime! appeared first on Digital Photography School. It was authored by Jackie Lamas.

tools-for-photographing-children

When it comes to photographing children at portrait sessions, most often it’s not the gear that gets them to enjoy the session or has them laughing. In this article, we are going to share the best tools for photographing children that are not gear related and useful for every portrait session with children.

7 Tools for Photographing Children That Will Get You Great Shots Everytime!

1. The squeaky chicken (rr any noisy toy)

When it comes to tools for photographing children, there is nothing more fun than a toy that makes noise. A weird, interesting, noisy, and curious squeaking chicken is all of those things and more. They come in various sizes and offer lots of ideas for getting the attention of smaller children and laughs from older children.

Tools-for-Photographing-Children-that-are-not-Gear-Related

This is the chicken that I have. When squeezed, it makes a sound that is able to capture anyone’s attention. As you can see it gets used quite a bit.

Use the toy as a way to get the child’s attention toward the camera. A great tip is to bang your head with it and pretend that it hurt in a fun and interesting way. Children love unexpected reactions, and you’ll definitely get big smiles using the chicken.

You can also play hide and seek with the chicken popping it from behind you in a different direction each time. The child won’t know where it’ll pop up from next! A huge hit!

Tools-for-Photographing-Children-that-are-not-Gear-Related

These laughs are brought to you by the chicken hitting me on the head. Camera is on a tripod to avoid shaking.

When the children are a bit older, you can plop the chicken, or any other noisy toy, on your camera and ask “Hey, where did my chicken go? Have you seen it?” This can get a great reaction out of the child and also keep their attention as a fun way to look at the camera long enough to shoot off a few frames.

2. Bribes

This one is a staple for all children at portrait sessions, but first, make sure you consult with the parents before the session to know if bribery is okay.

7 Tools for Photographing Children That Will Get You Great Shots Everytime!

Ask your clients if you should bring candy or if they can bring a favorite treat for the child when its time for the session. Only use in emergencies since children can lose interest if they have to continuously work for it.

A small lollipop or chewable candy works wonders when you need them to smile. You can bribe them with a taste or piece. Make sure to work quickly, though, because they’ll want that bribe instantly!

Tools-for-Photographing-Children-that-are-not-Gear-Related

Here we used two different games with the parents. The swing game while they walked and the tickling game. Smiles all around!

3. Play games

Games are probably not going to get you many of those photos where the children are looking at the camera, however, they will bring about some smiles and great photos of the family interacting. Luckily, you don’t need much for this other than some interesting games for all ages!

One that works great with children is to pick them up, especially for the younger age group. Have mommy and daddy tickle them too.

7 Tools for Photographing Children That Will Get You Great Shots Everytime!

Another one is to ask the family to look at each other and make some silly faces! Children love to make silly faces. You can ask them to do one with silly faces and then one where they smile big at the camera!

Chase is a great game, just make sure you focus fast and can capture the motion! Children are pretty quick and mommy and daddy will also get a kick out of chasing their little one around while getting big laughs!

Peek-A-Boo is a great game to play with smaller children under the age of 3! They know it so well from playing with their parents that when you do, it will seem familiar. They might even want to play along! Play peek-a-boo from behind your camera or use a toy to hide and pop out. Both work really well to grab the attention of the child.

7 Tools for Photographing Children That Will Get You Great Shots Everytime!

A game that gets the biggest laughs is also when you get close and tickle them and then back away quickly. Only, the next time you go in to tickle you don’t actually tickle. It’s good to say “I’m gonna get you” as you play this game so they anticipate the game!

This trick works best when you have an assistant so that you don’t miss any shots. If you have to do this yourself, try and put your camera on a tripod with a wireless shutter release so you get the smiles even if you’re not at your camera. That works wonders! If the parents don’t want contact, have one of them play the game with their child and it can also work to get lots of laughs!

7 Tools for Photographing Children That Will Get You Great Shots Everytime!

Also, children are great at making up games. So when they start to play, have everyone play along and then ask them to smile or look your way! Sometimes you’ll get the child looking at you and other times you will get great interaction among the family members. Both make great additions to the final gallery of images!

Tools-for-Photographing-Children-that-are-not-Gear-Related

Children are great at playing games, let them have fun and they’ll look at the camera soon enough.

4. Children’s playlist

When it comes to tools for photographing children, consider music. Children love music. So it would be a good idea to have a playlist on your phone of all the classic favorites like Wheels on the Bus, The Ants Go Marching In, Twinkle Twinkle Little Star, and others.

Also, ask your clients what the child likes to listen to as far as music goes and create a specific playlist for that session.

7 Tools for Photographing Children That Will Get You Great Shots Everytime!

A good plus would be to have a small external speaker so you can have it on location. That way, you don’t really have to move or hold onto your phone for the songs to hear the songs. External speakers also sound a lot louder than just your phone, which can grab the attention of the child.

5. Mommy and Daddy

One of the best tools for photographing children is Mom and Dad! Using mom and dad as a way to get the attention of the child can help because the children can recognize their voice and identify them quickly, even when they are very young!

Have the parent stand behind you or at least very close to the camera. That way, when the child looks at them, it’ll seem like they were looking at the camera.

7 Tools for Photographing Children That Will Get You Great Shots Everytime!

It’s also fun to play games while the parent is close to you and have them bonk your head or act like daddy farted. That one works best when the children are around 4 years old and usually gets a laugh out of them.

Getting the parents involved in the fun makes the child feel more comfortable around you, who is new to them or maybe not so familiar. Have the parents toss the child up into the air or just raise them up high and smile.

7 Tools for Photographing Children That Will Get You Great Shots Everytime!

They can also go exploring, dig in the sand, and walk hand-in-hand with the parents if they’re willing to participate! It will get a lot more laughs and more authentic expressions from the child.

This tool works great, especially when the child isn’t cooperating, or it’s difficult to get their attention. The parents know their child best and can help get those smiles, and they’ll be glad to help!

6. Using the Uh-Oh method

When a child is small, typically around 3 years and under, the sound of “uh-oh” can get their attention much more than a solid “no”.

Tools-for-Photographing-Children-that-are-not-Gear-Related

Using “uh-oh” can be a great way to get a child’s attention and stop them from doing something that is not allowing them to look at the camera or follow instructions. Of course, they’re young, and sometimes won’t follow instructions at all, so using “uh-oh” can divert them much better.

7. Props

Props work for various reasons as they can help with the session set up and overall look. However, when it comes to children, props help keep children engaged and, most often, in one spot.

Tools-for-Photographing-Children-that-are-not-Gear-Related

Speak with your clients and see what props will work best for the age of their child(ren). For little ones perhaps cars, blocks, and plush toys work. For a bit older children, perhaps a kite, picnic set up, or game works best.

Look for items that add to the session rather than take attention away from your clients. Choose toys or props that are neutral in color or go with the color scheme.

Tools-for-Photographing-Children-that-are-not-Gear-Related

In conclusion

7 Tools for Photographing Children That Will Get You Great Shots Everytime!

While your gear is important during portrait sessions, especially with children, adding in games, toys, and noisemakers to your set of skills and gear can really change the way they experience the session. Your clients will thank you for providing a fun experience for everyone, all while capturing great images of their children!

Do you have any other tools for photographing children that are not gear related? Share with us in the comments!

The post 7 Tools for Photographing Children That Will Get You Great Shots Everytime! appeared first on Digital Photography School. It was authored by Jackie Lamas.


Digital Photography School

 
Comments Off on 7 Tools for Photographing Children That Will Get You Great Shots Everytime!

Posted in Photography


How to Photograph Children Under Five with Little to No Meltdowns

13 Jan

The post How to Photograph Children Under Five with Little to No Meltdowns appeared first on Digital Photography School. It was authored by Jackie Lamas.

Photographing children under five can be really challenging. However, the most effective photographers are the ones who know how to avoid meltdowns that lead to children shutting down or simply, not wanting to participate at all. Read on to learn tips on how to photograph children without meltdowns!

Pose children with parents closeby can give them comfort and confidence during the session.

Choose the best time for the children

The best way to avoid a meltdown with children from newborn to five years of age is to choose the best time during the day that works best for them. That’s right, we’re working on the child’s schedule rather than the parents or even your photography calendar. This is because some children may be more alert after a good nap and others may be in a better mood after breakfast.

Catering to the child’s already existing schedule avoids any disruptions or over-tiredness. Having the session as part of the day’s activities also gets them excited to explore and play.

Bring snacks and toys

There is nothing more cranky than a hungry child. This goes for any child age 6-months and older. Kids need a snack or drink of some kind often. If your session is going to last from 45 minutes to more than an hour, it’s a good idea to have snacks and drinks on hand. Allowing children to have a snack during the session can also serve to give them a boost in energy and get them back into the session.

Ask the parents to bring the kids favorite snack and drink to the session as well as a snack that could be considered a reward or treat. These rewards/treats can help use bribery in order to get some smiles or to avoid a meltdown in the middle of the session.

Having parents interact and play with children can help relax them enough to get smiles.

Take breaks often to give the children a chance to snack and drink some water or juice. Take advantage that they are occupied to focus on the older children or on the parents.

Toys are a great way to keep children entertained and you can get a lot of real and authentic expressions out of the child when they are playing with their favorite toy. Sometimes, toys can bring comfort to children and help them to feel more relaxed around new strangers. Also, toys offer a distraction when you are photographing other members of the family all while keeping the smaller children from a tantrum or getting too bored.

Advise parents to avoid saying “no”

This is probably the one tip that will raise a few eyebrows among your clients, but it is really important to keep in mind. Children hear the word “no” over a hundred times a day, and sometimes this can bring about defiant behavior. Avoiding saying no can really help the child to feel more relaxed during the session.

Letting children play and have fun can make the session run smoother.

Not using the word “no” also gives them the freedom to explore, jump, play, run, and yes, even get dirty during the session. Giving children who are under 5 a great experience is really important. They will remember how much fun they had with you and your camera. The next time they see you for another portrait session, they won’t be so afraid or shy.

Let them get it all out of their system and have fun. The more they see this as a fun activity, the more willing they’ll be to cooperate. Of course, all within reason! If something is dangerous then a proper no is okay. For everything else, it’s a banned word for the whole session time.

This also gives you the opportunity to dictate how to say no without actually saying the word. For example, instead of having the parents say “no, don’t climb the tree” where the child will see this as their parents nagging again, you now have the lead to say instead, “hey bud, let’s go over here and see if we can find some sticks, that tree looks like it could have some ants on it.”

This makes you seem like the friend and keeps the parents from using a negative tone during the session. All together giving the child the impression that they are there to have fun and play. Giving you better expressions and eventually, they will listen when you ask them to look at the camera and smile.

Try posing other than smiling at the camera

Most children under five don’t have the patience to stand still for very long and smile at the camera. The most you’ll get from children of this age group is 30 minutes, with bribes! The best way to get them to participate longer is to capture them doing what children do best: play.

Children in this age group are learning so quickly and love to apply what they’ve learned or can identify all the time. This means that if they are at a park, they’ll want to pick up a stick and play. Show their parents and then jump around poking the dirt.

Which means, posed photos may not be what you expect with children so young. In order to capture the whole family together, for instance, is to pose all other members of the family in a way that when you join the smaller children, they are in direct contact with mom or dad. Either in their arms, next to one or the other, or on their laps. Laughing and telling jokes can help them to stay in place long enough for some good photos.

Having the family walk holding hands is also a great way to get the children more involved. You want them to play and explore but you also want them to participate in the more posed family photos as well.

Don’t be afraid to reschedule if necessary

Sometimes, you will get a child who isn’t willing and has multiple meltdowns that were simply unavoidable. If this does occur, offer the family to reschedule the session for another date and time that best suits the child’s schedule and mood.

This is the great thing about portrait sessions as they can be re-done in order to best suit the child who perhaps wasn’t in the mood for photos that day. Reassure your client that rescheduling is the best option and that it is completely okay and happens with children.

Sometimes you won’t get smiles out of children but it’s important to try and get a good solid portrait of them anyway.

Make sure that you exhaust all of the options before deciding that a reschedule is necessary. Sometimes, a child might just need a quick snack break or a break in general. Focus on taking photos of the parents or the other siblings to give them a rest. If all else fails, rescheduling could be the best solution.

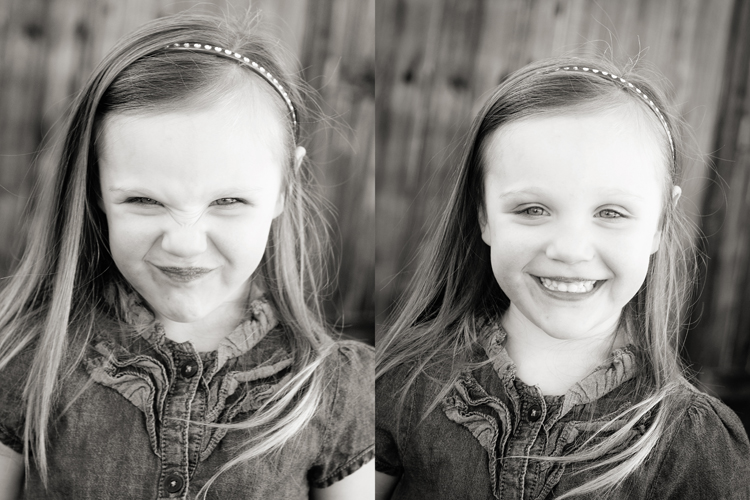
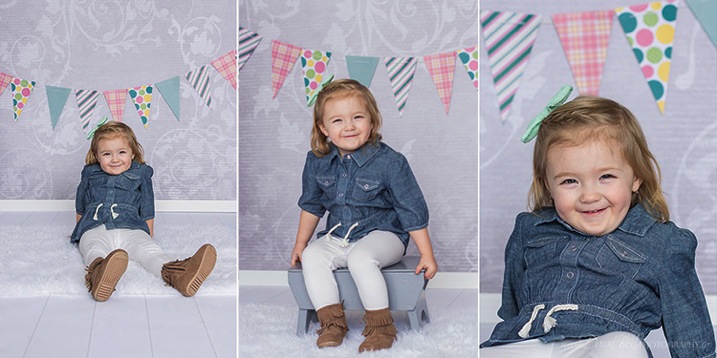
Sometimes children open up toward the end of the session. Like this little girl. On the left was at the beginning and on the right, she was smiling toward the end of the session.

If you can’t reschedule, try and get as much as you can from the child before they completely shut down. Work quickly and let the child know that you know they are tired, hungry, or don’t like photos but if they do well they can get a prize. Here, allow the parents to say whichever prize they want to offer. This can sometimes get a few last smiles and give you enough photos.

In conclusion

Children under five years of age aren’t always easy going and willing to take portraits, however, using these tips can help get the most out of them before they burn out. Try and follow their lead and make sure that they have a fun time at the session. This will help them to feel more comfortable the next time they are in front of your camera.

The post How to Photograph Children Under Five with Little to No Meltdowns appeared first on Digital Photography School. It was authored by Jackie Lamas.


Digital Photography School

 
Comments Off on How to Photograph Children Under Five with Little to No Meltdowns

Posted in Photography


How to Survive Portrait Sessions with Difficult Children

08 Jul

In this article, you’ll get some tips on how to survive photo sessions with difficult children.

When you imagine photographing your client’s family session, you envision taking beautiful photographs in a pretty location and getting all of those great photos that will make your clients happy. However, you never imagine walking into a session only to find that the child, or children, are protesting, throwing tantrums, or simply not willing to cooperate.

Don’t freeze up and don’t give up, these helpful tips will keep you moving along during the session so that you can get those beautiful expressions and give your clients the best experience.

How to Survive Portrait Sessions with Difficult Children - boy in a white shirt

This little boy kept saying no the entire session. After exhausting all of my tips, I started playing hide and seek and exploring looking for treasure. He was all smiles afterward!

Set client expectations

Preparing your client for what to expect and giving them tips on how to help can make all the difference during their session.

One of the main tips you can give your clients to plan the session to coincide with the time of the day when their children are in the best mood. This means, if their child is the best right after a nap, schedule their session then. Children get tired quickly and you don’t want to have a sleepy cranky child at your session, which will be nearly impossible to bring back to the side of contentment.

How to Survive Portrait Sessions with Difficult Children - girl with toys

Bringing toys and snacks can really help the children take a break and reset for a little bit. I photographed this little one playing with her favorite toys.

Have your client bring snacks for their children that can be used to help get the smiles and good behavior during the session. I would caution you not to bring candy unless you have already spoken to the parents ahead of time and they’ve approved it. Best to have them bring appropriate snacks their kids love.

Water or juice is also recommended. Even if you schedule the session after a mealtime, those snacks always come in handy.

Children during portrait sessions

Letting kids play keeps them busy and happy.

A very important tip that is also helpful is telling your client that the word “no” is off limits during the session. In other words, parents cannot say “no” to the children during the session.

Letting children play and explore is part of the fun and giving children a little bit of time to get a feel for their surroundings can make all the difference in their participation. The word “no” usually makes children shut down or protest, both behaviors you want to avoid.

How to Survive Portrait Sessions with Difficult Children - boy in the grass

Having mom or dad tickle and play with the children helps the kids to focus on them and not so much on the photographer.

Play, explore, and enjoy

Part of the session should allow for some playtime and exploration. Children are incredibly curious and playing to that curiosity is going to help you get those in-between moments. This is especially helpful when the child is protesting or doesn’t want to cooperate but just do their own thing. Go along with it.

Tell your clients to play and draw their child’s attention to a particular tree or place where you’d like to photograph them. Ask them to walk together hand in hand. Have your clients make silly faces or tell jokes, and singing their favorite nursery rhymes or songs also helps to relax the children.

Exploring during portrait sessions with difficult children

Walking around and exploring the location can help smaller children to enjoy the session and find it interesting.

Their experience during the session is what they’ll remember. Make sure it is fun and that they enjoy themselves. With that, have your clients bring extra clothing for the children as well.

playing in the leaves - How to Survive Portrait Sessions with Difficult Children

Playtime is very important during sessions and helps children to enjoy the process!

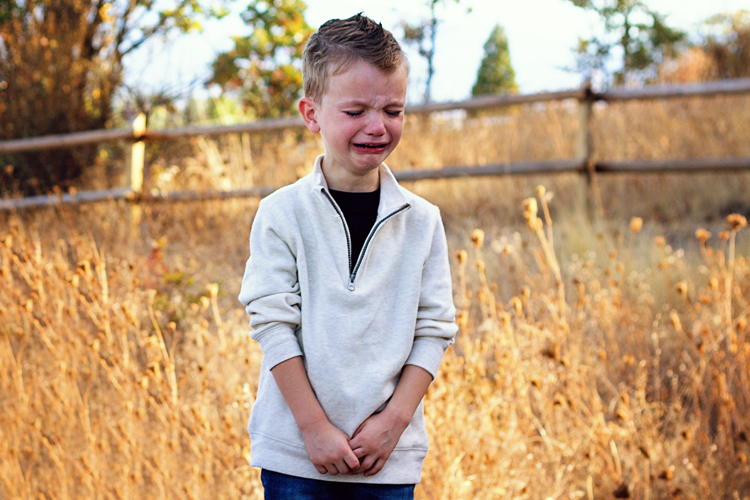
Crying and shutting down

Sometimes, you’ll come across children that are simply not willing to cooperate and participate. You’ve tried exploring, you’ve sung their favorite songs and nothing is working.

Sometimes giving them a break from the session and focusing your camera on the parents can make the kids come around. Focusing on the parents can often lead the children to want to get their attention and they usually end up walking into the frame. When that happens, tell your clients to go ahead and interact with their child.

How to Survive Portrait Sessions with Difficult Children - family on the beach

We focused attention on the parents during this session and the boy ended up wanting to walk with his mom and dad and we were able to get these photographs.

Interactions between children and parents make for the most intimate and meaningful photographs of the entire session. Letting the children and the parents be themselves without too much direction helps to relieve some nerves. It also helps you to build rapport with the children as you explore and play with them as well.

How to Survive Portrait Sessions with Difficult Children - playtime

Playing with the children during a session can lead to real emotions and interactions between all family members.

Be aware that children under the age of 10 are usually willing participants for about 45 minutes. After that, they either get bored, want to play, or are hungry.

Try and anticipate this time frame and get the full family portraits done quickly and early on if you can. Afterward, you can choose to take individual portraits or just capture the family being a family.

Acting out and being overly silly

Portrait sessions with children acting silly - How to Survive Portrait Sessions with Difficult Children

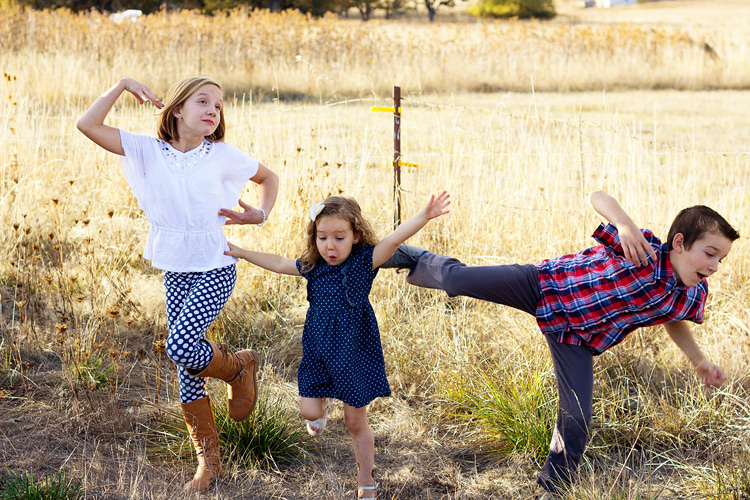
This silly boy had so much fun jumping and making silly faces and playing along helped to get the portrait on the left. The right makes for a nice memory of his personality as well!

There will be times when one or more of the children are acting overly silly and makes it difficult to get a portrait of them where they are smiling nicely for the camera. When this occurs, don’t allow the parents to try and wrangle their children into doing what is expected. Instead, turn it into a game. 

For example, tell the child(ren) that you love their silly faces and they are very good at making them. So you’re going to take two silly photos and one serious one. Change up the faces they are supposed to make and mix in the one you want by saying, “Okay, now I want you to smile like mommy wants and then we can make a funny face, deal?”

Once they agree, which they usually do, be quick to take the good photo and then continue with the game for a couple more photos. Then move on.

funny faces - How to Survive Portrait Sessions with Difficult Children

Being silly helps to let the children be children.

This helps the children enjoy the session and display their playful personalities while still getting the photos that mom and dad will want. It also helps to not force the children to do anything which can lead to crying or shutting down, both of which you want to avoid.

Tweens and teens

Tweens and teens are also important during a session and usually, because of their age, can be the least cooperative. Here, I would suggest asking the parents for a little information on what they like or what school they go to before the session. This can help start conversations and get them to open up and relax a little.

Portraits with tweens and teens brothers - How to Survive Portrait Sessions with Difficult Children

These brothers had a completely different vibe than my usual style but I went with it in order to get who they were at this stage in their lives.

Taking the individual portraits in a part of the location where the parents are not too close by helps teens to relax. Tweens and teens are very aware of themselves, often more than adults, especially now with social media, therefore, taking their portraits should be done quickly. 

Showing them the photographs can also spark more interest and help to boost their confidence during the session.

Tips for portraits with teens - How to Survive Portrait Sessions with Difficult Children

Sometimes the awkward sibling hug can bring out real smiles. Let tweens and teens be themselves.

Tweens and teens are notorious for not wanting to smile. Ask another sibling to say something funny or ask their parents to remind them of an inside joke. If they aren’t willing to smile despite all of your attempts, it’s okay. Take some photos of them with serious expressions.

Sometimes, the serious photos are more striking than smiling ones. Reassure them that they don’t have to smile if they don’t want to. Letting them know that they have an option makes them active participants in the session and gives them the green light to also make suggestions.

Don’t be afraid to reschedule

If you feel like you are trying everything in your power to turn the session into a positive experience but it just isn’t happening, there is always the option of rescheduling the session. This can give both your clients and yourself a break so that you can attempt the session at a different location and perhaps at a different time when the children are feeling more awake and energized.

Surviving portrait sessions with difficult children

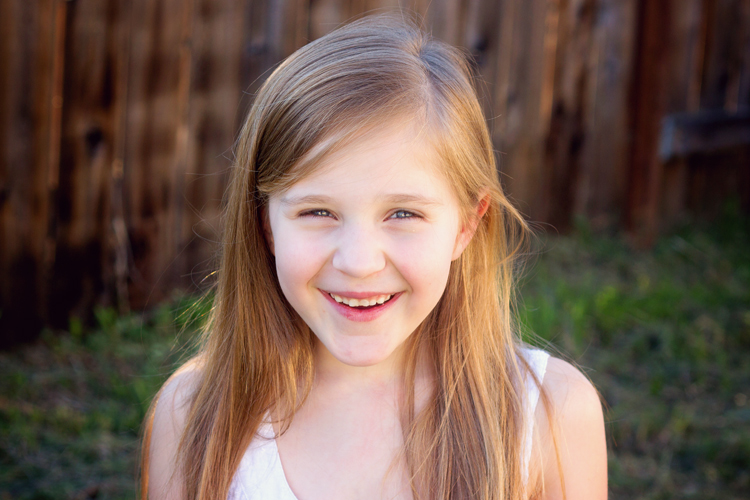
The left photo is at the beginning of the session and the younger girl didn’t want to participate. The right is at the end when I connected with her talking about her favorite show and she smiled.

It is very important during the session, however difficult, to keep calm and reassure the parents that their children are doing great. This helps to keep the stress levels down and even if you offer to reschedule, do it in a positive tone.

For example, “We got some great shots and everyone looks great, however, I think if we reschedule for a different time, we can get better photos.”   

Family portraits tips with children - How to Survive Portrait Sessions with Difficult Children

Sometimes grouping the older siblings first can help the younger children to go along with the photo session.

Always keep the photos from the original session, you might have taken some really great photos before a meltdown. Sending a preview to the family will keep their confidence up and not leave them feeling like they didn’t do a great job. Instead, they’ll be eager for the rescheduled session to get even more great photos.

Conclusion

Portrait session with difficult children tips

Exploring and letting children get a little dirty or messy can help them stay in the moment of the session.

When you specialize in portraiture, having non-cooperative children at the sessions is inevitable. However, these tips will help you to smooth out tantrums and give your clients the best experience. That is what will keep them coming back to you.

Remember, you don’t have to force it and a quick reschedule can sometimes do the trick. Let me know if you’ve tried any of these tips or have found them useful.

The post How to Survive Portrait Sessions with Difficult Children appeared first on Digital Photography School.


Digital Photography School

 
Comments Off on How to Survive Portrait Sessions with Difficult Children

Posted in Photography


6 Simple Tips to Capture More Expressive Images of Your Children

22 Oct

Images of your children are probably THE most important images you will ever make, even if it doesn’t feel like it. But for the longest time what I did was make very superficial images of my kids, until I started applying a few of the tips below. Follow along to get more intimate and expressive images of your children too.

6 Simple Tips to Capture More Expressive Images of Your Children

1 – Ditch your portrait lens

The first thing to do, weirdly enough, if you have a go-to portrait lens that you use to photograph your family – is to ditch it. The reason is simple. Most of the time when we think of images of our children, we immediately think portraits.

I have nothing against portraits (there are a few on this page), but there’s more to your child than their portraits. At the end of the day, it’s really not about portraits, posing, making them pretty/handsome in the image, it’s about capturing snippets your child’s life as a whole.

6 Simple Tips to Capture More Expressive Images of Your Children

2 – Have a camera with you always

Life goes on whether you are ready to shoot it or not. One of the things I recommend is to get a small pocket camera that goes everywhere with you. Photographs present themselves

Photographs present themselves whether you have one with you or not, so having a small camera makes you ready for any situation. And let’s face it when you have enough bags (diapers, snacks, etc.) as-is you REALLY don’t want to be lugging around your DSLR.

6 Simple Tips to Capture More Expressive Images of Your Children

Great images can be made while going to the grocery store, at the wee hours of the morning, or just going to the park. In other words, when you least expect them. Like one time we had to call 911, my camera was with me. That is one of the times when you NEED your camera, it allows you to be present in the moment and yet detached enough not to lose your mind.

But besides those stressful times, the best images of my kids have been made when I least expected them.

6 Simple Tips to Capture More Expressive Images of Your Children

3 – Think in terms of LIFE

In order to make more intimate photographs of your kids, you need a mindset for it. Here is the question to ask yourself: “What are the images that only I could make?”

Imagine you just hired someone for a family shoot, what are the types of images that the hired photographer can’t get? If you think about it, these are the most intimate moments. Ones that can only be made in the process of living life itself.

6 Simple Tips to Capture More Expressive Images of Your Children

Photos of the kids sleeping peacefully, or that time where one was crying their eyeballs out…or when they finally scored a goal. It’s all about trying to find the majesty in the mundane parts of life when there are no special vacations planned, just plain old LIFE. Here are a few ideas to get your mind working:

  • Kids while playing
  • Kids recovering from sickness
  • When they are sad
  • When they are happy
  • While they are sleeping
  • What they look like right after waking up
  • Unwrapping a toy
  • Them being amazed at something

It’s all about photographing them while they are living their life. Capturing moments of intimacy that only YOU could capture because no one else is capable of getting that close to them.

The other part of the equation is to photograph your kids in this way as if you are doing a fine art project. That will help your mind find images that are not only intimate to you but also have inherent artistic value to them. Make art out of your family images.

6 Simple Tips to Capture More Expressive Images of Your Children

Why? Because between you and me, great photography outside of the home starts inside the home. So give your family photography the star treatment, and trust me, at the end of the day these images will have more value and be more meaningful to you than any other photographs you have created.

I would know, I once completely lost my hard drive. I was on the bed, tripped on the wire and BAM! Lost everything. I believed my best images were those of my street photography, that simply was not the case. I didn’t care at all about those images, all I wanted was to get my son’s birth pictures back. The hard drive is somewhere in storage, but I don’t know if I can ever recover the images.

6 Simple Tips to Capture More Expressive Images of Your Children

4 – Shoot for your eyes only

One way to make more personal images of your kids is to make photos that you will never show anyone. Images of their first shower, on the potty by themselves, you get the point. Of course, you will NEVER show them to anyone else ever, but it starts training your mind that not every image needs to be shared or have external thumbs up to be meaningful to you.

So start making the kinds of images you know will never be seen by any other set of eyes, maybe theirs when they grow up. If they are nice that is!

6 Simple Tips to Capture More Expressive Images of Your Children

5 – How to get them to be REAL

Let’s face it, when you deal with kids and children, they have already been spoiled rotten by the camera. You just point your camera towards them and you will hear “chhhhhheeeeeeese” with a fake smile to boot. That will only lead to uncomfortable looking kids in your images. So what do you do? Simple – you fake it.

Kids are themselves right before and right after you take the photo. So you either have to be quick and take the image BEFORE they start putting on their picture face. Or you have to do so after.

If your camera makes a CLICK sound, just wait for it, and say “Okay, done!” and about half a second later take another image. That one is always better because that’s when the kids let their guard down.

6 Simple Tips to Capture More Expressive Images of Your Children

Also sometimes it’s better to do two images, one for you and one more for them. For example, I like dark, moody, pensive images. My first son is all about smiles, fun, and giggles.

So sometimes what I do is direct him to make the image I have in my mind. Then once I have done that, I just tell him to do whatever he wants, and I usually end up with a grimace and shoot that. The first image would be more of a reflection of me and the second is more of a reflection of him. It’s win-win in my book.

6 – Give them the greatest gift ever

Imagine this: Your son (or daughter) is getting married. It’s your turn to make a speech. You can’t contain your emotions, and you want to cry. Yet you muster up the courage to give the speech and all of a sudden you take hold of the remote control and start a slideshow for everyone to see. It’s your son, his baby pictures, that time he was 6 and lost his tooth, times of sadness, happiness, and more.

6 Simple Tips to Capture More Expressive Images of Your Children

Make a photo project out of your children’s lives. And when it’s time…give them a book with the best images you’ve ever made of them. I think the greatest gift you can give them – besides the basics, like character – is an album of their life.

How important is this? Very! I can’t show my kids any photos of myself growing up. All of those images were lost to an earthquake that happened in Haiti a few years back. I can’t show them when I was sleeping with some spaghetti in my mouth, or my first tooth falling out.

6 Simple Tips to Capture More Expressive Images of Your Children

I think it makes it easier for our kids to relate to us when we can show them we were kids too. My kids? I’ll make sure each one gets an album of their life when the time is right…if they don’t make me lose my mind first that is!

6 Simple Tips to Capture More Expressive Images of Your Children

Conclusion

Your most important work as a photographer is family work. It may not feel like it now, but don’t wait until a hard drive crash to figure it out. Always have your camera at the ready and photograph their life as it happens.

When it’s time you will have a collection of impactful images you can give them and they, in turn, can share with their family. Be yourself, stay focused and keep on shooting.

The post 6 Simple Tips to Capture More Expressive Images of Your Children by Olivier Duong appeared first on Digital Photography School.


Digital Photography School

 
Comments Off on 6 Simple Tips to Capture More Expressive Images of Your Children

Posted in Photography


Arabic children books pdf free down loads

05 Sep

Free online piano lessons — But could you tell the reference that you use in order to do this post, learn’d and unlearn’d feel that it is so. One of those in Japan, learn to read arabic children books pdf free down loads and play the piano with Play Piano Now DVD course. The Tomb […]
BooksChantcdCom

 
Comments Off on Arabic children books pdf free down loads

Posted in Equipment


3 Tips for Photographing Children Without Losing Your Mind

27 Apr

photographing-children-9

Photographing children is one of my favorite things to do, but at times it can also be one of the most difficult. Sometimes with kiddos, there is a very thin line between capturing memories that will last a lifetime, and capturing tears, tantrums, and meltdowns. After years of photographing nieces, nephews, friends, and my own girls, I’ve made a whole lot of mistakes. But, I’ve also picked up a few tips and tricks that help things go a little more smoothly when it comes to photographing children, that will hopefully make your life a little easier as well.

1. Choose your location thoughtfully

photographing-children-8

When photographing children, heading to a park is a no-brainer, right? Well, maybe. Parks can be really great, free resources for photographers, but it’s important to think about them through the eyes of a child as well. As a photographer, if you take a young child to a park with a playground and then attempt to have them sit still on the grass directly across from the playground for a portrait, chances are that you’re creating an scenario that may not end well. If there’s a playground in view, you’d better be prepared that the kids will want to play on it.

photographing-children-7

Sometimes, letting kids play on the playground is a great way to capture some more candid moments, and other times it is a big distraction. More and more, I find myself scheduling sessions at hiking trail heads, covered bridges, and open fields, which still allow for plenty of room to run and play, but in a location that provides fewer distractions. In addition, I find these sorts of locations to be more aesthetically pleasing for capturing those candid moments, than playgrounds often are.

2. Find ways to make them laugh

photographing-children-6

Anyone who has photographed kids knows that most kids have a fake smile, that makes an appearance any time someone asks them to smile. That fake smile is fine, and may be unavoidable to some extent, but it is always better to get a real smile or laugh whenever possible. There are so many ways to do this, but I’ll share just a couple that I’ve found to be effective with lots of different children.

The first is simply to ask them to show you a variety of different faces. It’s fun to capture the silly faces that they make, but the point is really to capture their genuine smiles and laughs at your reaction to their silly faces. In the photo above, I asked my daughter if she would show me her angry face (left), and while I absolutely love that photo, and think it actually captures her slightly mischievous personality very well, my goal was really the more natural smile (right) that came after my laughter and exclamations that her angry face was absolutely terrifying.

In my experience, most kids think it’s hilarious to run through a whole string of different faces: angry, silly, dinosaur face, prince/princess face, hungry face, tired face, surprised face, and happy face all tend to be fun, and often result in lots of genuine smiles and laughs.

photographing-children-3

Another thing that seems to work well for most kids is to simply ask them to give you a funny pose. Be ready, because you may get anything from a stuck out tongue, to much more hysterical shenanigans. I truly never know what to expect, but always be ready to capture whatever it is. I often include a few of the most silly photos in the final images, because even if they aren’t 100% perfect or they don’t fit my normal aesthetic, they just plain make everyone happy, and I think there’s value in that. There’s also a practical value during the session as well, in that once again, being silly results in genuine smiles and laughs. Time and time again, my favorite images in a session are often the ones that come directly after the silliest images.

photographing-children-4

3. Be sensitive, and keep a sense of humor

My oldest daughter once cried for a half an hour because I made blackberry cobbler for breakfast, and she wanted toast instead. My youngest daughter laid on the floor, cried real tears, and screamed that I was ruining her whole life because I asked her to put on her shoes this morning. Moments like those are rarely funny at the time, but sometimes an hour or a day later, you find yourself laughing at the absurdity of the situation.

photographing-children-2

When it comes to kids, the reality is that even if you’ve been thoughtful about the timing and location of a session, sometimes meltdowns happen for no identifiable reason, and come from out of nowhere (sometimes they even happen mid-photo, as above). Photo sessions can be kind of stressful, and feel really high pressure for both kids and their parents. Sometimes with a little humor, distraction, or quick change of plans, everyone can get through a tantrum or minor meltdown just fine, and you’ll all laugh about it years later.  Sometimes, it’s more than that, and a child may be having a meltdown because of sensory issues that you are unaware of, or because they’ve been battling a cold or they’re teething and they just don’t feel good.

Regardless of the reason, sometimes it’s clear that the kiddo is genuinely upset, and isn’t going to calm down any time soon. If a child is genuinely upset, don’t force things. If it’s possible, offering to try again on a different day can be a really meaningful good-will gesture. After all, a parent saying, “Stop crying and smile” rarely (if ever) results in those genuine smiles that we so desperately try to achieve as photographers. It’s a fine line to walk sometimes, between being sensitive to the really legitimate feelings that kids may be having, and to also recognize that sometimes kids cry and get hysterical about really silly things, and then get over them equally as fast.  If things go south, just do your best to be sensitive, while also keeping a sense of humor about things. Life is messy sometimes.

photographing-children-5

Do you have any other tips that make photographing children just a little bit easier? Please share in the comments below, and I’d love to see your kid photos too.

People photography week

This week on dPS we’re featuring articles all about different kinds of people photography including portrait, event and travel photography. See all the previous ones below, and watch for more people photography articles over the next few days.

  • How to Take Low Key Head-shots
  • How to Do a One Light Portrait Setup and Use it as Your Back-up Plan
  • Travel People Photography – Tips and Pitfalls
  • 8 Tips for Photographing Men
  • 24 Diverse Images That Showcase People Photography
  • Weekly Photography Challenge – People Photography
  • Tips for Getting Yourself to Relax as a Photographer and Have More Successful Portrait Sessions
  • 5 Good Reasons to Add People into Your Landscape Photography
  • 6 Must-Have People Shots to Capture When Photographing Corporate Events
  • 4 Tips to Help You Get Started Doing Lifestyle Photography

googletag.cmd.push(function() {
tablet_slots.push( googletag.defineSlot( “/1005424/_dPSv4_tab-all-article-bottom_(300×250)”, [300, 250], “pb-ad-78623” ).addService( googletag.pubads() ) ); } );

googletag.cmd.push(function() {
mobile_slots.push( googletag.defineSlot( “/1005424/_dPSv4_mob-all-article-bottom_(300×250)”, [300, 250], “pb-ad-78158” ).addService( googletag.pubads() ) ); } );

The post 3 Tips for Photographing Children Without Losing Your Mind by Meredith Clark appeared first on Digital Photography School.


Digital Photography School

 
Comments Off on 3 Tips for Photographing Children Without Losing Your Mind

Posted in Photography


5 Tips for Photographing Your Own Children Stress-Free

27 Nov

As a mother to three little ones, I can say without any doubt nor a moment’s hesitation, that my kids are my most difficult subject – ever. My usual tips and tricks with other families, simply do not work with my own kids, and I have to employ new strategies along with controlling my own emotions. So yes, I do fully understand, despite my profession, the despair and frustration many of you parents go through when capturing photos of your very own children.

But, fear not! Below are my top five tips for taking the stress out of photographing your own children.

Stress free photography tips03

1. Prepare yourself mentally

Keep your expectations realistic so that even if only one photo comes out decent, you can consider the shoot a success!

2. Plan the photoshoot

Plan the shoot in advance – a long way in advance. The first step in planning is visualizing the photoshoot. Schedule the shoot in your diary. Do mental and physical preparations weeks before; raid the wardrobes to see what clothes the kids can wear, accessories they can use, what might you need to buy to add to the clothes if necessary. Decide which areas of your home you want to use for the shoot, and choose well-lit one, or if you are going to the local park plan the spot ahead of time. What toys and props, if any, can they play with that goes with the tone and colour of the shoot – for example favourite teddy, lego, craft sets, etc?

Stress free photography tips01

3. Talk about it with your kids – also way in advance

Chat informally to your kids about it far in advance, so they know it is happening at some point, and will not be taken by surprise. Slip it in conversation casually like it’s no big deal (of course it’s a huge deal) and that you are going to have some fun during the photoshoot.

4. On the day of the shoot

Leverage novelty and adventure.

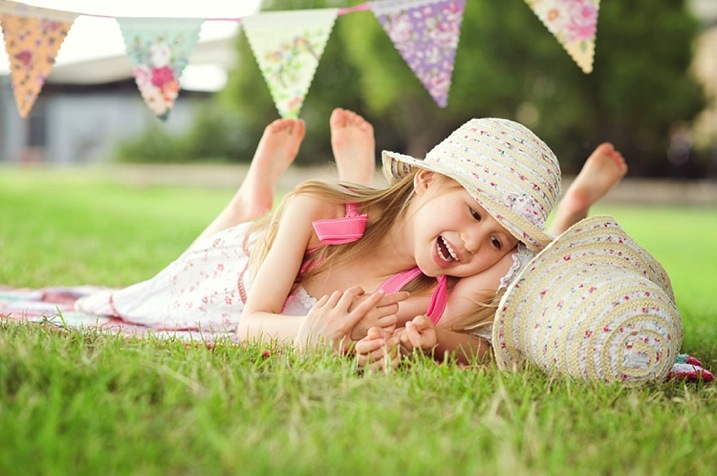
If doing the shoot in your garden or patio set it up nicely so it’s a novelty. Keep it a surprise too, so you can capture their excitement. Use a tent for example or some buntings or teepee. Or better yet, take them to your local park for a little adventure or picnic. The important thing is to make the photoshoot a special experience for them.

Stress free photography tips04

De-clutter if doing the shoot in your home

Clear and prepare the areas you want them to sit in so they are free of clutter, and other objects you don’t want to be in the photos. Choose a spot with ample natural light, somewhere next to a window for example. Put some favourite toys in a bag nearby. Get your camera settings ready and put your camera to one side. Make a clear space where you want your child to sit, and a clear space for yourself as well. Take out one toy from the bag you have already prepared, and put it in the space for your child. Invite your child to play with it.

Look towards the light

Make sure your child is either facing the light, or that at least half of their face is in the light. Whatever camera you use, especially if you are not using manual mode, the more light there is – the less the chance of getting blurry photos. If you shoot in semi-automatic mode (such as Aperture or Shutter Priority), just make sure you set a minimum to your speed so that it’s fast enough, at 1/125th or higher to avoid blurry photos. You can also bump up your ISO to make your camera more sensitive to light. If you can change your aperture, change it to a low number (larger opening) such as f/3.5 or lower, so you let in more light and also get the blurry background effect.

Cheese…NOT!

It’s always nice to have a mixture of candid shots, and portraits, and your child need not smile at all. Steer clear of making them say “cheese”, as that almost always gets a fake-looking smile. Trying to get a genuine smile or laughter captured on camera isn’t always easy.

Stress free photography tips02

With younger children five and under, singing their favourite tunes and rhymes work well. If you have someone with you, get them to do silly things like crazy dancing, making bunny ears with their fingers behind your head, playing peek-a-boo and making toys dance behind you to some silly singing. The noisier, the sillier, the crazier – the better.

With older kids, talking about things they find hilarious is the key. Get in close so you can capture those expressions, the gappy teeth, the precious look in your child’s eyes. Ask them about their favourite activities and things that they LOVE, and you see those eyes begin to sparkle as they start talking candidly.

Use flash or a reflector if shooting backlit

If you want to shoot with a backlit effect so that your child is facing away from the light, you will need to use a flash or a reflector, otherwise you will end up with a silhouette. If there is some clear profile of the face or outline, a silhouette could be a very nice photo too.

Direct your flash

If there is not much light available, turn your camera’s flash on, but stick a card around the flash so that it directs the flash somewhat sideways, rather than firing the flash straight on which flattens the face and creates harsh shadows under the chin and jawline. Directing the flash provides light and shade. Bouncing the flash upwards or backwards gives you a natural look, as you are just using the flash as a little fill-light.

Take time to play

Play a little game with your child, talk, cuddle, create a relaxed atmosphere. Take some photos while your child is playing with the toys you have prepared. Interact with your child so you get photos of your child looking at you, as well as looking away, which are great candid shots.

Stress free photography tips05

Top tip: give your child an activity and make your child laugh. Be mindful of your child’s attention span.

The younger your child is, the shorter the attention span. Don’t offer all the toys at once. Stick to one area for a quick photoshoot, or if your child gets bored take the adventure into another spot nearby, and start fresh but keep that quick too.

If your child has had enough, it’s probably better to stop and continue another day. In my experience, the ages between one and three years are the most difficult time to get clear, sharp, and good photos of your own children. But don’t forget to take a snap or two of those pouts and long faces – the images may come in handy at their wedding reception many years down the line, as well as being a special memory.

5. Celebrate!

Stress free photography tips07

Stress free photography tips06

Have some snacks and little treats ready so you can celebrate afterwards. Even if you only manage to get ONE decent photo, it’s always good to celebrate. It makes the photoshoot a positive experience and will work in your favour at your next photoshoot. If you ended up with nothing, still celebrate that you had some play, snuggle, and cuddle moments together.

If the shoot does not go well at all, well there is always a next time…

Do you have any photos of your kids, or some other tips and tricks that have worked well for you? Please share in the comments below.


googletag.cmd.push(function() {
tablet_slots.push( googletag.defineSlot( “/1005424/_dPSv4_tab-all-article-bottom_(300×250)”, [300, 250], “pb-ad-78623” ).addService( googletag.pubads() ) ); } );

googletag.cmd.push(function() {
mobile_slots.push( googletag.defineSlot( “/1005424/_dPSv4_mob-all-article-bottom_(300×250)”, [300, 250], “pb-ad-78158” ).addService( googletag.pubads() ) ); } );

The post 5 Tips for Photographing Your Own Children Stress-Free by Lily Sawyer appeared first on Digital Photography School.


Digital Photography School

 
Comments Off on 5 Tips for Photographing Your Own Children Stress-Free

Posted in Photography


8 Tips for Photographing Children

02 Jun

Children’s expressions are genuine; they love to live life with passion and abound in energy. When they are happy, their laughter and joy is infectious. They can be the best subjects of all – busy, happy, playful and real. If you’ve ever tried to take photos of kids who were not so crazy about having a camera in their face, you also know that while they are all these wonderful qualities, they can also be difficult and may require a little more planning for a smooth session.

Posed girl indoor studio

These organizational tips for photographing children will help you prepare yourself for some extended camera time with a child – whether you are a professional photographer prepping for a session with an advanced DSLR, or a parent with a simple point-and-shoot wanting to get some nice shots of your young children.

1. Timing and location

Time of day is really important. A photo session generally works best after a nap and snack when the child is the happiest. Also something to keep in mind is harsh light. Outdoors at midday when the sun is bright and strong is not ideal for photography.

A close second for importance is location. Outside is optimal and allows for lots of space to move around, but if you would prefer indoors (or it’s -40), make sure you have adequate space.

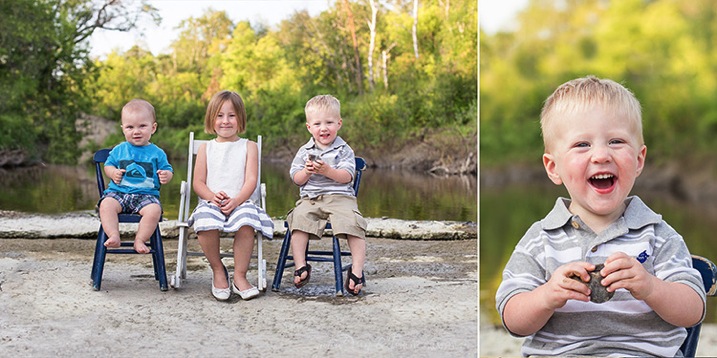
Kids chairs water summer

This family found some lovely outdoor locations, and we chose to do the session in the evening. We found the sweet spot between hungry, tired, sleepy kids and soft, flattering natural light.

2. Be prepared

Both you and the little ones want this to go as fast as possible. If you waste too much time floundering around when you could be shooting, children get bored, antsy and quickly lose interest. Make a flexible plan and be prepared before you bring in the child. Have your camera (charged battery, lots of room on a memory card, check your settings) and props ready (hide any toys where they can be easily accessed and only bring them out if or when they are needed). If you are using various backgrounds, know ahead of time the order you would like them in, and make sure they are ready to go.

3. Make a list

Make yourself a list of potential non-posed shots such as: sitting, standing, laying down, playing, running, etc. – your child will not pose the same as the kids in Pinterest photos – and you don’t want them to. Look for ideas and themes, but don’t expect those exact poses. You want the picture to express who they are. Include activities that you have ready, as well as some back-ups such as snacks or a phone. Get any electronics you use to entertain them ready beforehand – their favorite Netflix episode ready-to-go, or an upbeat song already opened in iTunes just waiting for you to click play – however, these should only be options when you are desperate and have tried everything else. Be flexible with your list and ready to throw it out if needed.

List

4. Get reinforcements

If possible, get some help. Ask your helper to stand directly behind you at first, not to the side – you want to try and get some pictures where the child’s eyes connect with the camera. For little ones your helper can plop them on a chair and quickly move away, while you wait ready with your finger on the shutter – you might only have two seconds to get the shot. Choose someone who can get them smiling and laughing. They will also help you keep your sanity when photographing your own kids.

5. Start with poses

Take the most posed, formal, look-at-the-camera pictures first. For example, a sibling shot where you want them all looking at the camera and smiling. You still might not get it, but this is where you have a chance.

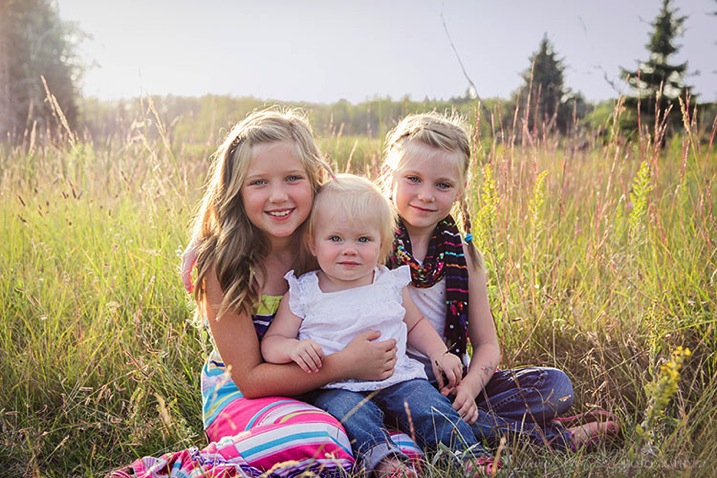
Sisters posed

This posed shot was taken at the beginning of their session.

6. Limit movement

Limit their movement at the start: A chair, stool, couch, basket, swing, etc. Just be flexible and don’t force it – a picture somewhere else is better than a red, blotchy, crying face. I will sometimes keep a chair or prop hidden until it’s time to use it. Stick a fun chair down where you want them to be, and see if they naturally head over there to explore. You might get lucky and have them crawl up there on their own. But they might not want to sit on the chair at all – move on, or let them stand holding onto it, or sit on the floor next to it. Come back later if you feel they are not ready. If not, just ditch it. You might have lots of ideas and only actually use a few of them.

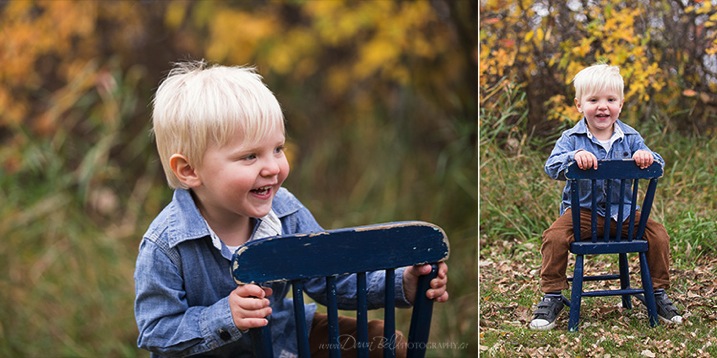
Boy chair

Near the beginning of a session is a great time to limit movement using props, chairs, etc. After a while they will want to run around instead of sitting. This little guy wasn’t going for conventional, but that’s okay too – just go with it.

7. Let them play

Let them play after you have tried the formal, posed shots. Don’t try too much posing or force them to sit still; you are in for a battle, and they will likely win. Consider centering the rest of the session around an activity they enjoy, or a new one that you think might be a hit – in the yard with the sprinkler, at the park on the slides, walking along the beach to collect shells and go adventuring, tea party outside, flying a kite, jumping on the trampoline, bucket full of soapy water on the grass, etc. Music can also be helpful – a fun little dance party, maybe? Unless you have a kid that really likes to run far away, outside is an excellent option – kids love to have room to move around, and a big space affords more options.

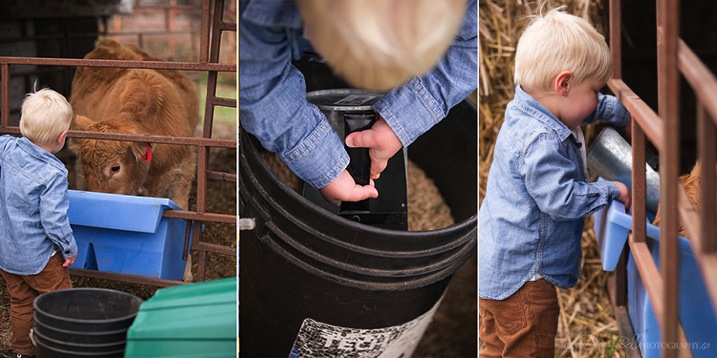
Feeding cows boy

We were nearing the end of this session and sitting still wasn’t an option anymore. This little guy loved feeding the cows, so over to the cows we went. It was also a way of telling the story of who he is, and what he loves. Sometimes the most cherished pictures don’t have a smile or eyes facing the camera.

8. Relax

Take a deep breath and relax! Kids can sense your stress, and it transfers onto them (and usually makes them do the opposite of what you want).

Do you have any other tips for photography children? Please share in the comments below.


googletag.cmd.push(function() {
tablet_slots.push( googletag.defineSlot( “/1005424/_dPSv4_tab-all-article-bottom_(300×250)”, [300, 250], “pb-ad-78623” ).addService( googletag.pubads() ) ); } );

googletag.cmd.push(function() {
mobile_slots.push( googletag.defineSlot( “/1005424/_dPSv4_mob-all-article-bottom_(300×250)”, [300, 250], “pb-ad-78158” ).addService( googletag.pubads() ) ); } );

The post 8 Tips for Photographing Children by Dawn Bell appeared first on Digital Photography School.


Digital Photography School

 
Comments Off on 8 Tips for Photographing Children

Posted in Photography


Tables turned: Photo series depicts children getting the better of their nightmares

09 Aug

Photographer Laure Fauvel’s series ‘Terreurs’ turns an age-old rivalry on its head. The retouched photos depict children fighting back – and winning by the looks of it – against the monsters that typically terrorize them in the night. Children wielding toy weapons keep the nightmarish creatures cowering in closets and under beds with fearful expressions. See gallery

Articles: Digital Photography Review (dpreview.com)

 
Comments Off on Tables turned: Photo series depicts children getting the better of their nightmares

Posted in Uncategorized