RSS
 

Posts Tagged ‘Checklist’

This Drone Photography Checklist will Ensure You Never Miss Your Shots

11 Jul

The post This Drone Photography Checklist will Ensure You Never Miss Your Shots appeared first on Digital Photography School. It was authored by Matt Murray.

drone photography checklist feature

Capturing stunning images with your drone is incredibly exciting. But with so many things to think about before you take off, there can also be some nervousness wrapped up with that excitement. The first few times I flew my drone, I struggled to remember everything. Did I put a memory card in the drone? How strong would the wind be? Did I charge all the batteries? Did I need permission to launch my drone at the beach?  Trying to keep track of all these issues was exhausting, but the one thing that made my life much easier was keeping a drone photography checklist with my backpack.

Drone photography by Matt Murray
A drone photography checklist can help you get the most out of every flight.

The process of checking through this list the day before a planned flight – as well as just before I left home – helped me to be calmer and better prepared.

Below is my drone photography checklist to ensure that you don’t forget anything and are flying as safe as possible.

1. Before you leave the house

Planning for your flight should start before you leave the house, preferably the day before the flight. There are three things I typically check: air space, location and the weather conditions.

Drone photography by Matt Murray
Make sure you have permission from the landowner to launch your drone.

a. Airspace

This is quite possibly the most important check you’ll need to do: are you legally allowed to fly your drone in the airspace above your launch location? And if so, to what height can you ascend to? Do national limits apply or is there a local restriction?

Making sure you understand the laws that govern airspace where you fly your drone is incredibly important and can potentially save you a lot of trouble.

Drone photography guide
Even if you are allowed to legally fly in the airspace, it’s important that you keep watch for other aircraft.

If you are able to fly in that airspace, you also need to check who else could be flying there too. Take a look at your proposed launch location using Google Maps – are there any helicopter pads, airports or airfields in the vicinity? Are there any model aircraft clubs or paragliding locations nearby? Is it a popular place that other drone enthusiasts might use? You need to take all these issues into consideration when planning your flight.

b. Location

As well as considering the airspace where you plan to fly, you also need to take into account what local laws govern the flying of drones in the city, state, or region you’re in. Even if you can technically fly in the airspace, local laws or rules may ban drones flying at those locations. For example, many national parks in Australia do not allow drones.

Another factor to consider is if you need the landowner’s permission to take off at your proposed launch location. Many local councils publish information on their websites regarding places you can and can’t launch your drone from. It’s always best to check beforehand well ahead of time, especially if you need to apply or seek permission before your flight.

c. Weather conditions  

It’s always a good idea to check the forecasted weather conditions ahead of time. Many weather websites predict wind speeds for the next few days – this is invaluable for drone owners. If the predicted wind speeds are too high, it may be necessary to delay your flight.

Drone photography checklist
Weather websites can predict wind conditions for the next few days, which invaluable for drone owners.

Also, keep an eye on other weather conditions. For example, is there any rain on the radar map? Are thunderstorms predicted? For morning flights, what are the chances of fog limiting visibility?

Also, think about the possibility of bright sunshine impairing your ability to see your drone in the sky or view the device that controls your aircraft.

2. Equipment

A drone photography checklist is also very handy for keeping track of your equipment. A checklist can help you to remember to pack everything you’ll need, as well as making sure your equipment is ready for your flight.

Drone photography checklist
Your drone photography checklist can also include a list of accessories you need to take with you such as launch pads and neutral density filters.

First of all, check that all of your batteries are fully charged the day before the flight. This can take some time, so doing it half an hour before you plan to leave the house is not a good idea.

Next, check your drone over to make sure that it’s in perfect working condition. This includes making sure the propellers are not damaged or have nicks in them.

Next, check that you have all of your accessories packed and ready to go. The accessories I pack include a set of neutral density filters, a launchpad, and, of course, at least one memory card.

Make sure your memory cards have enough space on them to record multiple videos and images during your flight. Also, check that you’ve copied the contents of the memory card to your hard drive if you decide to format it beforehand.

Drone photography checklist
Keep your drone software up-to-date: check for any updates 24 hours before your planned flight.

Finally, check that the device you use to control your drone (smartphone or tablet) is fully charged and that you have the latest drone software updated on it, ready to go.

3. At your launch location

When you arrive at your launch location, it’s important to have a good look around and assess the area where you’ll fly. Even after you’ve done your homework about the airspace, the location and the weather, there still can be significant risks.

Take a look around when you arrive at the location: what risks are present? Are there any power poles? Are there groups of children playing nearby? Check if there are any dogs off leash in the vicinity. Here in Australia, we also have the possibility of birds swooping you or your drone.

Drone photography checklist
Make sure you keep watch around you while flying for other distractions such as children and animals.

If you have a launch pad, set it up somewhere flat away from other people. Some people also carry bright cones to mark out a small area to warn other people that a drone will be taking off and landing in the vicinity.

Start your device and your drone. Make sure you calibrate your compass before the flight and that the drone records the home point at your launch location.

Double-check your memory card is inside the drone – there is nothing more annoying than going to take a photo or a video before realizing it’s in your bag on the ground. Take a look at the lighting conditions: do you need to use an ND (neutral density) filter? If so, which one is best suited to the light today?

Before you take off, also make sure your smartphone or device is set to “do not disturb’ mode.

Drone photography by Matt Murray
Take into account that bright sunshine during your flight can impair your ability to see your device effectively.

As you fly your drone, keep an eye out for other aircraft in the airspace, the weather conditions, and people or animals on the ground near your location. If it’s safe to do so, try to take a range of different shots with your drone. If you need ideas, check out my article, 7 shots to incorporate for better drone photography.

4. Post-flight

After your flight is completed, ensure everything is turned off correctly in the right order. Inspect your aircraft and propellers for damage.

Have a checklist of the items you brought with you and tick them off as you pack everything away. Drone ND filters are very small – you don’t want to leave one behind at your launch location.

When you get home, have a regular routine of how you pack your kit away. If you plan on flying again soon, put your batteries on charge again.

Copy your images and videos from your micro SD card ready for your next flight. If you have two or three verified copies of the images, at that point, you may wish to format your memory card, ready for your next flight.

Drone photography checklist
Have a shot list of images you’d like to capture during your flight.

Conclusion

A drone photography checklist is a great idea to keep you prepared and to ensure you are taking reasonable steps to fly safely and legally. Instead of worrying that I have forgotten to do something while driving to my location, I now head out confident that I have taken steps to prepare for the flight.

I start working through the checklist 24 hours before any planned drone activities. This gives me plenty of time to get things sorted, as well as providing me with some reassurance that I am a responsible drone flyer. My checklist is also a big help when packing my gear before the flight, and when packing up afterward.

I’d encourage you to create your own list to print out and keep with your drone backpack, ready to check before you take to the skies. What else would you add to your drone photography checklist? Tell us in the comments below.

Drone Photography Preflight Checklist Feature Image

Drone checklist summary

You can download the PDF drone photography checklist here to keep and print out. That way, you will never miss getting your shots. Alternatively, you can just refer to the list below.

Airspace

  • Am I legally allowed to fly my drone in the airspace above this location?
  • What is the maximum height I can fly my drone at this location?
  • Will other aircraft be in the vicinity? (planes, helicopters, hot air balloons, drones, model aircraft, paragliders).

Location

  • Do I need the landowner’s permission to launch my drone at this location?
  • Will there be a lot of people at this location? How will I keep my drone away from other people? Will there be distractions such as dogs, children or birds?

Equipment

  • Are all of my drone batteries charged?
  • Does my memory card have enough space for images and videos for my next flight?
  • Is my smartphone or device fully charged? Does it have the latest version of the drone operating software on?
  • Is my drone in perfect working order? Are the propellers clean with no issues?
  • Do I have all the accessories I need? E.g. Cables, launch pad, ND filters.

Weather

  • What is the estimated wind speed for the time of my flight? Will I need to take any extra precautions due to the wind speed?
  • Are any storms or extreme weather events expected? Will bright conditions make it difficult to view my device?

Pre-flight

  • Risk assessment at the location.
  • Calibrate compass and record home point.
  • Check memory card is in the drone.
  • Check shot list.

During flight

  • Continually monitor conditions (weather, airspace, ground issues).

Post-flight

  • Examine equipment for any issues or faults.
  • Ensure all items (drone, ND filters, propellers) are accounted for.

The post This Drone Photography Checklist will Ensure You Never Miss Your Shots appeared first on Digital Photography School. It was authored by Matt Murray.


Digital Photography School

 
Comments Off on This Drone Photography Checklist will Ensure You Never Miss Your Shots

Posted in Photography


Essential Family Photo Session Preflight Checklist

26 Nov

Essential Family Photo Session Preflight Checklist 1

When preparing for a family photo session, there are plenty of things to keep in mind. Such as: making sure you know what time to meet, where you are going to do the shoot, and having all your gear handy. However, even the most seasoned family photographer can overlook some items from time to time though.

For people who are new to this type of work, it can be a headache trying to keep track of all the little things that can make or break a portrait session. A simple solution is to borrow a technique from the aviation industry known as a Preflight Checklist. Creating a checklist makes all the difference between happy clients and photographic disaster.

2 Essential Family Photo Session Preflight Checklist

A Preflight Checklist is a list with various items on it that you can physically check off. Pilots use them to make sure everything is in order before taxiing down the runway, and photographers can use them before they start snapping photos.

You could create one on your phone with any note-taking app, but I recommend a physical Preflight Checklist. Since you can keep it in your pocket, you don’t have to worry about accessing apps or unlocking your phone. You can also hand it to someone else if you need another pair of eyes to check it over.

Some of the items on a photographer’s Preflight Checklist might sound relatively obvious, but it’s a good idea to keep one handy to make sure you have everything in order. Simple mistakes can make or break a photo shoot, and it doesn’t hurt to double-check that you have every little thing set – especially when dealing with families and children.

Following are the items I advise you to put on your checklist. You may want to customize it to suit your needs and possibly even create your own from scratch using a word processing program. I have included explanations for each item on this list. You could remove them to save space and focus just on the items and not the rationale for including them.

3 Essential Family Photo Session Preflight Checklist

Checklist items

1. Format Your Memory Cards

Each photo session should use fresh memory cards. The best way to do that is to format them using your camera. Doing a complete reformat, using the instructions provided in your camera’s manual, is preferred over merely deleting the pictures one-by-one. Doing a complete reformat resets your memory card to a fresh state. Deleting pictures can leave certain bits of data intact that, over time, could cause problems and make it more difficult to recover images in the case of a card failure.

2. Charge All Batteries

Charging your batteries may seem painfully obvious, but most photographers have been in at least one situation where they forgot to bring fully-charged batteries to a session. Having this on a checklist ensures that this doesn’t happen to you.

4 Essential Family Photo Session Preflight Checklist

This engagement session lasted quite a while, but luckily I remembered to have plenty of fully-charged batteries. I almost forgot though, which would have spelled disaster for the entire shoot.

3. List the Camera Gear You Need

You probably don’t need to bring all your camera gear to every photo shoot. Having a checklist for family photo sessions (or other types of sessions, such as sports or weddings) is an excellent way to ensure nothing gets overlooked. This list should include camera bodies, specific lenses, flashes, filters, even specific equipment like camera straps and lens cleaners. Don’t just assume you will remember to bring these! Having them on a checklist can save you from a big disaster during the photo session.

4. List the Accessories You Need

Accessories can include something to write with, something to write on (such as a clipboard), blankets for people to sit on, benches, footstools, and even stepladders (depending on the location and situation). Be as detailed as you like with this. It may help to have different accessories listed for different types of sessions such as pictures involving young children, or elderly grandparents.

5 Essential Family Photo Session Preflight Checklist

I was so focused on getting the gear I needed for this shot that I nearly forgot to bring a blanket for this baby to lay on.

5. Edible Items

It never hurts to have food or snacks on hand. As well as pacifying fussy kids or calming nervous parents, it sends a message to your clients that you know what you are doing and have their needs in mind. Chewy granola bars, single-serve packs of fruit snacks, and bottles of water all come in handy at photo sessions. The clients appreciated it too. Just be sure to avoid food that leaves crumbs or stain clothes!

6. Specific Types of Shots

Wedding photographers know this well, but some family photographers can easily make the mistake of forgetting specific shots in the hustle and bustle of a session. Write out the shots you want (i.e., Mom and Dad, Mom and kids, Dad and kids). Consult with the family beforehand to see if they want anything unique to their shoot. Even if they don’t have something in mind, they may appreciate that you asked for their input.

6 Essential Family Photo Session Preflight Checklist

The family specifically requested this type of shot, so I made sure to include it on my checklist.

7. Specific Poses

It’s easy to get lost in the shuffle and chaos of a family photo shoot only to realize afterward that there were certain poses you wanted to get. Or worse, certain poses your clients requested that slipped your mind. Once, I looked through my photos in Lightroom after a session. I banged my head against my keyboard because I forgot to get a shot of the parents holding their daughter or all the brothers in one group.

If you take more of a freeform approach to your sessions, you might not be too concerned about certain poses. However, if you want to cover your bases, putting your poses in your checklist is a great way to get the ones you want.

8. Clear the Pockets

If I had a dollar for every time I looked through pictures from a photo session only to realize that someone had keys, a giant cell phone, a glasses case, or other sundry items sticking out of their pockets, I’d be a rich man. These types of imperfections can land an otherwise frame-worthy photo in the rejection bin. Alternatively, it requires hours of postprocessing to fix.

The easiest solution is to have clients empty their pockets before you start taking pictures. Family sessions can be so hectic that it’s easy to overlook. Put this item on your checklist, and you’ll be all set.

7 Essential Family Photo Session Preflight Checklist

I forgot to use a checklist on this photo shoot. As a result, I didn’t think to have everyone empty their pockets. Even though the family was very pleased with their pictures, the phone and handkerchief are glaring mistakes that could have been easily avoided.

9. Clothing Check

Similarly to pocket-clearing, this one is an easy fix but can cause you to pull your hair out in post-processing if you forget. Make a note on your checklist to see that shirts are tucked in, collars are down, and ties aren’t sticking into belts.

10. Names

Names are last, but it’s one of the most important things to remember. It can make the difference between a one-time client and years of repeat business. Leave space on your checklist to write all the names of your clients and take a bit to rehearse them before your clients show up. This helps to avoid an awkward scene when directing a person to stand somewhere or put a hand on another’s shoulder, but you can’t remember their name. Nothing says unprofessional like barking out, “Hey you over there, move your hand!” Write your clients names down and use them during the photo session as much as possible. It helps the entire event to run smoother.

8 Essential Family Photo Session Preflight Checklist

There were a lot of names to keep track of during this session, but writing them down on a checklist was an easy way to help me remember.

Every photographer is going to need different items on his or her checklist. Hopefully, these give you a good idea of where to start. Creating the list is as simple as opening up a word processor and starting a bulleted list. Once you have a basic one created, you can fine-tune it to meet your needs on each shoot. It might seem like much work to create a checklist, but in the end, it saves you far more time than you might realize. You create better results for your clients too.

If you’d like to use my checklist as a template, you can download it here. I strongly recommend using this as a starting point and adding, removing, or changing the items to suit your needs.

Do you already use a Preflight Checklist or other such devices to help you with your photo sessions? If so, what do you put on it? I would love to hear your thoughts in the comments below, and I’m sure other photographers would as well.

The post Essential Family Photo Session Preflight Checklist appeared first on Digital Photography School.


Digital Photography School

 
Comments Off on Essential Family Photo Session Preflight Checklist

Posted in Photography


Composition Checklist for Beginners

30 Apr

At a recent meetup with several photographers, during a discussion on composition, one of the beginners commented: “Why isn’t there a composition checklist for all the things we need to think about?” It was a good question and was the inspiration that prompted this article.

It’s not about the gear

You can have the most expensive camera gear and the most amazing light. You could be in a fabulous scenic location, or shooting a stunning model. There are many situations that might provide you with the opportunity to shoot breathtaking images, but if the composition is not spot on, then it doesn’t matter how fancy or expensive your gear is.

Composition Checklist for Beginners - flower blooming

The reverse is true also, you can craft amazing images with beginner grade gear (even your cell phone) if your understanding of composition is good. When you know the rules and guidelines, can work them to your advantage, and even push the barriers and be really creative. No one will care what gear you used to get the shot, they will go “Wow, you must have an amazing camera!”

Learn the composition basics

Even though there are many different kinds of photography, whether you do street, landscapes, macro, studio or anything else, there are a lot of basic composition concepts that apply. Not every concept will need to be considered for every image but having a good understanding of the basics will get you a long way.

Truly understanding composition was one of the major steps in my photography making a big step up in improvement. Like every new idea, you have to put some effort into learning the idea, practicing, learning from your mistakes and practicing again and again. When you can frame up a well-composed shot without consciously thinking about what you are doing and why then you can really start to think about new ways to frame and shape your images.

First, you have to master the basics.

roller derby - Composition Checklist for Beginners

Getting Started

First of all, these are not rules. While there are some guidelines you should consider when creating an aesthetically pleasing image, it is entirely possible to ignore them all and still make a stunning image. It is, however, a lot easier to do that when you know what the guidelines are first. So this is a list of concepts you should consider for each image, not rules you absolutely have to follow.

Some things are easy and obvious, or so you might think. Yet the number of images with noticeably crooked horizons you see posted online is a testament to the fact that this stuff is not always obvious, and is hard to learn. Be kind to yourself and take it in stages. Maybe even write your list down and carry it in your camera bag as a handy reminder.

Also, every image will have different elements in it, and different concepts will apply. So pick and choose the ones that work for you and the scene in front of you. As an example, there are things you would do when framing up a landscape that won’t apply when shooting street photography shots.

So be sensible, pick a few that make sense to you or that apply to the way you shoot. Then practice them until it’s like breathing – it just happens automatically when you pick up the camera and frame a shot. When you get to that stage, add some more concepts to your process, and absorb those the same way.

Composition Checklist

So here is the checklist of things to look for in your composition as a starting point.

  1. Is the horizon straight?
  2. Is the subject strong and obvious within the image?
  3. Are the edges of the frame clean? Is anything poking into the frame that distract the viewer? Are there elements of the image that lead the eye out of the frame that could be positioned better?
  4. Is the background clean – are there distracting elements like a car parked in the background, or a fence or a house that doesn’t fit? Can you move or change the angle to remove that element?
  5. Is the foreground tidy? Are you shooting a landscape or natural scene where there might be branches or leaves or twigs in the foreground that could be tidied away?
  6. The position of people in the shot. Do they have a lamp post or a tree growing out of the top of their head? Have you chopped heads, feet, arms, or legs off?
  7. Eye contact – when shooting a group of people, do we have eye contact with all your subjects?
  8. Camera position – are you at the right height/angle for the best composition?
  9. Point of focus – when taking photos of people/creatures/animals have you focused on the eye? Do you have a catchlight in the eye?
  10. Is the Rule of Thirds being used effectively?
  11. Do you have a sense of scale – particularly valid for large landscape scenes?
  12. How does the eye travel around the image? Where does it go first? Where does it end up? Is that the story you want to tell the viewer?
  13. Lens choice – does the lens you are using affect the composition in a positive or negative way? Would a different lens be worth considering?
  14. Less is more – what truly needs to be in the frame? What can you leave out?
  15. Is it sharp? Do you want it to be?

Considering Composition in More Detail

#1 – Is the horizon straight?

It would seem fairly easy to notice if the horizon is straight when you are taking a shot. It is also extremely easy to fix in post-processing, yet so many images are posted online that have crooked horizons, varying from a little bit to quite a lot. Our brains automatically hiccup when they encounter it, so it is a genuine composition issue that needs to be resolved.

You can take the time to set the camera up so it is completely level. When shooting a panorama, timelapse, video and similar things, it is worth the extra effort. For general purpose use, it can be easily edited in post-production.

tilted horizon example - Composition Checklist for Beginners

The horizon is about 3 degrees tilted down to the left – just enough to make your brain twitch.

#2 – Is the subject strong and obvious within the image?

There are some composition concepts that are fairly straightforward and obvious, like point #1 above. Then there are some that are more open to interpretation.

This point could be considered one of those things. However, I then propose this question to you. If the subject is not strong or obvious then how do we know what the point of your image is?

Composition Checklist for Beginners - green garden image

There are a lot of competing elements in this image, where do we start?

#3 – Are the edges of the frame clean?

Are there things poking into the frame that distract the viewer? Look for elements in the image which lead your eye out of the frame. Could they be positioned better?

Running your eye around the edge of the frame when composing your shot is a valuable step that can save you a lot of time. This is one lesson I personally had to learn the hard way and it applies to most general styles of photography.

Are there things poking into the frame from outside it that impose themselves on the image and distract the viewer? Are there blurry elements in the foreground that you could move or change your point of view to reduce their impact? Is there half a car or a building partially visible in the background perhaps?

Quite often when you are framing a shot, you are focused so intently on the subject, that you may neglect to see the whole image. So you may miss these extra details that can make or break the shot.

purple flower - Composition Checklist for Beginners

The extra leaf and bud in the top left corner are distracting.

#4 – Is the background clean?

Are there distracting elements like a car parked in the background, or a fence or a house that doesn’t fit? Can you move or change the camera angle to eliminate that element from the image?

This is an extra step on top of point #3 above – putting more effort into assessing the background.

Are you taking a nice landscape and there is a farm shed clearly visible? Perhaps there is a truck parked in the distance or a vehicle on the road you need to wait to move out of frame. Are the colors harmonious? Is the sky doing nice things? Is the sun a bit too bright in the clouds?

colonial mansion - Composition Checklist for Beginners

This lovely colonial mansion had a very modern hospital and school behind it and was difficult to frame it up to reduce those jarring elements.

#5 – Is the foreground tidy?

Are you shooting a landscape or natural scene? Are there branches, leaves, or twigs in the foreground that could be tidied away?

This is particularly relevant in nature and landscape photography, but still worth remembering in general.

Is what you have in the foreground adding to the image or distracting from the subject? Is there rubbish or stuff on the ground that looks messy? Are there twigs too close to the lens so they are blurry? Can you move any branches or things out of the way or do you need to change the angle of shooting instead?

Composition Checklist for Beginners - red mushroom

Look at all the mess of cones and twigs in the foreground, all blurry and untidy.

#6 – The position of people or the subject

Do any people in your image have lamp posts or a tree growing out of the top of their heads? Have you chopped heads, feet, arms, or legs off awkwardly?

Often a problem for posed outdoor shots, this is essentially a specific element of point #3 above – checking the background in relation to your subjects.

Is the camera straight, is the angle flattering? Are people squinting into the sun? Is the lighting good? Do you have all their body parts within the frame? Is everyone looking in the same direction or interacting in the desired manner?

cat photo - Composition Checklist for Beginners

His eyes are sharp but I cut his front paws off, not good.

#7 – Eye contact

When shooting a group of people, do we have eye contact with all the subjects?

Quite often when shooting people they will generally be looking at the camera. However, if some are and some are not, it has a weird kind of dissonance to the viewer. So make sure you have some way of engaging the people so they look at you and take several shots.

If worst comes to worst you can work some Photoshop magic to blend a few frames together if it’s a critical image.

Composition Checklist for Beginners

Notice they are not all looking at the camera.

#8 – Camera position

Are you at the right height and camera angle for the best composition?

Being at eye level with your subject makes a big difference to the feel of an image. When photographing people, the camera angle does have an effect on how flattering the shot might be to the subject.

You may want to push some creative boundaries and do something different for a particular scene. Street photography is one genre where the height and angle can directly impact the story you are telling.

On average most people tend to stand and shoot from that position, but what if you get down really low?  What if you find some stairs or some way to get higher up?  What if you shoot straight down on top of your subject rather than side on?

Start to think more creatively about how you use composition to evoke a mood or tell a story about a scene.

white swan - Composition Checklist for Beginners

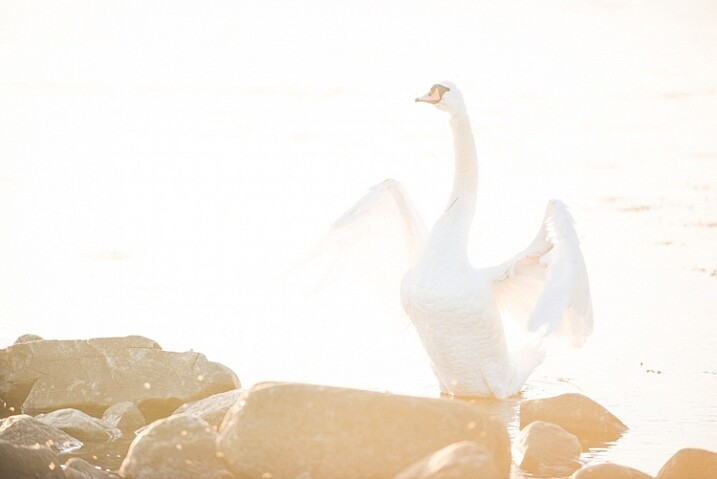
This image works because I was flat on the shore at a similar height to the swan. Had I been standing you would not have seen the wonderful curve in the bird’s neck.

#9 – Point of focus

When taking photos of people, creatures or animals have you focused on their eyes? Do you have catchlight in the eyes?

If you have a subject with eyes in the image that is looking at the camera it is important to have the focus point on the eye. Faces of people, birds, and animals are very dimensional and it can be easy to get the focus point on the tip of the nose or forehead or somewhere else. So if you have a living creature looking at your camera, focus on their eye.

Another trick to make them look alive and engaged is to angle your shot so that there is some light reflected off the dark iris. This is called a catchlight and is important especially for animals and birds that have large dark eyes. Fashion photographers use fancy round beauty dish lights to give a distinctive ring effect in their shots.

Composition Checklist for Beginners - cat photo

The nose is sharp but the eyes are just a bit out of focus which is not desirable.

#10 – Is the Rule of Thirds being used?

While the Rule of Thirds is more of a guideline than a hard and fast rule, it is a good one for a beginner to take on board. It is easy to remember and does help you create a more dynamic and interesting image when used well.

So if you intend on using it, add it to your mental checklist.

birds - Composition Checklist for Beginners

The subject in this image is more or less in the middle, but if you crop it to use Rule of Thirds the image doesn’t work as well.

#11 – Do you have a sense of scale in your landscape scenes?

Big mountain vistas are lovely. But sometimes they can become bland and uninteresting because they lack a sense of scale to truly appreciate them.

One recommendation is that a foreground element can be used to both ground the image and provide scale for the big vista behind it. Some photographers like to use themselves as a prop to help add scale as well.

Composition Checklist for Beginners - man in landscape scene

#12 – How does the eye travel around the image?

Where does your eye go first? Where does it end up? Is that the story you want to tell the viewer?

What do you have in the image to engage the eye? Are there different elements or points the eye can travel around? Does it have contrast? Are there elements that lead the eye out of the image? Are there elements that lead the eye into or around an image?

spider web in a tree - Composition Checklist for Beginners

#13 – Lens choice

Does the lens you are using affect the composition in a positive or negative way? Would a different lens be worth considering?

This can cross the boundary between a technical consideration and a creative one. Sometimes there may be a valid reason to use a specific lens, a faraway subject likely to fly away demands the use of a long lens. A tiny flower might be better shot with a macro lens. Telephoto lenses compress the elements in an image, making them seem closer together. Wide angle lenses create a lot of distortion around the edges, especially at minimal focal lengths.

Beyond that are the creative choices. Yes, you could shoot the front of this house with a wide focal length, but what if you put a zoom on and highlighted the fancy door knocker or handle? Is the lens you are using giving a flattering look to the person you are shooting?

Composition Checklist for Beginners - large eagle wings spread

A different lens would have allowed me to zoom out far enough to get this entire bird in the frame *sigh*.

#14 – Less is more

What truly needs to be in the frame? What can you leave out?

A mistake a lot of beginners make is to include too many elements in an image. It can be cluttered, messy, and confusing as to the point of the image.

Sometimes that can be used to advantage in things like street photography, but usually, less is more. A strong obvious subject and minimal distraction around it is a very aesthetically pleasing combination but it can be difficult to learn how to frame images up this way.

Composition Checklist for Beginners - landscape scene

So much going on here, its a bit overwhelming with no clear subject. It’s a pretty scene but is the composition effective?

#15 – Is the image sharp?

Do you want it to be? Not every image need to be 100% sharp. You can use aperture to creative effect by selecting a narrow depth of field. ICM or Intentional Camera Movement adds blur and movement as well. Use of specialty lenses like those from Lensbaby gives you many different ways to add soft focus or special effects to enhance your image.

Many street shots have blurred movement and creative focus elements, either the photographer or the subject (or both) may be moving.

Some people insist that images be absolutely as sharp as they can be, but that is a creative choice up to you, the photographer.

Composition Checklist for Beginners - motion blur from moving water

A bit of slow shutter speed on the waves for a soft creative swirl effect.

Summary

Some of the items on the checklist are basic sensible things that apply to most images. Some are more advanced technical considerations. Others may only apply if you are considering trying some more creative approaches to your composition

There are many other specific technical concepts that are not covered in this composition checklist. When you are ready for them, you can find plenty of information here on dPS to guide you.

This list is designed to cover the most basic ideas and thoughts that a beginner might need to keep in mind when first starting to think about properly composing and framing up their images. Good news, if you have made the step to start making your images with deliberate intention, that means you already have your feet on the path to becoming a better photographer.

Pick a few key items from this composition checklist that apply to your style of photography and try to remember them deliberately everytime you shoot. Eventually, it will become so automatic, you adjust for them without thinking, your mental muscle memory will have kicked in.

Are there any key concepts you feel should be included in this list?  By all means, let me know in the comments below.

The post Composition Checklist for Beginners appeared first on Digital Photography School.


Digital Photography School

 
Comments Off on Composition Checklist for Beginners

Posted in Photography


A Helpful Checklist to Use Before Photographing Anything

08 Dec

If you are reading this you probably find photography exciting, maybe even so exciting that from time to time you forget changing your camera settings according to the subject you’re shooting. You have probably already missed at least one amazing shot, just because you forgot to change the ISO or shutter speed.

Image2

You are not alone. This happens to both amateurs and professionals, however there are a few simple tricks to avoid ever missing that shot again due to unpreparedness. In this article I’m going to share with you the simple steps I follow before going out to photograph, the steps I have learned the hard way. A helpful checklist to use before photographing anything.

Why do you need a checklist?

Okay, before I start sharing the steps, let’s briefly talk about why you need a checklist. The reason I need a checklist might be different than yours, and it all comes down to your needs. What are you photographing? Are you photographing to make huge prints? Are you capturing a moment that only lasts a brief second?

My main field of photography is landscapes and nature. It is rare that my window of opportunity only lasts for a brief second, meaning that I often have the time to find the best settings. However, if you are more into wildlife photography, travel, or perhaps street photography, your window of opportunity is much shorter, ergo you must be able to quickly take up your camera, and fire off some shots without spending much time fiddling with your settings.

Image7

The feeling of coming back home after an amazing evening, importing your photos, and realizing all the shots are ruined as a result of forgetting to change the settings is a feeling I don’t wish upon anyone. No matter what type of photography you do, quality is the most important.

Point one – Before you leave

Step one takes place before even leaving your home. This might very well be the most important step, and I know for a fact it’s one that many often forget.

Part one of the checklist consists of four basic, yet crucial elements to check:

  • Are your batteries charged?
  • Is your memory card full?
  • Did you clean your equipment?
  • Is all your gear packed?

Are your batteries charged?

You may laugh and think, “Do’h, obviously I won’t go out with empty batteries”. Well, that’s exactly what I thought too until one time when I drove seven hours to the west of Norwa,y where I would spend the weekend in a tent photographing epic landscapes. After one hour of shooting my first battery died, and I realized that all my spare batteries where empty too. Since I was camping I did not bring a charger.

In deep frustration I ended up driving the seven hours back home, as I did not want to spend the weekend in some of the greatest nature of Norway without my camera (Yes, I should have stayed and enjoyed the nature – but my thoughts where not rational at the time). Luckily I managed to pull off one descent shot from that evening, which I did not realize before writing this article!

Image5

I have made a habit to always set my batteries to charge as soon as I get home from photographing, yet I also double check that all batteries are charged when I leave on trips.

Is your memory card full?

Now, leaving home with a full memory card is not as critical as not having any battery time. However it is rather annoying to get the message “Memory card full” after taking 10 pictures. You then have to waste time deleting images one-by-one. Make sure there is enough free space on the card when you head out on your adventures!

Is your equipment clean?

Most of us are guilty of not cleaning our equipment from time to time. It’s more exciting to process your images when you get back home rather than clean your gear, right?

Regardless of what is fun or not, cleaning your equipment needs to be done, especially after photographing in rough conditions or by the sea. I recommend always bringing a microfiber cloth, air blower, and some cleaning spray when you are out, but the more you clean at home, the more time you have to photograph when you’re out.

Personally, in my earlier days I had a couple shots ruined due to forgetting to clean my filters after being out photographing by the ocean.

The image below is a typical example of what your files might look like if you forget to clean your lens before shooting. This shot was luckily not ruined, but it took some time removing all dust spots.

Image1 DustSpots 2

Did you pack all your gear?

This is something I have yet to experience myself, probably due to my paranoia of forgetting something. But it’s happened more than once that I have been out with someone who forgot their memory card, remote shutter, or even their camera. So make sure that all of the equipment you need is in your backpack when you exit the door!

Point two – In the field

Now that your batteries are charged, your memory card has available space, your gear is cleaned, and the equipment you need is packed, let’s head out to capture some beautiful images! But don’t get too excited, remember to go through these quick steps first:

Determine the subject you are about to photograph

Before you look into the settings themselves, start by reflecting upon the subject you are going to photograph. Is it a landscape, animal, people, or something else? By spending a few seconds becoming aware of what you are about to photograph, it will be much easier for you to remember to set your settings accordingly. You will then avoid photographing a bird with a narrow aperture when you want to blur the background.

At this stage I would also recommend putting some thought towards what lens you will need most. If you’re photographing birds, you normally need a long zoom, more than the wide angle. Prepare the correct equipment right away, so you avoid having to change lenses while you watch the bird fly away.

Image4 Bird

Check your ISO

If you are a landscape photographer like myself, you want the ISO to be as low as possible in most situations. However, you are also outside photographing sunrise, daytime, sunset and nighttime. These hours often require different settings.

It sucks to photograph a beautiful sunrise, just to come home and realize you forgot to change the ISO from 1600 after photographing the stars last night.

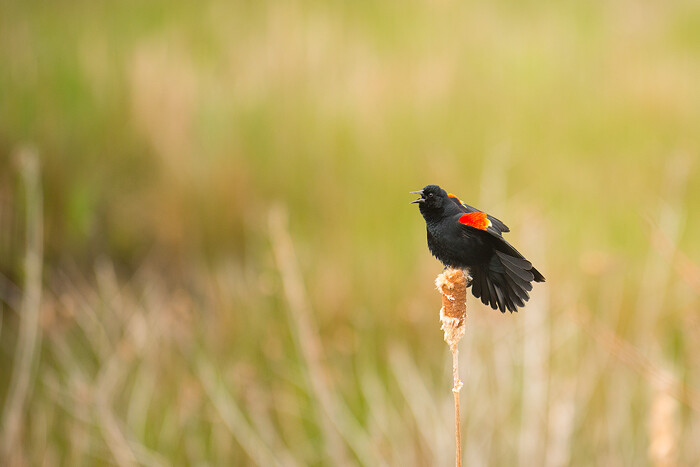
As a default I always check that my ISO is set to 100 when turning my camera on, as this is the setting I use for most of my shots. If you are photographing wildlife you might use 400 as a default to make sure you freeze the moment.The image below is a unfortunate example of one time I forgot to reset my settings from the night before. This resulted in me missing that small moment when the bird spread its wings.

Image4

Check your White Balance

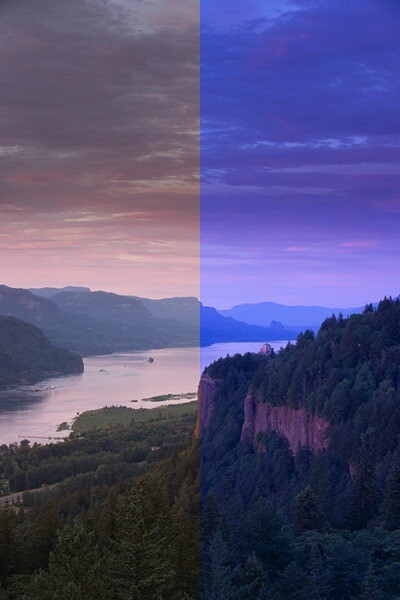
Most of us look at the image preview after firing of a couple shots so we quickly become aware of any visible mistakes we have made, such as not setting the White Balance. Sure, the White Balance is easy to fix in post processing, but I prefer to make the shot as complete as possible in the camera. Quickly check that the White Balance is set to what you normally use (even if it is Auto, Cloudy or any other pre-made setting).

Image3 WhiteBalance 2

Don’t forget the focus!

Have you ever quickly taken up your camera to photograph the bird that just passed you, and later noticed that the image is out of focus because you forgot to change to Autofocus? It’s an easy mistake to make, so before you start photographing, be aware of how you have set the focus.

This also applies for the other way around as well. Say you are about to photograph a long exposure, you set the focus perfectly and slide on the filters. Then, just as you are about to start taking the picture, your autofocus starts going. No, it’s not a disaster, just simply annoying.

Image6

Point three – Back home

At this point your memory card is hopefully filled with amazing images. This is the last step, and it loops right back to point one. Now it’s time to set your batteries to charge, import your photos, and clean your equipment. If you make a routine of doing this after every session, you will avoid making the mistake of heading out unprepared.

That’s it for this checklist, and I hope it helps the next time you are out photographing. These steps don’t take much time to follow, and you don’t need to spend hours in post-processing trying to save a image anymore.

Do you have any “rituals” you do before going out to photograph? Please share in the comments section below.

googletag.cmd.push(function() {
tablet_slots.push( googletag.defineSlot( “/1005424/_dPSv4_tab-all-article-bottom_(300×250)”, [300, 250], “pb-ad-78623” ).addService( googletag.pubads() ) ); } );

googletag.cmd.push(function() {
mobile_slots.push( googletag.defineSlot( “/1005424/_dPSv4_mob-all-article-bottom_(300×250)”, [300, 250], “pb-ad-78158” ).addService( googletag.pubads() ) ); } );

The post A Helpful Checklist to Use Before Photographing Anything by Christian Hoiberg appeared first on Digital Photography School.


Digital Photography School

 
Comments Off on A Helpful Checklist to Use Before Photographing Anything

Posted in Photography