RSS
 

Posts Tagged ‘catching’

BCN Retail shows Canon catching Sony in the Japanese full-frame MILC market, Nikon stagnant — for now

27 Oct

BCN Retail, a Japanese analyst firm that collects daily sales data of mirrorless interchangeable lens cameras from online and in-person points of sale in Japan, has published (translated) its latest numbers, showing the breakdown of Japanese domestic market share in the full-frame mirrorless interchangeable lens camera (MILC) market.

BCN Retail starts its report with partially encouraging news, noting the camera market, at least in Japan, has almost entirely recovered from the pandemic drop, with unit sales in the month of September being down just 2% and revenue from those sales down just 10% year-over-year (YoY). Lower numbers YoY is never a good thing, but considering the state of the camera market even pre-pandemic, these drops aren’t terrible.

According to BCN Retail’s latest numbers, Canon and Panasonic have seen a rise in market share over the past few months, while Nikon has more or less stayed even. Meanwhile, both Sony and Sigma have seen their market shares drop over the past few months.

Full-frame mirrorless market share numbers: Brown (Sony), Red (Canon), Yellow (Nikon), Blue (Panasonic), Grey (Sigma). The dark blue and red bars at the bottom show unit sales and revenue (as a percentage of overall interchangeable lens camera (ILC) camera sales), respectively.

BCN Retail says Canon’s rise in market share — now 34.7% — can be attributed to the release of its R5 and R6 mirrorless cameras, while Panasonic’s rise — now 5.8% — is attributed to the launch of its S5. Nikon’s market share saw a small increase in July, which could likely be attributed to the release of its entry-level Z5, but since August its market share has more or less stayed stagnant, sitting at roughly 13%. It’s possible its forthcoming Z6 II and Z7 II mirrorless cameras could give the company a boost, though.

Meanwhile, Sony has seen its market share drop from roughly 60% back in May to now just 43.9%, only 9% ahead of Canon who, at the start of the year, had just 15% of the market share. Sigma, too, has seen its market share drop to just 2.6% after once being ahead of both Nikon and Panasonic back in May when the FP sales were hot.

The Canon EOS R5 was the most popular full-frame mirrorless interchangeable lens camera (MILC) of September, according to BCN Retail.

It’s worth noting these market share numbers are specific to the Japanese market and greatly impacted by new cameras launched within a given month or quarter.

Back in the summer of 2018, Sony effectively had 100% of the full-frame MILC market share, as there were no other competitors. Within six months of both Canon and Nikon introducing their respective full-frame mirrorless cameras, Sony’s market share was effectively halved and since then, it’s been further chipped away at by Canon.

This doesn’t necessarily mean Canon or Nikon were eating into Sony sales at the beginning when the two first entered the market, as you can see unit volume also rose when Canon and Nikon introduced their mirrorless cameras, but now that sales have more or less returned to their pre-pandemic volume and Sony is further dropping in market share, it is possible we’re starting to see Canon starting to pull away some of Sony’s customers a bit.

Canon EOS RP (left), Nikon Z5 (right).

What should be interesting to see is whether Nikon’s new Z6 II and Z7 II take more market share from Canon or Sony or is simply converting more DSLR users and therefore adding to the sales volume rather than taking from elsewhere in the full-frame MILC market. In the past, it seems Canon’s numbers are more affected by the rise and fall of Nikon’s market share, whereas Sony’s are more affected by the rise and fall of Canon’s market share, but even with the charts, it’s difficult to get the full picture without knowing the precise number of units being sold and the price at which they’re selling for—two numbers that prove challenging to extrapolate from BCN Retail’s numbers or even CIPA.

BCN Retail also notes that full-frame sales have hit 10.7% of the overall interchangeable lens camera (ILC) market, marking the first time it’s been in double-digits. Revenue from full-frame MILC, as a percentage of the overall ILC market, also saw a dramatic jump to 25%. These are both the highest-ever numbers for the full-frame market, but BCN Retail does note this is because the average cost of a full-frame MILC tends to be 2.3x as much as a crop sensor ILC —¥230,000 (~$ 2,200) to ¥100,000 ($ 955), respectively.

Articles: Digital Photography Review (dpreview.com)

 
Comments Off on BCN Retail shows Canon catching Sony in the Japanese full-frame MILC market, Nikon stagnant — for now

Posted in Uncategorized


The iPhone 11 is more than just Apple catching up to Android

18 Sep

Apple announces iPhone 11 (Pro)

Major smartphone manufacturers introduce new models on a yearly cadence. Camera upgrades tend to be a major focus, with little else apparently to differentiate new models from old ones. Often, what seem like small, incremental upgrades can have significant impact on photo and video quality. The iPhone XS, for example, dramatically improved image quality in high contrast scenes thanks to the sensor’s ability to capture ‘inter-frames’ – short exposures in between longer ones – to improve dynamic range and noise. Similarly, 4K video was improved with multi-frame HDR capture.

Last week, Apple announced numerous updates to the cameras in the iPhone 11, some of which will inevitably be seen as attempts to catch up to capabilities of contemporary Android offerings. But, taken together, we think they stack up to meaningful upgrades that potentially make an already very capable camera one of the most compelling ones on the market.

See beyond your frame

The iPhone 11 offers a whopping 13mm 35mm equivalent field-of-view with its wide-angle, ‘0.5x’ lens. The iPhone 11 is the first Apple phone to feature an ultra-wide angle lens, a feature that’s been present on numerous Android phones. Wide angle lenses often add drama and a sense of depth to everything from landscapes, portraits, architecture and still life. They also allow for creative framing options, juxtaposing interesting foreground objects and distant ones. They’re also useful when you simply can’t step any further back from your subject.

The iPhone 11 models alert you to the potential presence of objects of interest beyond your current framing by showing you the wider field-of-view within the camera user interface. Simply tap the ‘1x’ focal length multiplier button to zoom out (or zoom in, on the Pro models).

Refined image processing pipeline

Newer, faster processors often mean increased photo and video capability, and the iPhone 11 is no exception. Its image processing pipeline, which handles everything from auto white balance to auto exposure, autofocus, and image ‘development’, gets some new features: a 10-bit rendering pipeline upgraded from the previous 8-bit one, and the generation of a segmentation mask that isolates human subjects and faces, allowing for ‘semantic rendering’.

10-bit rendering should help render high dynamic range images without banding, which could otherwise result from the extreme tone-mapping adjustments required. Semantic rendering allows faces to be processed differently from other portions of the scene, allowing for more intelligent tone mapping and local contrast operations in images with human subjects (for example, faces can look ‘crunchy’ in high contrast scenes if local contrast is uniformly preserved across the entire image). The end result? More pleasing photos of people.

Night mode

The general principle of night modes on smartphones is to use burst photography to capture multiple frames. Averaging pixels from multiple exposures reduces noise, allowing the camera software to brighten the image with less noise penalty.

Google set the bar for low light photography with its Night Sight mode. Other Android phones soon added their own similar modes, making the iPhone’s lack of such a mode particularly conspicuous (third party solutions like Hydra haven’t offered quite the level of detail as the best Android implementations, and of course require you to launch a separate app).

Apple has developed its own Night mode on the iPhone 11 phones, which turns on automatically under dim conditions. Apple’s approach is slightly different from Google’s, using ‘adaptive bracketing’ to capture and fuse multiple exposures with potentially differing shutter speeds (the Pixel takes a burst of images at the same shutter speed).

Varying shutter speeds to capture both short and long exposures can help reduce blur with moving subjects. Information from shorter exposures is used for moving subjects, while longer exposures – which are inherently brighter and contain less noise – can be used for static scene elements. Each frame is broken up into many small blocks before alignment and merging. Blocks that have too much motion blur are discarded, with a noise penalty resulting from fewer averaged frames for that scene element.

Deep Fusion

Google’s Night Sight mode isn’t just about better photos in low light. Night Sight uses burst photography and super resolution techniques to generate images with more detail, less noise, and less moiré thanks to the lack of demosaicing (slight shifts from frame to frame allow the camera to sample red, green and blue information at each pixel location). ‘Deep Fusion’, available in a soon-to-be-released update later this year, seems to be Apple’s response to Google’s Night Sight mode.

Deep Fusion captures up to 9 frames and fuses them into a higher resolution 24MP image. Four short and four secondary frames are constantly buffered in memory, throwing away older frames to make room for newer ones. The buffer guarantees that the ‘base frame’ – the most important frame to which all other frames are aligned – is taken as close to your shutter press as possible. The buffer ensures a very short, or zero, shutter lag, enabling the camera to capture your desired moment.

After you press the shutter, one long exposure is taken (ostensibly to reduce noise), and subsequently all 9 frames are combined – ‘fused’ – presumably using a super resolution technique with tile-based alignment (described in the previous slide) to produce a blur and ghosting-free high resolution image. Apple’s SVP of Worldwide Marketing Phil Schiller also stated that it’s the ‘first time a neural engine is responsible for generating the output image’. We look forward to assessing the final results.

Portrait mode

Apple is famous for using its technologies to perfect ideas that other companies introduced. That could be said about iPhone’s Portrait mode. Fake blurred background modes have been around for years, even on some compact cameras, but they were never convincing. By applying depth mapping technology to the problem, Apple made a portrait mode that worked, and soon the feature was everywhere. And we’re slowly seeing a similar trend with portrait re-lighting: researchers and companies have been quick to develop relighting techniques, some of which do not even require a depth map.

The iPhone 11 updates portrait mode in a few significant ways. First, it offers the mode even with the main 26mm equivalent main camera, allowing for shallow depth-of-field wide-angle portraiture. The main camera modules always have better autofocus, and its sensor has been updated to have ‘100% focus pixels’ (hinting at a dual pixel design), so wide-angle portrait mode will benefit from this as well.

Second, on the Pro models, the telephoto lens used for more traditional portraits has been updated: it’s F2.0 aperture lets in 44% more light than the F2.4 aperture on previous telephoto modules. That’s a little over a half stop improvement in low light light gathering ability, which should help both image quality and autofocus. Telephoto modules on most smartphone cameras have struggled with autofocus in low light, resorting to hunting and resulting in misfocused shots, so this is a welcome change.

And thirdly…

Portrait relighting

The iPhone 11 offers a new portrait relighting option: ‘High-Key Light Mono’. This mode uses the depth map generated from the stereo pair of lenses to separate the subject from the background, blow out the background to white, and ‘re-light’ the subject while making the entire photo B&W. Presumably, the depth map can aid in identifying the distance of various facial landmarks, so that the relighting effect can emulate the results of a real studio light source (nearer parts of the face receive more light than farther ones). The result is a portrait intended to look as if it were shot under studio lighting.

We’ve now talked a bit about the new features iPhone 11 brings to the table, but let’s turn our attention backwards and take a look at the ways in which iPhone cameras are already leading the industry, if not setting standards along the way.

Sublime rendering

Straight out of camera, iPhone photos are, simply put, sublime. Look at the iPhone XS shot above: with a single button press, I’ve captured the bright background and it looks as if my daughter has some fill light on her. If you want to get technical, then, white balance is well judged (not too cool), skintones are great (not too green), and wide dynamic ranges are preserved without leading to crunchy results, a problem that can result from tone-mapping a large global contrast range while retaining local contrast.

Much of this is thanks to segmented processing techniques that treat human subjects differently to others when processing the image. Digging deeper and looking at images at pixel-level, Apple’s JPEG engine could do a better job in balancing noise reduction and sharpening: often images can appear overly smoothed in some areas with aggressive sharpening and overshoot in others. This may be done in part because results have been optimized for display on high DPI retina devices, and a Raw option – that still utilizes all the computational multi-frame ‘smarts – would go a long way to remedying this for enthusiasts and pros.

But it’s hard to argue that iPhone’s default color and rendition aren’t pleasing. In our opinion, Apple’s white balance, color rendering, and tone-mapping are second to none. The improvements to image detail, particularly thanks to Apple’s as-of-yet unreleased ‘Deep Fusion’ mode, should (we hope) remedy many of our remaining reservations regarding pixel-level image quality.

HDR Photos

No, not the HDR you’re thinking about, that creates flat images from large dynamic range scenes. We’re talking about HDR display of HDR capture. Think HDR10 and Dolby Vision presentations of 4K UHD video. Traditionally, when capturing a high contrast scene, we had two processing options for print or for display on old, dim 100-nit monitors: (1) preserve global contrast, often at the cost of local contrast, leading to flat results; or (2) preserve local contrast, often requiring clipping of shadows and highlights to keep the image from looking too unnatural. The latter is what most traditional camera JPEG engines do in the absence of dynamic range compensation modes.

With the advent of new display technology like OLED, capable of 10x or higher brightness compared to old displays and print, as well as nearly infinite contrast, the above trade-off need no longer exist. The iPhone X was the first device ever to support the HDR display of HDR photos. Since then, iPhones can capture a wide dynamic range and color gamut but then also display them using the full range of its class-leading OLED displays. This means that HDR photos need not look flat, retaining both large global contrast from deep shadows to bright highlights, while still looking contrasty, with pop. All without clipping tones and colors, in an effort to get closer to reproducing the range of tones and colors we see in the real world.

It’s hard to show the effect, and much easier to experience it in person, but in the photo above we’ve used a camera to shoot an iPhone XS displaying HDR (left) vs. non-HDR (right) versions of the same photo. Note how the HDR photo has brighter highlights, and darker midtones, creating the impression that the sky is much brighter than the subject (which it is!). The bright displays on modern phones mean that the subject doesn’t look too dark compared to the non-HDR version, she just looks more appropriately balanced against the sky, rather than appearing almost the same brightness as the sky.

Wide color (P3)

Apple is also leading the field in wide gamut photography. Ditching the age-old sRGB color space, iPhone images can now fully utilize the P3 color gamut, which means images can contain far more saturated colors. In particular, more vivid reds, oranges, yellows and greens. You won’t see them in the image above because of the way our content management system operates, but if you do have a P3 display and a color managed workflow, you can download and view the original image here. Or take a look at this P3 vs. sRGB rollover here on your iPhone or any recent Mac.

Apple is not only taking advantage of the extra colors of the P3 color space, it’s also encoding its images in the ‘High Efficiency Image Format’ (HEIF), which is an advanced format intended to replace JPEG that is more efficient and also allows for 10-bit color encoding (to avoid banding while allowing for more colors) and HDR encoding to allow the display of a larger range of tones on HDR displays.

Video

The video quality from the iPhone XS was already class-leading, thanks to the use of a high quality video codec and advanced compression techniques that suppressed common artifacts like macro-blocking and mosquito noise. 4K video up to 30 fps also had high dynamic range capture: fusing both bright and dark frames together to capture a wider range of contrast. Check out this frame grab of a very high contrast scene, with complex motion due to constant camera rotation. Note the lack of any obvious artifacts.

The iPhone 11 takes things further by offering extended dynamic range (EDR) for 4K 60p capture. Android devices are still limited to standard dynamic range capture. While a few Android devices offer a high dynamic range (HDR) video output format – such as HDR10 or HLG – to take advantage of the larger contrast of recent displays, without HDR capture techniques (fusion of multiple frames) this benefit is limited.

To sum up: we expect that the iPhone 11 will offer the highest quality video available in a smartphone, with natural looking footage in even high contrast scenes, now at the highest resolution and frame rates. We do hope Apple pairs its HDR video capture with an HDR video output format, like HDR10 or HLG. This would allow for a better viewing experience of the extended dynamic range (EDR) of video capture on the latest iPhones, with more pop and a wider color gamut.

Video experience

Apple is also looking to change the experience of shooting video in the iPhone 11 models. First, it’s easier to record video than it was in previous iterations: just hold down the shutter button in stills mode to start shooting a video. Instant video recording helps you capture the moment, rather than miss it as you switch camera modes.

Perhaps more exciting are the new video editing tools built right into the camera app. These allow for easy adjustment of image parameters like exposure, highlights, shadows, contrast and color. And the interface appears to be intuitive as ever.

Multiple angles and ‘Pro’ capture

Advanced video shooters are familiar with the FiLMiC Pro app, which allows for creative and total control over movie shooting. The CEO of FiLMiC was invited on stage to talk about some of the new features, and one of the coolest was the ability to record multiple streams from multiple cameras. The app shows all four streams from all four cameras (on the Pro), allowing you to choose which ones to record from. You can even record both participants of a face-to-face conversation using the front and rear cameras. This opens up new possibilities for creative framing, in some cases obviating the need for A/B cameras.

Currently it’s unclear how many total streams can be recorded simultaneously, but even two simultaneous streams opens up creative possibilities. Some of this capability will come retroactively to 2018 flagship devices, as we describe here.

Conclusion

Much of the sentiment after the launch of the iPhone 11 has centered around how Apple is playing catch-up with Android devices. And this is somewhat true: ultra-wide angle lenses, night modes, and super-resolution burst photography features have all appeared on multiple Android devices, with Google and Huawei leading the pack. No-one is standing still, and the next iterations from these companies – and others – will likely leap frog respective capabilities even further.

Even if Apple is playing catch up in some regards though, it’s leading in others, and we suspect that when they ship, the combination of old features and new – like Deep Fusion and Night mode – will make the iPhone 11 models among the most compelling smartphone cameras on the market.

As the newest iPhone, the iPhone 11 camera is by inevitably the best Apple has made. But is the iPhone 11 Pro the best smartphone camera around currently? We’ll have to wait until we have one in our hands. And, of course, the Google Pixel 4 is a wildcard, and just around the corner…

Articles: Digital Photography Review (dpreview.com)

 
Comments Off on The iPhone 11 is more than just Apple catching up to Android

Posted in Uncategorized


Stunning Capture of Kingfisher Catching a Fish – Behind The Shot

23 Aug

The post Stunning Capture of Kingfisher Catching a Fish – Behind The Shot appeared first on Digital Photography School. It was authored by Caz Nowaczyk.

Stunning-Capture-of-Kingfisher-Catching-a-Fish-janet-smith

Do you want to know how to photograph a Kingfisher catching a fish? Then read on!

About this stunning capture of Kingfisher catching a fish

Photographer: Janet Smith

Camera Settings: 80mm focal distance, auto ISO, f5.6, 1/1200th. Camera set to manual and continuous silent shooting.

Camera equipment: Canon 5D mark IV, Canon 70-200mm f2.8, Neweer remote trigger, Manfrotto tripod, and black bin bag as a rain cover.

Where and when was the shot taken?

Shropshire Photography hides, Market Drayton near Shropshire and Staffordshire borders, 6 July 2019, around 3:30 pm.

What is the background behind getting the shot?

This is my bucket list shot – a shot that I thought I’d never be able to take because I could not afford to buy a fast lens which I was told is required in this type of shot.

Then almost a year ago, Brendan Van Son gifted me his old Canon 70-200mm f2.8 lens after learning I’ve wanted one but could not afford it. Having the lens opened up a whole new world for me. I saved and booked a hide day at Shropshire Photography Hides that got canceled three times because of bad weather and Minks decimating the Kingfisher nest and killing all the birds.

On the 6th of July, I finally managed to get to the hide. The day was overcast, drizzly, and windy. I set up the camera at water level and wrapped in a black bin bag to keep it dry. Then I set the camera to manual, f5.6, auto ISO and 1/1200th, set up the remote trigger and waited.

It took nearly six hours of waiting and shooting before I got this shot. I could not get the timing right, and this bird was super-fast. The light was also very low, and the drizzle persisted.

I ended up with more misses than hits, but it was well worth it. One thing I learned is patience and determination pays off. And maybe nicer weather would have helped as well.

What method or technique did you use to achieve the shot?

I prefocused on the area where the bird was likely to enter the water with the camera set on silent continuous shooting to minimize noise.

Describe any post-processing, including tools and techniques used

There was very minimal post-processing. I did a close crop to show more of the water movement and the bird. Also, I lightened-up the shadows +25 on the photoshop slider, pulled up the vibrance to +15, and exposure to +5.

What are your tips for others wanting to achieve a shot like this?

My tip is to be patient, ask for advice from seasoned bird photographers and observe the bird’s behavior. I learned that this bird would move three paces either left or right and bob it’s head down before diving. As soon as it does that, I pressed the remote and continue pressing until it was back on the branch.

You may also like:

  • 10 Must-Use Bird Photography Camera Settings for Beginners
  • 10 Common Bird Photography Mistakes and Their Solutions
  • 10 Surefire Tips for Photographing Birds in Flight
  • 5 Unforgiving Post-Processing Mistakes Every Bird Photographer Must Avoid
  • Review of the Nikon D500 for Wildlife and Bird Photography
  • 5 Secrets for Stunning Creative Bird Photography
  • 5 Tips for Better Forest Bird Photography
  • A Guide to Photographing Birds and Wildlife in a Wetland Area


Stunning-Capture-of-Kingfisher-Catching-a-Fish-janet-smith

The post Stunning Capture of Kingfisher Catching a Fish – Behind The Shot appeared first on Digital Photography School. It was authored by Caz Nowaczyk.


Digital Photography School

 
Comments Off on Stunning Capture of Kingfisher Catching a Fish – Behind The Shot

Posted in Photography


Canon catching up? Canon EOS-1D X II tested in our studio

04 May

Announced back in February, the Canon EOS-1D X Mark II has at long last made its way through our door. We’re just itching to get it out and put its 20.2MP sensor and 14 fps burst rate to work shooting some fast action to see what its AF system can do, but first we put it through our slate of studio image quality tests.

Like the EOS 80D there’s a big improvement in the camera’s dynamic range. Canon’s move to a design using on-chip analog-to-digital conversion allows less noise is added before the signal is converted into digital values, meaning it’s easier to distinguish between captured information and background noise. In turn, this means more malleable Raw files with more useful information available when you try to process them.

In our standard studio tests, the findings were slightly less positive. The JPEG engine seems to use the same sharpening parameters as the 50MP EOS 5DS R, which ends up being rather heavy-handed when applied to 20MP levels of detail capture. High ISO performance, once a Canon strength, drops a little behind its better rivals.

Raw Dynamic Range

Exposure Latitude

In this test we look to see how tolerant of pushing exposure the EOS-1D X II’s Raw files are. We’ve done this by exposing our scene with increasingly lower exposures, then pushed them back to the correct brightness using Adobe Camera Raw. Examining what happens in the shadows allows you to assess the exposure latitude (essentially the dynamic range) of the Raw files.

Because the changes in this test noise are primarily caused by shot noise and this is mainly determined by the amount of light the camera has had access to, the results are only directly comparable between cameras of the same sensor size. However, this will also be the case in real-world shooting if you’re limited by what shutter speed you can keep steady, so this test gives you an idea of the amount of processing latitude different formats give.

$ (document).ready(function() { ImageComparisonWidget({“containerId”:”reviewImageComparisonWidget-49568559″,”widgetId”:351,”initialStateId”:2428}) })

The Canon EOS-1D X Mark II shows very similar amounts of noise to the excellent sensor in the Sony a7R II up until a 3EV push, with the Canon dropping behind after a 4EV push. It’s a similar story against the likes of the Nikon D750$ (document).ready(function() { $ (“#imageComparisonLink2429”).click(function() { ImageComparisonWidgetLink(2429); }); }) or D810$ (document).ready(function() { $ (“#imageComparisonLink2430”).click(function() { ImageComparisonWidgetLink(2430); }); }). This means that the darker shadows in a processed image would be slightly cleaner in images from these cameras, after contrast adjustments or a less extreme push.

However, this performance is noticeably better than the Canon EOS 5DS R$ (document).ready(function() { $ (“#imageComparisonLink2432”).click(function() { ImageComparisonWidgetLink(2432); }); }) and, significantly, better than the 1D X II’s most direct rival: the Nikon D5$ (document).ready(function() { $ (“#imageComparisonLink2433”).click(function() { ImageComparisonWidgetLink(2433); }); }).

ISO Invariance

A camera with a very low noise floor is able to capture a large amount of dynamic range, since it add very little noise to the detail captured in the shadow regions of the image. This has an interesting implication: it minimizes the need to amplify the sensor’s signal in order to keep it above that noise floor (which is what ISO amplification conventionally does). This provides an alternate way of working in situations that would traditionally demand higher ISO settings.

Here we’ve done something that may seem counter-intuitive: we’ve used the same aperture and shutter speed at different ISO settings to see how much difference there is between shooting at a particular ISO setting (and using hardware amplification) vs. digitally correcting the brightness, later. This has the advantage that all the shots should exhibit the same shot noise and any differences must have been contributed by the camera’s circuitry.

$ (document).ready(function() { ImageComparisonWidget({“containerId”:”reviewImageComparisonWidget-36973092″,”widgetId”:349,”initialStateId”:null}) })

You can see the EOS-1D X II’s full results here. As you may have inferred from the Exposure Latitude tests, the EOS-1D X II isn’t entirely ISO invariant – the camera is adding enough downstream read noise such that you can’t use a lower-than-normal ISO and selectively brighten the image later – to protect highlight information – without some noise cost.

To put this in perspective, though, the camera’s files appear much more flexible than those of the Canon EOS 5DS R$ (document).ready(function() { $ (“#imageComparisonLink2434”).click(function() { ImageComparisonWidgetLink(2434); }); }), which itself was a big step forward from the EOS 5D Mark III$ (document).ready(function() { $ (“#imageComparisonLink2435”).click(function() { ImageComparisonWidgetLink(2435); }); }). So, while they’re not a match for the likes of the Nikon D750$ (document).ready(function() { $ (“#imageComparisonLink2436”).click(function() { ImageComparisonWidgetLink(2436); }); }) or the latest Sony sensors, the 1D X II is a step forward for Canon, and performs better than the Nikon D5$ (document).ready(function() { $ (“#imageComparisonLink2437”).click(function() { ImageComparisonWidgetLink(2437); }); }) in this regard. In fact this test slightly under-represents the Canon’s performance, since the D5’s ISO 6400 result is better to start off with: to start off ahead but then fall behind the Canon, the Nikon must be adding more noise at low ISOs.

Articles: Digital Photography Review (dpreview.com)

 
Comments Off on Canon catching up? Canon EOS-1D X II tested in our studio

Posted in Uncategorized


6 Ways to Use Color for Eye Catching Compositions

04 Aug

A painter only needs to look at their palette before applying color to the canvas. Photographers have a different challenge, as they must locate their tones by studying a scene. Of course, this can be easy to bypass when you’re thinking about shadow, highlight, depth of field, shutter speed, and all of the other technical details that go into a photo. Still, as the great painter Kandinsky said, “Color is a power which directly influences the soul.” To use it in your compositions can infuse your work with a new level of sophistication.

1) Background Separation

To maximize the effect of bold colors, you’ll want to start by looking for dark, muted backgrounds. This type of stark contrast will deemphasize the surrounding areas, bringing the viewer’s attention directly to the subject. Of course, mixed lighting can trick even the most sophisticated metering systems. For the most accurate exposure, use the camera’s internal spot meter to take a reading of the brighter part of the scene. By purposely underexposing by approximately half a stop, vibrant colors will take on a deep, rich tonality.

2) Just a Dab of Color

If you want to draw people into your photograph, try including just a small amount of color. This subtle method gives your subject importance by allowing it to stand out from the rest of the frame. These thoughtful compositions are aided by a different approach to photography. Instead of working to add more visual interest, you want to eliminate any competing colors, and simplify the frame. While looking through the viewfinder, check all four corners carefully for distracting elements.

3) Cut the Glare

Each autumn, brilliant displays of fall foliage attract scores of photographers looking for that classic outdoor landscape. Yet, in many of these scenes, the glare of wet shiny leaves will actually detract from the desired color. An inexpensive solution is to add a circular polarizer to your kit. As you rotate the front element of the filter, you’ll actually see the surface reflection disappear to reveal only color. For added warmth you can even adjust the white balance using the cloudy or shade preset.

4) Make it Glow with Backlighting

Of all the directions light can come from, perhaps there’s no finer option than shooting directly into the sun. This is particularly true when working to emphasize color. When lit from behind, your subject will appear to glow. If the contrast is too great, eliminate the sun from the frame. This will make for a more even exposure, while still providing the dramatic benefit of backlighting. If you’re not comfortable with metering manually, take several shots using exposure compensation. Bracketing this way is a quick way to handle an otherwise tricky scenario.

5) Set the Mood

For added impact in your outdoor photography, consider using complementary colors. Although blue and yellow reside on opposite sides of the color wheel, they can be used together with outstanding results. On one side of the spectrum, blue is ideal for creating a quiet introspective mood. Warmer tones however, will infuse your subject with a dynamic energy. Each are effective on their own, but when used simultaneously, the contrast will bring attention to your main subject.

6) Use the Silhouette

During the magic hours around sunrise and sunset, you’ll enjoy a splendid display of color in the sky. Meanwhile, your subject will likely be in heavy shadow. If you properly exposed the subject, the sky would become pale, or even washed out. One simple option to retain the vibrant color is to create a silhouette. This is especially useful with moving subjects when HDR is less than ideal. To do this, simply expose for the sky, and let the subject’s tonality fall to black.

Conclusion

To fine tune your vision, give yourself an assignment where capturing a specific color is the only goal. For example, head out for a photo walk with no specific objective besides seeing and shooting – red. Rather than looking at subjects literally, you will be thinking in color. By studying the world around you with this in mind, you may be surprised at just how many opportunities reveal themselves. With practice, you’ll soon recognize color as an essential element of composition.

googletag.cmd.push(function() {
tablet_slots.push( googletag.defineSlot( “/1005424/_dPSv4_tab-all-article-bottom_(300×250)”, [300, 250], “pb-ad-78623” ).addService( googletag.pubads() ) ); } );

googletag.cmd.push(function() {
mobile_slots.push( googletag.defineSlot( “/1005424/_dPSv4_mob-all-article-bottom_(300×250)”, [300, 250], “pb-ad-78158” ).addService( googletag.pubads() ) ); } );

The post 6 Ways to Use Color for Eye Catching Compositions by Chris Corradino appeared first on Digital Photography School.


Digital Photography School

 
Comments Off on 6 Ways to Use Color for Eye Catching Compositions

Posted in Photography


Catching The Action: Photographing Youth Sports

05 Nov

The action is almost always more dramatic when it is coming towards the photographer.

 One of the most popular subjects people photograph is their children.  Everyone is always showing off photos of their little ones.  And when those little ones grow bigger, we photograph their activities. One of the more challenging children’s activities to photograph is youth sports.

With a few exceptions, sports tend to take place on large fields, where a photographer will have limited ability to get close to his subject. Couple that fact with a lack of control over lighting, and sports of any level can be a challenge to photograph.

The biggest issue most beginners seem to have with sports is stopping action.  Motion blur, caused by using too slow a shutter speed, frustrates many new sports photographers.  The bottom line here is very simple: a minimum shutter speed of 1/500 is needed to freeze action.  The longer the lens, the faster the shutter speed needs to be.  So while 1/500 is the minimum, if your focal length is 600mm, you will need a shutter speed of at least 1/640. Faster is better.

Using a faster shutter speed ensures stopping the motion of the ball as it hits the bat.

The next issue to contend with is the backgrounds.  Youth sporting events take place in parks, at schools, or in other places where the background is less than pleasing.  It could be a parking lot, a building, or you may just have  a lot of spectators in the background that can cause your subject to get lost in the mess. Photographers have two options here.  The first is to move to an area where the backgrounds are cleaner.  Since that may not be an option, the second becomes much more important.  Shoot your images at the widest aperture possible with the lens you are using.

Pro sports photographers typically use wide aperture lenses with apertures of f/2.8 and f/4 for a variety of reasons.  One reason is because they allow  more light into the camera, thus allowing for faster shutter speeds. The second reason is that a wide aperture creates a shallow depth of field- meaning while your subject will be sharp, the background will be nicely blurred, eliminating distractions.

Lens choice is another important part of the equation when shooting sports.  Not everyone will have access to a 400mm f/2.8 lens, but great sports shots can be captured with a variety of lenses- not just the big telephotos.  A 70-300mm zoom lens, which is typically one of the more popular telephoto lenses available, makes a great choice for shooting you sports.  While not as fast as a lens with an f/2.8 aperture, as long as the light is good enough to get a fast shutter speed, these lenses do just fine.  The 300mm focal length will get you enough reach to get closer to the action, but remember to stay disciplined.  Let the action come to you. Shooting across the field will simply result in lots of pictures where the athletes don’t fill the frame, and the dramatic impact is greatly diminished.  For on-field action, typically a lens with a focal length of at least 300mm will be needed. Most pros use anything from 300mm f/2.8 up to a 600mm f/4.

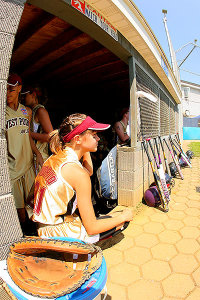
A wide angle lens is useful for situations where you want to show the complete context of where the athlete is. In this case, a fisheye lens shows the entire dugout as well as the player sitting on the steps.

Most people don’t think of wide angle lenses as good sports lenses, but there are several times where a wide angle can be the perfect lens.  Generally, wide angles work well when the photographer can be close to the athletes, be it for a team huddle on the sidelines, a post-game handshake, or a portrait taken on the bench with spectators in the background.   For those who can get access and don’t mind putting their gear at risk, a soccer or hockey “net cam” is a great use for a wide angle lens.  When pros do this they use a protective housing for the camera. It is NOT recommended that a photographer mount their camera in a goal without being protected.  The effort can be worth it.  Some of the most dramatic soccer and hockey photos come from cameras mounted in the goal with a wide angle lens.

When shooting action on the field, working with the available light becomes incredibly important.  Most of these outdoor games take place in midday sun, which is often harsh.  Add in helmets, hats, or other headgear which can cast shadows over faces, and you’ve got a lighting nightmare. With sports such as football or baseball, with hats and helmets on the athletes,  use of exposure compensation can be helpful in opening up the shadows on faces.  A setting of +1/3 or +2/3 is a good starting point.  For later afternoon or early morning games, shooting backlit can add a bit of drama to the lighting, with the sunlight creating a nice rim light on the athletes.  Exposure compensation can help open up the shadows again to maintain detail in the faces.

For indoor sports, the use of flash can be problematic.  Always be sure the use of flash is permitted, first and foremost.  In many sports, such as gymnastics, use of flash is strictly forbidden.  If the available light allows, it’s best to try to shoot without flash. This is where today’s extreme high ISOs and the outstanding noise performance of today’s DSLR’s is especially handy. Photographers often find themselves in school gyms with ISOs set to 3200, 6400, or higher.  Fast lenses with apertures of f/2.8 or larger are also useful in these situations. The same rule for stopping action applies, using a shutter speed of at least 1/500 or faster.


Sideline portraits can sometimes be more impactful that the action on the field. Don't be afraid to turn away from the action and photograph the intensity on the sidelines.

Athletes tend to move quickly, so you’ll want to make sure your autofocus is set to Servo or Continuous (dependent on what brand of camera you use). This allows the camera to refocus as the athlete moves towards or away from the camera.  Setting the drive to continuous will also allow the camera to take multiple photos by holding down the shutter button, ensuring that peak action is captured.

Today’s cameras offer a variety of AF arrays, from 9 or 11 AF points on entry level models, all the way up to 61 AF points on high end models.  Generally speaking, it is easiest to select one AF point and keep it on your subject, though some cameras are especially good at using all available AF points to track a moving subject. Photographers should experiment and practice to find which settings work best for them.

Sports offer a variety of photo opportunities aside from the action on the field.  The sidelines are great for shots of players interacting with each other, coaches instructing players, and sideline portraits.  With all the ups and downs of competition, the emotion on the sidelines makes a great subject all by itself.  Don’t be afraid to turn away from the action during the moments to catch the emotion in the bench area.

Jubilation shots can be some of the most rewarding and sought after shots. It takes discipline to remember to continue shooting even after the play has ended.

In addition, the pomp and circumstance that goes with many youth sporting events also make for great photo ops.  Watch for the halftime performances of cheerleaders and bands at various school sports.  The more devoted “fans” in the stands also make for great opportunities.

Telephoto lenses with wide apertures blur the background nicely, eliminating anything unsightly or distracting in the background.

Knowing where to stand is one of the most important parts of sports photography.  Each sport is different and the games have their own flow of action.  Photographers want to be where the action is going, not where it has been.  Each sport generally offers a ton of options as far as where a photographer can stand.

Personal knowledge of the sport, as well as the teams being photographed is especially helpful.  Photographic knowledge is only half of the battle when shooting sports.  When a photographer knows a team’s tendencies, and even individual athlete’s tendencies, he can anticipate the play, as well as reactions and get something special from it.   Shooting the same team repeatedly makes this easier.  The added bonus is that the team also gets to know the photographer, making them more comfortable and willing to be open in front of the camera, in much the same way people open up to their friends.


Post originally from: Digital Photography Tips.

Check out our more Photography Tips at Photography Tips for Beginners, Portrait Photography Tips and Wedding Photography Tips.

Catching The Action: Photographing Youth Sports


Digital Photography School

 
Comments Off on Catching The Action: Photographing Youth Sports

Posted in Photography


Catching High Water on the South Platte River

16 Oct


s-platte-packraft

September 13, 2012. Alpacka Yukon packraft on the South Platte River between Kersey and Kuner. Camera: Pentax Optio WG2

A couple days of rain increased water level in the South Platte River from around 100 cfs during dry summer to 2000 cfs at Kersey. I managed to catch the high water wave in this late afternoon bike-packraft trip: Kuner-Kersey-Kuner.

Related posts and more pictures:
Wildcat Mound Run – the South Platte River by Bike and Packraft
Biking and Packrafting – A Selfsupported Classic Run on the South Platte River near Greeley
Inline Skating and Packrafting – Road and River Test on the South Platte
South Platte River below Denver, Colorado
GPS/photo river guide


paddling with a camera

 
Comments Off on Catching High Water on the South Platte River

Posted in Photography


Letsplaychess.com presents Chess News: Topalov catching up! (Gruenfeld Defence)

12 Jan

Play online turn-based chess at www.chessworld.net Topalov,V (2767) – Cheparinov,I (2696) [D90] 4th M-Tel Masters Sofia BUL (8), 16.05.2008

A sequence of video sequences shot in parallel with the TZ7,FZ38 and GH1 to give comparisons of image size and quality at either end of the zoom range. Shot under a variety of outdoor and indoor lighting conditions these sequences should give enough information to enable an informed opinion to be made about the various parameters of each of the cameras. In addition to the Panasonic Lumix camera sequences a parallel sequence shot with the nikon D5000 with standard kit lens are included. It is possible to make benchmark conclusions about the Nikon quality from this video. The opening sequence is shot with a Nikon D90 with f1.8 50mm lens set at f2.8 to give some opinion as to the D90 video quality with a prime lens. Hand held stabilisation shots are included at full zoom on each camera. Sequences were shot outdoors and indoors under tungsten and fluorescent lighting to compare AWB operation.