DJI has kicked off its string of announcements with the Ronin 4D, a new—and arguably revolutionary—cinema camera system that combines a cinema camera with four-axis image stabilization, LiDAR focusing and wireless transmission to create the ultimate all-in-one shooting experience.
The DJI Ronin 4D attempts to create an ‘integrated cinematography solution,’ in DJI’s own words. At the heart of the Ronin 4D is CineCore 3.0, a proprietary chipset DJI is calling ‘its most powerful cinematic imaging platform to date.’ According to DJI, this system can capture internal 8K Raw video ‘with precise color reproduction, advanced assistive functions with a high-performance AI engine, and multi-link monitoring and control with low-latency image processing.’
To pair with the new chipset is a pair of new full-frame (36mm × 24mm) Zenmuse X9 gimbal camera systems, available in 8K and 6K versions. Both the X9–8K and X9–6K will be able to record Apple ProRes 422 HQ and ProRes RAW, as well as your standard H.264 codec. The Zenmuse X9–8K tops out at 8K/75fps while the X9–6K tops out at 6K/60fps with the option to get 120 fps footage at 4K resolution.
Zenmuse X9 cameras feature interchangeable lens mounts, but will be available at launch with options for its proprietary DL mount and Leica M mount lens systems. DJI says it should also work, at least in theory, with ‘other mounts with short-flange focal distances,’ but doesn’t elaborate on whether or not it will be offering any other interchangeable mounts at this time.
The sensor inside the X9–8K and X9–6K offers dual-native gain and can capture ‘over 14 stops of dynamic range.’ There are also nine built-in physical ND filters that can be adjusted from ND2 to ND512 for times when you need to reduce the amount of light hitting the sensor. Footage captured with the new Zenmuse X9 camera systems will be processed by DJI’s Cinema Color System, which it says ‘delivers natural skin tones and enables effortless tonal consistency across a project when using different cinema cameras.’
A comprehensive list of recording specs for the Zenmuse X9-8K camera system.
Moving onto the four-axis gimbal, DJI says the Ronin 4D ‘has been designed with an innovative industry-first active Z-axis to eliminate vertical camera shake effectively.’ DJI has also taken inspiration from its drone lineup to add a set of downward-facing ToF sensors, as well as forward and downward dual-visual sensors, a built-in IMU and a barometer to achieve the best stabilization possible.
The Ronin 4D will feature three different autofocus modes: manual focus, autofocus and a new Automated Manual Focus (AMF) mode. The latter two modes use the onboard LiDAR Range Finder, which casts over 43,200 points as far as 10M (33ft) to locate and track subjects in situations where traditional AF might not work due to the lack of light. The unique AMF mode will track subjects and turn the focus wheel during recording, with the option for the camera operator to jump in and manually pull focus when needed. To help in manual focus and AMF modes, there will be LiDAR Waveform available on the monitor to help cinematographers ‘locate focus points and pull focus with extreme precision.’
Once again taking inspiration from its line of drones, DJI has developed an all-new O3 Pro transmission technology that can output 1080p/60fpsd video to remote monitors via the 4D Video Transmitter. DJI says the transmission range is roughly 20,000 feet and notes the video feed is AES 256-bit encrypted for end-to-end privacy. The system uses 2.4GHz and 5.8GHz bands, as well as the DFS frequency band, which DJI says ‘significantly improv[es] stability and anti-interference performance, even in crowded signal environments and locations that feature complex architectural structures.’
While third-party monitors can be used, DJI is also offering a new 7” wireless monitor with 1,500 nits of brightness and a built-in gyro that effectively turns the monitor into a motion controller for the Ronin 4D camera system. The High-Bright Remote Monitor includes an integrated microSD card slot for 1080p/60fps proxy recording and connects with a slew of accessories, including the Ronin 4D Hand Grips, DJI Master Wheels, DJI Force Pro and the new DJI Three-Channel Follow Focus. Multiple monitors can be used at once and customized independently to fit the production’s needs.
Video can be recorded to media three different ways: to SSD over USB-C, to CFexpress Type-B cards via the internal card slot and directly to DJI’s proprietary PROSSD 1TB SSD, which DJI claims ‘delivers the best performance and highest stability for internal recording at maximum resolution and frame rate.’ The Ronin 4D has built-in microphones capable of recording two-channel 24-bit audio, but also has two 3.5mm ports on the body as well as the option to add two XLR ports via the Expansion Plate for further input options.
The Ronin 4D uses the same TB50 Intelligent Battery used by DJI’s Ronin 2 and Inspire 2, which offers up to 2.5 hours of shooting time. Below is the full launch event video:
The 6K version of the DJI Ronin 4D will be available for $ 7,199 in December 2021. It will includes the main body, a Zenmuse X9–6K gimbal camera, a LiDAR Range Finder, a High-Bright Main Monitor, Hand Grips, a Top Handle, TB50 Intelligent Battery and a carrying case. The 8K version of the DJI Ronin 4D will be available for $ 11,499 ‘at a later date’ and will include the Zenmuse X9–8K Gimbal Camera as well as a PROSSD 1TB. The 4D Video Transmitter, High-Bright Remote Monitor and DJI PROSSD 1TB will also be available to purchase separately.
You can find out more about the DJI Ronin 4D on DJI’s website and download sample footage on DJi’s dedicated download page.
The post Zone Focusing: How to (Always) Capture Sharp Street Photos appeared first on Digital Photography School. It was authored by James Maher.
Do you struggle to capture consistently sharp, in-focus street photos? You’re not alone.
In street photography, consistently nailing focus, especially if you don’t have the opportunity to look through your camera’s viewfinder, can be insanely difficult (and often seems impossible).
That’s where zone focusing comes in.
You see, zone focusing lets you set your focus in advance. And then, when your subject steps into the frame, snap – you get the shot.
Not every street photographer zone focuses, but the ones who do swear by it. And while I use autofocus when I can, I swear by zone focusing, too.
So what, specifically, is zone focusing? How does it work? And how can you learn to do it for sharp photos?
All will be revealed in this article! Let’s get started.
Canon 5D Mark II | 17mm | f/11 | 1/320s | ISO 1800
What is zone focusing?
Zone focusing is a technique where you manually prefocus your lens to a certain distance and adjust your aperture for a deep depth of field. Then, when you’re confronted by an interesting subject, you don’t need to focus through your viewfinder; instead, you wait for your subject to enter your acceptable zone of focus and capture the photo.
Note that zone focusing is very flexible. If you like to shoot intimate portraits, you can zone focus just a few feet in front of your lens. And if you prefer wider shots with more distant elements, you can zone focus 10+ feet away.
Why is zone focusing so useful?
Zone focusing works to varying degrees in plenty of photography genres, but it’s most commonly used by street photographers for two major reasons:
When shooting on the streets, the world happens fast. Gorgeous photo opportunities slide by in the blink of an eye. If you take the time to focus, you’ll often miss the shot.
In street photography, putting a camera to your eye often makes your subject (and you) uncomfortable. So if you can focus without looking, you’ll be able to keep discomfort to a minimum while capturing more honest scenes.
In other words, if you’re a street photographer, zone focusing is an easy way to increase your keeper rate while keeping your photos perfectly candid.
Zone focusing and depth of field (dof)
Canon 5D Mark II | 28mm | f/4 | 1/250s | ISO 3200
Before I explain how to zone focus, it’s important that you understand the factors that go into creating a zone of sharp focus, also known as a deep depth of field.
As you may already be aware, depth of field refers to the zone of acceptable sharpness in a scene. So when you focus on a subject and you create a deep depth of field (more on how to do that in a moment!), your subject will turn out sharp – but so will a certain area in front of and behind your subject.
For instance, if you focus on a subject that’s 10 feet away, a deep depth of field would ensure sharp focus from around 8 feet to 14 feet, depending on your specific camera settings. Keep in mind that the area behind your subject that is acceptably sharp will always be greater than the area in front of your subject, and in many cases, it will be much greater.
What affects your depth of field? Three simple factors:
Aperture. The smaller your aperture, the greater the depth of field. So if you’re shooting at f/16, you’ll have far more in focus than if you shoot at f/2.8.
Focal length. Wider focal lengths create a deeper depth of field. So if you are shooting at 28mm, much more of your scene will be in focus than if you are shooting at 100mm. (This is why I rarely zone focus with lenses longer than 35mm.)
Distance to the subject (or point of focus). The further away you focus, the more depth of field there will be in a scene. So if you focus on a person 10 feet away, then you’ll have a deeper depth of field than if you focus on a person 3 feet away.
If you want to test out these different factors and see how they affect the depth of field in real life, check out this website, which offers a handy depth of field calculator.
How to zone focus: step by step
Canon 5D Mark II | 17mm | f/8 | 1/400s | ISO 1600
You can zone focus in three simple steps:
Adjust your camera settings for a deep depth of field
Prefocus your lens in the right area
Hit the shutter button when your subject moves into range
Let’s take a look at each step in greater depth:
Step 1: Adjust your camera settings for a deep depth of field
When zone focusing, you want the range of sharpness (i.e., the depth of field) as large as possible. That way, you have the most room for error, and you’ll end up with the most keepers. Plus, a deep depth of field will allow you to keep multiple subjects sharp, which is useful if you’re capturing a more complex, layered shot.
First, you’ll need to choose a wide-angle lens, such as 24mm, 28mm, or 35mm. My personal go-to focal length is 28mm, but any of these options work for zone focusing. Unfortunately, if you zoom any closer (50mm, for example), you’ll struggle to get a usable depth of field range.
Next, make sure your camera is set to Manual mode, and dial in a narrow aperture. I’d recommend working at f/8 and beyond – so depending on the light levels, you might use f/8, f/11, f/13, or even f/16.
Because zone focusing is often done with moving subjects (and you might be moving, too!), make sure your shutter is at least 1/250s, though higher is better, if you can afford it. And adjust your ISO to keep your exposure sufficiently bright.
Really, it’s the combination of the wide focal length and narrow aperture that’ll give you the deep depth of field you need, but it’s important not to neglect your other settings.
Step 2: Prefocus your lens in the right area
Now that you have your camera settings dialed in, it’s time to determine where you want to focus your lens.
Part of this should be personal preference and may depend on the context. For instance, if you prefer more intimate street portraits, you’ll want to focus a few feet in front of you. Or if you’re shooting in an environment where people are passing at a distance, you’ll want to focus farther away.
But it’s not just about artistry. Recalling the discussion of depth of field, you know that a closer point of focus decreases the range of acceptable sharpness. So if you want to maximize the chances of a sharp shot, it’s a good idea to focus far off in the distance.
Regardless of where you plan to focus, a lens with a manual focus display is a huge benefit here. I’m talking about something like this:
That way, you know exactly where your lens is focused (and you can consistently prefocus in the same spot).
If your lens doesn’t include a manual focus display, that’s okay, but you’ll need to spend extra time learning to estimate distances.
Step 3: Hit the shutter button when your subject moves into range
You’ve got the right settings, and you’re prefocused in the right spot.
Which means that all you need to do is take the photo.
Keep an eye out for interesting photo opportunities. Estimate your range of focus.
Then, when something interesting happens, wait until the subject comes into your focusing zone, then take a photo. The closer your subject gets to the center of your range of focus, the better (and don’t be afraid to capture multiple photos to maximize your chances of nailing a sharp shot).
A zone focusing tip: learn to guess distances
Zone focusing works really well, and if you’re shooting in bright light with a narrow aperture, you’ll have a lot of leeway.
But if you’re like me, then you often do street photography in less than ideal lighting, such as on the subway. And thanks to the poor light, you’ll need to widen your aperture – to f/2.8 and beyond.
What does this mean? Well, even with a wide-angle lens and a relatively distant subject, you’ll need to be very careful; your range of sharpness will be quite small.
Fujifilm X100 | 35mm | f/2 | 1/250s | ISO 3200
For this reason, you must learn to estimate the distances away from your camera’s lens, all the way up to around 12 feet. I suggest using a tape measure and measuring out the distances. Then just go out and practice.
Find different objects and try to guess their distance. Then, before you head out to shoot, pick an object at a known distance, focus on it, and use it as a sort of “calibrator” for all your future photos.
The other reason to get good at guessing distances? People move and scenes develop. You might want to capture a person walking toward you at 10 feet, then again at 5 feet. To nail both those shots, you’ll need to have one hand on the focusing ring, and practice manually focusing back and forth, from 10 feet to 8 feet to 6 feet and so on.
Eventually, you’ll be able to capture someone walking toward you at both 10 feet and 6 feet, without even having to look through the viewfinder. It’s an incredibly effective technique, and you can use it for some gorgeous results.
Canon 5D Mark II | 28mm | f/5 | ISO 1600
How to zone focus: final words
Now that you’ve finished this article, you should be a capable zone focuser – though I certainly recommend you spend some time really getting to know different distances (and how to accurately prefocus at those distances, too).
So head out with your camera. Have some fun with zone focusing. You’ll love the results!
Now over to you:
Have you tried zone focusing? What do you think? Do you like it? Share your thoughts in the comments below!
Table of contents
Street Photography
GENERAL
10 Tips for the Aspiring Street Photographer
7 Street Photography Rules That Should Be Broken
How to Approach Street Photography in 12 Easy Steps
50 Things I Try to Avoid in Street Photography
5 Questions to Ask Yourself to Help Improve Your People Photography
5 Exercises to Improve Your Street Photography
PREPARATION
7 Steps to Get Over Your Fear of Street Photography
How to Plan a Street Photography Shoot When Traveling
SETTINGS
Zone Focusing: How to (Always) Capture Sharp Street Photos
What is zone focusing?
Why is zone focusing so useful?
Zone focusing and depth of field (dof)
How to zone focus: step by step
Step 1: Adjust your camera settings for a deep depth of field
Step 2: Prefocus your lens in the right area
Step 3: Hit the shutter button when your subject moves into range
A zone focusing tip: learn to guess distances
How to zone focus: final words
What are the Best Street Photography Camera Settings and Why
LIGHTING
There is No Bad Light for Street Photography
Make the Most of High Contrast Lighting for Dramatic Street Photos
COMPOSITION
The Importance of Capturing Gesture and Emotion in Street Photography
Seeing and Street Photography
13 Great Subjects for Urban Night Photography
How to Avoid Distracting Backgrounds in Street Photography
How the Square Format Can Enhance Your Street Photography
Tips for Minimalist Photography in an Urban Environment
How to Improve the Impact of Your Urban Images Using Lines
How to Use Framing in an Urban Environment
GEAR
5 Reasons Why Shooting With a Rangefinder Will Make You a Better Street Photographer
Pros and Cons of a Telephoto Lens for Street Photography?
The Five Key Features on any Street Photography Camera
Which Street Photography Lens is Right for You?
6 Reasons Why You Should Use a Standard Lens for Street Photography
A Look at the Fujifilm X100V in Action for Street Photography (video)
How to Use a Wide-Angle Lens for People Photography
Street Photography with $ 10 Ilford HP5 Film Camera
ADVANCED GUIDES
8 Advanced Street Photography Tips to Get You to the Next Level
Getting Close and Personal: 11 Tips for Close-up Candid Street Photography
7 Tips for a More Anonymous Approach to Street Photography
A Cowards Guide to Street Photography
6 Tips for Aiming Low and Going Unnoticed in Street Photography
9 Tips for Creating Great Street Portraits
Street Portraits vs Street Photography: What is the Difference?
17 Tips for Shooting Better Urban Portraits
What Makes A Great Street Photograph and How Do We Create Them
How to Tell a Story With Your Street Photography
In the Dark: 10 Tips for Street Night Photography
7 Tips for Urban Landscape Photography
A Street Photographer’s Guide to New York City
Urban Exploration Photography – Urbex
7 Tips for Capturing the Decisive Moment in Street Photography
A Common Misconception About Street Photography – Just Take Photos of People Walking
What do I look for on a Photo Walk? Part 1 – City Walk
8 Things You Should Know if You are Dating a Street Photographer
7 Ways to Become More Spontaneous with Your Street Photography
5 Essential Shots You Need to Get for Street Market Photography
Using Humor In Street Photography
Watch a Street Photographer Going about a Shoot [VIDEO]
Using Street Photography to See Beyond the Ordinary
CREATIVE TECHNIQUES
5 Tips for Shooting Glass to Enhance Your Street Photographs
Window Street Photography ~ Try Something New And Grow!
The Pros and Cons of Black and White Versus Color for Street and Travel Photography
4 Ways to Add a Sense of Motion to Your Urban Photography
7 Steps to Create Street Photography Silhouettes
POST-PROCESSING
How to Enhance Urban Night Photographs Using Luminosity Masks in Photoshop
13 Steps for Editing Street Photography in Lightroom from Start to Finish
How to Turn Day to Night Using Photoshop for Urban Landscapes
BUSINESS
Model Releases: Working with People on the Streets
INSPIRATION
20 Beautiful Examples of Urban Decay Photography
30 Street Photography Images to Inspire You
33 Gritty Photos of Graffiti Street Art
28 Diverse Images That Showcase People Photography
39 Street Photography Images That Have Common Threads
Focus on Thomas Leuthard – Street Photographer
Focus on Street Photographer Eric Kim ~ In your face with a smile!
Focus on Chris Porsz ~ It’s All About The People
Focus on Scott Frederick – Urban Explorer
OPINION
The Uncomfortable Truth About Street Photography
Street Photography: Exploitative vs Respect
To be or not to be a Street Photographer
Consent in Photography – What to Think About When Photographing People
var dpsTopics = {
id: 38294,
titles: [{“id”:”what-is-zone-focusing”,”permalink”:”https:\/\/digital-photography-school.com\/ultimate-guide-to-zone-focusing-for-candid-street-photography\/”,”title”:”What is zone focusing?”},{“id”:”why-is-zone-focusing-so-useful”,”permalink”:”https:\/\/digital-photography-school.com\/ultimate-guide-to-zone-focusing-for-candid-street-photography\/”,”title”:”Why is zone focusing so useful?”},{“id”:”zone-focusing-and-depth-of-field-dof”,”permalink”:”https:\/\/digital-photography-school.com\/ultimate-guide-to-zone-focusing-for-candid-street-photography\/”,”title”:”Zone focusing and depth of field (dof)”},{“id”:”how-to-zone-focus-step-by-step”,”permalink”:”https:\/\/digital-photography-school.com\/ultimate-guide-to-zone-focusing-for-candid-street-photography\/”,”title”:”How to zone focus: step by step”},{“id”:”step-adjust-your-camera-settings-for-a-deep-depth-of-field”,”permalink”:”https:\/\/digital-photography-school.com\/ultimate-guide-to-zone-focusing-for-candid-street-photography\/”,”title”:”Step 1: Adjust your camera settings for a deep depth of field”},{“id”:”step-prefocus-your-lens-in-the-right-area”,”permalink”:”https:\/\/digital-photography-school.com\/ultimate-guide-to-zone-focusing-for-candid-street-photography\/”,”title”:”Step 2: Prefocus your lens in the right area”},{“id”:”step-hit-the-shutter-button-when-your-subject-moves-into-range”,”permalink”:”https:\/\/digital-photography-school.com\/ultimate-guide-to-zone-focusing-for-candid-street-photography\/”,”title”:”Step 3: Hit the shutter button when your subject moves into range”},{“id”:”a-zone-focusing-tip-learn-to-guess-distances”,”permalink”:”https:\/\/digital-photography-school.com\/ultimate-guide-to-zone-focusing-for-candid-street-photography\/”,”title”:”A zone focusing tip: learn to guess distances”},{“id”:”how-to-zone-focus-final-words”,”permalink”:”https:\/\/digital-photography-school.com\/ultimate-guide-to-zone-focusing-for-candid-street-photography\/”,”title”:”How to zone focus: final words”},{“id”:”what-is-zone-focusing”,”permalink”:”https:\/\/digital-photography-school.com\/ultimate-guide-to-zone-focusing-for-candid-street-photography\/”,”title”:”What is zone focusing?”},{“id”:”why-is-zone-focusing-so-useful”,”permalink”:”https:\/\/digital-photography-school.com\/ultimate-guide-to-zone-focusing-for-candid-street-photography\/”,”title”:”Why is zone focusing so useful?”},{“id”:”zone-focusing-and-depth-of-field-dof”,”permalink”:”https:\/\/digital-photography-school.com\/ultimate-guide-to-zone-focusing-for-candid-street-photography\/”,”title”:”Zone focusing and depth of field (dof)”},{“id”:”how-to-zone-focus-step-by-step”,”permalink”:”https:\/\/digital-photography-school.com\/ultimate-guide-to-zone-focusing-for-candid-street-photography\/”,”title”:”How to zone focus: step by step”},{“id”:”step-adjust-your-camera-settings-for-a-deep-depth-of-field”,”permalink”:”https:\/\/digital-photography-school.com\/ultimate-guide-to-zone-focusing-for-candid-street-photography\/”,”title”:”Step 1: Adjust your camera settings for a deep depth of field”},{“id”:”step-prefocus-your-lens-in-the-right-area”,”permalink”:”https:\/\/digital-photography-school.com\/ultimate-guide-to-zone-focusing-for-candid-street-photography\/”,”title”:”Step 2: Prefocus your lens in the right area”},{“id”:”step-hit-the-shutter-button-when-your-subject-moves-into-range”,”permalink”:”https:\/\/digital-photography-school.com\/ultimate-guide-to-zone-focusing-for-candid-street-photography\/”,”title”:”Step 3: Hit the shutter button when your subject moves into range”},{“id”:”a-zone-focusing-tip-learn-to-guess-distances”,”permalink”:”https:\/\/digital-photography-school.com\/ultimate-guide-to-zone-focusing-for-candid-street-photography\/”,”title”:”A zone focusing tip: learn to guess distances”},{“id”:”how-to-zone-focus-final-words”,”permalink”:”https:\/\/digital-photography-school.com\/ultimate-guide-to-zone-focusing-for-candid-street-photography\/”,”title”:”How to zone focus: final words”}] };
The post Zone Focusing: How to (Always) Capture Sharp Street Photos appeared first on Digital Photography School. It was authored by James Maher.
The post 12 Tips to Capture Stunning Vegetable Photography appeared first on Digital Photography School. It was authored by Ana Mireles.
Are you interested in vegetable photography? Then you’ve come to the right place.
In this article, you’ll find plenty of tips and tricks for photographing vegetables; if you’re a food photography beginner, you’ll learn how to get started, and if you’re already a food photography enthusiast, you’ll discover easy ways to improve your results.
Now, I’m not a botanist or a chef, so I apologize in advance if my example photos contain food that’s not technically a vegetable. And in photography, the categories are more flexible. (If you think of the most famous vegetable photographs, you’ll probably think of Edward Weston’s Pepper series, and peppers are technically a fruit!)
In any case, feel free to use these techniques with raw produce in general: fruits, vegetables, legumes, mushrooms, etc.
Now that we got that out of the way, let’s get started.
1. Handpick your produce
Canon 70D | 55mm | f/4.5 | 1/250s | ISO 100
If you were taking a professional portrait, you would cast your model, right? Well, the same should be true for vegetable photography – before getting out your camera, you need to carefully pick your “hero” subject.
If you’re photographing for commercial purposes, you might want to look for the shiniest, roundest, most perfect vegetable you can find.
However, if you’re doing a personal project or a still life, you can take some liberties. You don’t need to use the best looking product; instead, aim to find produce that looks interesting. Find a vegetable that complements the props you’re using or that features a noticeable texture, etc.
No matter what individual item you end up using, the point is that you take the time to choose. You should find a market or a store that allows you to pick the produce yourself (don’t order online!). And try to get to the store early in the day so you can have first pick of the produce. Also, avoid peak hours so that you can take your time.
Consider talking to the seller. Explain what you usually look for in products. Once you make friends, they can be of great help and may even give you some insider tips on how to treat the produce.
2. Pay careful attention to composition
Canon 70D | 38mm | f/8 | 1/100s | ISO 100
The composition is the way you organize the items inside the frame. And the right composition will help the viewer navigate your picture.
There are many guidelines that can help improve vegetable photography compositions, but the most basic tip is to use the rule of thirds, which suggests that you position key elements a third of the way into the frame. And because most cameras and smartphones have a handy rule of thirds grid overlay, it’s an easy way to get started.
There are many other compositional guidelines you can follow, ranging from simple leading lines to more complex triangles and the rule of odds, so make sure you familiarize yourself with these composition tips.
3. Choose the right shutter speed, aperture, and ISO
Canon 70D | 55mm | f/8 | 1/100s | ISO 200
Your camera settings will determine both the exposure and the final look of your photos. So while getting a correct exposure is important, you also need to consider the impact that each setting will have on your shot.
Specifically, you’ll want to think about your three primary settings: shutter speed, aperture, and ISO.
A fast shutter speed is key when you have a moving element. In the case of vegetable photography, this could be a splash of water or even a hand that’s chopping the produce. Shutter speed is also helpful if you’re shooting handheld; the faster your shutter speed, the more likely you are to eliminate camera shake.
The aperture helps determine the depth of field. Smaller apertures give a deeper depth of field, while larger apertures will give you a nice background blur. Keep in mind that the focal length and the distance between the camera and the subject influence depth of field, as well.
Finally, there’s the ISO. This setting is often overlooked by beginner photographers, but a small ISO value will ensure a smooth image while a high ISO will introduce noise.
4. Change the angle of view
Canon 70D | 42mm | f/4 | 1/100s | ISO 100
The position of the camera in relation to the subject is very important – it affects the composition, the depth of field, and it helps define what you are communicating with your picture.
There are three common angles used in food photography: down from above, table level, and a 45-degree angle that mimics the way you see food when you’re sitting down to eat. So use these as your starting points (though bear in mind that they are just guidelines, so feel free to move around until you find the perfect viewpoint.)
I advise you to get your main shot the way you initially envisioned it. Then experiment with other angles. You might happen upon a great perspective that you hadn’t considered!
5. Use color to make your photos stand out
Canon 70D | 55mm | f/5.6 | 1/80s | ISO 100
Color can be a great way to improve your vegetable photography. The great thing about natural subjects such as vegetables is that they already have colors that work wonderfully together, so use these to your advantage. Find orange carrots with their green leaves or a colorful variety of chili peppers, then arrange them in striking compositions.
That said, you don’t necessarily need to use contrasting colors that make the subject pop – you can also go monochrome to create a mood or to help the viewer focus on shape and texture.
And you can always use the color wheel to discover new color palettes and color palette inspiration. Adobe has a wonderful tool called Adobe Color, and it’s available even if you don’t have a membership. It can even show you color trends and color palettes based on concepts and ideas.
6. Experiment with close-ups
Canon 70D | 55mm | f/8 | 1/50s | ISO 800
One of the things I enjoy most while shooting vegetables is getting up close and capturing wonderful textures and patterns.
If you’re shooting for commercial purposes, close-ups may be less feasible, but they’re great for personal projects. You don’t need lots of specialized gear, either; a macro lens is a big help, but you can also work with a telephoto or wide-angle lens and focus as close as possible.
Then, you can create your final result with some cropping in post-production. Keep in mind that you will be losing pixels with this process, so use the highest resolution camera that you have available.
7. Use light modifiers (and a tripod)
Canon 70D | 45mm | f/8 | 1/100s | ISO 800
You can do great vegetable photography with natural light and a handheld camera. However, adding some accessories to your setup can help you achieve better results.
Light modifiers make a big difference whether you use artificial light or natural light. Use diffusers or lightboxes to soften the light and avoid hard shadows. And reflectors can bounce back the light to fill in the shadows, while flags can help you block and direct the light. All of these can be purchased for cheap, or you can DIY them.
A tripod is important when there isn’t lots of light for handholding. Plus, it can help with your compositions and special techniques like focus stacking.
8. Think about lighting direction and contrast
Canon 70D | 55mm | f/8 | 1/3s | ISO 100
Careful use of lighting will shape your photos the way you want them. In vegetable photography, you’ll often work with natural light, though you can also use artificial light to achieve a specific mood (or when you don’t have enough natural light available).
Either way, there are two main aspects of light you need to consider: its direction and its contrast. In other words, where is the light coming from and how harsh does the light appear?
If you want dark, defined shadows, you need hard light. If you prefer even lighting with diffused shadows, you need soft light.
As far as the lighting direction, backlighting offers many creative choices. Sidelighting helps to highlight texture and add depth. Frontal lights flatten the elements, which is great for flat-lay shots.
Feel free to experiment with different setups. And make sure you study the work of other photographers to determine what you like and how it’s done.
9. Use a complementary (or non-distracting) backdrop
Canon 70D | 55mm | f/2.8 | 1/6s | ISO 100
As with any type of photography, the background is just as important as the subject. You should choose a background that complements the subject – or, at the very least, doesn’t distract from it.
You can’t go wrong with neutral, solid backgrounds. However, they can be a bit limiting for your creative vision. Wood backdrops are a nice match for vegetable photography, especially if you’re going for a rustic, just-harvested look. You can also use marbled tabletops or tiles if you want to create a kitchen feel.
The background will help you create the mood. Unfortunately, not everybody has the budget and the space to have a lot of backdrops at home, but you can always use printed sheets or digital backgrounds displayed on your TV or your computer.
10. Style before you shoot
Canon 70D | 28mm | f/8 | 1/80s | ISO 100
Styling is a big part of food photography, including vegetable photography. Even if you decide to isolate a single vegetable, that’s a styling choice, as is the decision to position it whole, chopped, peeled, etc.
If your vegetables aren’t isolated and you decide to introduce props, these will also require careful consideration. Do you want to present the food in a wicker basket or on a designer plate? Do you want to add cutlery? Do you plan to introduce a human element?
Different stylistic elements will help you to create your chosen ambiance and convey a specific message with your photos.
11. Enhance your vegetable photography with editing
If you want to really take your vegetable images to the next level, I highly recommend you do some editing.
Start by fine-tuning the composition using the Crop tool. Most programs like Photoshop or Lightroom even include some composition overlays to guide you while cropping.
You can adjust the white balance and exposure, if necessary, though I recommend you do the best you can while shooting in-camera to avoid having to fix problems in post-production.
(That said, try to shoot in RAW to maximize the amount of information you have to work with when processing.)
When editing vegetable photography, I recommend keeping it on the realistic side. Of course, you can add your own aesthetic style – by giving the file a vintage look or using warm tones to simulate the golden hour – but make sure you don’t overdo it.
One more tip: If any of your vegetables have a dent or a damaged spot that’s distracting, feel free to fix it with the Clone Stamp or Healing tools.
12. Have fun with levitation (and other special effects)
Canon 70D | 38mm | f/6.3 | 1/80s | ISO 100
If you want to spice things up in your vegetable photography, try adding some special effects.
There are different choices that you can make – for example, you can do splash photography or chiaroscuro photography – but today I’d like to talk about levitation photography.
This is really trendy right now and it looks very impressive, but it all comes down to a simple composite. I’ll give you the basic steps, and you can then make your shot as elaborate as you want.
The levitation shot
You’ll need props to hold up the vegetables and arrange them in a pleasing composition. There’s no hard rule about this as you’re going to remove the items in Photoshop later; you can use toothpicks (like I used in the example image above), or you can use threads if you want to hang the food from outside the frame.
If you’re just starting out with levitation photography, try to use a very soft light. That way, you won’t have to deal with toothpick shadows (shadows are usually the hardest part of any composite). A dark background can provide a little extra help.
Once you have all the elements where you want them, position your camera and set the exposure. Make sure you adjust your settings manually as they need to be the same in all the pictures you use for the composite.
Once you capture the first photo, take away the subject and snap a picture of the empty background (remember, the settings and focus should stay the same!). For a simple shot like the one above, you’ll only need two images, but you can always take a picture of each element to achieve a more professional result.
Editing your photo
Start by opening both images as layers in Photoshop. Make sure the image with the subject is on top. Then add a Layer Mask and grab the Brush tool. Using black, paint over the toothpicks or threads that you used to hold up the vegetables.
The mask will hide the props and reveal the empty background from the other layer, creating the levitation effect. If part of the produce is covered by a holding prop, use the Clone Stamp tool or the Healing Brush to subtly remove it.
Vegetable photography tips: final words
Well, there you have it:
12 tips to take your vegetable photos to the next level.
All that’s left to do now is practice – and have fun!
Now over to you:
Which of these tips do you plan to implement in your own vegetable photography?Do you have any vegetable photo tips? Share your thoughts (and photos!) in the comments below!
Vegetable photography FAQs
How do you make vegetables look fresh?
Photograph them while they’re still fresh! Keep them away from heat while you prepare the scene and maybe spritz some water on them before the shot.
Can you photograph fruit in the same way as vegetables?
Yes. The same tips and techniques apply for fresh fruits, herbs, tubers, mushrooms, vegetables, and other types of raw produce.
Is vegetable photography only about fresh produce?
The most common use of the term vegetable photography refers to raw produce – once it’s cooked, it’s normally classified as “food photography.” However, you might run into a client or a photographer who also includes cooked vegetables in the “vegetable photography” category.
Is vegetable photography a kind of still life photography?
Yes, normally vegetable photography refers to a still life composition using raw produce. Although you can also do lifestyle photography shoots with vegetables.
Can you use cooked ingredients for vegetable photography?
You can use a cooked dish as part of the composition. However, vegetable photography normally has raw produce as the main subject.
The post 12 Tips to Capture Stunning Vegetable Photography appeared first on Digital Photography School. It was authored by Ana Mireles.
The post Capture One vs Lightroom: Which Editing Program Is Best? (2021) appeared first on Digital Photography School. It was authored by Dawn Gilfillan.
Not sure whether to use Capture One or Lightroom for your image editing? Both programs have plenty of fans, but which option is best for you?
This article aims to give you a clear, unbiased assessment of the pros and cons of Capture One vs Lightroom. By the time you’re done, you’ll know all about these two programs – and you’ll know which one is right for your needs.
Let’s get started.
Capture One overview
Thanks to its advanced tools, Capture One is often the choice of professional photographers and retouchers. It’s a high-end program that offers powerful tethered shooting, in-depth image editing, and a robust image-organization system that’ll satisfy even the most demanding of photographers.
Pros
A vast range of image-editing tools and features
Tethered shooting option that performs well
Designed for professional workflows
Superior RAW image processing
Cons
The user interface can be confusing – it’s not always easy to find the tools you need
Not beginner-friendly
Expensive
Image organization/library feature is clunky and difficult to use
No simple one-click presets or filters
Lightroom overview
Lightroom offers image organization and library features, as well as RAW, TIFF, and JPEG image processing. Thanks to Lightroom’s smooth integration with Adobe Photoshop, many photographers use both programs for image editing. Lightroom is easy to use and includes a range of one-click presets to speed up your workflow.
Pros
Easy for beginners to use
Simple and effective image library/organization
Good range of one-click presets available online
Good for beginners and advanced photographers
Affordable
Cons
No image adjustment layers
Subscription-only model
Tethered shooting performs poorly
Image editing tools not as advanced as Capture One
Capture One vs Lightroom: in-depth comparison
Now that you’re broadly familiar with these two programs, let’s take a closer look at how they stack up, starting with:
Editing tools
While both Capture One and Lightroom offer a near-identical range of basic image editing tools, there are some key differences worth considering.
First, Capture One offers adjustment layers, while Lightroom does not.
Adjustment layers in Capture One.
Lightroom is designed to be used alongside Adobe Photoshop, an advanced layer-based editor. So if you want to use adjustment layers, you do have the option to send your Lightroom-adjusted files across to Photoshop, though this can be inconvenient compared to Capture One’s more comprehensive, one-stop-shop approach.
Both programs offer lens corrections and profiles, as well as the usual cropping and rotating features, etc. As a quick aside, the Crop tool in Lightroom is simpler to use than the one in Capture One – and it’s also far easier to find!
Crop tool in Lightroom.
Capture One and Lightroom can process RAW files, but Capture One does have the edge here, especially considering the amount of fine-tuning you can do with the shadows and highlights. Capture One offers high dynamic range editing of your RAW files, which lets you make significant adjustments to the highlights, shadows, blacks, and whites:
High Dynamic Range tool in Capture One.
While Lightroom offers RAW exposure adjustments of its own, the options are clunkier and less sophisticated compared to Capture One.
What’s one area where Capture One really beats Lightroom hands down? Color adjustments. The Capture One Color Editor doesn’t just offer Basic and Advanced options, but also a tool to fine-tune skin tones, plus an outstanding interface that serious color editors will love.
Color Editor in Capture One.
Capture One also offers the Color Balance tool with Master, 3-Way, Shadow, and Highlight options. If color grading is your thing, Capture One blows Lightroom out of the water; its sophisticated tools are capable of performing even the most demanding of color edits.
Color Balance tool in Capture One.
Lightroom does offer color adjustments, of course, but nothing comparable to Capture One:
HSL panel in Lightroom.
Tethered shooting is also where Capture One excels. I have used it extensively, and it’s fast and efficient. Although Lightroom does offer tethering, it’s not reliable, and it’s slow and glitchy at times. It just doesn’t cut the mustard for a pro photographer, especially one who has clients waiting to see the RAW shots during an in-progress session.
Ease of use
As far as I’m considered, Lightroom is much easier to use; the interface is simple, and you can view all the tools and features on one screen.
Capture One, on the other hand, uses a series of tabs, cursor tools, menus, and sub-menus, and it’s easy to get lost or spend ages hunting for something you need.
The Lightroom Library system is also clear and simple, while Capture One makes this unnecessarily complicated.
The Lightroom Library.
Using presets in Lightroom is easy. Download your presets, import them into Lightroom, and they’ll appear on the lefthand side of the Develop module. Hover your mouse over a preset to see how it will affect your image, click to select a favorite, and you’re done. Just look at the simplicity of Lightroom’s Preset panel:
Capture One doesn’t do presets – sort of. It does have preset equivalents, but they’re called Styles, and you’ll have to go into the Adjustments tab and follow the sub-menu to find and apply them:
Also, Styles packs are expensive, whereas there are plenty of free Lightroom presets on the market.
Supported file formats
Capture One supports the following file formats:
RAW
DNG
JPEG
TIFF
PNG
PSD (read-only)
HEIF/HEIC
DNG files are supported in Capture One Pro, but not in brand versions (e.g., Capture One for Fujifilm, Capture One for Sony, etc.)
Lightroom supports these file formats:
RAW
Digital Negative format (DNG)
HEIF/HEIC
TIFF
JPEG
Photoshop format (PSD)
Large Document format (PSB)
CMYK files
AVI
MP4
MOV
AVCHD
If you want to use PSD or PSB formats, then Lightroom will be your best choice. It’s also best for those who want to import the supported video files listed here. As noted with Capture One, DNG files from all cameras are only supported in the Pro version, whereas all DNG files are supported in Lightroom, regardless of which camera they came from.
Is there a mobile version?
Lightroom offers a totally free app for your device, downloadable from both iOS and Android app stores. You will need an Adobe subscription to access several advanced features, but once you’ve purchased Lightroom, this will take care of itself. Also, note that images and edits from your Lightroom app will sync across your Lightroom CC programs – so you can edit on your phone, then see the changes on your desktop (and vice versa).
Unfortunately, Capture One doesn’t currently offer any kind of mobile app. If you want to edit images taken on your smartphone, you’ll need to transfer them to your computer (and if you want to edit images on your phone, you’re out of luck, though you can always grab the free Lightroom app).
Pricing
As with all Adobe apps, Lightroom is only available as a monthly subscription. You can purchase Lightroom CC on its own – with 1 TB of cloud storage – for $ 9.99 USD per month, or you can grab Lightroom as part of Adobe’s Creative Cloud Photography Plan, which includes access to Lightroom CC, Lightroom Classic, and Photoshop CC and starts at $ 9.99 USD per month, though you can pay extra for additional cloud storage.
Unfortunately, Capture One is quite expensive, and the pricing structure can be confusing, too. You can buy the program outright or rent it via a monthly subscription, and you can buy plans for specific camera brands, such as Sony, Fujifilm, or Nikon (these camera-specific plans are cheaper, but can only be used on images from certain cameras).
Capture One Pro is $ 299 USD for a new perpetual license, and subscription plans start at $ 19 USD per month. An annual prepaid subscription for Capture One for Fujifilm, Nikon, or Sony is $ 149 USD (which comes to around $ 12.50 USD per month).
Capture One vs Lightroom: final thoughts
Ultimately, the software you choose will be a reflection of your preferences, your skill level, and your budget.
Therefore, if you are a professional photographer who requires an integrated workflow from tethered shooting through to finished images, then Capture One is the best choice. It’s also the program to choose if you like advanced editing and color grading on adjustment layers.
Lightroom, on the other hand, is great for beginners, intermediate, and pro photographers who don’t need the huge array of features and tools available in Capture One. Lightroom is also less expensive, plus it’s more pleasant to use.
I’ve used both programs extensively, and each has its own strong and weak points. If you’re still on the fence, I’d recommend you take the time to determine the features that are important to you in an image editor. That way, you can make an informed decision regarding the best program for your editing needs.
Now over to you:
Which program do you like better, Lightroom or Capture One? Which do you plan to purchase? Share your thoughts in the comments below!
The post Capture One vs Lightroom: Which Editing Program Is Best? (2021) appeared first on Digital Photography School. It was authored by Dawn Gilfillan.
The post How to Capture Motion Blur in Photography (6 Tips) appeared first on Digital Photography School. It was authored by Darren Rowse.
Are you looking to capture motion blur in your photography?
While photographing motion blur might seem difficult, it’s actually pretty easy; with a bit of camera know-how, you’ll be taking stunning photos like a pro.
And that’s what this article is all about: giving you the tools and techniques you need to get beautiful results!
Note that motion blur can look great in any photography genre, so don’t try to limit yourself. Instead, embrace the power of the blur!
1. Slow down your shutter speed
Here’s the fundamental motion blur tip:
Use a slow shutter speed.
You see, the reason for motion blur is simply that your camera’s shutter remains open for a significant period of time. In other words: you get motion blur when your shutter speed is long, whereas you freeze the action when your shutter speed is short.
So the number one tip for capturing movement is to select a longer shutter speed.
If your shutter speed is too fast (e.g., 1/4000s), you’re not going to capture much movement. But if you dial in a lengthy shutter speed (e.g., five seconds) you won’t need your subject to move much at all before you start to see blur.
How long should your shutter speed be? Here, the speed of your subject comes into play. A moving snail and a moving racecar will give you very different results at the same shutter speed. The slower your subject, the slower the shutter speed needs to be to create blur.
The other factor that comes into play when determining shutter speed is how much light exists in the scene. A longer shutter speed lets more light into your camera and runs the risk of blowing out or overexposing your image. Below, we’ll cover some ways to let less light in (so you can use long shutter speeds without overexposure concerns).
Bottom line:
There’s no one-size-fits-all shutter speed for motion blur. It’ll depend on the speed of your subject, the brightness of the scene, and how much motion blur you want to capture. The key is to experiment!
2. Stabilize your camera
There are two ways to get a feeling of motion in your images:
Have your subject move.
Have your camera move.
But for the type of photo we’re after today, it’ll be the subject that’s moving. In such cases, you need to do everything you can to keep your camera perfectly still. Otherwise, you’ll capture a blurry subject – but you’ll also end up with a blurry background.
How do you stabilize your camera?
A tripod is ideal, but you can also place your camera on some other steady object (e.g., a table or a bench). I’d recommend using a remote shutter release or a self-timer mechanism; that way, you can trigger the shutter without touching your camera (because the more you touch your camera, the more likely it is that you’ll introduce blur).
3. Try Shutter Priority mode
As you know, the shutter speed is crucial to achieving a beautiful blurred look. Even small changes will have a big impact upon your shot – so you should use a camera mode that gives you full control over your camera’s shutter.
You have two options. First, you can switch your camera to full Manual mode. It’ll work well, and it’s a good idea for more experienced photographers – but in Manual mode, you’ll also need to select your aperture and ISO (and you’ll need to make sure that the shutter speed, aperture, and ISO interact to create a perfect exposure). So if you don’t yet feel confident working in Manual mode, you have another option:
Shutter Priority mode.
With Shutter Priority, you set the shutter speed (and the ISO, if you so choose), but your camera will set the aperture to ensure the shot is well exposed. It’s a very handy mode for motion blur photography because it ensures you get the movement effect you’re after while also capturing generally well-exposed images.
How to compensate for long shutter speeds when there is too much light
Remember what I said about a long shutter speed?
The longer the speed, the more light that will get into your camera, and the brighter your photos will be.
So unless you compensate for this, whenever you try to capture motion blur, you’ll end up with overexposed shots.
Below, I’ll suggest three easy methods for preventing this overexposure.
(Note: A fourth method is to simply wait for the light to change – i.e., for it to get darker. Many shots that incorporate blur are taken at night or at dawn/dusk for this reason.)
1. Use a small aperture
Here’s the first, and simplest, method of preventing overexposure:
Narrow the aperture.
Because the narrower the aperture, the less light that will hit the camera sensor.
If you’re shooting in Shutter Priority, your camera will actually narrow the aperture for you. As soon as it detects a slow shutter speed, it’ll close down the aperture and deliver a well-exposed shot.
But if you’re shooting in Manual mode or Aperture Priority, the aperture can generally be changed via a dial on your camera.
One thing to bear in mind:
Adjusting the aperture won’t just affect your photo’s exposure. Aperture also affects the depth of field, which refers to the amount of the scene that’s sharp. A wide aperture creates a limited depth of field, like this:
Whereas a narrow aperture ensures the entire scene is sharp throughout:
So while it’s easy to combine a deep depth of field with a well-exposed motion blur image, working with a shallow depth of field while also ensuring well-exposed motion blur can be tough. If you’re after a shallow depth of field effect, you’ll need to counteract overexposure another way, as I explain in the next section:
2. Decrease your ISO
If you’ve tried narrowing your aperture and still aren’t getting you the results you need, or if you’re after a shallow depth of field, here’s an alternative method for preventing overexposure:
Drop your ISO.
ISO impacts the sensitivity of your digital camera’s sensor to light, where a higher number will induce greater sensitivity (and therefore a brighter exposure) and a lower number will induce less sensitivity (and therefore a darker exposure).
You can adjust your ISO in Manual mode or Shutter Priority mode, so simply dial in a low ISO (such as 100) and watch as your exposure decreases. Of course, there’s a limit to how low you can drop your ISO; once you get to ISO 100 or ISO 50, your camera won’t allow you to go any further. But it’s always worth checking whether a lower ISO is an option because it’s a simple way to prevent overexposure.
3. Try a neutral density filter
Say you’re after a motion blur photo, but you just can’t get the exposure dark enough. You’ve narrowed the aperture, you’ve dropped the ISO, but your shots keep coming out overexposed.
You still have another, more dedicated option:
A neutral density filter. It’s a piece of glass that blocks light from passing through your lens – sort of like sunglasses – and lets you use a long shutter speed while preventing overexposure.
For example, if you’re shooting a seascape in bright sunlight and you want to blur the water, you’ll end up with a blown-out, overexposed scene – even with a narrow aperture and low ISO. But pop a neutral density filter over your lens, and you can slow the shutter speed right down while keeping a perfect exposure.
(By the way, a polarizing filter can have a similar effect, though it’ll also impact the look of your images by cutting out reflections.)
Note that neutral density filters come in many strengths. You can get a basic, subtle ND filter, one that’ll slightly darken the scene. Or you can buy an ultra-powerful, 10-stop ND filter, which will allow you to dramatically lengthen your shutter speed in bright sunlight.
A quick note: two more creative techniques to try
If you want to capture images with motion blur but you’re looking to come away with uniquely artistic results, here are two other techniques to consider:
Slow sync flash. This lets you capture a relatively sharp subject while creating a moving, blurry background, and it’s a great way to create in-your-face shots.
Panning. Here, you simply follow a moving subject with your camera; the subject will generally come out nice and sharp, while the background stretches and blurs.
Motion blur in photography: conclusion
Well, there you have it! Six easy tips to capture motion blur in photography.
So remember these tips. And the next time you’re after some creative motion blur photos, you’ll get stunning results!
Now over to you:
Have you tried taking motion blur photos? Did it go well? Do you have any tricks or tips? Share your thoughts (and images!) in the comments below!
The post How to Capture Motion Blur in Photography (6 Tips) appeared first on Digital Photography School. It was authored by Darren Rowse.
The post Capture One 21 Review: Dehaze, Speed Edit, and More appeared first on Digital Photography School. It was authored by Carl Spring.
In this comprehensive Capture One 21 review, I’m going to take you through everything you need to know about Capture One’s latest editing software.
In fact, as a beta tester for the newest release, I’ve spent plenty of time working with Capture One 21 behind the scenes (and I have used Capture One as my main editing software going all the way back to version 12!).
So let’s take a closer look at this software program – and determine whether it’s the perfect editor for you.
Starting with…
What’s new in Capture One 21?
The list of new features is a little lighter than in other major upgrades.
It includes:
A new import design
Dehaze
Speed Edit
ProStandard profiles
General speed upgrades and bug fixes
New tooltips and hints
The familiar Capture One layout with a few new additions. Are these enough to make it worth the upgrade?
Dehaze
Capture One’s new Dehaze tool is a welcome addition for landscape photographers. Dehaze has been in Lightroom for some time now, and it’s nice to finally see it in Capture One.
Basically, the Dehaze tool is there to reduce the amount of atmospheric haze in images and improve the saturation in low-contrast photos.
Dehaze is most commonly associated with removing fog or smog from an image, but you can also increase the haze – an effect that can add atmosphere. The tool can also be applied selectively via layers. To my eye, it seems to work quite well, but I’m a non-landscape shooter and have little to compare it to.
Now, I have seen this tool used to dodge and burn portraits, and it can subtly enhance faces if used sparingly.
However, while the Dehaze tool is good (and many claim it’s better than Lightroom’s), it’s not really the tool that landscape photographers desperately wanted. And for those of you who are not landscape photographers (like me), it’s a tool you will rarely use.
As a non-landscape photographer, I will rarely use the Dehaze tool. I had to search through my archive for a landscape shot.
Speed Edit
Wow! Just wow! Capture One 21’s new Speed Edit feature is really good. I am a huge Loupedeck fan, but I may be moving away from it for editing in Capture One. The Speed Edit tool really is the next best thing.
In basic terms, Speed Edit is a set of keyboard shortcuts you use with your mouse to edit images. Simply hold down the key associated with the edit, then drag the mouse to make the adjustment.
The process works incredibly well in practice and, within a few minutes, becomes second nature. The ability to edit images in a full-screen layout with no distractions is amazing. The only thing you will see is an unobtrusive slider at the bottom of the screen showing which edit you are carrying out.
Capture One 21 comes with the most common Speed Edit keys mapped for you, but these can be customized to suit your preferences. You can also adjust the sensitivity of your mouse. This can be changed easily, so if you are looking to get a set of rough edits done, you may want to leave the sensitivity quite low. Then, when you go back to complete final edits, you can fine-tune the sensitivity for precise control of the sliders.
The main editing tools come with corresponding keys, but you can easily change these and add other shortcuts.
The adjustments you can make to an image with Speed Edit are:
Exposure
High Dynamic Range
White Balance
Dehaze
Clarity
Levels
Vignetting
Sharpening
Lens Correction
You can also use these shortcuts to quickly and easily alter the size, opacity, and hardness of brushes. I’ve heard some people comparing Speed Edit to PC gaming, and while I’m not a gamer, it feels natural to use the keyboard and mouse in harmony like this while editing.
Speed Edit is a serious timesaver and brilliantly implemented. It will save a lot of people a lot of time when editing – especially if you edit hundreds of files at once. Also, the ability to edit without toolbars allows you to focus solely on the image.
The Speed Edit tool allows you to edit your images with no visual distractions, and it works perfectly in practice.
ProStandard profiles
This feature is currently only available for a selection of the most popular cameras, but Capture One is working on profiles for more cameras, and ProStandard looks like it will be the default profile for new cameras going forward.
Capture One states that these “ProStandard” profiles have been completely reworked to give much greater color accuracy while protecting hues and color shifts. For people doing work such as product photography or reproduction of artworks, this is a massive improvement.
But for those who are not in need of such accuracy, do the ProStandard profiles really make a difference?
The answer is yes – but it is subtle.
When I compared some files shot on a Canon 5D Mark IV, the unedited photo simply looked better with the ProStandard profile applied. Colors seemed a little richer and more lifelike, and it felt like a better starting point.
However, the difference is not night and day. So while ProStandard profiles are nice, they’re not an essential feature for most photographers.
One of these is the standard profile, and one is ProStandard. Can you tell which is which?
Import and speed improvements
The Capture One import process had a facelift.
It is now easier to pick and unpick selects before you import images into the system, and while I haven’t run tests, the actual import feels much faster.
Improvements continue under the hood. Capture One feels snappier. It’s hard to quantify this, but it’s something I noticed, and no doubt a lot of long-term Capture One users will, too.
The import is improved in Capture One 21. It’s faster overall, though many will not notice or need this.
Enhanced tooltips
When a software company lists new and improved tooltips and tutorials as a key feature, it really does make you question how significant the new version is.
Yes, the tooltips are improved, but they aren’t really needed past the first few weeks of using the software.
Then again, I am a long-term Capture One user. So I spent some time thinking about those who are coming across from Lightroom or other software, and here’s what I concluded:
The tooltips and tutorials will be useful while you get accustomed to the software. The tutorials are short, meaning you don’t have to wait too long before you can dive back into your edit. And the tutorials are well done. The tooltips, while annoying for longer-term users (you can switch them off!), will help you get to grips with Capture One 21 – so that mastering the software will not take you that long.
As a seasoned user, I forget that tips like this can be really useful when learning software.
Is Capture One 21 worth it?
Capture One marketed their software release with an approach of buy now, discover later. They ran a series of online events showcasing new features, each time promising there was much more to come.
However, there wasn’t much more to come, and many customers who either purchased or upgraded came out en masse to make their voices heard. Feedback was decidedly mixed, and many were not very happy with the new feature set.
And I’ll be honest:
It really doesn’t feel like a full-blown release to me.
A saving grace for the Capture One team is that they have upgraded Capture One 20 to run on the latest Mac OS X. This is a welcome gesture, one that will make the decision of whether to upgrade easier for many.
Capture One is working on an Apple silicon adaption, but this is not yet ready (though I’m sure it will be here sooner rather than later). Again, this is only useful for some users but worth pointing out, especially if you are tempted by one of the new Macs that Apple has already released or is bringing out in 2021.
I hope there is a large update within a few months that adds ProStandard profiles for many more cameras, and maybe even some more tools that make this version more of a must-have.
The fact that cameras like the Nikon Z7 II will only be supported in version 21 means that some users will have no choice but to upgrade, although I feel some may be headed back to Lightroom.
There was also a price increase that doesn’t sit well with me. At the time of launch, Capture One for Sony, Nikon, and Fujifilm cost $ 129, but the price was quickly boosted to $ 199 (and the price to upgrade increased, as well). Photographers (especially professionals) have had an awful 12 months, business-wise. While this price increase may bring in some extra cash in the short term, it feels like the Capture One team failing to read the room. The way this release has been so aggressively marketed will, in my opinion, see many moving back to Lightroom.
However, Capture One is still my choice of editing software, so would I recommend you upgrade?
I love how Capture One makes my images look. For new users, there is an obvious conclusion; for those upgrading, it’s a little different.
For new users
I always tell those who use Lightroom to try Capture One. And when doing a Capture One 21 review, it’s easy to get caught up thinking about upgrades for existing users.
However, Capture One 21 is the best version of this software yet. So for those who are exploring software alternatives, I would strongly suggest taking a look. Especially those of you who have cameras compatible with the ProStandard profiles.
If you shoot with one camera brand, you can even get a brand-specific version of Capture One 21, which will save you money.
Here’s the bottom line:
RAW processing is where Capture One excels, and this release proves no different. Capture One images simply look better compared to Lightroom. I still feel Capture One is the best RAW editor out there.
For existing users
The new tools in Capture One 21 feel aimed at a specific niche of photographers. The Dehaze tool has no real appeal to someone like me who rarely shoots landscapes. Yes, it is fun to experiment with Dehaze on portraits, but I will use this tool infrequently at best. And I’m sure this is true for any non-landscape photographer.
The ProStandard profiles are nice, but not yet available for many cameras. And the need for incredibly accurate colors caters to a select group of photographers.
The new tool I love is Speed Edit. It’s beautifully executed and removes the need for a workflow tool such as a Loupedeck for many users. The ability to edit images in full screen without distraction is simply amazing. For those (like myself) who shoot weddings or events, this tool will be a huge timesaver.
Lastly, there is the new importer. It’s nice, but honestly, most won’t notice the difference. And those who need the speed will continue to use Photo Mechanic.
So my Capture One 21 review boils down to this:
Which new tools will you use? And do they justify the price increase? Personally, I am not able to justify the upgrade price just for the Speed Edit tool. Like many other photographers, my work has been drastically affected in the past 12 months, and I cannot justify the price of the upgrade right now. I am sure many other working professionals are in the same boat.
That said, for a small section of photographers, the upgrade is a no-brainer. Capture One 21 is the fastest version of the program, and it has features some will welcome with open arms. If you are yet to try Capture One, you really should test it out and see what all the fuss is about.
However, I will wait for Capture One 22.
You can download a 30-day trial of Capture One 21 on the Capture One website.
The post Capture One 21 Review: Dehaze, Speed Edit, and More appeared first on Digital Photography School. It was authored by Carl Spring.
Nikon Japan has announced (machine-translated) it’s developed a 17.84-megapixel 1”-type multi-layer CMOS image sensor that can capture high dynamic range video at up to 1,000 frames per second.
Nikon is known to use Sony sensors in a number of its imaging products, but it also develops its own sensor technology. Case in point is this new 1”-type backside-illuminated (BSI) CMOS sensor, which offers high-speed capture with impressive dynamic range in a square capture format.
The stacked sensor uses 17.84 million 2.7?m pixels (4224×4224 pixels) to capture video at up to 1,000 frames per second with 110dB dynamic range. If dropped to 60fps, the dynamic range jumps to 134dB.
Nikon doesn’t specify what kind of products this sensor is destined for, but based on its square format and hint at its use in ‘industrial fields such as automobiles,’ it’s unlikely we’ll see this in a consumer camera anytime soon.
Recently, I kicked off a new series of articles comparing the software provided by camera manufacturers with one of their most popular third-party alternatives, pitting Canon Digital Photo Professional head-to-head against Adobe Camera Raw. Now, I’m back with the second in the series, in which we’ll take a look at how Adobe’s raw processing rivals that offered for free with Nikon’s cameras.
Nikon ViewNX-i version 1.4.3’s user interface.
There’s a bit more to discuss this time around, as Nikon offers a choice of two different raw processing apps for free — the somewhat inconsistently-named ViewNX-i and Capture NX-D. As in the previous article, I’ll be limiting discussion mostly to each application’s user interface and image quality in the interests of keeping things to a readable length, and won’t be addressing features like image management, tethering or printing.
The ground rules
In this article, I’m comparing Adobe Camera Raw 12.4 alongside Adobe Bridge 10.1.1 versus Nikon ViewNX-i 1.4.3 and Capture NX-D 1.6.3, all of which are their current versions. My computer is a 2018-vintage Dell XPS 15 9570 laptop running Windows 10 version 1909.
To level the playing field as much as possible, I’ve once again aimed to reproduce the look of already-processed images from our galleries, without any prior knowledge as to the recipes behind them. I’ve chosen images from the Nikon Z6 for use in this comparison, since it’s similar in price and resolution to the EOS R used in the first article, and has been around long enough for Adobe to fine-tune its support.
Adobe Camera Raw version 12.4’s user interface.
To avoid getting too far into the weeds, sharpness and noise reduction were left at their defaults, while lens corrections were enabled for all three apps where possible.
Adobe Camera Raw doesn’t allow built-in corrections to be disabled at all. ViewNX-i doesn’t allow you to change whether or not distortion correction is enabled, and just abides by what’s set in the raw file. Only Capture NX-D allows corrections to be enabled/disabled (although even it prevents disabling distortion correction for certain lenses).
Images processed in ACR were saved at JPEG quality 11, just as used in our galleries. For NX-i and NX-D, I saved at JPEG quality 86, producing similarly-sized files.
The main differences
Click or tap for the full-sized ACR version; here for ViewNX-i version
Of course, the most immediately obvious differences between ACR and NX-i / NX-D are their camera support and price tag. You already paid for NX-i and NX-D when you bought your Nikon camera, so it’s effectively free. While it only supports Raw files from the company’s own cameras, you can expect full Raw support for every Nikon camera to be available pretty much immediately upon release.
By contrast, ACR comes with a recurring subscription fee. While it supports a vast range of cameras from many manufacturers – including every single interchangeable-lens Nikon camera made to date – that support can sometimes take a while to arrive after the release of new models.
It’s also sometimes more limited than that in first-party software, especially for Coolpix compacts. While Adobe offers ‘camera matching’ profiles for almost every Nikon ILC, for example, it’s not available for a fair few compacts, including the relatively recent Coolpix A1000.
As for the differences between ViewNX-i and Capture NX-D, we’ll describe those in more detail when we look at NX-D on the next page. Suffice it to say that NX-i is the simpler, more approachable of the pair, however.
ACR is a little cleaner, but NX-i is approachable too
Click or tap for the full-sized ACR version; here for ViewNX-i version
For the remainder of this page, we’ll focus solely on ViewNX-i. Although its interface isn’t quite as modern as that of ACR, it’s still pretty clean overall, with relatively few controls on offer. Some features like sharpening are combined into a single easy-to-use slider, while others like noise reduction are controlled entirely automatically.
The selection of controls available to the user is sometimes a bit odd, though. For example, I’d wager that most NX-i users won’t have the first clue what “axial color aberration” means, nor will they find any tooltip explaining it if they hover over the control. Yet several more common (and easily-understood) attributes like distortion and vignetting corrections cannot be controlled by the end-user.
The selection of controls available in ViewNX-i is sometimes curious. For example, there are controls for more obscure functions like aberration and diffraction, but none for more easily-understood variables like distortion and vignetting.
The good news is that, with fewer controls on offer, Nikon gives you access to everything up front. Editing functionality isn’t hidden behind buttons or under menus. Nor is it strewn across multiple tabs of controls, as in some applications.
Instead, you’ll find all available editing tools grouped together in a single, relatively short scrollable panel. And sliders move smoothly rather than in large steps, so making fine-grained adjustments is easy.
Like ACR, modern features like support for 4K displays, touch-screens and pen control are pretty good, although if you switch between 4K and Full HD displays — especially while NX-i is running — you’ll often have to resize panels or perhaps even restart the application entirely so it redetects the screen resolution before you can get to work.
ACR is still the speed champ, but ViewNX-i isn’t that far behind
Click or tap for the full-sized ACR version; here for ViewNX-i version
ViewNX-i isn’t quite as fast as ACR, especially when it comes to previewing changes as controls are adjusted. Still, it trails Adobe by only around a third in terms of final rendering times, which is much better than some rivals. All six images in this preview took ViewNX-i around 26 seconds to batch-process, compared to 19.5 seconds for ACR.
And while image previews aren’t adjusted in near real-time as in ACR, they never take more than a second or less to catch up to your changes, and render in a single pass. The accuracy of that preview isn’t perfect when viewing full images, so for the finest adjustments you’ll want to switch to a 1:1 view instead, but it’s certainly good enough to get you close.
Unfortunately, there’s no indicator to show when the preview is updating, which is a bit frustrating when making more subtle adjustments.
ACR gives you much more control, especially over shadows and highlights
Click or tap for the full-sized ACR version; here for ViewNX-i version
As noted previously, ViewNX-i offers a smaller selection of controls than does Capture NX-D, and the same goes doubly when compared to Adobe Camera Raw. A particularly surprising omission in an app aimed at less-experienced users is the lack of a one-click auto control to help get everything in the ballpark. Much like ACR, ViewNX-i includes slider control over brightness, contrast, shadows and highlights.
NX-i also has D-Lighting HS and Color Booster sliders, the latter replacing the separate saturation/vibrance sliders offered by Adobe, and providing a choice of people or nature modes for some control over skin tones. Sharpening control is likewise limited to a single slider with no fine-tuning possible. And Nikon’s app lacks ACR’s sliders for texture, clarity, dehazing or black-points and white-points entirely, as well as its noise reduction and curves controls.
The D-Lighting HS slider makes it really easy to recover shadow detail, but I found its interactions with the shadow protection and contrast sliders in particular to be a bit difficult to predict and control. With D-Lighting HS set in the upper half of its range, as little as a 2-3% change in the contrast slider could have a pretty major effect overall and badly block up deeper shadows. This was particularly true of the shots inside the aircraft hangar, as well as the backlit model shot.
The fixed noise reduction is too heavy-handed by far
Click or tap for the full-sized ACR version; here for ViewNX-i version
With less challenging scenes, though, I thought ViewNX-i did a pretty good job in most respects. It yielded pleasingly lifelike color with relatively little effort, and I found myself preferring its rendering of foliage and skies in particular over those of ACR.
The fly in the ointment is that its noise reduction – which, remember, can’t be disabled – is quite heavy-handed. This is particularly noticeable in portrait shots, where much fine detail is lost in things like hair or thread patterns in clothing, and skin can end up looking unnaturally plasticky. This, more than anything else, will push more experienced photographers to either Capture NX-D or a third-party alternative like ACR.
ViewNX-i’s default noise reduction can lead to slightly plasticky-looking skin.
If your shot doesn’t have much noise to start off with, though, ViewNX-i can extract about almost as much detail as can ACR. (And can appear a little crisper at default settings, thanks to slightly stronger unsharp masking).
Final thoughts on ViewNX-i
Click or tap for the full-sized ACR version; here for ViewNX-i version
Less experienced photographers might, perhaps, find ViewNX-i to be a bit less intimidating than Capture NX-D or Adobe Camera Raw, and it’s certainly capable of providing decent results if you can live with its noise reduction performance. Performance is decent too, especially in terms of final rendering, although Adobe still takes the win handily in this respect. But for many, the limited controls on offer and the heavy-handed noise reduction will push them to Capture NX-D or a third-party alternative instead — and rightly so.
Nikon ViewNX-i
Pros
Cons
Available free with your camera
Excellent support for Nikon’s cameras from launch day
Realistic color with minimal effort
Impressive shadow recovery from D-Lighting HS
Decent performance, albeit still not as good as ACR
Only supports Nikon cameras
Lacks many controls offered by ACR and other rivals
Selection of controls doesn’t make sense for less-experienced shooters
No one-click auto control
Can’t use distortion correction if it wasn’t enabled at capture time
Denoising robs fine detail and can’t be disabled
Interactions between controls can prove challenging
Adobe Camera Raw
Pros
Cons
More modern user interface
Supports a vast range of cameras from many brands
Great performance and accurate real-time preview
Great image quality overall
Holds onto more fine detail than ViewNX-i
Does a great job with highlights/shadows
Recurring subscription fee with no perpetual license option
Camera support can take a while to arrive
Less pleasing color than Nikon’s software by default
Leaves significantly more noise in images by default
And with our Nikon ViewNX-i vs. Adobe Camera Raw comparison complete, it’s time to see how Capture NX-D fares against its third-party rival. Continue reading on the next page!
The post Capture One 21 Has Been Released, a Powerful Alternative to Lightroom appeared first on Digital Photography School. It was authored by Jaymes Dempsey.
Just last week, Phase One launched the latest version of their Capture One software:
Capture One 21, which offers several powerful new features, plus all the tools that made the post-processing program so compelling in the first place.
While Capture One is often pitched as a Lightroom alternative, it’s known among photographers as the “advanced” all-in-one photo editor, geared toward serious hobbyists and professionals looking for extensive editing capabilities in a single package.
In other words:
Compared to Lightroom, Capture One is more difficult to learn – but also the better program, once you get the hang of it. In nearly every area, Capture One (including Capture One 21) matches Lightroom edit for edit. But the program also outperforms Lightroom in a few key ways, which is why more and more serious photographers have been making the conversion to Capture One.
So what does Capture One 21 offer?
First, the new features:
Capture One 21 now boasts a Dehaze slider, which removes haze from your photos for a crisp, contrasty look.
You also get improved color profiles for certain cameras, including Sony’s high-end mirrorless models, plus a handful of Nikon and Canon DSLRs and MILCs.
Phase One has also promised performance upgrades, claiming that with Capture One 21 it’ll be “faster than ever to search and browse photos.” There’s also a brand-new “Speed Edit” feature, which lets you quickly edit images without using sliders; instead, you can make changes with a few hotkeys and the scroll wheel.
Additional new features include Capture One’s support of 8-bit HEIC files, so you can edit your HEIC smartphone photos directly in Capture One, and a set of integrated tips and tutorials for mastering Capture One 21 as quickly as possible.
Of course, Capture One 21 also packs its usual standout features. First, there’s the class-leading color tools, which allow you to take your photos to the next level with selective color adjustments and precise color grading.
Then there’s the powerful digital asset management capabilities, which allow for both session-based and catalog-based organization, plus keywording, comprehensive export options, and seamless Photoshop integration.
Finally, there’s a suite of powerful adjustment tools, including layers, luminosity masking, levels, curves, and more.
For advanced photographers looking for a comprehensive alternative to Lightroom, Capture One 21 is the way to go. You can grab it here starting at $ 129 USD for a one-time license, or you can purchase a subscription starting at $ 9.99 USD per month. Alternatively, you can download a 30-day free trial right here.
Now over to you:
Have you tried Capture One software? Are you a fan? And which do you prefer, Capture One or Adobe Lightroom? Share your thoughts in the comments!
The post Capture One 21 Has Been Released, a Powerful Alternative to Lightroom appeared first on Digital Photography School. It was authored by Jaymes Dempsey.
Fujifilm has announced a firmware update for its GFX 100 camera that adds Pixel Shift and Multi-Shot functions to its flagship camera, which work alongside Fujifilm’s new Pixel Shift Combiner software to stitch together up to 16 Raw photographs into a single 400MP Raw image.
The new 400MP image capture mode in firmware version 3.00 combines the capabilities of the GFX 100’s 102MP sensor, its in-body image stabilization and the X Processor 4 inside. To achieve this level of resolution, the GFX 100 will first capture a the base shot, before shifting the sensor one pixel left, right and down for a total of four images. The camera will then repeat this process with each of these four images for a total of 16 Raw photographs.
This method ensures each pixel records image data in red, green and blue, which helps to increase color reproduction accuracy with minimal false color. To get the final result, users will need to rely on Fujifilm’s new Pixel Shift Combiner software, which will automatically stitch all 16 Raw images together to create a single 400MP Raw image (DNG), which can then be edited in the program of your choosing.
The high color accuracy and resolution make this an obvious choice for digital archiving and art preservation, but also for commercial photographers who need resolution and accuracy, as showcased with this image of the one-off Koenigsegg Agera RS ‘Draken’ from Dan Kang:
This first image is the standard image as captured by the GFX 100:
The full-resolution version of this image came in at 51.5MB
This second image is a 100% crop of a photo captured with the new 400MP Pixel Shift Multi-Shot mode:
The full-resolution version of this image came in at 204.9MB
Firmware version 3.00 for the Fujifilm GFX 100 also addresses a few smaller changes. Now, when rating images captured in the [JPEG + Raw] mode, both the JPEG and Raw file will keep the rating. Fujifilm has also fixed an issue that caused its EF-X500 to incorrectly fire other flash groups when using it as a commander in multi-flash scenarios. Eye AF performance has also been improved and a number of smaller bugs have been addressed as well.
You can download firmware version 3.00 for the GFX 100 as well as the new Pixel Shift Combiner program (macOS and Windows) on Fujifilm’s website.
Image credit: Photographs used with permission from Koenigsegg and Dan Kang.


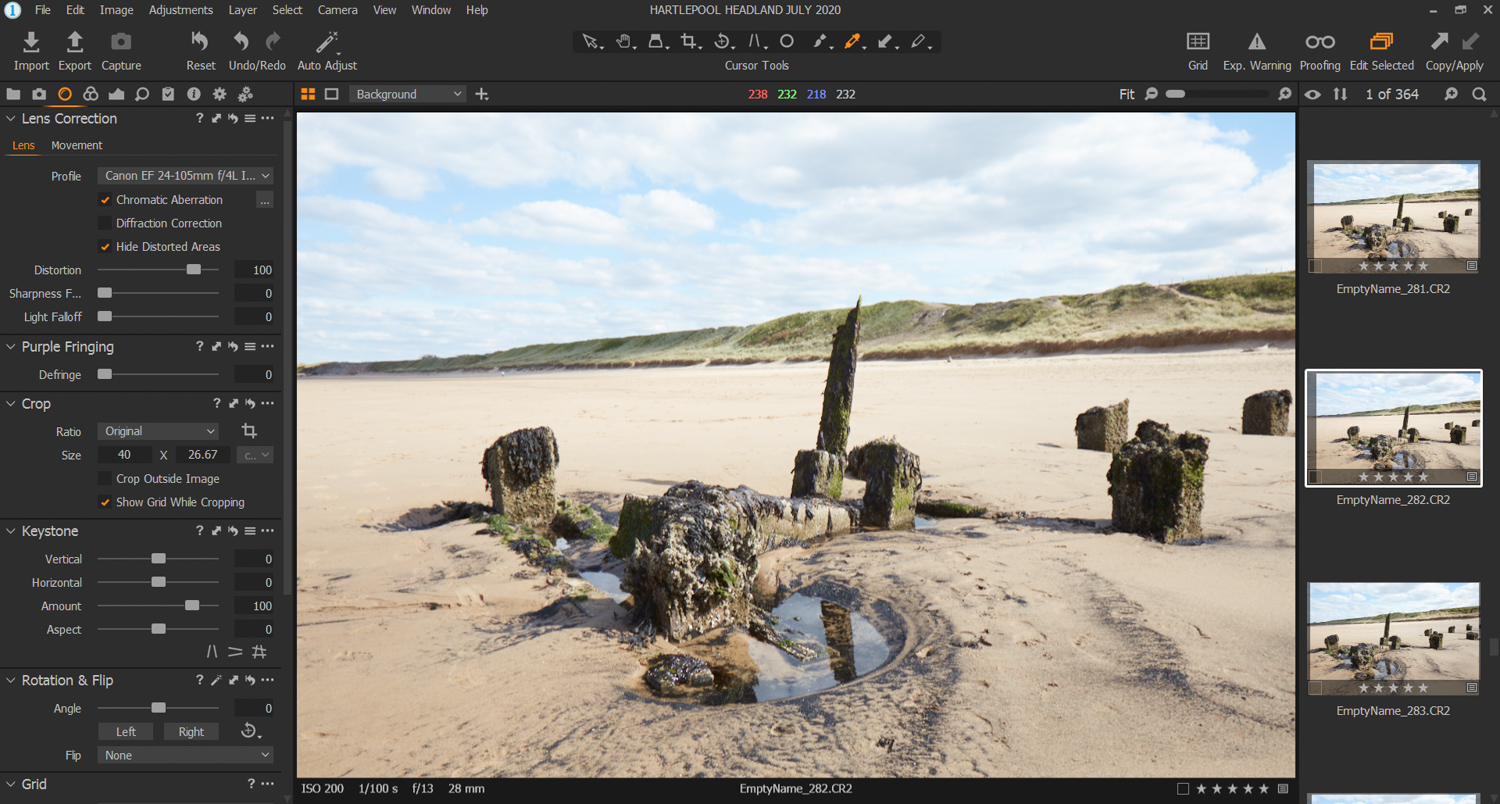

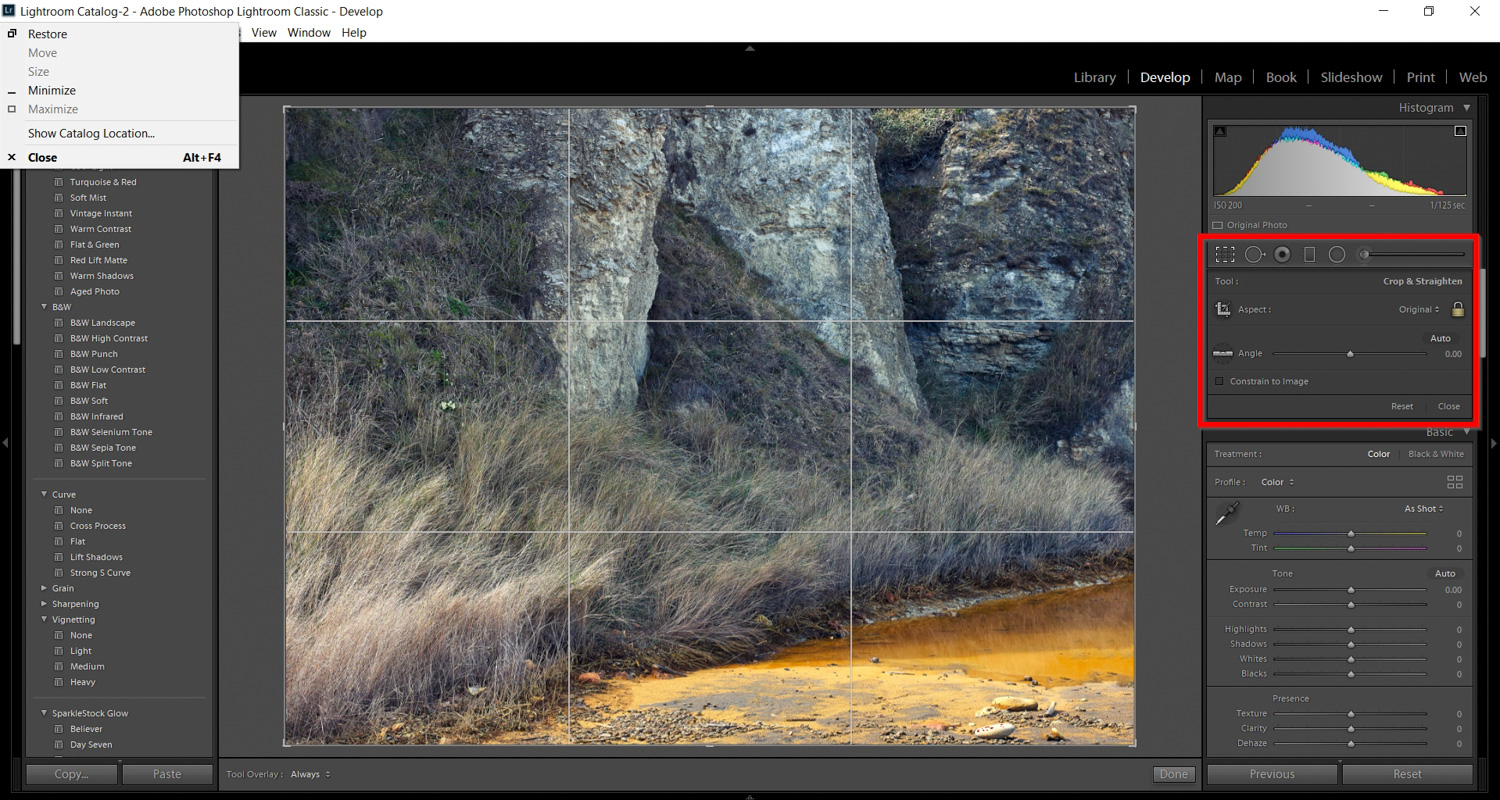


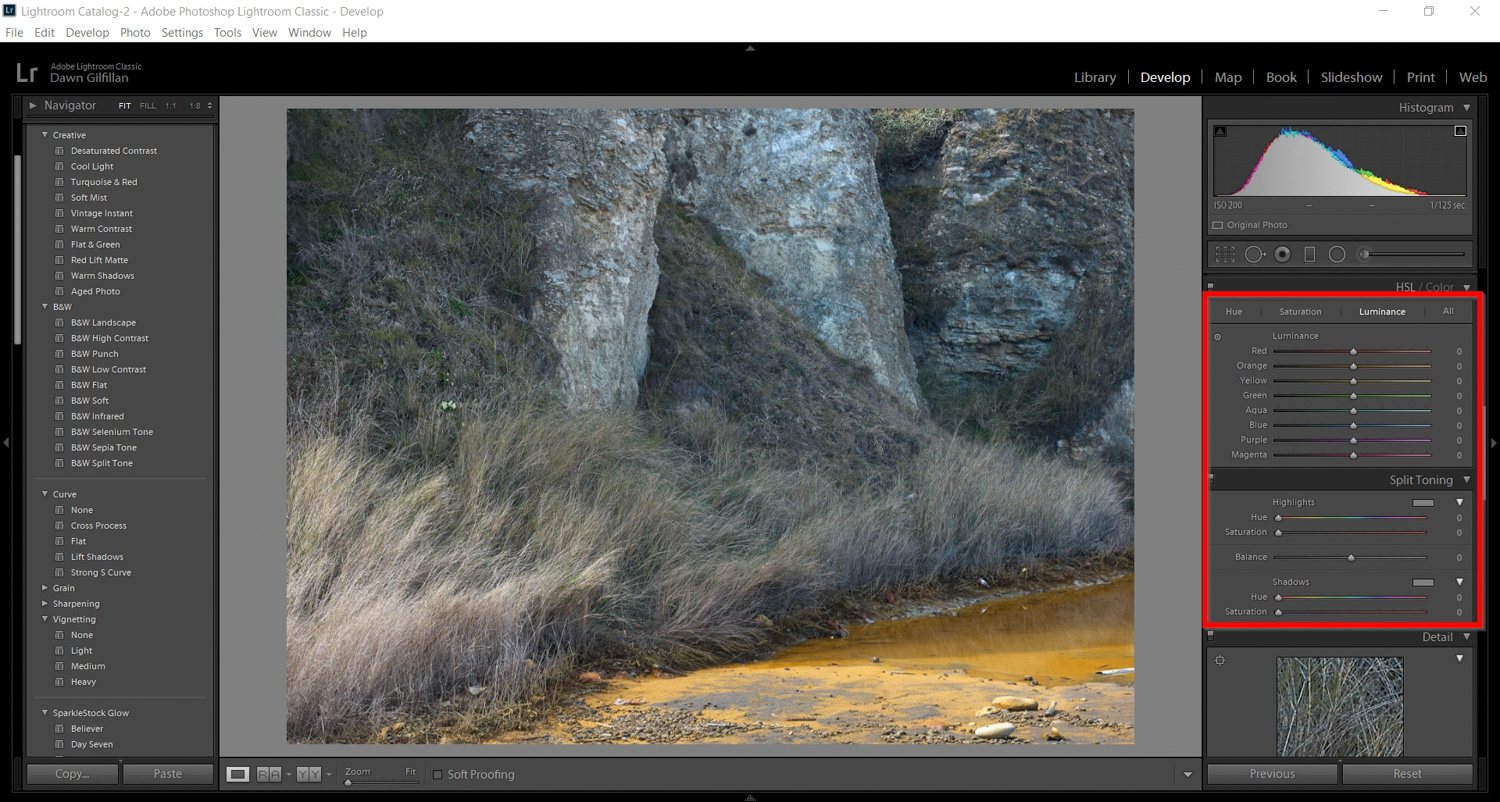
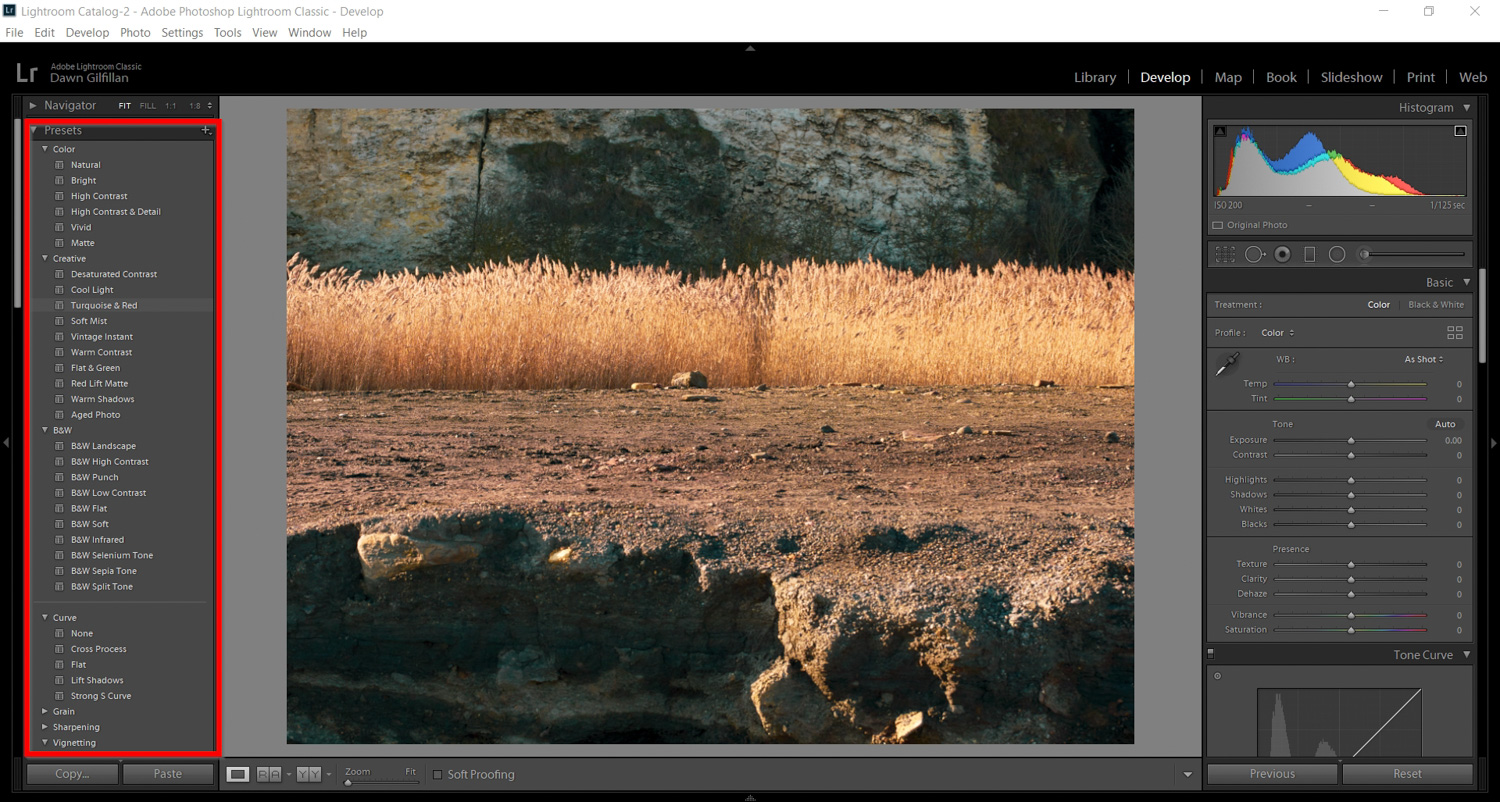


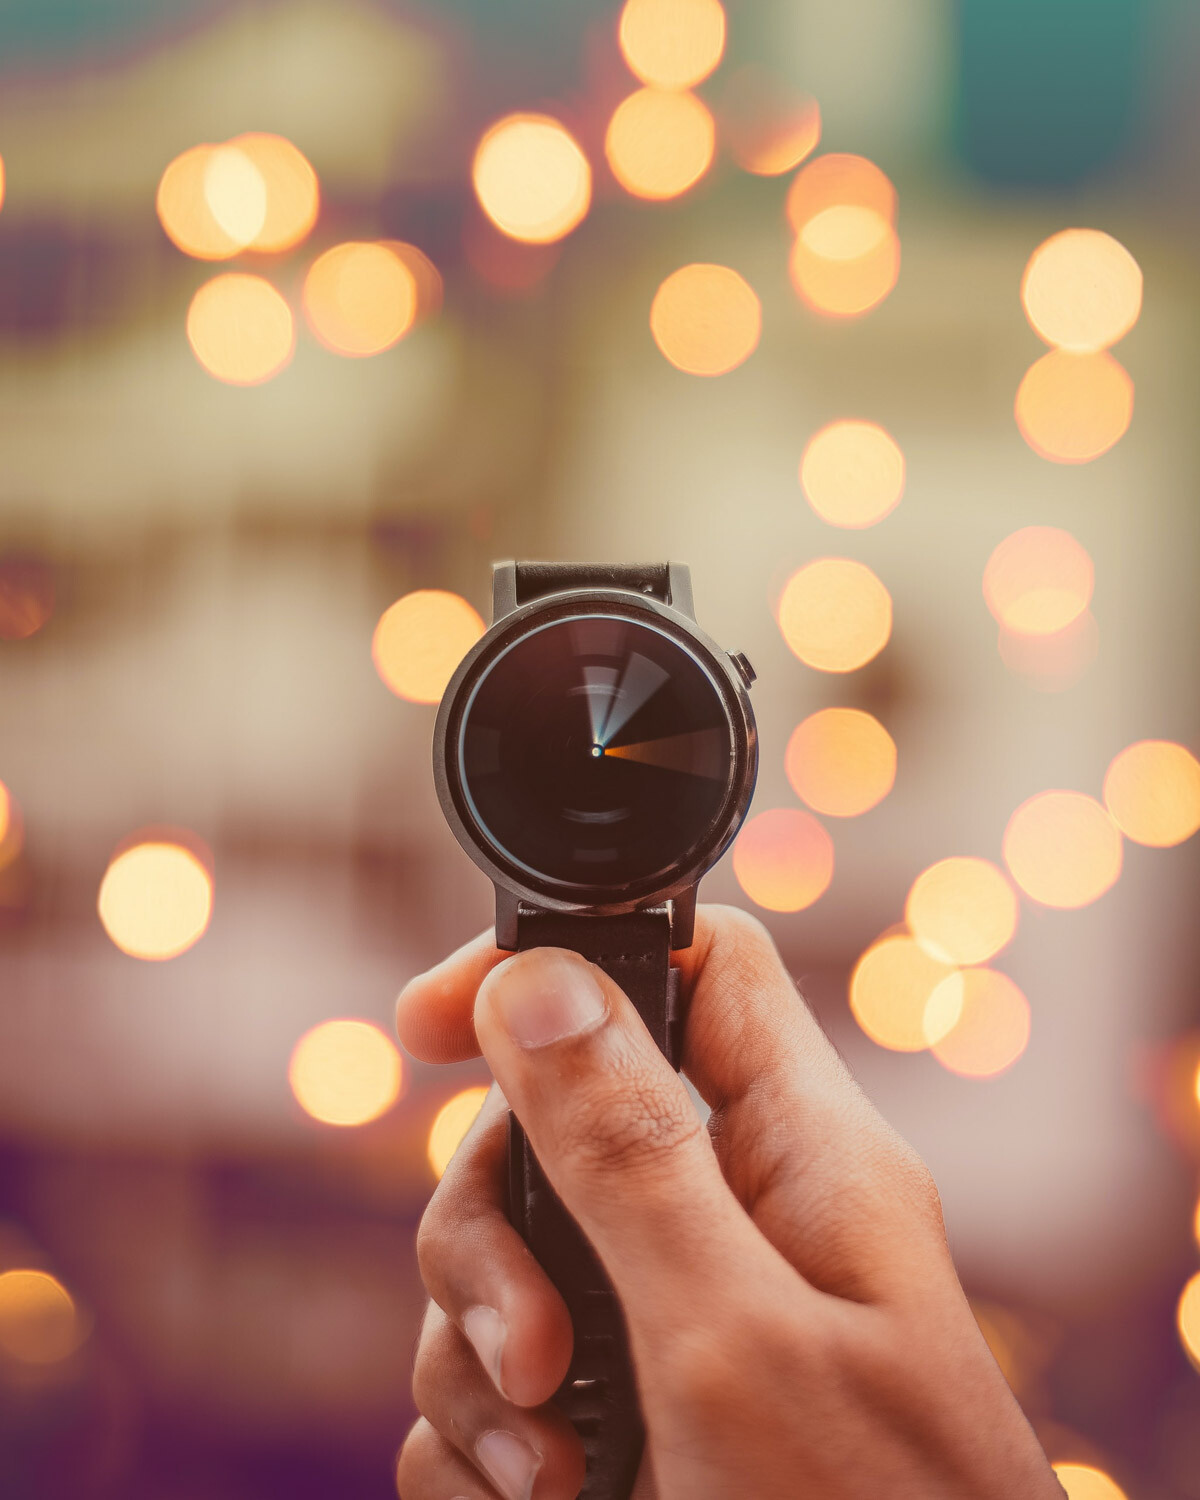


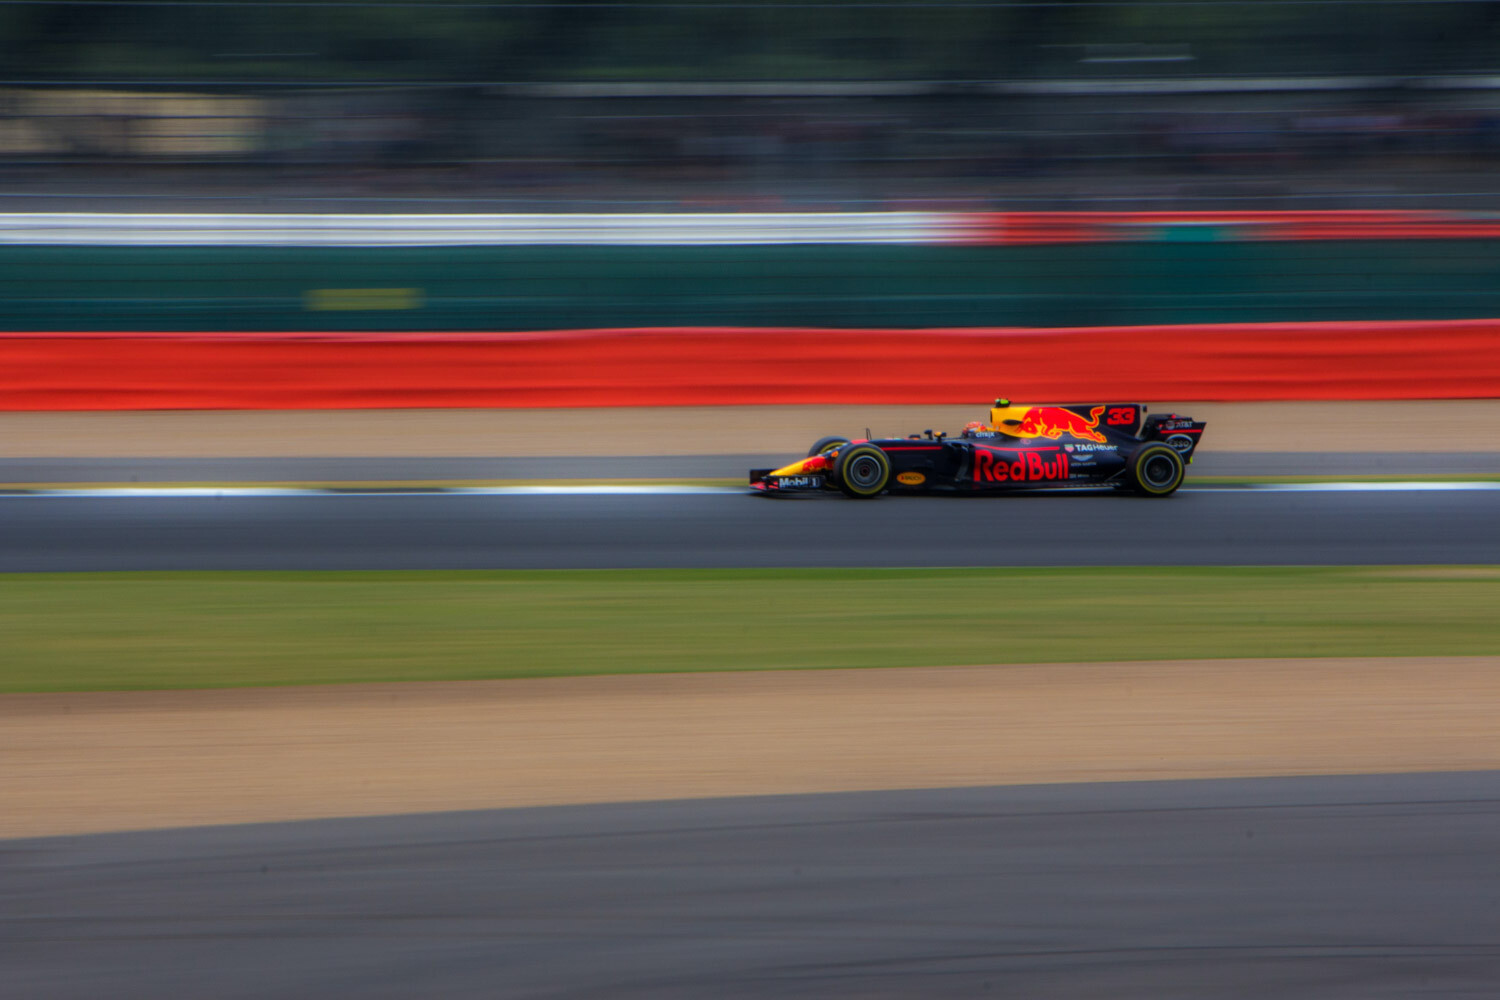


You must be logged in to post a comment.