RSS
 

Posts Tagged ‘Canadian’

Canadian non-profit PPOC speaks out against ‘porch portraits’ during pandemic

17 Apr

The growing trend of ‘porch portraits’ has drawn criticism from a number of people, prompting an official advisory against the activity published by the non-profit Professional Photographers of Canada (PPOC). The organization recommends that any type of front porch-based photography be avoided at this time in order to help curb the spread of the novel coronavirus.

‘Porch portraits’ is the term used for a new type of photography session involving people, often families, posing on their home’s front porch. The photos commemorate the ongoing quarantines and this unique time in history, but have prompted criticism from some people, including many photographers, who have called the activity risky and unnecessary.

Under present social distancing efforts, the public is encouraged (or, in some places, required) to stay home except when necessary, with the only acceptable exceptions including work in cases where in can’t be performed at home, as well as trips for essential items like prescriptions and groceries. In some cases, the public is also encouraged to go out for exercise, but to maintain a distance from other people.

Traditional photography sessions aren’t something that can be performed under these restrictions, but a number of photographers have started conducting ‘porch portrait’ sessions, which, in the spirit of the activity, involves the photographer maintaining a distance from the subjects and remaining outdoors. That intention doesn’t always pan out in real life, however, and the PPOC notes that mistakes happen.

In its newly published advisory, the PPOC says:

‘We have been contacted by several photographers upset to see this happening in their area when they are abiding by the suggested public health measures and are staying home. We have also heard from photographers who don’t understand why they should not do these kinds of photography sessions, if they are being safe about it, are doing it for charity, and are following their region’s suggested public health restrictions.’

The PPOC’s official position against ‘porch portraits’ is based on concerns that, in addition to ultimately being unnecessary and nonessential, photographers may also make mistakes that put themselves and their communities at risk of contracting and spreading the virus.

PPOC Chair Louise Vessey explained:

‘I understand that photographers are suddenly cut off from most ‘in real life’ social contact and thus their clients; but this type of photography is not a necessary interaction, nor is it an essential service. Although most do it with the very best of intentions, it still leaves room open for mistakes that could potentially cost lives. Some photographers may knock on the door or ring the doorbell, pass someone in the street, a child could run over to hug them, or their built in photographer instinct to go over and fix hair, pose the client and assist could easily kick in. These potential actions risk passing on, or catching COVID-19.’

The PPOC ultimately states that photography is not an essential business or service and that it ‘strongly recommends’ that photographers do not conduct porch portrait sessions at this time. Vessey states:

‘These stories will still be there once the dust settles and we are on the other side of this Pandemic crisis. We can photograph and tell their stories when the time is right. This is serious! Any risk is not a risk worth taking no matter how small you believe it is.’

Some photographers have turned to other unique types of photo sessions that help maintain distance from other people. Ohio-based photographer Nick Fancher, for example, has started shooting ‘Remotrait’ sessions, which involves using FaceTime to capture unique portraits of clients projected on to different backgrounds in order to compensate for poor connection quality.

Articles: Digital Photography Review (dpreview.com)

 
Comments Off on Canadian non-profit PPOC speaks out against ‘porch portraits’ during pandemic

Posted in Uncategorized


The Canadian Internet Registration Authority has created a free and funny stock photo library

20 Jan
A lumberjack checking out a hockey player is a Canadian take on the ‘distracted boyfriend’ meme. Photo courtesy of CIRA/.CA.

The Canadian Internet Registration Authority (CIRA), the organization in charge of Canada’s ‘.ca’ top-level domain, has published a series of stock photos that poke fun at Canadien stereotypes. In a bid to get more people to add something ‘uniquely Canadian’ to their projects, they’re offering up their library of stock images for free.

Photo courtesy of CIRA/.CA

Anyone can use small, medium, large or extra-large sized images from the library, though they ask for an email address to access the extra-large 4K files. All CIRA asks, in return, is that a credit along the lines of ‘photo by CIRA/.CA,’ along with a link back to their website, is included.

Photo courtesy of CIRA/.CA. Also, no, this is not long-lost relative of Jordan—so far as we’re aware.

CIRA has their own version of the popular ‘distracted boyfriend’ meme, featuring a hockey player, and other distinct nods to Canadian culture including a moose interacting with backpackers and a lumberjack taking a swig of maple syrup. Anyone with the desire to add to this collection of images is encouraged to contact CIRA.

Articles: Digital Photography Review (dpreview.com)

 
Comments Off on The Canadian Internet Registration Authority has created a free and funny stock photo library

Posted in Uncategorized


Camera-friendly Canadian airport cuts holes in perimeter fence for aviation photographers

23 May

Québec City Jean Lesage International Airport, often shortened to Jean Lesage International Airport, has made camera holes in a range of locations around its perimeter fence to allow photographers an unhindered view of planes taking off, landing and moving along its runways and taxi areas.

The airport has propelled itself to the number one spot for aviation photographers with the project. Metal frames surround the holes to prevent wire scratching lenses and accompanying signs to clarify the area is reserved for photographers.

The airport got together with local plane-spotting group YQB Aviation to identify the best angles for photographers and then created a total of 10 sites all around the airport that provide views of exactly what photographers want to shoot, seen in the image below:

Jean Lesage International Airport which recently won awards for its environmental practices and as an outstanding workplace, and which carried almost 1.8 million passengers in 2018, also hosted a 5km run on its runways earlier this month to offer locals a different view of the airport.


Photo credit: Images by Jean-Lesage International airport, used with permission.

Articles: Digital Photography Review (dpreview.com)

 
Comments Off on Camera-friendly Canadian airport cuts holes in perimeter fence for aviation photographers

Posted in Uncategorized


Behind the scenes: Shooting a motion time-lapse in the Canadian wilderness

17 Feb

Back in summer 2017, I went on a six week adventure to British Columbia and Alberta in order to capture Canada’s beautiful landscapes in the most impressive way possible. I wanted to make a time-lapse film that raises more awareness of our planet and our environment.

Planning

When it came to logistics, I tried to be as prepared as possible for this 6-week trip, and did tons of research ahead of departure. I knew I probably wouldn’t have a whole lot of internet (or time to waste on the internet) in the Canadian wilderness, and wanted to be prepared to just take things as they came. So I collected locations that I discovered on Google, on Instagram, or on other photographers’ portfolios, and created a long list of spots that were worth checking out.

I didn’t have a specific shot list. I just tried to capture the most beautiful scenery and moments that I could find along my adventure. However, I paid a lot of attention to interesting details around me instead of going for spectacular vantage points only. That’s how the whole moody intro sequence was conceived. By stepping closer to the subject, I tried to approach time-lapse in a slightly different way than you see in your typical, ‘epic’ time-lapse films online.

Challenges

I guess my biggest challenge with shooting this project was my own safety—doing all of alone, in an area packed with grizzly bears, was pretty scary.

Hiking alone comes with a risk that I always had to bear in mind. I carried bear spray at all times, and tried to let the bears know that I was there by creating a lot of noise on the hiking trail (they can get really dangerous when they’re startled). When I set up a time-lapse shot, I always had to have an eye on my surroundings and make a lot of noise by singing or talking to myself. Over the course of my trip, that risk was something I got used to.

Being all alone also didn’t make it possible for me to camp out on location. Obviously because it is very risky, but most of all because I simply couldn’t carry camping gear along with my camera gear and slider all by myself.

As a result of this, I had trouble getting to the best possible location at the best times of day. In order to shoot at sunset or sunrise, I either had to find a location that was fairly close to the parking lot, or take the risk of hiking up or down in the darkness with my head lamp as the only light source.

This is all of the gear I brought with me into the Canadian wilderness

Gear

Since I was all alone on this mission and wanted to hike out to locations a lot, I had to keep my gear package as compact and efficient as possible. I packed my Sony a7S II and Nikon D5100 (as backup camera) together with a newly purchased Canon 16-35mm F4 and Rokinon 14mm F2.8, as well as two cheap vintage lenses: an SMC Pentax-M 50mm F1.7 and an SMC Pentax-M 100mm F2.8.

As you might have noticed, my camera package was pretty humble. That was all I had and all I could afford, and honestly—that was all I needed.

A great Sony camera with only 12 MP paired with a sharp Canon wide-angle lens that could almost do anything on location. This lens is my absolute favorite due to its great flexibility for wide three-dimensional time-lapse movements. The Rokinon lens is well-known for its night- and astrophotography abilities, as it has just little amount of coma and is wide enough to capture almost the whole night sky. The Pentax lenses are actually my first lenses I’ve ever bought. Obviously, they’re old, cheap, and not the sharpest; they’re also small, light, and capable of projecting an image onto my sensor I was totally happy with.

In contrast, my time-lapse gear was downright extravagant thanks to a sponsorship from the innovative company eMotimo. They gave me a loaner for a great package for the duration of my whole trip: The spectrum ST4 is a newly designed 4-axis motion control system that, combined with the iFootage Shark Slider S1, simply can do it all—slide, pan, tilt and even pull focus in video or time-lapse shooting mode.

Using a Playstation Controller, I could easily set up literally any shot I wanted, and the ability to set keyframes in between the start and end point of my programmed shot gave me ultimate control over my composition. Additionally, an innovation that I’ve never seen before is a mountable extra motor to automatically pull the focus as the time-lapse is running. There are many ways to mess around with that: one I used was to shift focus from an interesting foreground to the revealing scenery in the background.

Another great feature worth mentioning is the ability to repeat a programmed movement at different speeds. This allowed me to record shots at different frame rates, but still have the exact same camera movement in each.

Since I couldn’t get the idea out of my head to combine a moving time-lapse shot with a real time video, with both shots having the very same camera movement, I did exactly that in the final shot of ALIVE. I recorded the whole scenery in dynamic time-lapse except for the person (me) being recorded in real-time video 25fps. Even though it took a lot of time perfectly masking out the person in post production, this shot probably wouldn’t have been possible without the spectrum ST4.

With all the flexibility of the motion control devise I felt an enormous freedom as a time-lapse photographer and could explore further ways to creatively make use of its features. However, this turned out to be a weakness as well, as I often found myself tempted to design way too sophisticated time-lapse shots. In this case, the inorganic/mechanical camera motion often drew way too much attention when watching the processed time-lapse sequence making the scenery appear surreal.

So in the process of my trip I learned that less is more in this case. It is way more important so be at the right spot at the right time—which is ultimately what I was seeking for my whole adventure.

Editing

In the editing process of ALIVE it was certainly very hard to come up with an edit as I had to choose the best among 149 time-lapse shots I recorded on my trip. Since I wanted to keep my film under 4 minutes, I forced myself to make some hard decisions. That turned out to be a pretty emotional process because every shot has a background story that connects to me personally.

It just often felt super frustrating to kick out a shot for which I woke up at 4 a.m. and hiked up a mountain for two hours in order to be there for sunrise.

A Story

Let me conclude my little behind the scenes tale with a story from Lake O’Hara, one of the most captivating landscapes I have ever experienced in person, and the final shot of the film. I decided to hike up to this incredible viewpoint for sunset and kept shooting until there was no light left to work with. That was the moment when I found myself alone in the darkness on the edge of a cliff.

The final shot of the film, captured above Lake O’Hara at sunset.

Should I take the risk of hiking down the steep and forested trail in the darkness potentially ending up as grizzly bear food? Or should I rather just stay up here all night and do another time-lapse of the milky way? Without camping gear and food, I stayed and spent another 5 hours in the cold darkness until the sun came back up.

Even though this shot of the milky way didn’t even make it into the final film, there is nothing I regret about staying up on this mountain all night all alone without a tent in bear territory… simply because it was one of these adventures that made my trip so unique.

Articles: Digital Photography Review (dpreview.com)

 
Comments Off on Behind the scenes: Shooting a motion time-lapse in the Canadian wilderness

Posted in Uncategorized


From the Dead: Businessman Resurrecting Canadian Ghost Town

24 Dec

[ By WebUrbanist in Abandoned Places & Architecture. ]

ghost town resurrection

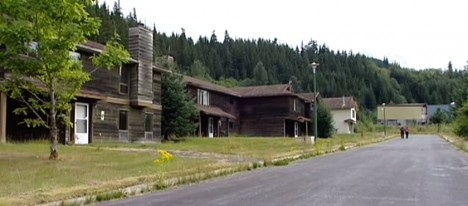
Built in the late 1970s, this mining village housed 1,200 people at its peak and was left effectively intact for over twenty years before being sold as a whole for $ 5,000,000 to an entrepreneur in 2004 who has worked on bring it back to life in the decade since. He has, however, had to adjust his plans to the market along the way – his latest endeavor: to revive it to fit its original purpose once more (image above by Andrea B).

ghost town street

kitsault abandoned mall hall

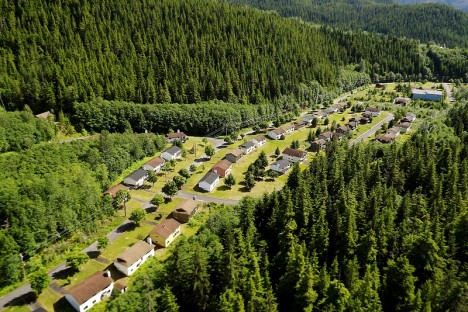
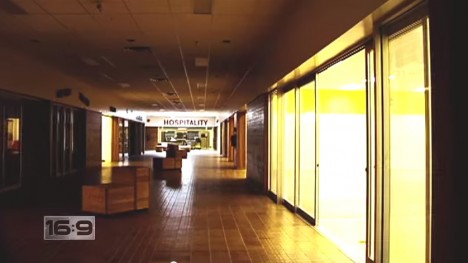
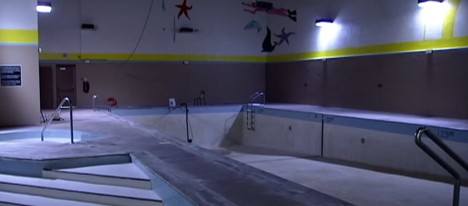
Located in northern British Columbia, Kitsault boasts a remarkable lack of decay, its infrastructure still mostly intact. It has over 100 houses and apartment buildings as well as a movie theater, hospital, shopping mall, recreation center and swimming pool.

kitsault resort town drawings

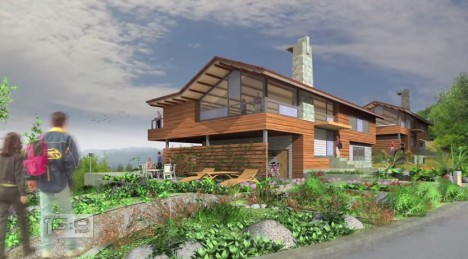
Krishnan Suthanthiran purchased the town with visions of turning it into a rural retreat for the creative class and has already spent over $ 10,000,000 repairing landscapes and fixing buildings.

kisault deserted mining area

kitsault swimming pool area

Still, much more work would have been required had the relocation of its previous occupants not been so hasty – they were moved almost overnight in the early 1980s, leaving almost everything intact behind them. Indeed, many of the spaces come complete with vintage furniture and decor dating back to the abandonment of the town.

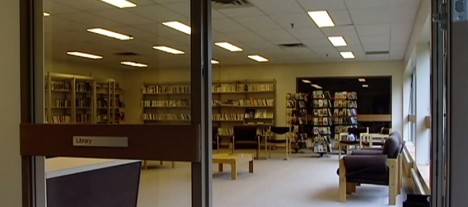
kitsault deserted library room

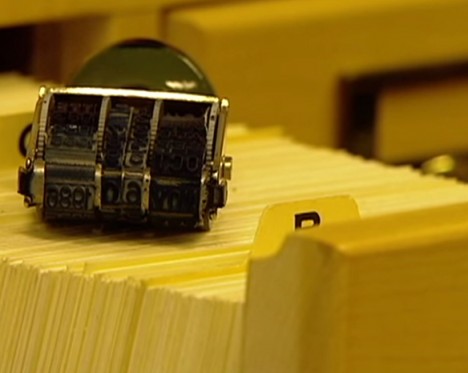
kitsault abandoned library stacks

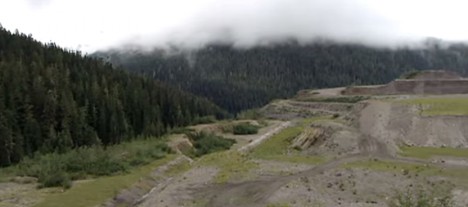
The idea has evolved over time, however, as commodities markets have rebounded – this time liquid natural gas may be the key to the area’s success. In the end, Kitsault could once again become what it was to begin with: a mining town.

Share on Facebook


[ By WebUrbanist in Abandoned Places & Architecture. ]

[ WebUrbanist | Archives | Galleries | Privacy | TOS ]


WebUrbanist

 
Comments Off on From the Dead: Businessman Resurrecting Canadian Ghost Town

Posted in Creativity


Dirty Camp 30: Canadian POW Camp Battles Neglect & Decay

17 Nov

[ By Steve in Abandoned Places & Architecture. ]

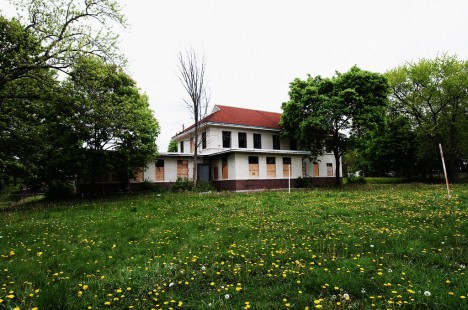
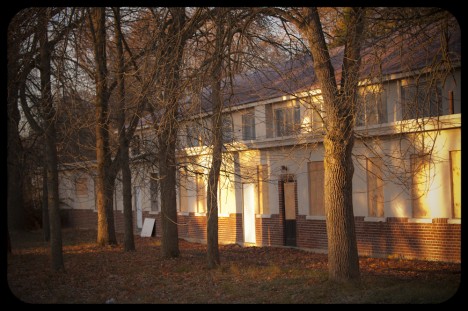
abandoned camp 30 barracks
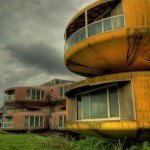
Camp 30, located east of Toronto, was one of Canada’s main World War II POW camps and although named a National Historic Site, continues to be neglected.

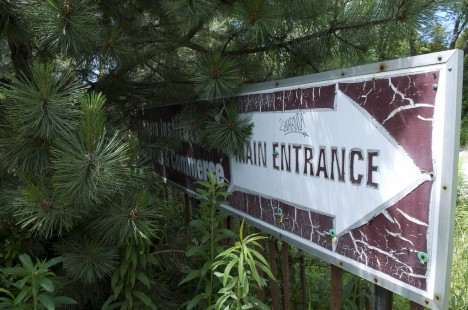
abandoned camp 30 entrance sign

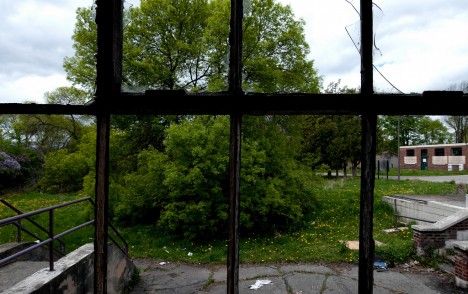
abandoned camp 30 windows

The community of Bowmanville, Ontario, is home to just over 40,000 people, many of whom work in Toronto and commute daily via Highway 401. Only a tenth as many made Bowmanville their home in 1941, however, when the Canadian government ordered the Bowmanville Boys Training School (a “school for unadjusted boys who were not inherently delinquent”) to vacate the site. By the end of the year, the former school and its environs had been converted into Camp 30 and the first German prisoners of war arrived. (credit AlexLuyckx with the above images)

abandoned camp 30 sunset

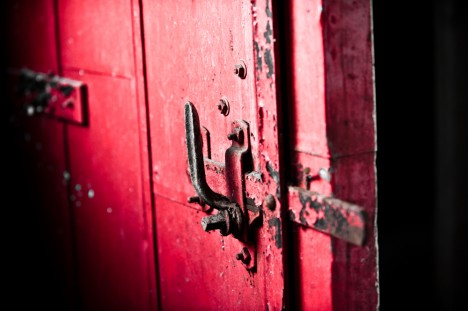
abandoned camp 30 cafeteria red door

abandoned camp 30 turn around graffiti

Many of these prisoners were considered “high profile” – the reasoning being, the farther they were from Nazi Germany, the less chance of them returning there after a successful escape. Among the more notable Camp 30 prisoners were U-boat commanders Wolfgang Heyda and Otto Kretschmer, the latter credited with sinking 47 ships (totaling 274,333 tons) between the start of the war and his capture in March of 1941. (credit Courtney McIntosh with the above images)

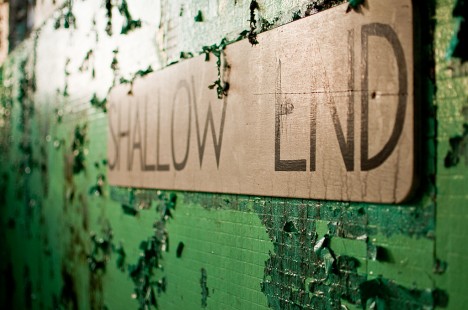
Shallow End

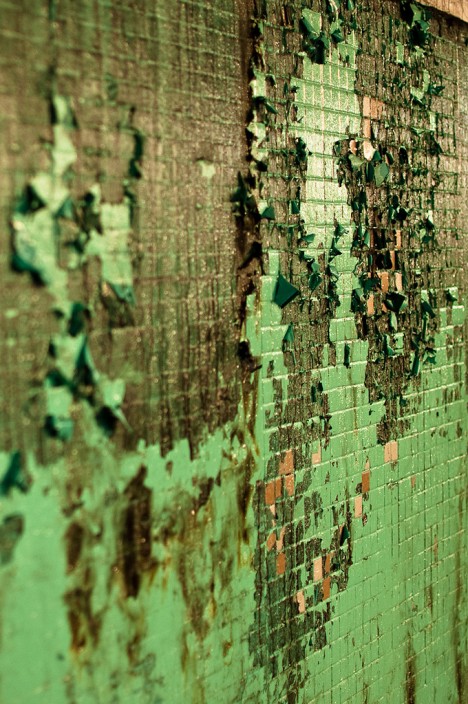
Paint Chips

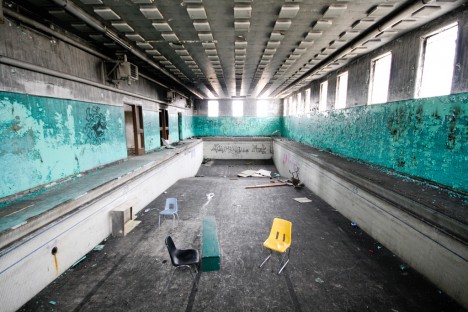
In stark contrast to the treatment doled out to Allied POWs in German prison camps, those prisoners sent to Camp 30 enjoyed a wealth of freedoms and amenities. As Camp 30 was a former boy’s school, prisoners were allowed to use the indoor pool as well as the soccer and football fields. If that wasn’t enough, authorities approved requests to build a tennis court and a mini zoo! (credit ckocur with the above images)

abandoned camp 30 pool blue

abandoned camp 30 electric

abandoned camp 30 pool graffiti

These perks and much more (read about Camp 30 in detail at the unofficial Camp 30 website) didn’t stop the prisoners from carrying out their duty to escape, and at least a half dozen attempts – some quite elaborate and well-planned – were foiled by guards. (credit Rick Harris with the above images)

Next Page – Click Below to Read More:
Dirty Camp 30 Canadian Pow Camp Battles Neglect Decay

Share on Facebook


[ By Steve in Abandoned Places & Architecture. ]

[ WebUrbanist | Archives | Galleries | Privacy | TOS ]


WebUrbanist

 
Comments Off on Dirty Camp 30: Canadian POW Camp Battles Neglect & Decay

Posted in Creativity


Photography Trip of a Lifetime to the Canadian Rockies for Your Bucket List

10 Jul

With thousands of awe-inspiring and exotic places in the world, you have no shortage of places to visit and photograph. If you’re like me and have a bucket list of adventures you just have to shoot before you hang up your camera, allow me to add one more trip to your inventory.  This excursion not only includes heart-pounding scenery, but also what is probably the most expensive piece of photographic equipment you’ll ever get the chance to use – all for the price of “admission”.
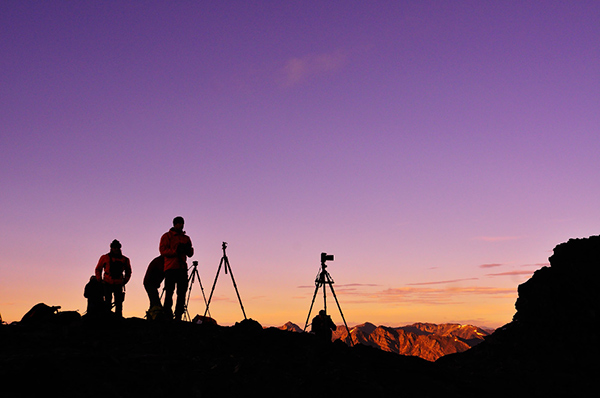
_2DS1286W

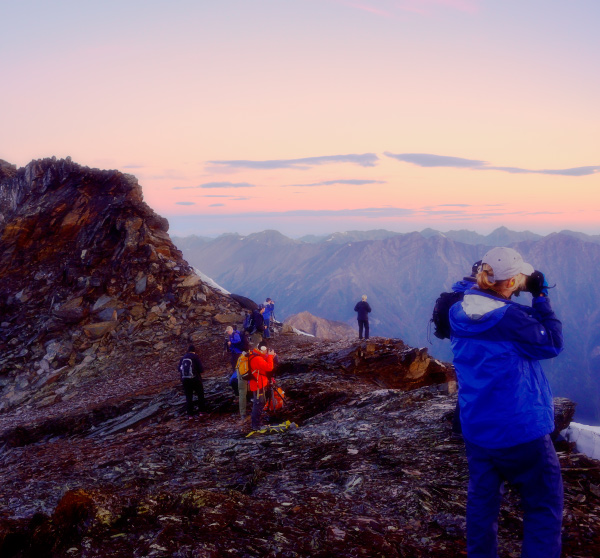
Photographers waiting for the right moment.

The adventure is heli-hiking, in the Bugaboo Mountain Range in Canada but with a twist for photographers. I signed up last September for a trip sponsored by the Canadian Geographic Society Photography Club, and I was so enchanted a friend and I are going back this year to do it again, this time with world renowned Canadian nature photographer John Marriott heading the trip. I wanted to share this photo adventure with you because it’s almost the perfect photographer’s dream destination.

This trip has it all:

  • Rarely seen mountain vistas so your images won’t soon become cliches
  • Soul-soothing Mother Nature everywhere to inspire and energize your imagination
  • All the gourmet food you can eat
  • Genuine, fun and extremely knowledgeable staff
  • First class accommodations
  • Yoga and massages
  • Affordable budget
  • And helicopters

Yes, helicopters – that’s the pricy bit of equipment I was mentioning.  Let’s talk about photography and the helicopters first, then I’ll go into the logistics of the trip and what you need to know if you decide to go.

Mountain Landscapes Like You’ve Never Seen Before

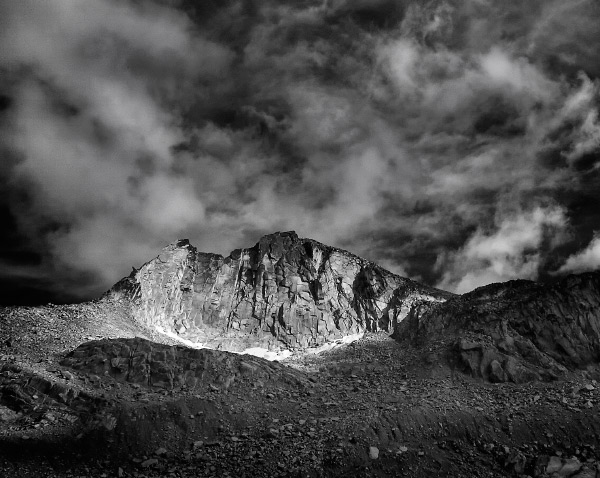
In the Purcell Mountains (generically referred to as the Canadian Rockies), in eastern British Columbia, Canada, just west of the famous town of Banff,  is a remote mountain range known as the Bugaboos (PDF map). It’s not easily accessible, and the rugged terrain limits visits to only those die-hard outdoor adventurers. There are almost no roads into the area, and climbers and hikers are warned that it is a “wilderness area, without supplies or equipment of any kind”. Fortunately for us photographers, the helicopters allow easy travel to the most photogenic locations, and the company that runs the trips also has two first-class lodges high up in the hills, so all your creature comforts are taken care of.
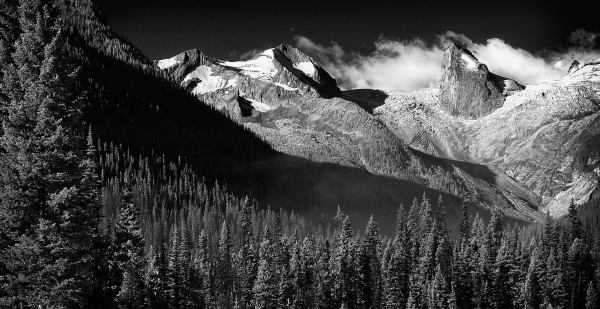
Bugaboo mountains for photographers

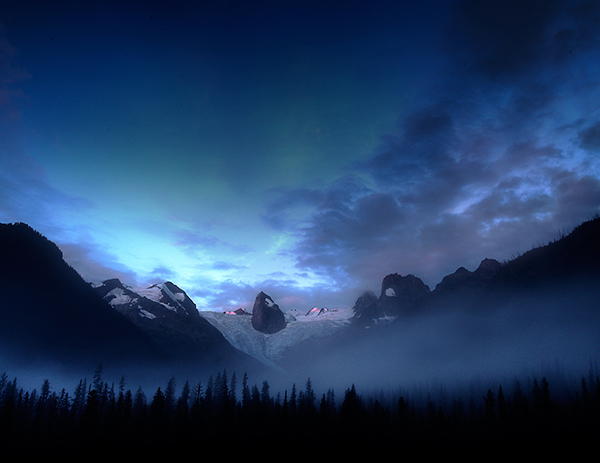
The Bugaboo Spires, as viewed from the Lodge.

Each morning the helicopter, transports you high into the alpine meadows, glaciers, hanging valleys and azure blue mountain lakes, that very few people ever get to see. I visited several locations last year that were around 9000 feet in elevation. All the views were heart-stopping!  Each day is like this, the tour guides – specialists in interpreting mountain environments, safety, and photography – along with an expert professional photographer, provide advice, help and expertise in shooting mountain landscapes. From selecting the best locations for the day, to determining when to set out in the morning to get the sweet light, all the hard stuff is taken care of for you. It allows you to devote your creative energy to capturing what your imagination perceives. Imagine being immersed in beauty, with ten other photographers, and having an expert photo instructor at your side for four days – what could be better than that?
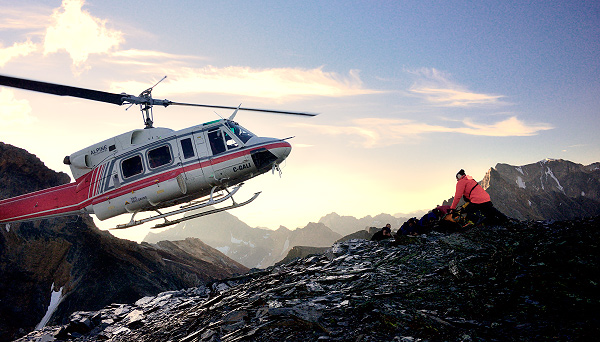
_DSC7249

Your ride for the weekend – transporting you to the peak.

Photographic Tips and Advice from a Pro

It’s an education like no other, in a real world classroom. It’s camaraderie and fun with other photographers who think like you do. At every location, the tour photographer will help you set up, explain the best lenses to try, what settings you should start out with and generally give you some direction to ensure you shoot some great frames. But at the same time, there’s plenty of room for innovation and your own individual shooting and subject preferences. One thing that I kept having to remind myself of is that the alpine environment is also prime scenery for macro photography too. It’s not just the “big picture”. When I was there in September, the wildflowers had already finished flowering, but between craggy rocks all sorts of vegetation was making an appearance. This year I’m going back at the beginning of August – the peak of wildflower season. There are spectacular details in everything. Don’t forget to look down.
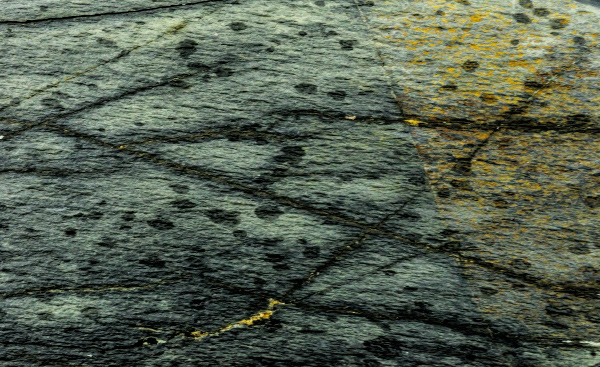
Alpine Abstract

Alpine Abstract

 Spend Every Minute Immersed in Your Passion

No time is wasted on a photography heli-hiking trip. At least once, you’ll be up before dawn to fly off to a place where sunrise will be dramatic.  Even if no pre-dawn flight is planned on that day, sunrise from the lodge is always a wonder. The coffee is always ready for you no matter when you roll out of bed, so there’s no excuse for sleeping late. After your sunrise shots, a full breakfast will be waiting for you, hot eggs, healthy grains, whatever you could imagine is all there. Back on board your helicopter ride and it’s off to another location. You even get gourmet picnic lunches on the mountain, where you can take a break and compare notes and images with your group, or just keep shooting.
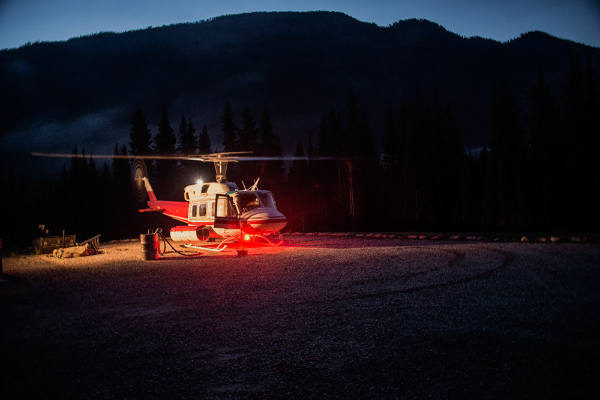
The wh-early bird gets the worm.

The “wh-early” bird gets the worm. 

_DSC7151

On top of the world at sunrise.

_DSC6180crop

Would Ansel Adams approve?

Sunrise over the Spires, view from the Lodge

Sunrise over the Spires, view from the Lodge

More Photography, Food, and Fun

When the day is done, your helicopter will bring you back to the lodge where you can have a massage for your tired body before the gourmet dinner. Depending on your program, you may have a photo class after dinner, a show and share session, or another helicopter trip to catch the golden hour on a mountain lake or peak, for that once in a lifetime shot.
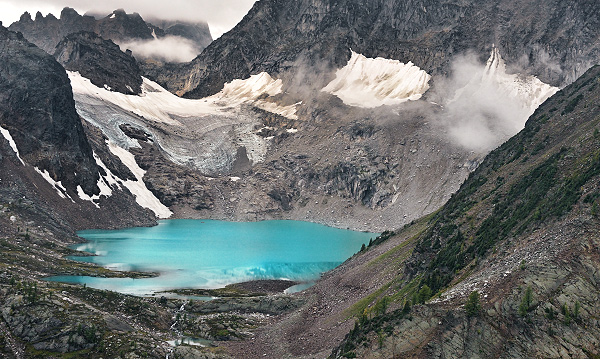
Aptly named Cobalt Lake

Aptly named Cobalt Lake

In fact one of the more delightful aspects of these trips happens back at the lodge. Not surprisingly, the staff are the coolest and most genuinely friendly people I have come across in any of my travels anywhere in the world. Everyone sits together for dinner, family style. Your helicopter pilot may be serving your wine, and the person who made up your room in the morning might be handing out the appetizers. Everyone pitches in where needed, although only the pilots ever fly the helicopters. The atmosphere is encouraging and supportive; informative and humorous.

Fun, whether in the field or at the lodge, is definitely a key item on the overall agenda. So besides sharing photo tales and techniques with your fellow photogs, the guides and staff will keep you more than amused with stories of their adventures in the Bugaboos (and if you’re like me, you’ll also be planning your next visit).
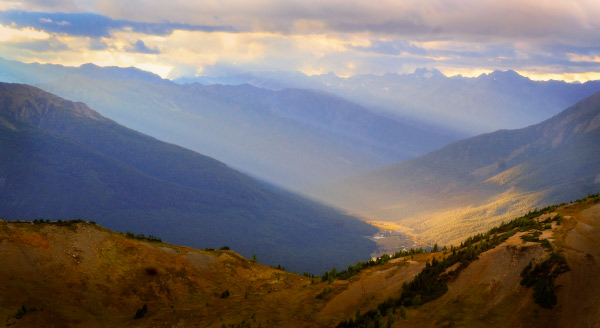
Sunset godrays

Sunset godrays

What You Need to Know

You’ll want to seize the experience up there in the mountains so a bit of basic preparation will go a long way. You don’t want to be lugging 40 pounds of gear up those trails, and despite loving the helicopter rides you won’t want to have to make an extra trip back to the lodge because of an injury. The company that runs the tours has all the info you need as far as mountain safety and fitness is concerned, and they will provide you with all the hiking gear you’re likely to need.  But as a photographer who’s made this trip, I have some recommendations based on my mistakes.

Making great images on a trip like this requires that you’re fully prepared, energized, and organized. You’ll spend some time walking and perhaps hiking (depending on your group), and you don’t want to be all tuckered out before the end of your day.
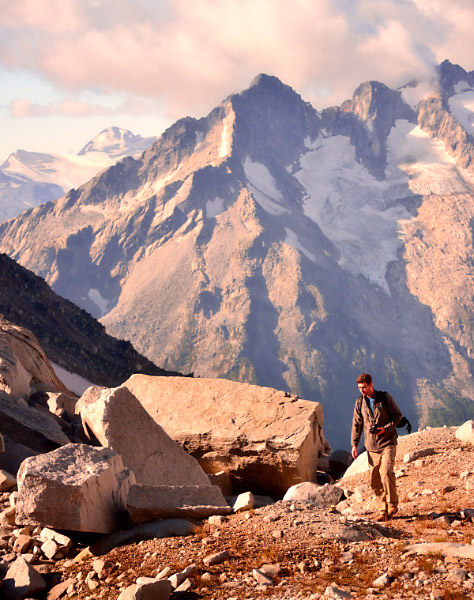
_DSC7324

The air is thin up here. Pack light.

Pack Light

Bring the minimum amount of gear necessary, and be strategic. Remember you have to pack your lunch and water as well, and a tripod is a must. If one of your telephoto lenses has macro capability bring that one, rather than two separate lenses.

For my trip last summer, I bought a light-weight Sirui carbon fibre tripod and ball head. That was a smart move. The dumb move was bringing three camera bodies and five lenses. I’m a girl from the prairies and hiking with all that gear at 9000 ft was just plain dumb! What was I thinking? If you sign up for the John Marriott workshops, he will send you information regarding the equipment you should bring, but I recommend a wide angle, a small macro and a telephoto (70-200mm range) plus polarizers, and a neutral density filter. Less stuff challenges you to be a more creative photographer.
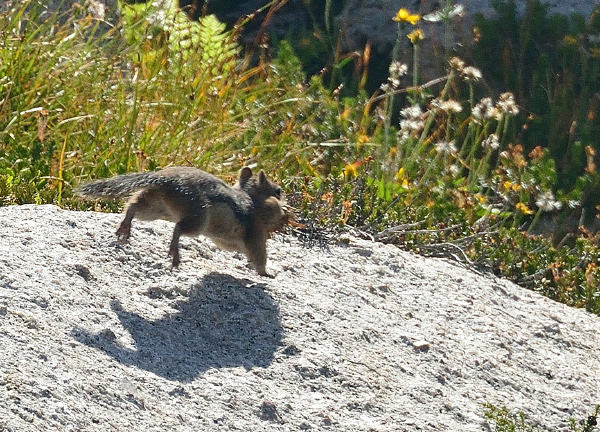
A little exercise before you leave home won't hurt.

A little exercise before you leave home won’t hurt.

Get in Shape

Even though there is little serious hiking on the photo tours, a short uphill climb can feel like a marathon with a backpack full or gear, thin air, and an out of shape body. You don’t have to be an athlete, but again every little bit of fitness helps. My dumb move – last year I did nothing, plus I was in a car accident the week before I left and fractured two ribs. Walking to the bathroom was painful, never mind an uphill climb with too much stuff in my backpack. This year I am so far not injured, so I am running flights of stairs, walking around with my full backpack and doing the 7-minute-workout three times a week. I have five weeks to go, and I know I won’t win any gold medals, but my time in the mountains will be a little more enjoyable this year because of my preparation.
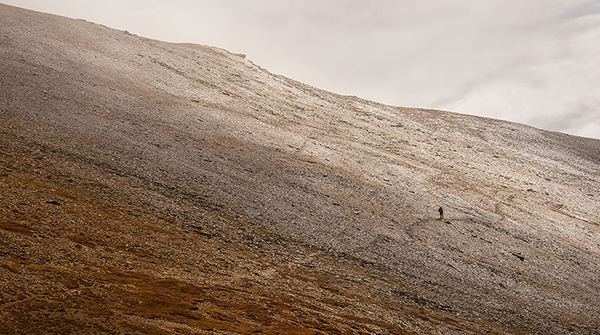
Just sit and enjoy the experience for a few minutes.

A little uphill walk can feel like a marathon.
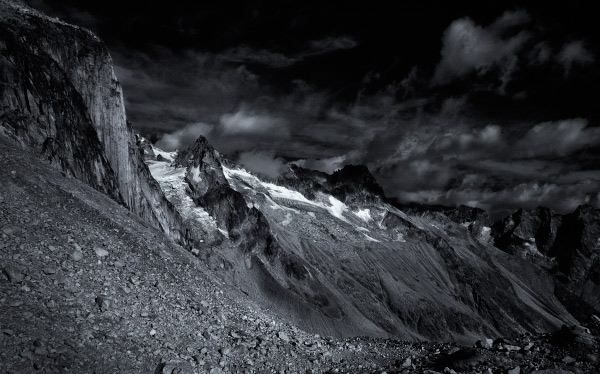
Take a minute enjoy the moment.

Take a minute enjoy the moment.

Try Not be be Overwhelmed

It’s so very easy to be completely blown away the first time you get off the helicopter. You’ve never seen anything like this before, and for many, you won’t have a chance to see it again. But when you get to a location, put all your gear down. Rest for a minute. Take a few deep breaths. Snap a few iphone photos at first so you have the memories, but just sit and  feel how you are feeling. Take a few minutes to let it all settle in your brain. There’s no need to rush, trying to capture everything. Relax, you’ll be at this spot for a while, and the day is long.
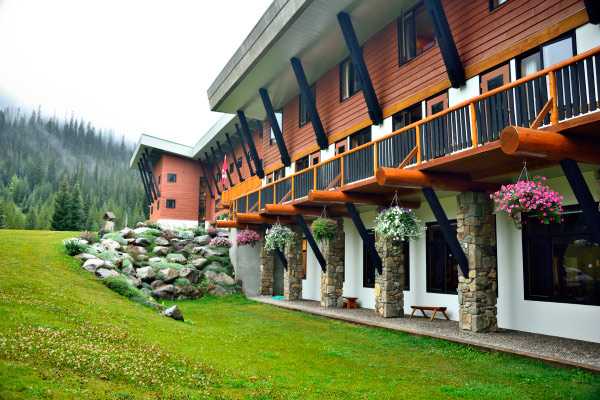
The CMH Bugaboo Lodge

The CMH Bugaboo Lodge

The Logistics

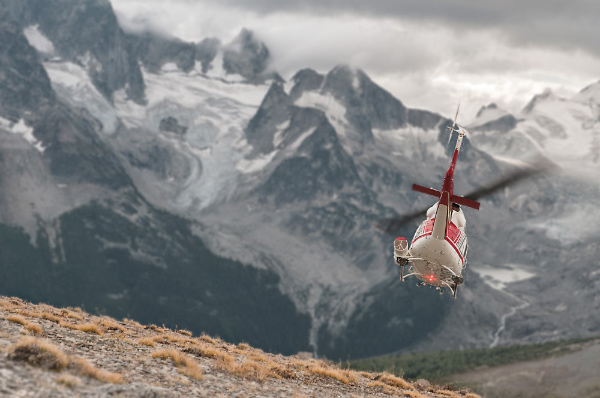
I tend to rave about this trip for many reasons but what was outstanding was how thoroughly well organized everything was. Everything! Given all the complexities of booking and moving so many people (about 40 guests are participating in various heli-hiking tours along with the photography groups) to a remote lodge, and planning flights around weather, and light, and all those people, the fact that nothing went awry was such a huge surprise. All the details from making my reservation, taking care of answering any questions, call backs if needed, were handled so well. If someone said they’d call back they did. They send extremely detailed emails containing everything I needed to know from packing lists to travel insurance.  Everything is taken care of.  If you decide to embark on this adventure, you just have to get yourself to Banff, Alberta. That’s it.
_2DS1192W

You’ll need to spend at leat one night in Banff, because your trip to the helipad starts very early. Most people fly to Calgary, Alberta, and take the shuttle bus to the hotel in Banff or Lake Louise. In the morning you take a cab to the bus depot where you meet the coach that will take you to the helipad. The tour company pays your fare for the cab and the bus. Once on the bus you’re served coffee and breakfast, and you’ll get a lively and comical conversation from your bus guide. It’s about a two hour trip.

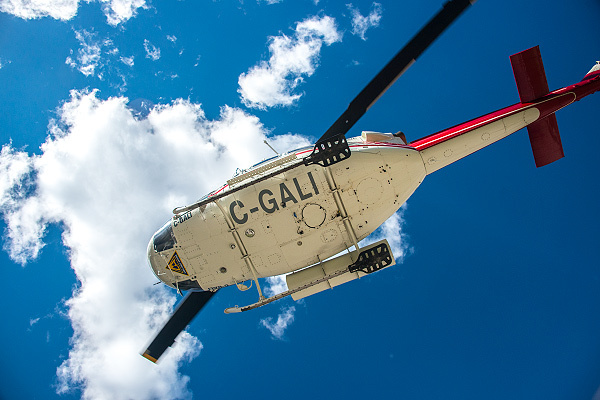
Once you arrive at the helipad, the helicopter will transport about 8-10 people at a time to the lodge, about a ten minute flight. When you arrive at the Lodge, you get lunch, a safety orientation, get fitted for your hiking equipment, and then before you know it, you’re on your first helicopter ride to the mountain tops for the perfect photography experience of a lifetime. It just gets better and better after that!
_DSC7575

The company I went with is CMH – Canadian Mountain Holidays. They’ve been doing this for years and the founder was the person who invented heli-skiing so they know the mountains. There is one more photo trip in September this year (2014), but my friend and I got the last to spots for the August photo trip with John Marriott.  The cost for the heli-hiking photo tour is about $ 3280 CAD + taxes, and it includes everything except alcoholic beverages and your massage treatments.  Photography in the Bugaboos – the perfect photography trip.

What was your favorite bucket list photo trip?

There’s a good chance I’ll be back again next year – I’d love to take a group of photographers to this magnificent place to experience a real Canadian photography bucket list trip.   Anyone keen on joining me?

The post Photography Trip of a Lifetime to the Canadian Rockies for Your Bucket List by Alex Morrison appeared first on Digital Photography School.


Digital Photography School

 
Comments Off on Photography Trip of a Lifetime to the Canadian Rockies for Your Bucket List

Posted in Photography


Canadian Travelogue – Nova Scotia – Brier Island

12 Aug

Long Island and Brier Island, along with several much smaller uninhabited islands, form the archipelago that lies right at the tip of Digby Neck, a peninsula that juts into the Bay of Fundy. With a population hovering around 300 residents, Westport, Brier Island’s only village, cannot help but be relaxing. Consequently I recommend the village of Westport as one of the most relaxing three-day summer holiday destinations in Nova Scotia. There is only one access route to Brier Island: drive west on Highway 217 from Digby for about an hour, and two small ferry crossings.

Brier Island, the outer-most island along Digby Neck, is essentially a comprised of lava-flow-formed basalt rock. While making a beauthiful coastline to photography, it is also brutal on scrapped knees.

Brier Island, the outer-most island along Digby Neck, is essentially comprised of lava-flow-formed basalt rock. While making a beauthiful coastline to photograph and enjoy, it is also brutal on scrapped knees.

There are countless photo opportunities, including rare flora, numerous shore and seabird species (Brier Island is located on the Atlantic Flyway, and autumn is the best season for bird-watching) and spectacular seascape opportunities wherever you choose to “drop” your tripod.  Brier Island juts into the lower Bay of Fundy, and the waters surrounding it are the summer home of the nearly extinct Atlantic Right Whale. Endangered humpback whales are also regularly seen in these waters, as are finback and Minke whales and the Atlantic white-sided dolphin.

One of my favourite locations on Brier Island is a stretch of basalt columnar formations along the east and south-east shorelines. Simply park your car at the lot at the end of the road and walk south toward the small monument that profiles the seafaring heroics of Joshua Slocum, the first sailor to circumnavigate the world solo. Really good hiking books are essential here as you will be scampering along a fairly rugged shoreline. Be careful of the slippery seaweed and the tide: you will have great difficulty out-running the rising water if you’re caught where you shouldn’t be.

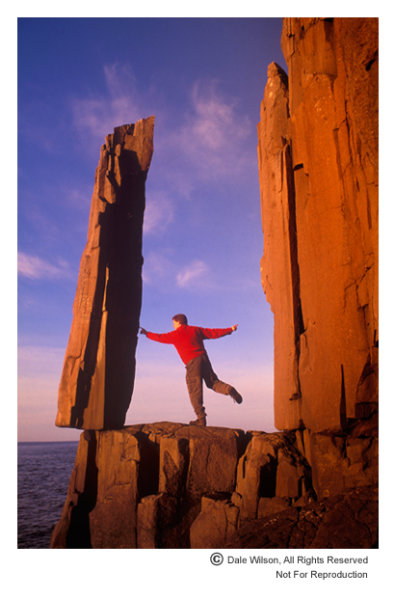
One of the quirkiest sights in all of Nova Scotia is the “Balancing Rock.”  Near the village of Tiverton on Long Island, this precariously perched piece of basalt stands nearly seven metres high and looks as a good wind would blow it off its precarious perch.  Not so. It’s easy to find, just look for the roadside sign several kilometres west of the Tiverton or ask any local resident.

I first discovered the Balancing Rock in 1991 when working on an editorial assignment and immediately saw its photographic potential. Getting close to it then was quite a chore, but I am pleased to report that a boardwalk now makes crossing the bogs and fens much easier and a really convenient stairway with an observation deck has replaced the knotted hawser once tangling over the cliff edge.  It is about a 30-minute trek from Highway 217 and is most definitely a sunrise location.

Precariously perched on a ledge above St. Mary's Bay, local folklore indicates three lobster boats once tried to pull over this rock in unison - unsuccessfully, apparently.  The Balancing Rock can now only be photographed from a viewing platform, so it is highly unlikely you will find any fairies testing their strength.

Precariously perched on a ledge above St. Mary’s Bay, local folklore indicates three lobster boats once tried to pull over this rock in unison – unsuccessfully, apparently. The Balancing Rock can now only be photographed from a viewing platform, so it is highly unlikely you will find any fairies testing their strength.

Welcome to this great little archipelago jutting like a finger into the Bay of Fundy and be prepared for many great days of therapeutic relaxing while gulls screech in this working harbour and the smell of salt wafts through the air.  Your watch won’t be wound quite so tight when you leave – I guarantee it.

Post originally from: Digital Photography Tips.

Check out our more Photography Tips at Photography Tips for Beginners, Portrait Photography Tips and Wedding Photography Tips.

Canadian Travelogue – Nova Scotia – Brier Island


Digital Photography School

 
Comments Off on Canadian Travelogue – Nova Scotia – Brier Island

Posted in Photography


Canadian Travelogue – Nova Scotia – Peggy’s Cove

07 Aug

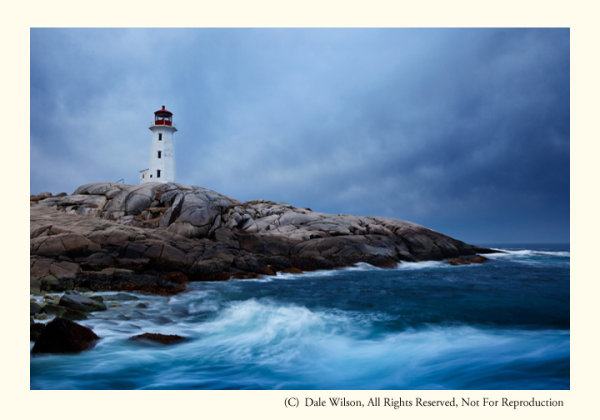
No location in Canada’s Ocean Playground is more quintessentially Nova Scotian than Peggy’s Cove. It’s all there: a lighthouse, pounding surf on large granite outcroppings and a tranquil working fishing community. And it’s only 50 kilometres from Halifax, the largest city in Atlantic Canada.

Early spring is a great time to photograph one of the most photographed lighthouses in the world, should you want images without people in the picture

Early spring is a great time to photograph one of the most photographed lighthouses in the world, should you want images without people in the picture

The only land route to Peggy’s Cove is Highway 333, starting at Armdale, and then routes along to coast and eventually joins Highway 103 at Upper Tantallon to the west. You then turn right onto Highway 103 and drive east back to the western reaches of Halifax at Bayers Lake. The coastal drive from Armdale to Peggy’s Cove along Route 333 is by far the most scenic and interesting, offering may little side trips to the not too distant shoreline and coastal communities.  You will have no difficulty locating Peggy’s Cove itself: it’s one of the top tourist destinations in all of Canada, so road signage is abundant.

Photographers who desire images of the lighthouse without people milling about will have their patience taxed to the limit. The task will be almost impossible in the peak tourist season of July and August, and just plain difficult at any other time of the year … except maybe the coldest days of winter. I find April is a good time as most of the snow will have melted and it is still too early for people to be thinking about visiting this Atlantic sentinel. Additionally, what little foliage there is will still be brown and this is typically a good month for storm clouds that create interesting and supportive notions of why a lighthouse is there in the first place.

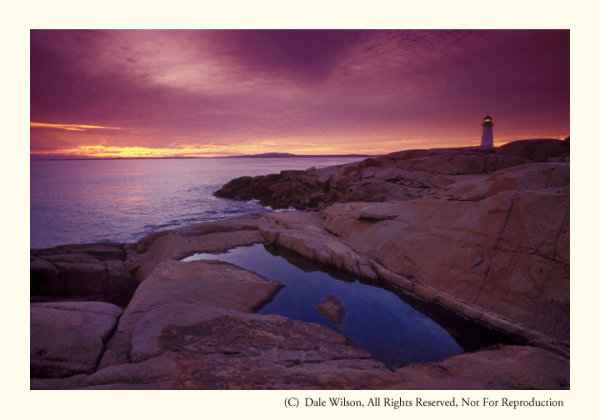
The best approach to photograph the village and the lighthouse is to arrive in early morning and “play tourist,” making pictures as you meander around the harbour. You can easily spend several hours just following your nose, and there is a large restaurant on site for that moment when the light gets too harsh. Make sure to re-visit in the evening –after a noon-day nap, of course—and leave yourself lots of time to find the perfect location to get the classic lighthouse-against-the-sunset photograph.  Should you stake out a vantage point on the south side of the lighthouse there is a better chance you will be able to eliminate people from the image with creative camera positioning and sight angles. From a low elevation the camera’s line of sight will be just over the heads of the tourists who sit on the rocks enjoying the last rays of the day.  The other classic view is from the water’s edge just to the north of the little cove in front of the lighthouse itself, immediately below the restaurant. Be aware, from here you will almost be guaranteed there will be people in your picture.

By staying to the south of the light, it is possible to keep the camera low and avoid people from creeping into the frame. Challenge yourself to look for creative images as well as portaits of the light.

By staying to the south of the light, it is possible to keep the camera low and avoid people from creeping into the frame. Challenge yourself to look for creative images as well as portaits of the light.

When travelling along the shoreline anywhere in Atlantic Canada, but especially so in Peggy’s Cove, be astutely aware of your surroundings, rogue waves are common and have called unwary visitors to the depths to dwell with King Neptune. So, please, be careful and mindful of the signage; if those rocks are black or wet you are too close to the water’s edge. The Atlantic Ocean is huge and powerful, and its combers deserve, and demand, your respect.

Now get out there and enjoy one of the most photogenic places in all of Nova Scotia, and Canada. You won’t be disappointed.

Post originally from: Digital Photography Tips.

Check out our more Photography Tips at Photography Tips for Beginners, Portrait Photography Tips and Wedding Photography Tips.

Canadian Travelogue – Nova Scotia – Peggy’s Cove


Digital Photography School

 
Comments Off on Canadian Travelogue – Nova Scotia – Peggy’s Cove

Posted in Photography


Canadian Travelogue: Nova Scotia – Cape Breton Highlands National Park

21 Jul

The autumn foliage of Cape Breton Highlands National Park offers a more exciting colour palette than anywhere else in Canada, and quite possibly in North America.

The best time to visit is immediately after Thanksgiving weekend in October. The holiday weekend itself can be nightmarish, with hordes of people and endless lines of tour buses. Restaurants are filled to capacity and accommodations are hard to find unless you have made reservations well in advance. On the Monday immediately following the holiday weekend, you will pretty much have the entire Highlands region and the National Park to yourself.

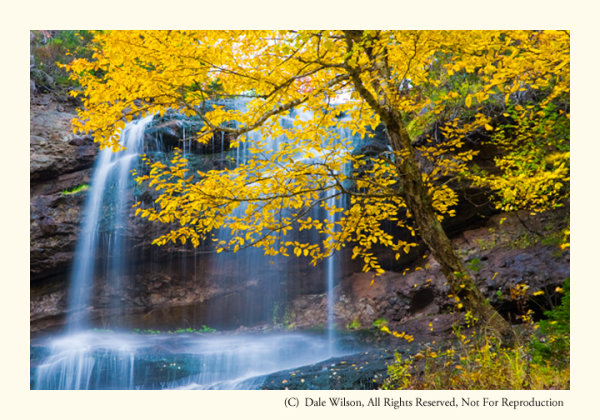
Beulach Ban Falls in the 2nd week of October.

Beulach Ban Falls in the 2nd week of October.

The park is enclosed by the northern section of the famed 300Km long Cabot Trail, a loop of highway that starts and ends at Baddeck. I prefer to enter the Park at the western terminus, near the Acadian village of Cheticamp, and tour the park in a by driving in a clockwise direction along the Cabot Trail.

For those who enjoy American history, the original residents of Cheticamp are repatriated families who had previously been extradited to the United States during the Great Expulsion (Le Grand Dérangement) of 1755.  The word Cajun, which is a common term used to identify the French residents of Louisiana, for example, is actually an anglicized mispronunciation of the French word Acadien. This is a topic for another day, but Cheticamp is a fabulous place to base a few days and listen to the residents speak a very unique and distinct dialect of French and English languages.

One cannot leave the Cape Breton without the classic Cabot Trail photo, and the opportunity comes early in the trip. Park your car at the Cap Rouge pull-off and look southwest back toward the village of Cheticamp – you will instantly recognize the view and potential for a great post card picture. This is an afternoon shot, unless you are looking for a photographic challenge. A sunset photo from this location can be breathtaking, but it can also be difficult to pull-off. The sun will be slight to the right-centre of the frame so you will most likely have to contend with lens flare, and make your images thinking of a final HDR treatment.

Two particular locations in the park that call me back each year are Mary Ann Falls and Beulach Ban Falls. Beulach Ban Falls is at the eastern base of North Mountain, near the most northerly point on the Cabot Trail. It is reached by way of a gravel laneway that passes a warden’s cabin, on the opposite side of the road from the Big Intervale Campground. About 2 kilometres on this gravel laneway will get you to a small picnic park, and to the base of the falls. You should hear the falls from the parking lot. As with any waterfall, the option to include the entire waterfall, or selective portions, is an entirely personal choice – let the muses direct your creativity.

Mary Ann Falls in 2nd week of October. Yes, I placed the leaves; however, I later heard a photographer swear up and down that those leaves in his picture were exactly as he found them!

Mary Ann Falls in 2nd week of October. Yes, I placed the leaves; however, I later heard a photographer swear up and down that those leaves in his picture were exactly as he found them!

On the Park’s eastern limits, and about a 5 kilometre drive west from the town of Ingonish, you will come to a gravel road leading inland to the Marrach Group Campground. Continue along this road, following the signs to Mary Ann Falls, for about 7 kilometres until you come to a gated wooden bridge – Mary Ann Falls is immediately to your right, or downstream.

Successful images can be made at several vantage points, but the weather will often decide your ideal location along this relatively small but photogenic waterfall. Like most watercourses, the ideal time to make photographs at either Mary Ann Falls or Beulach Ban Falls is during a light drizzle or with overcast skies, thus lowering the overall contrast. Shutter speeds below 1/15th of a second should produce the often sought after “bridal veil” effect, suggesting water movement.

There are many other locations in Cape Breton Highlands National Park that deserve your attention: there is a fantastic panoramic image looking up MacKenzie River from a pull-off near the top of MacKenzie Mountain, the Coastal Trail offers some really unique Jack Pine stands (an uncommon tree in Cape Breton) as well as several vantage points for great views along the Gulf of St. Lawrence shoreline, and a really easy hike among the hardwoods of the Lone Shieling Trail.

As with most national parks, there is much to offer and explore. You simply have to allow yourself the time and flexibility to maximize your efforts in this park due to its maritime environment – if you don’t like the weather, wait an hour.

The Highlands of Cape Breton, in autumn, is a world-class destination. Plan to spend at least four days to appreciate its splendour.

Post originally from: Digital Photography Tips.

Check out our more Photography Tips at Photography Tips for Beginners, Portrait Photography Tips and Wedding Photography Tips.

Canadian Travelogue: Nova Scotia – Cape Breton Highlands National Park


Digital Photography School

 
Comments Off on Canadian Travelogue: Nova Scotia – Cape Breton Highlands National Park

Posted in Photography