RSS
 

Posts Tagged ‘Calendar’

How to Create Your Own Desktop Calendar

07 Jan

Creating-calendar-1

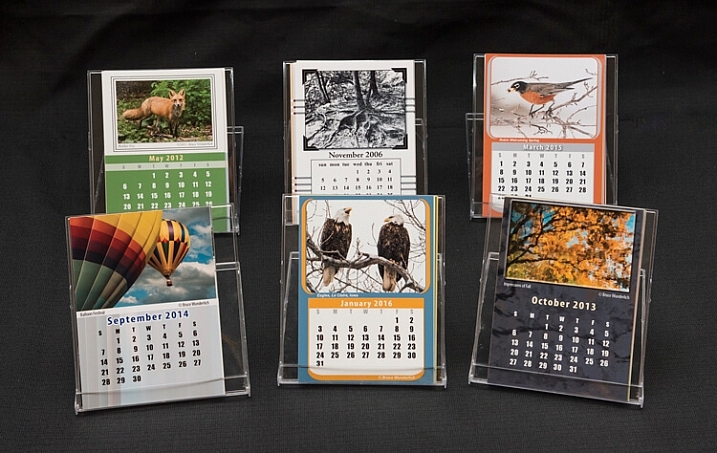
Ansel Adams once said “12 significant photographs in any one year is a good crop”. Creating a desktop calendar is a fun way to share your photography with family and friends, and they make great gifts. These calendars can feature any and all subjects; family members and gatherings, vacations, wildlife, landscapes, or whatever you enjoy shooting. Small enough to set on a desk or mantel, this type of calendar displays your best images all year long.

What do you need?

  • Software – Creating these calendars requires some type of design software such as Adobe Illustrator, Adobe InDesign, Microsoft Publisher, CorelDraw, Mac Pages, or Microsoft Word. If you have no other design software, Adobe Photoshop may be used, though it presents more challenges than the others. You can also do a Google search for “2016 desktop photo calendar templates” and you will find several like these, or these for MS Word.
  • Inkjet photo printer and 4×6″ photo paper – Depending on the number of calendars you want, you may choose to send out the calendar pages to be printed by an online printing service, such as Mpix.
  • Paper cutter – To easily and accurately trim your calendar to its finished size, a paper trimmer works better than scissors!
  • Jewel case – The jewel case (CD case) is used to package and display your final calendar.

Instructions

  1. Select 12 photos: Sometimes selecting your images can be the toughest part of creating a calendar! Finding 12 images of which you are really proud, or having too many favorites to whittle them down to just 12, may present something of a dilemma! Not only do you need 12 photos, you need to select which photo to feature in any given month of your calendar. Try to choose photos that depict a season or month in which you plan to place it, such as choosing a snowy landscape for winter months, or budding flowers for spring.

    Creating-calendar-7

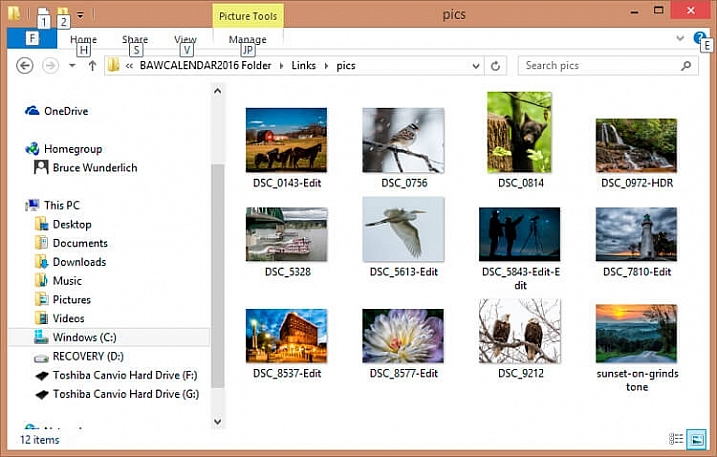
    Collect your 12 final images into a folder for use in your calendar.

  2. Set up your page size: In your design software, set up for a 4×6″ page. (If you’re using Photoshop, set the dpi to 300 which will allow for sharp resolution for printing.) Be aware that the size of the jewel case is actually only 5.5″ tall, which means the 4×6″ prints will need to have half an inch trimmed off the bottom for finishing.
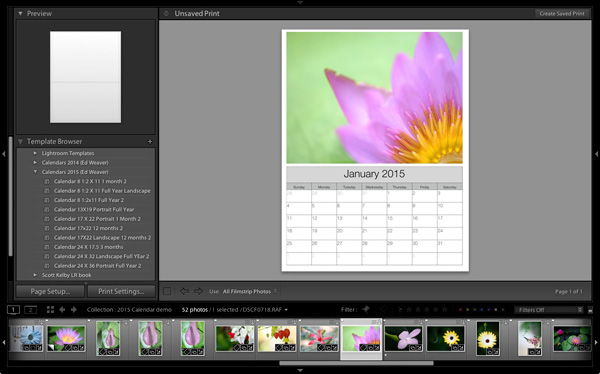
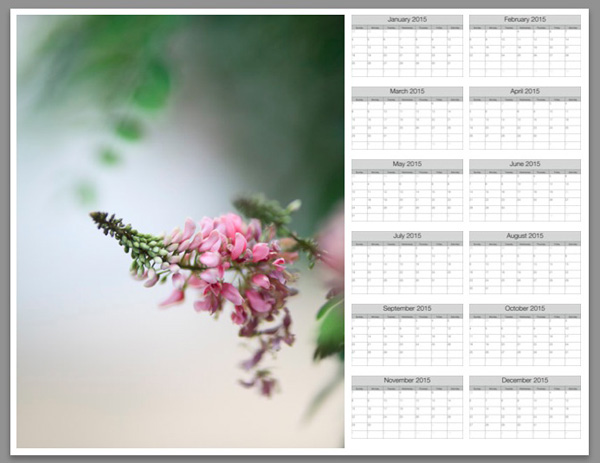
  3. Design the layout: The layout can be as simple as placing your photo at the top of the calendar and placing the calendar dates below. Be creative and add interesting elements to your page by adding rules or borders around your photos. Keep in mind the font you use is a factor in the calendar design. (Setting the text for the calendar is much easier in software like Adobe Illustrator.) You will need to keep your calendar high enough on the page that they will show above the bottom of the jewel case.

    Creating-calendar-6

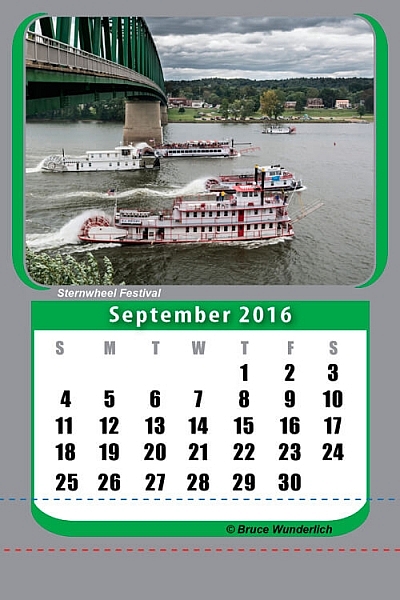
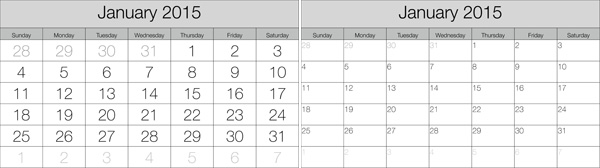
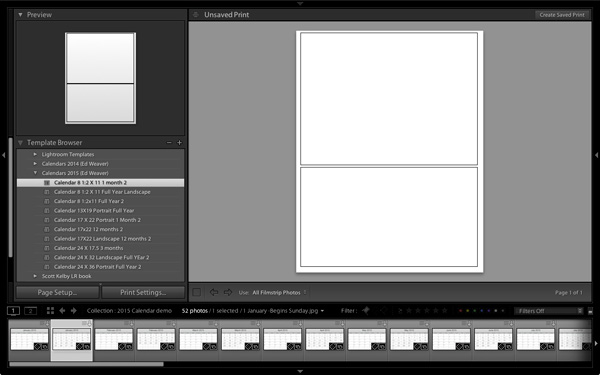
    The red line on the bottom (0.5″ from bottom) indicates where page will be trimmed after printing. The blue line (1″ from bottom) indicates the area of the page that will be below the edge of the jewel case.

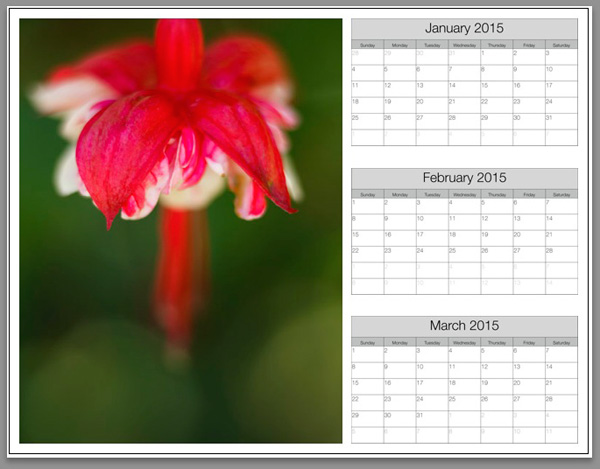
  4. Add some color to your calendar: Choose colors from your image to use as background colors, or for any text or rules, to add zip to your calendar page (most design software features an eye dropper tool that is handy to accomplish this). Using complementary colors such as red and green, or blue and orange works well. You may need to lighten the background colors as you don’t want them to overpower your image; rather, let them accent the hues within the photo. If you are using dark colored backgrounds, your text will need to be white, and  vice versa, with light colored backgrounds your text will need to be black, or a very dark color to make it easily readable.
    Creating-calendar-3

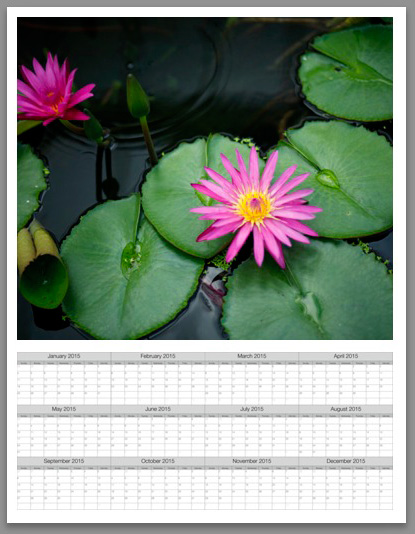
    Notice how the green borders highlight the green color of the water in the image.

    Creating-calendar-5

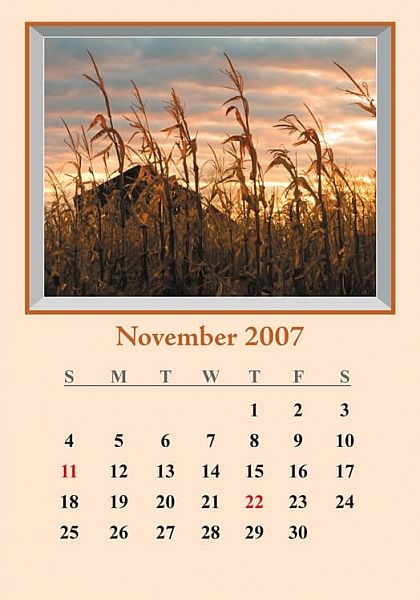
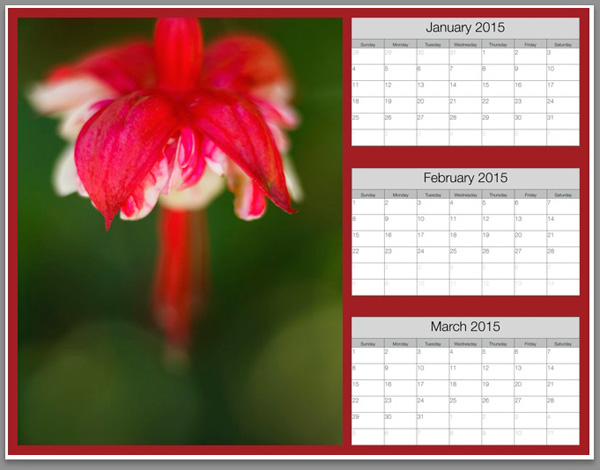
    Holidays can be printed in another color to mark their importance and add color (note the red dates above).

  5. Template: Once you have completed your first page you can use it as a template for creating the other 11 pages of your calendar. You may also want to create a cover page, which will give you the opportunity to add a 13th image to your calendar if desired.
  6. Check your work: Once you have all your calendar pages created, double check all of your dates for accuracy. It may also be useful to have someone else check them for you, as another person can often catch the errors that you missed.
  7. Print out a test copy: A print of all your pages, trimmed to size and placed in a jewel case, will ensure that all pages are properly displayed.
  8. Save file or print: If you are sending your calendars to a service like Mpix for printing you will need to save each page as a high resolution jpg image, and be sure to give each file a unique file name. Of course, you may print the calendar pages on your personal printer using 4×6″ inkjet photo paper.
  9. Trimming your pages: Cut each calendar page down to 5.5″ high so they will fit nicely into your jewel case.
  10. Load your pages: Place all calendar pages, January through December, into the jewel case.

    creating-calendar-2

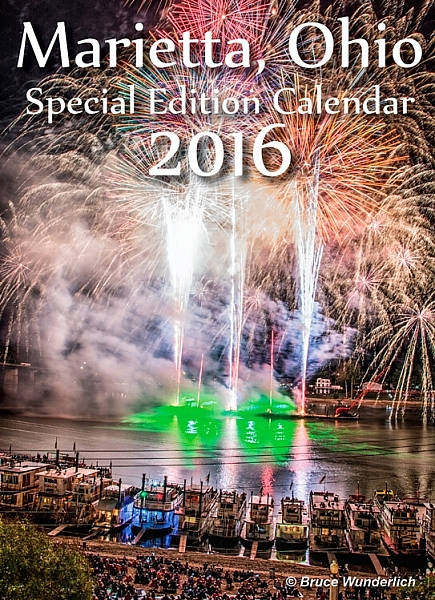
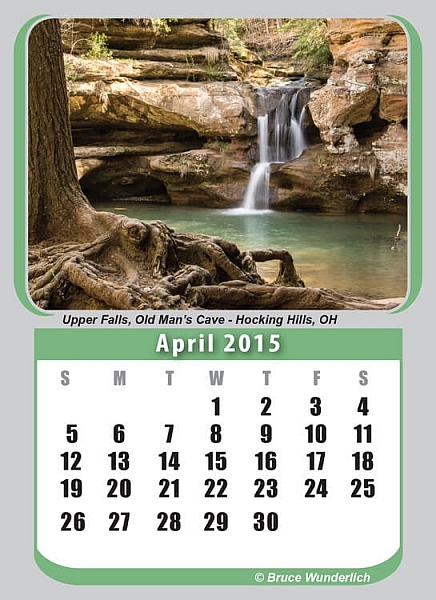
    Including a cover page is a great option for calendars that depict a special event or location.

Your calendar is now ready to use, or give to a friend or family. You may want to ask your recipients to save the jewel case, so you can create a refill calendar with a new batch of images next year.

There are many unique items you can design featuring your photography. What ideas do you have for creative photo projects? Leave your ideas or suggestions in the comments below.

googletag.cmd.push(function() {
tablet_slots.push( googletag.defineSlot( “/1005424/_dPSv4_tab-all-article-bottom_(300×250)”, [300, 250], “pb-ad-78623” ).addService( googletag.pubads() ) ); } );

googletag.cmd.push(function() {
mobile_slots.push( googletag.defineSlot( “/1005424/_dPSv4_mob-all-article-bottom_(300×250)”, [300, 250], “pb-ad-78158” ).addService( googletag.pubads() ) ); } );

The post How to Create Your Own Desktop Calendar by Bruce Wunderlich appeared first on Digital Photography School.


Digital Photography School

 
Comments Off on How to Create Your Own Desktop Calendar

Posted in Photography


How to Create a 2015 Calendar in the Lightroom Print Module

23 Dec

Create a calendar in the Lightroom Print module

The Lightroom Print module is a great tool for creating print layouts, but one thing it is not designed to do is make calendars (hopefully Adobe will introduce this feature in future versions of Lightroom). Luckily, in spite of that it is not too difficult to create a calendar once you know how, and you are prepared to put the work in to create the month and day parts of the calendar.

Or – you can let someone else do all the hard work. That somebody is photographer Ed Weaver, who has created some Print module calendar templates that anybody can download from his website for free.

Ed updates the templates every year, and has recently added templates for 2015. There are two versions, one with the week starting on Sunday, and the other with it starting on Monday. Just select the one that is appropriate for your part of the world (the links are at the bottom of the web page) and download the files.

The download includes a set of calendar graphics and Lightroom Print Templates, along with instructions. All you have to do is import the calendar images into the Lightroom Catalog and add the Print Templates to the Print module. It only takes a few minutes and you’re ready to go.

Creating a calendar

Follow these instructions to make your first calendar using Ed’s templates.

1. Open the folder containing the templates you want to use. Import the JPEGs into Lightroom. There are two JPEGs for every month in 2015, one with large numbers, the other with small numbers (see below), giving 24 in total.

Create a calendar in the Lightroom Print module

2. Go to the Library module and create a Collection for the calendar. Add both the calendar JPEGs you just imported plus any photos you may wish to use in the calendar.

Create a calendar in the Lightroom Print module

3. Go to Lightroom’s Print module, then select Print > New Template Folder from the menu. Give the folder an appropriate name (i.e. 2015 Calendar). Right-click on the folder name and select Import. Navigate to the folder where Ed’s calendar templates are stored, select them all and click the Import button.

Create a calendar in the Lightroom Print module

4. Open the Template Folder you just created. There are ten templates to choose from. When you click on a template, Lightroom displays it in the Content window (see below). The templates use the Custom Package layout style, which means that Lightroom doesn’t add photos to the layout automatically. Instead, you have to do it yourself by dragging the photos from the Filmstrip.

Create a calendar in the Lightroom Print module

5. Drag photos and calendar templates as needed from the Filmstrip to create your calendar. With this template, you need just one of each.

Create a calendar in the Lightroom Print module

6. Click the Create Saved Print button in the top right corner of the Content window (see below). Give the print a name in the Create Print window and click the Create button. Lightroom creates a Print Collection (marked by a printer icon in the Collections panel) containing only the images used in the print. Now you can leave the Print module and return to your print at any time without losing any changes.

Create a calendar in the Lightroom Print module

7. Repeat for the rest of the months in the year, and you have a complete calendar.

Here are some examples using some of the other templates:

Create a calendar in the Lightroom Print module


Create a calendar in the Lightroom Print module


Create a calendar in the Lightroom Print module

Modifying template files

Ed’s templates are great, but there is no easy way to change the colours, fonts, or any other aspect of the design of the JPEG files, at least not in Lightroom. If you want to change the style, you should open the files in Photoshop or Photoshop Elements. Using layers, it is relatively straightforward to replace the font Ed used with that of your own choice, or change the colours. Of course, you could also start completely from scratch and create your calendar files to use with Ed’s templates.

Changing background colour

Create a calendar in the Lightroom Print module

You can change the background colour of the calendar from its default white by going to the Page panel and ticking the Page Background Color box. Click the swatch on the right to choose a colour. Just bear in mind that adding a background colour uses more ink if you print the calendar on an inkjet printer.

Create a calendar in the Lightroom Print module


Mastering Lightroom: Book Five – The Other Modules ebook coverMastering Lightroom: Book Five – The Other Modules

My new ebook Mastering Lightroom: Book Five – The Other Modules shows you how to use Lightroom’s powerful features to create fun and interesting projects using the Map, Book, Slide show, Print and Web modules. Whether it’s geotagging, putting together a photo book, printing your best photos or creating web galleries all the information (and inspiration) you require is right here.


googletag.cmd.push(function() {
tablet_slots.push( googletag.defineSlot( “/1005424/_dPSv4_tab-all-article-bottom_(300×250)”, [300, 250], “pb-ad-78623” ).addService( googletag.pubads() ) ); } );

googletag.cmd.push(function() {
mobile_slots.push( googletag.defineSlot( “/1005424/_dPSv4_mob-all-article-bottom_(300×250)”, [300, 250], “pb-ad-78158” ).addService( googletag.pubads() ) ); } );

The post How to Create a 2015 Calendar in the Lightroom Print Module by Andrew S. Gibson appeared first on Digital Photography School.


Digital Photography School

 
Comments Off on How to Create a 2015 Calendar in the Lightroom Print Module

Posted in Photography


Blood Moon Eclipse: Mark Your Calendar 10.8.14

07 Oct
October 8th 2014 Lunar Eclipse Map

View full size courtesy of NASA Eclipse Web Site

If you’re looking for a great photo opportunity this week look no further than October 8th. The Blood moon will be in full eclipse in the white areas of the map above.   Check dates and times for your area on the Lunar Eclipse Computer.

For my fellow Californians the date and times will look similar to this.

Note: These times are specific to San Francisco.

                                                      Moon's
                                                Azimuth   Altitude
                                     h  m            o        o
Moonrise               2014 Oct 07  18:23          84.4     ----
Moon enters penumbra   2014 Oct 08  01:14.1       190.7     57.1
Moon enters umbra      2014 Oct 08  02:14.5       215.2     52.7
Moon enters totality   2014 Oct 08  03:24.6       236.4     43.1
Middle of eclipse      2014 Oct 08  03:54.6       243.4     38.2
Moon leaves totality   2014 Oct 08  04:24.5       249.6     33.0
Moon leaves umbra      2014 Oct 08  05:34.7       261.9     20.1
Moon leaves penumbra   2014 Oct 08  06:35.2       271.2      8.7
Moonset                2014 Oct 08  07:25         278.7     ----

I highly recommend geeking out with your planning now in preparation for your shoot. Good luck!

Animation of the October 8th Lunar Eclipse

Animation of the October 8, 2014, total lunar eclipse as the moon passes through the Earth’s shadow from west to east. Image credit: Tomruen


Copyright Jim M. Goldstein, All Rights Reserved

Blood Moon Eclipse: Mark Your Calendar 10.8.14

The post Blood Moon Eclipse: Mark Your Calendar 10.8.14 appeared first on JMG-Galleries – Landscape, Nature & Travel Photography.


Related Stories

  • Wilderness Protection – Only As Strong As The Wilderness Act
  • Wilderness Protection – Only As Strong As The Wilderness Act – Enclosure
  • The Insightful Landscape – A New Landscape Photography Book
Feed Ads by FeedBlitz
powered by ad choices


JMG-Galleries

 
Comments Off on Blood Moon Eclipse: Mark Your Calendar 10.8.14

Posted in Equipment


Superstitions, Illustrated: A Calendar of Fallacious Thought

21 Nov

[ By Steph in Art & Drawing & Digital. ]

Even in a world of smart phones, high-speed trains, artificial intelligence and Mars exploration, many of us still bow to old superstitions. We avoid crossing under ladders, knock on wood, cross our fingers and worry about ‘jinxing’ things by speaking them aloud. Illustrator Fortuna Todisco features twelve of these superstitions in ‘Unfortunately013‘, a simple, modern calendar.

‘Fortune: Or other people’s bad luck,” reads the quote for March, beside an image of a rabbit with a peg leg. December proclaims, “Santa Claus doesn’t exist.”

The calendar was inspired by the common superstition that the ending of the ancient Mayan calendar, which is coming up in just a few short weeks, predicts the end of the world.

Todisco says, “UNFORTUNATELY013 is a reflection, through images, about the anachronistic persistence of superstitions in the present society.”


Want More? Click for Great Related Content on WebUrbanist:

Time For A Change: 12 Cool & Creative Calendar Designs

If your days are going by in a blur, it’s time for a change. Give the monthly countdown a little extra character with these 12 cool, creative calendar designs.
8 Comments – Click Here to Read More »»


Pretty Packaging: 15 Illustrated Boxes, Bottles & More

Dragging art off the gallery wall and onto products that we use every day, these 15 illustrated packaging designs really pop on the shelf.
Click Here to Read More »»


Share on Facebook


[ By Steph in Art & Drawing & Digital. ]

[ WebUrbanist | Archives | Galleries | Privacy | TOS ]


WebUrbanist

 
Comments Off on Superstitions, Illustrated: A Calendar of Fallacious Thought

Posted in Creativity


Microsoft Outlook 2010 – Enlarge or Change the Calendar Date Navigator Font

10 Sep

Make the Date Navigator easier to read in Outlook 2010, or customize the font.

If you find the small font of the Date Navigator in Microsoft Outlook 2010 difficult to view, or you find it hard to click on the small day numbers, you may wish to enlarge the font.

Especially if you have a larger monitor and resize the Navigation pane, you can increase the font size by a few points. Or, for the sake of customization you may also wish to change the font entirely from its default….

Read more at MalekTips.
New Computer and Technology Help and Tips – MalekTips.Com

 
Comments Off on Microsoft Outlook 2010 – Enlarge or Change the Calendar Date Navigator Font

Posted in Technology


Microsoft Outlook 2010 – Show Week Numbers in the Calendar

06 Aug

Add week numbers when viewing Outlook 2010 calendars to calculate meeting dates that must occur every 3 or 4 weeks instead of monthly.

It might prove useful when viewing calendars in Microsoft Outlook 2010 to show week numbers. Perhaps there is an ongoing project where participants convene for a status review every three weeks, or you might have a regular lunch networking group that meets every four weeks or so instead of monthly.

The following tip shows how to add week numbers when viewing calendars in Month view, or when displaying calendars in the To-Do Bar:…

Read more at MalekTips.
New Computer and Technology Help and Tips – MalekTips.Com

 
Comments Off on Microsoft Outlook 2010 – Show Week Numbers in the Calendar

Posted in Technology


Microsoft Outlook 2010 – Show More Calendar Months in the Right Pane

30 Oct

Configure Outlook 2010 to show more calendar months in the To-Do Bar on the right side of the application window.

On the right side of the Microsoft Outlook 2010 window is the “To-Do Bar”. By default, this shows the current calendar month, upcoming appointments, and a list of Tasks.

If you would like to, at a glance, see the next calendar month as well in the To-Do Bar, perform the following tweak. You can add even more months, though this will require a higher resolution / window size to view them all. Also, simultaneously viewing more months may push the appointment and Task displays off the screen….

Read more at MalekTips.
New Computer and Technology Help and Tips – MalekTips.Com

 
Comments Off on Microsoft Outlook 2010 – Show More Calendar Months in the Right Pane

Posted in Technology