RSS
 

Posts Tagged ‘burst’

What is Burst Mode and How Can it Benefit Your Photography?

30 Jul

The post What is Burst Mode and How Can it Benefit Your Photography? appeared first on Digital Photography School. It was authored by Megan Kennedy.

When it comes to photography, timing can be everything. Whether you are photographing a high-speed car or a static landscape, knowing when to press the shutter button is all-important. But the average human reaction time to a visual stimulus is 0.25 seconds, making photographs of brief opportunities somewhat difficult. Fortunately, when frantically depressing the shutter button just doesn’t cut it, there’s burst mode.

Let’s take a speedy look at burst mode, and how it can benefit your photography.

burst mode photography 737
Burst mode is great for capturing fast-moving subjects. 1/250s | f/9 | ISO 160

What is burst mode?

Burst mode is also known as continuous shooting mode or continuous high-speed mode. It’s a camera function that allows you to make a series of photographs in quick succession. With burst mode activated, a photographer can hold the shutter button down and the camera will take multiple photographs, minimizing the interval between shots.

burst mode photography cockatoo
I used burst mode to capture this moment of a cockatoo eating grass seed. 1/8000s | f/5.6 | ISO 500

When is burst mode used?

Burst mode can be used at any time, but it’s especially useful for fast-moving subjects and fleeting opportunities. Burst mode records moments much faster than capturing an event manually frame-by-frame. This increases the chance of making successful photographs of short-lived moments.

What is Burst Mode and How Can it Benefit Your Photography?
Handholding with extension tubes can be tricky. Using burst mode is one way to increase the ratio of sharp macro images. 1/100s | f/6.3 | ISO 100

Burst mode is often viewed as a setting best suited to photographing high-action sports events. But street photographers, for example, may use the mode to anticipate interesting photographic opportunities. Burst mode is also great for macro and wildlife photography and for capturing the nuanced expressions of subjects in portraiture.

How to use burst mode

Activating burst mode can vary depending on the camera. For my Canon 5D Mark II, I activate continuous shooting by pressing the dedicated AF•DRIVE button on my camera and selecting continuous shooting on the main screen with the quick control dial. If you aren’t sure how to activate burst mode, consult your manual or have a look online.

burst mode icon on a canon 5D mk II camera
The burst mode icon displayed on a Canon 5D MK II. 1/60s | f/9 | ISO 500

With burst mode engaged, you’ll also need to ensure you set the right focus mode. For burst mode photography, it’s best to shoot in continuous focusing mode. Known as AI Servo on Canon and AF-C on Nikon, continuous focus will constantly track moving objects, helping to maintain sharp focus while burst mode is activated.

Finally, set your camera settings (shutter speed, aperture, and ISO) accordingly, and you are ready to go! Focus on a subject, depress the shutter button, and the camera will take a burst of images as long as the shutter button is held down (to an extent; see below).

The technical bits of burst mode

There are a few aspects that govern the performance of continuous shooting. The speed of a camera’s burst mode can depend largely on the camera itself. While some cameras operate at two or three frames per second (fps), higher-end cameras can perform at 8+ fps per burst.

In addition, burst mode photographs are saved to a shot buffer before they are transferred to your memory card. The size of the camera’s shot buffer and memory card determines how long you can shoot in burst mode, and the writing speed of any images taken. For example, with a UDMA card, my Canon 5D Mark II can shoot a burst of 310 large JPEG files.

Burst mode bee
Burst mode is good for capturing fleeting moments. 1/160s | f/6.3 | ISO 400

However, if I want to shoot in RAW, the buffer has the capacity for 13 images per burst with a UDMA card. This is important to know when planning a shoot as the requirement for a longer burst will depend on your willingness to shoot in JPEG.

Another option to improve the length of a burst is to change the camera’s frames per second setting. Not all cameras have this option. However, selecting a slower burst mode will maintain your burst for longer, but with a greater interval between each shot.

An additional aspect to keep in mind when using burst mode is battery life. Shooting in burst mode can drain the life of a battery faster than with single-frame shooting. If you plan to use burst mode frequently over the course of a shoot, it could be prudent to take an extra battery or two along with you.

Conclusion

Whether you’re photographing a family portrait with active kids, capturing a flock of birds in flight, or covering a sporting event, burst mode can snap up the moments that could otherwise be missed in single-shooting. By setting your camera to burst mode, you can anticipate events and make a series of exposures without worrying so much about reaction time.

The post What is Burst Mode and How Can it Benefit Your Photography? appeared first on Digital Photography School. It was authored by Megan Kennedy.


Digital Photography School

 
Comments Off on What is Burst Mode and How Can it Benefit Your Photography?

Posted in Photography


Several Canon 1D X Mark III users are reporting issues with the OVF freezing in burst mode

11 Mar

A number of Canon 1D X Mark III owners have reported issues with Canon’s flagship DSLR, wherein the camera appears to lock up and fall asleep while shooting in continuous mode.

First reported nearly three weeks ago in the DPReview forums, users have noticed their 1D X Mark III cameras seizing up after a few shots, making the camera unusable for a few seconds until it appears to reset. DPReview reader Hamilton Pytluk made what we believe to be the first mention of the issue when he had the following to say (emphasis his) in the Canon EOS-1D forums:

“My only gripe so far [with the 1D X Mark III] has been what I believe to be a buffer “issue” when shooting through the OVF, which seemingly puts the camera to sleep after taking a series of shots (as few as 5 in my usage) and de-pressing the shutter (if you keep it half-pressed, it’ll stay “awake”). Everything shuts down — I can’t even open the menu — until the write (red) light stops flickering.”

DPReview forum member PrestoPhotographer responded to Pytluk’s post confirming they too were affected by this issue:

‘I have the same issue with the viewfinder ‘sleeping’. Incredibly frustrating when shooting soccer or any fast-moving sport. I’m sending mine back as it’s currently not usable for me. I’ve noticed the card access light going off randomly amongst some other bizarre things as well. I’m set up for an eventual exchange but no clue when they’ll get more stock.’

Pytluk responded with the following YouTube video, showing exactly what both users described: after ten shots in continuous mode, the digital markings on the optical viewfinder (OVF) went blank and shut off until the camera caught back up, at which point the shutter could be released again.

Follow-up posts in the thread confirmed this issue occurred regardless of whether or not a memory card was inside the camera.

We experienced a similar issue with a pre-production camera earlier this year, but have not replicated the problem with two production samples of the EOS-1D X Mark III currently undergoing testing at DPReview. We have contacted Canon for comment and will update this article if we receive a response. If you’ve noticed this issue on your 1D X Mark III unit, leave us a message in the comments below.

Articles: Digital Photography Review (dpreview.com)

 
Comments Off on Several Canon 1D X Mark III users are reporting issues with the OVF freezing in burst mode

Posted in Uncategorized


The Leica SL2 is a refined full-frame camera with in-body stabilization, fast burst shooting and capable video features

09 Nov

$ (document).ready(function() { SampleGalleryV2({“containerId”:”embeddedSampleGallery_3068214413″,”galleryId”:”3068214413″,”isEmbeddedWidget”:true,”selectedImageIndex”:0,”isMobile”:false}) });

The Leica SL2 is a major update of the company’s original full-frame mirrorless camera, the SL, which was introduced four years ago. The SL2’s design isn’t a dramatic departure from the original, though the hard edges have been softened, the grip has been refined and a new three-button rear interface is similar to that of the Q2. Build quality and weather-sealing has improved to the point where the SL2 has earned an IP54 rating.

The real differences between the SL2 and SL can be found on the inside. The SL2 has a 47MP full-frame CMOS sensor – likely similar to what’s in the Q2 and Panasonic’s S1R – and a 5-axis sensor-shift IS system that can also be used to produce 187MP Raw images. Its contrast detection autofocus system has been improved according to Leica, and a ‘Smart AF’ feature can automatically switch between focus and shutter release priority.

$ (document).ready(function() { SampleGalleryV2({“containerId”:”embeddedSampleGallery_3364066639″,”galleryId”:”3364066639″,”isEmbeddedWidget”:true,”selectedImageIndex”:0,”isMobile”:false}) });

Photos can be composed via a 3.2″ touchscreen display with 2.1 million dots or a large 5.76M-dot electronic viewfinder. As before, a small status display on the top plate shows important shooting information.

The SL2 can shoot bursts at 20 fps with the electronic shutter and 10 fps with the mechanical shutter, both with AF locked. For continuous focus and exposure, you’ll need to drop to 6 fps. The camera has dual SD card slots, both of which are capable of UHS-II speeds. The official battery life rating for the SL2 is 370 shots per charge, but as always, you’ll likely do better.

The SL2 can shoot DCI or UHD 4K at up to 60p from nearly the full width of the sensor. Both 60p and 50p footage are captured as 8-bit 4:2:0, while 30p and below can be recorded or output as 10-bit 4:2:2 streams. There’s also an option to shoot 5K at up to 30p from a 4:3, roughly 1.6x, cropped region of its sensor. The camera will let you shoot using a proprietary L-Log gamma curve for any of its 10-bit modes and the standard, ready-for-use HLG curve in its 10-bit 4:2:2 modes.

The Leica SL2 will be available on November 21st at a list price of $ 5995.

View our SL2 sample gallery

Go hands-on with the SL2

Watch DPReview TV’s first impressions

Press release:

A New Icon: Leica Camera Announces the New Leica SL2, Successor to the Trailblazing Leica SL

November 6, 2019 – Building on the foundation established in 2015 with the visionary Leica SL-System, Leica Camera proudly introduces the Leica SL2, the storied brand’s new icon and next evolutionary step towards building the perfect all-purpose camera. By listening closely to the valued feedback of photographers and existing SL owners, Leica made many efforts to push the envelope of technological innovation and performance while respecting its heritage of design and legacy. In addition to a technical marvel of pure performance and unmatched build quality, the Leica SL2 is also a joyous experience to use with improved ergonomics and more comfortable grip married to the well-established, simplified three-button control layout, further unifying the Leica design language across multiple product lines. While cutting-edge new features such as in-body image stabilization unlocks newfound potential from legendary Leica M-Lenses, it simultaneously augments the growing selection of SL-Lenses which are some of the finest optics Leica has ever produced. The Leica SL2 is the natural evolution of the innovative Leica SL, serving as a groundbreaking embrace of the future of digital photography and videography while paying homage to its respected history and lineage.

CMOS sensor with 47 megapixels for superior image quality

The unprecedented resolution of the SL2’s CMOS image sensor in full-frame format results in an unparalleled level of detail rendition and image quality. Enormous dynamic range, a color depth of 14 bits per RGB channel and a sensitivity of up to ISO 50,000 enable outstanding image quality in all lighting conditions. Even when combined with Leica TL lenses, which are designed for the smaller sensor format of the Leica TL2 and CL, the SL2’s sensor still delivers an excellent image resolution of over 20 megapixels.

Image stabilization through sensor-shift technology

In a major evolution of the SL, the Leica SL2 features a suspended sensor which adjusts its position in order to quickly and efficiently compensate for camera shake. This in-camera method even makes image stabilization available to lenses that are not equipped with their own.

Additionally, in multishot mode, the tripod-mounted camera can record up to eight consecutive frames, whereby the sensor is shifted in half-pixel increments in between every exposure. This key feature results in images with an incredible quadrupled resolution of around 187 megapixels, leading to an extreme increase in detail resolution.

Improved ergonomics for stress-free shooting in any situation

Despite significant technical improvements, the Leica SL2 is neither larger nor heavier than its predecessor and feels particularly compact to handle. This is due to the fully redesigned camera body, whose handgrip and the edges have been subtly refined for easier handling.

Improved body design paired with increased durability make the SL2 the perfect companion for all forms of shooting. The SL2’s IP54 certification ensures an elevated weather sealing for more rugged situations, while a new option to turn off noise reduction during long exposures allows for more hands-free shooting. Less worry about the weather and environmental situations means photographers can focus more on getting the shot.

Overall the design of the SL2 recalls more of the iconic Leica identity and traditional design DNA elements that the brand has become known and loved for.

Streamlined design with new status menus

The Leica SL2 offers an innovative user interface whose efficient design allows photographers to focus their attention on the creative process. The design alignment with the existing M and Q systems makes the adjustment even easier for existing Leica photographers.

The main recording parameters can be viewed on the rear display and adjusted quickly and easily with a simple finger tap. A click wheel, a joystick and three strategically placed, individually configurable buttons also contribute to a straightforward operation. Thanks to two dedicated status menus for stills and video recording, the parameters for either shooting mode can be adjusted entirely separately from each other.

Limitless connections

Featuring an L bayonet lens mount, the Leica SL2 is not only compatible with the ever-growing portfolio of SL-System lenses, but also with lenses of the TL-System and with the legendary lenses of Leica’s M, S and R-Systems via adapter, providing more than 170 Leica lens options, guaranteed to offer the right fit for any photographic scenario. The L-Mount Alliance expands this scope of possibilities even further, by giving SL2 photographers access to L-mount-compatible lenses from Sigma and Panasonic.

Maestro III processor for ultra-fast operation

The new Maestro III processor facilitates a superior operating speed that shines in many aspects of the SL2’s performance. The autofocus is significantly faster and allows for a virtually lag-free shutter release in any shooting situation, which is further complemented by the new Smart AF mode, which autonomously switches between focus priority and shutter release priority. Full-resolution recordings of consecutive images are possible at 10 frames per second with the focal plane shutter, and 20 frames per second with the electronic shutter. Thanks to two UHS-II-compatible SD card slots, raw files can be saved simultaneously in DNG and JPEG format.

Leica EyeRes® viewfinder with even higher resolution

The camera’s electronic viewfinder now boasts a resolution of 5.76 megapixels, allowing for a large, entirely natural-looking viewfinder image. Simultaneously, the experience is further enhanced when using the touchscreen, which has increased in size to a 3.2-inch diagonal, and now offers a significantly higher resolution of 2.1 megapixels.

Perfect tool for cinematographers

In addition to its great appeal for photographers, the Leica SL2 speaks the language of cinematographers, as the camera is able to record up to 60 frames per second in Cine 4K mode, and up to 180 frames per second in Full-HD mode. Activating Cine mode transforms the SL2 into a manually controlled cine camera as ISO becomes ASA, the shutter speed is marked in degrees on the rotary disk shutter, and the f-stops indicating the aperture ratio are replaced by T-stops, which measure the actual amount of light transmitted through the lens. Connecting audio equipment to the Leica SL2 no longer requires the use of adapters, as the camera now features a build in headphones and mic jack, complemented by a fully-fledged HDMI connector for external monitors.

The Leica SL2 is available in Leica Stores and Leica Boutiques beginning November 21, 2019, at a recommended retail price of $ 5,995.

Leica SL2 specifications

Price
MSRP $ 5999
Body type
Body type SLR-style mirrorless
Body material Magnesium alloy
Sensor
Max resolution 8368 x 5584
Image ratio w:h 3:2
Effective pixels 47 megapixels
Sensor size Full frame (36 x 24 mm)
Sensor type CMOS
Processor Maestro III
Color space sRGB, Adobe RGB
Color filter array Primary color filter
Image
ISO Auto, 100-50000 (expands to 50-50000)
Boosted ISO (minimum) 50
White balance presets 8
Custom white balance Yes
Image stabilization Sensor-shift
CIPA image stabilization rating 5.5 stop(s)
Uncompressed format RAW
File format
  • JPEG
  • DNG (14-bit)
Optics & Focus
Autofocus
  • Contrast Detect (sensor)
  • Multi-area
  • Center
  • Selective single-point
  • Tracking
  • Single
  • Continuous
  • Touch
  • Face Detection
  • Live View
Autofocus assist lamp Yes
Manual focus Yes
Number of focus points 225
Lens mount Leica L
Focal length multiplier 1×
Screen / viewfinder
Articulated LCD Fixed
Screen size 3.2
Screen dots 2,100,000
Touch screen Yes
Screen type TFT LCD
Live view Yes
Viewfinder type Electronic
Viewfinder coverage 100%
Viewfinder magnification 0.78×
Viewfinder resolution 5,760,000
Photography features
Minimum shutter speed 1800 sec
Maximum shutter speed 1/8000 sec
Maximum shutter speed (electronic) 1/40000 sec
Exposure modes
  • Program
  • Shutter priority
  • Aperture priority
  • Manual
Built-in flash No
External flash Yes (via hot shoe)
Flash X sync speed 1/250 sec
Drive modes
  • Single
  • Continuous
  • Interval
  • Exposure bracketing
  • Multishit
Continuous drive 20.0 fps
Self-timer Yes
Metering modes
  • Multi
  • Center-weighted
  • Spot
Exposure compensation -3–5 (at 1/3 EV, 1/2 EV steps)
AE Bracketing ±3 (3, 5 frames at 1/3 EV steps)
Videography features
Format MPEG-4, H.264
Modes
  • 4096 x 2160 @ 60p, MOV, H.264, Linear PCM
  • 4096 x 2160 @ 50p, MOV, H.264, Linear PCM
  • 4096 x 2160 @ 30p, MOV, H.264, Linear PCM
  • 4096 x 2160 @ 25p, MOV, H.264, Linear PCM
  • 4096 x 2160 @ 24p, MOV, H.264, Linear PCM
  • 3840 x 2160 @ 60p, MOV, H.264, Linear PCM
  • 3840 x 2160 @ 50p, MOV, H.264, Linear PCM
  • 3840 x 2160 @ 25p, MOV, H.264, Linear PCM
  • 3840 x 2160 @ 23.98p, MOV, H.264, Linear PCM
  • 1920 x 1080 @ 120p, MOV, H.264, Linear PCM
  • 1920 x 1080 @ 100p, MOV, H.264, Linear PCM
  • 1920 x 1080 @ 60p, MOV, H.264, Linear PCM
  • 1920 x 1080 @ 50p, MOV, H.264, Linear PCM
  • 1920 x 1080 @ 30p, MOV, H.264, Linear PCM
  • 1920 x 1080 @ 25p, MOV, H.264, Linear PCM
  • 1920 x 1080 @ 23.98p, MOV, H.264, Linear PCM
Microphone Stereo
Speaker Mono
Storage
Storage included Dual SD card slots (UHS-II supported)
Connectivity
USB USB 3.1 Gen 1 (5 GBit/sec)
HDMI Yes (10-bit output)
Microphone port Yes
Headphone port Yes
Wireless Built-In
Wireless notes 802.11ac + Bluetooth
Remote control Yes (via smartphone)
Physical
Environmentally sealed Yes
Battery Built-in
Battery description BP-SCL4
Battery Life (CIPA) 370
Weight (inc. batteries) 835 g (1.84 lb / 29.45 oz)
Dimensions 146 x 107 x 42 mm (5.75 x 4.21 x 1.65)
Other features
Orientation sensor Yes
Timelapse recording Yes
GPS None

Articles: Digital Photography Review (dpreview.com)

 
Comments Off on The Leica SL2 is a refined full-frame camera with in-body stabilization, fast burst shooting and capable video features

Posted in Uncategorized


Snapdragon 845 will bring 10-bit color, faster burst and more to next year’s smartphones

07 Dec

With smartphones, image processing is as important—if not more important—than the camera hardware components themselves, which is why the chipset is a crucial element in the imaging pipeline. Most Android smartphones come equipped with Qualcomm’s Snapdragon chipsets, and the company has just unveiled its latest top-end product, the Snapdragon 845.

We will probably see the Snapdragon 845 in many of 2018’s high-end devices, and that’s a very good thing for the camera system.

As you’d expect from any new chipset, it’s faster than the predecessor Snapdragon 835, comes with more integrated AI processing power and supports higher data speeds. However, the Snapdragon 845 also offers a range of important improvements in the imaging department.

Images can now be captured in 10-bit color with a Rec. 2020 gamut, offering a wider range of tones and hues than the previous 8-bit color. While that’s impressive, the 845’s capability to shoot 60 frames per second at 16MP is even more important when you consider image stacking applications, such as HDR modes or low-light modes that combine several frames to average out noise and improve overall quality.

Another area of improvement is slow-motion video. Next year’s Android flagships will be able to record an impressive 480fps slow motion at 720p in HDR—unfortunately, 1080p resolution will still be limited to 120 fps, lagging behind the current iPhones’ 240 fps capability. Qualcomm is catching up with Apple in terms of video frame rates, though. Like the iPhones 8, 8Plus and X, Snapdragon 845-equipped phones will be able to record 4K footage at 60 fps.

The Xaomi Mi 7 will be the first 2018 model to come with the new chipset, but it’s also expected to be installed on the Samsung Galaxy S9 (which may also come with a variable aperture…). Other brands will likely follow soon after, giving mobile photographers a lot to look forward to in 2018.

Articles: Digital Photography Review (dpreview.com)

 
Comments Off on Snapdragon 845 will bring 10-bit color, faster burst and more to next year’s smartphones

Posted in Uncategorized


How to Create a Dynamic Zoom Burst Photograph

11 Jan

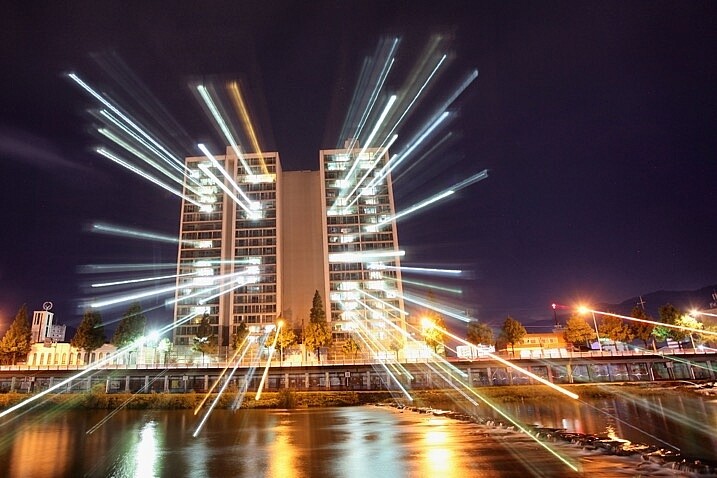
Who doesn’t love warp speed? In this article, you’ll go hurtling into the future at warp speed nine, and you don’t need any federation star fleet spaceships to do it! A DSLR camera with a zoom lens and a tripod is the only equipment you’re going to need for this exciting technique. There are similarities to light painting by camera rotation, and the zoom burst is indeed another form of kinetic light painting. Let’s take a look at this technique, what it will give to your photos, and how to do it.

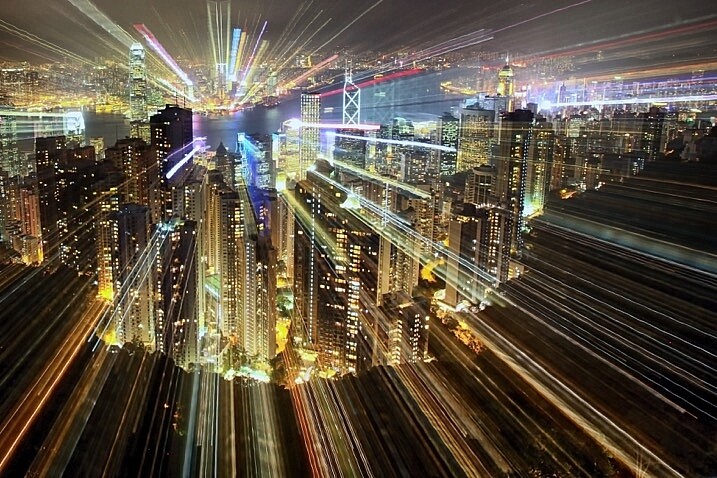
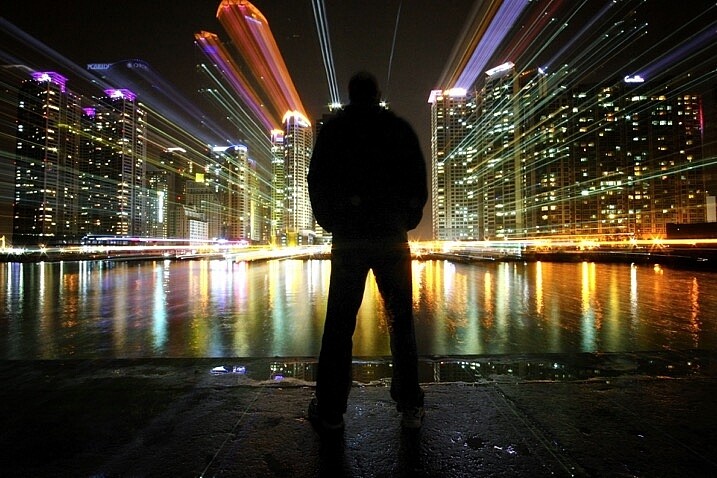
zoom burst photo cityscape

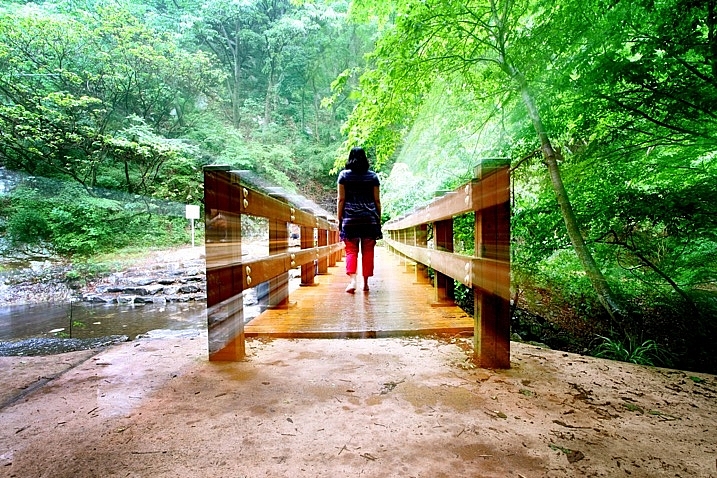
In this photo, a friend stood still in front of Marine iCty in Busan.

What does this technique add to your photograph?

Put simply, this gives a still frame a much more dynamic edge. This article will look at how you can apply zoom bursting to architectural photos and is best used in an urban environment. The nature of still frames is of course that they’re a single moment, by changing the focal length during long exposure you can add movement and urgency to your frame. The zoom also produces leading lines within your frame that all lead up to your main subject within the frame.

How to take zoom burst photographs

Taking a zoom burst photo is a simple technique, in fact, you can even do this handheld. The effect is achieved by changing the focal length of your camera lens during a long exposure. Follow these steps:

  1. Choose a scene that has mixed areas of light. You can use a forest with mottled light, or an apartment building where some lights are on and some are off.
  2. The exposure should be between half a second and 2 seconds long.
  3. You can take this photo handheld but it’s better to use a tripod.
  4. Change the focal length of the lens during the exposure. Zooming out tends to work better during the night for longer exposures, and zooming in works better during the day.
zoom burst lights

A photo that uses zoom with no stationary phase. This photo is colorful and abstract.

How to take zoom burst photos that show structures

Now that you know how to make a simple zoom burst, which looks abstract in nature, it’s time to move a step further. Now you are going to see how you can introduce architectural structures into this frame.

1 – Choose the correct location

Not all locations work well for zoom bursts, especially if they’re too cluttered. You need to choose a building that’s well lit and not surrounded by others. There are other options you can look at as well such as Ferris wheels or sculptures. Any location you choose should allow you to zoom into the structure, and then zoom out on the lights that surround it.

zoom burst too many buildings

When there are too many building in the frame, the zoom burst shot can get busy.

2 – Set the camera on a tripod

If this is going to be a long exposure of 25 or 30 seconds, you will have to use a tripod. You need to secure the tripod in position, making sure it doesn’t move about. A lot of tripods let you hook your camera bag to the extendable center, doing so will steady the tripod. Apply the same logic you would use to attain a sharp image. The focal length movement of the lens will prevent you getting maximum sharpness, though.

3 – Select the right lens

The best lens for this type of photo is a super zoom, one that goes from 18mm-300mm. A super-zoom gives you maximum flexibility over composition and allows for more creative photographs. If you don’t have a zoom with this kind of range, you can use a kit lens. The 18-55mm lens works very well for the zoom burst.

4 – Focus the camera using Live View

Now compose your photograph in the position you intend to finish your zoom burst. The final composition will be at the wider or widest end of your lenses focal length. Turn the camera’s Live View function on, and zoom into the central structure you wish to focus on. Use the lens’s manual focus so that the image on the Live View screen is sharp. Keep the camera lens in manual focus to prevent loss of focus during the exposure. Keep a mental note of the focal length where you focused, especially if that isn’t the widest part of the lens.

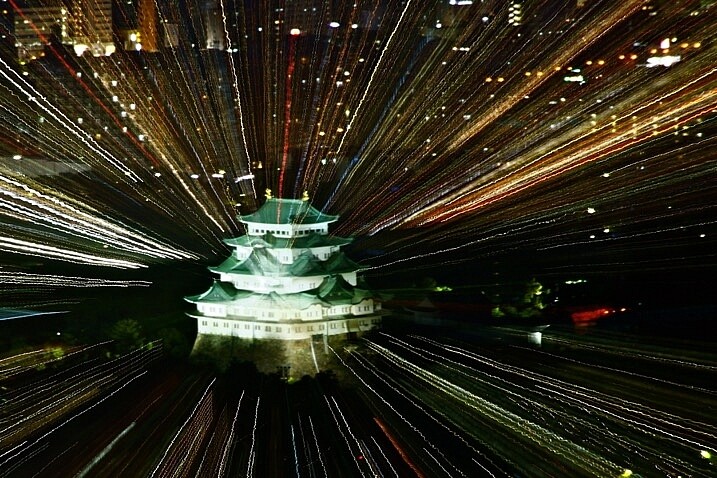
castle zoom burst photo

In this photo, Nagoya castle was focused on using a zoom. I zoomed into the castle.

5 – Zoom into the target area

Select the area of the scene you want to have as the center of your zoom, this should have been decided already during initial scene composition. Ensure that all your settings remain the same, as this is the final step before you begin the exposure. Set the camera to expose for 25-30 seconds, at f/8 or f/11. You can use a smaller aperture if you need to in order to get a longer exposure.

6 – Carry out the zoom burst

Set the camera to the 2-second timer (or 10 seconds if you want to prepare yourself for the zoom). Hit the shutter button to begin the countdown to the exposure. At the point when the shutter is about to open begin slowly zooming out. As the camera is exposing, continue to zoom out keeping it as smooth as possible to avoid camera shake.

You should be zooming out for between two and five seconds, the longer the zoom is the more pronounced the light trails will be in the image. As you zoom keep an eye on the focal length of the lens so you finish at your composed position.

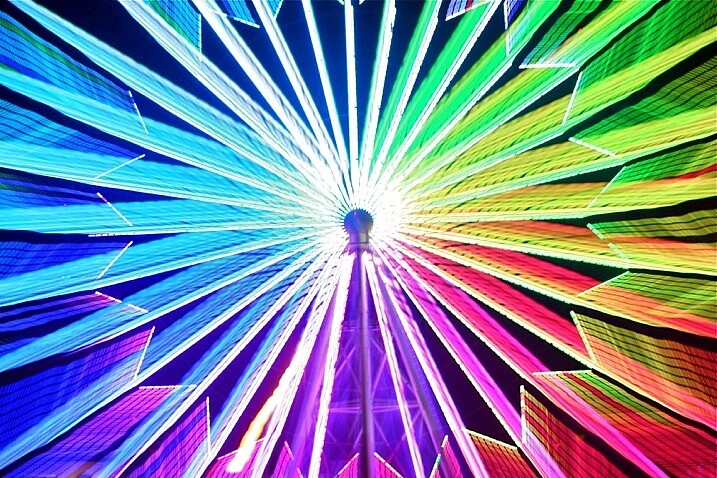
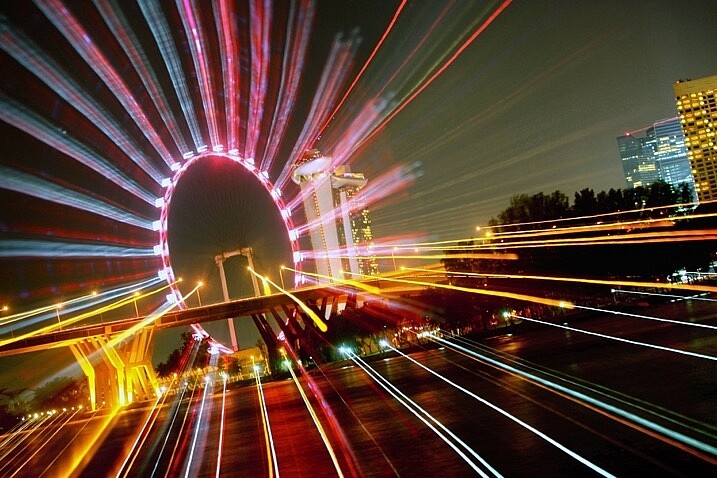
The ferris wheel is a great subject for zoom bursts. The middle is empty, and there is a ring of light to zoom out.

The Ferris wheel is a great subject for zoom bursts. The middle is empty, and there is a ring of light to zoom out.

7 – Allow the camera to finish the exposure

Once you have finished the zoom remove your hand from the lens, without moving the camera. The camera will continue to expose for 20-25 seconds depending on the exposure time you used. The image will now show zoom burst lights and architectural structures in the same exposure.

8 – Carry out post-processing work on the photo

The result in-camera will look nice, but adding contrast in post-processing is important. The image has “lost” five seconds of exposure time, so adjusting the contrast helps. You can use NIK color efex, which has a filter called pro-contrast and is an excellent choice for this type of photo. The centered position of the zoom can’t be adjusted in camera, though cropping the photo in post-processing allows you to move the zoom to an off-center position.

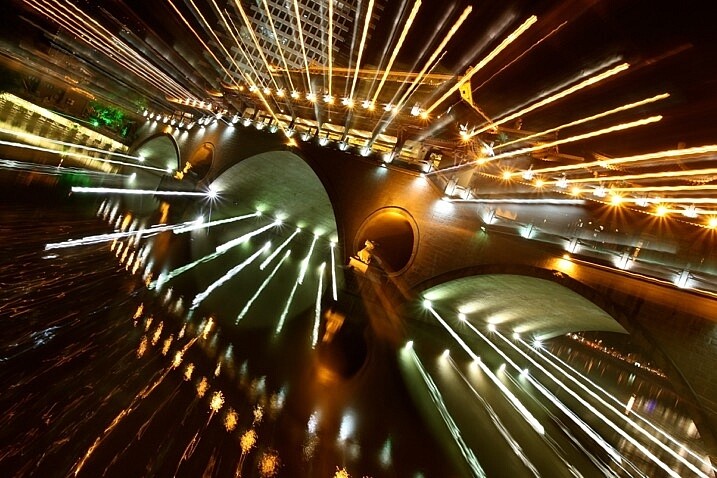
The bridge lit with many lights is a good subject for a zoom burst.

The bridge lit with many lights is a good subject for a zoom burst.

Where should I go to take zoom bursts?

The best place to take this type of photograph is in a city, one that’s well lit, and has interesting architecture. A Ferris wheel is a great structure to use as it’s circular, which helps with the centered nature of the zoom burst. Other architecture can also work as long as it’s alone and not surrounded by other structures. A cityscape with many buildings can look too busy with too many light streaks in one frame.

You can even take zoom burst photos during the day, but you will need an ND filter to do this. An ND filter that allows you to shoot for 30 seconds will allow you to create a zoom burst using the steps listed above, though the zoom should last longer.

img_2957

I look forward to seeing your photos using this zoom burst technique, please post any images you have in the comments section below.

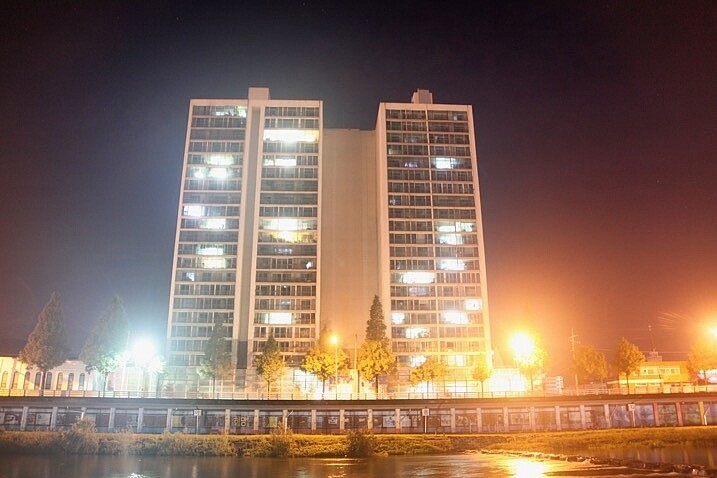
This is a good example of a lone building with lights on.

This is a good example of a lone building with lights on.

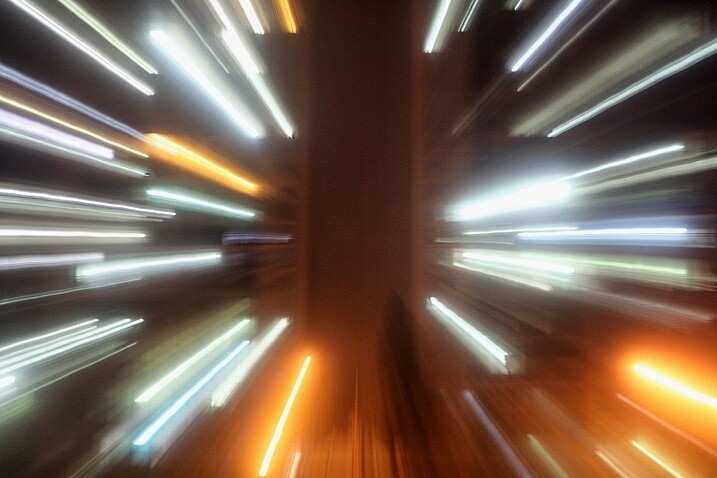
In this photo only zoom is used, there is no stationary phase.

In this photo only zoom was used, there was no stationary phase.

This photo shows how a zoom burst and static phase produces an image.

This photo shows how a zoom burst and static phase produces an image combining light streaks and architecture.

googletag.cmd.push(function() {
tablet_slots.push( googletag.defineSlot( “/1005424/_dPSv4_tab-all-article-bottom_(300×250)”, [300, 250], “pb-ad-78623” ).addService( googletag.pubads() ) ); } );

googletag.cmd.push(function() {
mobile_slots.push( googletag.defineSlot( “/1005424/_dPSv4_mob-all-article-bottom_(300×250)”, [300, 250], “pb-ad-78158” ).addService( googletag.pubads() ) ); } );

The post How to Create a Dynamic Zoom Burst Photograph by Simon Bond appeared first on Digital Photography School.


Digital Photography School

 
Comments Off on How to Create a Dynamic Zoom Burst Photograph

Posted in Photography


Sony releases a6300 videos showing AF tracking and 8 fps live view burst performance

04 Feb

Sony has released a video showing the AF tracking and 8 fps live view burst of the newly announced a6300, as well as a video demonstrating AF with subject tracking in 4K video.

The camera appears to have impressive AF subject tracking accuracy, following not just the dog but the dog’s face in the demo. We’ll reserve judgement until we get our hands on one, but previous Sony cameras had a tendency to wander off to other areas of the subject when using general subject tracking, so these results indeed appear impressive. The expansive 425-point array also mean the camera can track the subject to almost any point in the frame, and all of these points purportedly work with A-mount lenses mounted via a LA-EA3 adapter (we expect Canon mount lenses to work as well, with appropriate adapters).* Have a look below.


Sony a6300 ‘4D Focus’ demo


The a6300 also potentially addresses one of the largest shortcomings of mirrorless cameras for action shooting: the often stop-motion playback of last-shot images, as opposed to a live feed, when shooting continuous bursts. We recently reported on Nikon’s calling out of this particular weak point of mirrorless cameras, so Sony’s response in the a6300 today seems timely. Essentially, the a6300 offers a live feed in the EVF or on the LCD during 8 fps continuous shooting, in between what seem to be very short blackouts. This should make it much easier to both pan the camera and still keep your subject in the frame, or keep your selected AF point(s) over your subject. 

The video above, in addition to one Sony presented at the press event earlier today, demonstrate a promising live feed during 8 fps bursts, but ultimately its utility will be largely dependent on the length of those blackouts between shots. Sony claims that the length of blackouts is competitive when compared to a <$ 1000 DSLR.

While that might seem like a relatively low bar, the fact that Sony is getting a live feed off the sensor at all in between shots at 8 fps represents significant progress in the realm of mirrorless cameras. In comparison, a DSLR doesn’t have to do anything but return the mirror to get you this ‘live feed’ through the optical viewfinder between shots.


Autofocus in video


Sony has also released a video demonstrating impressive AF in 4K video recording with native mount lenses. There appears to be little hunting, with fast refocusing and even subject tracking available during movie recording. Have a look above.

This should be a boon for videographers, assuming Sony now allows one to easily specify the subject before tracking it. On the note of specifying a subject, it’s a huge shame that a touchscreen isn’t paired with this capable video AF system for focus point selection.

At least on paper, we think that these advances mark some significant progress for mirrorless (it’s too bad we can’t say the same for the a6300’s ergonomics), and we’ll be curious to see how the systems perform when we get our hands on a production a6300.


* It remains to be seen if subject tracking is available in any mode save for ‘Wide’ with 3rd party lenses though: subject tracking has been severely limited with 3rd party glass on the a7 II and a7R II due to the inability of the photographer to specify the subject, since it’s only available in Wide area mode.

Articles: Digital Photography Review (dpreview.com)

 
Comments Off on Sony releases a6300 videos showing AF tracking and 8 fps live view burst performance

Posted in Uncategorized


Bursting the Burst Mode Myth: [What I Learned from Shooting with Film]

29 Jul

Over the next week we’ll be featuring a mini-series of posts from Rachel Devine (author of our kids photography eBook) in which she’ll be talking about five reasons learning photography on film cameras made her the digital photographer that she is today.

Here’s today’s on Busting the Burst Mode Myth.

no burst mode here

There are a few things I hear as top advice for budding children’s photographers and parents who want to take better photos of their children. I think that setting the camera to burst mode and holding the shutter down while taking photos is the one I hear most often and makes me cringe hardest. Called the “spray and pray” method, lots of digital photographers rely on taking hundreds of images (I have actually heard of thousands of frames shot for one portrait session) at a sitting to get a handful of good shots.

When keen new photographers ask for advice on how to get better photos of kids (their own or for a client) and are told, “It is digital, it will not cost you anything, just put the camera in burst mode and take as many as you can and you are bound to get a good one in there” they are being fed bad advice…or rather non-advice.

I started my photography career on film 16 years ago and when I did, those who swear by the spray and pray method may be shocked to learn that there were lots of other kid and family photographers who had to get the entire session worth of images for their clients on just a few rolls of film. And they did…every time.

Here is why shooting in burst mode not best for everyone and what I think is better advice for those really wanting to get better at taking photos of kids.

Burst Mode does actually cost something

Time:: It takes time on your end to weed through those hundreds of resulting shots. Culling images is a time sucking and soul zapping process where you will be tied to your computer for hours sorting, comparing and slitting hairs. It may be fun the first few times you go through your images, but it will wear on you over time and if you get into the habit of having to shoot this way, you will also have to allow time for sorting and editing all of those images.

Not learning to see:: If you do have to resort to shooting in burst mode, then things really are on auto. Burst mode does not allow for the photographer to make changes to the image and exposure settings while they are taking the shots. With single images taken thoughtfully, the photographer can fine tune the exposure settings and compose carefully. Learn to recognize what makes a great image and then set out to purposefully shoot that.

no burst mode here

Missing Details:: When the camera is set to burst mode, the focus is on quantity and quality tends to take a back seat. People tend to forget to scan the shot for details and end up with an entire series of cute expressions on a child who seemingly has a tree growing out of the top of their head. That photographer can now tack extra time onto their post processing routine to edit that sucker out. I have seen tags left on clothes, dirty faces, cars parked prominently in the background. Things get missed easily in the rapid fire fury.

Connection with the subject:: Finally, I have heard an argument in favor of burst mode that it helps avoid missing any special moments. Really, the wham-bam-thank you ma’am approach to photography may seem like a good idea for kids because they are fast and have short attention spans, but getting them involved in the whole experience is so much more enriching for both photographer and subject. These are not wild animals on safari, but tiny human beings who can and should bring personality to the table when they are active participants in your sessions, not just being shot at. This is especially true for people who enjoy documenting their own children over and over again. Slow down, take a moment to breathe, observe and photograph and then breathe again…it is then when you will not only be photographing the special moments, but also participating in them.

If that all does not speak to you, let’s talk cash…

Shutter actuations:: Your camera does have a shelf life and it really is not determined by when the latest and greatest new model is released, but more by how many times the shutter has actually clicked. While the total end number can vary by camera model and may seem really quite high, it will be reached faster if you are taking hundreds of images each time you go to use your camera.

Where burst mode does come in handy

no burst mode here

Shooting big group portraits :: Great for getting extra shots of the same scene (especially when mounted on a tripod) where you may need to do a head swap because someone closed their eyes.

Sports :: That is pretty much why it is called Sports Mode

Portraits with a point and shoot camera :: The shutter lag present in point and shoot cameras (the time it takes the camera to actually capture the shot from when you press the shutter button is called shutter lag and is very apparent in point and shoot cameras) can cause you to miss the moment even when you are shooting carefully and are ready for it. Setting the little compact cameras to sports mode can help overcome this technical hurdle.

Back in the days of film, we were limited by budget as we had to pay cash money for the film and processing. That made it necessary to shoot mindfully. We ended up with more images that we loved and fewer wasted frames. Today with digital, the costs are hidden, but there are still costs. Take the time to set up the sessions, meter the light, compose and be present while you are photographing your little subjects. Practice shooting digital with the discipline of film. You just may find that you enjoy the act of photographing kids even more than you thought possible.

For more on the topic of Kids Photogrpahy – Check out Rachel’s eBook Click! How to Take Gorgeous Photos of Your Kids.

kids photography tips

Post originally from: Digital Photography Tips.

Check out our more Photography Tips at Photography Tips for Beginners, Portrait Photography Tips and Wedding Photography Tips.

Bursting the Burst Mode Myth: [What I Learned from Shooting with Film]


Digital Photography School

 
Comments Off on Bursting the Burst Mode Myth: [What I Learned from Shooting with Film]

Posted in Photography


A Sudden Burst of Rain

21 Jun

When Jorgen arrived we had a great overcast sky without a hint of rain, but shortly after getting on the road the downpour started.  So much so that we had to abandon the first location (without getting a single shot) and headed south trying to outrun the edge of the storm… it continued to catch up with us as we hurried in and out of the car for shelter as we chased after these images.

And catch them we did.

One of my all-time favorite quick shoots, even though Jorgen, my camera and I all got soaked.


Jake Garn Photography

 
Comments Off on A Sudden Burst of Rain

Posted in Uncategorized


Nikon D300 Hands free bracketing burst for HDR tip.

05 Apr

Please Read: The D300 allows Auto-bracketing up to 9 stops with 9 shots. That’s -4 to +4 stops and at +4 shutter speeds can get low and motion blur becomes a problem. This will allow you to program the camera to take all 9 shots at varying exposures automatically. Also, apparently you don’t need to set the number of frames per interval to 9. It can be set to 1 x 1 = 1 and it will force the camera to take the number of shots configured in auto-bracketing back-to-back. I don’t know why it works that way. So if you have bracketing set to 9F and interval timer set to 2 x 1 = 1 it will actually take 18 pictures. (9 at each interval) Another correction on the video: When I have the Interval set for 1 second, and the display reads 5 x 1 = 5 I say that is 5 frames every 5 seconds for a total of 25 seconds. That is wrong, it is one frame every second for 5 frames for a total of 5 seconds. And one last note about auto-bracketing: The feature has a ceiling of 30 seconds to 1/8000 seconds. Any auto-bracketing exposures beyond that will be exposed at 30s or 1/8000s. You must either change your ISO, apeture or use manual/bulb mode beyond those limits.

From the two leaders in the category we take a closer look at the Nikon D300 and the Canon 40D. they both share a lot of technology with their bigger siblings in a more affordable package.
Video Rating: 4 / 5