RSS
 

Posts Tagged ‘Bubble’

Video: What it’s like to photograph hockey games inside the NHL ‘bubble’

29 Aug

Like many professional sports, the National Hockey League (NHL) is playing its playoff-only season in a containment bubble to minimize the risk of spreading COVID-19 amongst its ranks. In addition to the players, this bubble also requires all team personnel, photographers included, to quarantine and work inside empty arenas that would normally be filled with fans.

To highlight how this looks for the photographers and editors inside their respective bubbles, the NHL has published a behind-the-scenes video showing what goes on before, during and after a game.

Throughout the six-minute video, we hear from NHL Images Senior Manager, Kara Bradley, as well as NHL photographers Chase Agnello-Dean, Mark Blinch and Dave Sandford. Each of them share their experiences thus far, showing that while not much different than shooting a regular game from a capture standpoint, the sheer number of games played back-to-back makes it difficult to get images turned around and remote cameras set up.

Here are a few fun stats from the video:

  • Photographers usually operate five cameras at once: two handheld (typically one wide-angle and one telephoto) and three remote cameras (usually one at center ice and one at each net)
  • The photographers average 15,000 steps a day, many of which are up and down stairs and rafters to set up remote cameras and strobes
  • Around 3,000 images are taken in low-scoring games while high-scoring games can see upwards of 7,000 images captured
  • So far most of the photographers have shot around 46 games in just 21 days

Having shot plenty of hockey games myself, I know how challenging even a single game in a night can be. To be shooting two a day — in addition to auxiliary shots before and after the game — for nearly a month straight is absolutely absurd. In the words of Dave Sandford from the video, ‘it’s like groundhog day here.’

Articles: Digital Photography Review (dpreview.com)

 
Comments Off on Video: What it’s like to photograph hockey games inside the NHL ‘bubble’

Posted in Uncategorized


New owners completely redesign Mk ll Meyer Optik G?rlitz Trioplan 100 ‘soap bubble’ lens

17 Jun

The new owners of the Meyer Optik G?rlitz lens brand say they’ve completely redesigned the optical designs and much of the mechanics of the Trioplan 100mm f2.8 lens so it produces better resolution and contrast while controlling internal reflections more effectively.

Famous for its soap-bubble bokeh the original Trioplan 100 was recreated in 2015 by a company called net SE that eventually went bankrupt taking customer’s pre-order money with it. The new owners, Optical Precision Components, has produced its lenses up-front and has just started shipping them.

A OPC Optics spokesperson told us the Mk ll lens has a completely new optical construction and many newly designed mechanical parts inside too. ‘As we are an optics company, rather than a marketing company, we have the know-how and equipment to analyze and optimize optical systems in-house’, the spokesperson tells us. ‘This led us to completely redesign the optical construction of the Trioplan 100, as we especially wanted to improve its resolution and contrast performance.’

According to the spokesperson, ‘the new optical design meant we needed to use different glasses and differently shaped elements, which in turn required a lot of mechanical changes. We prioritized the optics first and everything else is built around that new design.’

The spokesperson further elaborated on the differences between the two lenses, saying (edited for clarity and brevity):

‘All the parts inside and outside the lens have been produced completely new, but some retain the same design as those used in the Mk I version. As we have changed the shape of the main elements in the design and changed the distance of the elements from the aperture, we also needed to redesign the mounts that hold the elements in place [and change] the way the aperture unit works, as in the Mk l version it had no hard stops when it closed or opened completely. That caused damage to the aperture, as the blades could get bent when the aperture ring was turned to its full extent. Our Mk II the aperture has hard stops, so you can turn the aperture ring and really hit against the end without damaging anything. Overall we changed many small things to produce a lens of much higher quality and to make the focusing smoother, but most important are the changes to the lens elements and those main mechanical parts that increase durability.’

As with the original model, this new version uses just three elements in its construction, and a newer 15-blade aperture diaphragm helps to form the characteristic round out-of-focus highlights in the background. The soap bubble effect is often enhanced through the use of macro extension tubes to bring the minimum focus closer and thus exaggerate the size of the bubbles. The lens is manual focus only and takes a 52mm filter.

OPC Optics says it has also redesigned the rest of the Trioplan series as well as its Primoplan lenses. Again, in these models the aim is to improve resolution, contrast and to reduce flare while building a more durable construction.

The Meyer Optik G?rlitz Trioplan 100 f2.8 ll is available in mounts for Canon EF, Fujifilm X, Leica L, Leica M, M42, MFT, Nikon F, Pentax K and Sony E cameras. It costs €999 (approx. $ 1100) and is shipping now. For more information see the Meyer Optik G?rlitz website.

Articles: Digital Photography Review (dpreview.com)

 
Comments Off on New owners completely redesign Mk ll Meyer Optik G?rlitz Trioplan 100 ‘soap bubble’ lens

Posted in Uncategorized


Tips for Doing Fine Art Underwater Bubble Photography

04 Nov

The post Tips for Doing Fine Art Underwater Bubble Photography appeared first on Digital Photography School. It was authored by Joanne Taylor.

tips-for-doing-underwater-bubble-photography

Doing underwater bubble photography is both fun and challenging! Read on for easy-to-follow techniques, tips, and tricks for you to try no matter which underwater environment you’re in!

underwater-bubble-photography

Safety

For your safety, have someone on land, in a boat or in the water with you to act as a spotter. Have them keep a floatation device with them at all times too. Underwater photography can be tiring, and you might feel the need for assistance from time to time.

Have drinking water accessible regardless of the weather. Be sure to have sunscreen on and beware of the sun reflections off the water: sunburns hurt!

underwater-bubble-photography

Equipment

There are many devices you can use, including a GoPro, underwater phones, and the disposable ones they sell at the drug store. However, the best way to achieve shots like these is to have an SLR camera within a professionally-made underwater housing. You can still try these types of shots with whichever device you do have, but it is easier to take them with a lot of control going in.

I achieved these shots with a Nikon D7100 and a custom Ikelite housing.

You can shop for professional underwater equipment from a variety of places, but Ikelite – www.ikelite.com has a strong reputation internationally, and for good reasons. You can also check out Mozaik Underwater Camera – www.housingcamera.com

Both websites sell camera and housing packages for underwater photography and also individual housing cases. You definitely want reliable, trustworthy equipment to achieve consistent, sharp images.

Equipment check

Please note that human error causes most floods (where water breaches the housing compartment, and you risk losing your camera and every photo you’ve taken). Common causes of floods are sand, hair, or dust in the O-ring (which you should lightly lubricate every so often) and improperly secured latches.

With a professional underwater housing, you have the same capabilities underwater as you do on land. This saves much time if you’re in deep water – no need to climb in and out of the boat or in and out from the beach. Same for scuba diving – sometimes coming up from a deeper depth is simply not an option. For those using other devices, be sure to know the depth limit of the device, or you risk losing everything!

Tips for Doing Fine Art Underwater Bubble Photography

Camera settings and taking the first few shots

Make sure the lens on both the camera and the housing is clean. There is nothing worse than getting underwater, taking some fantastic bubble photos, and then seeing a sunscreen finger smear in the corner of each shot.

In underwater photography, your body will be moving, so too is the water and the bubbles. So if in doubt, use your camera in Auto Mode the first few times. Alternatively, try setting your camera to F22 and F20 at 1/2000th, 1/4000th, and rely on natural light.

Next, you are ready to get into the water and don’t forget to defog your goggles before putting them on (spit or a defogging spray work great).

Bring your equipment in and determine if it’s working underwater with a few test shots (aim at your feet) and then check the image on your viewfinder. Make any adjustments necessary.

Tips for Doing Fine Art Underwater Bubble Photography

Water and weather

Take into consideration the appearance of the water. You are looking for water clarity. Sometimes, the bottom can be churned up by a recent storm, and there can be a lot of debris. Debris can cause low visibility and definitely with underwater photography, the clearer the water, the better.

If you are in a controlled setting such as a pool, the clarity of the water will depend on the chemicals added. If the water is cloudy due to improper chemical balance, there will be a hazy quality in all of the photographs.

The weather affects the light in your photographs. A cloudy day will allow you to use a flash if you have one. Only add a small amount of flash, or you run the risk of blowing out the bubbles entirely.

If you don’t have a flash, keep shallow and try taking photos in the top two feet or so as the light will only decrease the further down you go. If it’s raining, you can still take photographs. It is fun to get the water droplets falling on the surface of the water while bubbles are rising towards them.

When it’s a sunny day, light streams through the water surface and lights up the bubbles from behind. Try to take a few pictures with the sun in the shot as well.

underwater-bubble-photography

How to create bubbles with containers

Use a variety of containers for different sized bubbles. Try sand buckets, Tupperware, or other plastic bowls. Children’s stacking cups are great too, as long as they don’t have a hole or holes in the bottom. Anything can work (re-usable drinking bottles are great too) but avoid all breakables like glass.

Bring them one by one into the water, so they don’t float away. You would benefit from a helper to pass them to you, so it’s easier to juggle your camera and the buckets.

Start with the smallest, easiest to manage container, and work up to the largest as they are the hardest to maneuver underwater.

Take the container underwater by holding the opening directly over the surface and pushing it down underwater to catch the air inside. Practice tilting the cup slowly underwater to let the air trickle out in a trail of bubbles and practice tilting the cup quickly to let all the air out at one time.

Now take a few test shots of the air escaping the container. You might have to practice a few times not to catch your hand or the container in the shot.

Try taking the container deeper. Be patient until you get the right balance of speed of the bubbles versus shutter speed. Check your viewfinder and make any necessary adjustments regarding shutter speed, focal length, or the strength of your flash if you’re using one.

Tips for Doing Fine Art Underwater Bubble Photography

Try taking a series of images of bubbles using multi-shot (continuous shooting) for a better choice of images later.

Move into another section of the water for a variety of images. If you’re using the sun as a backlight, you may also have to angle your camera up towards the surface of the water to get a better shot.

How to create bubbles without containers

Take the containers out of the water and try kicking your feet and making lots of tiny bubbles.

Tips for Doing Fine Art Underwater Bubble Photography

Editing

Once you have downloaded your images, you are ready to edit.

Adobe Lightroom will make editing easy – though, you can use any editing software of your choice. Cropping will be your most used tool as you eliminate any hands, containers, or debris. Cropping is also necessary to zoom in on a section as you attempt to create the most aesthetically pleasing bubble photograph.

Tips for Doing Fine Art Underwater Bubble Photography

Occasionally, you may want to adjust the color of the photograph by making it bluer or taking all color away to see the bubble shapes in black and white.

Tips for Doing Fine Art Underwater Bubble Photography

Conclusion

Fine art underwater bubble photography takes a lot of patience, so relax and have fun. Bubbles are fragile, finite, and often hard to predict. Your best shots may be a string of bubbles, a cloud of little ones, or a single, large one.

Let’s see what you can do! Please share your underwater bubble photography with us in the comments!

The post Tips for Doing Fine Art Underwater Bubble Photography appeared first on Digital Photography School. It was authored by Joanne Taylor.


Digital Photography School

 
Comments Off on Tips for Doing Fine Art Underwater Bubble Photography

Posted in Photography


1969 US Geological Survey photo of a massive lava ‘bubble’ goes viral

07 Apr
Photo by JB Judd/USGS

A photograph captured by US Geological Survey (USGS) photographer JB Judd in 1969 is ‘going viral’ online this week. The photo shows a massive, symmetrical lava dome fountain that was captured during a 5-year-long eruption of the Kilauea volcano’s Mauna Ulu cone between 1969 and 1974.

The so-called lava “bubble” measured approximately 65ft / 20m in height, and it owes its Internet fame to this “Throwback Thursday” tweet by the USGS:

After a bit of digging, the internet managed to unearth Judd’s original photograph of the lava bubble, which seems to have been flipped horizontally, straightened, and edited to produce the image shared on Twitter. The USGS photo page lists the estimated height of the bubble as 50 to 75 meters, or approximately 164 to 246 feet, and describes symmetrical dome fountains such as these as “rare.”

The image is one of many public domain photos in the USGS photo archive. To see more, head over to the USGS website where you can browse the full collection.

Articles: Digital Photography Review (dpreview.com)

 
Comments Off on 1969 US Geological Survey photo of a massive lava ‘bubble’ goes viral

Posted in Uncategorized


Bikesphere: Car-Detecting Ring of Red Light Puts Cyclists in a Safety Bubble

09 Jun

[ By SA Rogers in Design & Products & Packaging. ]

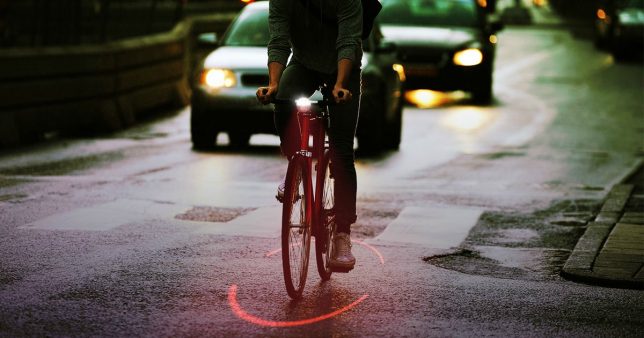
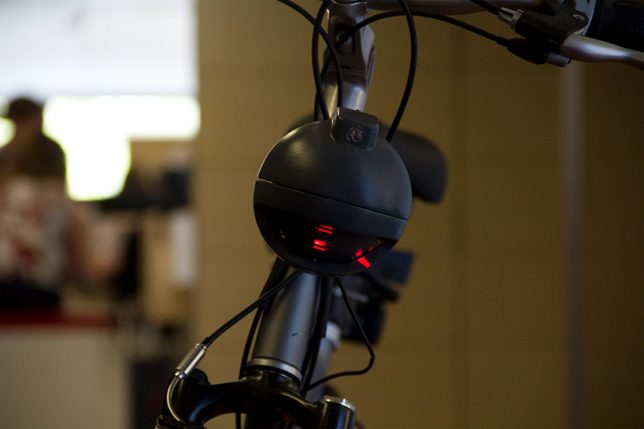
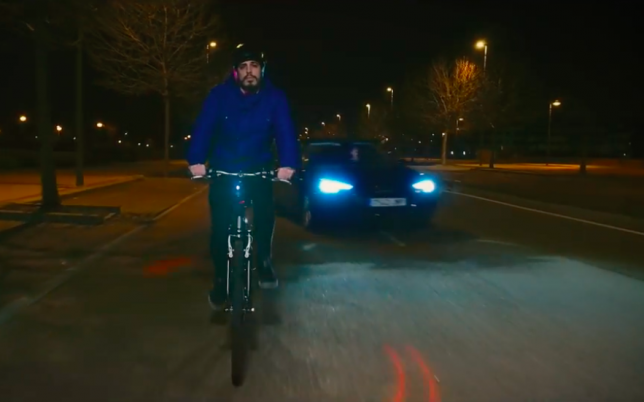
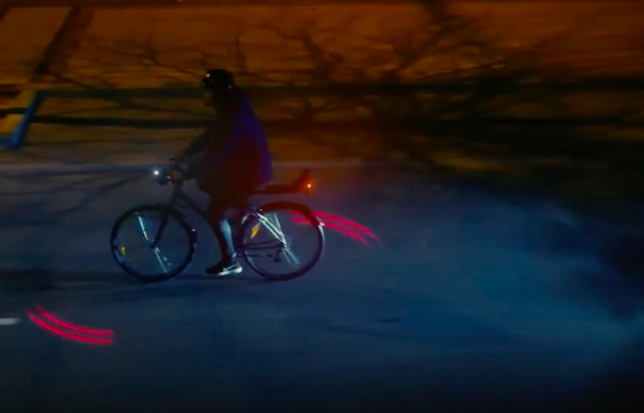
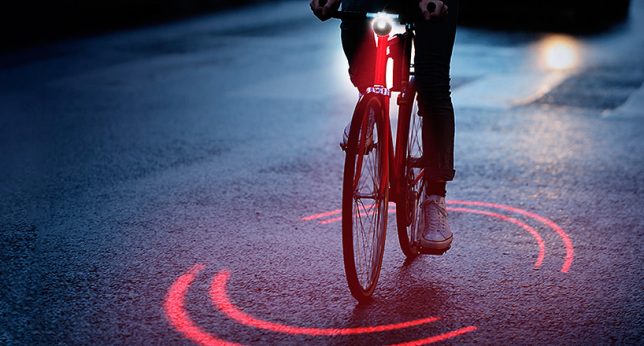
There’s no missing cyclists – or the zone of space you need to safely pass them – when they’ve got a ring of red light encircling them as they ride down the road. Michelin’s new open-source project, Bikesphere, features a light sensor and proximity detecting sensor that work together to monitor the environment around a cyclist and react accordingly if a car gets too close, pointing a double laser spotlight on the ground to define a safety area.

As it stands, riding a bike in an urban area can be a risky proposition, with more than 5,000 avoidable accidents happening every year due to cars passing cyclists at an unsafe distance.

During the day, the Bikesphere works like a normal light-detecting bike lamp, turning on when you go through dark areas as needed. By night, it’s ready to defend you, projecting a single-lined sphere for the entirety of your ride. When it can tell a car is coming, the light turns into a double line and starts to spin faster to alert both the cyclist and the driver.

Bikesphere is the first crowd-sourced idea to come to fruition through Michelin’s #TrendyDrivers movement, which aims to change the habits of drivers to make the roads safer. When an idea is approved, they fund the project to get it off the ground. Ultimately, the Bikesphere will be made public, so anyone who wants one can purchase the common components and download the plans to print the rest using standard 3D printers.

Share on Facebook


[ By SA Rogers in Design & Products & Packaging. ]

[ WebUrbanist | Archives | Galleries | Privacy | TOS ]


WebUrbanist

 
Comments Off on Bikesphere: Car-Detecting Ring of Red Light Puts Cyclists in a Safety Bubble

Posted in Creativity


Bubble Buildings: 13 Structures You’ll Wish You Could Pop

12 Jul

[ By SA Rogers in Architecture & Public & Institutional. ]

bubble buildings dome 4

Would the satisfaction that comes with popping bubble wrap scale up as the bubbles get larger and larger, until they’re big enough to cover entire buildings? These blobby bubble-shaped buildings tempt us to find out. Inflatable translucent structures offer space for gardens, bathrooms, museum extensions and even entire parks enclosed to keep out air pollution in a literal representation of the term ‘living in a bubble.’

SKUM Pavilion by Bjarke Ingels Group / BIG

bubble buildings skum 1

bubble buildings skum 2

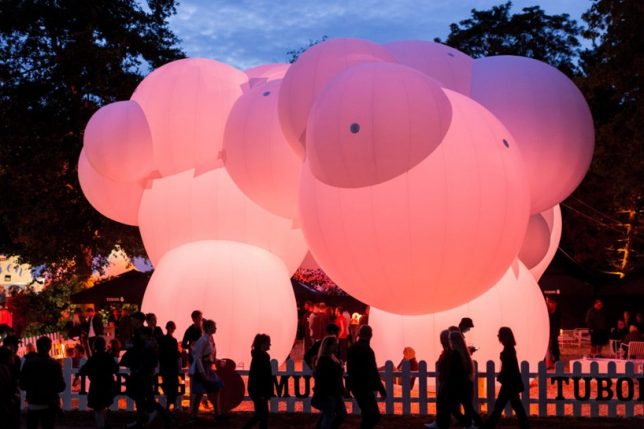
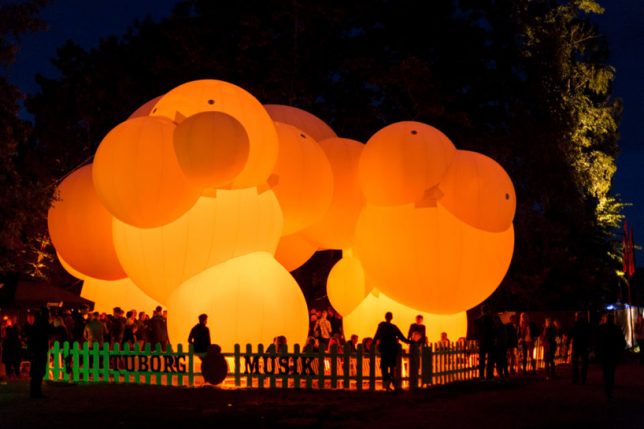
Named ‘SKUM,’ the Danish word for ‘foam,’ this blob-shaped structure is an inflatable balloon pavilion illuminated with colored LED lights by Bjarke Ingels Group / BIG for the CHART Art Fair in Copenhagen. “The idea of using a bouncy castle as material came about because one can create any kind of structure with the material. It is inflatable and easy to pack down and inflate again, but it has been much harder to produce than we thought. The manufacturer almost gave up, and we were under a massive time pressure, but the result is the most beautiful you can imagine.”

Real Bubble Building by DUS Architects

bubble building dus 1

bubble building dus 2

bubble building dus 3

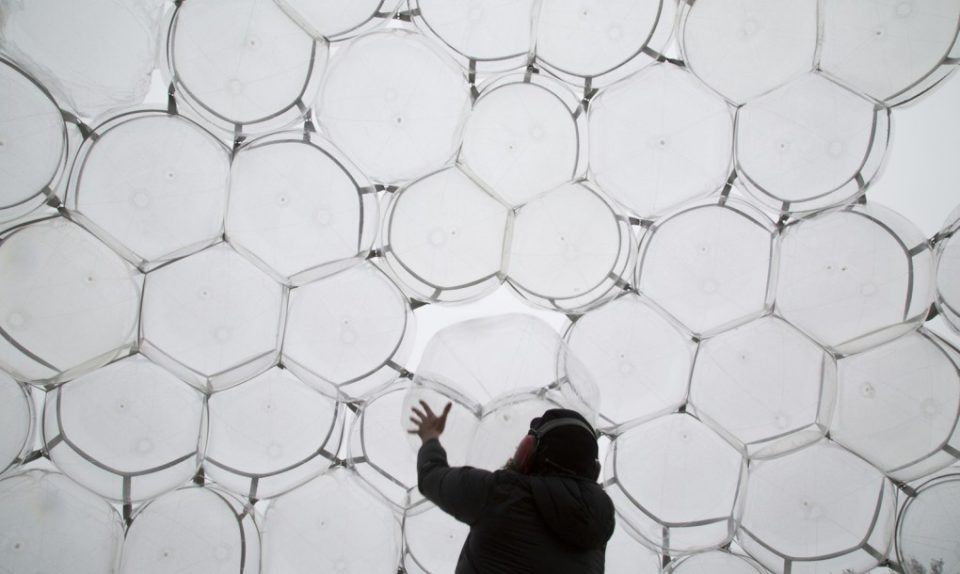
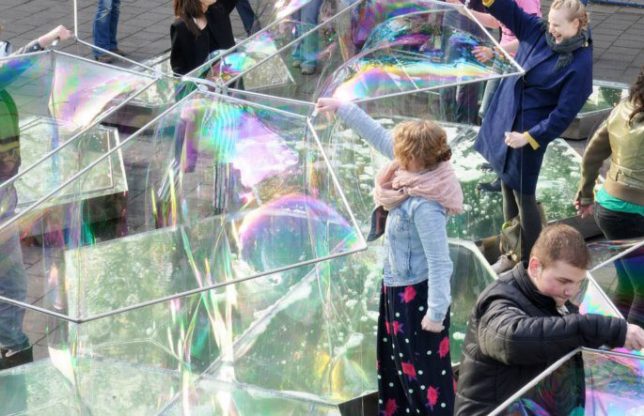
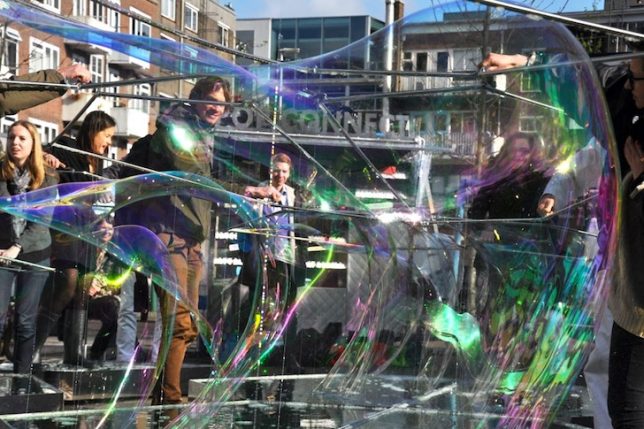
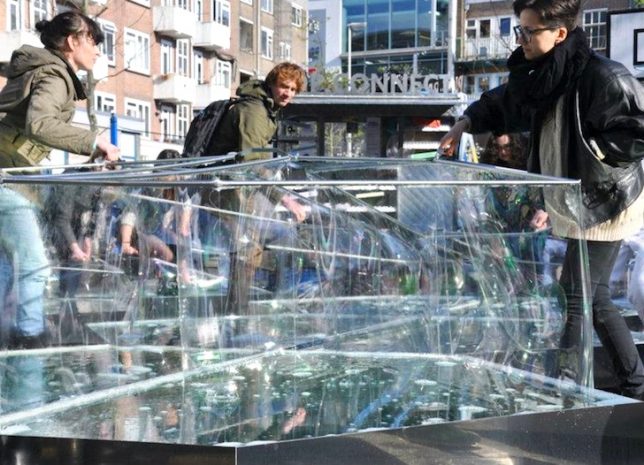
Now here’s a structure that isn’t just bubble-shaped – it’s actually made out of real soap bubbles. Dutch firm DUS created the pavilion in a Rotterdam square using metal frames in five-sided steel pools to create massive geometric bubbles you can stand inside, calling it “the world’s most temporary pavilion.”

Bubble Extension for the Hirschhorn Museum

bubble building extension 1

bubble buildings extension 2

bubble buildings extension 3

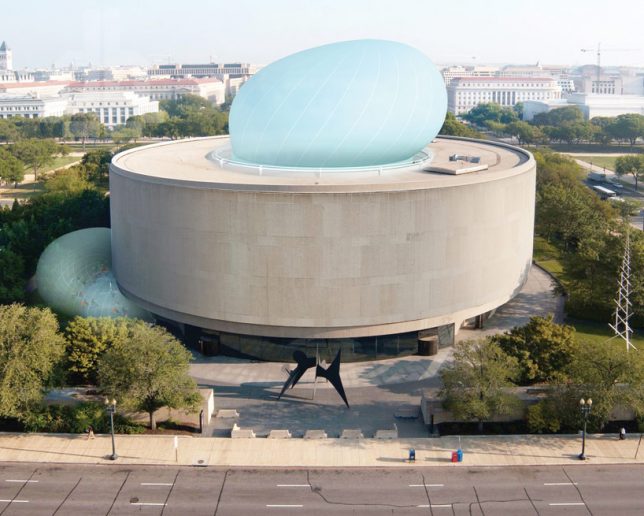
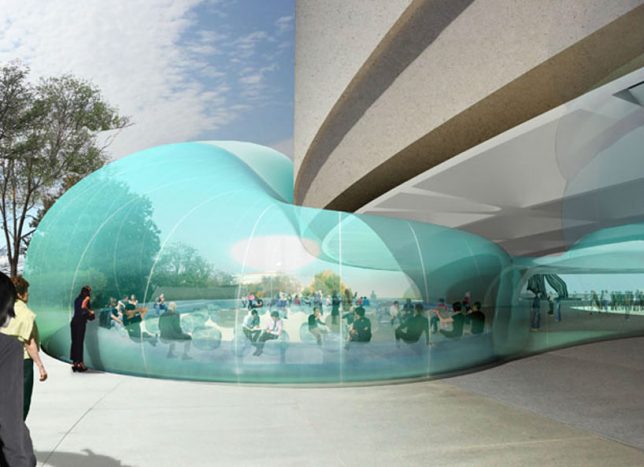
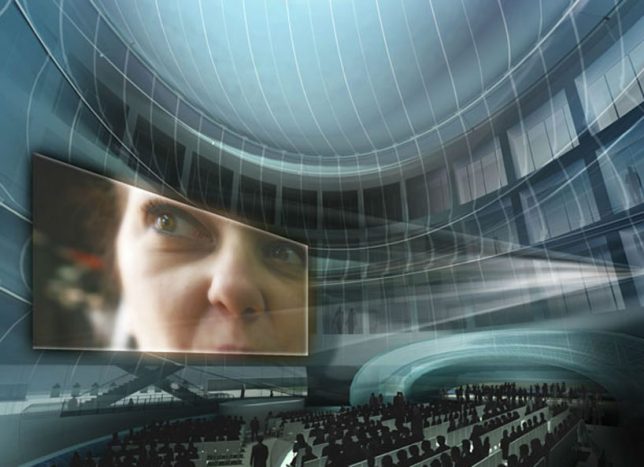
The firm Diller Scofidio + Renfro was all set to add a wild looking inflatable enhancement to the Smithsonian’s Hirshchorn Museum, creating a venue for two months of special programming, but the design was suspended due to costs. You might imagine that a large translucent fabric ‘bubble’ swelling up out of the museum’s internal courtyard would be less expensive than temporarily roofing it and adding additional covered space along the exterior, but the design was pretty complicated, and the museum board was concerned that costly additional issues with its installation would come up.

Transparent Mobile Bathroom

bubble building bathroom

bubble building bathroom 2

bubble building bathroom 3

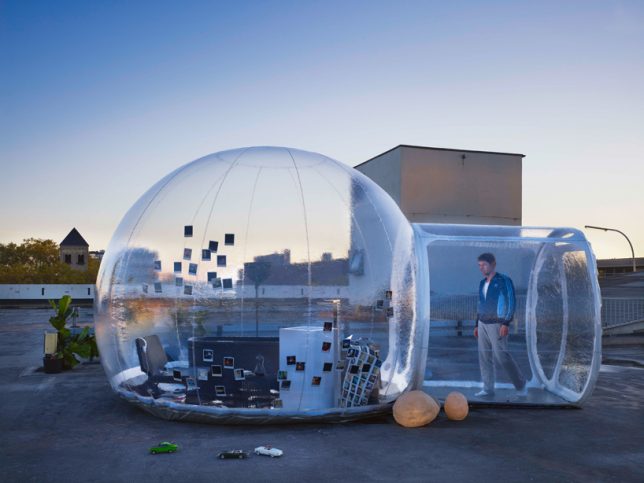
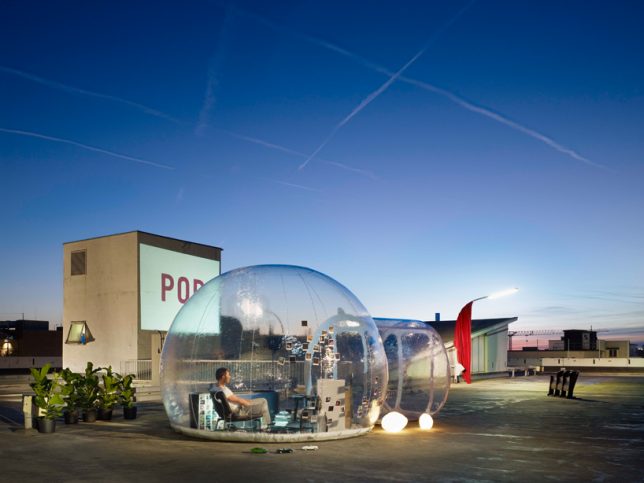
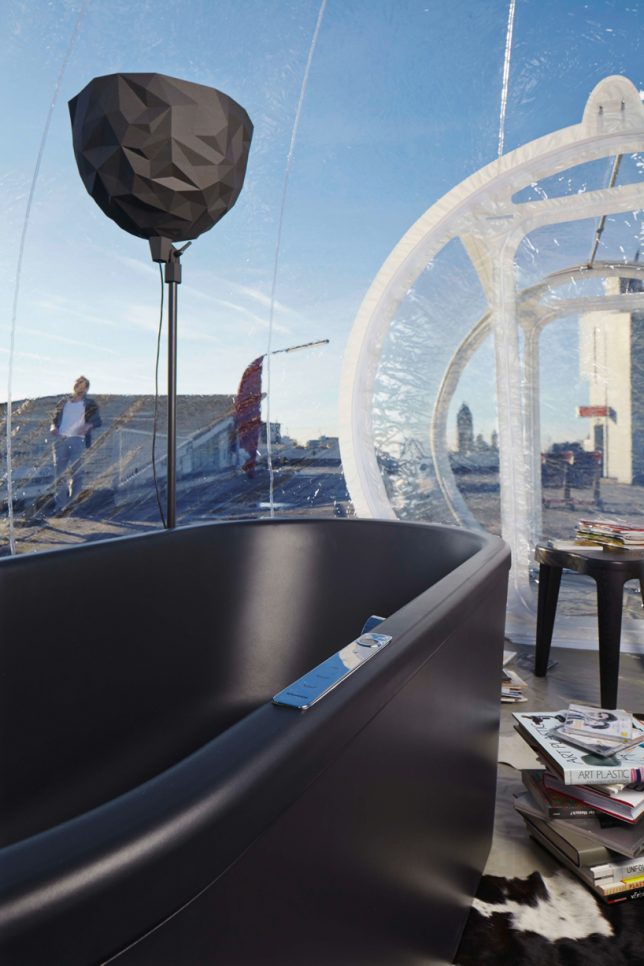
Would you want to take a bath in a totally transparent bubble with a panoramic vista? This inflatable bathroom pod is intended to be placed in the woods or in rooftops as the ‘ultimate bathroom experience,’ designed after polling groups of people about their dream bathroom. The inflatable structure includes a tub, chair, dresser and basin.

Garden Bubbles for Paris in Winter

bubble buildings garden paris 1

bubble buildings paris 2

bubble buildings paris 3

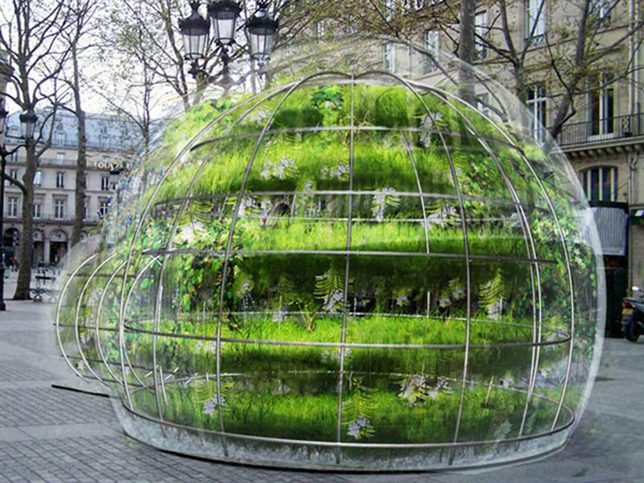
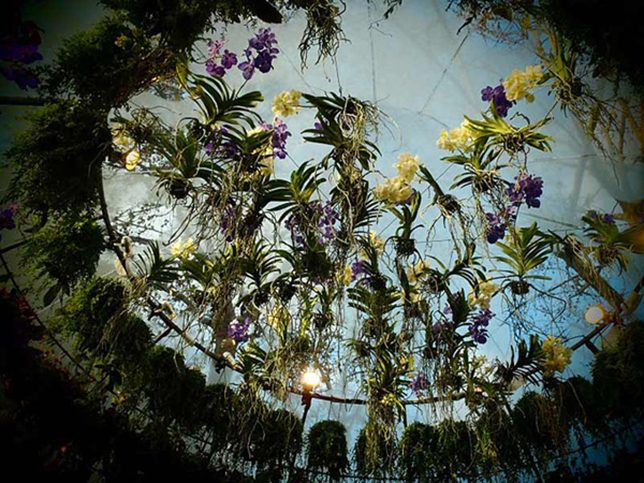
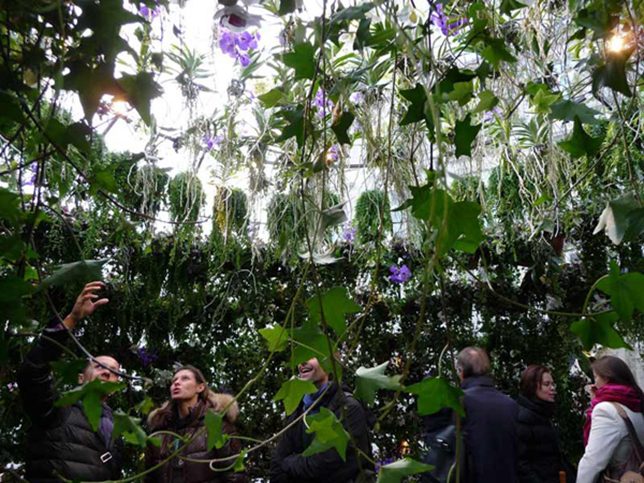
This pop-up art installation in Paris by Amaury Gallon inserted lush greenery back into the city in the middle of winter, providing passersby with 15 minutes of relaxation, beauty and fresh air. Four bubble gardens were placed on city sidewalks, each filled with a different type of plants, including a ‘jungle’ and hundreds of orchids.

Next Page – Click Below to Read More:
Bubble Buildings 13 Structures Youll Wish You Could Pop

Share on Facebook


[ By SA Rogers in Architecture & Public & Institutional. ]

[ WebUrbanist | Archives | Galleries | Privacy | TOS ]


WebUrbanist

 
Comments Off on Bubble Buildings: 13 Structures You’ll Wish You Could Pop

Posted in Creativity


Meyer-Optik launches Kickstarter campaign for 50mm ‘Soap Bubble Bokeh’ Trioplan lens

15 Apr

$ (document).ready(function() { SampleGalleryV2({“containerId”:”embeddedSampleGallery_3223429076″,”galleryId”:”3223429076″,”isEmbeddedWidget”:true,”standalone”:false,”selectedImageIndex”:0,”startInCommentsView”:false,”isMobile”:false}) });

German optical manufacturer Meyer-Optik Gorlitz has begun a Kickstarter campaign to raise funds to produce a modern 50mm F2.9 version of its Trioplan lens. The Trioplan design is known for its exaggerated circular bokeh which earned it the nickname ‘Soap Bubble Lens’ in its original version. The company has recently released a 100mm F2.8 Trioplan after a similar Kickstarter campaign that raised almost $ 360,000. On this occasion the company is hoping to reach an initial target of $ 50,000 – which is going swimmingly, as it met that goal within hours of the campaign going live.

The new lens will be an updated version of the company’s original 50mm Trioplan but using glass from the Schott factory and with modern coatings and production standards. The new 50mm Trioplan also has a movable front element that allows much better close focusing and a maximum reproduction ratio of 1:4.

The lens uses a basic Triplet design with three elements in three groups with a 12-bladed iris designed to help produce smooth and circular out-of-focus highlights at all apertures.

Meyer Optik plans to produce the manual focus lens in mounts for:

  • Canon EF
  • Nikon F
  • Sony
  • FujiX
  • Micro Four Thirds
  • M42
  • Leica M (rangefinder not supported/focusing via live view)

The expected price is $ 1299 though discounts can be had by backing the Kickstarter campaign. For more information visit the Meyer-Optik Gorlitz website.


Press release:

Today Is the Day.
Support the Historic and Innovative Trioplan 50 Now!  

We just launched our Kickstarter for the Trioplan f2.9/50, a special new lens that returns the tradition of a versatile soap bubble bokeh lens to the Meyer Optik line up. Order the art lens that you will always keep attached to your camera body now!  In addition to its regular focus element, the Trioplan f2.9/50 features a second front focus element that opens a whole new horizon of creativity to the world of photography.

These elements and the quality of the glass used takes the legendary Trioplan 50mm soap bubble bokeh lens to a wider variety of creative photographic situations, including events, travel, street, nature, portraits, macro and so many more scenes.  

The new Trioplan f2,9/50 is the one lens you can use for every situation. It is ultra compact and features an innovative front focusing element putting incredible amounts of creative opportunity into the palm of your hand. The movable front lens reduces the minimum focusing distance to less than 30 cm (under 12 inches) and raises the image ratio up to 1:4.

This feature takes the Trioplan 50 into the Macro-Spheres.  Carrying a heavy set of lenses is something that most photographers choose to shed at some point, but they do not want to cut back on their creativity. We give you the best of both worlds in one lens – with only 200 g or about 7 ounces — it has never felt so light to be this prepared.

The Trioplan 50 produces smaller, finer soap bubbles that turn into a small swirl effect in the corner of the image. Sharpness and contrast are also the highest yet of any Trioplan lens.  

Surprisingly, for a 50 mm lens it is a perfect tool for portraiture especially including awesome landscapes in the image. Moreover the possibilities in street photography are awesome and the macro capabilities are stunning. This is more than just a nostalgic art lens. It is the most modern innovative lens you can imagine.

The lens will be available with mounts for
* Canon EF
* Nikon F
* Sony
* FujiX
* Micro Four Thirds
* M42
* Leica M (rangefinder not supported/focusing via live view)

The most creative historic lens you have ever held in your hands is available to Kickstarter Backers starting at $ 449!

The lens is estimated list price is $ 1299. Restore 100 Years of Tradition with the Most Versatile Soap Bubble Bokeh Lens.

What better way to bring back the Trioplan lens than with the most versatile version possible, the f2.9/50 with its new innovative front variable element? Innovating upon the classic, modernizing the traditional, extending soap-bubble bokeh creativity to a new modern era. Help us bring back the Trioplan 50. Pledge your support now !  Click the Link to visit our Kickstarter campaign.

Sincerely,
Dr. Stefan Immes and the whole MOG team.

Articles: Digital Photography Review (dpreview.com)

 
Comments Off on Meyer-Optik launches Kickstarter campaign for 50mm ‘Soap Bubble Bokeh’ Trioplan lens

Posted in Uncategorized


How to Capture a Photo of a Bubble Bursting

30 Sep

Set yourself a high-speed challenge: Capture a bursting bubble

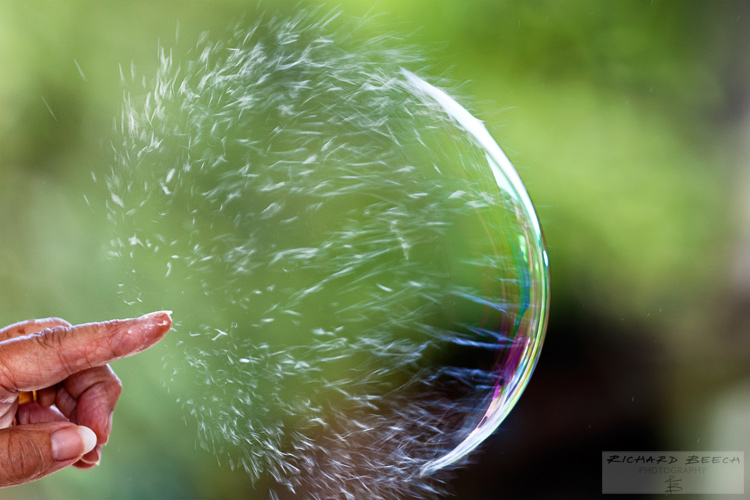
bubbledps1
I have always loved the idea of photography as being a way of taking an instant out of time, and preserving that moment forever. By freezing time in this way, a photograph can show something that may not normally be seen in day-to-day life, and can make an ordinary subject extraordinary.

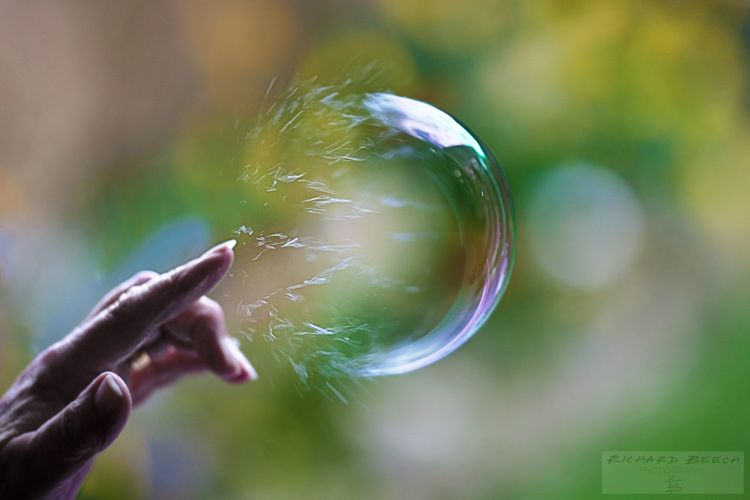
So, when going through a bit of a creative lull a couple of years ago, I felt that I needed to set myself a challenge to restore my motivation. I decided that I was going to capture the exact moment of a bubble being burst. After some internet research, I came to the conclusion pretty quickly that I did not have the necessary budget for a super slow-motion camera to achieve this. I did, however, become determined to capture a bubble in mid-burst using only equipment I already owned – my DSLR, various lenses and a flashgun (speedlight).

The challenge was lengthy and often frustrating, but when I did successfully take a photograph of a bursting bubble, it was incredibly satisfying. By freezing a moment, the photograph showed something that could not normally be seen by the human eye – a soap bubble with one half completely intact and the other half made up of separate swirls of liquid. The bubble was collapsing in on itself in mid-air. Friends and family who saw the photograph showed surprise and commented that they, like me, had assumed that a bubble just disappeared when popped. A photograph had changed their view of the world simply by freezing a single moment of time and I was reminded just how powerful photography can be.

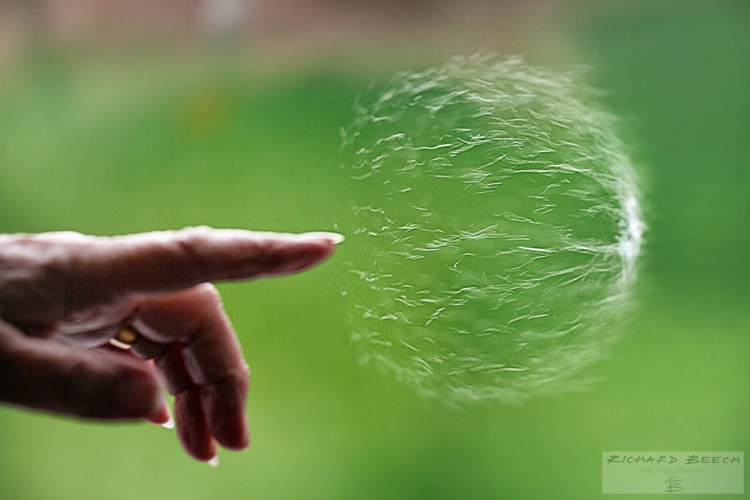
bubbledps2

With my motivation fully restored, I progressed further and attempted to capture a sequence of shots to show the entire process of a bubble collapsing. One of the shots has even been included in an international exhibition for scientific images. I have included some of these shots here but there are many more on my website at the link shown below in my bio.

I would definitely recommend this challenge to anyone, particularly if you may be in need of a creative boost or maybe need to rediscover your passion for photography. If you do decide to take up this high-speed challenge, here are some things that I learned along the way. I hope that they will be of help to you when capturing a bursting bubble.

1. Use large bubbles

Larger soap bubbles will be easier for you to focus on than small bubbles, and they will also be easier to burst. Additionally, the composition of your shot can really benefit from using larger bubbles – you should be able to get a frame-filling shot of a bubble bursting without the need to crop.

I have previously used a kids’ bubble toy set (purchased for around £1) that came with a bubble wand of around 5cm (2 inches) in diameter. I found this to be ideal for blowing one or two medium-to-large size bubbles, that stayed in the air long enough to capture them being burst. Smaller wands tended to produce streams of little bubbles which were (a) difficult to burst and (b) cluttered up the final shot.

2. Get a friend to help you

You are probably going to need somebody else to help you with this project unless you have superhuman reaction times! Blowing the bubble, bursting the bubble, and setting up the shot was just too much for me to complete on my own. Having someone to blow and burst the bubble for you, allows you to compose and focus your shot without distraction.

3. Shoot indoors

If possible, shoot indoors so that you can limit the movement of the bubble. I have taken a number of shots outdoors, but any slight breeze will cause the bubbles to fly away pretty quickly, making it much harder to set up your shot.

I have found it very useful to shoot in front of a floor-to-ceiling window facing onto a garden. This provides lots of natural light and some pleasing, natural colours for the backdrop, which was the look I was after. Just remember to leave some space between the bubbles and the window to reduce any reflections or glare that you may get from the glass.

4. Use a zoom lens

Even when shooting indoors, the movement of the bubbles will still be somewhat unpredictable. For this reason, I have found it useful to use a zoom lens when shooting bubbles, so that I can adjust the focal length as necessary to focus and compose the shot while the bubble is in mid-air. I have usually taken the bursting bubble images with a Canon 70-200mm f/2.8 lens set to between 100-150mm. A further advantage of using this lens is that it helps to create some pleasing bokeh (blurry out-of-focus highlights) in the background while keeping the bubble details sharp when the focal length is increased.

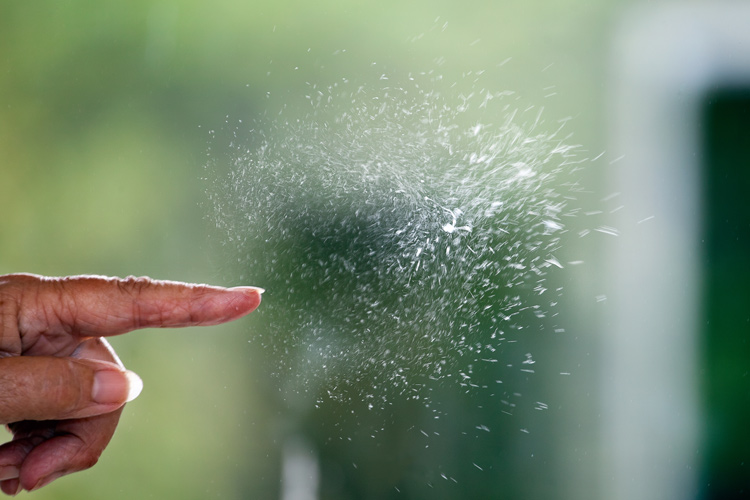
bubbledps3

5. Shoot in full manual mode

Shooting in full manual mode will give you the control over the settings that you will need to get good results. Firstly, you will need to set as fast a shutter speed as you can get away with, depending on the available light. The action of a bubble bursting is extremely fast and so you will need to set your camera to a shutter speed of 1/1000 second or faster to freeze the action – the faster the better.

With such fast shutter speeds, you will need to use a wider aperture (lower f-number) or a higher ISO setting. However, given the unpredictability of the bubble’s movements, you do not want to have such a wide aperture (and, therefore, shallow depth of field) that you end up with most of the bubble out-of-focus. For this reason, I prefer to increase the ISO setting before dialling in a wider aperture as some additional noise to the image is easier to manage (and can be corrected to a certain extent during post-processing) than an image where the bubble is largely out-of-focus.

If the available natural light is not sufficient to allow fast shutter speeds, a flash can be used to help to freeze the action. However, I would recommend using a diffuser or reflector with any flash, particularly if shooting indoors in front of a window.

6. Focus manually

I have tried to capture bursting bubbles with and without the use of autofocus. My preference is definitely without. My best results have been when I focused manually on the bubble floating in mid-air and pressed the shutter release button as soon as the bubble was to be burst. On several occasions, the autofocus was too slow and I missed the shot as the camera struggled to find focus. If nothing else, this project will give you a lot of practice in manual focusing!

7. Keep calm and carry on

bubbledps4

The speed at which the bubble bursts means that you will probably have to try this many times to get the timing exactly right. Patience is key. Don’t give up on the challenge. Accept that it is going to be slightly frustrating but know that, when you get the timing spot-on, your final image will be much more satisfying.

googletag.cmd.push(function() {
tablet_slots.push( googletag.defineSlot( “/1005424/_dPSv4_tab-all-article-bottom_(300×250)”, [300, 250], “pb-ad-78623” ).addService( googletag.pubads() ) ); } );

googletag.cmd.push(function() {
mobile_slots.push( googletag.defineSlot( “/1005424/_dPSv4_mob-all-article-bottom_(300×250)”, [300, 250], “pb-ad-78158” ).addService( googletag.pubads() ) ); } );

The post How to Capture a Photo of a Bubble Bursting by Richard Beech appeared first on Digital Photography School.


Digital Photography School

 
Comments Off on How to Capture a Photo of a Bubble Bursting

Posted in Photography


Living in a Bubble: 15 Privacy-Free Transparent Houses

08 Jul
[ By Steph in Architecture & Houses & Residential. ]

Glass Houses Main

Sometimes, beautiful views of your surroundings simply trump the need for privacy. Living in a bubble isn’t so bad when you’re in a remote location gazing at the sea or the forest, but some people take it one step further, living in almost entirely transparent spaces even in busy urban locations.

Cylindrical Glass House Containing a Tree

Glass Houses Cylindrical 2 Glass Houses Cylindrical 1

If you’re living in a secluded forest, does it matter whether the walls of your home are entirely transparent? Perhaps you wouldn’t mind if you lived inside ‘Tree in the House,’ a four-story modern treehouse encapsulating a beautiful tree. A white spiral staircase winds around the tree, taking you from one room to the next.

Transparent Floating Vacation Home

Glass Houses Floating 2 Glass Houses Floating 1

The term ‘floating house’ would typically indicate a house boat or other structure on the water, but in this case, it’s all about the visuals. Designed by Jarmund/Vigsnaes Arkitekter, this home features a gabled black upper floor on top of an entirely transparent lower floor so that from a distance, the home appears to be levitating.

Farnsworth House by Mies van der Rohe

Glass Houses Farnsworth 1 Glass Houses Farnsworth 2

The classic Farnsworth House is one of the most well-known works by architect Mies van der Rohe. Built for Dr. Edith Farnsworth between 1945 and 1951 in Plano, Illinois, the glass home is located on a secluded 10-acre site. The design seeks to unite the occupants with the natural world just outside, using the adjacent trees for shading and privacy.

Glass Cube House by Carlo Santambrogio

Glass House Santambrogio 1 Glass House Santambrogio 2

Glass House Santambrogio 3

These two entirely see-through houses redefine what it means to put your life on display. Italian architecture firm Santambrogio sought the clearest glass to maintain transparency even through a series of walls, built-in shelves and staircases. ‘Snow House,’ the three-story structure pictured, is one of a series of glass houses created by the firm, and this one has glass thick enough to withstand heavy loads of snow. Special glass panels instantly turn matte for privacy at the touch of a button. The single-story version, ‘Cliff House,’ uses thinner, lighter glass elements.

House NA by Sou Fujimoto Architects

Clear Houses Fujimoto 1 Clear Houses Fujimoto 2

Rather than trying to cut individual inhabitants off from their neighbors, as is typical in densely populated settings, Japanese architect Sou Fujimoto decided to create a home that would unite them. House NA has an almost entirely transparent street-front facade, and instead of enclosed rooms, the interior is filled with small platforms at various heights for free movement and clear lines of sight.

Next Page – Click Below to Read More:
Living In A Bubble 15 Privacy Free Transparent Houses

Share on Facebook


[ By Steph in Architecture & Houses & Residential. ]

[ WebUrbanist | Archives | Galleries | Privacy | TOS ]


WebUrbanist

 
Comments Off on Living in a Bubble: 15 Privacy-Free Transparent Houses

Posted in Creativity


Photographing bubbles, one bubble at a time

29 Mar

16.Bubble_Landscapes.jpg

British photographer Richard Heeks has made a project of taking something ordinary – soap bubbles – and making them extraordinary. Some of his images capture the exact moment when a bubble bursts, while others reflect the environment around with interesting color. One of his bubbles even looks like the ‘Death Star’ from the Star Wars trilogy. To get the photos, he took thousands of shots, gradually learning how light, weather, aperture and shutter speeds affect the final image. See gallery

News: Digital Photography Review (dpreview.com)

 
Comments Off on Photographing bubbles, one bubble at a time

Posted in Uncategorized