Good photographers learn to work within the limitations of their equipment and learn to cope with scenes where the brightness range is too great for the camera’s sensor to handle. Here are some ideas for you to explore – and none of them involve HDR techniques.
1. Look at the light
I suspect the reason that most photographers are attracted to HDR photography is because they like the look of the high contrast, super saturated images you often see created with this technique. It’s not really about capturing every detail of a high contrast subject.
Look at the light instead. If you are shooting a landscape or architectural study, and the brightness range of the scene is too much for your camera to handle, you are most likely shooting in the wrong light for the subject. Wait until the sun is lower in the sky and the light is softer. The quality of the light will be better, the brightness range will be less, and the photo will be better.
2. Let shadows go dark

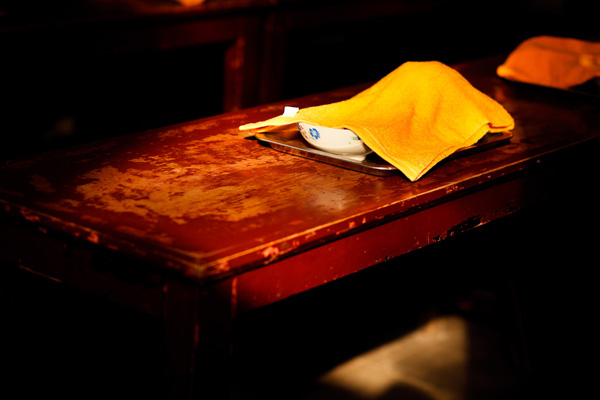
You don’t have to see into the shadows. Let them go dark. If the brightness is too bright, expose for the highlights (i.e make sure the camera captures all highlight detail) and let the shadows go where they will. It won’t work all the time – sometimes you just need better light (see tip one). But exposing for the highlights and letting the shadows go dark is a good exercise in observation and creating images. Work with the light to create graphic images, not against it.
You can take this even further in post-processing. Photographers Eduardo Izquierdo and Tom Hoops both deliberately make dark backgrounds in their portraits darker or even black so that the viewer’s attention goes straight to the model, without distractions. Maybe it’s time for a low dynamic range setting on our cameras?
3. Exposure blending

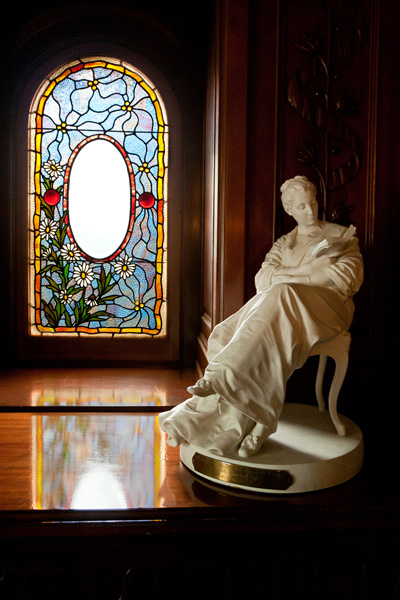
Sometimes you will come across a scene like the one above where the brightness range is too much for your camera but the quality of the light is good. The issue here is the difference in brightness between the light coming through the window and the light illuminating the interior of the building. If you expose for the interior, the window will burn out. If you expose for the window, you won’t get much detail in the interior.
So what do you do if you want good detail in both? The answer is to take two separate exposures, as in the examples above, and blend them in Photoshop. Ideally the camera should be on a tripod so that the images match exactly, but I was able to do that with the above photos even though they were hand-held and slightly out of register:

4. Exposure blending in the landscape
Landscapes are another area where you may have good quality of light, but the brightness range is still too great for your camera. That’s because the sky is often much brighter than the landscape itself. You may also want to make the sky darker for dramatic effect (as well as to capture more detail).
One solution is to use a neutral density graduated filter; a square or rectangular filter that is clear at the bottom and dark at the top that clips into a holder screwed onto the front of your lens. You move it up or down so that the dark half blocks some of the light from the sky and effectively reduces the brightness range of the scene.
Grads are great, but they’re not perfect. They work well when the horizon is a straight line across the photo, but badly if it has an irregular shape. Good quality grads are expensive, and cheap ones may give your sky a magenta colour cast.
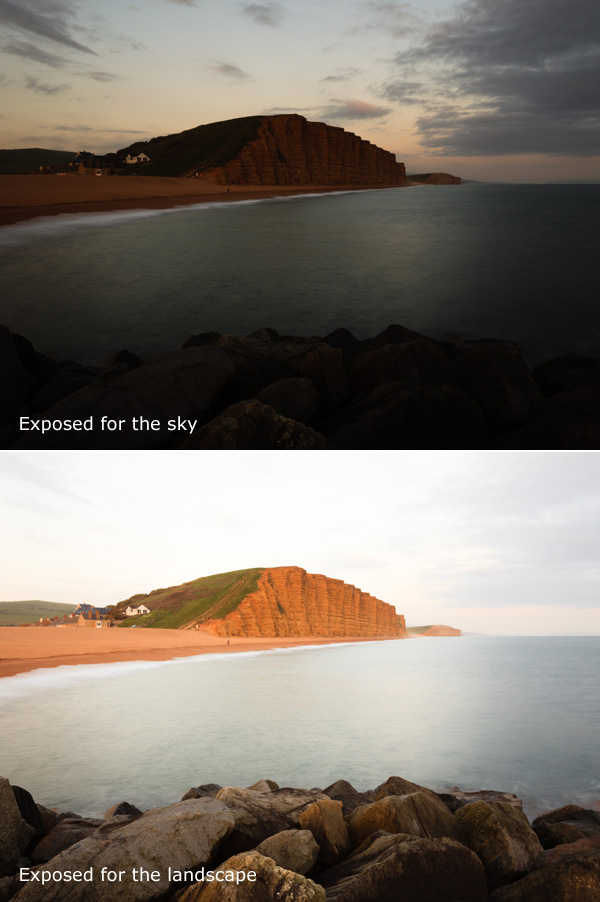
Exposure blending resolves those issues. Just like the previous example, you need to take two photos – one exposed for the sky, and the other for the landscape itself:

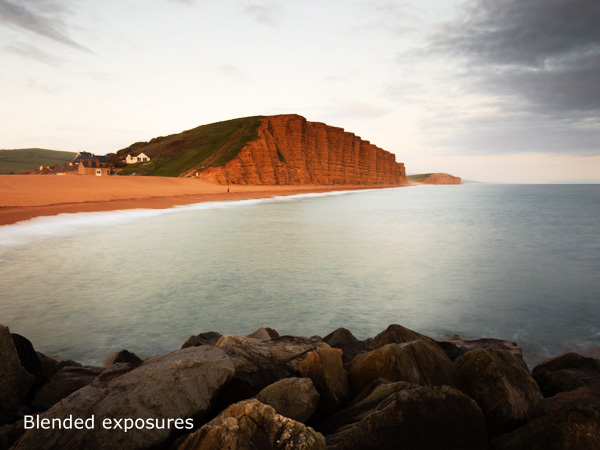
Then you can blend the two together in Photoshop. The idea is to create a blend that looks natural to the eye, so that means making sure the sky isn’t too dark, or that the landscape isn’t too light, otherwise it won’t look right. You end up with something like this:

The Photoshop techniques used for this can get quite involved. Christopher O’Donnell has written a good article about it here.
Mastering Photography

My latest ebook, Mastering Photography: A Beginner’s Guide to Using Digital Cameras introduces you to digital photography and helps you make the most out of your digital cameras. It covers concepts such as lighting and composition as well as the camera settings you need to master to take photos like the ones in this article.
Post originally from: Digital Photography Tips.
Check out our more Photography Tips at Photography Tips for Beginners, Portrait Photography Tips and Wedding Photography Tips.
Coping with Extreme Brightness (Without HDR)

You must be logged in to post a comment.