RSS
 

Posts Tagged ‘Break’

PSA: Leica’s new TL2 may break if you use it with the Leica Visoflex electronic viewfinder

21 Jul

Earlier this week, word surfaced online about an issue with the newly released Leica TL2. Apparently, some cameras would simply stop working when you attached Leica’s own Visoflex electronic viewfinder.

Online retailer Lcameras.com posted a notice on its Facebook page advising customers that it had paused sales of the camera due to Leica’s recommendation, but details weren’t forthcoming. Now, Leica has issued an official statement on the matter confirming an issue with the external EVF.

According to Leica’s notice, “a defect may occur that could stop the camera from working” when it is used with the Visoflex viewfinder. An earlier version of the statement used bleaker language, stating “If this defect occurs, then it is no longer possible to use the camera.” By all accounts, this is a serious issue that could ‘brick’ your new camera.

Earlier today, the company released another statement saying they had “identified the cause of the failure when using the TL2 in combination with the electronic viewfinder” and that “it is very likely that this can be resolved with a firmware update.” But until that firmware update is ready (it is currently being ‘intensively’ tested) users should either not attach the Visoflex viewfinder, or they should return their TL2 to the Leica dealer they purchased it from.

Articles: Digital Photography Review (dpreview.com)

 
Comments Off on PSA: Leica’s new TL2 may break if you use it with the Leica Visoflex electronic viewfinder

Posted in Uncategorized


These Nikon videos break down the gear and settings you need to shoot the eclipse

08 Jul

The total solar eclipse that’s about to take place next month presents an extremely rare photo opportunity. We have some pointers (and a little bit of opinion) coming at you from an expert in the coming days, but in the meantime, the folks at Nikon have put together a useful pair of tutorial videos that will help you nail that perfect eclipse shot when the time comes.

To be clear: these videos were created by the Nikon USA YouTube channel. To that end, there are a few points in the gear video specifically where the branding is laid on pretty thick; however, if you can get past the PR, the information is very useful and, in fact, brand-agnostic. Photographer Lucas Gilman knows his stuff.

Nikon broke down their tutorial into two 3-minute videos: Gear & Prep and Camera Settings. If you’re planning to shoot the eclipse, grab yourself a pen and pad, scroll down, and click play.

Part 1: Gear and Preparation

The first stop on the gear and prep train is safety—get proper eye protection and slap a solar filter onto your lens to prevent sensor damage. Then, Gilman touches on the kind of camera and lens you should choose.

For his needs, he’s picked a D500 APS-C body for a bit of extra reach, and a Nikkor 200-500mm lens attached to a Nikon 1.4x teleconverter.

Finally, Gilman outlines some of the accessories you’ll want to bring along. Namely: a stable tripod, extra memory cards, a few fully charged batteries, and a cable release.

Camera Settings

Now that you have the proper gear, it’s time to set up your camera. In the second video, Gilman discusses how to determine the proper exposure for two key eclipse shots: a closeup of the sun at totality and photographing the crescent.

While your settings will obviously vary depending on the conditions on the day you’re out there shooting, the tips in the video above will get you most of the way there.


Photos courtesy of Nikon USA

Articles: Digital Photography Review (dpreview.com)

 
Comments Off on These Nikon videos break down the gear and settings you need to shoot the eclipse

Posted in Uncategorized


Hy6 rises again as DW Photo tries to break from tangled history

24 May

Some ideas are apparently too good to let die. DW Photo of Braunschweig, Germany, has become the latest company to attempt to produce the Hy6 645 medium format camera. This follows the collapse of DHW Fototechnik, which itself took over responsibility from the defunct Franke & Heidecke, which grew from the remains of Rollei.

The company will produce the Hy6 mod2 version of the camera, originally released in 2012 and use manufacturing facilities at the former Rollei factory. The camera will cost €5950.

German photo site Photoscala also has a fascinating look at how the camera, once sold under the Leaf, Sinar and Rolleiflex brands, came into being and how its collaborative development following the fall of Rollei has created a legal tangle for anyone trying to bring the camera back to market. Even in Google Translated form, it’s well worth a read.

Articles: Digital Photography Review (dpreview.com)

 
Comments Off on Hy6 rises again as DW Photo tries to break from tangled history

Posted in Uncategorized


Adobe’s Lightroom Coffee Break videos give quick time-saving tips

11 May

It’s over ten years since Adobe’s Lightroom emerged from beta, and it’s evolved a lot since then. The company’s ‘Coffee break’ series of videos introduces features you might not know. For a minute of your time, these tips can help speed your workflow.

For instance, the video above (as highlighted on PetaPixel) shows you how to set the default processing applied to all your files. You can set it to a different preset per camera or even per ISO setting, if you have a preferred noise reduction and sharpening system.

In this video, Lightroom team member Benjamin Warde explains (in 46 seconds) how to define a new starting point for when you work with new files. That’s got to be worth a moment of your time, hasn’t it?

Click here to see the Coffee Break playlist of 34 sub-minute video.

Articles: Digital Photography Review (dpreview.com)

 
Comments Off on Adobe’s Lightroom Coffee Break videos give quick time-saving tips

Posted in Uncategorized


Studying high-res satellite images on your lunch break can help uncover new archaeology sites

03 Feb
You gotta start somewhere – GlobalXplorer participants’ first mission is to look for pits that signal looting.

If you’ve ever dreamed of becoming an archaeologist, you might want to take a look at GlobalXplorer: a browser-based app that trains ordinary citizens to analyze high-resolution satellite imagery for signs of looting and previously unknown sites. It’s the brainchild of Dr. Sarah Parcak, a National Geographic Fellow and Space Archaeologist (really!) whose techniques have identified 17 potential pyramids and 3,100 potential settlements in Egypt.

Dr. Parcak won 2016’s $ 1 million TED prize to turn her vision for citizen-powered, satellite-based archaeology into a reality. Launched this week, GlobalXplorer is available to anyone with an internet connection. Participants register to the site, watch a training video and get started by looking for signs of potential looting in satellite images. There’s a ‘gamification’ factor too – you can level up once you’ve gained enough experience and start looking for the really exciting stuff, like signs of currently unknown archaeological sites. 

GlobalXplorer’s imagery is provided by DigitalGlobe’s commercial satellites courtesy of a customized version of the Tomnod crowd-sourcing platform. For now, the journey starts in Peru, where citizen archaeologists are examining 200,000 square km of land. If you’d like to channel your inner Indiana Jones, head to the GlobalXplorer website and get started.

Articles: Digital Photography Review (dpreview.com)

 
Comments Off on Studying high-res satellite images on your lunch break can help uncover new archaeology sites

Posted in Uncategorized


4 Value Speedlight Modifiers that Won’t Break the Bank

18 Sep

Cheap generally means nasty. But in this article, we’re going to look at four different light modifiers that give you a range of looks that definitely fit in the value category.

4 Value Speedlight Modifiers

#1 – The Godox 120cm Octagon Softbox

This modifier is a 48″ Octagon Softbox that uses an umbrella shaft to mount to a speedlight. The flash aims into the silver backing, meaning that it’s an indirect source. This gives one layer of softening, and because the flash faces away from the subject, there’s less of a hotspot that with a direct flash Octabox.

The single diffusion panel provides a second level of softness, making for a big beautiful light. There are plenty of similar looking Octaboxes on eBay or Amazon, but the Godox branded ones have one huge advantage: fibre glass rods. Usually the rods are u-shaped metal spines. These provide you with good strength while bending, but very little lateral strength. A blast of wind which knocks the softbox off or over will bend or break a metal rod. Fibre glass, on the other hand, has strength in all directions, making it more resilient.
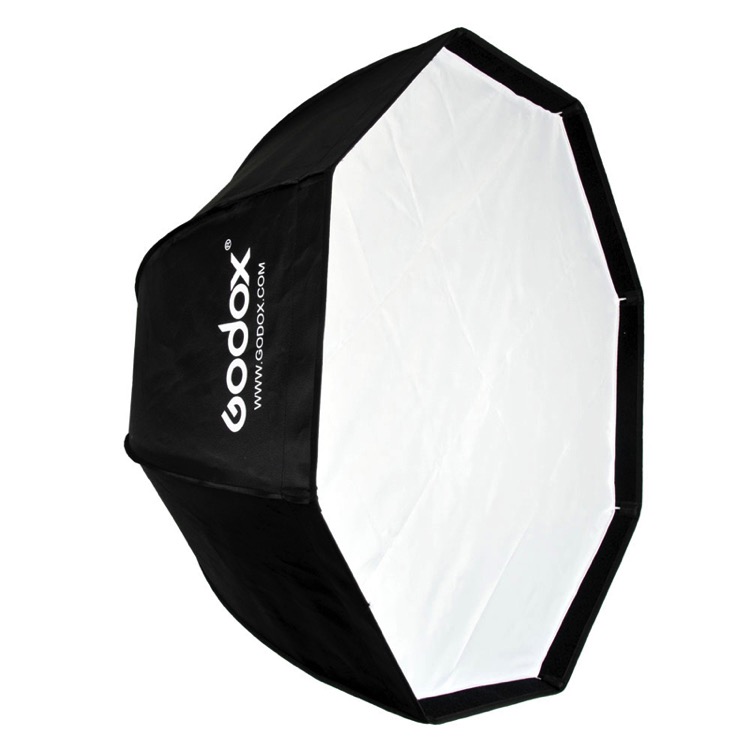
Godox 120CM Octabox speedlight modifier

Bonus: You can bend the closed Octabox to make it fit into a suitcase. This is easily my most used location light modifier because I can vary the softness and coverage using distance. As the softness of the light depends on the relative size on the modifier to the subject, close means softer, and farther away, the light gets harder. Being four feet in size, it’s super soft in close.

Here’s a typical setup I use with this modifier and the resulting photo. Shot as an example in the studio.

Value speedlight modifiers godox bts

Value speedlight modifiers godox image

Here’s a few more example shot on location:

Value speedlight modifiers godox 2

Value speedlight modifiers godox 3

Depending on the Octabox model you order, you can get it with a grid. This helps make the light more directional. By blocking the light going out the sides, it pushes the light forward. You may have situations where you need to stop spill (on the ground or background), and a grid really helps with that.

#2 – The Meking Ring Flash

There are a number of ring flash adapters for speedlights. None are perfect, but I really like this $ 30 modifier, the Meking Ring Flash. Firstly, it folds down really compact, so you can always have a modifier with you. Secondly, you get a really soft quality from this, providing a more flattering light. Thirdly, you’re not obliged to use it on camera, you can easily use it as an off camera light, either as a key light or as a fill.
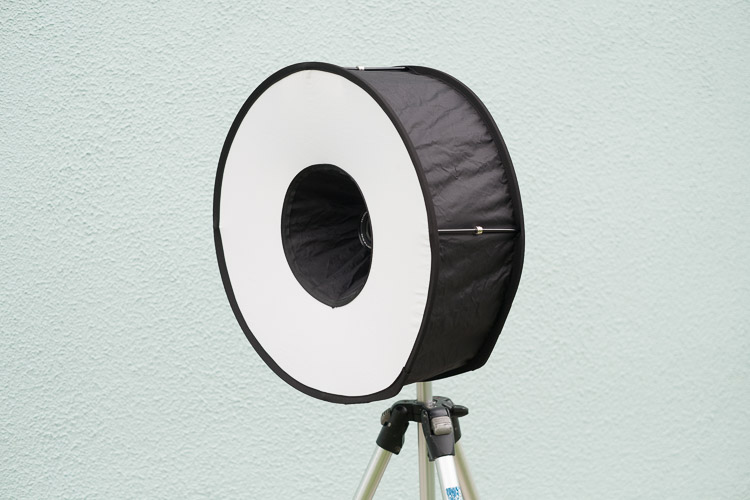
Value speedlight modifiers meking 1

To use it, expand the ring, then push the magnetic separators together, pushing the two sides apart. Finally, mount the ring softbox to your flash using the retained velcro strap.

Here are some examples of  the ring flash use. Notice the shadow that surrounds our model, as well as the classic donut cathchlights in the eyes.

Value speedlight modifiers meking 2

Below I’ve used the softbox off camera, in a hotel foyer. This is two separate photos combined into one image.

Value speedlight modifiers meking 3

#3 – Westcott Double Fold Umbrella

Umbrellas are the staple diet of most speedlight beginners. The Westcott Double fold umbrella offers a little more than a basic one. For a start, it can be used as both a bounce  and shoot-through umbrella.

Using it as a bounce umbrella allows the light to focus a little and is good when the scene is larger and you need the light to fill in but still be out of camera view. You’d use it as a shoot-thru to get really close to your subject for big, soft light. The black backing can stay half on (see image below) to prevent spill onto clothes, making this a really versatile, compact, light modifier.

41G7gGhZ3YL

Here’s the standard bounce look. It’s similar in setup to the Godox (which is effectively a silver bounce umbrella with a layer of diffusion).

Value speedlight modifiers westcott 1

Turning the umbrella around, and removing half the black covering creates this look (below):

Value speedlight modifiers westcott 2

It’s much softer, but notice that the bottom part of the photo is darker. This is because the black covering is blocking light going to her body and clothes. It’s a great tip which comes from the inspirational Joe McNally, for when then clothes are distracting in a portrait. If it’s not clear, here’s what the umbrella setup looks like.
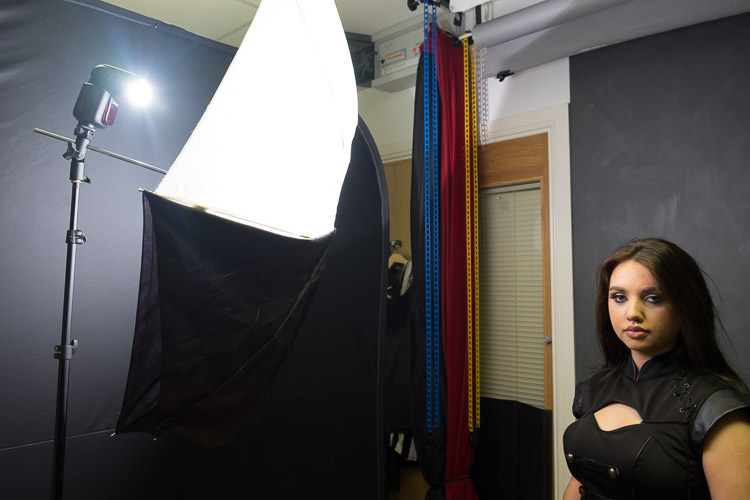
Value speedlight modifiers westcott 4

The final look from the umbrella is using it as a shoot-through. This means removing the black covering altogether.

Value speedlight modifiers westcott 3

As you can see, it’s really soft, and floods everywhere (especially compared to the bounce umbrella). Here’s the setup for this.
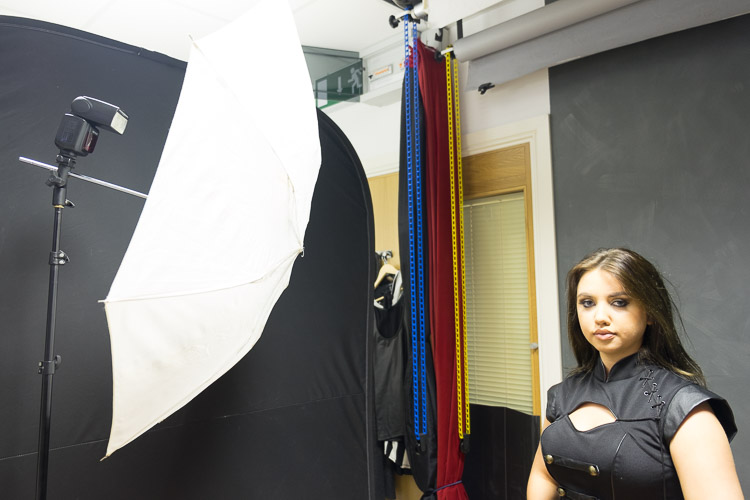
Value speedlight modifiers westcott 5

Notice light spills everywhere with this setup which may work for light or high key portraits. If you want more light control use it as a bounce umbrella with the black cover on.

#4 – MagMod Basic Kit

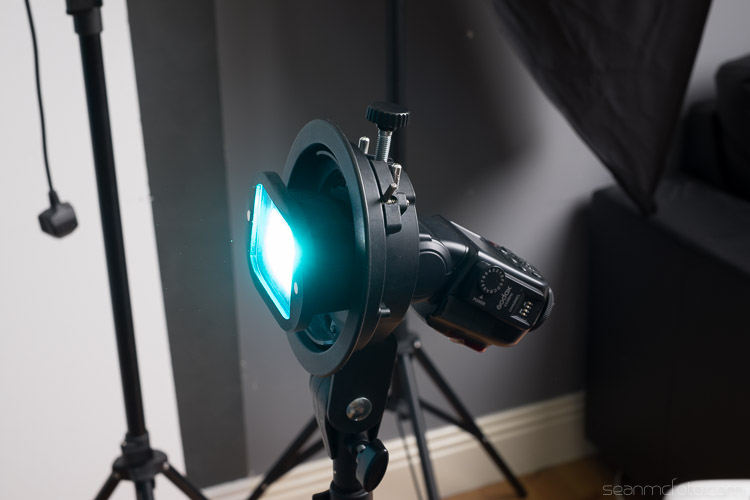
MagMod is a Kickstarter based company whose products use strong rubber and even stronger magnets to make attaching speedlight modifiers a thing of ease. Rather than use annoying velcro, you stretch the MagGrip around your flash to hold the modifiers. You can see a MagGel on a MagGrip in my article How to use Lighting Gels to Change Your Background Color and in the image below.
Changing-your-background-with-gels-magmod

There’s a whole range of MagMod accessories, but the basic kit comes with a grid and a gel holder, along with rigid gels for the holder. These rigid gels are a blessing. A regular gel is essentially a coloured sheet of acetate, so it folds and crumples easily. The rigid nature of the MagGels makes them easy to swap in and out of the holders. There are a variety of colors available. You get a basic set of color correction and ND gels with the kit, but there’s also the Creative and Artistic sets for a larger range of options.

The MagGrids are great for restricting light, letting you aim it with a huge degree of control.

Value speedlight modifiers magmod 0Here’s a shot done with a bare speedlight:

Value speedlight modifiers magmod 1

Here’s the same speedlight with a MagGrid attached. Notice how tight the light is around the model, more like a spotlight.

Value speedlight modifiers magmod 2

Here’s the Aqua MagGel from the Artistic series gels. I’ve set the white balance to daylight to keep the colour correct.

Value speedlight modifiers magmod 3

Combining the modifiers

The beauty of these light modifiers is you can mix and match them to make really creative light.

To achieve the image below, place your on flash on camera, with the Aqua MagGel attached. Next, put the Meking Ring Flash over it to create a soft aqua-colored fill light. Then, place a MagGrid on a second flash and aim it tight on the model’s head. The grid light washes out the gel from her face, but in the shadow areas, the gels fills in for a cool look.

It’s almost like the image has been post-processed for color, but it’s actually done in-camera.

Value speedlight modifiers magmod 4

Another look you can get is a high key portrait. First, set up the Westcott as a shoot-through umbrella on a boom, between you and the model. You’re shooting below the umbrella. For the background, set up the Godox Octabox facing the camera, behind your model. Use a reflector to bounce the light back up to the model for a perfect high key portrait.

Value speedlight modifiers mixed

All in all, this gear is under $ 200 (total if you buy them all) and will give you a good range of creative lighting setups. Even just one of them would make a great addition to your speedlight arsenal.

Do you have any other good value light modifiers you’d like to share? Please do so in the comments below.

googletag.cmd.push(function() {
tablet_slots.push( googletag.defineSlot( “/1005424/_dPSv4_tab-all-article-bottom_(300×250)”, [300, 250], “pb-ad-78623” ).addService( googletag.pubads() ) ); } );

googletag.cmd.push(function() {
mobile_slots.push( googletag.defineSlot( “/1005424/_dPSv4_mob-all-article-bottom_(300×250)”, [300, 250], “pb-ad-78158” ).addService( googletag.pubads() ) ); } );

The post 4 Value Speedlight Modifiers that Won’t Break the Bank by Sean McCormack appeared first on Digital Photography School.


Digital Photography School

 
Comments Off on 4 Value Speedlight Modifiers that Won’t Break the Bank

Posted in Photography


Break it down: iFixit disassembles the Canon PowerShot G1 X Mark II

02 Apr

iFixit disassembles the Canon PowerShot G1 X Mark II

Taking apart a camera isn’t for the faint of heart, but if you’ve chosen to do so you don’t have to go alone. Our friends at iFixit publish disassembly guides to empower owners of electronic devices to make some fixes themselves. And who hasn’t wanted to see what’s underneath the plastic shell of Canon’s top-of-the-line compact camera? Take a look at what lies beneath the surface of the Canon PowerShot G1 X Mark II.

iFixit disassembles the Canon PowerShot G1 X Mark II

As always, the first and most important step – remove the battery from the camera. 


All images courtesy of iFixit

iFixit disassembles the Canon PowerShot G1 X Mark II

With the battery safely set aside, you’re free to go about the business of taking your camera apart. 


All images courtesy of iFixit

iFixit disassembles the Canon PowerShot G1 X Mark II

After removing the screws on the left, right and bottom of the camera, there are four more to remove under the flip-up LCD.


All images courtesy of iFixit

iFixit disassembles the Canon PowerShot G1 X Mark II

Now that those pesky screws are out of the way, the back panel comes right off, though be sure to disconnect the ribbon cable attaching it to the body before pulling too hard.


All images courtesy of iFixit

iFixit disassembles the Canon PowerShot G1 X Mark II

Unsurprisingly there are additional screws to remove, this time for this copper plate (possibly used to dissipate heat). Underneath that there’s yet another plate, this one silver.


All images courtesy of iFixit

iFixit disassembles the Canon PowerShot G1 X Mark II

With those plates off there are three ribbon cables to remove with your trusty spudger.


All images courtesy of iFixit

iFixit disassembles the Canon PowerShot G1 X Mark II

After removing a screw behind the pop-up flash and another on the front just below the Canon logo, you can ‘pop the top’ on the G1 X Mark II.


All images courtesy of iFixit

iFixit disassembles the Canon PowerShot G1 X Mark II

Once you’re removed even more screws, you can spudge the left side of the camera right off.


All images courtesy of iFixit

iFixit disassembles the Canon PowerShot G1 X Mark II

Finally, after much spudging of ribbon cables, you can remove the front panel of the camera. The round thing toward the right is the G1 X II’s speaker.


All images courtesy of iFixit

iFixit disassembles the Canon PowerShot G1 X Mark II

Two screws must go in order to remove the metal plate surrounding the I/O ports. There are ports for HDMI and USB output as well as a wired remote.


All images courtesy of iFixit

iFixit disassembles the Canon PowerShot G1 X Mark II

With the back and side plates of the camera removed, the time has come to take off the front panel…


All images courtesy of iFixit

iFixit disassembles the Canon PowerShot G1 X Mark II

… and the lens has been liberated from the rest of the camera. That’s the capacitor for the flash on the right – definitely not something you want to handle.


All images courtesy of iFixit

iFixit disassembles the Canon PowerShot G1 X Mark II

After the removal of countless screws and ribbon cables, here’s Canon’s flaghsip compact camera, the PowerShot G1 X Mark II, in pieces.


All images courtesy of iFixit

Articles: Digital Photography Review (dpreview.com)

 
Comments Off on Break it down: iFixit disassembles the Canon PowerShot G1 X Mark II

Posted in Uncategorized


Commercial Break: 8 Abandoned TV Stations & Studios

16 Feb

[ By Steve in Abandoned Places & Architecture. ]

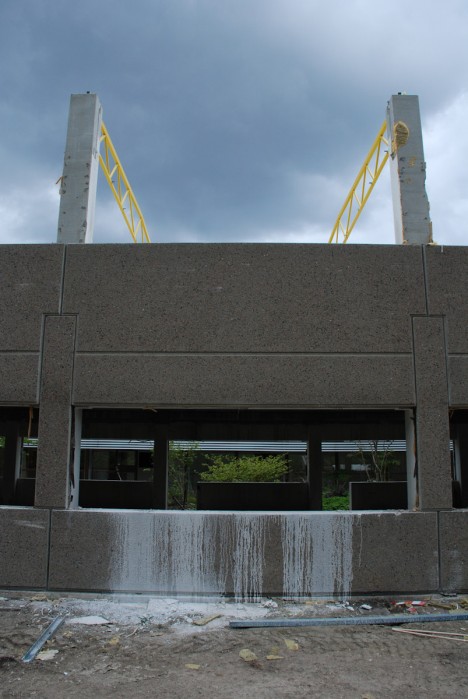
abandoned TV station SR Gothenburg 1
The golden age of television has long since passed, especially for these 8 abandoned TV stations whose cameras have permanently put on their lens caps.

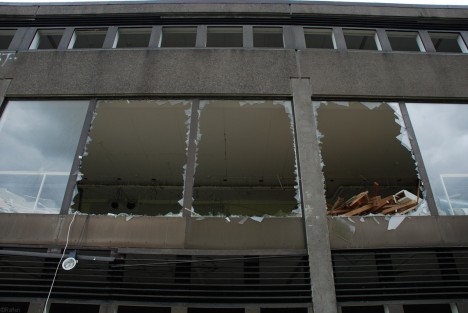
abandoned TV station SR Gothenburg 3

abandoned TV station SR Gothenburg 4

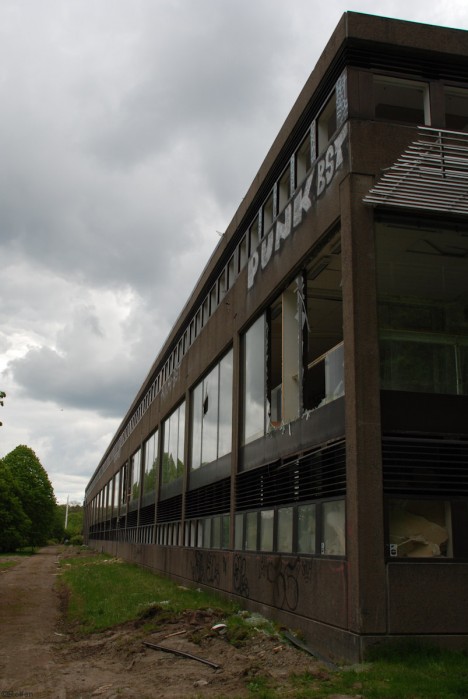
The Sveriges Radio TV building in Gothenburg, Sweden opened in 1970 – the same year Swedish TV began broadcasting in color. We’re assuming the novelty wore off, as by the end of the decade the building had been abandoned to the depredations of squatters, salvagers and the unavoidable swing of the wrecking ball.

abandoned TV station SR Gothenburg 5

abandoned TV station SR Gothenburg 2

How Swede is was, now not so much. Kudos to Flickr user Rolfen who visited the decrepit SR television studios (or “TV-house”, as he puts it) in May of 2009.

KVVV-vvv…

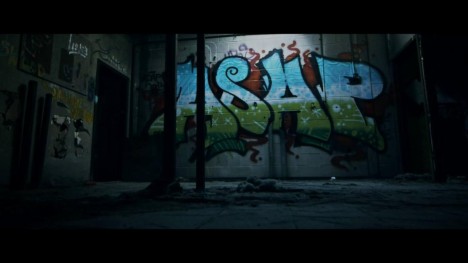
abandoned TV station KVVV Texas 1

abandoned TV station KVVV Texas 2

abandoned TV station KVVV Texas 3

Based in Friendswood, Texas and broadcasting to the metro Houston area, KVVV-TV was an independent television station that opened in February of 1968. A money-losing proposition from the get-go, the station fired most of its staff by the end of ’68 and finally shut down entirely on August 31st of 1969. The station may not have broadcasted for long but its studio building is still hanging in there, though after decades of vandalism hanging’s probably too good for it. Full props to urban explorers UER for recently posting some screencaps from their must-see video of the extremely decrepit ex-station.

Southern Discomfort

abandoned TV station WTVY 1

abandoned TV station WTVY 2

WTVY is a CBS-affiliated television station from Dothan, Alabama, that began broadcasting on channel 4 in 1960. In 1978 the station moved to new digs in Bethlehem, Florida where its 2,035 ft tall transmission tower is still the tallest in the state. Meanwhile, WTVY’s old studio building and much-faded kitschy Sixties sign molder away, slowly succumbing to the relentless march of scrub brush and kudzu.

Next Page – Click Below to Read More:
Commercial Break 8 Abandoned Tv Stations Studios

Share on Facebook


[ By Steve in Abandoned Places & Architecture. ]

[ WebUrbanist | Archives | Galleries | Privacy | TOS ]


WebUrbanist

 
Comments Off on Commercial Break: 8 Abandoned TV Stations & Studios

Posted in Creativity


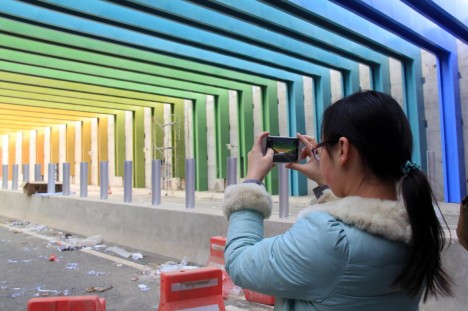
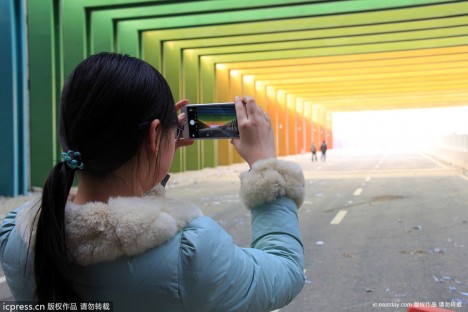
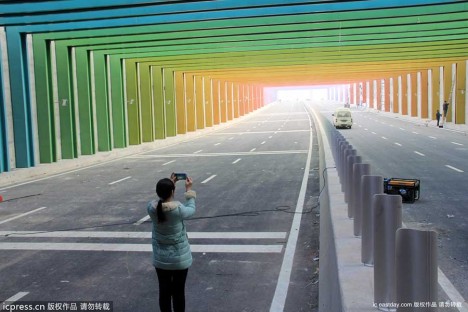
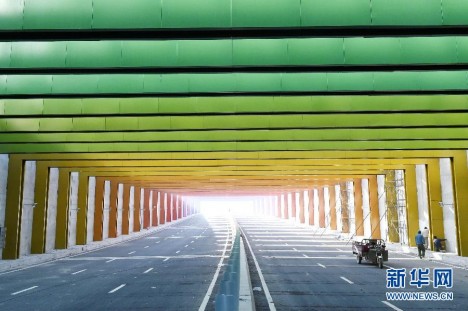
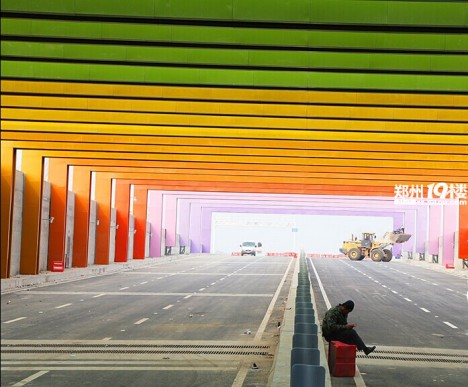
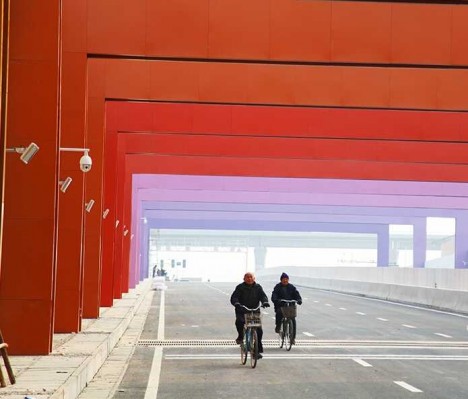
Prism Break: China’s Eye-Soothing Rainbow Road Tunnel

19 Jan

[ By Steve in Architecture & Cities & Urbanism. ]

China Rainbow Tunnel 2
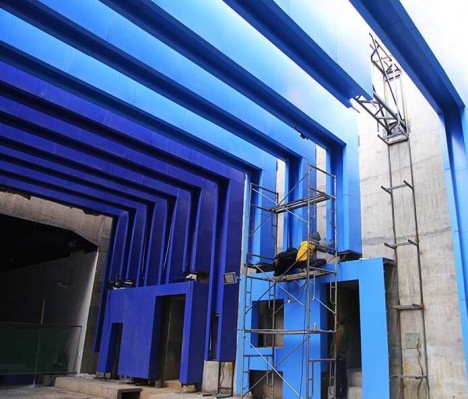
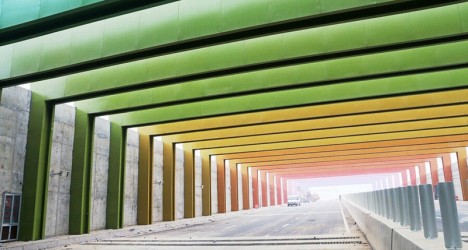
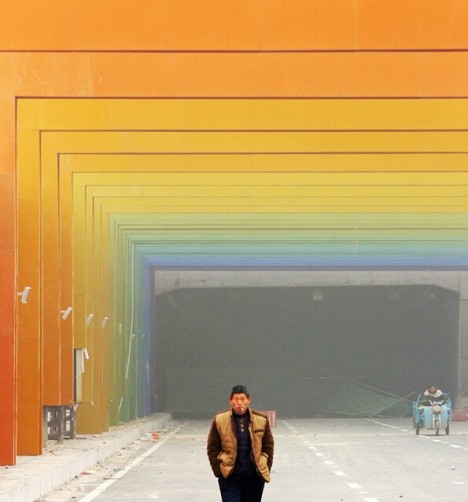
A 1,000-foot long rainbow underpass in Zhengzhou, China is designed to help drivers’ eyes adjust from daylight to a artificial lighting and back again.

China Rainbow Tunnel 2b

China Rainbow Tunnel 2a

Break out the Skittles, it’s time to drive the rainbow! Well, almost… the Cheng Avenue rainbow tunnel isn’t quite ready for prime time though it’s already cost Zhongmou County a pot of gold – about 100,000,000 yuan (about $ 16 million) and counting.

China Rainbow Tunnel 6

China Rainbow Tunnel 8

China Rainbow Tunnel 8b

The tunnel (actually a shallow underpass) is located about 50 meters north of the S223 Provincial Highway intersection just outside Zhengzhou in China’s east-central Henan province. The area around the project appears rather dry and drab; the soil radiating the pale yellow hue of dust blown eastward by strong winds scouring the Gobi Desert.

China Rainbow Tunnel 9a

China Rainbow Tunnel 9

China Rainbow Tunnel 7b

China Rainbow Tunnel 7a

If civic planning authorities intended to alleviate the visual monotony by injecting some color into the landscape, a 400-meter (1,312 ft) long “rainbow tunnel” is one way to do it. No matter if some bureaucratic committee can’t decide on a single hue: the rainbow tunnel has got ‘em all!

Next Page – Click Below to Read More:
Prism Break Chinas Eye Soothing Rainbow Road Tunnel

Share on Facebook


[ By Steve in Architecture & Cities & Urbanism. ]

[ WebUrbanist | Archives | Galleries | Privacy | TOS ]


WebUrbanist

 
Comments Off on Prism Break: China’s Eye-Soothing Rainbow Road Tunnel

Posted in Creativity


How to Break Into the Photography Business with dPS Writer Gina Milicia

11 Jan

Our very own dPS writer Gina Milicia was recently interviewed and asked about her thoughts on how to break into the photography business.

She talks openly about how she got her break in the business and some of her struggles. I can totally relate to what she says about just wanting to do the thing you enjoy, no matter if you you get rich or make a living from it or not. Watch the video and see if you can relate to what she says too:

“Just keep showing up every day and do something.” – Gina Milicia

In this second video you can see the resulting images from some of the behind the scenes clips in the one above.

Do you have any additional tips for someone just starting in the photography business? Please tell us in the comments below.


Gina is the author of four dPS eBooks including:

  • Portraits: Making the Shot
  • Portraits: Striking the Pose
  • Portraits: Lighting the Shot
  • Portraits: After the Shot

You can buy one for $ 19.99 or grab the whole bundle for only $ 49.99 (save 38%) from any of the links above.

googletag.cmd.push(function() {
tablet_slots.push( googletag.defineSlot( “/1005424/_dPSv4_tab-all-article-bottom_(300×250)”, [300, 250], “pb-ad-78623” ).addService( googletag.pubads() ) ); } );

googletag.cmd.push(function() {
mobile_slots.push( googletag.defineSlot( “/1005424/_dPSv4_mob-all-article-bottom_(300×250)”, [300, 250], “pb-ad-78158” ).addService( googletag.pubads() ) ); } );

The post How to Break Into the Photography Business with dPS Writer Gina Milicia by Darlene Hildebrandt appeared first on Digital Photography School.


Digital Photography School

 
Comments Off on How to Break Into the Photography Business with dPS Writer Gina Milicia

Posted in Photography