RSS
 

Posts Tagged ‘Boring’

How to Find Interesting Subjects for Photography in a Boring Place

26 Sep

One of the common complaints I hear about photography is from people who struggle to find interesting things to take photos of. I understand the frustration. Some people are lucky enough to live in photogenic places that other people have to travel to see. But lots of people live in places where it’s genuinely hard to find interesting subjects for photography.

So, what do you do when this happens to you? Here are some ideas to help you find interesting subjects and inspiration.

pink flower - How to Find Interesting Subjects for Photography in a Boring Place

Food photography

Okay, I admit that people taking photos of their brunch with smartphones and uploading them to Instagram is getting old. But don’t let this put you off taking food photos at home. The nice thing about food photography is that it combines two hobbies – cooking (or baking) and photography. If you’re a good cook, it could be the perfect subject you.

There are two sides to food photography. One is the ability to prepare food so that it’s photogenic enough for a photo. The other is to provide the right environment to show the food off at its best.

If you don’t have what you need already that does involve a small investment. Think chopping boards, wooden tables, hand-made plates, and so on.

For lighting, nothing more sophisticated than window light is required. But you can also use it as an opportunity to practice your flash skills. I made this photo below using natural light.

Interesting subject - How to Find Interesting Subjects for Photography in a Boring Place

Flower photography

It’s quite possible that you don’t need to look any further than your backyard for an interesting subject. Most people have flowers in the garden. If you don’t, perhaps you know somebody who does. There may also be a park or botanical garden nearby that provides an interesting selection of flowers to photograph.

To be successful you’ll need to get close to the flowers using extension tubes, close-up lenses or a macro lens. It’s a good way to practice your macro and close-up techniques.

I made this photo in a local park.

flowers - How to Find Interesting Subjects for Photography in a Boring Place

Build a studio

The advantage of photographing food or flowers is that you can set up your photos indoors. There’s no need to worry about the weather or light, as window light is beautiful enough for both types of photography.

But why not take it further and set up an indoor studio? It’s possible to create a studio in the smallest of spaces. If you have any doubts about this then check out Nick Fancher’s book Studio Anywhere. It’s full of ingenious tips and tricks for setting up a studio in the tightest of spaces.

Note you can read more from Nick in these dPS articles:

  • How to Create Dramatic Portraits in Your Garage
  • Making the Most out of the Photography Stuff You Have Already
  • How to Create Dark Moody Low-Key Portraits with Minimal Gear

Get a model

Once set up, you need a subject. We’ve already looked at food and flowers, but you can take it a step further by finding local people to model for you. Whether you’re looking for models or characters, friends and family are a good way to start. Once you’ve got a few shoots under your belt – and the start of a portfolio – you can approach other people to see if they’d be interested in taking part.

I made this portrait using a single Canon Speedlite flash in a 90cm Lastolite softbox.

portrait - How to Find Interesting Subjects for Photography in a Boring Place

Start projects

Feeling inspired yet? My next tip holds the true key to finding interesting subjects in boring places. There’s no better way to become a better photographer than to start a project. They are so good for improving your photography skills that even pros regularly set themselves personal projects.

Projects can be simple, or they can be complex, expensive and time-consuming. But don’t feel intimidated by grand projects – you can get started with a modestly ambitious project.

For example, over the last few years I’ve spent time photographing dancers, craftspeople, artists, musicians, parkour and circus performers. Here’s a photo I made recently of a dancer.

dancer - How to Find Interesting Subjects for Photography in a Boring Place

The reward of these projects has been twofold. On one hand, I’ve made some interesting photos and portraits for my portfolio. On the other, I’ve met lots of new and interesting people and made new friends. I’ve had experiences that I would never have had if I had not created these projects.

Reach out to new people

The great thing about projects is that they give you an excuse to contact people who may be interested in taking part. For example, let’s say you’d like to start a project photographing dancers. There may be local dance schools you can approach or Facebook groups for dancers. You can get in touch, explain your project idea, and ask if anybody is interested in taking part.

The hardest part is getting started. After your first photo shoot, you will have some photos to show other people. Also, the person you photographed might be able to introduce to other people who could be interested in taking part.

Projects are a fantastic way of finding interesting subjects to photograph. I’m sure that wherever you live, no matter how boring it may seem, there are people nearby doing interesting things that could make a great photo project.

I made this portrait of a local singer after getting in touch by email and asking if she’d like to take part in a shoot.

singer - How to Find Interesting Subjects for Photography in a Boring Place

Conclusion

Hopefully, these ideas give you a head start on defeating boredom and finding interesting things to photograph in your area, no matter how boring or uninteresting it may seem.

Do you have any suggestions for finding interesting things to photograph? Please let us know in the comments, I’d love to hear them.


If you enjoyed this article and would like to learn more about the creative side of photography then please check out my ebook Mastering Photography. It shows you how to take control of and be creative with your digital camera, no matter what your skill level!

The post How to Find Interesting Subjects for Photography in a Boring Place by Andrew S. Gibson appeared first on Digital Photography School.
Digital Photography School

 
Comments Off on How to Find Interesting Subjects for Photography in a Boring Place

Posted in Photography


5 Tips for Avoiding Boring Photos of Mountains

21 Jul

Jagged peaks, precipitous drops, deep and sweeping valleys: mountainous landscapes are unquestionably some of the most photogenic places on the planet. It shows too – take a look at any photo magazine or website, and you are likely to find not just one or two, but dozens of images of mountains.

Bhutan-Jhomolhari-02

Mountains are a landscape torn apart by the steady pressure of plate tectonics and erosion, and in that drama is the potential for spectacular photography. Why then are so many images of mountains boring? Because landscape drama does not always translate well into photographic drama, without the right combination of factors. Though there are really too many of these to name, I think five are particularly important: foreground, light, color (or lack of it), juxtaposition, and perspective.

Before we dive in, I want to make it very clear that there are as many different methods for making successful images of mountains as there are mountains themselves. Not every image has to have a compelling foreground, nor does of every image have to contain dramatic color or light. These five points are suggestions and starting places, not a formula. That noted, let’s get started:

1. Foreground

Foreground serves a number of purposes in a landscape; among these are depth and scale, setting details, and to provide a starting point for the path through the image. Foregrounds are tricky, done wrong they can make an image confusing, misleading, or unbalanced.

I’m a sucker for a good foreground. I love the way a well placed element can echo and balance features in the background, provide detail to a larger scene, and lead the viewer’s eye neatly into the photograph.

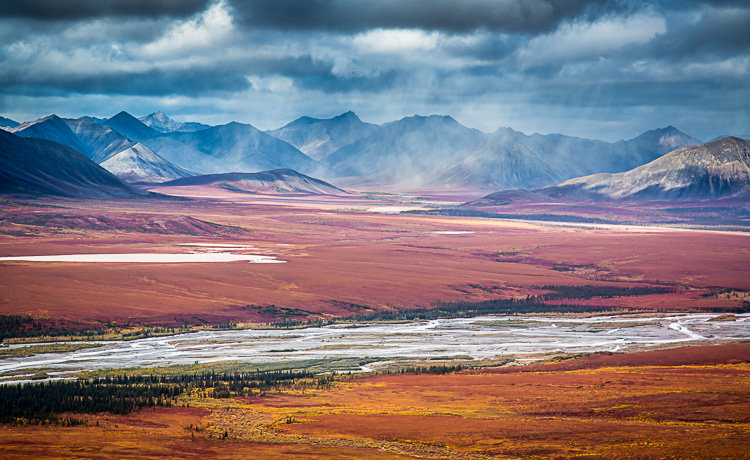
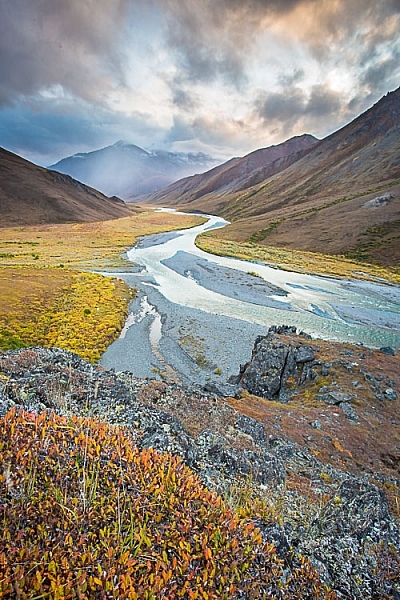
The autumn colors in the close foreground provide a good starting place for this image, guiding the eye to the winding river and then onto the stormy mountains beyond.

The autumn colors in the close foreground provide a good starting place for this image, guiding the eye to the winding river and then onto the stormy mountains beyond.

Yukon-Kluane-lake-123074-32

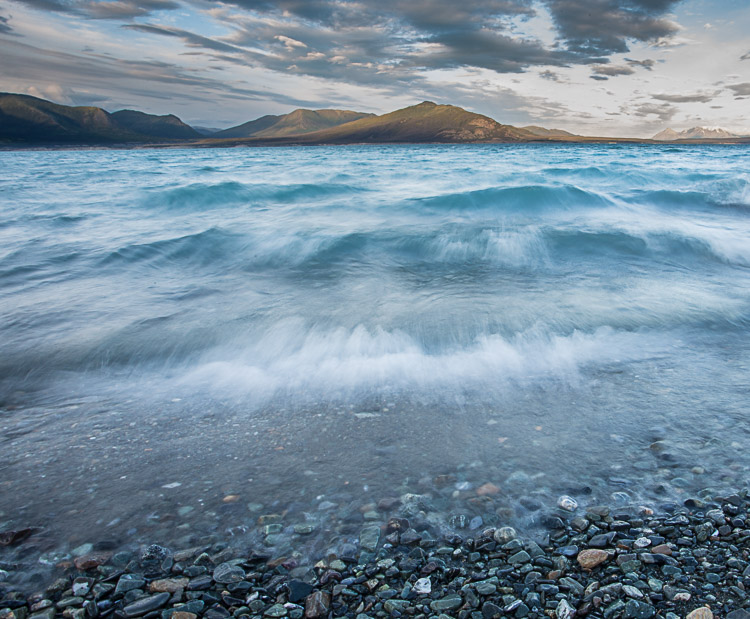
Water is a great foreground subject, and in this image of a wind-tossed lake, the water plays double duty, providing color and interest, while the texture is reminiscent of the mountains in the background.

AK-ANWR-Kongakut-WhaleMtn-1063-101

2. Light

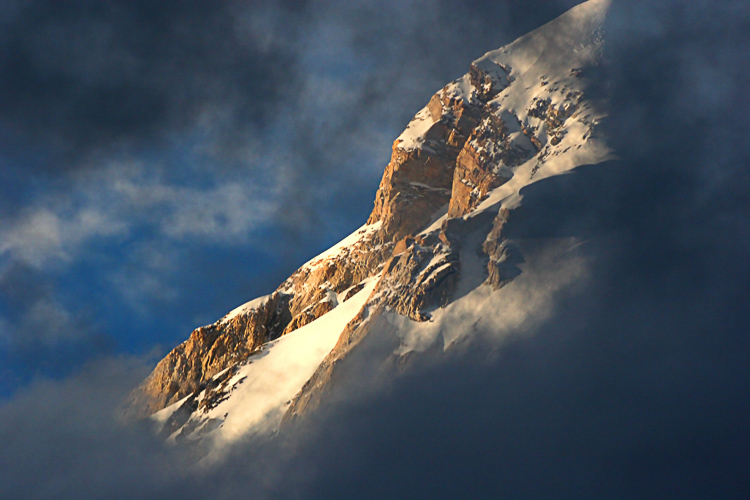
Lighting may be the single most important aspect of a successful image. While backlight, and front light can work under some circumstances, mountains thrive in side-light. Light from the side brings out the shadows, and detail in the ridges, cliffs, and rolling slopes. It provides contrast and drama.

Images of big landscapes, like mountains, rely on natural light to for illumination, so you are really at the whim of the weather. Cloudy days can flatten the light, while midday sun will drown out shadows and turn pleasing contrast into an eye-squinting mass off whites and blacks. Successful images can arise from these challenging scenarios, but low-angle side-light makes our lives as photographers so much easier.

AK-ANWR-Jago-106274-35

This detail shot of a mountainside in Alaska’s Brooks Range, despite being front-lit, retains some drama thanks to the patchy sunlight.

AK-ANWR-Kongakut-WhaleMtn-1063-274

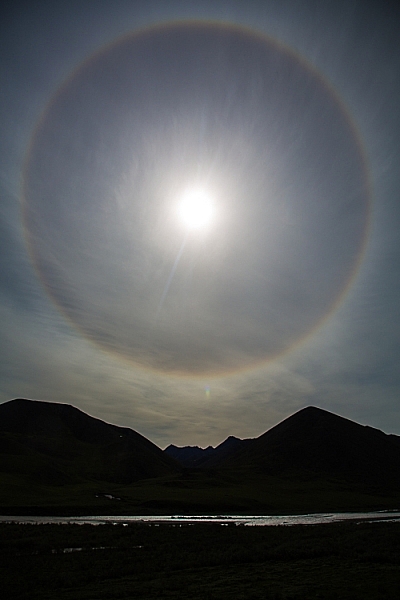
A case where backlight worked to my advantage was when the mountains, darkened to silhouette, appeared to cradle this ring around the sun (caused by high elevation clouds).

AK-DenaliNP-June2008-95

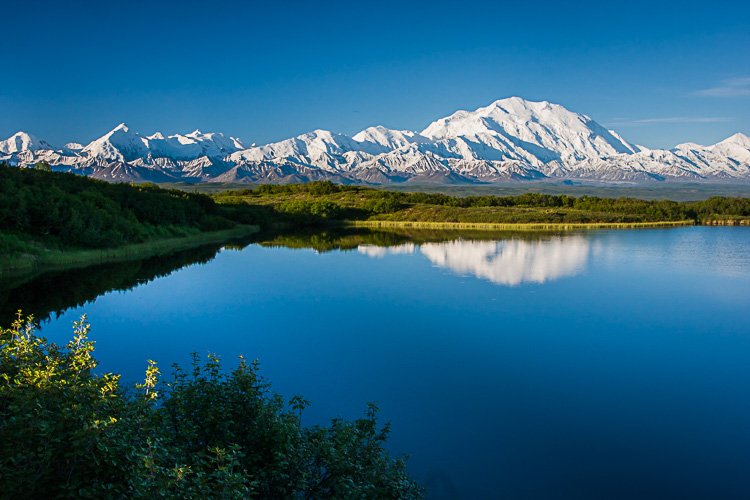
Classic side light on Denali peaks of the Alaska Range, from Reflection Pond in Denali National Park, Alaska.

3. Color (or lack of it)

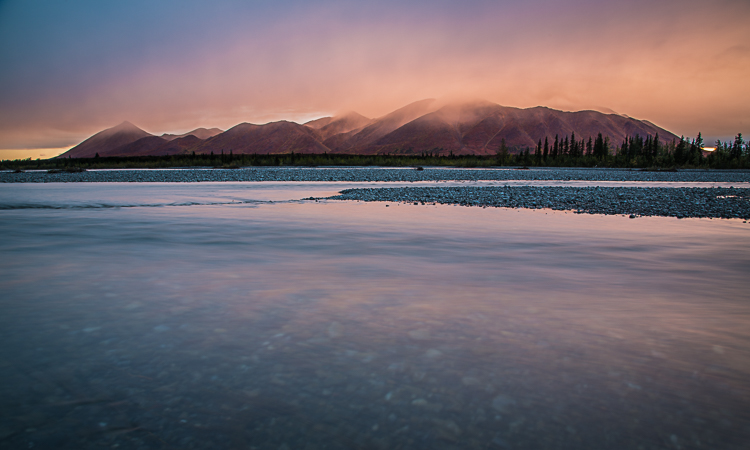
Bright colors (not artificially saturated) attract the eye. This is particularly true in images of mountains. Sunset and sunrise, colorful foregrounds, and bright blue alpine skies, will help catch and hold the gaze of a viewer.

AK-NoatakPreserve-KellyRiver-1083-320

As I think about it, this goes very tidily with #2 (Light). Good light very often equates to good color. The better the light quality, the more vivid the colors of the scene become. Get one, and you often get the other.

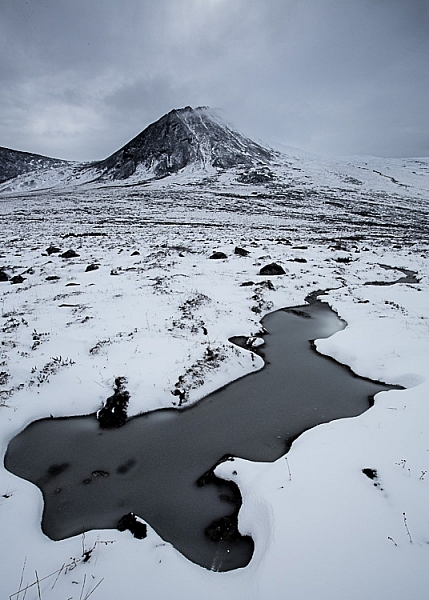
None of this is to say that an image has to have bright colors to be successful. Low-saturation images can be moody and brooding. Storms and winter images are two examples where colors may not be rich, but do not hurt the final image. These photos thrive on the drama of the scene, rather than their colors.

AK-ColleentoKongBP-1066-105

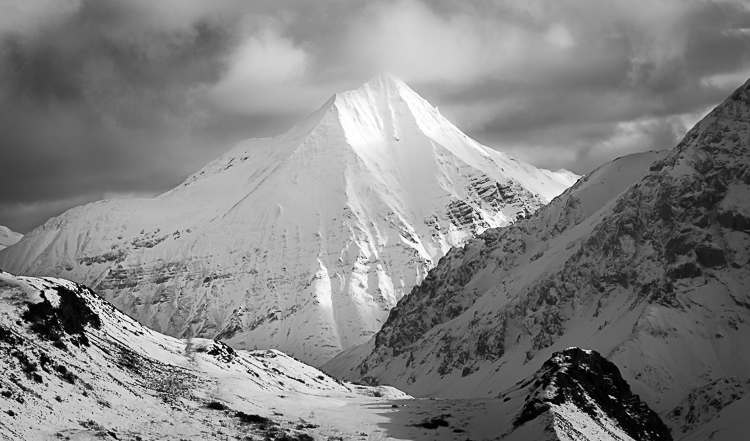
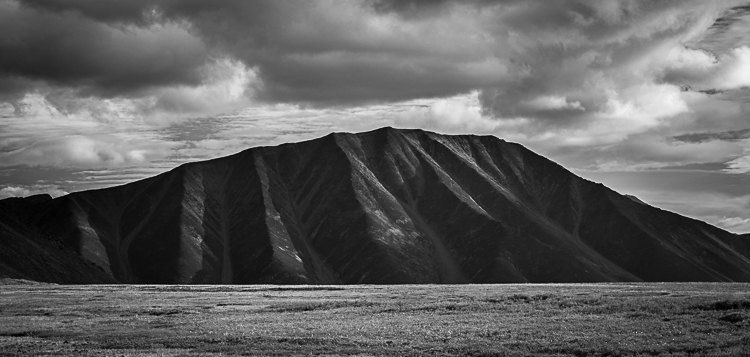
In black and white images, color is absent, and yet can result in a rich portrayal of the mountains. In such images, contrast and mood play an even more important role.

A note on Black and White: when factors like light and color are not in your favor, a black and white conversion can often be a great tool. I’ve made numerous images on flat-light days that converted well to black and white, when a true-color image would have been dull and muted.

AK-DNP-17Sep07-46

AK-GAAR-AIR-1073-1012

Bolivia-Altiplano-Feb2008-555

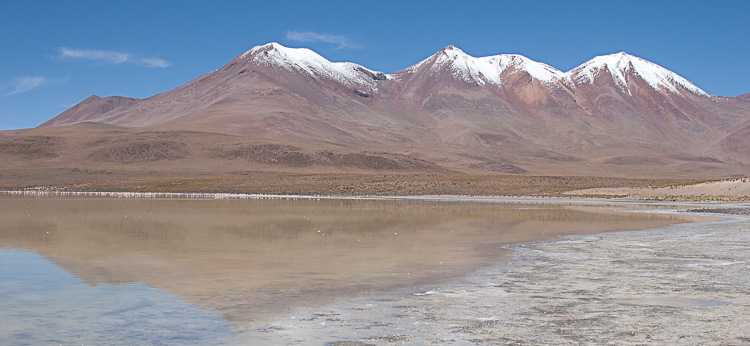
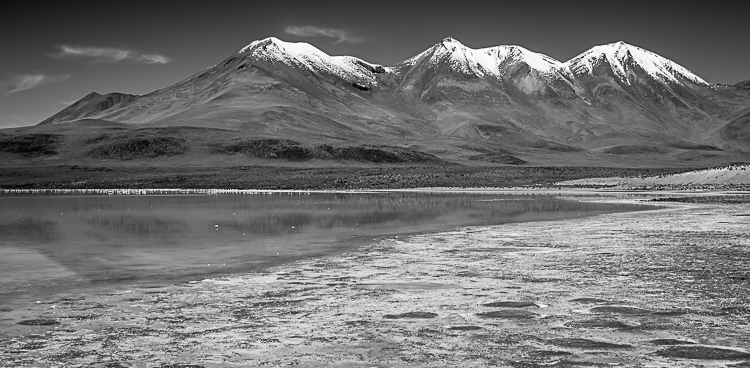
I made this image of peaks in the Bolivian Altiplano at mid-morning when the near-equitorial sunlight was hot and bright. It doesn’t look particularly good in color.

Bolivia-Altiplano-Feb2008-554

Convert the above image to black and white, however, and the photo comes alive in a way it wouldn’t otherwise be able.

4. Juxtaposition

Juxtaposition is defined as: “two things placed together with contrasting effect”. In photography, that contrast can be literal; light versus dark contrast, colors (bright versus subtle), tonality (hot or cool), or, perhaps most effectively, the subject matter.

All of these are important parts of mountain photography. Contrast, I noted earlier in this article, but tonality and subject matter both warrant some attention.

Juxtaposed color tones combine in interesting ways. Mountain scenes, particularly from places like the Rockies, Cascades, or Alaska, tend to be dominated by cool tones; blue skies, green tundra and forest, glacial streams, or clear blue lakes. These cool-colored scenes often benefit when warm tones, like yellow, red, or pink, are integrated into the scene. Often that warm tone is best presented as a flash of color, a setting sun, a wildflower, the bright jacket of a hiker, rather than as an equal to the cool tones. When the two are equivalent, your brain has a hard time sorting out which to pay attention to, and the pleasing juxtaposition becomes a tangle of clashing color.

AK-GAAR-AIR-1073-1028

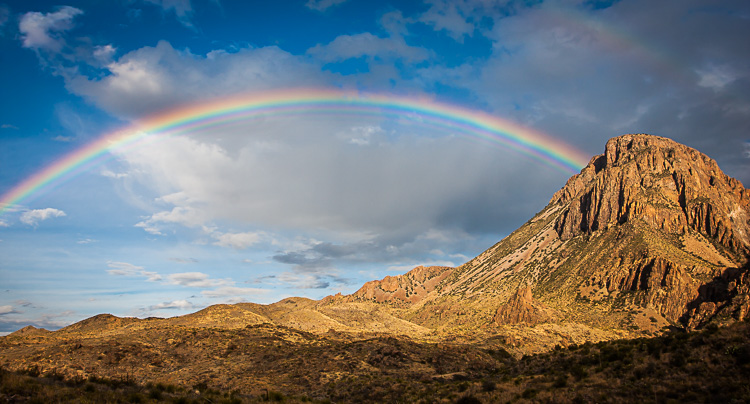
Subject juxtaposition is where a landscape images comes alive. When it comes to mountains, the potential for such contrasts are many. So many in fact, that it’s hard to mention just a few. Some, like the image below of the rainbow over the desert mountains of Big Bend National Park, have obvious subject juxtaposition (rain and dry desert rock). But the same image also has contrasts in shapes and texture (the jagged rocks and and smooth curve of the rainbow for example). All of these combine nicely to provide interest.

TX-BigBendNP-Jan2009-735

AK-CanningMarshFork-1066-49

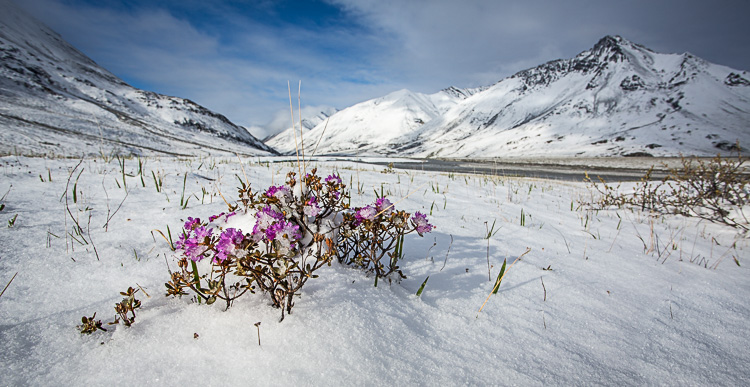
Snow and flowers is an obvious juxtaposition in this image of the aftermath of a June snowstorm in the Arctic National Wildlife Refuge, Alaska.

5. Perspective

The final aspect of mountain photography I want to discuss is perspective. Which is to say, the perspective from which you make the image. For simplicity sake, I’ll break this down into three divisions: bottom, middle, and top. Each of these greatly impacts not just the appearance of the final image, but also its mood and feel.

Photographs of mountains made from a valley bottom looking up, make the mountains appear large and imposing. These low shots provide space for an interesting foreground, and many classic landscapes have been made from this perspective. Though effective, there are drawbacks to shooting from the valley bottom. The low perspective means that the view is limited; there are no seas of mountain peaks spreading to the horizon. Light too is often difficult. The bottom of the valley is the last place to gain sunlight in the morning, and the first to lose it in the evening, so balancing light makes exposure tricky, and by the time the landscape is evenly lit, the sweet light of dawn or dusk is long past.

AZ-GCNP-FebMar12-160

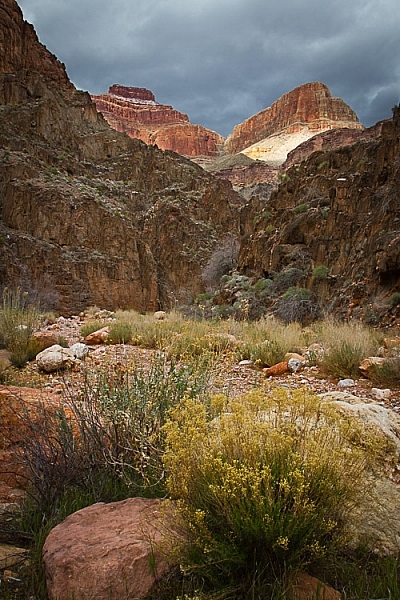
Exposure was tricky as I tried to capture the storm light on the Red Wall of the Grand Canyon high above my camp along the Colorado River.

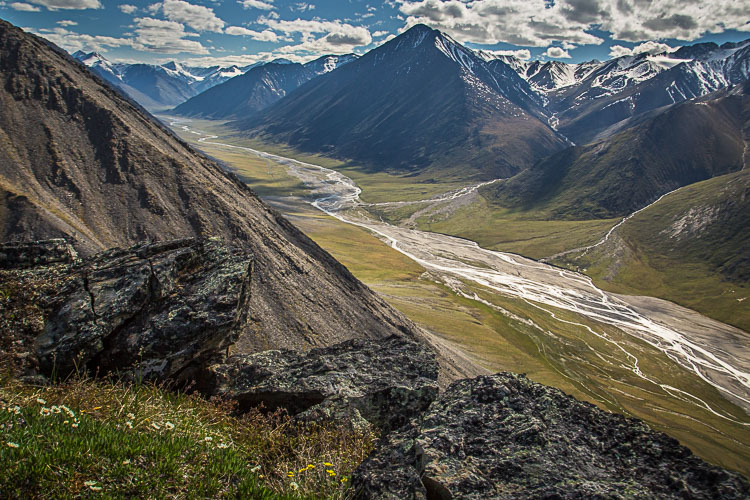
Mid-mountain shots can be spectacular, providing views both below and above. This perspective is one of my favorites, allowing for a lot of depth in the landscape, while maintaining the size and drama of the mountains.

AK-ANWR-Jago-106244-14

AK-NoatakPreserve-KellyRiver-1083-469

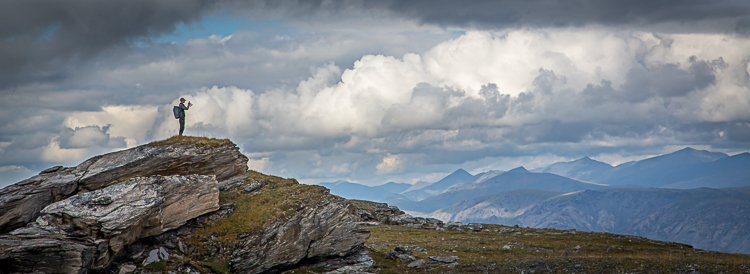
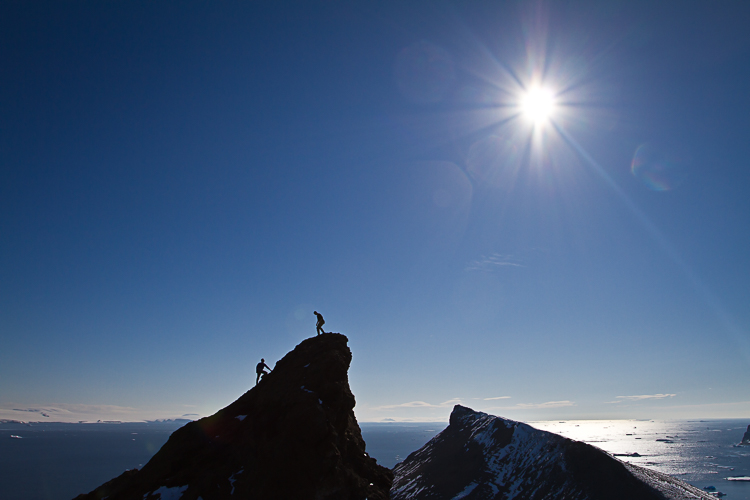
Mountaintops are tricky. Images made from the summit of peaks tend to make the surrounding landscape look small. I’ve taken photographs from peaks in which all the mountains look like rocky waves, rather than the towering summits they are. You can make up for this by adding a human to the shot, which provides scale. You remove the focus from the mountains, and place it on the human experience within them. It changes the image, making it less of a landscape, and more of a portrait or action shot, but the results can be effective.

AK-GAAR-Alatna-Noatak-1083-347

A hiker atop a mountaintop in Gates of the Arctic National Park, Alaska becomes the subject in this image.

ANT-16Jan10-DevilsIsl-11

Without the climbers nearing the top of this peak in Antarctica, there wouldn’t be much to look at in this image.

Conclusion

One of the great joys of photographing mountains, is simply being in the mountains. A camera is great excuse to go for a hike, or float a mountain river. But, the camera can also be a tool for experiencing the place more deeply. It can make you appreciate how the mountains look in various light and seasons, and from different angles. In turn that appreciation can lead to better images. Now go out and explore.

This week we are doing a series of articles to help you do better nature photography. See previous articles here:

  • 3 Habits Every Outdoor Photographer Should Develop to Avoid Missing Shots
  • 5 Tips for Better Nature Photography
  • 27 Serene Images of the Natural World
  • Weekly Photography Challenge – Nature
  • 10 Ideas for Photographing Nature in your Backyard
  • 6 Tips for Capturing Character and Personality in Wildlife Photography
  • 5 Tips for Setting the Focus in Your Landscape Photography
  • 7 Tips for Better Marine Wildlife Photography
  • Tips for Processing Landscape Photos – from Basic Edits to Artistic Interpretation

googletag.cmd.push(function() {
tablet_slots.push( googletag.defineSlot( “/1005424/_dPSv4_tab-all-article-bottom_(300×250)”, [300, 250], “pb-ad-78623” ).addService( googletag.pubads() ) ); } );

googletag.cmd.push(function() {
mobile_slots.push( googletag.defineSlot( “/1005424/_dPSv4_mob-all-article-bottom_(300×250)”, [300, 250], “pb-ad-78158” ).addService( googletag.pubads() ) ); } );

The post 5 Tips for Avoiding Boring Photos of Mountains by David Shaw appeared first on Digital Photography School.

Digital Photography School

 
Comments Off on 5 Tips for Avoiding Boring Photos of Mountains

Posted in Photography


How to do Great Photography Even When Your Surroundings are Boring

07 May
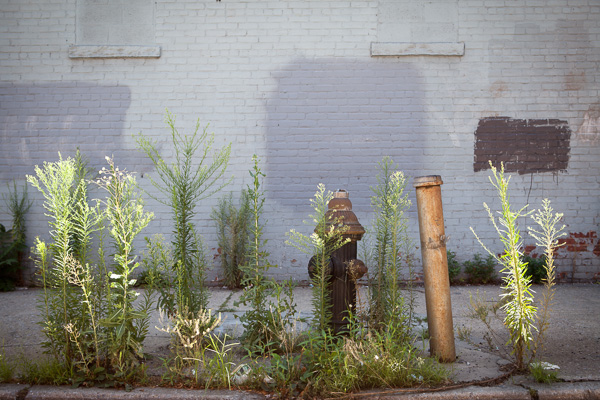
Gowanus Fire Hydrant

Gowanus Fire Hydrant

I have always been fascinated with great photography taken in areas that people might commonly refer to as ‘boring.’

I use the word boring because that is the specific word I most often see used as an excuse for people having trouble with their photography. Someone will say, “I wish I lived somewhere more interesting and beautiful”or “I can’t do interesting work where I live. It’s too boring.”. Can you relate to that?

What these people don’t realize is that what might seem boring and routine to them could seem fascinating to others, and by dismissing where they live they do not even give themselves a chance to try and photograph it in an interesting way.  They take themselves out of the game before they even start.

When someone uses the word boring, I tend to think that they mean quiet and not traditionally picturesque, or maybe there are not many people around and the ones that are around seem uninteresting.  These are not reasons that you cannot take an interesting photo. In fact, these topics all sound fascinating to me. Use these aspects to your advantage and figure out ways to make them interesting, photogenic, and appealing. Also, keep in mind that often the people that seem the least interesting, actually tend to be the most interesting.

Here are some tips to capture interesting photos in ‘boring’ places, and I hope after you read this article you will never use the word boring again.

Capture images of people you come across in everyday situations

Capture people that you come across in everyday situations

Take a camera with you on everyday excursions

Many people have the habit of only taking their camera out when there is supposed to be a picturesque moment. Maybe it’s a sunset, or to the park, or on a trip. This is a tough way to shoot because you already have the images you want to capture in your mind before you take them.

The goal here is to not stop yourself from taking images before you even start. The more ‘boring’ you think the place is, the more you should bring out your camera. Go into a situation with the mindset that you are going to figure out how to take an interesting photo no matter what happens.

Try to create interesting images in the course of your everyday life. Photograph your neighborhood. It could be at the gas station, at a roadside diner, in a supermarket, in a parking lot, or stopping on a quiet street corner at dusk. For me, this is the true fun of photography. It’s a way of helping you see aspects of your everyday world in an unique way.

Remember, if you have a DSLR that is too heavy to carry around frequently, there are alternatives. The most important one is the cellphone in your pocket. Cellphone cameras have come a long way, and while they are not close to the quality of a camera, you can still make good prints out of them. The most important reason for using a cellphone is that you are training your eye by using them when you otherwise wouldn’t take a camera with you.

Some other alternatives are to purchase a smaller prime lens or a pancake lens to lighten your DSLR for everyday use, or purchasing a mirrorless or micro 4/3rds camera. I personally love the Fuji X100s.

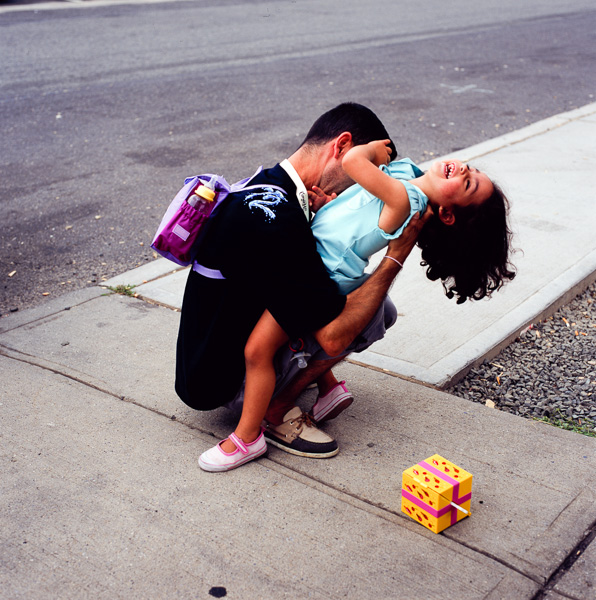
Dancer in Pharmacy

Dancer in Pharmacy. Taken with iPhone 4S.

Find beauty in the mundane

This is the most important point. Try to go beyond the safe photo. Capture something that you find interesting even though many people might not choose to put it on their walls. Don’t be afraid if other people hate it. That’s often a good sign. It only matters if you like it.

Focus on details and use everyday elements to make an image interesting. You don’t have to have a mountain, a stream, or a sunset in your photo to make it interesting. A brick wall, a parking cone, a street sign, or a bare building can all be beautiful when captured in the right way. Capture people that you come across over the course of your everyday routine. These can be the most interesting images since you will already know the subject well.

Aim to capture subtle images as part of your work. Subtle images might not jump out at a viewer right away, but they will stick with them. These images will make someone think and will become more interesting to the viewer over time as they wonder about them. Subtle images can be very powerful when done correctly.

Red Chair, Crate and Barrel

Red Chair, Crate and Barrel

To be honest, the jury is out on what I think about this image above, and I think it will have to age before I figure it out.  But I had to try it.  It might look completely normal and banal, especially if you live in the U.S., but it takes on a different meaning when you compare it to this image taken by William Eggleston in 1984.  The ‘boringness’, the browns and muted tones become the point of this image.

Tell a story

Pretend you have a viewer that knows nothing about where you are from. Maybe you live in a quiet corner of suburbia, where all the houses look the same, or maybe you’re in the middle of a rural area.

Your photos should tell the viewer what it is like to be there. Think about it as though you are talking to the viewer through your images. Use your images to tell the stories that surround you, no matter how big or small.

Gentrification

Gentrification

I have walked past this building with my camera every couple of days for almost seven years.  Then, one day there was an interesting image.

Experiment

It is a hard process to learn to photograph this way and you will undoubtedly take many bad photos during the learning process. You will have a hard time figuring out what is good and even asking for feedback might confuse you further. I don’t know about you, but that sounds like fun to me.

Find a friend or two or a fellow photographer that you trust and show them your images over time. Let them grow with your work while you do. This will become invaluable feedback down the road and help you talk out your work with them.

The only constant in this process is that it takes time to succeed and to figure out what you are doing and what you are photographing. There is no roadmap for doing this type of work.

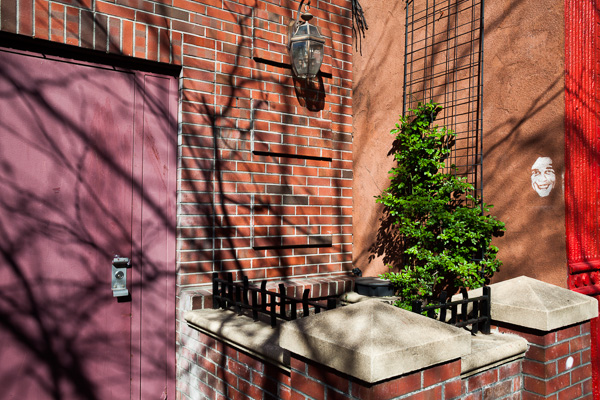
White Face

White Face

Don’t take your area or lifestyle for granted

Just because something does not seem interesting to you, does not mean it is not interesting. The way you do things and your environment are both vastly different from the rest of the world. Keep that in mind. Capture intimate aspects of your world for others and they will find those photographs fascinating, even if they might feel routine or normal to you.

Great photographers can do great photography anywhere, however it sometimes can take a little inspiration to get the wheels turning. The most important thing is to walk out the door frequently. If you think you are not going to capture any interesting images then you are not going to walk out the door.

Take a long walk, anywhere, at anytime, and challenge yourself to capture an interesting image.

A Plant Grows, Chase Bank

Plant, Chase Bank

Further viewing

For further viewing, I highly suggest exploring the work of Williams Eggleston, Lee Friedlander, and Stephen Shore.  They are photographic masters who have spent much of their time photographing in this way.

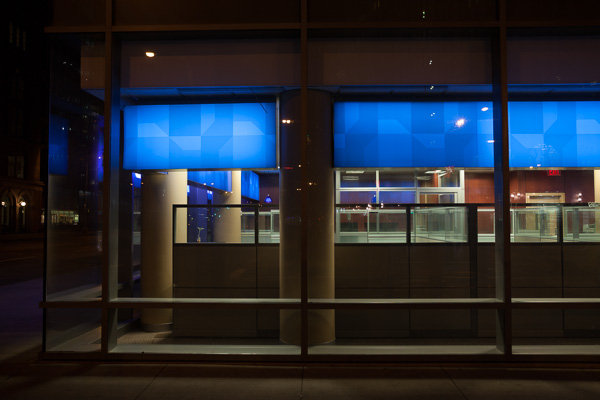
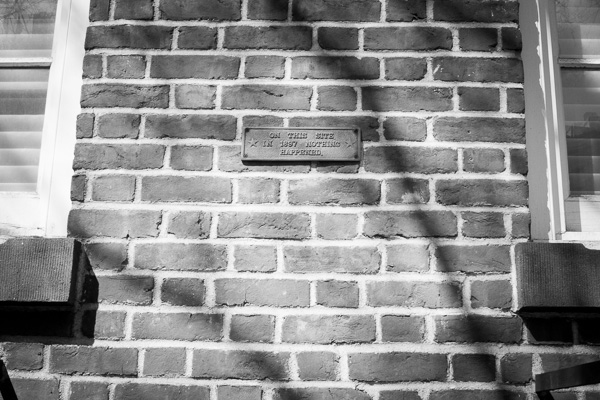
On This Site in 1897 Nothing Happened

On This Site in 1897 Nothing Happened

The post How to do Great Photography Even When Your Surroundings are Boring by James Maher appeared first on Digital Photography School.

Digital Photography School

 
Comments Off on How to do Great Photography Even When Your Surroundings are Boring

Posted in Photography


7 Tips for Photographing Newborns without Becoming Clichéd, Derivative or Boring

11 Jun

by Lynsey Peterson.

When I first started doing professional photography, newborn babies were the coveted prize. An adorable sleeping creature that would look cute no matter what? Sign me up! Let’s put that baby in a stockpot! In a basket! Wait! –A headband that looks like a flower! In a field of flowers! With butterflies! And maybe a big gift box bow!

Then I realized that Anne Geddes is the landlord of that entire market. And that it’s rare for a portrait client to actually want a picture of their baby in a stockpot. What people do want is a picture of their baby, that looks like their baby. Because in about 5 minutes their baby isn’t going to look like this anymore.

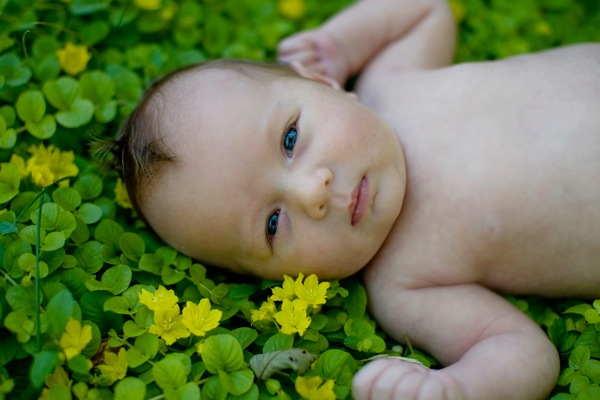
BABY1

Set the Scene

In an ideal situation, you are photographing a newborn that is less than two weeks old (when they tend to be more “mold-able”), in the morning (when they tend to be a more willing participant), just after being fed (when they tend to be a little more tolerant), and in a warm room (where they tend to be a little more comfortable).

Having everything ready to go before shooting a single shot is taken will serve you well: various blankets for background and warmth, cloth diapers for when someone pees on you (let’s hope it’s the baby), any clothing you plan to use and back-ups of every possible thing. I prefer minimal clothing on newborns, but this is just personal preference. Amble natural light is important because even if you do usually shoot flash, it’s often disruptive enough to wake a newborn and rule number one in photography, parenting, and life is: Never wake a sleeping baby. If there is anything I’ve learned, it’s that.

Be prepared to work fast because babies can be ticking time bombs, but slowly because they are delicate ticking time bombs. You are methodical. You are confident. You are patient. You are the baby whisperer. Because we are speaking in ideals. And if you’re me and we are still speaking in ideals, you also have on your cute jeans and are having a great hair day. Because, why not?

BABY2

Find the Purpose

Photographing newborns is one of the few times I make a point of asking clients what they are planning on doing with the end result. Often it’s for use in a baby announcement or just as “baby pictures” documenting this time. But if it’s going to end-up as a 24″x36″ canvas above a fireplace, I want to know beforehand. Or if I’m going to need negative space to create an announcement card, I’d rather shoot with that in mind then trying to backtrack later in post.

Another thing to think about is the ratio of images of the baby alone and the baby with parents or siblings; there is no right or wrong answer here but knowing what you or your client is wanting in advance is key. Newborn shoots are not (usually) guided by a free-spirited toddler and therefore require more of a plan from you than shoots with older children. And you never know when a baby will decide that pictures are just not what he wants to do today and let’s you know this in a very unsubtle and loud way.
  
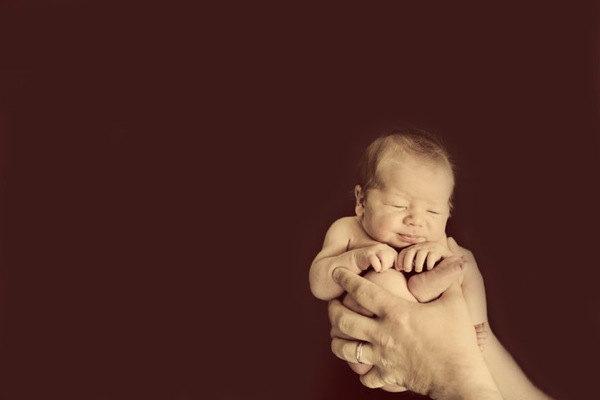
BABY3

It’s all about the Baby

The only thing I always bring to a newborn shoot is a large piece of black cloth. I have had it for nearly a decade and more babies have peed on it than I wish to think about. I have hung it on walls and used it on floors and beds as a back-drop. I use it every single time because it simplifies everything and allows the focus to be completely on the baby. Lots of photographers do a version of a black background of some sort and I’ve found that there is no need to get fancy.

Many photographers use a velvet, but mine is about 2 yards of a stretchy thick cloth that I bought at a fabric store for ten dollars. It washes well (luckily) and the light sheen of it makes editing out any wrinkles in post extremely easy. I carry thumbtacks and painters tape to hang it with if I need to and it’s thick enough to hang over about anything and not have backlight shine through. I cannot stress having a way to simplify a newborn shoot enough. If a black background isn’t your style, find what is that will clean-up everything and let the newborn to be the focus, and allow it to become your key piece for baby photography.

BABY4 1

It’s in the Details

And why shouldn’t it be? Baby details are sorta amazing. I mean have you seen a baby toe recently? Talk about something I’d like to dip in butter and call a snack. We have all seen baby parts photographed in the same boring ways: wedding rings on toes, close-ups of belly buttons and umbilical cords (ew), tops of bald heads in big grown-up hands. I am guilty of doing every one of these, multiple times over. I now see that the shots that will stand the test of time will be very simple close-ups that highlight just how small newborns are: tiny hands holding a parent’s finger, brand new feet that have yet to see wear, yawns and other adorable expressions that only look adorable on a baby.

BABY5

As Cute as they are Awkward

Oh sure, we all know they are adorable, but what are you supposed to do with them? They are flimsy and tiny and often naked. This is where I think we get into trouble and put them in baskets and stockpots. Because we can. Instead of creating scenes, it’s better to just think of “positions”. Babies can only do about two positions unassisted—laying down this way or that way. Work with that.

They may just lay there, but the beauty in this is that they often let you adjust them however you want. Tuck legs up under bodies, pull flailing arms into blankets, curl them up into someone’s hands. The baby is the star of this show and is plenty cute to pull off this role without a big supporting cast of props. A key to getting the position you want and having it stay that way long enough to get the shot you want is to keep your hands on the baby longer than needed after positioning them.

Think of it as long hug—you don’t need that extra ten seconds at the end, but it feels nice. Get the baby settled and then stay there for a bit longer. The warmth of your hands and the consistency and reassurance is often exactly what the baby needs to “hold” the position you are seeking.

BABY6 1

Got Extra Arms? Use them

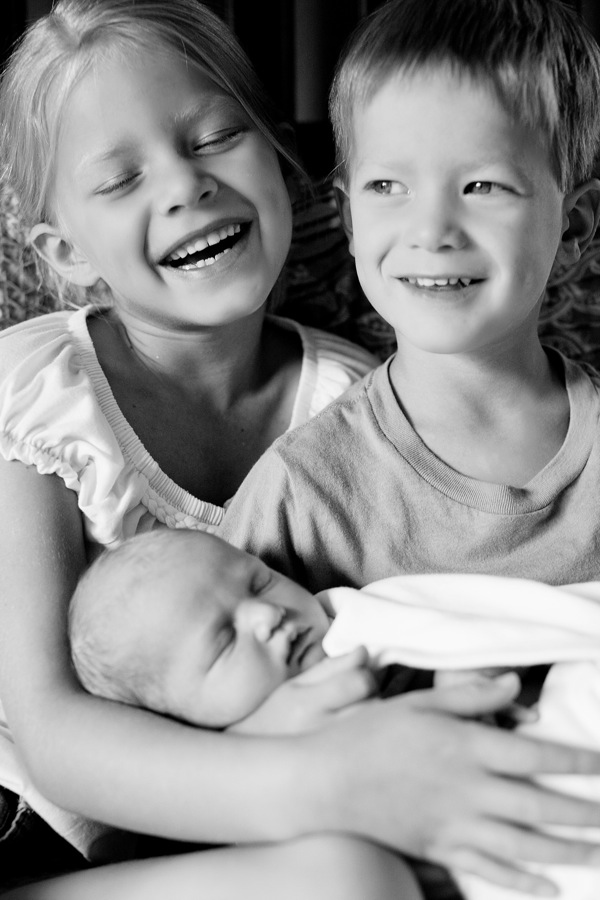
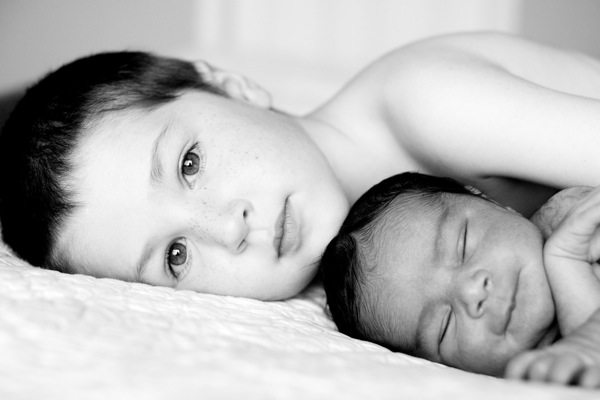
I like to include siblings as often as I can, no matter the age. This gets tricky because the very definition of tricky is a two year old holding a newborn while exhausted parents watch the situation go down. Enough pillows and promises of lollipops though will get you a shot or two and a little variation in the final images. Interaction is the name of the game here—look for whatever the emotion is that’s happening and play on it. If it’s pride, comment on it to instill confidence and document a sweet moment in sibling history. If it’s indifference, engage the older child so they forget there is even a new addition in the photograph and are happy to be your star for a moment.

BABY7

Stop Worrying

I love a good worry and consider myself to be quite good at it. But as jobs go, photographing newborns is about as close to shooting fish in a barrel as you are likely to get. It’s easy to feel the pressure given that babies are so fragile and grow every single second. The truth is any picture you take of a newborn is a gift. Just as any time spent getting to photograph a newborn. I don’t get sappy often, but newborn babies are pretty special. Enjoy it.

Especially if the newborn belongs to someone else and you get to walk out of there without a crying baby and go home to a bed where you’re permitted to sleep through the night.

Check out more of Lynsey Peterson’s work on her website.

Post originally from: Digital Photography Tips.

Check out our more Photography Tips at Photography Tips for Beginners, Portrait Photography Tips and Wedding Photography Tips.

7 Tips for Photographing Newborns without Becoming Clichéd, Derivative or Boring


Digital Photography School

 
Comments Off on 7 Tips for Photographing Newborns without Becoming Clichéd, Derivative or Boring

Posted in Photography