
We all know most people aren’t comfortable being photographed. What’s less well documented is many photographers actually feel nervous about photographing people.
It’s understandable when you think about it. Since we know that the people we’re photographing don’t want to be photographed, we feel we’re invading their space. We also feel just as ‘on show’ as the subject. We have to perform, be charming, build rapport, make people smile, effortlessly change the settings on our camera and ultimately show them how great they look in the photo. It’s a lot of pressure!
But hey, there’s never going to be a big sympathy movement for photographers, so we have to overcome our confidence demons on our own. I know how you feel. I used to quiver with fear when photographing people, too. Over the years I’ve picked up many helpful tricks and now I can actually enjoy the spotlight and hectic pressures of a large wedding. Here are a few for you:
Tips for boosting your confidence doing people photography
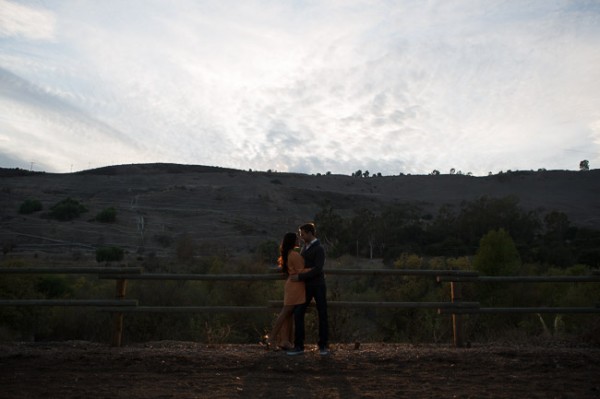
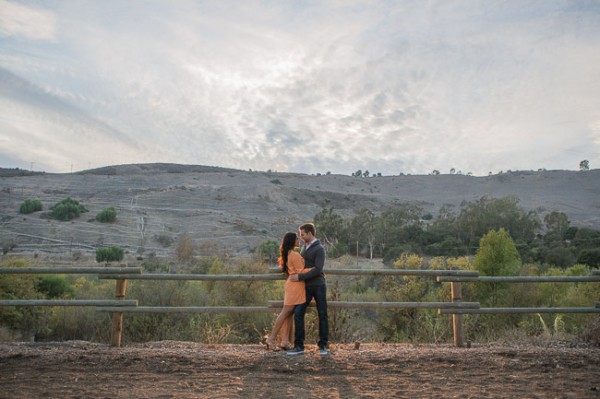
Plan the photo before you speak to them
 |
 |
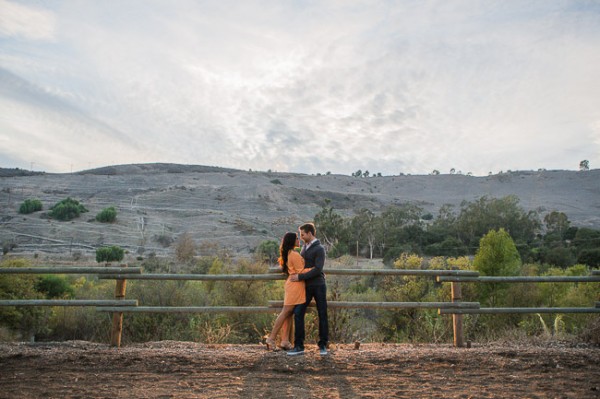
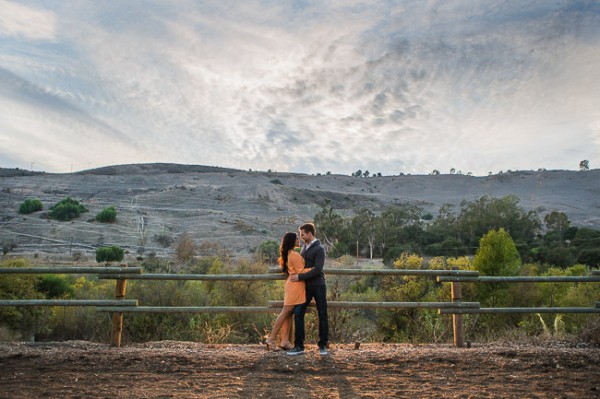
Once someone has agreed to be photographed you don’t want to be standing there flapping about wondering what you’re going to do with them. Have a clear image in your head that’s based on the available light, backgrounds, and the message you want to convey through the environment and their pose.
Think about why you wanted to photograph them in the first place and then use your composition, posing and photographic skills to tell the story. The better prepared you are the more confident you’ll feel. You’ll be able to give your subject instructions and explain why you’re doing what you’re doing.
For example, you could say “Your hair looks fantastic and if we take the photo over here then the sun will create a beautiful halo as it shines through it.” The model will feel great, you’ll feel in control and you’ll really sound like you know what you’re doing.
Help your model feel confident
 |
 |
The more relaxed your model is, the easier the process will feel for you too. Stay positive. Even if you can see you’ve screwed up a photo just keep sounding positive. Tell them how well they’re doing and never let silence descend. As soon as you stop talking, your model will instantly tense up. Imagine someone staring at you without talking and you’ll know how the model feels.
Often when we’ve just gotten started I’ll say, “Right, I’m just going to take a couple of practice photos to make sure I’ve got the exposure perfect, so you can pull funny faces at me if you like.”. Whether they pull a face or not they’ll often be more relaxed or even smiling naturally at this point. Because of this, some of the best images in a session can be your first.
How to keep the conversation going

We’ve already established that silence is kryptonite for a photography session, but what do you say to help take the model’s mind off the photography? As a portrait and wedding photographer I prepare what I’m going to say during the session almost as much as I plan the photos.
Here is a selection of the techniques I use in different circumstances:
- When photographing a group I might ask everyone to look at the person with the smelliest feet, or who spends the most time in the shower, etc.
- I ask them to keep their eyes open for as long as possible. You start with a glazed expression but as their eyes begin to dry out they start to smile and then laugh. I turn it into a competition if there are several people.
- Do you have any nicknames for each other?
- For group photos I have a method for avoiding people blinking. I ask everyone to shut their eyes and then open them on the count of three. Just after I say ‘three’ I tell them to remember where I’m standing!
- I ask them to guess the two people I get told I look like (it’s the comedian Harry Hill and the TV chef Heston Blumenthal, by the way)

For travel portraits some of the above ideas might work, but you can also just ask simple questions like:
- What do you love most about this place?
- Is there anywhere you recommend I go?
- Where’s the best place to eat?
- Do you have any hobbies?
- Don’t forget to tell them how beautiful their country and food is!
To help make the conversation even more natural I sometimes use a tripod and remote shutter button once I have the photo composed. This means I can maintain eye contact and build rapport more effectively. It helps the model feel like they’re in a proper conversation rather than staring at a piece of machinery.
Talk with them first
For a posed photo you should speak with the model first, whether you’re photographing a stranger or an old friend. Tell them why you want to take their photograph (I love your hair, you look cool, etc.) so the model isn’t left wondering.
When I’m on holiday I like to chat with the locals before I ask for the photo. Maybe I’ll buy something from their shop or pretend I need directions to get the conversation going. Once you start chatting and build rapport it feels much easier and more natural to ask for the photo.
*Note: for more read: Practical Tips To Build Your Street Photography Confidence for Tips for Photography People when Travelling.
 |
 |
Camera tricks for the super-nervous
If you’re really too shy to speak with people, or want a reportage style – then the obvious solution is to use a long lens. However, it can feel a bit creepy doing this and it’s even more embarrassing when you get caught!
An alternative is to put your camera on a tripod and use a remote shutter. This way people don’t realize you’re taking a photo at that exact moment because you’re not looking through the viewfinder. You then wait for people to walk into your composition and fire the shutter at the right moment. You’ll have to pre-focus the camera and use a deep depth of field to increase your chances of a sharp image.
Another method is to use a wide angle lens and place the person you want to photograph at the edge of the photo. The camera won’t be pointing at them so your motive is less obvious.

Feelings follow actions
When talking about building confidence most people talk about ‘positive thinking’. Psychological tests have shown that in reality feelings follow actions. What this means is that if you act like you feel confident then you’ll actually become confident.
If you smile, project your voice, dress sharp and stand up tall you’ll actually start to feel more assured.
Do you have any techniques, games or phrases you use when photographing people? Write them in the comments box below – we’d love to hear them. If you really want to step out of your comfort zone try How to Photograph Strangers: the 100 Strangers Project.
The post Tips for Boosting Your Confidence Doing People Photography by Dan Waters appeared first on Digital Photography School.
You must be logged in to post a comment.