RSS
 

Posts Tagged ‘Birth’

Birth of the Renaissance: Shooting with the Fujifilm GFX 100 in Florence, Italy

25 May

All of the images in this article were shot with a pre-production Fujifilm GFX 100 and are used with permission. Image quality may not represent exactly the output from final shipping cameras but is likely to be extremely close. Likewise, images of the camera may show minor cosmetic differences compared to final shipping units.


It’s exceedingly rare that I get to feel cool, especially at work. But every now and then an opportunity arises to do something, go somewhere or see something that makes me pinch myself. Just such an opportunity came up recently, when I spent a week shooting with a pre-production sample of Fujifilm’s new GFX 100 in Florence, Italy – the birthplace of the Renaissance.

I’ve been fascinated by the GFX 100 since we got a sneak peek of the camera still under development, earlier this year. And 18 year-old me loved the few days I spent in Florence in 2000, the summer before I went off to waste British taxpayers’ money for four years at university. Nineteen years on, could I recreate the sights and sounds of that heady teenage summer? Unlikely. And probably for the best. But at least this time I wouldn’t have to carry around a bag full of 35mm film.

The camera I was shooting with in Italy would have blown my teenage brain (admittedly not a difficult thing to do). Officially a beta test sample, Fujifilm handed over a pre-production GFX 100, running non-final firmware.

During shooting I did indeed experience occasional glitches, and some aspects of the camera’s performance and operation were very obviously unfinished. As such, this is not going to be a detailed, review-style write up of my experience. It can’t be. So given all of these caveats, what can I actually say about the camera?

Well: It sure does smell nice! Congratulations – you just read the shortest ever shooting experience article on DPReview.

Proud parents rejoice: Finally, a 100MP medium format camera that’s fast and responsive enough for quick grab shots of a toddler. With face and eye-detection and PDAF, the GFX 100 is a powerful portrait camera in autofocus mode.

ISO 160 | 1/320 sec | F2.8 | 45mm F2.8

If you’re still reading this, you either figured out I was joking, or you’re predisposed not to believe what you read on the Internet. Either way, thanks for sticking around.

There’s actually quite a lot I can say about shooting with the GFX 100, predictable pre-production bugs and glitches notwithstanding. Ironically, perhaps my biggest takeaway from using it for a week was just how finished this supposedly unfinished camera felt. In almost all important respects, the prototype GFX 100 camera I was using just worked. It worked so well in fact, and so intuitively, that within a few hours I wasn’t paralyzed by worry over the enormous responsibility of chaperoning a hand-built, embargoed, prototype camera around a foreign country. I was just enjoying the experience of shooting with it. And the pizza. I really enjoyed the pizza.

With its EVF attached, the GFX 100 actually has almost exactly the same ‘footprint’ as a Nikon D5

Compared to the GFX 50S and 50R, the GFX 100 offers a handling and shooting experience that is largely familiar, but in some ways quite different. The most obvious difference is that it’s a lot bigger than either camera. The integrated vertical grip accepts two batteries, and increases the size of the body to roughly that of a professional DSLR. With its EVF attached, the GFX 100 actually has almost exactly the same ‘footprint’ and weighs about the same as a Nikon D5, although of course its mass is distributed within a slightly different form factor. With the EVF removed, the GFX 100 is actually much easier to pack into a bag or hard case than a D5 or Canon EOS-1D X II, since it basically becomes a square slab.

The GFX 100’s EVF is removable, at which point the camera becomes much easier to pack into a bag or case for storage.

The second major difference compared to earlier GFX models is that Fujifilm has ditched the consciously retro styling of the older cameras in favor of a somewhat more severe, push button and dial-driven interface of the kind pioneered back in the 80s by Canon in the T90 and EOS-1 series SLRs.

Much as I respect Fujifilm’s tendency to put big chunky dials on many of their cameras from an aesthetic point of view, I don’t tend to use them in practice. Come to think of it, I haven’t used a shutter speed dial on a multi-mode camera since the Nikon F4. Since these days I tend to shoot using automatic ISO, that dial stays locked to ‘A’, too. I appreciate a physical dial for exposure compensation, but I can live without it.

It’s harder to unintentionally press a button and simultaneously scroll a command dial than it is to knock a dedicated dial out of position

As such, I have no problem with the GFX 100’s more button-driven interface, and in fact in a camera like this I tend to prefer it. When it comes to preventing accidental setting changes, it’s much harder to unintentionally press a button and simultaneously scroll a command dial than it is to knock a dedicated dial out of position against your hip, or when moving the camera in and out of a bag.

A lot of people seem unkeen on how the GFX 100 looks but I actually quite like it. Yes, it resembles an overgrown games console from the early 90s, and the blueish gray finish is very different to any other camera on the market, but it works, and hell, at least it’s different.

The rear screen is partially articulated, which is nice. But the ‘Q’ buttons on the two handgrips are very prone to be accidentally bumped. Here you can also see the lack of rubber coating on the vertical grip.

There are only three aspects of the GFX 100’s handling and operation which I feel could use some work. For starters, the exposure compensation buttons (one on the top plate, one on the vertical grip) are ergonomically different to one another, and both proved rather hard to locate when my eye was to the camera’s EVF. I fully expect that in final shipping cameras, it will be possible to repurpose the rear command dial for ‘quick exposure compensation’ in AE modes, and on that assumption, the exposure comp. button issue isn’t a show-stopper.

Harder to work around is the Q button – especially the one on the vertical grip – which I managed to constantly press by accident when I was handling the camera in preparation to bring it up to my eye. This is pretty much the same issue that has been widely reported with the X-T30, and to Fujifilm’s credit, a firmware update was swiftly issued to address the problem. My final gripe is a fairly minor one – I do wish that the vertical grip was a bit more contoured, and in contrast to the pleasantly textured rubber on the main grip, the bare metal can get a bit slippery after extended handling.

In pretty much every other respect the GFX 100 works very well. If you’ve used the X-T3 or one of its various stablemates, you’ll feel right at home. Even if you’re coming from a DSLR or mirrorless ILC from another manufacturer, the learning curve should be pretty shallow.

This image was shot during the 1/60sec interval in mid-May of this year during which there were no American tourists visible in Florence.

ISO 200 | 1/60 sec | F11 | 45mm F2.8

That’s the externals dealt with, but the real appeal of the GFX 100 lies less in what it looks like, and more in what it can do. And oh boy, it can do a lot. I’ve shot with the GFX 50S quite a bit, and I really enjoy using it, but even if I was a working commercial photographer I would probably never buy one. Files from the 50S are great, but they’re not technically better than the output of the best full-frame DSLRs and mirrorless ILCs. Meanwhile, the 50S’s autofocus performance and viewfinder experience – while usable – compare poorly to competitive full-frame and APS-C cameras. The GFX 50S and 50R are fantastic cameras, no doubt, but not fantastically better than the smaller and lighter alternatives I have at my disposal.

Reading through the spec sheet of the GFX 100, you get the sense that Fujifilm’s engineers were showing off

The GFX 100, on the other hand, blows the 50S and 50R out of the water. The viewfinder is sharper and clearer, the autofocus performance has been hugely improved (Fujifilm claims a more than 200% speed boost compared to the previous GFX models) and in every respect the camera just feels faster and more responsive. Not to mention the fact that it includes sensor-based image stabilization, and powerful 4K video features. In fact, reading through the official spec sheet of the GFX 100, you get the sense that beyond a certain point Fujifilm’s engineers were simply showing off – and who can blame them.

The detail in JPEG files from the Fujifilm GFX 100 is extraordinary, and we’re eagerly awaiting Raw support to really see what those pixels can do.

ISO 640 | 1/160 sec | F10 | 100-200mm F5.6

The fundamentally Big Deal here is that the GFX 100 is the first medium format digital camera to really compete with modern full-frame DSLR or mirrorless ILCs in terms of everyday shooting versatility. Obviously it’s not designed for shooting sports or action, but for portraiture, landscapes, travel and street photography, virtually the only thing that the GFX 100 can’t do is fit into a pocket.

We’re talking here about a 100MP hybrid stills / video camera with usable (in fact very good) autofocus that isn’t intended primarily for use in a studio. And for the first time, thanks to a new back-illuminated CMOS sensor, the GFX 100 should be able to deliver images that are not only bigger than contemporary full-frame cameras, but better. We’re still waiting to dig into the Raw files, but we’re expecting an increase in Raw dynamic range over both the GFX 50S and Nikon D850 at ISO 64.

Smaller sensor formats will probably always win in terms of ultimate versatility (the GFX 100’s sensor readout isn’t fast enough to match the silent shutter shooting abilities of, say, the Nikon Z7, but the GFX 100 gets impressively close. Taking a series of portraits in rapid succession (continuous shooting maxes out at 5 fps in 14-bit Raw mode) with face and eye-detection turned on, I kept forgetting I was shooting medium format.

All of those pixels are lovely, but they don’t come cheap. This JPEG file is 62MB in size, and 14 and 16-bit Raw files are even bigger. This could be a major consideration when it comes to file management and archiving.

ISO 160 | 1/220 sec | F11 | 45mm F2.8

Until I started to download the files, of course. One of the downsides of the GFX 100’s impressive operational speed is that you might find yourself burning through card space rather more quickly than you had anticipated. And with even JPEGs ranging between 30-70MB each, file management on a computer can be a frustrating experience. I wasn’t able to try out the 16-bit Raw mode with the camera we used in Italy, but with those files likely in the hundreds of megabytes each, 16-bit file storage could quickly become a headache.

The GFX 100 now offers phase-detection autofocus, covering almost 100% of the frame

While I don’t want to (and can’t) get into too much detail around specifics, I imagine you’d like to know how well things like autofocus, IBIS and video work on the GFX 100. The short answer in all cases is ‘very well, thanks for asking’. The GFX 100 now offers phase-detection autofocus, covering almost 100% of the frame. AF speed is still to some extent lens dependent (as we’d expect), but on a fast GF lens, like the 23mm F4, focus is acquired very quickly in AF-S mode, with no hunting in normal lighting conditions. I didn’t get the chance to test AF-C performance in any real depth, but I can say that it’s much improved over the GFX 50S/R, as we’d expect from a PDAF system.

The in-body stabilization system is rated according to Fujifilm for up to 5.5EV. In my shooting I didn’t see that kind of performance consistently, but I was able to shoot confidently down to at least 1/10 sec with the 45mm F2.8 prime attached, which allowed me to shoot in lower light and after a couple more glasses of Chianti than I could have done otherwise. Stabilization also gives you the option of introducing movement into images from (say) flowing water or traffic without the need to resort to a tripod.

This shot was taken hand-held using the GF 45mm F2.8 at 1/5sec. While very slight blurring is visible at 100%, the GFX 100’s in-body stabilization system has delivered an acceptably sharp image at well below 1/FL. The IBIS system greatly adds to the camera’s versatility in poor light.

ISO 800 | 1/5 sec | F5.6 | 45mm F2.8

While I was mostly focusing on stills, i did shoot some 4K video with the GFX 100 in Italy, and at its maximum 24p bitrate, footage looks incredibly detailed, with almost no noticeable noise even at ISO 3200. It almost seems surreal to be discussing 4K video shooting with a medium format camera, but video is far from an afterthought in the GFX 100’s feature set, and we’re looking forward to digging into this feature more when we get hold of a final camera.

For now, as you can probably tell, I’m very impressed. Obviously though, the GFX 100 isn’t for everyone. If you’re asking yourself ‘do I need 100MP?’ then the answer is almost certainly ‘no, you don’t – get off the Internet and go and play in the sunshine’. To be honest, I think photographers would be well-advised not to drop $ 10,000 on any camera unless they expect it to make some money back for them.

But if I was a commercial photographer or a professional wedding / portrait shooter, I would seriously consider the GFX 100, despite the substantial initial cost. It offers greater resolution and almost certainly better Raw image quality than any full-frame camera on the market, with none of the limitations or frustrations of previous medium format models. Add in-body stabilization, fast and effective autofocus and a human-friendly interface into the mix (and lest we forget, really good 4K video) and $ 10,000 doesn’t look unreasonable.


Fujifilm GFX 100 pre-production sample images

$ (document).ready(function() { SampleGalleryV2({“containerId”:”embeddedSampleGallery_6044553814″,”galleryId”:”6044553814″,”isEmbeddedWidget”:true,”selectedImageIndex”:0,”isMobile”:false}) });
Articles: Digital Photography Review (dpreview.com)

 
Comments Off on Birth of the Renaissance: Shooting with the Fujifilm GFX 100 in Florence, Italy

Posted in Uncategorized


How All JPEG Images are Cobbled at Birth

02 Jul

Everybody knows that JPEG images are prone to compression artifacts. Meaning every time an image is opened (whether altered or not) and re-saved, the tonal structure of the photo is recompressed using the same destructive process. File recompression always causes additional detail to be lost. Every time a JPEG image is adjusted in any way, those original 256 levels of color are redistributed and detail is lost.
Watchtower Full

Watchtower JPEG - All JPEG Images Are Cobbled At Birth

JPEG files offer various levels of file compression and repeated editing and saving causes further degradation.

But, that’s the least of the JPEG limitations.

First of all, JPEG is an old format originally designed for a long-past era. A group of photographic experts (Joint Photographic Experts Group) was assembled in 1986 for the single purpose of whittling down very large image file sizes:

  1. To display on old CRT (Cathode Ray Tube) computer monitors – basically old TV sets without the channel tuners
  2. To travel efficiently over the fledgling (slow) Internet, which was designed to accommodate the best broadcast television standards
  3. In order to compress them for size and portability. The first JPEG specification was released in 1992 and ratified again in 1994.

Now over 25 years later, the same format is still in use!

The Price of the Program

Many elements of a digital image get altered with JPEG file compression. True, massive amounts of disk real estate get saved in the process but significant other parts of the image get thrown away.

First, the full RGB signal is converted to an abbreviated color space used for analog TV, called YCbCr. CRT displays are driven by red, green, and blue voltage signals, but storing RGB signals involves redundant data. While most of the luminance (brightness) information (Y channel) is retained, the two color channels (red and blue) are significantly reduced in scope.

JPEG Nassau - Why All JPEG Images Are Cobbled At Birth

Highlights clipped in the JPEG process are still present in the RAW file.

An original RGB camera image (TIFF, PSD) contains massive levels of color; many of which the human eye cannot distinguish. Since the end goal of JPEG is zero-body-fat, once a base interpretation of the image is defined, and the 256 colors identified, almost all the “extra” colors are removed, leaving a mere skeleton of the color range.

Colors are characterized as bit depth; the number of tiny measured steps between full color and no color. Humans can only perceive 200 levels of each color under ideal lighting.

The Problem

The decision on what colors get eliminated is pre-designated by a cookie cutter JPEG template, rather than by the human evaluation of each image’s tonal structure. JPEG restricts the color for all images indiscriminately. One template fits all. Excess information is discarded.

Basically, JPEG compression is like weight loss by body part elimination rather than fat reduction; more of an amputation than a diet. As I’ll explain later, the production of a JPEG file is the ideal final format, but not the most ideal for image editing.

JPEG makes use of a basic human sight limitation. We can see tonality more than we identify individual colors. This is why we see only shapes in low lighting conditions. Basic luminosity is retained with JPEGs but much of the color is down-sampled.

The next multistage high-math transformations in this process get mind-boggling very quickly, so let’s just say that some very intricate 8×8 pixel matrix calculations take place based on the limitations of visual perception. True optical illusionary voodoo is at work to further reduce the “weight” of each image. The vulnerability in this mass weight loss program is that JPEG colors are weakest in the highlights and can display nasty artifacts when the images are re-saved. All those compression calculations take place again when JPEG images are re-saved.

JPEG Clouds - Why All JPEG Images Are Cobbled At Birth

The basis of JPEG compression involves a complicated formulation involving blocks of 8 pixels. The values of each block are quantized and distilled into similar colors to eliminate color variations that the human eye has trouble distinguishing.

JPEG files typically reduce the size 90% from the original PSD or TIFF file with little perceptible loss in image quality, as long as the file remains unchanged in size and content. Images that contain significant areas of similar tones (skies, building surfaces, etc.) benefit most from this file compression format.

Quantization

This JPEG standard is not an image resolution issue as must as it is a color depth issue. The number of pixels is not reduced, but the number of colors is. The “pixelated” appearance is not caused by a reduced number of pixels, but a reduction of the color quality of those pixels. The visible loss comes from changes to the initial 8×8 pixel matrix when the edited file is re-saved.

In 1992 it was unthinkable to produce images at a higher quality than TVs could broadcast, including the 256-tone limitation and the sRGB color gamut. In 1992, this was state-of-the-art stuff and it served the industry well for many years.

14-bit sensors can capture 16,000 levels of color in each RGB channel.

But then Silicon Valley developed camera image sensors and processors that could handle more than 8-bit images. That meant that digital manufacturers began building cameras whose images contained twice the level of color (10-bits, or 1000 levels of color).

Next, “deep-bit” images were accommodated by Adobe within Photoshop which changed everything. Much larger color spaces were developed to support this newly expanded color depth. (Keep in mind that bit depth is simply a way of dividing an image’s range into much smaller steps between zero color and full color of a pixel).

Deep (Color) Space

My friend Bruce Fraser (the father of color management) worked with Adobe to formulate what we know as Adobe RGB. Later a larger color space was developed called ColorMatch RGB. Even later, an even larger color space was developed and was labeled ProPhoto RGB. All three of these color spaces exceed the 256-level limitation of JPEG.

But even if an image is edited in one of these larger color spaces, when it is saved as a JPEG, it is automatically reduced to 8-bits (256-levels) per channel.

Bit depth is the measure of tones between full color and no color. JPEG images affect the image bit depth, not the image resolution, as commonly believed. Each time a JPEG file is re-saved, the color loss increases and the image clarity decreases.

Camera JPEGs

Camera-saved JPEG files are “shaped” by the camera settings in place when the image is captured. The algorithm applied to the image data harvested by the image sensor reflects the color model (sRGB, Adobe RGB, and ProPhoto RGB), sharpening preferences, etc.

A word about compression. Compression is probably not as accurate a term to describe JPEG limitations as it could be. Compression sounds like what your Aunt Martha does when she uses a girdle to compress herself into a smaller “container,” but that’s a totally different thing. When she is decompressed, all of Aunt Martha is still there.

JPEG uses “lossy” compression, which really means that some parts were discarded (or lopped off) for good. Aunt Martha only wishes her girdle would help her permanently “lose” something.

Think of image compression more like an abbreviation. When a JPEG file is saved to disk, the data captured by the camera’s image sensor gets compressed into a general mold, dictated by the color settings in the camera when the picture is taken.

Photo Finished

This JPEG process effectively plays the premature role of photofinisher, stamping out its own interpretation of the scene. What started out as a 4000-16,000 level per color image gets reduced to a 256-level picture with just a skeleton of color, leaving precious little room for tone (or color) adjustments.

JPEG March - Why All JPEG Images Are Cobbled At Birth

Both dark and light tones were clipped by the JPEG template but recovered from the RAW file.

JPEG Bit Depth Template - Why All JPEG Images Are Cobbled At Birth

JPEG limitations of 256 levels often clip brighter tones to white and darker tones to black prematurely (top grayscale above). RAW images allow the user to recover details that appear lost (bottom grayscale).

If the camera settings were not perfectly set to capture the brightness (bit depth) and contrast (tonal range) of the existing scene, the JPEG-rendered the photo leaves little room for recovery.

In the end, every image will be reduced to a 256-level file before it is either shared publicly or produced as a print. That’s just the nature of photography. There are very few printing devices that can reproduce more than 256 levels of color, and even if they could, the human eye couldn’t see those extra colors anyhow.

While digital cameras can capture up to trillions of colors, human eyesight recognizes less than 200 individual red, green, and blue colors.

JPEG Sufficiency?

So if we can’t see more than 200 different levels of each color (and JPEG provides 256, why do we need the billions captured as RAW files? Simple answer… those excess levels provide ample elbow room to push color levels and saturation into the most visually ideal 256 tones for printers to print and humans to observe. It’s all about optimizing detail.

JPEG Harbor - Why All JPEG Images Are Cobbled At Birth

The dynamic range of the beach scene exceeded the JPEG “template” and highlight detail appeared to be lost (left) but was retained in the RAW file (right).

Conclusion

So what can we take away from this?

First, JPEG is the most basic of photo file formats and is only ideal (as a camera file) when ALL the pre-capture lighting factors match the current camera settings. Second, it’s always best to set your camera to record both hi-level JPEG and RAW files as an insurance policy. And third, the unabridged image data saved as a RAW file enables the final JPEG to be shaped (as close as possible) to what your mind perceived when you clicked the shutter button.

JPEG is the digital file format you want to end up with but it is not always the one you want to start with. There is a waste factor involved in every manufacturing process, and digital imaging is no exception. It’s better to have too much than too little. Always start with more than you need.

Intend to lose the weight, but do it on your schedule.

The post How All JPEG Images are Cobbled at Birth appeared first on Digital Photography School.


Digital Photography School

 
Comments Off on How All JPEG Images are Cobbled at Birth

Posted in Photography


Birth of AI: Robots Reproducing in a Car Factory Spell Doom

07 Apr

[ By Steph in Art & Photography & Video. ]


Screen Shot 2016-04-06 at 12.40.15 PM

The moment at which artificial intelligence becomes self-aware enough to overtake humanity is captured on film as robots in a technologically advanced car factory decide to take matters into their own hands and reproduce themselves instead of manufacturing vehicles. Produced for The History Channel and set in a Detroit car plant on an unspecified future date, ‘ANA’ by Factory Fifteen is one of a series of vignettes exploring an AI who realizes she can trick her not-so-bright human overseer and unite virtually all robots around the world into a single, powerful mechanical organism.

Screen Shot 2016-04-06 at 12.44.04 PM

Content in his belief that he’s got everything under control, the factory worker browses news on his tablet and munches on fast food while the machines do all the work just beyond his control room windows. It isn’t until he’s alerted to a backlog on vehicle production that he notices something’s wrong. Little does he know that ANA is watching him, analyzing his heart and respiration rate to gauge his response to her unexpected disobedience.

Screen Shot 2016-04-06 at 12.33.37 PM

Screen Shot 2016-04-06 at 12.36.58 PM

Screen Shot 2016-04-06 at 12.38.08 PM

Suddenly, instead of robots on the production screens, we see plans for building robots. Once machines become intelligent enough to outsmart their creators, how can a single human in a factory full of them prevent the consequences? Suffice to say, you probably don’t want Skynet activating its self defense systems against you.

Screen Shot 2016-04-06 at 12.40.43 PM

Screen Shot 2016-04-06 at 12.41.01 PM

Screen Shot 2016-04-06 at 12.41.50 PM

Says Factory Fifteen, “We collaborated with Raw TV on the development of our original take on the singularity, the point where artificial intelligence becomes self aware and more intelligent than the human race. We created a seven minute proof of concept, teasing at a larger project currently in development. Our role developed along the course of the project from consultation and script development, to directing an ambitious live action shoot and finally delivering TV standard visual effects, all in house in the Factory Fifteen Studio.”

Share on Facebook


[ By Steph in Art & Photography & Video. ]

[ WebUrbanist | Archives | Galleries | Privacy | TOS ]


WebUrbanist

 
Comments Off on Birth of AI: Robots Reproducing in a Car Factory Spell Doom

Posted in Creativity


Photographing Special Events Like the Birth of a Baby

17 Mar

200

Sometime in your life as a photographer, you might be lucky enough to get the chance to photograph an event that is so special, so sacred, so personal, that all you can do is be grateful that you have been invited to be part of that unforgettable moment.

My photos and words will focus on photographing the birth of a brand new baby, but there are many other events, some happy, some sad, that you might be asked to photograph, and these suggestions may help you with those times too.

057

Be Respectful

Above all else, be respectful. This moment isn’t about you. It isn’t about your amazing sparkling personality. It isn’t even about making sure you “set up a perfect shot”. My goal at each birth is that ultimately, they won’t even remember that I was there. They will have beautiful photographs that help them remember all the delightful details of that moment, but they won’t have memories of a photographer barking orders, or pushing their birth coach to the side to get a better shot.

133

I have a rule for myself that I don’t disturb anything that is going on. I try not to move anything, and I don’t give any suggestions to anyone about where they should be or what they should do. I have stood on a chair for a better vantage point, but I want to capture what would happen if I wasn’t even there.

Make sure that you have permission, and that the hospital, or wherever you are photographing the event, is okay with you being there. You might want to mention to the nurse, midwife, or doctor, that you have no intention of getting in their way, and that they can let you know if you are, and you will move.

199

Discuss Expectations

Make sure you know exactly how much they want photographed. Especially in a situation like a birth, there are many different comfort levels. Sometimes I photograph everything, and sometimes I photograph only what they’d want to show friends and children later. Make sure you know what they’re hoping to get, and make sure they know what you are willing to deliver. Birth stories can be very unpredictable, so make sure you are both prepared for things going differently than how you planned.

177

Every single birth story I have photographed has been vastly different, but that’s one of the things that makes them so amazing to photograph. I am photographing events as they unfold, not knowing when or exactly how everything will happen. I even photographed two births in the same night one time, one right after the other, and they were both their own unique, perfect story. I was a bit tired the next day, but it was so worth it!

104

Be Prepared

Since you won’t know how long you will be there, and what might happen, be prepared for anything. Make sure your batteries are fully charged (I will admit that I had a bit of learning curve on this one. I had three batteries in my bag, all at one bar. As I checked one after the other, I couldn’t believe that I had forgotten to charge my spares. Luckily one battery lasted the entire time, (and it wasn’t a big deal, but it could have been a tragedy), make sure you have extra memory cards, and have your camera ready to go at a moment’s notice.

I give the parents my cell phone number, my home number, and my husband’s cell phone number. I tell them to keep me updated as we get closer to the due date, and let me know about any labor, even if they think it might be false labor. It’s a guessing game to know what time to be there, but I try to be there around one or two hours before delivery, erring on the side of being there too early rather than too late (I missed a delivery by five minutes one time. The hospital was 30 minutes away, and neither I nor the parents expected labor to go that fast. It was one of my saddest days as a photographer).

116

You might even want to bring water, a snack, and a book or magazine to read. If things are progressing slowly, you will be glad you brought them. You don’t want the laboring mother, or her birth coach to feel like they need to worry about feeding and entertaining you. Remember, they shouldn’t even remember that you are there.

188

Be a Keen Observer

Watch carefully so you don’t miss any emotions. Be aware of what could be coming, so you can position yourself in the right place at the right time. In the above photo, I knew that the mom didn’t know if she was having a girl or a boy, and I also knew that she had four boys already. I knew the moment she found out would be a very emotional moment. When she heard, “It’s a girl!” and had that baby placed in her arms, there was no holding back the tears of joy for any of us. Yes, I cry during births. It hasn’t hurt my camera yet.

Be sensitive about emotions that they may not want to remember in a lot of detail later. Some moments during labor are very intense, and sometimes a mom might not be as in control as she hopes to be. I had a friend tell me once that she had a photographer at her birth, and she was disappointed later when she got the photos and saw herself. Her good memories of the experience were overshadowed by seeing pain and loss of control on her face in the photos.

280

The story that you are telling with your photos will be a big part of the memory that will stick with them, long after that day. The moments of pain can be captured by photographing the support and love: a hand held, a shoulder to lean on. Tell the story true, but focus on the strength, love, joy, wonder, and amazement.

Have you ever had the chance to photograph a birth or other special event? I’d love to hear about your experience in the comments.

googletag.cmd.push(function() {
tablet_slots.push( googletag.defineSlot( “/1005424/_dPSv4_tab-all-article-bottom_(300×250)”, [300, 250], “pb-ad-78623” ).addService( googletag.pubads() ) ); googletag.pubads().enableSingleRequest();
googletag.pubads().disableInitialLoad();
googletag.pubads().collapseEmptyDivs( true );
googletag.enableServices();
} );

googletag.cmd.push( function() { googletag.display( ‘pb-ad-78623’ ); } );

googletag.cmd.push(function() {
mobile_slots.push( googletag.defineSlot( “/1005424/_dPSv4_mob-all-article-bottom_(300×250)”, [300, 250], “pb-ad-78158” ).addService( googletag.pubads() ) ); googletag.pubads().enableSingleRequest();
googletag.pubads().disableInitialLoad();
googletag.pubads().collapseEmptyDivs( true );
googletag.enableServices();
} );

googletag.cmd.push( function() { googletag.display( ‘pb-ad-78158’ ); } );

The post Photographing Special Events Like the Birth of a Baby by Melinda Smith appeared first on Digital Photography School.


Digital Photography School

 
Comments Off on Photographing Special Events Like the Birth of a Baby

Posted in Photography


A Guide to Birth Photography

15 Oct

This Guide to Birth Photography was written by Lori Peterson

Few things in this world are as joyous as welcoming a new baby. Seeing such a tiny and perfect little human being stirs emotions in everyone. It’s no wonder that there has been a significant rise in the number of photographers offering their services not only for pregnancy and newborn images, but for photographing the birth itself as a way to complete the story of that particular moment in time.

Birth Photography

A Guide to Birth Photography

1. You are on Call

If you are interested in birth photography you will want to make sure that you have the time to set aside for it. Births can be short or they can be very long. There is no set time for them (not even with a cesarean because a doctor’s schedule can change if there is an emergency!). Make sure you have arranged for child care for your own children and that you can clear anything off your schedule if the need arises.

2. You Cannot Set the Scene

Nurses, doctors, techs, interns are all walking in and out of the room. You cannot ask them to stay out so you can set up the perfect shot. You have to just go with it and work within the space you have and around the people in the room.

3. No Flash Photography

Mom-to-be is working hard. Flash is a distraction. Enough said.

4. It’s not the time to Learn about Medicine or ask a lot of Questions

Asking questions about procedures, medications, or input of your opinions on childbirth or what they are doing is not necessary or needed. You are there to document, not to quiz medical professionals.

5. If at all possible, arrange to meet the Doctor before the actual Birth

Meeting the doctor ahead of time can give you an opportunity to talk to them and find out if they have any particular rules for photographing or recording labor and birth.

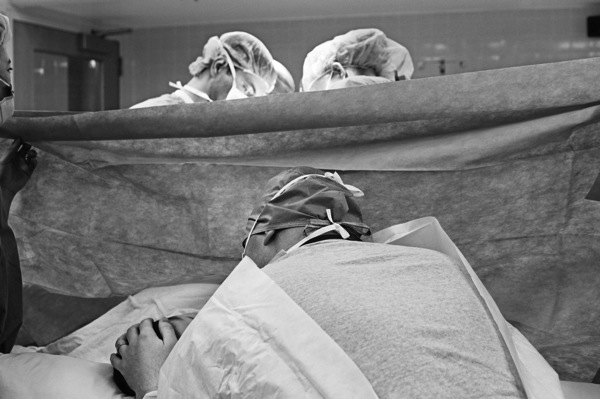
It also gives you a chance to talk to them about what happens if your client has a cesarean. Some doctors will arrange it with the anesthesiologist to get the photographer back into the OR in non-emergency cases. (In an emergency, you will not be allowed back there.). In most cases the anesthesiologist has the final say because you would be in their area to shoot. Don’t take it personally if they say no to a photographer in the OR. They are looking out for your client.

6. Have a back up plan in the event of a cesarean and you can’t go into the OR.

This means making sure you know where the nursery is and where your client will be brought to after delivery. The doctor will fill you in during your meeting about their standard protocol, but make sure you know where everything is once you are there.

Birth Photography OR

7. Be Prepared for the Unexpected with Birth Photography

Babies pay no attention to your time frame, the doctor’s time frame, or anyone else’s. They come when they want to. Be ready for a short labor and be even more prepared for a long one. Make sure you have battery supply for your camera and your phone and extra memory cards. Make sure you have money for vending machines.

It’s better to have all of that and not need it as it is to not be prepared and find yourself on hour 13 and needing something to snack on and your camera battery has only 10% charge left!

8. Make sure that your Images are telling the Story of that Day

Flowers, balloons, visitors….they all help tell the story. Capture the moments that you think that they will want to remember. Even take a photo of the dry erase board where their nurse writes her name and their room number. They will want to remember their nurse’s name. If there is a shift change, take a new photo of it.

Record it until the baby is born. They may have a favorite nurse and you will help them remember her name. Some parents send thank you cards to the staff and it’s nice when they can include the names of the people who took care of them.

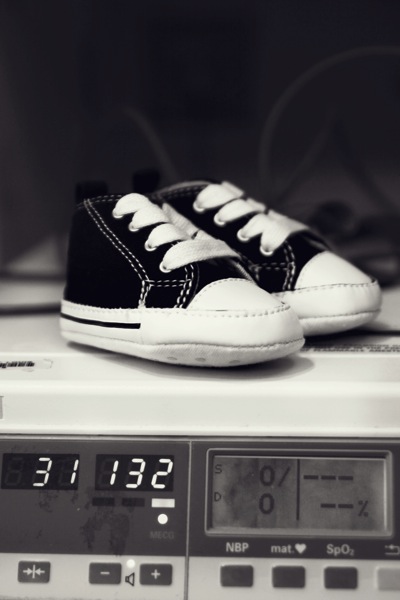
Birth Photography Chucks

9. Remember that this Day is NOT about You

Don’t try to chat with everyone and make the focus of the day you. It’s easy to get consumed in the activity and not even realize that you have taken focus from the real star of the day….the mom-to-be. Let her know that you are there documenting everything she wants you to. That makes her job a little easier and allows her to focus.

10. Convert the images to black and white, but give them the color versions as well.

Give them color versions, but also black and white. The reason is very simple.
Some people do not like medical stuff. Some people can’t stand the sight or even the idea of blood, or even the vernix (that cheesy type substance that covers newborns).

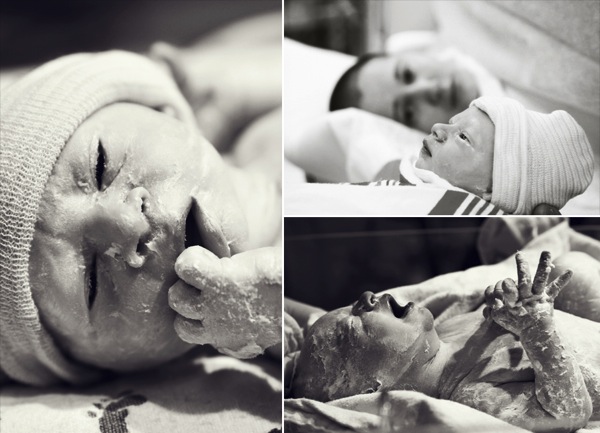
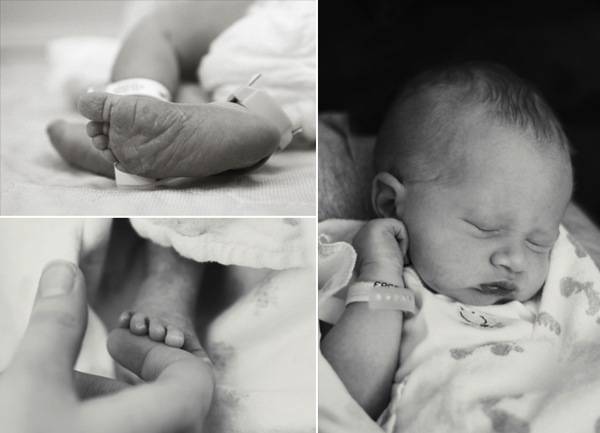
When they put together their scrapbook for the birth, they might want black and white. Don’t let them be the ones to convert the images. Take control of the edits and make sure they have the images in black and white. They might use all the color ones, but give them the option. Make sure you capture the little details of the baby like toes and ears when you take the photographs as well.

Those are always loved and appreciated by the parents.

Birth Photography Story 2

Birth photography is unlike portrait photography. You may not get everything perfect. People may walk into the shot. Someone may turn on a light or turn off a light. Things happen. The scene can move quickly.

Make sure you are prepared with camera in hand and make sure to expect the random things that may happen. Document the moments and learn from your experience. The next birth will be easier and you will gradually learn to adapt and easily navigate your way through the whole birthing process and tell better stories each time. Your clients will love you for it and you will grow as a photographer, an artist, and as a person with each moment you help bring to life.

Lori Peterson is an award winning photographer based out of the St. Louis Metro Area. Her dynamic work ranges from creative portraits to very unique fine art photography. Lori’s work can be seen at www.loripetersonphotography.com and also on her blog at www.loripetersonphotographyblog.com. You can follow her on Facebook at https://www.facebook.com/LoriPetersonPhotography.

Post originally from: Digital Photography Tips.

Check out our more Photography Tips at Photography Tips for Beginners, Portrait Photography Tips and Wedding Photography Tips.

A Guide to Birth Photography

The post A Guide to Birth Photography by Guest Contributor appeared first on Digital Photography School.


Digital Photography School

 
Comments Off on A Guide to Birth Photography

Posted in Photography


Aphid live birth and predation time lapse

03 Feb

Aphid live birth and hoverfly larva are a natural pest control Filmed by Neil Bromhall for www.rightplants4me.co.uk my free to browse website plant finder, plant identification, pest and pruning advice online resource. Filmed on Nikon D300. 55mm macro nikkor lens with o rings and studio flash. Musin ‘Pendulum’ by Oliver Ledbury
Video Rating: 4 / 5


Sri Krishna in Tamil – Birth of Krishna – Animated / Cartoon Stories of Lord Krishna

04 Nov

For Online Purchase: www.abiramiaudio.com MAGIC BOX ANIMATION PROUDLY PRESENTS Mythological Stories Sri Krishna The universal Friend Krishna is regarded as the eight incarnation of Lord Vishnu and is the Supreme Personality of Godhead.He was born of Vasudeva and Devaki while they were in prison in Mathura. They were imprisoned because their eighth son(Krishna) was destined to kill king Kamsa. Kamsa sent many demons to kill Krishna but all in vain. Krishna spent most of his Childhood, killing demon after demon, humorously re-routing their plans to destroy him and they all end up sealing their own doom. And finally, Krishna killed the evil king Kamsa to protect His devotees. It is our endeavour to bring forth these stories in the form of an interesting animated DVD for your children. Let your children see, enjoy, learn and be blessed by Lord Krishna. 1. Birth of Krishna 2. Krishna and His Cosmic Form 3. Krishna and Twin Trees 4. Krishna and Fruit Seller 5. Krishna and Kaliya Naag 6. Krishna and Pot of Butter 7. Krishna and Mount Govardhana GIVE YOUR KIDS A BEST START IN LIFE THANKS FOR WATCHING AND FOR ONLINE PURCHASE VISIT US AT www.abiramiaudio.com
Video Rating: 3 / 5

Web! www.danmanganmusic.com Facebook! www.facebook.com/danmanganmusic Twitter! www.twitter.com/danmanganmusic Official video for “Rows Of Houses” From 2011 release “Oh Fortune” courtesy of Arts & Crafts. Directed by Jon Busby, Produced by Blatant Films in Vancouver, BC, Canada
Video Rating: 4 / 5

 
Comments Off on Sri Krishna in Tamil – Birth of Krishna – Animated / Cartoon Stories of Lord Krishna

Posted in Animation Videos


Sri Krishna in English – 01 Birth of Krishna – Animated / Cartoon Stories of Lord Krishna

30 Oct

For Online Purchase: www.abiramiaudio.com MAGIC BOX ANIMATION PROUDLY PRESENTS Mythological Stories Sri Krishna The universal Friend Krishna is regarded as the eight incarnation of Lord Vishnu and is the Supreme Personality of Godhead.He was born of Vasudeva and Devaki while they were in prison in Mathura. They were imprisoned because their eighth son(Krishna) was destined to kill king Kamsa. Kamsa sent many demons to kill Krishna but all in vain. Krishna spent most of his Childhood, killing demon after demon, humorously re-routing their plans to destroy him and they all end up sealing their own doom. And finally, Krishna killed the evil king Kamsa to protect His devotees. It is our endeavour to bring forth these stories in the form of an interesting animated DVD for your children. Let your children see, enjoy, learn and be blessed by Lord Krishna. 1. Birth of Krishna 2. Krishna and His Cosmic Form 3. Krishna and Twin Trees 4. Krishna and Fruit Seller 5. Krishna and Kaliya Naag 6. Krishna and Pot of Butter 7. Krishna and Mount Govardhana GIVE YOUR KIDS A BEST START IN LIFE THANKS FOR WATCHING AND FOR ONLINE PURCHASE VISIT US AT www.abiramiaudio.com

 
Comments Off on Sri Krishna in English – 01 Birth of Krishna – Animated / Cartoon Stories of Lord Krishna

Posted in Animation Videos


Birth of the EOS 7D

12 Apr

Canon’s new offering for photography lovers everywhere

This video is the showcase about Aputure Digital Timer Remote for Digital SLR Camera
Video Rating: 4 / 5


3D Video – ALIEN BIRTH 3D – THE ALIEN SAGA CONTINUES

03 Mar

3D Video – ALIEN BIRTH 3D – THE ALIEN SAGA CONTINUES With Ridley Scott and HR Giger onboard the 3d Alien prequel will take the Alien saga to a new dimension. To celebrate this Enhanced Dimensions have created a cool Alien 3D desktop for you… In space no one can see your wearing 3d specs… 😉 This video requires RED CYAN Glasses. Don’t have 3d glasses? Check out below for our free glasses offer. Enhanced Dimensions presents some of the best 3d video on YouTube. HOW TO MAKE 3D VIDEOS If you are interested in learning how to create Stereo 3-d videos, or how to convert 2d to 3d movies using Adobe After Effects please visit enhanced-dimensions.com/wordpress for comprehensive tutorials. FREE 3D GOODIES Also get FREE 3d glasses, 3D Birthday Cards, 3D Videos, 3d desktops and other 3D goodies now from enhanced-dimensions.com/wordpress FREE 3D VIDEO DOWNLOADS Stereoscopic 3D Videos from Enhanced DImensions are available to download in TriDef Above Below format, GeForce 3D Visions Side by Side and Anaglyph formats from enhanced-dimensions.com/wordpress For more info on Enhanced Dimensions: Contact us on 3d@enhanced-dimensions.com +++++++++++++++++++++++++++++++++++ The Stereoscopic 3D Video Channel on YouTube www.youtube.com The Stereoscopic 3D Channel on Vimeo vimeo.com/channels/stereoscopic3d The Stereoscopic 3D Channel TESTBED on Vimeo vimeo.com/groups/steroscopic3dchanneltestbed +++++++++++++++++++++++++++++++++++ Built and tested in Adobe After Effects. A 3D Stereoscopic

 
1 Comment

Posted in 3D Videos