RSS
 

Posts Tagged ‘Bird’

Avian Palaces: Traditional Ottoman Bird Houses are Miniature Masterpieces

08 Aug

[ By SA Rogers in Culture & History & Travel. ]

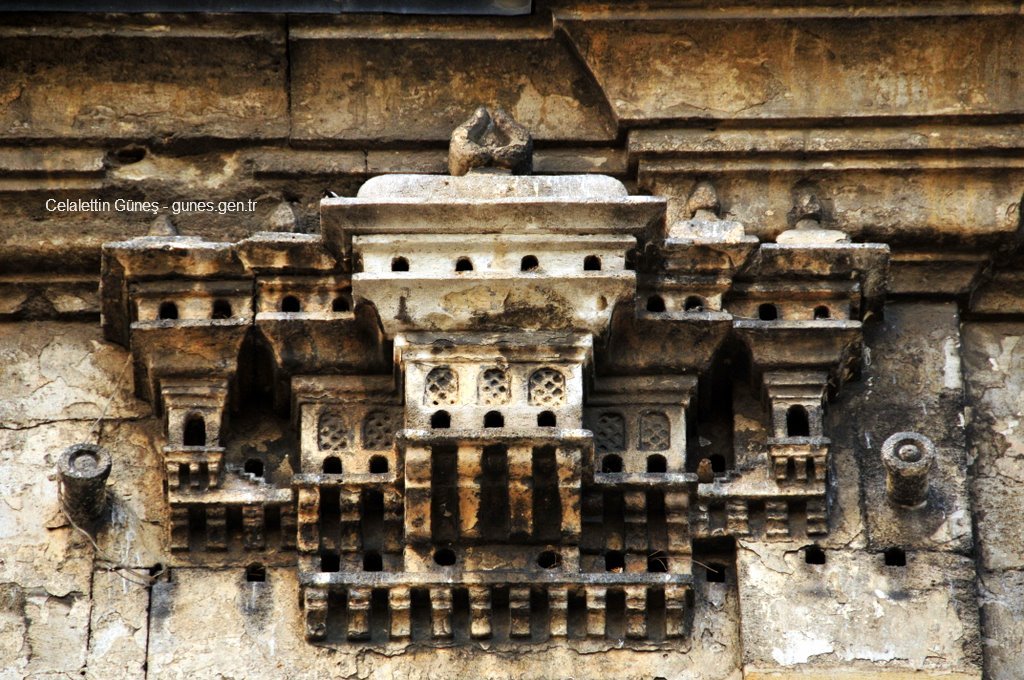
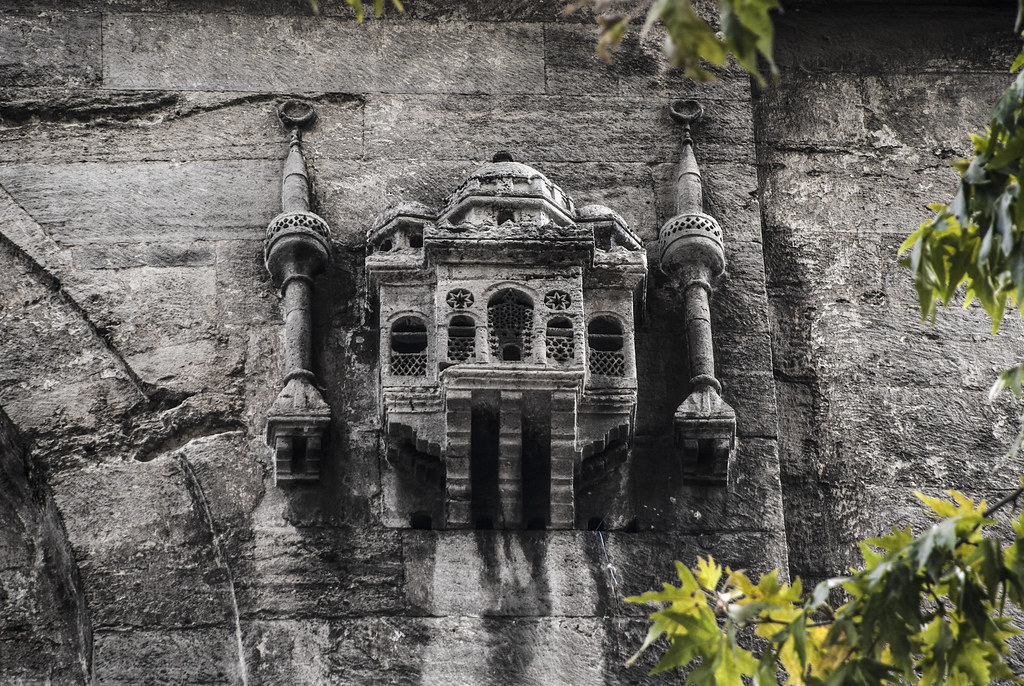
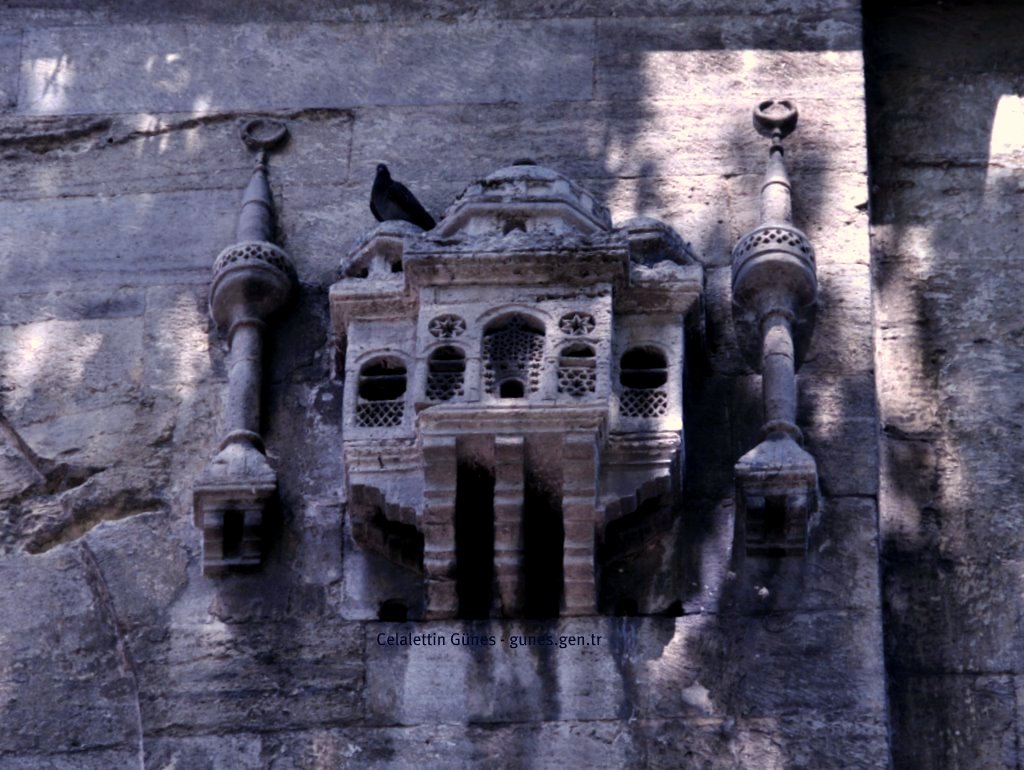
Istanbul takes bird houses very seriously, and always has – seriously enough to attach palatial digs for feathered residents to their own human-sized buildings. In fact, the oldest known bird house in Istanbul can still be spotted on the side of the Büyükçekmece Bridge, dating back to the 16th century. The charters for new mosques often included provisions for feeding the birds, and sometimes even allocated huge amounts of gold to look after them. The practice was thought to attract good luck.

Bird Palaces - Ayazma Mosque / Ku? Saray? - Ayazma Camii

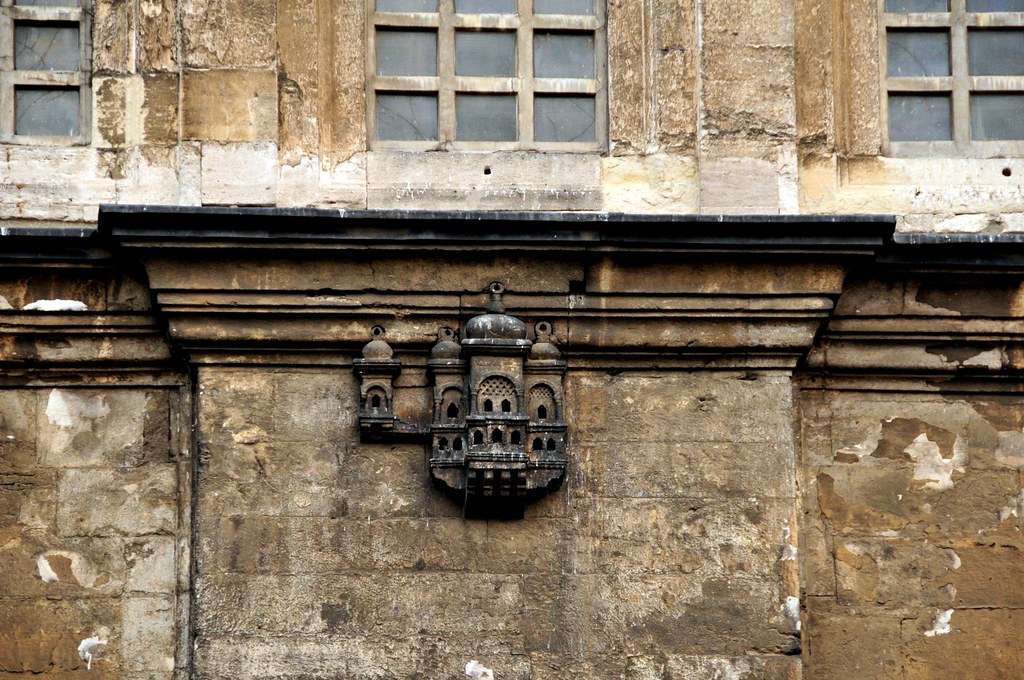
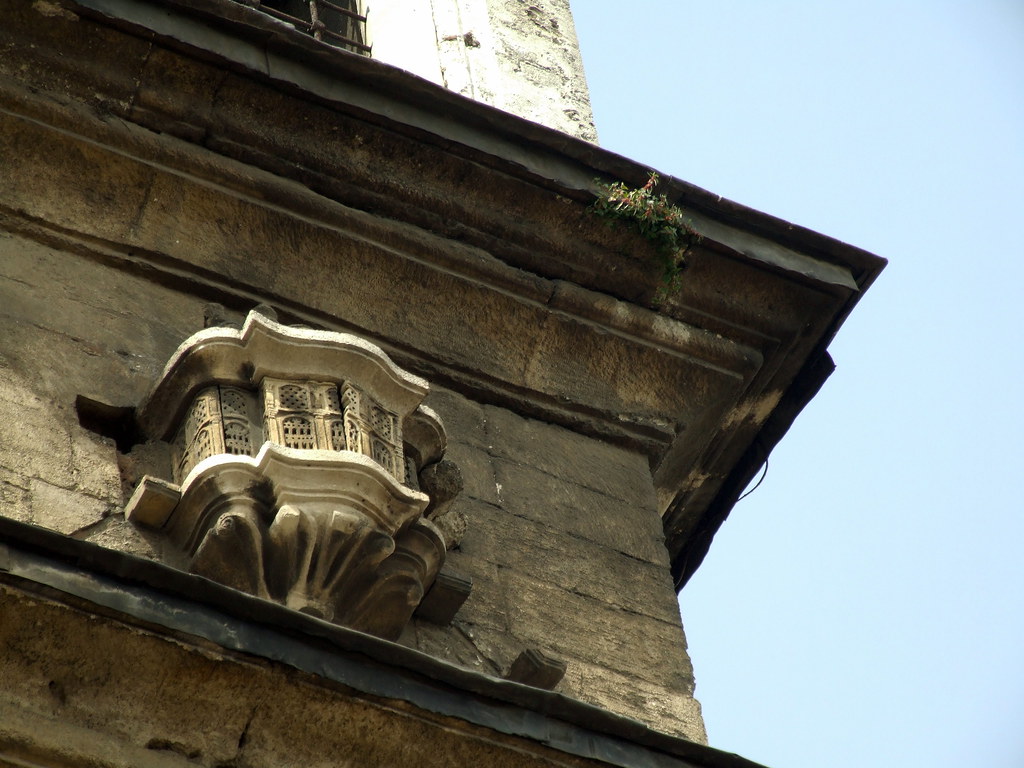
Today, you can wander through the cities of Istanbul, Bursa and Edirne and gaze up at the historic structures to find intriguing miniatures mounted to their facades, looking far fancier than anything you’ll ever live in yourself. Each one is designed to complement the building to which it’s affixed, or even act as a scale model of it.

"The bird house"

They’re designed to shelter any birds that might hang out around the buildings, including sparrows, pigeons, swallows, storks and wisecracks. According to Daily Sabah, the birdhouses had a practical purpose for humans, too, helping to keep the birds from hanging out on the roofs and spilling their droppings all over everything, eventually corroding the walls of mosques, inns and other structures.

Bird House, Ayazma Mosque, Istanbul, Turkey

But setting up programs to shelter, feed and protect animals is a longstanding tradition in the area (that remains in place today – check out the adorable film ‘Kedi’ about Istanbul’s street cats for a great example.) The Ottomans also helped street dogs find food, set out saucers of water for any animals that needed it, fed wolves and gave medical care to injured storks.

Bird House / Ku? Evleri

During the Ottoman era, these miniature palaces were painstakingly crafted using elaborate techniques, crowning each one with its very own vaulted or domed roof. Some are three or more stories tall and feature minarets and other architectural details that were popular around the time they were built.

Bird House / Ku? Evleri

Check out Daily Sabah’s feature article on Ottoman bird houses for lots more details about this endearing tradition.

Ku?evi / Birdhouse

Images embedded via Flickr’s API, all copyrights are retained by their respective owners.

Share on Facebook


[ By SA Rogers in Culture & History & Travel. ]

[ WebUrbanist | Archives | Galleries | Privacy | TOS ]


WebUrbanist

 
Comments Off on Avian Palaces: Traditional Ottoman Bird Houses are Miniature Masterpieces

Posted in Creativity


10 Must-Use Bird Photography Camera Settings for Beginners

09 Mar

With an overwhelming number of settings on the new DSLRs, it becomes increasingly hectic to know which ones to use. Then it takes an incredibly steep learning curve to understand how these settings work. It is much worse for a bird photographer, isn’t it? Bird photography is extremely challenging and a wrong setting might mean ruined photographs. It took several years for me to identify, practice, and stick to some of the key settings for bird photography.

Let me assure you that these settings are not reached in a philosophical way. They are tried and tested methods of achieving extraordinary results. These settings are the ones I teach to my photography workshop students as the first step towards making better bird photographs.

Set it and forget it

The key to making successful bird photographs is to select the settings and forget about them. Yes! Forget about them. Have only one or two variables so that you can focus primarily on making great bird photographs. Which is the art of photography.

In this article, I will give you 10 must-use camera settings that will help you improve your bird photography. These tips will relieve you of the persisting tension of changing the settings when the action unfolds. Remember, there are no retakes in bird photography. You have to be ready before the action unfolds.

So, let’s jump right in to find out how you can improve your bird photography with these 10 settings.

IMPORTANT NOTE: Please note that it’s not possible to give every step (for every camera) to configure a particular setting. I have given only just a few steps to show you the setting I have described. This is due to the constraint of space and the medium used.

bird photography camera settings

1. Shoot in RAW format

Always shoot in RAW format. If you have never used RAW, then make it a point to use it right now. Pick up your DSLR and set the Image Quality as RAW. Another option is to use RAW + Fine JPEG (or Basic JPEG) if you are unsure that you can handle a RAW file immediately. But, one day you may have to start working with RAW files. So, why not start shooting RAW from this day forward.

RAW Camera Settings for Canon DSLRs:

31 Canon 10 Must Use Bird Photography Camera Settings for Beginners

32 Canon 10 Must Use Bird Photography Camera Settings for Beginners

RAW Camera Settings for Nikon DSLRs:

01 Nikon 10 Must Use Bird Photography camera Settings for Beginners

10 Must Use Bird Photography camera Settings for Beginners

A RAW file holds all the data that your Camera Sensor captures. This means you are utilizing the sensor’s complete capacity. JPEG format, on the other hand, is an image compression standard. It compresses the data to reduce the size of the file, by throwing some of the data away. You don’t want to lose what your sensor captured, right?

Some of the key advantages of using RAW files are:

  • You can modify your White Balance settings during the post-processing stage.
  • The highest dynamic range that the sensor is capable of is stored in a RAW file. More data means more detail in both the shadow and highlight regions of your images.
  • You can bring back phenomenal detail in the shadow regions in the post-processing stage.
  • You can work on getting the perfect contrast and color in your image.
  • And much more.

Have you switched to RAW format yet?

bird photography camera settings

2. Use the Auto White Balance (AWB) Setting

The Auto White Balance (AWB) setting is a boon to every digital photographer. This is especially true for bird photographers. Imagine setting the white balance every time the light changes. On top of that, birds are constantly moving which means it’s almost impossible to set the white balance on the fly.

Even if you say, you can set the White Balance, remember that the light is changing throughout the day. Choosing just one standard white balance might yield wrong colors. Instead, the AWB setting will keep adjusting as the light changes. With newer DSLRs, the AWB setting does a tremendous job of getting the right colors, almost every time. Most often, it’s not necessary to change the white balance settings that the camera chooses for you.

So, use RAW format, set your camera on AWB mode, and then forget about it.

Auto White Balance Settings for Canon DSLRs:

10 Must Use Bird Photography camera Settings for Beginners

10 Must Use Bird Photography camera Settings for Beginners

Auto White Balance Settings for Nikon DSLRs:

10 Must Use Bird Photography camera Settings for Beginners

10 Must Use Bird Photography camera Settings for Beginners

Important Tip: If you use RAW format, you have complete control over the white balance during the post-processing stage. You can set it to any value you want. Tweak it to get the right colors.

3. Use semi-automatic modes like Av/A or Tv/S

It’s a common tendency to shoot in Auto mode as a novice bird photographer. But, you’ll have no control over the resulting exposure. Instead, start using the semi-automatic modes.

They are extremely simple to use and will give you incredible results. Start with the Aperture Priority (Av/A) mode. Most of the pros use this mode, including me. It allows you to choose the aperture (which will define the resulting depth of field), while the camera chooses the shutter speed for you. Combined with the Auto ISO setting (discussed next), it’ll ease your tension of worrying about the right settings.

bird photography camera settings

If you are unable to get the required shutter speed, in the case of low light, choose Shutter Priority (Tv/S) mode. It allows you to select the shutter speed (which helps you to either freeze the action or blur it), while the camera chooses the aperture for you. Combined it with the Auto ISO setting (discussed next) for ease of use.

Semi-automatic Camera Settings for Canon DSLRs:

10 Must Use Bird Photography camera Settings for Beginners

10 Must Use Bird Photography camera Settings for Beginners

Semi-automatic Camera Settings for Nikon DSLRs:

10 Must Use Bird Photography camera Settings for Beginners

10 Must Use Bird Photography camera Settings for Beginners

If anyone has told you that you should use Manual Mode to get the best bird photographs, forget about their advice. It’s not about which mode you use, it’s about how you use it. Forget about these petty talks. Instead, concentrate on making your life easier by using a semi-automatic setting. You’ll thank me, for sure.

4. Use the Auto ISO setting

The Auto ISO setting, if used properly, can solve a lot of problems in bird photography. Most often, you need higher shutter speeds to freeze the action in bird photography. This means you must use higher ISOs. Using higher ISOs, especially on the cropped sensors (like Canon 70D, 7DMarkII, Nikon D500, D7200, etc.), can result in a lot of noise, yielding an unusable photograph.

Most often you would have to work with ISO in the 400-800 range. Instead of setting the ISO to be at 400 or 800, it’s wise to set it to Auto ISO and select the Maximum Sensitivity to be 800. If you are using a full-frame camera (like Canon 1DX, 5DMark3, Nikon D4, D810, etc.), you can set the maximum sensitivity to ISO 1600 (or even 3200 depending on noise levels).

Auto ISO Settings for Canon DSLRs:

10 Must Use Bird Photography camera Settings for Beginners

10 Must Use Bird Photography camera Settings for Beginners

10 Must Use Bird Photography camera Settings for Beginners

Auto ISO Settings for Nikon DSLRs:

Bird Photography camera Settings for Beginners

Bird Photography camera Settings for Beginners

When you use Auto ISO instead of using a static ISO, you are allowing the camera to decide the ISO based on the changing light. Cameras are designed to keep the ISO value as low as possible, at all times.

Say you are working during the early morning when the light level is lower. The camera may start with ISO 800. But, as the light gets brighter and brighter, the ISO values will be smaller and smaller to compensate for the excess light. This means, your photographs will be much cleaner.

5. Use Auto ISO Combined With Minimum Shutter Speed

Many DSLRs allow you to choose the Minimum Shutter Speed in Auto ISO mode. This will ensure that the camera chooses the lowest possible ISO to achieve the Minimum Shutter Speed value. This gives you the best of both worlds. For instance, if you set the Minimum Shutter Speed to be 1/1000th of a second, the camera will alway try to select the lowest possible ISO value to meet your requirement.

bird photography camera settings

NOTE: If there is not enough light in the scene to achieve the required shutter speed despite choosing the maximum ISO, then the shutter speed will drop. So, keep an eye on the resulting shutter speeds.

Auto ISO and Minimum Shutter Speed Settings for Canon DSLRs:

Bird Photography camera Settings for Beginners

Bird Photography camera Settings for Beginners

Auto ISO and Minimum Shutter Speed Settings for Nikon DSLRs:

Bird Photography camera Settings for Beginners

Whenever you are unable to meet the minimum shutter speed that you need, just switch to normal ISO mode and set it to a higher value. But, I don’t recommend higher than ISO 800 on cropped sensors as the results will be too noisy and unusable. There are a few exceptions like the Nikon D500 and Canon 7D Mark II DSLRs that seem to work fine at higher ISOs. My suggestion: Test it. See how far you can push the ISO on your camera before the result looks too noisy.

6. Use the Evaluative/Matrix Metering Mode

The Evaluative (for Canon) and Matrix (for Nikon) options are default metering modes. But there’s a common belief that Spot Metering works best for bird photography. Although it’s true to an extent, it has too many limitations. It’s beyond the scope of this article to discuss it here.

bird photography camera settings

While Spot Metering mode considers just 3-5% of your image frame, Evaluative/Matrix metering mode considers many aspects such as; the subject in focus, other objects in the frame, the background, and uses a weighting system to arrive at the right exposure value. It’s more intelligent than Spot and Center-weighted metering.

When you combine the Exposure Compensation technique (discussed next) with Evaluative/Matrix metering mode, you can get perfect exposures. With recent DSLRs, I have seen that the default metering modes give the best results in the majority of situations. They are sufficient if the dynamic range of your camera is high enough.

Metering Mode Settings for Canon DSLRs:

Bird Photography camera Settings for Beginners

Bird Photography camera Settings for Beginners

Metering Mode Settings for Nikon DSLRs:

Bird Photography camera Settings for Beginners

Bird Photography camera Settings for Beginners

7. The Histogram is your best friend, learn to use it.

Yes, the Histogram is your best friend. If you are not using the Histogram, then you are missing a lot of image potential. There is enough material written about the subject, go ahead and embrace yourself with the knowledge. (Read: Histograms for Beginners)

Every time you take a photograph, you must check the Histogram. Don’t rely on the LCD monitor, check the Histogram. Why? LCD brightness and the ambient light can fool you into believing that a photo is under or overexposed. But, the Histogram gives you a clear cut exposure reading.

bird photography camera settings

Simply put, the Histogram is a graphical representation of the exposure. By looking at the graph you’d be able to see if the photograph is properly exposed, underexposed, or overexposed. Typically, if the graph is skewed towards the right-hand side of the Histogram, your image is overexposed (washed out whites or pure white areas with absolutely no detail).

Bird Photography camera Settings for Beginners Histogram

And if it is skewed towards the left, your image is underexposed (crushed blacks or pure black areas with absolutely no detail).

Bird Photography camera Settings for Beginners Histogram

You want to the Histogram to have the distribution not touching either the left-most end (underexposure) or the right-most end (overexposure). Typically, you are okay as long as the distribution is mostly in the middle.

The Histogram for Canon DSLRs:

Bird Photography camera Settings for Beginners Histogram

The Histogram for Nikon DSLRs:

Bird Photography camera Settings for Beginners Histogram

However, don’t expect the Histogram to look like a Gaussian curve. It needn’t be. Imagine an egret flying against a blue sky. Your Histogram will likely have two pillars on either side of the Histogram. One pillar (towards the left) would indicate the blue sky as it’s close to mid-grey and the other pillar (towards right) would indicate the egret. It’s a perfect exposure.

8. Enable the Highlight Indicator (Blinkies)

This is another useful and practical bird photography tip. The Highlight Indicator, widely known as Blinkies, clubbed with the Histogram and Exposure Compensation (discussed next) can assure you the best exposure at all times. Make sure you start using it from today.

bird photography camera settings

Make sure you keep detail in white feathers by using the histogram and highlight indicator.

The Highlight Indicator indicates any overexposed areas in your image. It’s very hard to know if you have overexposed your image or not, just by looking at the LCD monitor. I would say, never depend on the LCD monitor to review your image for exposure. The LCD monitor should be used for the sole purpose of checking your composition.

Check the Histogram for the exposure. Sometimes, it’s hard to find out if there are any overexposed areas on the Histogram. This is especially true if there’s just a slight overexposed area. That’s where the Blinkies comes in handy. You will see blinkers in the overexposed areas when you Enable Highlight Indicator or Blinkies.

In Canons, blinkies show up in the first screen itself, whereas you have to check RGB Highlights screen in case of Nikon. In any case, make it a point to check the Blinkies every time.

Highlight Indicator Settings for Canon DSLRs:

Bird Photography camera Settings for Beginners blinkies

Bird Photography camera Settings for Beginners blinkies

Bird Photography camera Settings for Beginners blinkies

Highlight Indicator Settings for Nikon DSLRs:

Bird Photography camera Settings for Beginners blinkies

Bird Photography camera Settings for Beginners blinkies

Bird Photography camera Settings for Beginners blinkies

If you develop this habit of checking the Histogram and Blinkies after every exposure, you are sure to improve your bird photography. Combine it with the Exposure Compensation technique you’ll see the improvement in leaps and bounds. Why not decide to use them from today?

9. Use Exposure Compensation (+/- Ev) to Tweak the Exposure

Here’s the best bird photography tip that I can offer: If you want to achieve the perfect exposure, then start using the Exposure Compensation technique right now. You’ll see a drastic improvement in your bird photography once you start using it.

The metering modes can only give you the exposure values based on some algorithms. It’ll never know what the subject is and how it should be rendered. For instance, it might render an egret in gray rather than white, and render a cormorant extremely dark. Because all the metering modes work on a concept called 18% Gray. I recommend you to read about it.

bird photography camera settings

Tweak exposure compensation to keep black feathers looking black.

It’s almost always necessary to tweak the exposure to record all the details in the scene. It’s especially important to render the subject in as much detail as possible. Simply put, expose for the subject.

By using Exposure Compensation technique, you can tell the camera to either underexpose or overexpose the scene by a particular value. Say, you chose -1 Stop Exposure Compensation using +/- button (as shown) on your camera. Then, the camera will underexpose the scene by 1-stop. If you select +1 Stop, then it will overexpose the scene by 1-stop.

Exposure Compensation Settings for Canon DSLRs:

Bird Photography camera Settings for Beginners

Bird Photography camera Settings for Beginners

Exposure Compensation Settings for Nikon DSLRs:

Bird Photography camera Settings for Beginners

Bird Photography camera Settings for Beginners

So, start using Exposure Compensation to improve your bird photography. You’ll see phenomenal improvement with just an exposure tweak of +/- 1/3 stops. Try it and you’ll see.

10. Learn to use AE/AF Lock or the AF-ON Button

One of the biggest issues that a bird photographer faces is to switch between AF-S (or One-Shot AF) to AF-C (or AI-Servo) mode. Normally you would need AF-S (or One-Shot AF) for the birds which aren’t moving (or perched birds) and AF-C (or AI-Servo) mode all other times.

bird photography camera settings

It’s quite easy now-a-days to fix this issue. If you have AF-ON button at the back of your camera, it’ll solve the issue. AF-ON button is used for back-button focusing (also known as rear-button focusing). Instead of half-pressing the shutter button to start focusing, you can use the AF-ON button to trigger autofocus functionality.

When you are using the back-button focusing, make sure you have set the shutter button to only take photos and to not autofocus. This will leave the focus only for the AF-ON button. Now, all that you have to do is, always use AF-C (or AI-Servo) mode so that you are ready for the action.

Whenever you release the AF-ON button it’ll automatically lock the autofocus, which means, it’ll work as AF-S (or One-Shot AF). If you don’t have AF-ON button, you can likely configure any other button, say the AE-L/AF-L button to do the same thing.

Focus Settings for Canon DSLRs:

Focus Settings for Nikon DSLRs:

Bird Photography camera Settings for Beginners

Bird Photography camera Settings for Beginners

Bird Photography camera Settings for Beginners

Bird Photography camera Settings for Beginners

Here’s when you use back-button focus:

For example, say a bird is currently perched. You want to make few compositions while it is static, but at the same time, you would like to be ready for any action like flight. All that you do is, be ready in AF-C (AI-Servo) mode, press the AF-ON button to achieve focus, and release it to lock the focus. Then start taking photos as if you are in AF-S (One-Shot Focus) mode. If you see any slight movement, press the AF-ON button and you are already in the AF-C (or AI-Servo) mode. It’s the best of both worlds, isn’t it?

This is one of the advanced bird photography techniques I have described here. It might take a while to understand but try it. You’ll love it.

bird photography camera settings

IMPORTANT NOTE: Please note that it’s not possible to give every step to configure a particular setting. I have given only just a few steps to show you the settings I have described. This is due to the constraint of space and the medium used. Consult the user manual for your camera if you need more help.

Conclusion

If you can bring these 10 camera settings into practice in your daily bird photography, you’ll see a drastic improvement in your images. But remember, settings and equipment can only take you so far. They are just the means to an end, not the end itself.

I strongly recommend you to read my most popular article 10 Incredible Bird Photography Tips for Beginners.

Remember, your goal is to make your life easy with the right camera settings. The fewer settings you have to deal with, the better. Don’t get bogged down by settings as such, concentrate more on making better bird photographs. If you know what you want, you’ll find a way. I would recommend you to find an easy way.

Another suggestion is to take it easy. Don’t try to pressurize or overwhelm yourself with the information. Take one tip at a time and practice it. As always, practice makes perfect.

Everything can be mastered over time. With the right mentor and right practice, you’ll eventually become an excellent bird photographer. Just keep at it.

Think Photography. Think Simple.

The post 10 Must-Use Bird Photography Camera Settings for Beginners by Prathap DK appeared first on Digital Photography School.


Digital Photography School

 
Comments Off on 10 Must-Use Bird Photography Camera Settings for Beginners

Posted in Photography


Art of Camouflage: Flying Bird Silhouettes Blend into Broken Window Voids

09 Nov

[ By WebUrbanist in Art & Installation & Sound. ]

cracked-glass-frame-art

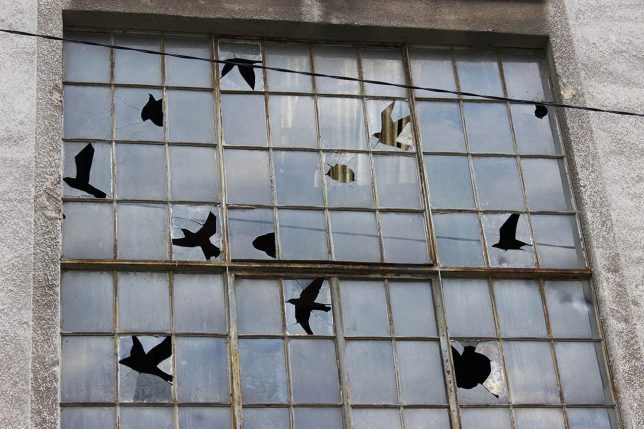
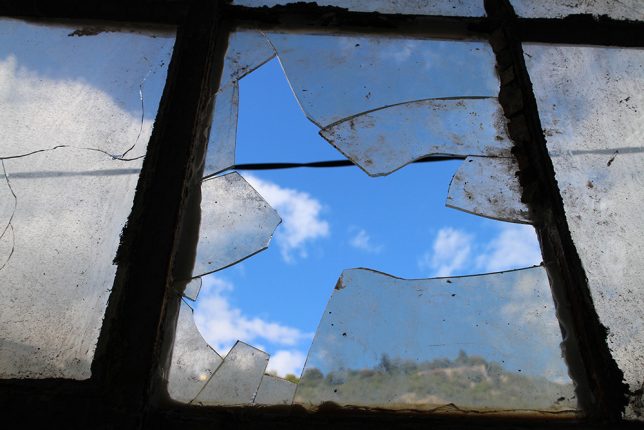
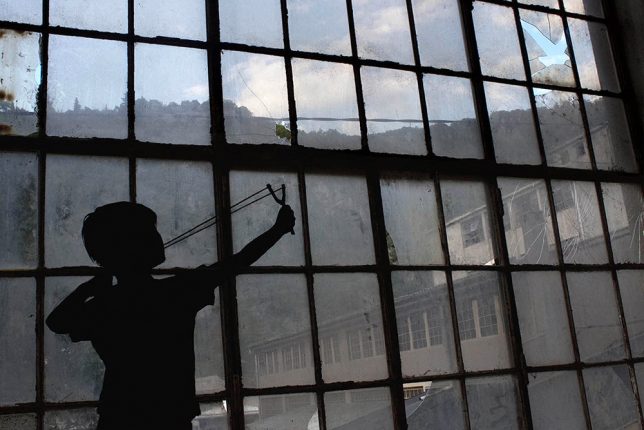
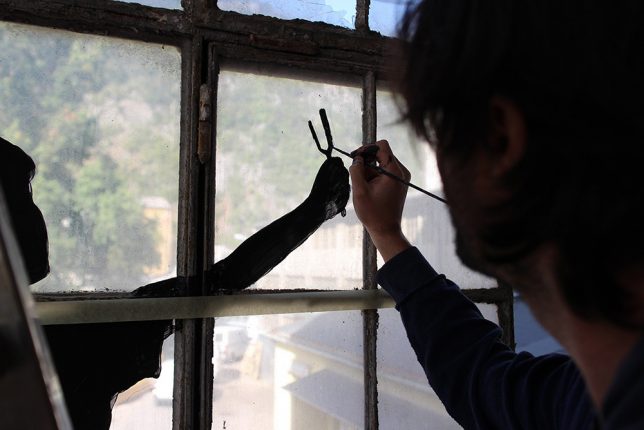
A boy aiming his slingshot into the sky seems to aim both at the broken windows of an abandoned building but also a series of birds that seem to appear in the gaps of cracked glass, transfixed in various stages of flight.

broken-glass-bird-art

Artist Pejac is well known for his negative-space interventions, from pealing back paint chips to carefully reveal brick beneath to other contextual installations. Much of the art is in the craft: a meticulous removal (or breaking) of materials to slowly reveal some new whole, much like a sculptor chips away at a marble edifice.

bird-window-boy-shooting

This latest piece was produced during his residency with the Museum of Modern and Contemporary Art in Rijeka, Croatia, where he spent multiple weeks crafting site-specific works.

bird-windows-power-plant

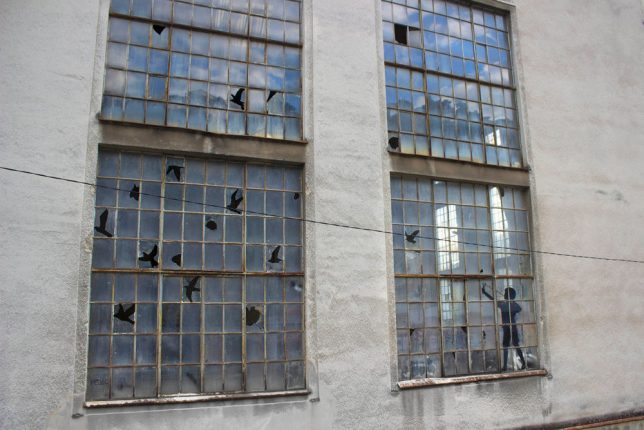
Camouflage (Tribute to René Magritte) is set in the huge windows of an old paper factory power plant, depicting a flock of birds that might be hard to spot were it not for the outline of a boy taking aim below them. His figure calls attention to the larger work, signalling a passer by the existence of something both large and subtle going on in the frame.

boy-taking-aim

painted-boy

The implied story is one about hunting and survival, the birds disguising themselves against a backdrop of broken window panes, making them harder for the child to spot. The boy, too complex a figure to render through even the most craftily broken glass, is painted over a series of panes (images by Sasha Bogojev).

Share on Facebook


[ By WebUrbanist in Art & Installation & Sound. ]

[ WebUrbanist | Archives | Galleries | Privacy | TOS ]


WebUrbanist

 
Comments Off on Art of Camouflage: Flying Bird Silhouettes Blend into Broken Window Voids

Posted in Creativity


Bird Biomimicry in Action: 12 Avian-Inspired Jets, Drones & Cars

14 Apr

[ By Steph in Design & Products & Packaging. ]

bird inspired skeleton race car 2

The very same evolution-driven characteristics that enable birds to glide effortlessly through the air can be applied to everything from drones to bullet trains to make them faster, lighter, more nimble and all around cooler looking. Avian-inspired aircraft with nature’s most aerodynamic silhouettes, cars with frames modeled on bird skeletons, gull wing fighter jets and even the U.S. military’s current B2 Spirit Bomber look to the skies for design and performance improvements.

Yamaha with Swan Wing-Shaped Paneling

bird inspired yamaha

bird inspired yamaha 2

With an overall design inspired by flowing garments on a high fashion runway, the Yamaha 04GEN scooter concept has an elegant birdlike frame and two transparent body panels modeled on the wings of the swan. The likeness is especially evident when the panels are flipped up. The experimental concept model was unveiled at the first Vietnam Motorcycle Show in Ho Chi Minh City, and there’s no word as to whether it will actually go into production.

Lockheed Stratoliner

bird inspired lockheed

bird inspired lockheed 2

Designer William Black created the Lockheed Stratoliner in tribute to the bar-tailed Godwit, a bird that holds the record for traveling the farthest without a single stop (7,258 miles.) Designed for long distances, it uses four cryogenic hydrogen turbofans as its engines, emitting zero pollution. The oversized wings and swooping body come straight from the Australian wading bird, as well. Considering that hydrogen-powered flight is still far off from being a reality on such a large scale, this is destined to remain a concept for the indefinite future.

Kingfisher-Inspired Shinkansen Bullet Train
bird inspired kingfisher train

bird inspired kingfisher train 2

bird inspired kingfisher train 3

Engineer Eiji Nakatsu, a general manager of the technical development department for Japan’s high-speed bullet trains, also happens to be a birdwatcher, and not just by coincidence. He realized studying the flight of birds could help make trains faster and lighter, pushing the boundaries of innovation in his field. The typical train nose design was creating incredibly loud sonic booms as it emerged from tunnels, and needed some tweaking. Nakatsu recalled the way a kingfisher’s scoop-like beak enables it to dive into water at high speed with barely a splash, and applied the same shape to the train, eliminating the noise problem and enabling it to run at higher speeds.

Swan Plane, Chicken Aircraft & Seagull Jets by Alex Brady
bird inspired swan brady

Bird Inspired Seagull Jet Brady

bird inspired chicken brady

An odd swan-shaped plane, seagull-inspired fighter jets and an aircraft that combines the forms of chickens and dragons are among the fantastical aircraft concepts by British artist Alex Brady. Admitting that they’re 100 percent whimsical, Brady isn’t too concerned about the opinions of experts, who have noted that these creations couldn’t fly without the invention of new propulsion systems. His other designs take inspiration from manta rays, warthogs, wood lice, porpoises and even a pterodactyl.

Next Page – Click Below to Read More:
Bird Biomimicry In Action 12 Avian Inspired Jets Drones Cars

Share on Facebook


[ By Steph in Design & Products & Packaging. ]

[ WebUrbanist | Archives | Galleries | Privacy | TOS ]


WebUrbanist

 
Comments Off on Bird Biomimicry in Action: 12 Avian-Inspired Jets, Drones & Cars

Posted in Creativity


10 Common Bird Photography Mistakes and Their Solutions

01 Oct

Do you commit mistakes in photography?

I bet you do. I have made mistakes. As a matter of fact I have committed many. But we all learn from our mistakes. What you don’t have to necessarily do is to re-invent the wheel. Instead of learning about these common mistakes the hard way, why not learn from other’s mistakes? That sounds awesome, doesn’t it?

Sandhill Crane Family Flying on a Beautiful Autumn Morning in Jasper-Pulaski Fish and Wildlife Area in Medaryville in northwestern Indiana. Every year around 10,000 Sandhill Cranes migrate to this location during Autumn. The calls of thousands of Sandhill Cranes that reaches several miles is an experience that is next to none. It is one of the best locations to photograph them as they fly past the Autumn trees at the Sunrise to feed in the close by farms.

Sandhill Crane Family Flying on a Beautiful Autumn Morning in Jasper-Pulaski Fish and Wildlife Area in Medaryville in northwestern Indiana. Every year around 10,000 Sandhill Cranes migrate to this location during autumn. The calls of thousands of Sandhill Cranes that reaches several miles is an experience that is next to none. It is one of the best locations to photograph them as they fly past the autumn trees at sunrise to feed in the nearby farms.

Here is the list of 10 common bird photography mistakes and their solutions. If you learn and apply these bird photography tips you would see the results immediately in your images.

#1 BAD EXPOSURE

This is the biggest mistake. A bad exposure would ruin the photograph. Most common is overexposed (blown-out) highlights.

01-The-Most-Useful-Bird-Photography-Tips-for-Beginners-by-Prathap-Nature-Photography-Simplified

Overexposed – highlights blown out.

The issue is that your camera has much less dynamic range than your eyes. This means you can see the details in both brighter and darker regions of a scene, but the camera doesn’t.

You have to make a choice whether to keep the details in the brighter or the darker region. Your choice would almost always be to keep the details in the brighter region. Because our eyes are more sensitive to brighter areas (or highlights).

02-The-Most-Useful-Bird-Photography-Tips-for-Beginners-by-Prathap-Nature-Photography-Simplified

Correctly exposed for the highlights.

In short – always expose for the highlights.

#2 BAD LIGHT

Photography is painting with light. If you underestimate the light, then you are bound to get bad photographs. It’s not an exaggeration to say most photographers seem to ignore it.

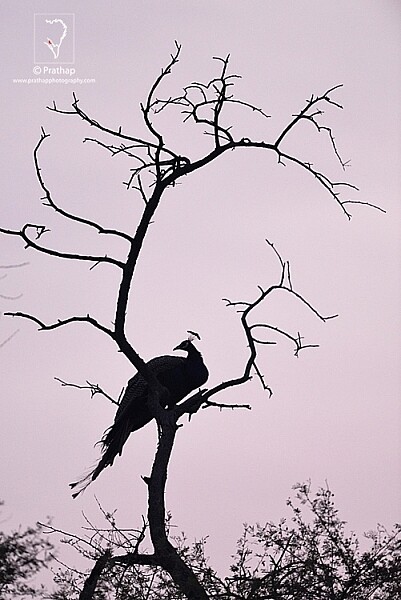
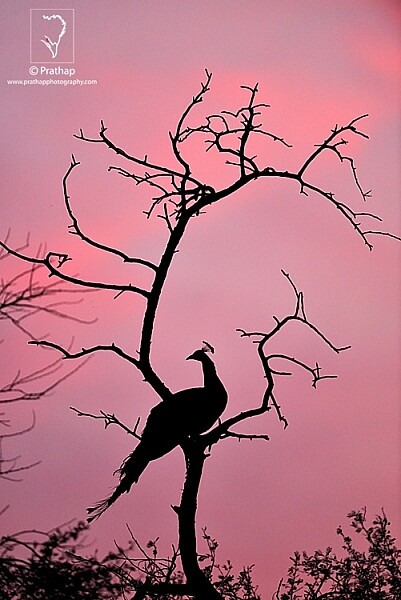
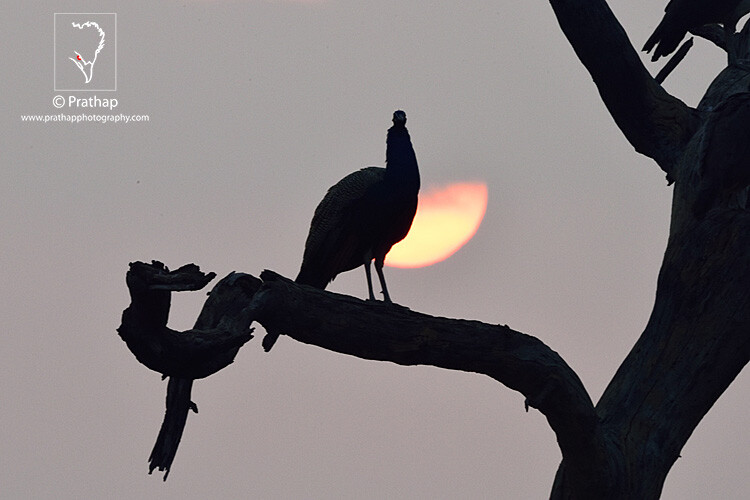
More the time is spent debating about equipment, than studying the light. No equipment can save your photograph if the light is not favorable. Look how boring this silhouette of an India peafowl is.

03-The-Most-Useful-Bird-Photography-Tips-for-Beginners-by-Prathap-Nature-Photography-Simplified
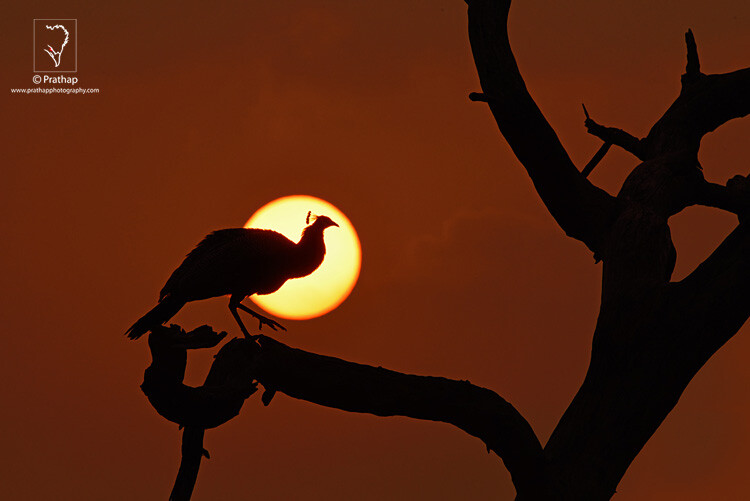
Just before minutes, it was like this.

04-The-Most-Useful-Bird-Photography-Tips-for-Beginners-by-Prathap-Nature-Photography-Simplified

Isn’t it evident? Learn to see the light. It’s all about light.

#3 BAD COMPOSITION

Bird photography is not demanding in terms of composition. Even so, a lot many bird photographers don’t seem to understand simple techniques. All that you need to know is the rule of thirds, the rule of spaces, and fill the frame composition techniques.

How many times have you seen a photograph like this? A subject in the center!

05-The-Most-Useful-Bird-Photography-Tips-for-Beginners-by-Prathap-Nature-Photography-Simplified

Just by following the rule of thirds, this is what I got.

06-The-Most-Useful-Bird-Photography-Tips-for-Beginners-by-Prathap-Nature-Photography-Simplified

Next time you are out in the field, remember to compose well.

  • Place the bird off-centered and give enough it breathing space.
  • Or, fill the frame with the bird.

That is as simple as it gets.

#4 BAD FOCUS

Blurry bird photos are everywhere. Birds are always active, making it harder to achieve sharp focus. But that doesn’t mean you don’t recognize it. If you rely heavily on your LCD monitor, this is what happens.

07-The-Most-Useful-Bird-Photography-Tips-for-Beginners-by-Prathap-Nature-Photography-Simplified
Nothing seems to be wrong in this photograph, right?

Wrong. It’s a blurry photograph. Can you see the out of focus eye now?

08-The-Most-Useful-Bird-Photography-Tips-for-Beginners-by-Prathap-Nature-Photography-Simplified
Fixing it is easy. Check for the critical focus by zooming in on your LCD monitor. If it’s not sharp, make the adjustments until you get the focus perfect. The initial focus was on the bird’s body. By shifting the focus point to the eye of the bird, I got this tack-sharp image.

09-The-Most-Useful-Bird-Photography-Tips-for-Beginners-by-Prathap-Nature-Photography-Simplified
#5 WRONG POINT OF VIEW

How do you see your world? From your eye level…isn’t it? But, how does the bird see its world? You got the point. But more than 90% of the bird photographers do not seem to understand this simple concept. They shoot from their eye level. Can you believe that?

10-The-Most-Useful-Bird-Photography-Tips-for-Beginners-by-Prathap-Nature-Photography-Simplified
If you are doing it too…stop it right now. It’s not your portrait but the bird’s.

11-The-Most-Useful-Bird-Photography-Tips-for-Beginners-by-Prathap-Nature-Photography-Simplified

Get down and shoot from a bird’s point of view, and see the magic unfold.

#6 WRONG HEAD ANGLE

Your eyes follow the lead. You will follow the line of sight of a bird. If the bird looks left, your eye will move in that direction and vice versa. If your eye is lead in an interesting way, then your image works.

What doesn’t work is when the bird looks away. It’s not uncommon to see such photographs everywhere on the web.

12-The-Most-Useful-Bird-Photography-Tips-for-Beginners-by-Prathap-Nature-Photography-Simplified
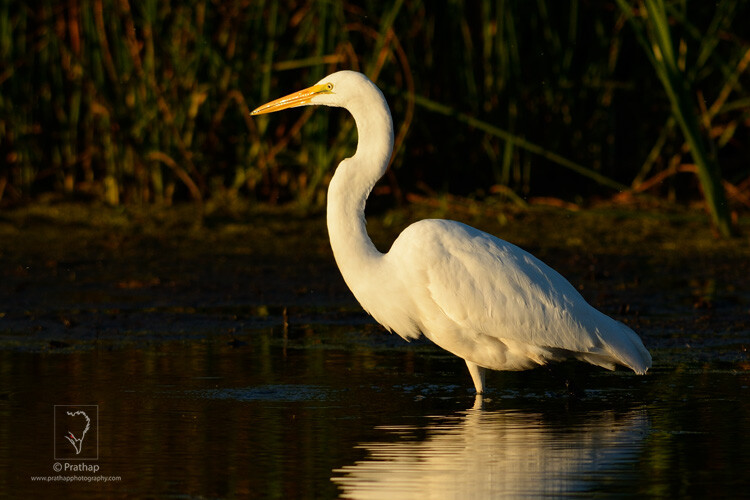
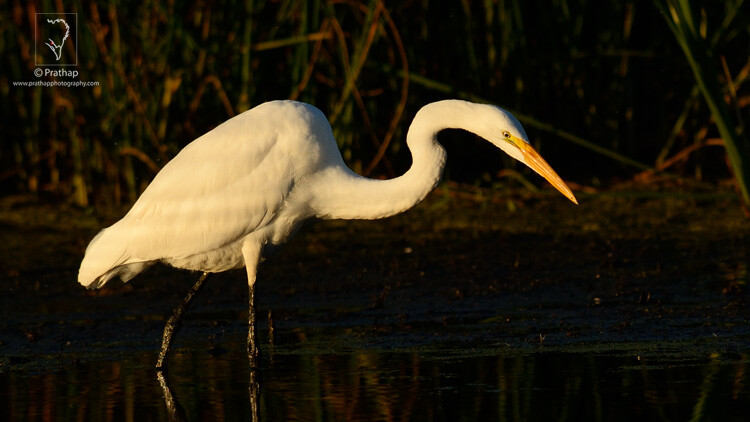
Wait for the right head angle. Take photograph when bird is actively looking for its prey. Or, when it is sensing an impending danger.

13-The-Most-Useful-Bird-Photography-Tips-for-Beginners-by-Prathap-Nature-Photography-Simplified
With just the right head angle, the image became more interesting. The Great Egret is actively searching for its prey. The head angle is diagonally inclined adding dynamism to the photograph.

#7 WRONG BACKGROUND

Do you care for the background? Most often bird photographers just don’t care about anything other than the bird. Why? Are you saying because it’s a bird photograph after all! Do you know it’s the background which makes the picture?

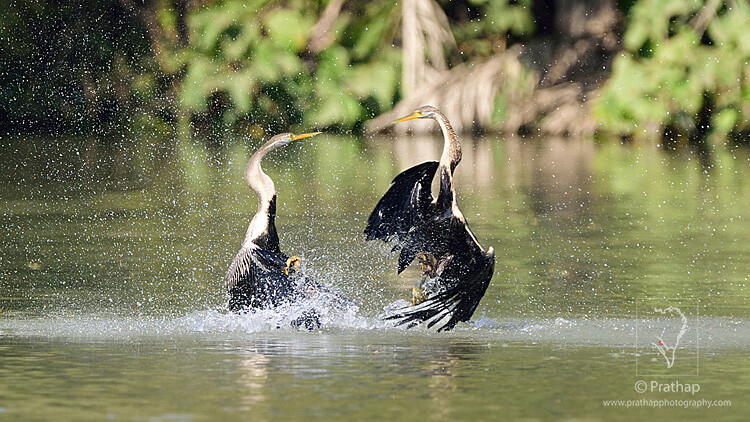
Okay, take a look at this bird photograph.

14-The-Most-Useful-Bird-Photography-Tips-for-Beginners-by-Prathap-Nature-Photography-Simplified
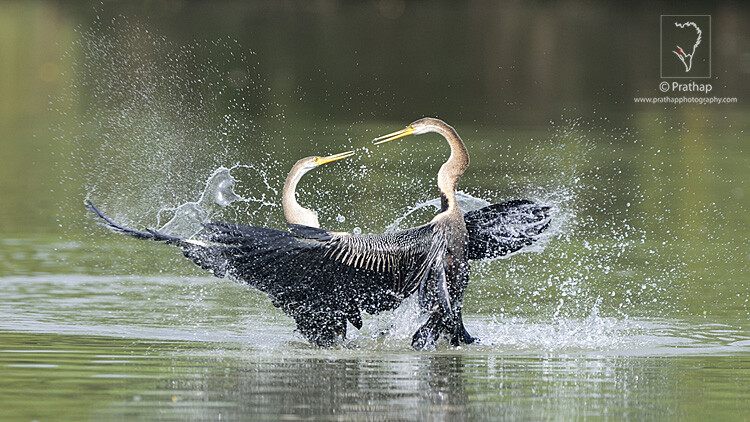
That’s a fantastic action shot of two Indian Darters or Snakebirds fighting. But, is it amazing? Take a look at this one now.

15-The-Most-Useful-Bird-Photography-Tips-for-Beginners-by-Prathap-Nature-Photography-Simplified
You see how beautiful the action is. It just couldn’t get better. Here’s the best bird photography tip I can give you – put more importance on background than the bird and you’ll make great bird photographs.

#8 BAD PROCESSING

Is post-processing good? There’s probably a hot debate around every corner about this topic. If you do post-process here’s what you shouldn’t do.

Here’s a simple and useful post-processing tip for bird photography. Don’t over process your image. Over sharpening and extreme noise reduction are typical mistakes of many bird photographers.

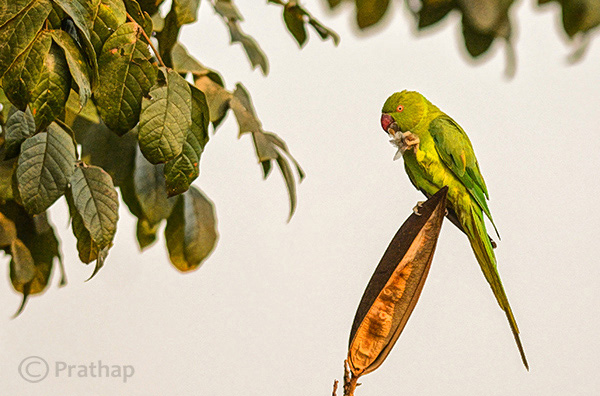
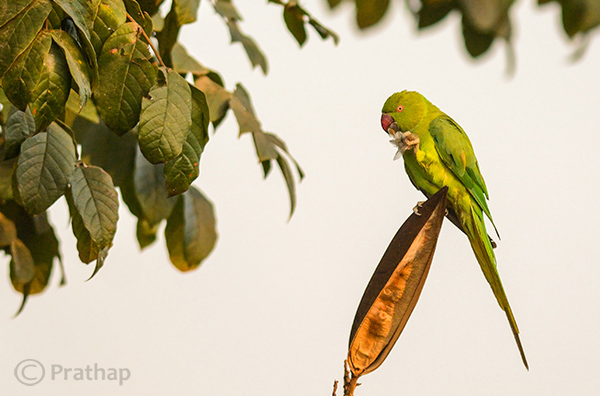
Rose-Ringed Parakeet displaying all its color in soft Sunlight in Bharatpur Bird Sanctuary. I sm so lucky to have been able to capture this beautiful parakeet. I love it!

This one has too much noise reduction

Rose-Ringed Parakeet displaying all its color in soft Sunlight in Bharatpur Bird Sanctuary. I sm so lucky to have been able to capture this beautiful parakeet. I love it!

This one is over sharpened.

It destroys your image. It makes it either look like a wax statue or a wired toy.

Take it easy. Keep your processing to a minimal. Just do enough processing to bring back the details and colors in the bird. Reduce noise only in the background. Sharpen only the bird with just enough to bring out detail.

Rose-Ringed Parakeet displaying all its color in soft Sunlight in Bharatpur Bird Sanctuary. I sm so lucky to have been able to capture this beautiful parakeet. I love it!

Rose-Ringed Parakeet displaying all its color in soft Sunlight in Bharatpur Bird Sanctuary. I sm so lucky to have been able to capture this beautiful parakeet. I love it!

#9 WRONG PLACE

Do you know that location really matters? In fact, it can make or break your image. It’s a very important bird photography tip to remember. If you end up photographing a species in a wrong place, then you’ll end up with bad results.

18-The-Most-Useful-Bird-Photography-Tips-for-Beginners-by-Prathap-Nature-Photography-Simplified
Find the right location where there are enough birds, good light, good feeding ground, and a good background. Assuming that you know important bird photography tips, you’ll most certainly make the best bird photographs.

19-The-Most-Useful-Bird-Photography-Tips-for-Beginners-by-Prathap-Nature-Photography-Simplified
#10 WRONG EXPECTATIONS

Not many photographers talk about this. But here’s the thing: If you think that a professional or experienced bird photographer goes to a place, points their expensive gear at the birds, and take home loads of amazing photographs, then you are wrong.

20-The-Most-Useful-Bird-Photography-Tips-for-Beginners-by-Prathap-Nature-Photography-Simplified
This is far from the truth. The truth is they are the ones who go to the place before anyone. Stay there until there’s no light. Come back to the same place again, and again, and again until they get what they want.

21-The-Most-Useful-Bird-Photography-Tips-for-Beginners-by-Prathap-Nature-Photography-Simplified
My friend, it’s not magic. It’s bird photography. Everyone needs to pay their due respect. Birds never differentiate.

CONCLUSION

Bird photography is fascinating.

Birds attract us like crazy. They make us forget about the world around us. But, you have to get over this. You have to see beyond the bird. You have to pay close attention to everything in the frame – the bird, the background, the placement, the light, exposure, etc.

It’s easy to be a bird photographer. Not that easy to be a good bird photographer.

These 10 bird photography tips should give you a fair idea of what makes a good bird photograph. Understand them. Practice them. Your bird photographs are bound to improve.

Let me know if you have any questions. I would love to answer them.

googletag.cmd.push(function() {
tablet_slots.push( googletag.defineSlot( “/1005424/_dPSv4_tab-all-article-bottom_(300×250)”, [300, 250], “pb-ad-78623” ).addService( googletag.pubads() ) ); } );

googletag.cmd.push(function() {
mobile_slots.push( googletag.defineSlot( “/1005424/_dPSv4_mob-all-article-bottom_(300×250)”, [300, 250], “pb-ad-78158” ).addService( googletag.pubads() ) ); } );

The post 10 Common Bird Photography Mistakes and Their Solutions by Prathap DK appeared first on Digital Photography School.


Digital Photography School
 
Comments Off on 10 Common Bird Photography Mistakes and Their Solutions

Posted in Photography


5 Unforgiving Post-Processing Mistakes Every Bird Photographer Must Avoid

03 Nov

Post-processing is one of the most important steps in the image making process. It is in fact one of the most powerful tools to make your vision come true. The camera does not see the way you see your world and it is your responsibility to translate your vision into reality in post-processing.

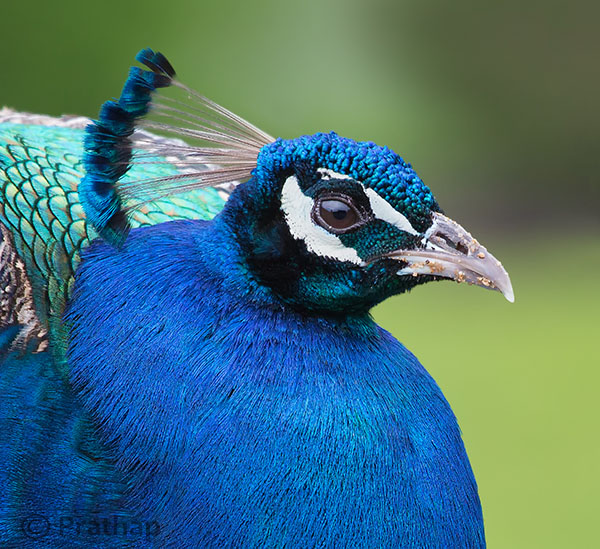
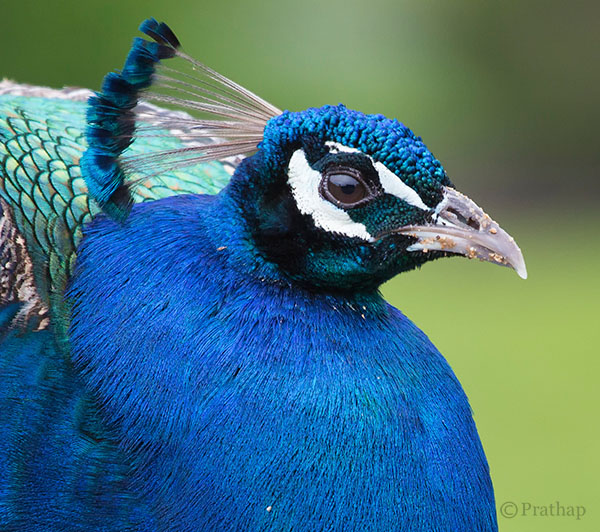
0 Nature Photography Simplified Bird Photography Post Processing Tips Peacock Portrait Featured Image

You can achieve most artistic results in post-processing that are simply not possible in reality. But, being a bird photographer you do not often get a chance to post-process your bird photographs artistically. Why?

Since the viewer would have seen the bird in reality, it is easier to compare to what is presented in a photograph. Bird photography is generally about showing the bird and its natural beauty not enhancing it artistically to achieve something else!
It is very similar to taking photograph of a person. Do you want to show the person as they are, or do you want to make them look someone else?

Does this mean, you have to just keep it real?

Not necessarily. But any enhancement in post-processing to make a bird or its features look beautiful has to be done with lot more care than if it was a landscape photograph for instance.

Remember that the mistakes will be caught easily!

Below I am listing the five post-processing mistakes that you, as a bird photographer, should avoid because they are unforgiving.
Committing any of these mistakes may ruin your bird photograph, and you definitely do not want to ruin your hours and days of effort in getting that one photograph you love. Do you?

Mistake #1: It’s cropped too tight

There is an ongoing debate about whether to crop or to get everything perfect in field. Though it is desirable to compose in the field, cropping in the post becomes necessary many a times in bird photography because of several factors like:

  • Not enough time to compose the fast action that unfolds in split seconds
  • Not enough focal length to fill the frame
  • Not enough time to compose an image especially in case of birds in flight

If you can improve the composition, then go ahead and crop the image. But too often, I see lot of bird photographers crop it too tight which makes the bird suffocate in the frame and the image look cramped.

1-Nature-Photography-Simplified-Bird-Photography-Post-Processing-Tips-Too-Tight-Crop

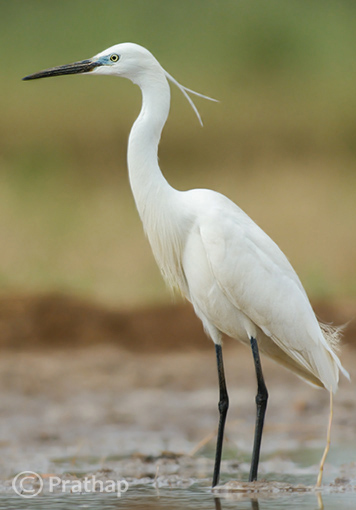
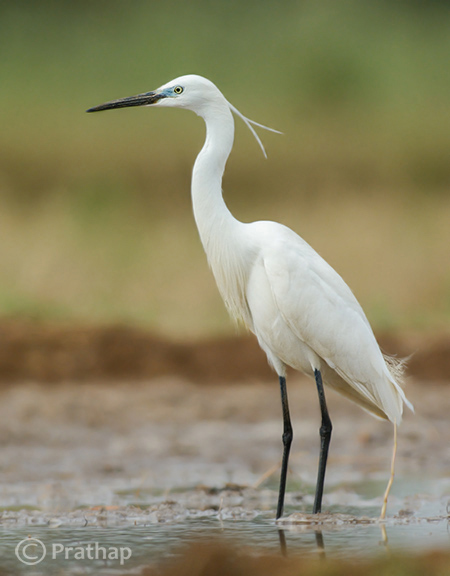
The little Egret in this photograph looks suffocated because there is no breathing space in front to look into, and no space to move which makes it look cramped.

2-Nature-Photography-Simplified-Bird-Photography-Post-Processing-Tips-Little-Egret

Notice how a little bit more space around the bird gives him room to look into and move. It is more pleasing to our eyes also.

Quick Tip: Use the Rule of Thirds as a guideline.

Mistake #2: It’s unrealistic

The clarity slider in Adobe Lightroom is such a lethal weapon that is hard to replicate even with Adobe Photoshop. It enhances the local contrast in an image, which is one of the most important aspects of processing. Too much local contrast makes an image looks unrealistic as it tends to sharpen.

The soft and smooth feeling of the smallest details in feathers of the bird starts to look very unrealistic.

3 Nature Photography Simplified Bird Photography Post Processing Tips High Local Contrast

Notice how unrealistic the Parakeet looks in the above image. Even the leaves look like plastic.

4 Nature Photography Simplified Bird Photography Post Processing Tips Rose Ringed Parakeet Female

Just enough local contrast (usually Clarity of +20 to +30) will bring out all the details in the bird.

Quick Tip: Instead of using your mouse to pull the Clarity slider, use keyboard arrows and watch the changes as you bump up the clarity. Restrict to the smaller numbers like +10 to +30.

Mistake #3: Everything is overly colorful

Over-saturated images are everywhere!

Birds are definitely colorful subjects and that is the reason we are all attracted to them. But are they so colorful?
Too much saturation looks overcooked. If you try to increase the contrast as a last step in your post-processing workflow (which is usually recommended), then it will also increase the saturation.

Note that Saturation slider increases the overall saturation of the image making everything in the image colorful. Do you really want everything in the image looking colorful? Do you want to emphasize the bird or the background?

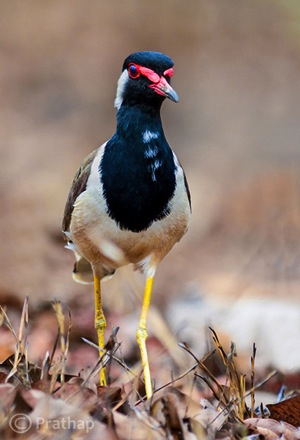
5 Nature Photography Simplified Bird Photography Post Processing Tips Over Saturated

Everything in the above photograph of a Red-Wattled Lapwing is colorful. It is way too colorful.

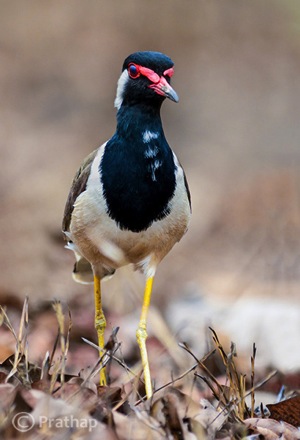
6 Nature Photography Simplified Bird Photography Post Processing Tips Red Wattled Lapwing

In the above photograph I have selectively increased the Saturation only for the bird in Adobe Photoshop.

Quick Tip: Use selective coloring. Saturate only the colors or object that are very important. Use the HSL panel or the adjustment brush to apply the color.

Mistake #4: The bird looks like a wax statue

Have you seen a wax statue of a bird in a shop? You can also see them on the web. Excessive noise reduction will give a plastic or wax statue look to your bird photographs.

While it is important to reduce the noise because most often we have to bump up the ISO to 400 or 800 to freeze the action, it is also important to understand what the Noise Reduction filter does. It The smoothes out the edges, by smoothening out the minute and important details of the image and the bird.

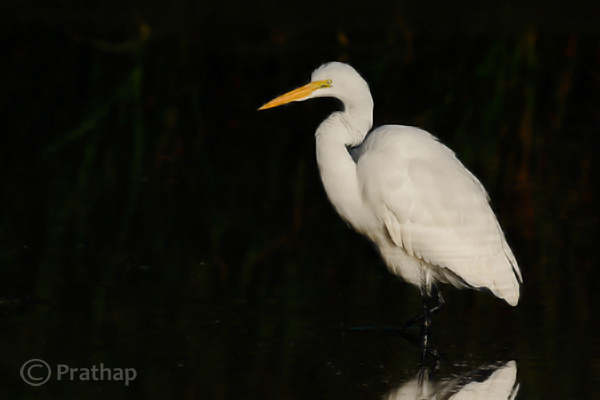
7 Nature Photography Simplified Bird Photography Post Processing Tips Waxing

The above image of a Great Egret has a waxy look because of the excessive noise reduction applied to the entire image. Remember that the water looses texture due to excessive noise reduction giving it an artificial look.

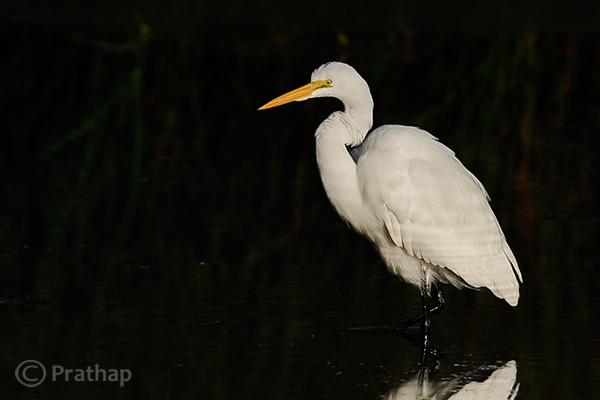
8 Nature Photography Simplified Bird Photography Post Processing Tips Great Egret

By reducing the noise only in the out-of-focus or low detailed or shadow regions of the image, it will help to keep the details intact.

Quick Tip: Reduce the noise only in the smooth areas (like the background) since noise is generally not visible in the high detailed areas (like the bird’s body).

Mistake #5: Too much is bad

Too much is bad in anything that we do. Pushing any post-processing slider too far will yield a bad image. But the most important one that is noticeable with many bird photographs, is that it is over-sharpened. No matter how good your post processing skills are, if you make this one mistake, there is no way out.

Over-sharpening kills a photograph. Period.

It is better to keep it little less sharp than to go too far and be overly sharp.

9 Nature Photography Simplified Bird Photography Post Processing Tips Over Sharpened

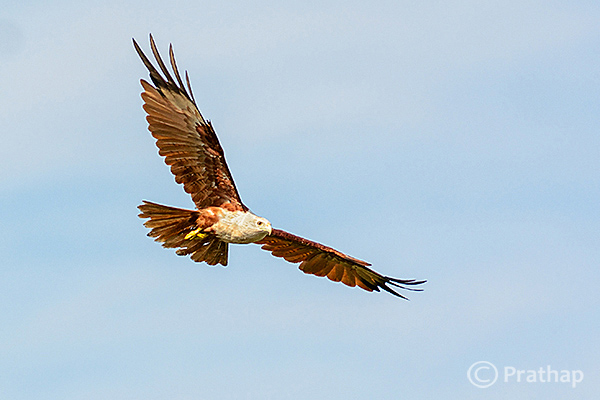
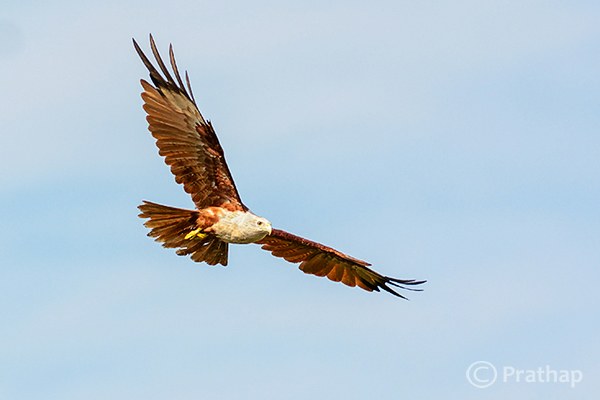
The features of the Brahminy Kite are way sharper than what they should be. Also check out the halo around the bird formed due to sharpening on the overall image.

10 Nature Photography Simplified Bird Photography Post Processing Tips Brahminy Kite In Flight

Quick Tip: Apply sharpening only to the bird but not to the background.

Final words

These are some of the major mistakes that should be avoided. Because they are unforgiving and can potentially ruin your best photographs. The best way to avoid these mistakes is to keep a small checklist to see if you have committed any and correct them immediately. With practice, you will easily avoid all of them.

Now, it’s your time to tell me the mistakes that you think should be avoided. What mistakes have you made in post-processing? Feel free to add your opinion on this subject but please make sure it is productive and helpful to all our readers.

The post 5 Unforgiving Post-Processing Mistakes Every Bird Photographer Must Avoid by Prathap DK appeared first on Digital Photography School.


Digital Photography School
 
Comments Off on 5 Unforgiving Post-Processing Mistakes Every Bird Photographer Must Avoid

Posted in Photography


Weekly Challenge of Bird Photography

04 Oct

Earlier I shared an amazing bunch of photos of birds. Here’s a couple more for you:

Susan

By Susan

Farrukh

By Farrukh

Weekly photography challenge – bird photography

Now it’s your turn to go photograph some of our fine feathered friends, the birds. Keep in mind you don’t need to go farther than your own backyard to find birds, or the nearest park. If flying ones are too fast, how about a chicken? Visit a local farm to photograph some barnyard fowl.

Need some help with bird photography tips?

  • Bird Photography Tips – How to Make Your Bird Photographs Stand Out
  • Bird Photography Tips for Beginners
  • Guide to Attracting Critters to Your Garden for Backyard Wildlife Photography
  • Tips for Photographing Birds in Flight

A few more bird images to get you started:

Nigel

By nigel

Howard Ignatius

By Howard Ignatius

Doug Brown

By Doug Brown

Davejdoe

By davejdoe

Share your bird photography

Simply upload your shot into the comment field (look for the little camera icon in the Disqus comments section as pictured below) and they’ll get embedded for us all to see or if you’d prefer upload them to your favourite photo sharing site and leave the link to them. Show me your best images in this week’s challenge.

The post Weekly Challenge of Bird Photography by Darlene Hildebrandt appeared first on Digital Photography School.


Digital Photography School

 
Comments Off on Weekly Challenge of Bird Photography

Posted in Photography


Bird Photography Tips – How to Make Your Bird Photographs Stand Out

02 Aug

Have you ever been disappointed when browsing through the bird photographs in your own portfolio? I was, in fact many times! Even today I get disappointed to see several of my own bird photographs and keep thinking why did I take that photograph in the first place?

In most cases, the reason for failure of not appealing bird photographs is the boring or distracting background.

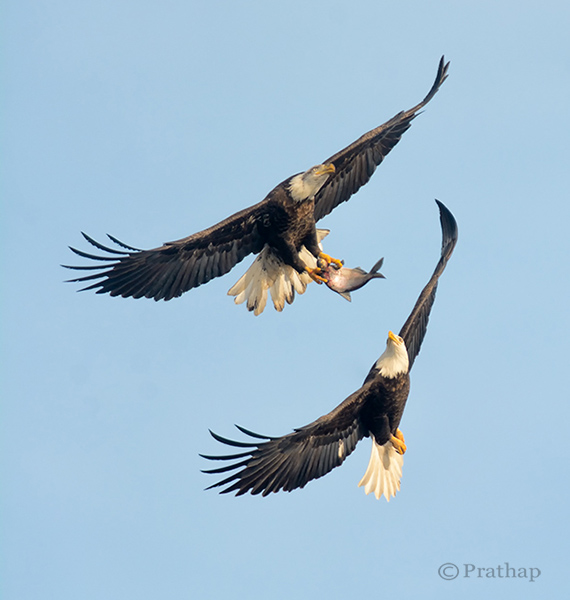
Nature Photography Simplified Bird Photography Bald Eagle Fight In Flight

Take a look at your portfolio again and see if the culprit is the background. You will be surprised, shocked, and probably start thinking why did I take this photograph? What was in my mind?

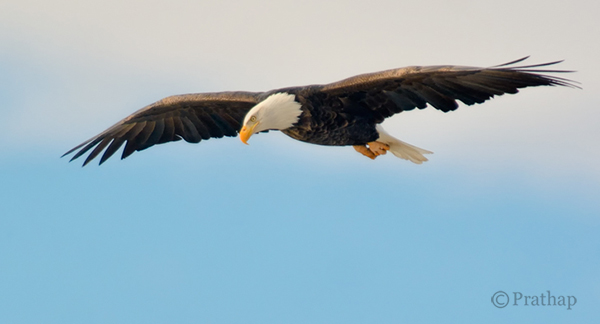
The reason is very simple. It’s our natural behaviour. We are accustomed seeing only what we want to see. Imagine a situation like this. You have your camera and a decent telephoto lens, when you see a magnificent bird like a Bald Eagle perching on a lone tree.
What do you do? You will most likely start capturing photographs in burst mode. Don’t you? We all do! The urge to capture the beauty, and the fear of losing that opportunity doesn’t allow us to think. Unless. . .

By following these very simple bird photography tips, and making a few changes before you press the shutter, you will be able to create bird photographs that stand out.

Your Background Makes the Picture

Remember that we see our world different than the Camera. We tend to see only what we want to see. Meaning, we are so tuned to looking at the world using filters. Our brain passes only the information which is very important to us filtering out all the unimportant things. So, we see only the bird and its beauty, but don’t see the background, or the distracting elements in the background.

But the camera doesn’t filter, it records everything that it sees.

No matter how beautiful the bird is, you have to make sure that the background is either clean, or interesting enough that it will complement the bird, which is your main subject of interest.

Nature Photography Simplified Bird Photography Eagle Flight Distracting vs Clean Background

Use Your Legs

Do you use your legs when you are photographing? Does this question sound crazy? Think again. Once you get to see the bird, it is a common tendency to capture it immediately. In that urge to capture, you generally forget to move around.

In order to get a clean and appealing background you have to move around sometimes, or rather most of the time. But remember to move very slowly. Most of the time moving just few feet to the left, right, forward or backward will give wonderful results.

Nature Photography Simplified Bird Photography Bald Eagle Flight

After all you are not a tripod!

Patience Always Pays Off

There is no substitute for patience when it comes to achieving anything worthwhile in your life. It is no different in the case of bird photography.

Why do we want to always move? Why can’t we sit in one place for several minutes to hours?

If you think deeper about it, you will understand that we are almost always restless. Also, we believe in the future or something that is non-existent. Learn to live in the present. Learn to embrace what is there in front of you. Rather than moving on in search of the next bird, spend time with the bird in front of you.

I would recommend you to spend hours to days in succession. You will fall in love with the bird and ultimately with nature. Patience is the key to making great photographs of any bird.

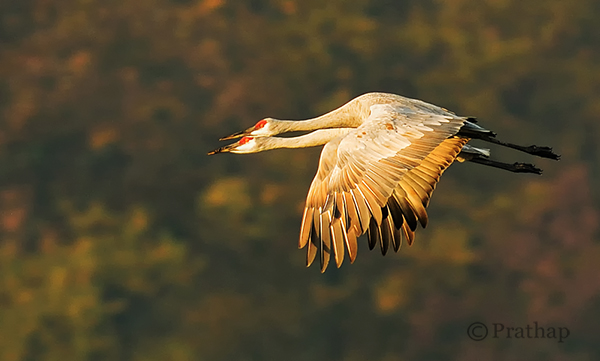
Nature Photography Simplified Sandhill Cranes Pair In Flight Jasper Pulaski Fish And Wildlife Refuge Indiana

Use Depth of Field (DOF) to Your Advantage

Depth of Field plays a major role in making your bird photographs look beautiful. By using DOF you can either isolate the subject from its background by using shallow DOF, or give importance to both the bird and its background by using deep DOF.

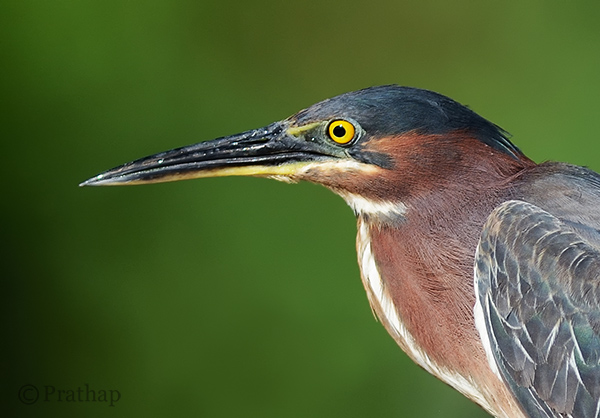
If the background does not convey anything about bird’s habitat, then using larger apertures like f/2.8, f/4, f/5.6 yields a pleasing bokeh in the background helping the bird to stand out in the frame.

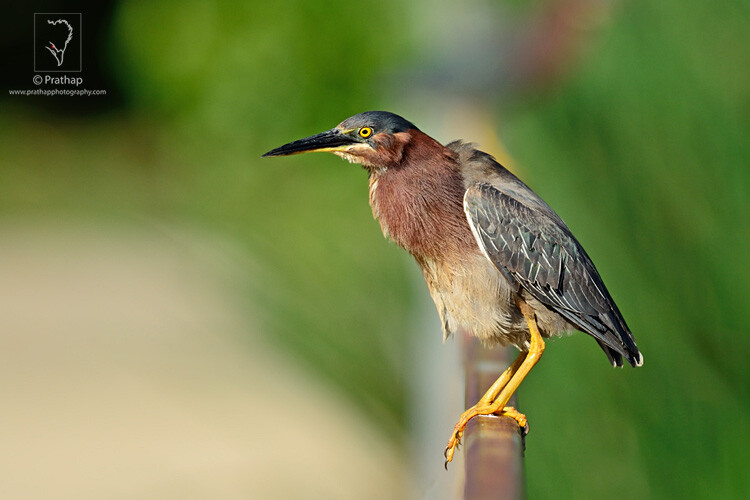
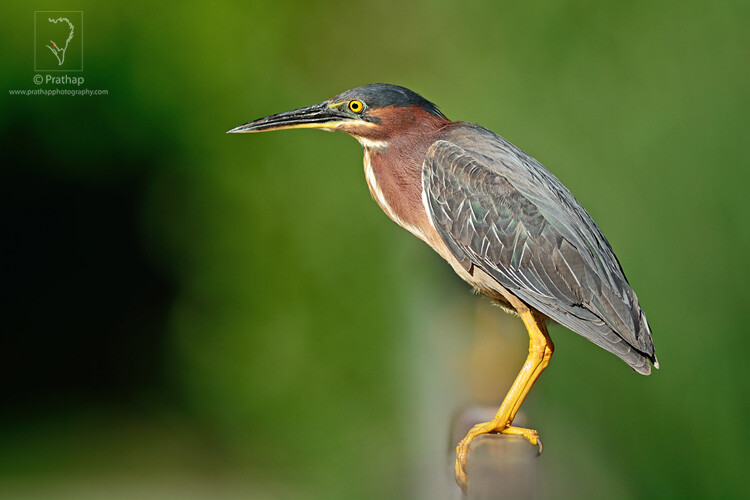
Nature Photography Simplified Bird Photography Green Heron Portrait Bokeh Effect

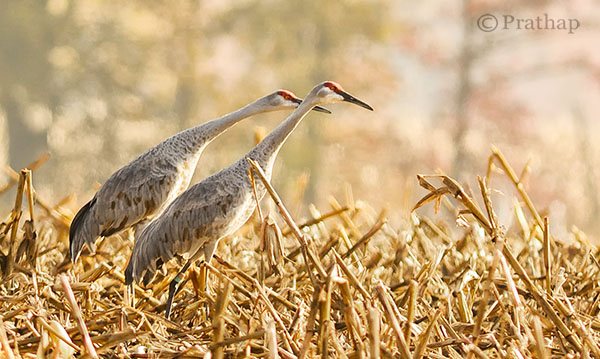
Otherwise, including the habitat by using smaller apertures like f/8, f/11, etc., helps to narrate a story to the viewer.

Nature Photography Simplified Sandhill Cranes In Jasper Pulaski Fish And Wildlife Refuge Medaryville Indiana

Fill the Frame

If you go through the bird photographs across the net, you will find that the majority of bird photographs will have the bird filling the frame.

Nature Photography Simplified Bird Photography Peacock Portrait

There are three main reasons for filling the frame with the bird:

  1. Most of the times, it’s all about the bird and its beauty. So, there is no reason why something else should be occupying the frame.
  2. The bird will be lost in the frame if it occupies only a part of the frame. Unless it is in its habitat, or there is a directional light illuminating it more than anything else in the frame.
  3. Filling the frame with the bird avoids any distractions in the background which is usually the case.

Remove Distractions in Post-Processing

This is a debatable topic for sure. Is it ethical or unethical? It depends really.

Are you sharing it only on social media sites? It shouldn’t bother you much. If you feel that removing distraction makes it a more pleasing image, it should be fine. However, it should not be overdone. Also, you should never do that if you are submitting your images to competitions or bird ID sites or any other place where it is not allowed.

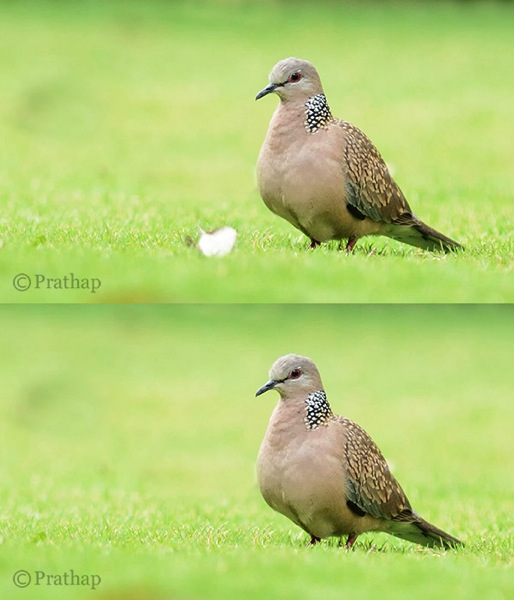
You should always try to achieve a distraction free image in the field. But, that is not always possible. My suggestion is to remove only the distractions that are by no means possible to remove in the field. Things like a tiny branch running across the bird, bright elements like aluminum foils, papers, etc., could be removed as they don’t contribute to the final result.

Nature Photography Simplified Bird Photography Beautiful Dove Background After Removing Distraction In Background

Cropping is another way to remove distractions and recompose the scene. It is an essential tool for the bird photographer since it is not always possible to have the longest telephoto lens.

Conclusion

Keep the background clean and make the bird stand out in the frame

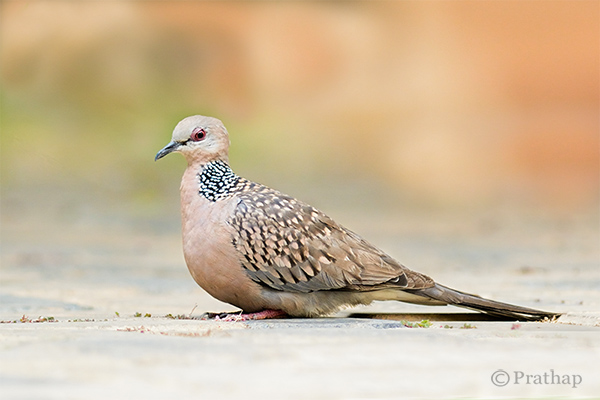
Nature Photography Simplified Bird Photography Dove Clean Background

You will make excellent photographs by following the above simple tips on bird photography. Now go out and shoot. That’s the best tip I can give if you want to seriously improve you bird photography, enjoy!

The post Bird Photography Tips – How to Make Your Bird Photographs Stand Out by Prathap DK appeared first on Digital Photography School.


Digital Photography School
 
Comments Off on Bird Photography Tips – How to Make Your Bird Photographs Stand Out

Posted in Photography


Bird Photography Tips for Beginners

19 Jul

The colour and texture of birds’ plumage makes them fascinating subjects for photography, made all the more exciting by their fleeting and elusive nature. With a lot of patience and practice, and the help of these tips, you’ll soon be on your way to making memorable photographs of our feathered friends.

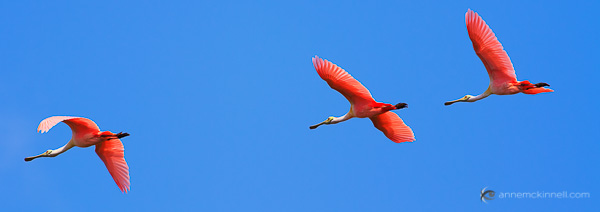
Roseate Spoonbills in Flight by Anne McKinnell

Equipment

To capture the best bird photography, the most important thing you’ll need is a lens with a very long focal length. How long, exactly? Generally, the longer the better for maximum magnification. But keep in mind that lenses get remarkably heavy – if you’re hiking up a mountain, it might not be practical to carry an extreme telephoto lens, which can weigh in at over ten pounds.

A 70-300mm zoom lens is one of my favourites because it is very versatile and some of them are fairly lightweight. But you’ll get a sharper image with a fixed focal length lens. I recommend trying out a 300mm or 400mm prime lens.

The extra weight of a long lens will increase the likelihood of hand shake blur, which will then be magnified by the distance between you and your subject. If you’re working with a heavy lens, a tripod or monopod will be a great benefit for taking the weight of the lens.

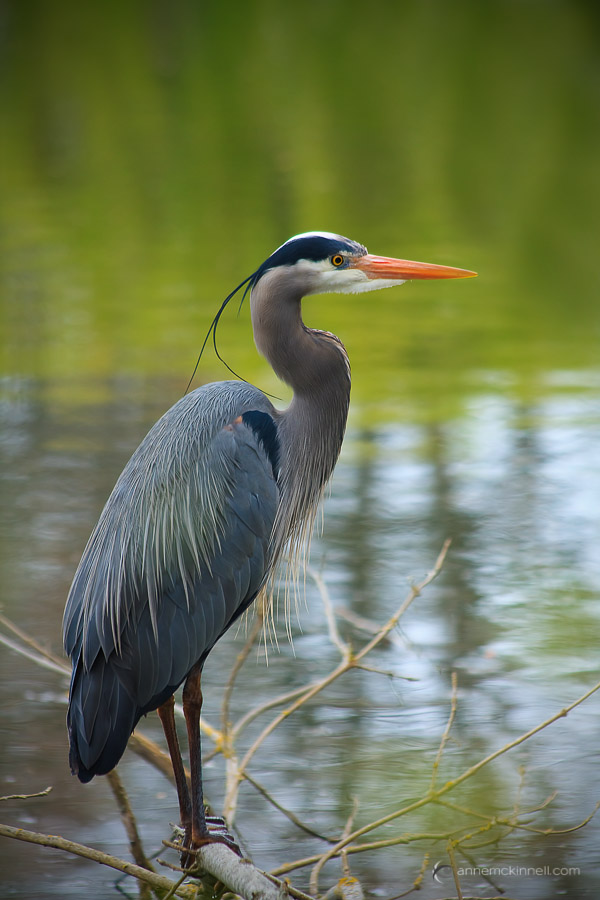
Great Blue Heron by Anne McKinnell

If you want the increased flexibility you’ll get by not using a tripod or monopod, be sure to use a very fast shutter speed to compensate for the hand shake blur.

Camera Settings

Exposure

When photographing birds, using shutter priority mode and a fast shutter speed will ensure you are ready for any action that might happen, even if the bird is standing still at the moment. You never know when it will take flight and you want to be ready when that happens.

Using a wide aperture like f/2.8 or f/4 will give you a shallow depth of field, which helps to isolate the bird from its background and direct attention to its shape and colour.

When you want to have total control over the shutter speed and aperture, use manual mode and set the ISO to auto. That way, the camera will decide which ISO is the best to balance the exposure.

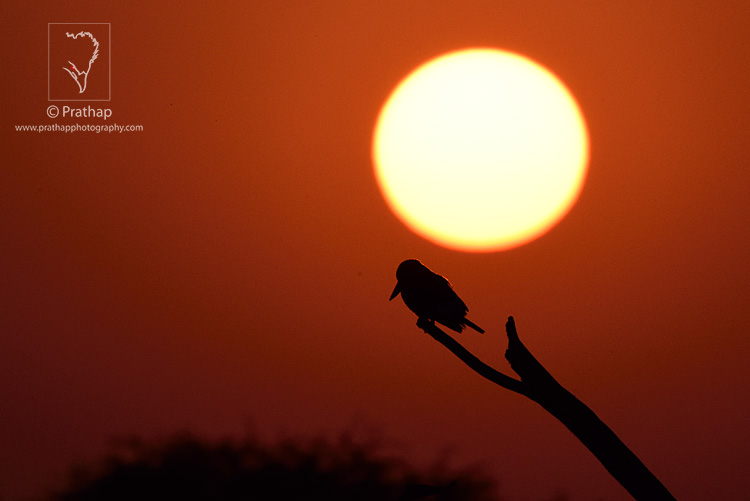
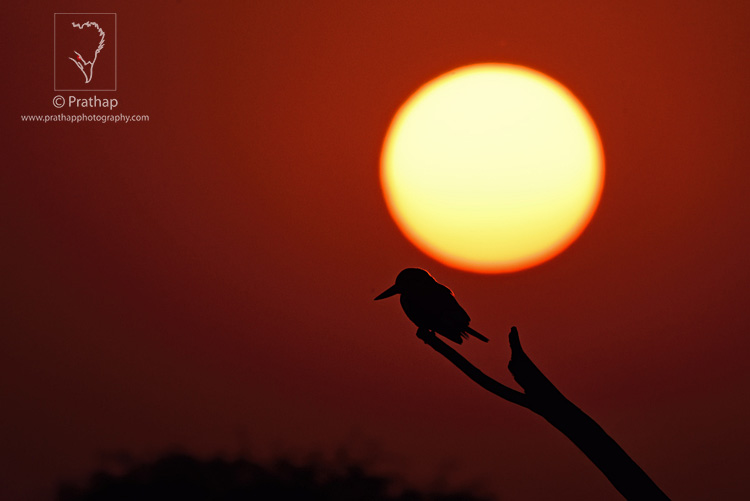
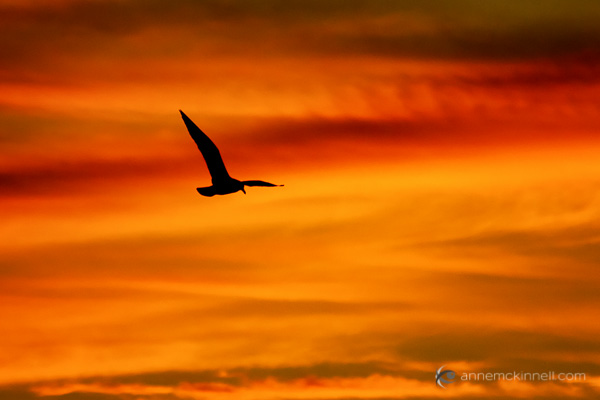
If you have a colourful sky, one option to try is to expose for the sky and allow the bird or birds to become silhouettes.

Seagull In Flight at Sunset by Anne McKinnell

Focus

How you focus on your subjects will depend on which approach you’re taking, as well as what equipment you have. Some lenses and some camera bodies auto focus faster, and much more accurately than others, so some experimentation is needed to get a sense of how quickly your auto focus motor moves.

Birds are moving subjects, so if you do use auto focus, change it to the “continuous focus” mode (usually called AF-C or AI Servo) which tracks motion. However, you might find that you get better results by learning to focus manually.

There should be an AF/MF switch on your camera and/or lens. If you switch it to MF (manual focus), you can turn the focus ring on your lens to adjust it by hand. This is fairly easy when your subject is still, but it takes a lot of practice to be able to do this quickly enough to lock in on a moving subject.

Juvenile Bald Eagle flying by Anne McKinnell

One method is to set up a perch (such as a bird feeder), with your camera on a tripod, and pre-frame and pre-focus your shot where the bird will be. When it lands, you just have to hit the shutter. There will be no focusing delay, so you can get the exact moment you have been waiting for.

Getting the Shot

Timing and Location

Birds are very active in the spring – the ground softens, plants and seeds starting coming out, and bugs are everywhere. They finally get the feast they’ve been struggling to find all winter. Similarly, in autumn they are avidly gathering food before the frost sets in. Both of these seasons are the best for finding birds near the ground – and whatever the time of year, early mornings and sunny days will draw the most action.

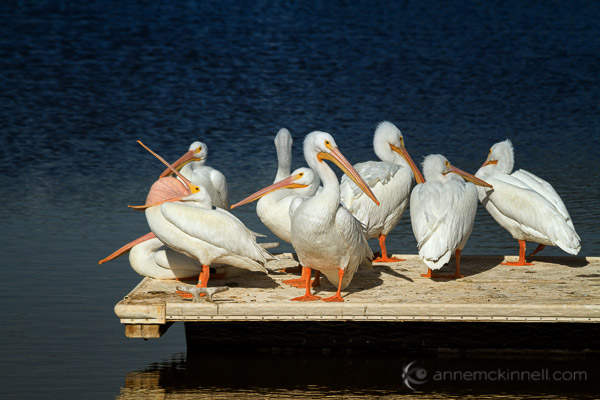
American White Pelicans at the Salton Sea, California, by Anne McKinnell

You might get lucky walking along a forest path, making photos of birds as you see them, but because birds see us as predators they will usually flee at the sound of our footsteps.

Instead, you may have better luck by finding a location birds enjoy, hiding yourself, and waiting. This is where the patience comes in to play! The better you hide yourself, the safer they will feel coming near you. Tuck yourself in next to a tree or bush, or hide behind a blind to camouflage yourself, and try to stay as still and quiet as possible.

One of the best places to start photographing birds might be your own backyard. Keep your camera handy with the right lens and camera settings for bird photography so that when one lands in your yard, you’re ready.

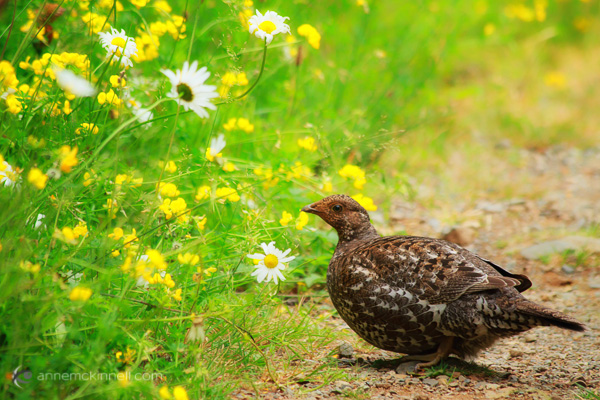
Female Sooty Grouse by Anne McKinnell

You can also seek them out in their natural habitats such as local forests, waterways, and beaches. You can find exotic and interesting species by visiting zoos, bird sanctuaries, and humane societies, or you can take a trip to a nearby national park or nature preserve. Birds that live in areas with more frequent human visitors will likely be less skittish and camera-shy.

Composition

Take care not to neglect your background. It should be clean and simple. Too much clutter will distract attention from the subject itself. Use your perspective and point of view to remove unwanted background objects from the frame, and choose a large aperture to blur them out.

Tips for the Field

  • The better your camouflage, the more likely the birds will come near you. Cover your camera with a green or brown sweater to mask its strange appearance.
  • Wear neutral clothing and avoid bright colours.
  • Make sure to remove or cover all reflective objects on and around you, including your equipment, camera bag, cell phone, and any jewelry you might be wearing.
  • If you do find yourself needing to get closer to a bird, keep a low profile. Don’t approach them directly, but rather move toward them in a zig-zag pattern. Keep very quiet and avoid making quick movements and startling them.
  • Birds often choose favourite perches. Even if it flutters off before you can get your shot, if you wait silently for a few minutes, it may come back.
  • Birds are easily startled, so a beeping camera can frighten them away. Turn off any beeps your camera might make.
    The same goes for flash – turn it off or your bird will be startled by your first shot and quickly leave.

Do you have any other bird photography tips you’d like to add to this list? Please share in the comments below.

The post Bird Photography Tips for Beginners by Anne McKinnell appeared first on Digital Photography School.


Digital Photography School
 
Comments Off on Bird Photography Tips for Beginners

Posted in Photography


Kids Posing Guide: Early Bird Discount Ends in 36 Hours

19 Jun

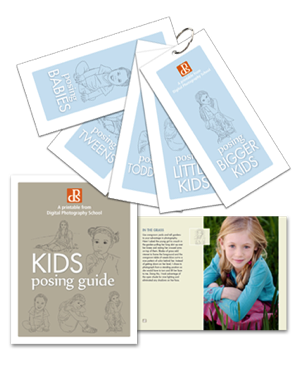
NewImageA few weeks ago we launched a brand new Kids Portraiture Printables collection in the dPS store with a 25% off Early Bird Discount (40% off if you get it with the companion eBook).

This post is just a quick note to let you know that that discount ends in just over 36 hours.

The printables collection is just $ 14.99 and gives you access to five kids posing models that cover all ages – Babies, Toddlers, Little Kids, Bigger Kids and Tweens.

Each of the 5 modules includes:

  • a tutorial to help you master posing kids of that age
  • a printable version of the poses that you can print out and fold up to take with you
  • a digital version that you can keep on your phone or tablet to use when photographing kids

NewImage

As an optional extra you can bundle this posing collection with our previously released Kids Portraiture eBook and save 40%.

The collection and eBook have been getting fantastic reviews from other websites like Two Days in Dublin who writes:

“If you want to improve your photography and capture those special moments, I recommend this e-book for those already in the business, just starting out in picture-taking, or for moms looking to capture great photos of their own kids!”

The Early Bird special ends in just over 36 hours so grab yours today here and start taking gorgeous photos of your kids.

The post Kids Posing Guide: Early Bird Discount Ends in 36 Hours by Darren Rowse appeared first on Digital Photography School.


Digital Photography School
 
Comments Off on Kids Posing Guide: Early Bird Discount Ends in 36 Hours

Posted in Photography