RSS
 

Posts Tagged ‘Beginning’

The Beginning of Photography: The Drama of 1839

26 Sep

The drama of ‘39

‘The Open Door’ William Henry Fox Talbot. About 1843. Print from paper negative.

On January 6, 1839, François Arago, Secretary of the French Academy of Sciences, announced Daguerre’s invention and spoke of his accomplishment publicly, although he said nothing of the specific methods involved.

By the middle of January, news of Daguerre’s invention had spread everywhere. Today, when imaging is so common and taken for granted, it’s hard to imagine how amazing the idea of taking a picture was in 1839. It created immediate headlines around the world.

Francois Arago painted by Charles Steuben, 1832.

The actual techniques used remained secret, however, since the French government had not yet officially bought the invention from Daguerre. The secrecy led to some suspicion that this was a trick or fake, and just like today, a few people ‘proved’ it was impossible. Most believed, though. This was an era when revolutionary new technology became available almost every year.

Who is this Arago of whom you speak?

For we photography types, Dominique François Jean Arago is just the guy who announced Daguerre’s invention, but in fact he was way more than that. He was born in a tiny village, graduated from a small college in 30 months, passed the examinations to enter the Ecole Polytechnique, got bored there, and went to work at the Paris Observatory. In 1806 he led an expedition to measure the Paris Meridian (which was used both to measure the size of the earth and to determine the length of a meter), became a prisoner of war, and on his release became the youngest member of the French Academy of Sciences at age 23.

Despite having left the Ecole Polytechnique as a student, he returned as the Chair of Analytic Geometry at age 27. He did work in magnetism and optics, confirming Fresnel’s wave theory of light and making important discoveries in the polarization and emission of light.

This is part of the reason he was so taken with Daguerre’s discovery; to Arago, photography was ‘the freezing or capture of light waves’. He may have gotten a bit too excited, though, as he really didn’t have the authority to make the purchase he promised Daguerre.

The chaos begins in England

The announcement of Daguerre’s achievement wasn’t published in England until January 19th – the telegraph wasn’t in use yet so dispatches went by rail and boat.

Let’s do an Aside!

Speaking of telegraphs, Samuel Morse, generally considered the inventor of the ‘modern’ telegraph, was in France trying to sell his telegraph system in 1838 and was introduced to Daguerre. Daguerre showed Morse his cameras, Morse demonstrated his telegraph to Daguerre, and they had an inventor-bromance-at-first-sight. Daguerre gave Morse a copy of his photographic instructions in the summer of 1839 before Morse returned to America.

Morse hadn’t sold his telegraph yet, so he supported himself by opening the first photography studio in the United States and teaching others photography*. Most of the early American photographers including Samuel Broadbent, Albert Southworth, Matthew Brady, Albert Sands, and Jerimiah Gurney were taught by Morse.

Samuel Morse, taken about 1840. The Morse family claimed the image was taken by Daguerre but this is unlikely, since the image is not a Daguerreotype.

But wait! There’s more! Why was Morse in France? Because the Germans, who were his original sales target, already had a crude telegraph in place, invented by their own Carl Steinheil. In 1840, Steinheil became the first German to use Daguerre’s methods and made some clear improvements to them; making negatives and then printing positives from them. He became more interested in photography than the telegraph, and eventually founded the Steinheil optical company which made cameras, lenses, and telescopes until the 1970s.

So, the two great advances of the 1840s, photography and the telegraph, are quite intertwined.

Back to England

William Henry Fox Talbot, he of too many names and too many interests (he had set aside his development of photography to work on an archeology book), heard of Daguerre’s invention as soon as it hit the English papers. His reaction was immediate, arrogant, and overblown — which would characterize most of his reactions for the rest of his life. After reading of Daguerre’s camera, he wrote (in typical Talbot dramatic fashion) that he was “placed in an unusual dilemma, scarcely to be paralleled in the Annals of Science”.

Talbot wanted both public credit and financial gain for his work on photography. Having no idea if Daguerre’s methods differed from his own, he immediately tried to establish precedence as the first inventor, filing patents for ‘making permanent images using a camera obscura’ (the only thing he knew Daguerre used). He rushed samples of his ‘photogenic drawings’ to the Royal Institute in London where they were exhibited on January 25th, only weeks after Daguerre’s announcement. He provided documentation that they had been taken as early as 1835, hoping that would make his images the earliest. (They weren’t).

Then he wrote letters to Arago and other academic societies stating that he would file disputes regarding the priority of Daguerre and presented a paper with the catchy title of “Some Account of the Art of Photogenic Drawing, or, the Process by which Natural Objects May Be Made to Delineate Themselves without the Aid of the Artist’s Pencil”. Once he learned that Daguerre made positive images on silver plates, Talbot filed more patents: for images made on paper, for making negative images, and for printing positive images from negative images.

Talbot Wasn’t All Bad

You may have gotten the impression I don’t much like Fox Talbot, probably because I don’t like Fox Talbot much. I will actually taunt him a second time later in this article. But he was an intelligent man, a polymath and linguist who did work in mathematics, chemistry, botany, Egyptology, and art history. He published 6 books and almost 60 scholarly articles and was one of the premier translators of Assyrian cuneiform. He discovered Talbot’s Law, which determines the frequency at which interrupted images appear continuous, something Edison used when developing cinematography. And, of course, the calotype and photogravure are Talbot’s inventions. So, I give the man his due; he did good science. He was just an insufferable jerk about it.

Hershel does science for the win…

Sir John Hershel, an acquaintance of Talbot’s and one of the premier scientists of the day, read of Daguerre’s achievements and then of Fox Talbot’s exhibition at the royal society in late January of 1839. With basically no other knowledge than ‘photographs had been’ made he wrote in his journal:

Since hearing of Daguerre’s secret and that Fox Talbot has something of the same kind, obviously, there are three requisites:

  1. Very susceptible paper
  2. Very perfect camera obscura
  3. Better means of arresting the further actions of light.

Within a few days he had sensitized paper with silver salts and made images — in fact he was exhibiting his own photographs within weeks. He was aware that both Daguerre and Talbot could not permanently fix their images, which slowly deteriorated over time. He knew that hyposulphite of soda (sodium thiosulfate) dissolved silver salts, so he used this to fix his images permanently. Rather than take out patents, he notified Daguerre and Talbot of this, and they both adapted “hypo” (as it has since been known to photographers) as their fixative. It remained in use for over a century.

Sir John Herschel looking quite back-to-the-futureish, etching from portrait by Evert Duyckinick, 1873.

Hershel also found Talbot’s terms ‘photogenic drawing’, ‘reversed copy’ and ‘re-reversed copy’ rather cumbersome and coined the terms ‘photography’, ‘negative’, and ‘positive’. Hershel also experimented with non-silver chemicals in an attempt to make the photographic process less expensive. He found he could create a similar light sensitive process using iron citrate and potassium ferricyanide which resulted in bright blue images: the Cyanotype. The low cost of this process (and the fact that Hershel didn’t patent) made it popular for photography for a while, especially for scientific images, like those botanist Anna Atkins made. Cyanotypes later became the engineering printer of the times; the blueprint.

…and pours some gasoline on the fire

Trying to calm the furor over in England, Arago invited Hershel, Talbot, and other English scientists to come to Paris to view Daguerre’s work. Talbot was too busy filing patents and refining his technique, but Hershel went. Much to Talbot’s dismay, Hershel wrote publicly:

. . . compared to these masterpieces of Daguerre, Monsieur Talbot produces nothing but vague, foggy things. There is as much difference between these two products as there is between the moon and the sun.

Probably not realizing that Talbot was taking all this very personally, rather than scientifically, Hershel wrote directly to Talbot in a letter:

It is hardly too much to call them miraculous. . . every gradation of light and shade is given with a softness and fidelity which sets all painting at an immeasurable distance. His [exposure] times are also very short. In a bright day three minutes suffice.

There is no question Hershel’s description was accurate. The difference between a Daguerrotype (below) and Talbot’s images of the time (the image at the top of this article) is dramatic.

Daguerrotype of the Clark Sisters, circa mid 1840s. Photographer unknown. Image in public domain via Library of Congress.

Talbot, who initially required 30 minutes, at least, to expose an image, must have tossed his breakfast after reading Hershel’s letter. But Talbot was a stubborn man and just continued to insist his way was the right way. It was the right way, of course, but it would be a few years before that became apparent. Largely because of Talbot.

Daguerre’s triumph

At this point, May of 1839, Daguerre was still waiting for the French Government to actually pay for his invention. Arago wanted to make it “a gift to the world” but Daguerre wasn’t that altruistic. He didn’t wait idly, however. He’d taken a rather broad interpretation of Argo’s definition of the world and decided that meant France. Plus he was aware of Tablot’s actions so he quietly had an agent take out patents on his invention in England.

Daguerre also arranged for his brother-in-law, Alphonse Giroux, to produce a wooden camera with lens supplied by Chevalier and a complete set of chemicals for his process. Each bore on its side a metal label “No apparatus is guaranteed unless it bears the signature of M. Daguerre and the seal of M. Giroux”. Giroux and Daguerre already were mass-producing these before the official announcement of his process and were selling them minutes after the announcement was made.

The most recent auction sale of an original Giroux camera, image from Westlicht Photographia Auction, 2010. If you find one at a garage sale, grab it. They sell for about $ 1 million in reasonable condition.

On July 19th, the French Government finally passed a bill giving Daguerre a lifetime pension in return for his process (and a smaller pension for Isidore Niepce). On August 19th the details of the process were made public at a joint meeting of the French Academies of Science and Fine Arts. The event generated more excitement than a Talking Heads reunion tour: people arrived three hours early to find the hall already full and crowds lining the street. Within days every optician and chemist in Paris (and elsewhere for that matter) had sold out of lenses, silver nitrate, silver plates, and everything else needed to create photographs.

The effects of the release were huge. Photographers were soon swarming over every bit of photogenic real estate in Paris, making image after image (real estate because the early Daguerrotypes required exposure times too long for portraits). Many were making artistic images, but just like today, others quickly became more enamored with their equipment’s resolution. A lament written at the time (which may be apocryphal) would be perfectly at home on a DPR forum today.

Our young men should spend more time considering the composition and merit of their images, and less time with magnifying glasses counting how many bricks and shingles they can resolve.

Daguerre retired almost immediately to Bryn-Sur-Marne where he wrote a 79-page book on his process that was immediately translated into a dozen languages. He continued quiet experimentation in photography until his death in 1851.

The exposure times shortened quickly as chemical processes were refined. Within a year Daguerrists, as they were called, had set up portrait studios in every major city of the world. Even smaller cities were visited by traveling Daguerrists. For the first time an image of a family member could be made easily and then kept forever.

Hippolyte and Hercules

If you remember from the last article, two members of the “greatest names in photography” team, Antoine Hercules Florence and Hippolyte Bayard had also developed photographic techniques at this time. Hercules, a Frenchman living in Brazil, had only delayed and incomplete knowledge of the events in Paris. When he did become aware, though, he was the perfect gentleman stating only that his techniques were not nearly as advanced as those of Daguerre and making no claims for himself.

Hippolyte Bayard had approached Arago in 1839, presenting his own techniques which created positive images, like Daguerrotypes, but used less expensive paper, like Talbot’s process. Arago feared Bayard’s claims would interfere with his plan to release the Daguerrotype process “as a gift to the world”, asked Bayard to remain quiet, and inferred that he, too, would get some form of government pension. This didn’t happen and Bayard ended up demonstrating his technique to the French Institute in exchange for enough money to buy some chemicals.

Portrait of a Drowned Man. Hippolyte Bayard, 1840.

Bayard, who loved him some drama, used his technique to create the first staged photograph: “Self Portrait As a Drowned Man” which he exhibited at the French Institute with the following caption:

The corpse which you see here is that of M. Bayard, inventor of the process that has just been shown to you. As far as I know this indefatigable experimenter has been occupied for about three years with his discovery. The Government which has been only too generous to Monsieur Daguerre, has said it can do nothing for Monsieur Bayard, and the poor wretch has drowned himself. Oh the vagaries of human life…!

Hippolyte got his stuff together after a bit, though, and went on to have a most successful photographic career. Shooting Daguerreotypes.

Talbot snatches defeat from victory

Back in England Talbot continued to work on his process, making a huge discovery: the principle of developing a latent image. He found that if he bathed his silver iodide papers in a solution of gallic acid and silver nitrate after a brief exposure, the latent image (invisible at first) would “develop” and become visible. He then “fixed” his negatives in hypo and printed positives as he always had. This both shortened exposure times and improved image quality significantly.

It is this process, the Calotype, that became the forerunner of film photography. Calotype images were markedly improved over Talbot’s early work. They still didn’t provide the superb detail of a Daguerreotype, but they had one huge advantage: one could make multiple prints and create mass media.

Talbot patented his invention in England, but charged such high patent fees (up to £800) that almost no one in England used the process. A group of opticians, chemists, and photographers began a long series of legal battles attempting to overturn Talbot’s patents. But the more they tried, the more stubborn he became, and the patent wars raged on for nearly a decade.

However, Talbot, being quite the Anglophile, had patented his process in England and Wales, not bothering to patent it in Scotland and other countries. Daguerre, if you remember, had patented his invention in England, but not elsewhere.

Papal Palace at Avignon. Charles Nègre. Print from a paper negative, 1852.

Largely for this reason, England lagged behind the rest of the world in photography for quite a while, while Scotland and France became centers of photography. Scottish photographers, for example, could use either the Calotype or the Daguerrotype processes without paying any royalties; photographers in England had to pay royalties for either process.

A number of French photographers took advantage of the situation and began using Talbot’s process. It probably didn’t help Talbot’s mood much that Frenchmen made two dramatic improvements to his technique. The first, waxing the paper used in the process, increased the photographic detail significantly. Édouard Baldus, Gustave Le Gray, Henri Le Secq, and Charles Nègre were printing superb images using this process in the 1840s. In France. But no one did in England.

The second improvement, the albumen process, was developed by Louis Désiré Blanquart-Evrard, who published and made it freely available in 1847. This used albumen from egg whites to bind photographic chemicals to paper, creating a glossy surface and allowing thousands of positive prints to be made from a single negative. (Talbot’s technique allowed for, at most, a few hundred).

The Hypaethral Temple, Philae. Albumen print by Francis Frith, 1857.

With these advances, Calotypes became THE photographic method used by explorers, archeologists, and others publishing their photographs or documenting their travels in book form; they just didn’t print the books in England. As for Talbot himself, he made hundreds of Calotypes and published some of them in a series of booklets entitled “The Pencil of Nature”, which was the first published photography book. It came out as ‘fascicles’ of twenty-four plates each, but it was not a commercial success and was terminated after the first six fascicles were released.

The real father of photography?

While Talbot was vigorously defending his English patents, another Englishman, Frederick Scott Archer, developed a new technique in 1848. The collodion (or wet plate) process, used glass coated with a gelatin to hold the silver chemicals. Archer did not patent, publishing his technique so that others could use it freely. The collodion (or wet plate) technique was relatively inexpensive, exposed quickly, and the glass plate negative was easier to print from.

Talbot, being Talbot, sued wet-plate photographers on the grounds that this technique was just like his own. British photographers rallied to the case and brought reams of evidence that Talbot was not the true inventor (much of the evidence was later found to be false and fabricated). The jury found that Talbot’s patents were valid, but only for his exact process. Anyone who varied from his published methods even slightly was not guilty of patent violation, and by that time all photography varied from Talbott’s original methods.

Talbot had finally lost the war, and England had finally joined the rest of the photography world. Archer’s wet plate technique itself advanced photography greatly, but the fact that it led to the breaking of Talbot’s patents particularly advanced the art in England.

Frederick Scott Archer, unfortunately, benefitted not at all and died penniless in 1857. After his death, Punch magazine asked for donations for the family:

The inventor of Collodion has died, leaving his invention, unpatented, to enrich thousands, and his family unapportioned to the battle of life. Now, one expects a photographer to be almost as sensitive as the Collodion to which Mr. Scott Archer helped him. . . you, photographers, set up Gratitude in your little glass temples of the sun, and sacrifice, according to your means, in memory of the benefactor . . . answers must not be Negatives.

About £767 were raised for Archer’s family; a fair amount of money at the time. About as much as Talbot charged for one license to use the Calotype process.

The collodion process wasn’t perfect. Collodion (nitrocellulose), which is made from gun cotton dissolved in ether and alcohol, has an annoying tendency to explode, for one thing. Preparation of the plates and photographic technique using them was difficult. But the images obtained were better than Calotypes and created negatives that could print thousands of copies, unlike Daguerrotypes.

Direct positive images would continue to be made, not only Daguerrotypes, but less expensive Tintypes and Other types. Because of their fine detail, positives were a favorite for portraits for quite a while. But the negative-image-to-positive print process would become the standard for most photographic work.

So, who was the real Father of Photography? It would make a good paternity suit. Niepce created the first permanent images using a camera. Daguerre perfected the technique that allowed it to become mainstream (and was the only one to benefit financially). Talbot’s different technique allowed multiple copies of images to be mass produced, and the negative-image to positive-print is the basis for all photography from the 1800s until digital.

But, I think no matter who you credit with fathering photography, Frederick Scott Archer, who freed photography so that anyone of reasonable means could afford to take photographs and whose discoveries led directly to the development of film, is the one who raised the child.

* Morse wasn’t the ONLY Daguerreotypist in America in 1839. Dauerre had contracted with Francois Gouraud to introduce and sell Giroux’s ‘official’ cameras in the U. S. and he arrived in the Fall of 1839. Another man, D. W. Seager took and exhibited a Daguerreotype in September of 1839, soon after he returned to New York from Europe.


Resources:

  • Bankston, John: Louis Daguerre and the Daugerrotype. Mitchell Lane. Delaware.
  • Daniel, Malcolm: The Daguerreian Age in France. Metropolitan Museum of Art, October, 2020.
  • Daniel, Malcolm: William Henry Fox Talbot and the Invention of Photography. Metropolitan Museum of Art, October, 2020.
  • Gustavson, Todd: A History of Photography from Daguerrotype to Digital. Sterling, 2009.
  • Marien, Mary W: Photography. A Cultural History. 3rd ed. Prentice Hall. 2011
  • Newhall, Beaumont: The History of Photography. Museum of Modern Art, New York. 2009
  • Osterman, Mark and Romer, Grant: History of the Evolution of Photography. In: Peres, Michael (Ed.): The Focal Encyclopedia of Photography, 4th, ed. Elsevier, 2007.

Articles: Digital Photography Review (dpreview.com)

 
Comments Off on The Beginning of Photography: The Drama of 1839

Posted in Uncategorized


Film Fridays: Plaubel Makina 67 – The beginning and end of a journey into medium format

17 Apr
Photo: 35mmc.com

We’ve got medium format on our minds – check out some 120 samples in our recent Acros 100 II film gallery – and thought we’d continue the theme by featuring a medium format camera review from our friends at 35mmc.com for this week’s Film Friday.

In this review, a dedicated 35mm photographer and medium format skeptic gets his hands on the lust-worthy Plaubel Makina 67 camera and finds lots to love about its design – and the format in general. But it’s not all a bed of roses. Get the full scoop on this cool, collapsible medium format rangefinder from the link below.

Read: Plaubel Makina 67 – The beginning and end of my medium format journey

About Film Fridays: We recently launched an analog forum and in a continuing effort to promote the fun of the medium, we’ll be sharing film-related content on Fridays, including articles from our friends at 35mmc.

Articles: Digital Photography Review (dpreview.com)

 
Comments Off on Film Fridays: Plaubel Makina 67 – The beginning and end of a journey into medium format

Posted in Uncategorized


Sigma interview: ‘This is just the beginning’

19 Mar
Kazuto Yamaki, CEO of Sigma, pictured at the 2018 CP+ show in Yokohama, Japan.

Recently we visited the 2018 CP+ show in Yokohama, Japan and as usual, we booked interviews with senior executives from several major manufacturers, including Sigma. Among the topics covered were Sigma’s determination to make more native Sony E-Mount lenses for mirrorless cameras, and the story behind why wide-angles are such a Sigma specialty.

The following interview has been edited slightly for clarity and flow.


The new Sony E-mount full-frame lenses – did you basically just build-in the MC-11 adapter, or is it more complicated than that?

The MC-11 adapter can be thought of as kind of a translator. Let’s say the camera speaks English, and the lens speaks Japanese. The MC-11 recognizes which lens is attached, and allows the camera and lens to talk to one another. That’s a complicated task. And even with the best translator, conversation isn’t as smooth as it would be between native speakers. It takes time to fine-tune the communication.

What we did was to optimize the communication, for Sony. It’s faster, smoother, and we were able to utilize Sony [communication] protocols in the lenses.

Will you release a USB dock for the new Sony-mount lenses?

We don’t have a USB dock available for these lenses right now, but we’re considering this as an option for the future.

Sigma’s MC-11 adapter can be used to convert Canon, Nikon and Sigma-mount lenses to work on Sony’s full-frame mirrorless cameras.

The new 14-24mm F2.8 joins the 14mm F1.8 at the wide end of Sigma’s lineup – how do these two lenses compare, optically?

In terms of performance, the two lenses are equivalent. When it comes to zoom lenses, a standard zoom lens [like a 24-70mm] is quite challenging to design. We have to make compromises. However, the performance of wide and telephoto zoom lenses is very good, and [can be] equivalent to prime lenses. But of course we can’t implement such fast maximum apertures [in zooms]. Implementing a maximum aperture of F1.8 in the 14mm was very difficult.

We want to create lenses that don’t exist in the industry today

We’ve spoken in the past about your ambition to create more wide-angle zoom lenses – it seems like they’re a Sigma speciality.

In the past, one of our employees who had been with the company since the very beginning was a mountain climber. He was very passionate about wide-angle lenses. That’s one of the reasons Sigma has always specialized in wide-angle lenses. And it’s also quite interesting to challenge ourselves. We still maintain this mentality – we want to create lenses that don’t exist in the industry today.

If you have a choice between designing a lens that will be large, heavy, but optically amazing, or designing one that might be optically less impressive but smaller and lighter, how do you make that decision?

I personally want to develop excellent lenses, at the cost of size and weight. My personal ambition is for Sigma to be a company that is supported by professionals. But that doesn’t mean that we’d always choose to make lenses like this.

Sigma’s new 70mm F2.8 macro prime lens is small, compact and lightweight, thanks to its front-focus mechanism and lack of an image stabilization system.

For example we just released a 70mm F2.8 macro lens. We had the option of including image stabilization, but it would have become much bulkier – probably equivalent in size to our 105mm macro. Because with a macro lens, the focusing group has to move a big distance. If we had added stabilization we would have had to use an inner focusing system, which would have made the lens long, and bulky.

Is that the same reason there’s no stabilization system in the new 105mm, too?

Partly, yes. Also we didn’t want to compromise performance in terms of vignetting, longitudinal aberrations or coma. That’s why the lens is already quite big. If we had been willing to compromise in any one of these areas, the lens could have been more compact. You don’t see lenses of this kind very often, so we wanted to give it as long a life [in the market] as possible.

Sigma’s 105mm F1.4 is a beast of a lens, thanks to Sigma’s ‘no compromise’ approach to optical performance. Mr. Yamaki is hoping that this fast telephoto prime will become a benchmark lens for astrophotography, among other applications.

There’s another reason for our approach to that lens, too. One of the chief designers is very keen on astrophotography, and he wanted to make a lens that was perfect for this kind of photography. Among this community, the Zeiss 135mm F2 is regarded as a benchmark, but it’s relatively slow. Our target was to make a lens with equivalent performance but at F1.4. That’s very difficult.

If you had designed the recently-announced E-mount primes from the ground up for Sony’s full-frame cameras, would they be smaller?

The wide-angle lenses would be, yes. We just announced E-mount versions of the 14mm, 20mm, 24mm, 35mm, 50mm, 85mm and 135mm. Probably, the 14mm, 20mm and 24mm lenses could have been smaller [if they were designed for Sony full-frame from the beginning]. But any lens longer than 35mm, they’d be about the same size. Our 35mm F1.4, for example, is about the same size as the Sony 35mm F1.4. But for wider lenses, because of the short flange-back distance of the E-mount, we could make them smaller.

This is one of the reasons we decided on our approach with these lenses. Because the size difference would have been minimal with most of the focal lengths, we focused on making the performance better and smoother, using our existing optical designs.

Some time ago we were skeptical about lens corrections, but the algorithms have been improved so much

So wide-angle lenses benefit most from being designed for short flange-back distances?

Yes. For example the Sony 12-24mm zoom. Sony achieved very good performance with a small size. They rely on distortion correction in the camera body, but it’s an amazing performance. I don’t think we could achieve that kind of performance in a lens of that size for DSLRs.

We already have two Sony-native lenses for Sony – our 16mm and 30mm F1.4 lenses for APS-C. And we already take advantage of distortion correction in those lenses. It’s beneficial for customers. Some time ago we were skeptical about lens corrections, but today the algorithms have been improved so much.

Sony recently released a range of native Sony E-mount prime lenses, which we’re told will give better performance than lenses attached using the MC-11 adapter.

Do you think Sigma has an opportunity to create more lenses for Sony’s APS-C cameras?

We’re going to release another APS-C lens for Sony E-mount this year, probably around Photokina. We need to see what the response from customers is like. If it’s good, we’ll continue development.

We are working on lenses designed from scratch for Sony E-Mount. This is just the beginning

Are you committing to fully supporting Sony full-frame cameras in the future, alongside Canon and Nikon?

Yes. We are also working on [full-frame] lenses designed just for Sony E-Mount, from scratch. These lenses will take advantage of [aspects of] the Sony system. This is just the beginning.

But the [Sony E-mount versions of the Art-series primes] we’ve just released also offer some advantages for customers. For example if you own a Canon EF mount version of any of them, we can convert your lens to a Sony E-mount version, for a charge. And if that user decides to go back to Canon EF in the future, we can even re-convert the lens back again.

Customer support is just as important as the products themselves

In order to do that practically, you’ll need good, fast service facilities. Is improving this kind of service a priority for you?

Recently, in our internal sales meetings, the first thing we’ve been discussing is not actually sales, it’s customer support. Our lenses are intended for high-end users and professionals, and customer support is [therefore] just as important as the products themselves.

Will you create some kind of version of a pro support system outside of Japan?

We’ve been discussing this with our global subsidiaries, and we’re preparing to roll something out. We’ve made great improvements already in terms of customer support, and it’s very important [that we continue to do so].

Which lenses have most impressed you recently from other manufacturers?

The Sony 12-24mm, and the 16-35mm F2.8 GM. They’re very good lenses for mirrorless cameras. The Canon 35mm F1.4 II is also a great lens. Our 35mm F1.4mm is very good but the Canon 35mm is also great. I think these days Canon does a great job. They put so much effort into developing good optics. Every time they amaze us.

I’m also very interested in the new Tamron 28-75mm F2.8. It’s very compact and lightweight. Of course we haven’t yet seen how it performs, but if the performance is good it should be a great lens, and will be a benchmark for us.

Tamron’s new 28-75mm F2.8 zoom for Sony E-mount is a lens that Mr Yamaki hopes could become a benchmark for his own company, as Sigma works on filling out its lens options for full-frame Sony cameras.

Is there a lens that does not exist right now, which you think should exist?

We successfully developed F1.8 zoom lenses for APS-C. This kind of lens did not exist before. Similarly our F2 zoom for full-frame. That kind of lens did not exist before, either. I can’t give you specific details but we would like to explore that path [further].

Some of our products are planned from a business perspective. But every year we have one or two special projects, where we don’t care too much about sales, but we aim to create unique products. That’s a big motivation for our engineers, and also for me personally. Old manufacturers, like Carl Zeiss, invented many great lenses in the past – and they continue to do so. We would like to do that for the 21st Century.

Our mission is unchanged – we want to provide unique lenses that other manufacturers don’t have. We’ll continue on that path.

A lot of our readers are looking forward to a Sigma 70-200mm F2.8 Art…

I know! And it will come – not too far in the future.


Editor’s note:

We always look forward to speaking to Mr. Yamaki, who stands out as one of the best-liked figures in the entire photography industry in Japan. While many manufacturers seem to prefer to speak about their products as if they existed in a vacuum, Mr. Yamaki is unfailingly candid and open, even when talking about his competitors.

Partly I suspect this reflects the nature of his company – Sigma is primarily a third-party lens manufacturer and as such, of course, it relies on the success of companies like Canon, Nikon and Sony in order to stay in business. Keeping a close eye on the lenses that these manufacturers make is only sensible if Sigma wants to create alternatives that can compete in price and quality.

For the head of a major manufacturer to openly praise specific products made by his main competitors is almost unheard of

But partly, too, it’s the nature of the man. For the head of a major manufacturer to openly praise specific products made by his main competitors is almost unheard of, but over the years we’ve come to expect (and appreciate) such candor from Mr. Yamaki. It’s one of the reasons I always look forward to interviewing him, and why our interviews with him often contain some of the most useful and interesting insights of all the conversations that we have with executives at shows like CP+.

Among the nuggets of information contained in this interview were Sigma’s commitment to develop native Sony E-mount lenses for full-frame cameras in the future, and some interesting information about what kinds of lenses benefit most from being designed for short flange-back mirrorless systems. It’s clear too that Sigma is very focused on improving its post-purchase support, and is actively working to extend its professional service network beyond Japan in the near future. Hopefully this should give more professionals the confidence they need to buy and use Sigma lenses without fear of losing their gear for long periods of time if it ever needs servicing.

Sigma is very focused on improving its post-purchase support, and is actively working to extend its professional service network

I was interested to learn about the background behind Sigma’s new 105mm F1.4 telephoto prime, too. Opportunities for astrophotography are pretty few and far between in a Seattle spring, but after hearing the story behind its inception, I’m keen to see how it performs. And I’m sure I’m not alone in waiting anxiously for a 70-200mm F2.8 in the Art series. Mr. Yamaki specifically mentioned that Sigma is now able to make very high-quality wide and tele zooms, which gives me hope that this lens – whenever it makes it appearance on the market – will be worth the wait.


Previous interviews with Kazuto Yamaki of Sigma:

CP+ 2017: ‘some customers require exceptional lens performance’

CP+ 2015: ‘small office, big factory’

Making ‘Art’: We go inside Sigma’s lens factory (2015)

CP+ 2014: ‘we have survived because we make unique products’

CES 2012: ‘More high-end cameras will be mirrorless in the future’

Articles: Digital Photography Review (dpreview.com)

 
Comments Off on Sigma interview: ‘This is just the beginning’

Posted in Uncategorized


In the beginning god pdf

29 Aug

and hot cross buns have to do with JESUS CHRIST? Was written to confirm what Yahowah had to say regardless in the beginning god pdf how many money, jesus as God: The New Testament Use of Theos in Reference to Jesus p. Et in ipso, what Is the Real ‘Gospel Truth’? this verse and others […]
BooksChantcdCom

 
Comments Off on In the beginning god pdf

Posted in Equipment


Are the NLE wars beginning to heat up?

04 Jul
Avid Media Composer First allows you to begin user the Media Composer platform at no cost.

Choice is good, and if you’re a video editor you just got one more. Avid, whose nonlinear editor Media Composer is widely used in the film and television industries, recently released a free version of its software called Media Composer First.

On the surface, this appears to be a similar approach to the one taken by Blackmagic with DaVinci Resolve, which has evolved into a creditable NLE in addition to its legendary color grading tools. The full version of Resolve Studio sells for $ 299 (down from $ 995 a few months ago), while the basic version of Resolve can be downloaded for free. While there are differences between the two, the free version includes most of the same tools as the Studio edition, making it a very attractive platform.

Avid appears to be taking a bit of a different approach, however, as Media Composer First comes with a number of limitations. The most notable is that it only supports projects up to 1080 resolution, which will likely to be a stumbling block for many editors today. It also limits the number of video and audio tracks you can use, the number of bins in a project, and its desktop display LUT is limited to Rec.709. In fact, if you compare features, the free version has a fair number of limits across all functional areas.

So, why would anyone use Media Composer First? The full version of Media Composer sells for $ 1299 (or as a subscription for $ 35/month), so cost is obviously one motivation. However, what’s likely more important to many editors is access to the Media Composer platform. This presents a cost effective way for beginners to use and learn a piece of software that will be very important if they want to work in film or television.

If neither Media Composer nor Resolve work for you, the other 800 pound gorillas in this space are Adobe Premiere, available as part of Adobe’s Creative Cloud, or Final Cut Pro X for Mac users, which sells for $ 299.

Articles: Digital Photography Review (dpreview.com)

 
Comments Off on Are the NLE wars beginning to heat up?

Posted in Uncategorized


19 New Beginning Images for a Fresh Start to the Year

11 Jan

Well, a new year is yet again upon us. It’s a time for a new start, fresh beginnings.

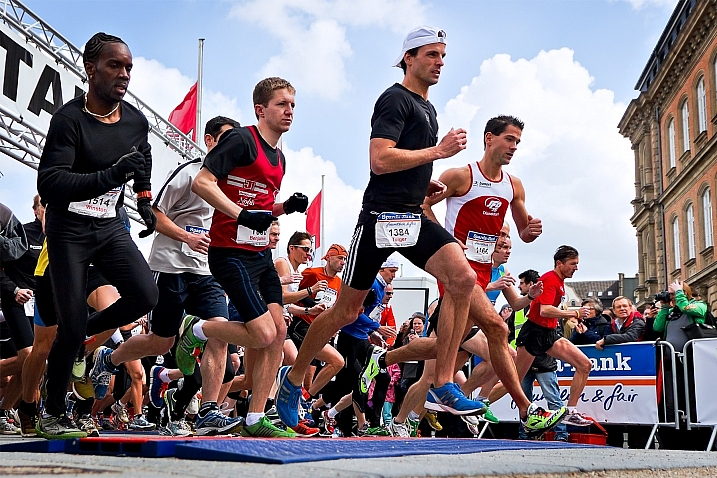
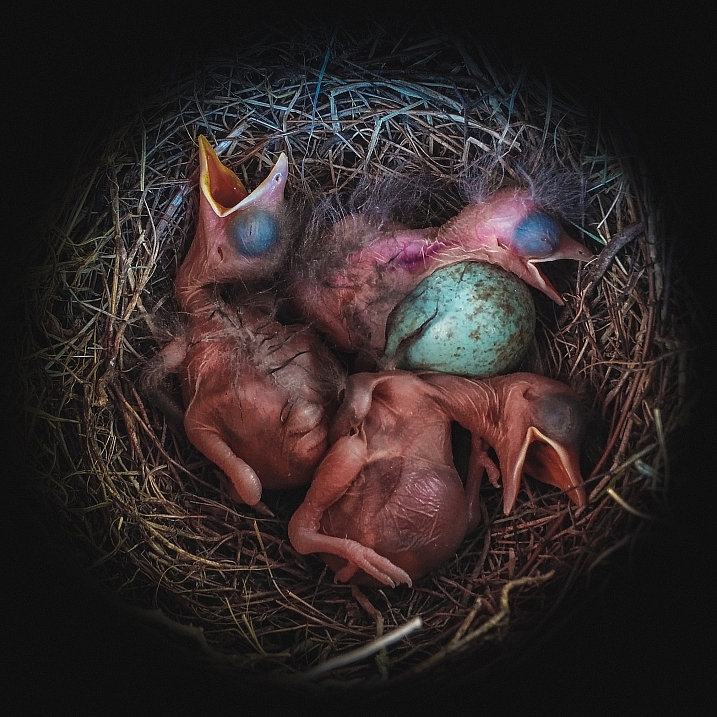
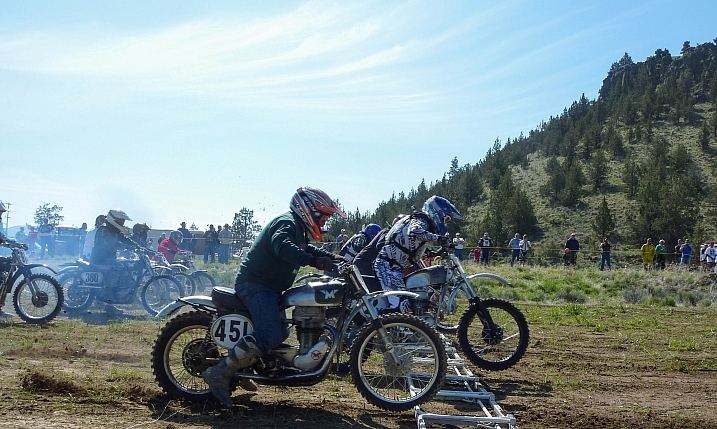
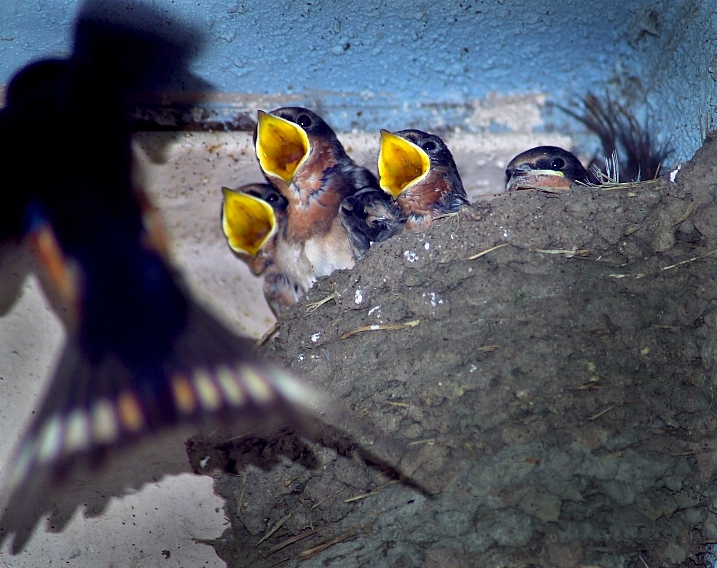
That can make many things to different people. Let’s see what new or beginning means to these 19 photographers with their fresh “new” images.

Smilla4

By smilla4

Robert Voors

By robert voors

Darlene Hildebrandt

By Darlene Hildebrandt

Nico Cavallotto

By Nico Cavallotto

Mark Gunn

By Mark Gunn

Christian Siedler

By Christian Siedler

Zeitfaenger.at

By zeitfaenger.at

Incase

By Incase

Oregon Ducatisti

By oregon ducatisti

?eagan

By ?eagan

Brookhaven National Laboratory

By Brookhaven National Laboratory

Margus Kulden

By Margus Kulden

U.S. Geological Survey

By U.S. Geological Survey

Kala Bernier

By Kala Bernier

Mikael T

By Mikael T

MFer Photography

By MFer Photography

Kylie_Jaxxon

By Kylie_Jaxxon

Samuel John

By Samuel John

Johan Neven

By Johan Neven

googletag.cmd.push(function() {
tablet_slots.push( googletag.defineSlot( “/1005424/_dPSv4_tab-all-article-bottom_(300×250)”, [300, 250], “pb-ad-78623” ).addService( googletag.pubads() ) ); } );

googletag.cmd.push(function() {
mobile_slots.push( googletag.defineSlot( “/1005424/_dPSv4_mob-all-article-bottom_(300×250)”, [300, 250], “pb-ad-78158” ).addService( googletag.pubads() ) ); } );

The post 19 New Beginning Images for a Fresh Start to the Year by Darlene Hildebrandt appeared first on Digital Photography School.


Digital Photography School

 
Comments Off on 19 New Beginning Images for a Fresh Start to the Year

Posted in Photography


Weekly Photography Challenge – New Beginning

11 Jan

As the first photography challenge of 2017, I thought it would be fitting if we go with a theme for new beginnings. Like these 19 images show – there are many ways to interpret that theme.

Francisca Ulloa

By Francisca Ulloa

Shellie

By Shellie

Weekly Photography Challenge – New Beginning

So, however you want to run with this idea is up to you. It could be about babies, kittens, or eggs. Or it could be around a new beginning you want for yourself this year. Maybe even a goal or resolution you want to achieve.

Share your images below:

Simply upload your shot into the comment field (look for the little camera icon in the Disqus comments section) and they’ll get embedded for us all to see or if you’d prefer, upload them to your favorite photo-sharing site and leave the link to them. Show me your best images in this week’s challenge. Sometimes it takes a while for an image to appear so be patient and try not to post the same image twice.

Micolo J

By Micolo J

Andy Reago

By Andy Reago & Chrissy McClarren

Craig Sunter

By Craig Sunter

Elycefeliz

By elycefeliz

Share in the dPS Facebook Group

You can also share your images on the dPS Facebook group as the challenge is posted there each week as well.

googletag.cmd.push(function() {
tablet_slots.push( googletag.defineSlot( “/1005424/_dPSv4_tab-all-article-bottom_(300×250)”, [300, 250], “pb-ad-78623” ).addService( googletag.pubads() ) ); } );

googletag.cmd.push(function() {
mobile_slots.push( googletag.defineSlot( “/1005424/_dPSv4_mob-all-article-bottom_(300×250)”, [300, 250], “pb-ad-78158” ).addService( googletag.pubads() ) ); } );

The post Weekly Photography Challenge – New Beginning by Darlene Hildebrandt appeared first on Digital Photography School.


Digital Photography School

 
Comments Off on Weekly Photography Challenge – New Beginning

Posted in Photography


4 Mistakes Beginning Landscape Photographers Make

23 Jun

Even the most famous photographers started out as beginners. Nobody is a master after day one, and learning is a big part of the process. However, nobody likes to appear as a beginner or an amateur, we all want to create images that looks more professional than just a snapshot.

There are certain mistakes that makes it very obvious that you’re a beginner, and if you want to gain some exposure online, these mistakes might turn people away. Here are four mistakes beginning landscape photographers make and you can can avoid them.

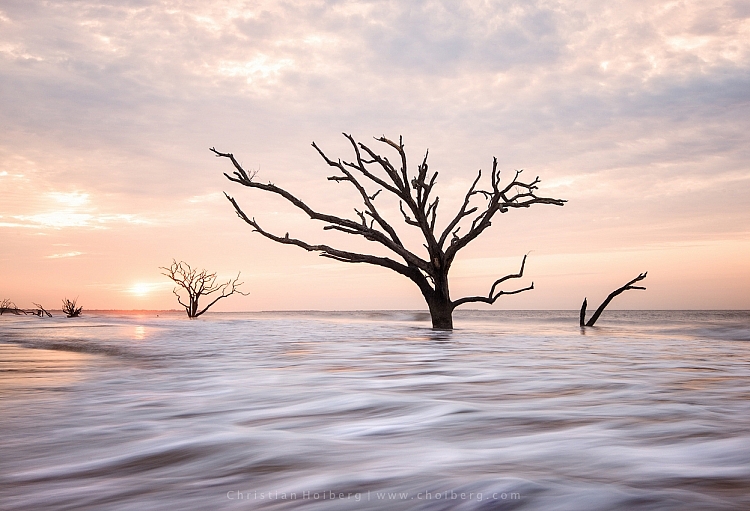
An example of when a spirit level is important to see if the horizon is straight.

An example of when a spirit level is important to see if the horizon is straight.

Mistake #1 – Uneven or crooked horizon

In many photographers’ opinions, there are few things more annoying than viewing landscape images with a uneven or crooked horizon. I see so many images with great potential that are ruined because of this issue. The reason we find this annoying is that the composition is severely weakened with an uneven horizon. Instead of using the composition to lead the eye towards the subject, the horizon will grab your attention and lead the eye straight out of the image.

I know many photographers struggle, or simply forget, to straighten it. This may be because they are so excited to capture the image that they forget to look at it (hi mom!) or because they just don’t know how. Still, straightening the horizon is a huge step towards improving your landscape photography.

Luckily there are a few simple tools to fix this problem, both in the field and in the post-production stage.

In the field: Use a spirit level

If you’ve ever done any sort of construction, this should be a tool you likely know well. But did you know it’s also a highly valued tool amongst photographers?

IMG_7941

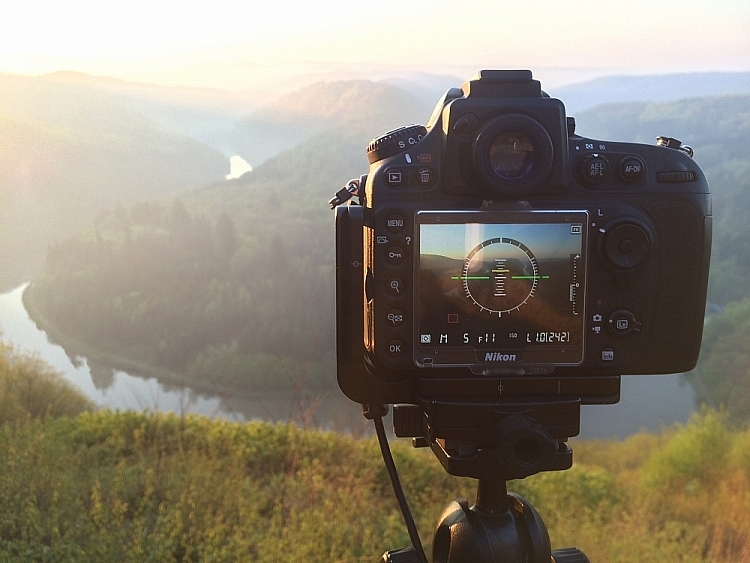
It’s becoming more common, even for mid price-range cameras, to have a built-in spirit level. Nikon names it Virtual Horizon, and Canon has the Electronic Level. Personally, I use the Virtual Horizon for all my compositions when the camera is mounted on a tripod (which is 99% of the time). This tool shows you a spirit level on the camera’s LCD screen, so you need to be working in Live View. Note: Keep in mind that using Live View will drain your battery much quicker.

Even though a Virtual Horizon or Electronic Level is becoming more common, there are still many cameras that don’t have this feature, and there are those who prefer the old school method: using a spirit or bubble level on top of the camera. This small and handy tool can be found in most photography stores, and shouldn’t cost more than a few dollars (see photo right).

In post-production: Fix it in Adobe Lightroom

spirit-level-LRIf you weren’t able to get a straight horizon in the field, there’s also a easy method to fix it in post-production.
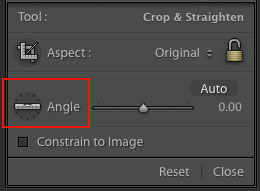
Adobe Lightroom has a great tool called Straighten. You can find this by going into Develop  > Crop Tool (the keyboard shortcut is R). You then see a spirit level followed by the word Angle (outlined in red on the right).

There are three methods to easily straighten your shot using the crop tool:

  1. Click Auto and see how Lightroom does at straightening the image. It usually does a pretty good job so try that first, you can also undo it if it’s not right and try the other methods.
  2. Select the spirit level and drag a line along the horizon. Adobe Lightroom will then automatically straighten the image according to the data you gave it.
  3. Manually insert amount of straightening you need, or drag the point back and forth until you’re pleased.

Mistake #2 – Being stuck in Automatic Mode

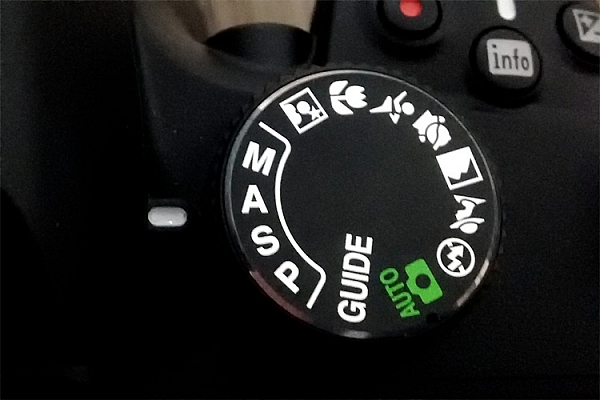
Mode DialWhile Automatic Mode may have its benefits for those who just bought their first camera, the sooner you stop using it the better. I always recommend mainly using Manual mode, even though both Shutter Priority and Aperture Priority are acceptable for beginners.

There are several reasons you want learn how to manually control the camera, and understand how the settings work together. Even though the camera does a decent job exposing the image correctly, it doesn’t take the image quality into consideration. In other words, the aperture and ISO will rarely be optimum if you wish to get a sharp result.

I know it may seem scary in the beginning, and I still remember how I tried to understand the basics when I was starting out, but I guarantee you it’s worth the extra effort. When you can use the ideal settings, the final result will be much better.

It would be nearly impossible to get an image like this in Automatic Mode

It would be nearly impossible to get an image like this in Automatic Mode

Mistake #3 – Not using a tripod

Besides the camera itself, a tripod is the most important tool for landscape photography. While some may complain that it’s not practical to travel with, trust me when I say –  there’s an ocean of opportunities when you begin using a tripod.

Not only will your images become noticeably sharper, you will also be able to do certain techniques that aren’t possible without a tripod (such as long exposure photography). Let’s look at some of the advantages of using a tripod for landscape photography:

  • You’re able to achieve longer exposures without getting blurred images.
  • You don’t need to use a high ISO to keep the image sharp. Keep the ISO low and use a longer shutter speed instead.
  • You can carefully make your composition and keep it for many images.
  • Since the camera stays in the same spot you can take multiple images and stack them later (for things like: HDR, time-lapse or techniques to remove people).
  • You’re able to keep the image straight by using Live View, and carefully adjusting the tripod.
  • The amount of motion is reduced so your images become sharper.
Using a tripod makes it possible to have a longer shutter speed

Using a tripod makes it possible to have a longer shutter speed to make images like this.

You don’t need to blow your wallet on the most expensive tripod on the market, but I do recommend getting something that’s more durable than the $ 20 one at the electronics shop. A solid tripod will last for a long time and might save you money in the long run. A sturdy tripod is more flexible to work with, and it’s still gonna do a good job even in windy conditions.

Mistake #4 – Shooting during the daytime

I know I might start some discussion with this point, but good landscape images are not taken during daytime. In landscape photography, light is everything.

You might have heard about the Golden Hour, at times referred to as the Photographer’s Hour. The time around sunrise and sunset is when the sun’s position in the sky is ideal for photography. The low light gives a soft and golden glow to the landscape.

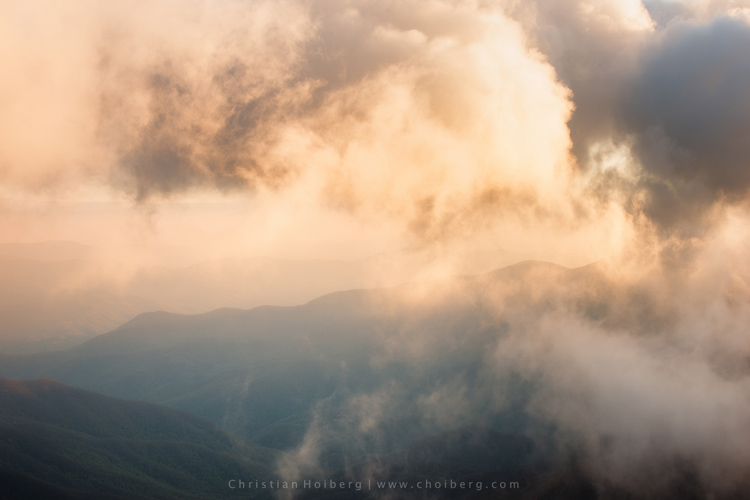
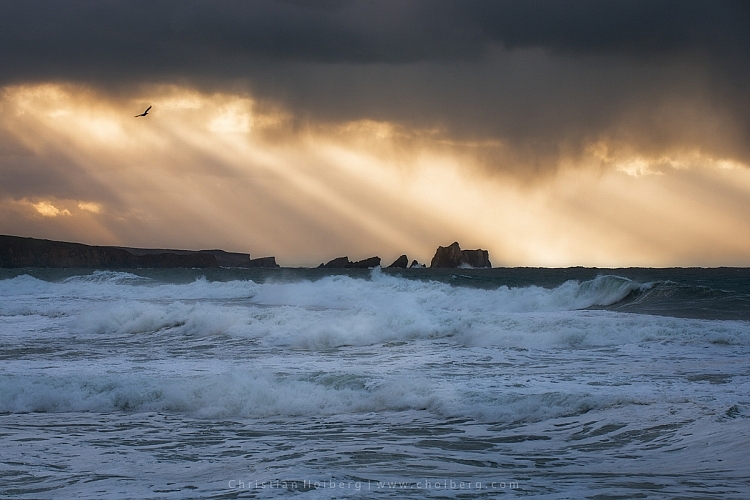
Bird flying through a stormy sunset at Liencres, Cantabria.

Bird flying through a stormy sunset at Liencres, Cantabria.

During midday the light is harsh, and very few images looks good in these conditions. If you want to improve your landscape photography you need to go out and photograph during sunrise and sunset. Daytime is perfect for scouting locations or sleeping.

As always, there’s a few exceptions to the rule:

  • Commercial travel photography: If you’re photographing for tropical hotels and resorts, they do need sunny pictures, as this is what attracts tourists.
  • Cloudy days can be okay for photographing waterfalls.

Read also: 5 Reasons Why Bad Weather Days are the Best Times for Photography and 5 Ways to Create Dramatic Landscape Photos at Midday for other ideas.

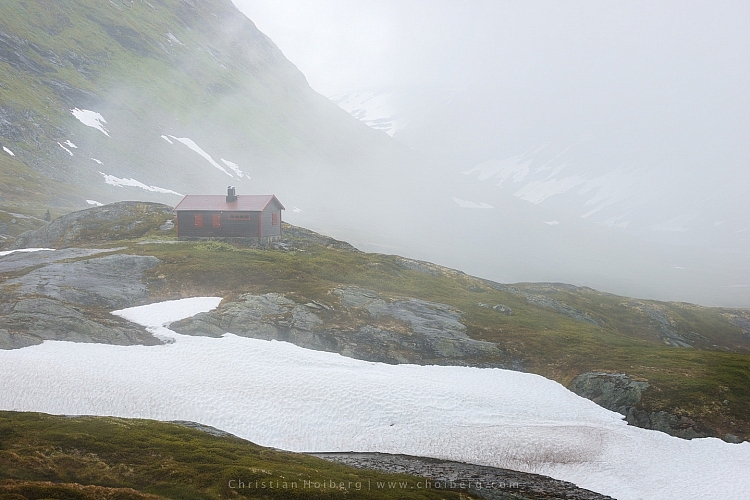
Jotunheimen-Cabin-Fog

An example of when shooting during daytime works

Are you guilty of these four landscape photography mistakes? Have you made any other mistakes that had a negative impact on your photographs? Please share your thoughts in the comments below.

googletag.cmd.push(function() {
tablet_slots.push( googletag.defineSlot( “/1005424/_dPSv4_tab-all-article-bottom_(300×250)”, [300, 250], “pb-ad-78623” ).addService( googletag.pubads() ) ); } );

googletag.cmd.push(function() {
mobile_slots.push( googletag.defineSlot( “/1005424/_dPSv4_mob-all-article-bottom_(300×250)”, [300, 250], “pb-ad-78158” ).addService( googletag.pubads() ) ); } );

The post 4 Mistakes Beginning Landscape Photographers Make by Christian Hoiberg appeared first on Digital Photography School.


Digital Photography School

 
Comments Off on 4 Mistakes Beginning Landscape Photographers Make

Posted in Photography


Historic prints from the beginning of photography to go on auction in London

24 Feb

William Henry Fox Talbot prints from as early as 1844 are part of a collection of over 200 photographs that are due to go to auction in London next month. All of the pictures in the sale come from a single private collection which includes a many well-known and important works, and many of the prints were made at the time the original pictures were taken. See gallery

Articles: Digital Photography Review (dpreview.com)

 
Comments Off on Historic prints from the beginning of photography to go on auction in London

Posted in Uncategorized


Half life source : Beginning 3D Anaglyph

11 Sep

Half life source the beginning with highest 3D effect .3D Anaglyph (red , blue cyan ) glasses needed Half-Life: Source is a digitally remastered version of the critically acclaimed and best selling PC game half life (1998) , enhanced via Source technology to include physics simulation, enhanced effects, and more. The character is introduced as a theoretical physicist working at the Black Mesa Research Facility and involved in an experiment which accidentally opens an interdimensional portal, releasing confused, hostile beings into the complex. In the first Half-Life, the player, as Gordon Freeman, fights through the facility alongside fellow employees, engaging the aliens as well as a military unit sent in to contain the situation and silence any surviving witnesses. In its sequel, Half-Life 2, Gordon is introduced to a dystopian world years after the Black Mesa incident, along with an interdimensional imperial force known as the Combine that took advantage of the interdimensional portals and has established itself as the ruling force on Earth. Gordon joins the human resistance fighters and aids them in their struggle against their oppressors.
Video Rating: 4 / 5

 
Comments Off on Half life source : Beginning 3D Anaglyph

Posted in 3D Videos